• Skip to main content
  • Skip to primary sidebar
  • Home
  • Contributors
  • Resources
    • Q&A with Paul “Coach” Wade
  • Workshops
  • Products
  • Forums
  • Articles
  • Blogs
    • RKC Blog
    • Strong Medicine Blog
  • Archives

PCC Blog

Progressive Calisthenics - The Official Blog for the PCC Community

Archives for March 2014

PCC Australia – The Experience of The Century

March 25, 2014 By Darren Manser 26 Comments

Darren_ManserWhen I signed up for the first ever PCC Australia, I knew I had my work cut out for me. I didn’t find out about the event until fairly late,  so I only had 3 weeks to get ready for The Century.

The first time I attempted the test, I completed the 100 reps in 8 minutes and 50 seconds. Not bad. I’ll be able to shave those 50 seconds off in the next three weeks, I thought. I decided to send Andrew Read from Dragon Door Australia an email to make sure I was doing it right. Andrew responded to my email very quickly.

“100 repetitions need to be completed within 8 minutes.  Once you start the exercise you cannot stop until the desired reps are completed.  You must complete ALL ten chin ups in a row.”

Crap, Crap, Crap. I thought I was able to stop throughout the set.

Three weeks out my max rep chin ups was a whopping eight reps. And that was fresh, with no hanging knee raises before.  How the hell am I going to do 10 chin ups AFTER holding onto the bar to do 20 hanging knee raises–especially at the end of three days of attempting all sorts of new and interesting techniques?

I then stumbled across Coach Wade’s article about kicking ass in the Convict Conditioning certification. Ideally you need to do 50% more for each activity prior to the weekend.

How the hell was I going to do that? I decided I was just going to keep doing the Century. I’d stop all other training and simply practice the test.

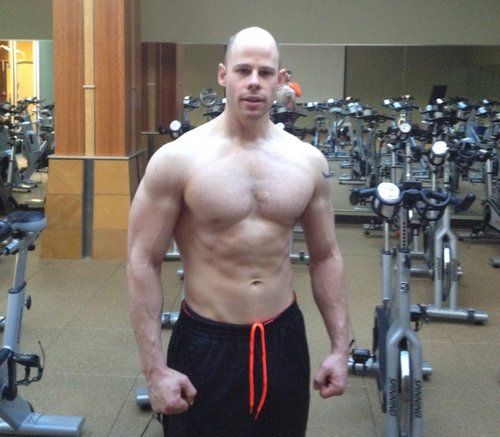
In the beginning I did the century morning and night for two days straight.  What a stupid idea!  As a result of me being 105kg (231lbs), I’m way too heavy to jump into that much volume.  I was now way too sore and the PCC was getting way too close.

After a couple of days with no training, it was time to rethink the strategy and start again.

My new strategy was to do as much work as I possibly could whilst staying as fresh as I could so I decided to do ladder super-sets.  I combined the squats and the push-ups and then the hanging knee raises and the chin ups.  I based the ratios on what was coming up in the PCC.  It looked something like this:

Squat:      4, 8, 12, 16, 20

Push up:  3, 6,   9, 12, 15

Squat:      4, 8, 12, 16, 20

Push up:  3, 6,   9, 12, 15

Squat:      4, 8, 12, 16

Push up:  3, 6,   9, 12

Squat:      4, 8, 12

Push up:  3, 6,   9

This adds up to a total of 184 squats and 138 push ups.  All done with excellent form (at the time I thought I was doing a brilliant job, that was of course until I did the PCC and realized how you can polish every little technique to get more out of it).

The ladders for the hanging knee raises and the chin ups looked like this.

Knee Raises: 2, 4, 6, 8

Chin ups:       1, 2, 3, 4

Knee Raises: 2, 4, 6, 8

Chin ups:       1, 2, 3, 4

Knee Raises: 2, 4, 6

Chin ups:       1, 2, 3

Knee Raises: 2, 4

Chin ups:       1, 2

Knee Raises: 2

Chin ups:       1

Total hanging knee raises: 60 reps

Total chin ups: 30 reps

Ideally I would rest for a couple of minutes in between ladders, although sometimes the morning permitted this and sometimes it didn’t.  Oh yeah, I forgot to mention that I have 6 children and I also run my own Natural therapies business, as a Naturopath, Acupuncturist and Kinesiologist.  So between my sets I would lift up my 3 youngest children (Bodhi 4, Tyson 3 and Ruby 15 months) up onto the chin up bar, so they could hang.  Or I would hold their feet and they would do a handstand.

I would do the routine three or four mornings in a row and then have a rest day. I made a deal with myself that I wouldn’t test myself again with the chin ups before the weekend. I simply didn’t have enough time to recover from a training session like that.  I was however, hoping and praying that the adrenaline from the event and the other attendees cheering would help raise me over the bar.

Finally, it was off to Melbourne for me.

The Course was AMAZING.  On the first morning, the first thing we did was the hollow position.  We drilled this again and again.  Then we applied that position to almost everything that we did.  WOW!! It is totally amazing how much better a push up feels whilst doing this. I even feel my poor little abdominals now whilst push-upping.

Then onto the next exercise, then the next exercise.  Every single section we did across the weekend, I had a first.  There was not one activity that I didn’t improve on.

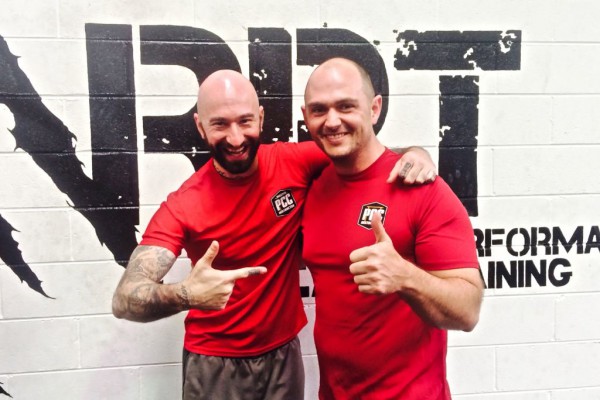
The weekend flew.  The generosity of both Al and Danny was definitely one of the highlights of both the course and my life.  The support from the other attendees was amazing.

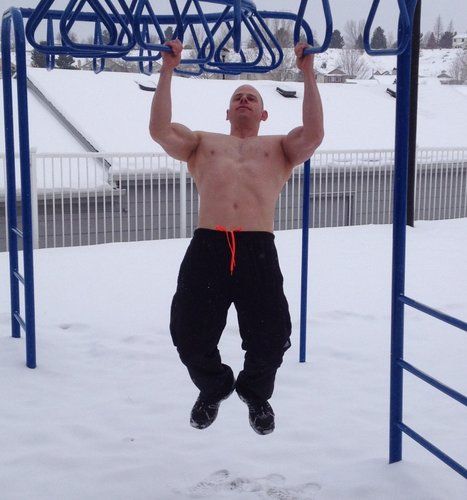
Sunday afternoon we arrived at the Century test.  There were a lot of fine looking specimens in the room.  My heart rate was jacked.  My palms were sweaty.  How on earth was I going to hang onto the bar–let alone do the test?  I had a massive feeling of letting down Al and Danny if I couldn’t do it.  I also thought I was letting down my kids, particularly my boys.  (I want to be a good role model for them).

As I watched the other people do the Century I was inspired.  Some people were amazing.  Some people were only just getting through.  A couple of others were not making it.  Then for some reason I thought, “The best thing I can do is the best that I can do.”  If I hadn’t prepared enough then that’s my fault.

Finally it was my turn to test.  I decided to take it nice and easy.  I started with getting to 30 squats and decided to have a rest in the top position.  (Once you start the set you can’t move your feet with the squats, shift your hand and lift your bum in the push ups or let go of the bar with the hanging knee raises and the chin ups.  Although you are allowed to let go of the bar in between the hanging leg raises and the chin ups).  Then I did another 10 squats until Andrew, my counter, says, “You’re done with the squats.” This caught me off guard – for some reason I thought I had to do 50. No complaints here!

On to the push ups! I waited maybe 30 seconds to allow my heart rate to fall slightly and then started my set.  I moved to 15 reps.  I stopped in the top of the push up position, took  a few breaths, then did 5 more repetitions to make 20.  Then 10 singles from 20 to 30.  YES!!!! The push ups were now done.

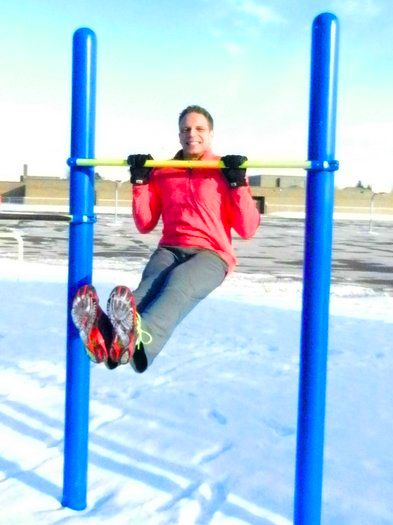
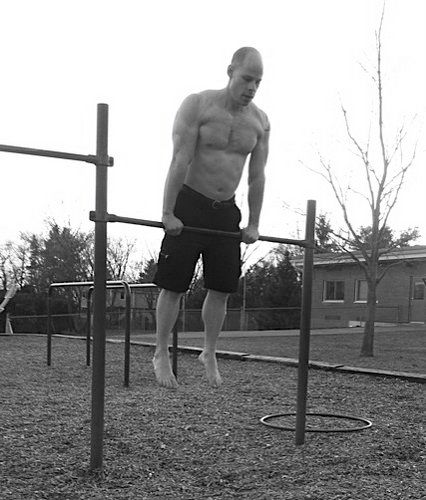
From the push ups I moved straight across to the hanging knee raises.  I wanted to get them done as quickly as possible so that I could have a long recovery before the pull-ups. I’d been practicing hanging knee raises a lot in the last three weeks and I actually got through them easier than I expected. All that was left was the pull-ups!

I had a lot of time left on the clock, so I took full advantage of it. I shook out the tension in the arms as much as I possibly could. I caught my breath and let my heart rate slow down. Before I knew it I was down to one minute and it was time to start the pull-ups.

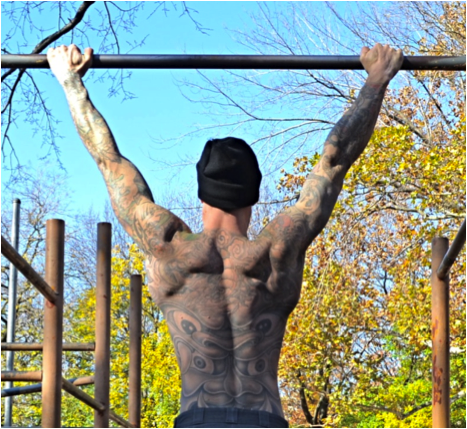
I positioned my hands on the bar and started my first few repetitions. When I made it to 6 repetitions, I remember thinking, “I can’t believe it, only four to go!”  I pulled really hard  again – now only three repetitions left.  Pulled hard again for number eight.  Two to go!!! By this time the other two people who were testing at the same time I was had already finished.  All the people were now cheering for me.  Pulled hard once more, and I only had one repetition to go.

An image of my 4 year old son pops in my head.  I decide that I’m going to do the last rep for him.  I yell out a massive “Come on” to psych myself up.  The crowd is cheering so loudly, Danny and Al both walk over and are standing in front of me, willing me to complete the last repetition.  Andrew, my counter, was cheering too.  I pulled as hard as I possibly could whilst only thinking about my son.  I must do it for him.  Somehow, some way I get over the bar.  Everyone cheers.  Al and Danny are both jumping up and down.  They come over to me and high-five me and give me a big hug.  I have tears in my eyes.  What the hell just happened?  How the hell did that happen?  What an amazing feeling.  I was then presented with my official instructor shirt and my certificates.  Then went outside and cried.  I did it!

So what did I learn from this process?

Ideally I should have been 15kg (30lbs) lighter.  This would have made all of the movements and the test a great deal easier.  More practice before the event would have been good, too.  Now that the course is over I am so motivated to incorporate this into my lifestyle, not just as a work out. I am really looking forward to what is possible.

The whole PCC course was amazing.  The presenters, Al Kavadlo and Danny Kavadlo were AMAZING with their knowledge and their time.  All in all this was THE best course I have ever done.  I would thoroughly recommend anyone to do this course.

I would like to say a massive thank you to John Du Cane, Paul Wade, Al Kavadlo, Danny Kavadlo and Andrew Read.  You have all changed my life in one way or another.  I love you all.

PCCAustraliaOfficial

Filed Under: Workshop Experiences Tagged With: Al Kavadlo, Andrew Read, Australia, bodyweight, calisthenics, Century Test, certification, Darren Manser, Dragon Door Australia, PCC, progressive calisthenics, Progressive Calisthenics Certification Workshop, workshop experience

Get Stronger by Improving Your Back Flexibility

March 18, 2014 By Keira Newton and Jarlo Ilano 19 Comments

Master RKC Keira Newton Spinal Flexibility

We get frustrated when flexibility work is just an afterthought in an athlete’s program, something done for only a few minutes after the main workout without a lot of thought or effort. The truth is that proper and focused flexibility training especially for your spinal flexibility, can help you get stronger!

Getting stronger from stretching sounds great, doesn’t it?

How is that? One of the ways flexibility work can make you stronger is immediately apparent in terms of form and technique. If you are so bound up in your upper back that you can’t pull your shoulders back in a proper line, your pressing is not going to be as strong, whether it’s pressing a kettlebell or your bodyweight in a handstand.

For instance, Keira remembers when she first started working seriously on her flexibility, that although her shoulders were pretty mobile, her upper back wasn’t. By working on that specifically, she was able to improve her shoulder positioning, and found her pressing strength immediately improved, as well as her hand balancing. Being able to extend correctly at the upper back placed her shoulders in a much better mechanical advantage and she was able to use her strength from a better foundation.

She also recalls one of her teaching sessions with an experienced RKC who was having trouble with her pull-ups. Keira gave her some corrective thoracic mobility exercises and she went from barely doing one, to doing sets of multiple reps. The flexibility work put her in a better position for her pull and she broke out of that plateau. She was working hard and putting a lot of effort in her pulls, but her mobility was holding her back. Once that was freed up, she was able to gain so much more from her efforts.

High tension techniques for strength and power are great. There’s no denying that those techniques work for getting people as strong as possible, but you have to balance out that tension with proper mobility to get the most out of your body. It’s not the act of stretching that will give you strength, but it’s the new options your body will have to get in the best positions to utilize the power and strength that you already have.

A Flexible Spine is a Powerful Spine

There’s a reason the word “backbone” is associated with strength and courage. A strong and flexible back is the foundation for power in the upper body, just as the hips are for the lower body. Thoracic spine (mid-back) mobility affects how well you can use your shoulder girdle and arms, by placing them either in resting positions of weakness or strength.

A kyphotic (flexed) thoracic spine puts your shoulders well forward of the vertical midline of your body and away from your power posture. It’s like trying to push from an unstable platform. You won’t be able to use your strength properly no matter how powerful your muscles.

Most of our full body rotation comes from the thoracic spine, so when you think of rotational work, that involves a great deal of thoracic function. Stiffness here reduces not just your mobility but your ability to apply the proper leveraging and angles for a lot of different strength skills.

Below we will show you comprehensive routines for improving your spinal mobility for forward bending, rotations, and backbending. You’ll probably find that some of the moves here will be easier for you while others will jump out and kick you in the butt! (Guess which ones you should work on more…)

We advise you to go through all of these movements and discover for yourself what you need to improve the most.

Forward Bending Sequence

Forward bending involves spinal joint and hip flexion, and the associated flexibility of the muscles and other soft tissues of the posterior chain. It can be difficult to isolate one specific cause as the key issue if you have tightness. While it’s very easy to say you have tight hamstrings, the fact is that the sensation of tightness in the hamstrings may very well come from an issue in your low back.

This sequence is a demonstration of “covering all the bases,” with a comprehensive approach that can be pared down as you practice and figure out what you need to work on for yourself. A quick run-through of the sequence can give you a baseline as well, and act as a measure for progress.

We begin with a full spinal flexion movement, from your neck all the way to your pelvis. You want to round out as much as possible, then move into full extension (back bending). Though the emphasis is on the forward bend, you’ll want to move into extension as a break in between. It takes the spine through a full range of motion and is a good warmup for the sequence.

In the squat, point your toes out at around 45 degrees. This positioning assists in helping you round out your lower back and go into a posterior pelvic tilt (the pelvis tucking under you). Get your chest between your knees and tuck your chin down, as well as letting your tailbone sink down. Play with rocking back and forth between your toes and your heels. Then sit back and drop down even further. Next, jump into a push-up position. Then drop your hips down to the floor and lift your chest up and out, locking your elbows out if possible. Remember to look up as well, for extension throughout the entire spine.

Do ten repetitions, or more if you feel up to it.

Master RKC Keira Newton Forward Bend SeatedNext is a standing forward bend, where you bring your hands to one side and keep them on the ground as you stand up. This is a combined forward bend and rotation. Another variant is to sit back into the opposite hip. So if your hands are to the right of your body, you’ll sit back to the left. Spend a couple minutes going between one side and the other.

The last move in the forward bending sequence is the seated forward bend. With this move, you’ll add a rotation to the forward bend, just as you did in the standing forward bend. With your legs locked out straight in front of you, pick a side and fold forward at a diagonal on that side. Move in and out of the stretch at least ten times on each side, as well as straight forward, and hold the stretch on one side for upwards of a minute.

Back Bend Preparation

Backbending (spinal extension) can be a very uncomfortable and difficult motion for many people. When you add up all the hours we sit, drive, and are parked in front of the computer, you’ll see how rarely we get into backbending positions during our normal daily activities. So it’s no surprise that a full backbend like the bridge posture can be so daunting.

With this in mind, it helps to go through a thorough preparation before going to the limits of your spinal extension range of motion.

The first emphasis is on the thoracic spine (your midback), and improving extension and rotation in this region. Improving mobility in this part of the spine prevents undue strain on the lower back by distributing the motion throughout the spine rather than all on the lower back. In the first exercise in this video, you’ll see that Keira has to emphasize the motion, not straight down but also forward, as her shoulders are so flexible that she isn’t moving at the spine. When she improves her direction of force, you can see that the stretch is now where it needs to be. Work on this for three sets of one minute each.

Next is thoracic rotation, which is essentially extension at the side of the spine you are rotating towards. This in combination with sidebending takes you to the end-range of the extension motion. So you’ll be working on all the structures that need to be pliable for a good backbend.

Keira is demonstrating two movement variations: the first is up on forearms and knees with the back starting in a neutral position, and the second is more on the back of the upper arm and shoulder with the torso bending to the side. When you try these out, you’ll notice that the second variation places you in a sort of pre-stretched position, so you won’t be moving as far. You may skip the first variation if you are already flexible, but even then, the first one is a good warm-up to do. Play with shifting your weight more onto your knees or your arms to find the best angle for you. Start with three sets of 30 seconds on each side.

Last in this video is a more direct back bend preparation and is adapted from a sequence taught by Jarlo’s Ashtanga yoga teacher, Cathy Louise Broda at http://www.purpleyoga.com. It starts with a kneeling back bend, then works on the hip flexors, quadriceps, and shoulder bridges, to fully warm up and prepare the body for more intense spinal extension postures.

In the kneeling backbend, it is key to elongate and lift the spine as you lean back. Pushing your hips forward and lifting your chest up and back will create this “open” spine, and will prevent a jammed up feeling in the low back. Relaxing your hips and buttocks will be difficult at first, but that is another key to a good backbend. 10 – 12 slow repetitions here will do you well.

Next up are lunge stretches with rotation to the side of the front knee. Adding rotation to this position adds depth to the stretch and is a great concept to employ in almost any exercise. You don’t have to do this in full splits like Keira is showing, just go into as deep a lunge as you are comfortable. The effect is still the same. Do three sets of 30 seconds on each side.

The camel pose in yoga is a backbend with arm support, and can allow you to improve your backbending technique with relatively little strain. With the support of your arms you can stay in the position a bit longer than you could just bending back. Remember the details of pushing your hips and chest away from each other to open up your spine. Work up to three sets of 30 seconds on this posture, as that’s a good amount of time to experience this position.

Following the camel is the kneeling quadriceps stretch. If your knees bother you in this position, you can sit on a small stool or a few cushions to take some pressure off. If this doesn’t help, don’t force it and try a standing or side lying quad stretch instead. You’ll be able to do this later, but don’t hurt your knees and put yourself out of commission. The key point here is to avoid a low back arch. Keep your back flat, so the forces of the stretch will be on the upper thighs and not on your back. Take your time and gradually lean back further when you can do so without pain. Three sets of 30 seconds to a minute will work well here.

Lastly, shoulder bridge practice starts you on a more active backbend and is a great way to get a lot of repetitions in with good technique. You’ll pull all of what you’ve practiced so far in the sequence and work on a smooth spinal curve, relaxed hips, and good mobility and strength in the quads. Choose the shoulder bridge variation that works best for you, and perform a couple sets of 10 repetitions to improve your bridge.

Full Bridge

In the full bridge, or “wheel pose” in yoga, you’ll need good flexibility in your shoulders, hips, and the entire back. But you’ll also need proper technique. Important details here are to create that smooth curve and arch, like an archway in a building that can support weight evenly, and simply looks good. You can tell when a person does a bridge and there is a sharp angle in one part of the spine – in that case, there will be more of a strain rather than a curve that distributes forces evenly.

Master RKC Keira Newton Back Bend
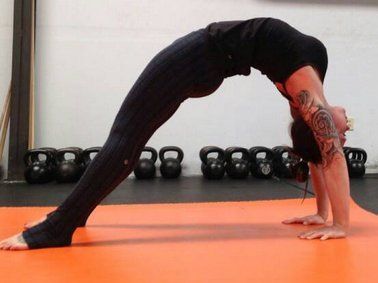
For a proper bridge, your arms and legs are the support structures and your hips and back should be relaxed and open. Your chest should be projected up and back, toward the top corner of the wall behind you, and your hips should be lifted up and forward, toward the top corner of the wall in front of you. This aiming in opposite directions creates that “openness” in the spine. Breathing should be steady and even, and you should hold the position for 5 to 10 breaths. Again, don’t force things. Take your time and improve steadily.

Master RKC Keira Newton Back Bend 2As you improve you can play with shifting your weight more toward your feet or toward your hands. You’ll find which way is more difficult, and that’d be what you need to work on! It will also lead you back to which of the preparation exercises to focus on. It may be the thoracic extension, or your hip flexors and quads if they are holding you back.

Invest in Your Flexibility

What we’ve shared above will improve your back flexibility and consequently improve your body positioning for every exercise and skill you practice.

It does take time and patience to increase your flexibility, especially if it’s been long neglected. But the payoff is well worth the effort. Set aside some time in your routine to make flexibility a priority and you will be more than happy with the benefits in your strength and power.

***

Keira Newton is an accomplished trainer with many certifications including that of Master RKC, Feldenkrais, FMS, and Z Health. Her combined knowledge of strength training along with flexibility and mobility work has helped hundreds of her clients at dkb Fitness and seminar students to help them achieve their maximum potential.

Jarlo Ilano,PT, MPT, OCS has been a Physical Therapist since 1998 and is a Board Certified Orthopedic Clinical Specialist. He has special interests in the neck and back, shoulder, and flexibility work, combining his clinical expertise with his own training in martial arts and yoga to provide practical and cutting edge knowledge for GMB Fitness.

Filed Under: Flexibility Tagged With: back flexibility, bridge, flexibility, Jarlo Ilano, Keira Newton, strength, stretching, thoracic spine, thoracic spine mobility, yoga

Who Needs Weighted Pull-Ups?

March 11, 2014 By Corey Howard 13 Comments

DannyKavadloHang

Back in late October I started experiencing pain in my right shoulder. Like most of us that place a large priority on our fitness, I ignored it. Dumb move!

As the next few weeks progressed, the pain expanded to my right trap, lat, pec, entire shoulder complex, bicep, plus numbness in my fingers. I’m not sure about the rest of you, but when I’m experiencing pain throughout that much real estate I get concerned and the workouts become kind of nonexistent.

After many doctor appointments over the last couple of months, I’m disappointed to report they still don’t have any idea what’s going on. However, after sitting around hurting, feeling sorry for myself, and not moving, I knew something had to change. My life is fitness. I tell people all the time how important it is to move. When something hurts, there are always ways to keep moving forward. And move forward I have, except this time it’s been exclusively with calisthenics.

As I returned to the gym after a 2 week layoff, I was forced to deepen my calisthenics knowledge. The basic movements were thankfully still easy for me, but I could no longer do weighted pull-ups, which had previously been a big part of my routine. I needed to find a way to keep getting stronger in pull-ups without hanging any weight off my body.

One of the first modifications I used was the “L-Sit Pull-Up”. This movement shifts the body’s balance just enough to make a regular pull-up harder. Not to mention it’s awesome for teaching ab tension throughout the motion!

The L-Sit Pull-Up is done by holding the top of a hanging leg raise, then doing your pull-ups while maintaining the L-sit position the entire time. I must warn you there are a few things you need to keep in mind while performing these. It’s imperative you begin by pulling your shoulders tight into the sockets to create the necessary stability so you don’t swing on your leg raise. Second, keep your legs straight and raise them up under control so you don’t create any upward momentum when you begin your pull. Remember Coach Wade likes slow controlled movements. Third, as you pull yourself up; pull your elbows in toward the midline so your arms aren’t flaired out. This does a couple of things; first, it mirrors the handstand push-up groove and second, it engages the pecs with the lats and creates a solid stable shoulder complex. I’ve seen many clients go from 20 dead hang pull-ups to only 5 on this one. Fire it up!

Corey Howard Performs an L-Sit Pull Up

The next change I made was to toss in some Archer Pull-Ups. We’ve all seen Al Kavadlo do these on his YouTube channel. The Archer Pull-Up is where you pull yourself up to one side then the other. Besides, we all are trying to achieve the one arm pull-up, and this is an amazing progression towards that!

When starting with these I strongly suggest alternating your grip. Turn your palm towards your face on the side you will be pulling towards and your palm away from you on the arm you plan on keeping straight. Next as you begin your pull, think about pulling your elbow to your opposite hip. This is where that L-Sit Pull-Up foundation will come in handy. In other words, if you’re pulling yourself to the right side, pull your right elbow to your left hip. Try and use your straight arm as a guide to keep you moving sideways. I’ve found a false grip or muscle-up hand position works best. Once you can comfortably knock out 7 quality reps or more per side without resting then you’re ready for the final pull-up challenge.

Corey Howard, PCC and RKC Instructor Performs an Archer Pull Up

The last tweak I used to make pull-ups evil is by modifying the grip heights. Paul Wade suggested you use a towel in the Convict Conditioning book, but I like to grab the pull-up bar with one hand and the vertical support structure of the pull-up rig with the other hand. This is similar to an Archer Pull-Up except with a lower non-dominant hand position. You have a few options here to make it harder as you progress. You can either move your hand lower on the pull-up rig, or… If you think this is just simply too easy for you, feel free to hang a stretchy band from the pull-up bar and grab that with your non-dominant hand! The stretchy band will refuse to provide you much for assistance and will scoff as you pull harder against it seeking help. Once you master these I promise you will have the upper body pulling strength of Samson!

Corey Howard, PCC and RKC Instructor Performs a Pull Up with Varying Grip Heights

There you have it. The 3 pull-up variations I switched over to so I could keep building pulling strength. The best part–not a single one of these pull-ups seem to aggravate my shoulder or arm. I’m just like you, and really at the end of the day we all like to get stronger. Grabbing a pull-up bar and pulling your body up with two arms is unfortunately something that many people still can’t do. However there are a few of us crazy dreamers out there that want to defy “normal.” We need to push the envelope and make pull-ups look insanely easy and maybe even knock out a few one arm pull-ups if possible. So go fire up some L-Sit, Archer, or Mixed Grip Pull-Ups. I guarantee you’ll get stronger, and you won’t have to hang weights off your body while doing it!

***

About Corey Howard, PCC, RKC, CK-FMS: Corey Howard strives to constantly become stronger, and to help others to achieve their fitness goals. He is the owner of Results Personal Training, and can be reached at www.resultsptonline.com or www.coreyhoward.com.

Filed Under: Progressive Calisthenics Tagged With: advanced, Al Kavadlo, archer pull-ups, calisthenics, Convict Conditioning, Corey Howard, Injury, progression, pull-up progressions, pull-ups, Raising the Bar, strength training

Turning Up the Mind-Muscle Connection

March 4, 2014 By Matt Schifferle 27 Comments

Matt Schifferle PCC

“You must be crazy! How can I possibly have weak glutes and hamstrings?!”

I’m at the chiropractor and I’m finally throwing in the towel on my lower back pain. I’m not a model patient.

“Do you know how much I deadlift and use kettlebells? Those things are like glute and hamstring blasters.” Then he told me something that changed everything about how I used exercise for the next 10 years; “Matt, exercises don’t work your muscles, only your brain can do that.”

I thought he was nuts but then he hit me with the science of what he was talking about.
“It’s simple; the signal instructing certain muscles to contract and how they work doesn’t come from a weight or a special exercise. Your brain creates a signal, it travels through the nervous system and eventually reaches the muscle fibers as your mind instructed. Everything about how the muscle behaves comes from your brain.”

Mind Muscle Connection Chart
Everything about how the muscle behaves comes from your brain. Diagram © Matt Schifferle 2014

It was a simple lesson, but over the years it has completely enveloped my entire approach to all aspects of my training. From calisthenics to bike racing and even walking has taken on new meaning due to this mind-muscle connection.

Here are some of the biggest lessons I’ve learned in how the mind-muscle connection has changed my calisthenics training:

#1- Distraction dilutes the mind-muscle signal

Anything that pulls your thoughts away from the exercise literally dilutes the signal you’re sending to your muscles. TV, talking, smart phones, even some types of music are now training enemy #1.

No TV, no smart phones, just a horizontal base and a truckload of focus.

#2- Mind-muscle signals become habitual

Habit is simply repeating the same mental signals over time. This repetition causes those signals to become easier to create and more powerful in their application. Of course habit can be both a great benefit and a massive detriment to your training. If your usual signal is to use your lats while doing pull ups you’ll use them in other activities as well. However, if you’re not in the habit of using them, they won’t turn on no matter how many pull ups you do.

#3- The signal can change at various points during the range of motion

It’s not uncommon for a signal and thus a muscle contraction to change during an exercise. At some points during the range of motion, it may be stronger and other points it may be weaker. Some common examples can include triceps relaxing at the bottom of a push up but contracting very powerfully at the top and glutes to shut off at the bottom of a squat while they may kick in halfway up towards standing.

Working to maintain the signal throughout the full range of motion makes a huge difference in the strength of the muscle as well as the integrity of the joints.

#4- It takes practice to get the muscle to do just what you want it to do

It’s common to not really feel a muscle turning on the first few times you try to use it more during an exercise. Sometimes it takes some time for the signal to develop and beat a neurological path to the muscle. I found this to be the case with my abdominals during the leg raise progressions. At first it felt like my abs were hardly doing anything, but the more I focused on turning them on, the more they eventually got into the game. Now hanging leg raises result in a deep abdominal burn and more powerful contractions even though the actual workout hasn’t changed much. Don’t be discouraged if nothing feels different at first. Keep concentrating and things will change very soon.

#5- Small and stubborn muscles may be due to a weak mind-muscle connection

My shoulders have always been a weakness for me. It didn’t matter how many shoulder exercises I did, they just wouldn’t grow and really develop. Once I started working on the mind muscle connection with my shoulders I was surprised to find how weak the signal was. Once the signal became stronger my shoulders grew like crazy. This was also the case with my hamstrings as I mentioned before.

It’s hard to believe that Matt ever had small shoulders!

#6- Exercises, and tools are simply templates for developing the mind-muscle signal

One of the biggest lessons about the mind-muscle connection was that there’s nothing in there about supplements, gadgets or fitness dogma. The root cause of all things muscle comes from the brain, not a product you can buy in a store.

As for a particular exercise, each movement places a certain demand upon a set group of muscles, but it’s a rough template for where the tension needs to go and how hard the various muscle contract. It’s up to your own focus and skillful concentration to refine the tension and direct it to the target muscles.

The million dollar question is: how can you develop and refine the mind muscle connection?

There are many techniques, but the common element is simply trying to build and control the tension in a select number of muscles through your own focus and concentration.

When I’m trying to really dial in my mind muscle connection I use what I call the P.T.R (Peter) method. Here’s how it would work with a classic push up.

Step 1- Set your Position

The first thing is to take your time setting up your position for the exercise you wish to do. This should be a pretty relaxed thing to do. In the case of push ups, I like to start my push ups laying on the floor so all of the muscles are relaxed. I then take my time placing all of my limbs and joints in the most perfect position I can. I check the position of my hands, elbows, shoulders, spine, hips, neck, even the placement of my fingers is something I really focus on getting just right.

Step 2- Set your Tension

Once I’m in position, I fire off the mind-muscle signal by tensing the muscles I want to involve during the exercise. I’m still laying on the floor, all of the tension is entirely proactive. I’m just flexing the muscles I want to engage as hard as possible. This can include my chest, shoulders, hands, lats, abs, triceps, quads and forearms. Lately I’ve been focused on getting my triceps more involved with my push ups, so I’ve been focusing more on tensing up the triceps.

Step 3- Apply Resistance

Once the tension is set just the way I like then I slightly lift myself off the floor and begin my set. Once the resistance is applied, the tension in the muscle grows much more, only now it’s flowing along the channels already established in step 2. So if I’m working to get my triceps more involved they now carry more of the resistance of the exercise.

The P.T.R method conditions you to really dial in the tension of any exercise you choose. It builds your ability to direct and alter the tension in your muscles at will so you can modify that tension however you wish.

P.T.R. works with any technique. Matt builds his lats with pull-ups.

Contrast this with simply dropping down and firing off push ups as fast as possible. The position and tension your body uses is going to be much more reactive rather than proactive. If you’re used to using your shoulders more than your triceps during the push up then that same pattern of signal will be generated. It’s not a bad thing, it’s just that it’s much more difficult to focus and change the mind-muscle connection and thus how your mind is asking your muscles to perform. Your old movement habits will take over both good and bad.

In closing I want to leave you with a couple of mantras I’ve used with my clients to reinforce the awareness of the mind-muscle connection:

– Muscle follows mind.

– Exercise doesn’t work muscle; your focus and concentration works the muscle.

– Nothing different happens in your training until you chose to make it different.

– Exercise technique is more than just keeping your back straight or toes pointing forward. Technique is about refining the mind-muscle signal. Thus technique isn’t everything, it’s the only thing.

– Effecting training isn’t just about blood sweat and tears. It’s about learning how to engage and use your body in a more effective way.

Yours in strength,

-Matt Schifflerle

****

Matt Schifferle a.k.a. The Fit Rebel made a switch to calisthenics training 5 years ago in an effort to rehab his weight lifting injuries. Since then he’s been on a personal quest to discover and teach the immense benefits of advanced body weight training. You can find some of his unique bodyweight training methods at www.RedDeltaProject.com.

Filed Under: Progressive Calisthenics Tagged With: brain training, calisthenics, Matt Schifferle, mental training, mind-muscle connection, technique, training strategy

Primary Sidebar

Featured Products

previous arrow
GetStrongBookCover
ConvictConditioningBookCover
StreetWorkoutBookCover
ExplosiveCalisthenicsBookCover
StrengthRulesBookCover
next arrow

Categories

Progressive Calisthenics Certification Logo
Click here for more information or to register for the PCC workshop

Get Strong Workouts TriadXP App
Get Strong Workouts App

Recent Posts

  • Top 5 Reasons Why an In-Person Workshop is the Best Way to Supercharge Your Training
  • HYBRID STRENGTH TRAINING IS HERE!
  • My Calisthenics Journey to the PCC
  • The Handstand Press: Complete Control Through the Handstand
  • The Get Strong App is Here!

Dragon Door Publications

Dragon Door Publications

Recent Comments

  • bross dandon on The Case for Curved Handstands
  • Johnny Flewellen Jr. on Strength for Life
  • Dan Earthquake on The Pursuit of the Daily Minimum
  • Johnny Flewellen Jr. on The Pursuit of the Daily Minimum
  • Johnny Flewellen Jr. on Yoga, Calisthenics and the Journey of a Lifetime
FOLLOW US ON TWITTER!

Copyright © 2025

Dragon Door Publications / The author(s) and publisher of this material are not responsible in any manner whatsoever for any injury that may occur through following the instructions or opinions contained in this material. The activities, physical and otherwise, described herein for informational purposes only, may be too strenuous or dangerous for some people, and the reader(s) should consult a physician before engaging in them.