There are very few objects that come to mind when thinking about “calisthenics equipment” other than the floor, a bar, and maybe some chalk. Bodyweight culture prides itself on minimal equipment, unrestricted movement, and the ability to exercise anywhere. The Smith Machine represents absolutely none of that.
When most bodyweight enthusiasts think of a piece of equipment like the dreaded globo-gym behemoth that is the Smith Machine, few would see an incredibly effective tool for learning and perfecting your push-up form. While the Smith Machine may evoke visions of flared elbows and terrible pressing technique form below the bar, I suggest getting above this piece of pop-gym equipment for perfecting your horizontal pushing pattern with incline push-ups!
 The Smith Machine is basically just an adjustable straight bar, so it really is a bodyweight athlete’s best friend in disguise when it comes to learning push-ups, both the basic and one-arm versions. Strict form push-ups are an absolute foundation of calisthenics, but they can be difficult for beginners, or those with shoulder injuries, to initially learn and perform safely. Earlier progressions like wall push-ups and knee push-ups are fairly fixed positions, but incline push-ups can perfectly fill the rather large gap between the vertical wall and the flat floor. While we can’t adjust the wall or the floor, the adjustable bar of the Smith Machine provides an effective way to perform an incredible range of push-ups at various inclines without having to sacrifice form.
The most common piece of equipment for incline push-ups is often a bench, a plyo box, a chair, maybe even your kitchen counter, but these items often vary from location to location and don’t really offer specific and strategic height modification. Not all of us go to gyms and not all gyms even have Smith Machine stations, so any squat rack with adjustable side safety bars or bar catches can be used with this article’s tips in a similar fashion—however, do exercise caution and always use a slow tempo when using an unsecured barbell.
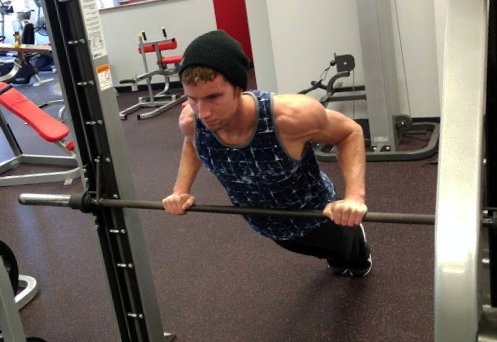
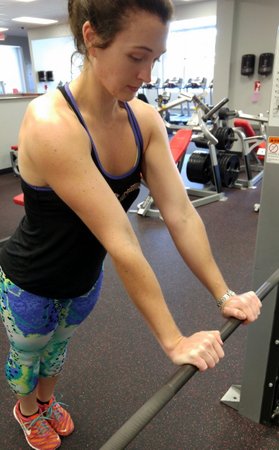
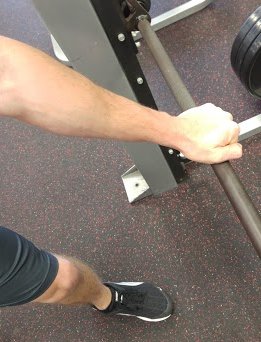 To begin working on Smith Machine incline push-ups, start with the bar set to about chest-height and set up your stance and grip as you would any other incline push-up, except you will be gripping the bar rather than placing an open-hand on the floor. This slight difference can cause the elbows to naturally want to flare out to the sides, so keep your grip close to shoulder width and be mindful of your form. I do recommend using a “thumbs over the bar” grip rather than wrapping them underneath, as this allows the wrists to turn out slightly and keep the elbows pointed inwards. After performing a good 10 reps to get a feel for the angle, assess your performance and fatigue.
Did you hit 10? How intense was it? How many sets could you complete? Ask yourself these questions while you rest and adjust the intensity accordingly. If you didn’t make all the reps, raise the bar a notch or two, then try again at this higher level. If you made all the reps and everything felt good and easy, then lower the bar a notch or two and repeat this process until you find a level that allows you to perform more than 5, but less than 10 repetitions for consecutive sets with good form—mark and remember that level as your base training level. Depending on your fitness goals, once you can perform 4-5 sets of 10 incline push-ups on a given bar level with <2 minutes rest each set, it’s time to progress.
These incline push-ups can also be easily modified based on specific training goals by raising or lowering the bar to alter movement intensity. Lower the bar until you can only perform 3-5 reps to emphasize strength. Move up and down to amass numerous sets within the 8-15 rep range for building size. Or try raising the bar to test your stamina and stability with higher reps (30+). The height of the bar can be adjusted to change the movement’s intensity based on your body angle across a wide difficulty range depending on the equipment’s adjustment design. Bar height/intensity can also be changed from set to set and rep to rep, allowing for seamless Pyramid Sets, Drop Sets, or even Interval Sets.
At this point, you can also modify your foot position from wide to narrow as mini-progressions between bar heights, making the same level push-ups more difficult as your stance gets closer to centered or easier as your stance and base of support widens. Using a straddled stance will give a much wider base of support and make the movement a bit more stable. As the stance narrows towards shoulder width and then tight together, the balance shifts more towards the upper body. From there, you can even begin to stack your feet or perform push-ups with one leg raised, placing more weight and much more balance demand on your arms.
 With these same methods of adjusting movement intensity via bar height and foot placement, one can also begin to safely explore the more advanced one-arm push-up progressions. Although most of the preceding article has been geared towards beginner calisthenics practitioners who are attempting to learn basic push-ups, all of the stance strategies and varied intensity tactics discussed above can be used by more intermediate and advanced bodyweight athletes attempting to learn or perfect their one-arm form. No matter your level, using an adjustable bar is a simple and effective way to track and ensure your progress.
****
Derek Spoden, PCC, M.S., is a personal trainer and health caretaker from Minnesota who enjoys teaching calisthenics to clients from ages 8-80. Bodyweight exercise and mindful exploration are at the heart of his training.
Check out Facebook.com/derekspoden to learn more about Derek!