• Skip to main content
  • Skip to primary sidebar
  • Home
  • Contributors
  • Resources
    • Q&A with Paul “Coach” Wade
  • Workshops
  • Products
  • Forums
  • Articles
  • Blogs
    • RKC Blog
    • Strong Medicine Blog
  • Archives

PCC Blog

Progressive Calisthenics - The Official Blog for the PCC Community

calisthenics

The Dragon Pistol Squat

July 28, 2015 By Al Kavadlo 25 Comments

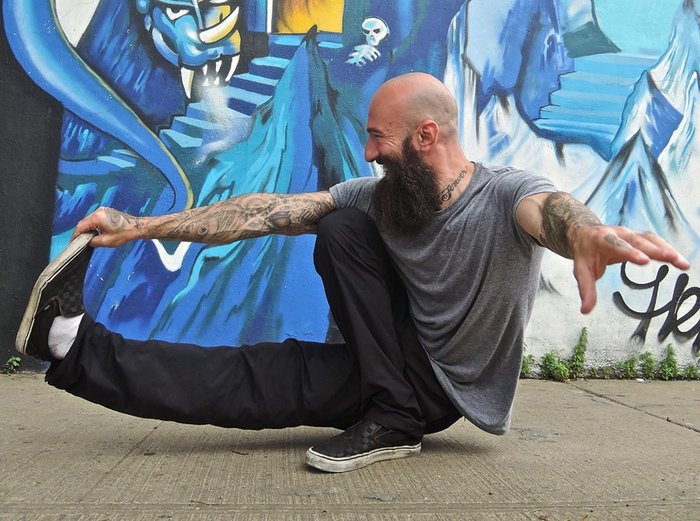
Al Kavadlo Dragon Pistol Lead

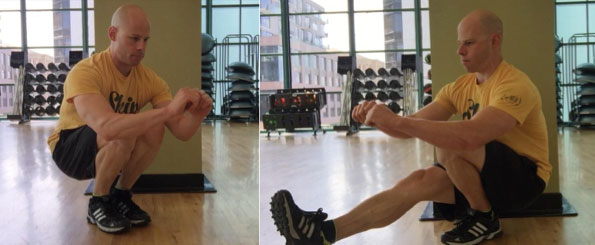
The first time I ever tried to do a one-legged pistol squat, I failed miserably. Even though I thought I had strong legs from years of weight training, my initial attempt at this calisthenics staple resulted in me falling on my behind. After several weeks of dedicated practice, however, I was able to nail the pistol squat and eventually build up to performing it for reps.

Later on, I discovered an exercise known as the shrimp squat, which finds the non-squatting leg held behind the body, rather than in front, as it is with the pistol. Once again, my first attempt at this new one-legged squat variation was unsuccessful. This time, however, I was able to get the hang of my newfound lower-body calisthenics challenge within a few training sessions. The strength and stability I’d built from pistols had a good amount of carryover to learning this new skill.

As I got more comfortable with the shrimp squat, I began finding new ways to make single leg squats more challenging. By holding both hands behind my back, I discovered I could change the leverage and add a significant amount of resistance without relying on external weights. I was also starting to practice a technique that would later go on to be dubbed the “jumbo shrimp”, which involves increasing the range of motion of a standard shrimp squat by standing on an elevated surface so that the back leg can drop down lower than when standing on the ground.
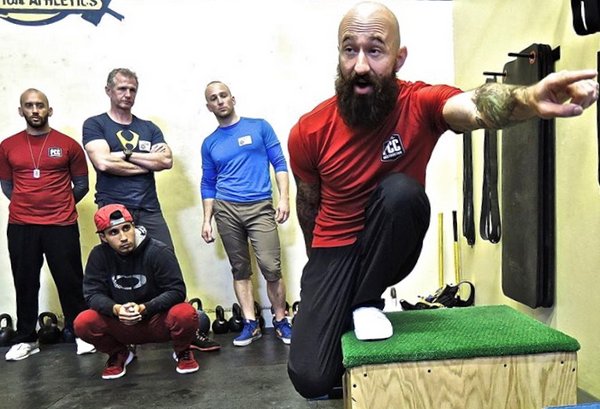
Raised Shrimp Squat "Jumbo Shrimp" at Encinitas PCC workshop

Legs Get To Work
One of the most common misconceptions about bodyweight strength training is that it can only be progressed so far. After a certain point, many people would argue that the only way to increase the difficulty of an exercise is to add weight. This is especially true when it comes to leg training. Even folks who have come around to the idea that a muscular and highly functional upper-body can be built with calisthenics alone often have a hard time conceiving that the same is true for their lower half.

Though different people define strength differently, there are plenty of bodyweight squat variations to keep your workouts fun and challenging for a lifetime. If standard pistol squats and shrimp squats are no longer difficult for you, don’t start thinking you need to join a gym. Instead, consider giving the dragon pistol squat a shot.

Dragon Pistol Squat ? #ProgressiveCalisthenics #Legs #Calisthenics #Legday #PistolSquat #BeardPower #NinjaTraining #NowYouTry

A video posted by Al Kavadlo (@al_kavadlo) on Jul 23, 2015 at 11:42am PDT

Enter The Dragon Pistol
Like the traditional pistol squat, the dragon pistol requires serious strength, balance and mobility – and in a very unique way. The dragon pistol can be surprisingly taxing on your inner thighs as well as your deep glute and hip muscles. And of course, all the other muscles that you work in a standard pistol will get hit as well.

As we each have our unique strengths and weakness, some people may find this move a lot harder than a normal pistol, while others may not experience a huge disparity. Regardless, I suggest building a solid foundation in standard pistol squats before beginning to work on this variation.
Convict Conditioning Vol 2 Twist

Other than that, I recommend you spend some time working on your hip mobility by practicing twist holds, which you may recall seeing in Coach Wade’s Convict Conditioning Vol 2. Once you’re able to do a standard pistol and a full twist hold, you shouldn’t be too far from the dragon pistol.


Elevation Training
Though standing on a bench or other elevated surface when performing a shrimp squat can increase the difficulty of the exercise by increasing the range of motion, practicing the dragon pistol while elevated can actually be a very helpful regression. By allowing your non-squatting leg to drop below the bench, you can decrease the amount of mobility required to perform the exercise. (This same technique of standing on an elevated surface can be very useful when someone is learning to do a standard pistol squat as well.)

Dragon Pistol Raised Regression

Toe the Line
If you’ve spent some time working on pistol squats, you’ve probably at some point experienced a cramp in your non-squatting leg as you fought to keep it in the air. This is common when learning the dragon pistol, too, only the cramping may take place in your hip and/or inner thigh instead of your quads. To minimize this issue, many people find holding the toe of their squatting leg to be helpful, particularly in the bottom position.

The dragon pistol also has quite a bit in common with the shrimp squat, as both moves begin with the non-squatting leg behind the body, rather than in front. As such, you may find that holding your toe behind your back at the top of a dragon pistol (similar to how you would in a shrimp squat) will allow you to control your leg as you gradually extend it into the bottom position (which more closely resembles a pistol squat, only with the extended leg threaded behind the squatting leg). Note that your hand will reach across to the opposite toe for this variation, whereas in a shrimp squat it is more common to hold the toe on the same side. So if you’re going for a dragon pistol on your left leg, you would hold your right toe with your left hand.
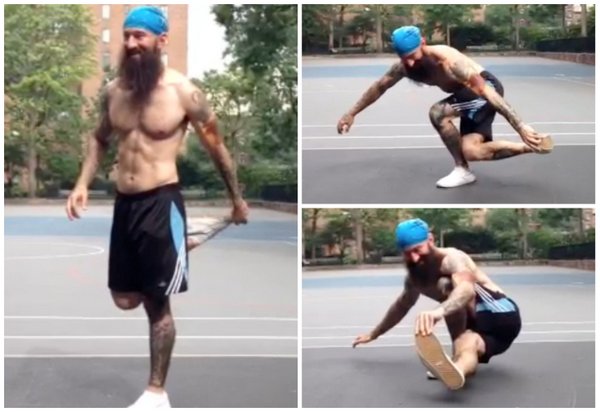
Al Kavadlo Dragon Pistol How To

When practicing these progressions, I recommend keeping your training volume low. Warm up with a few easier moves (basic squats, split squats, maybe a few pistols and shrimps) then get into practicing your dragon pistol progressions (elevated, holding your toe, etc). When starting out, stick to just one or two reps at a time – a total of 10 reps per side in one training session is probably plenty. If you go slowly and focus on staying in complete control of your movement, you won’t need to do a whole lot of volume.

I’ve only recently begun experimenting with this move, so don’t take my guidance as the final word. I’m sure I will learn a lot more as I go. Feel free to share your experience with the dragon pistol squat in the comments below.

***

Al Kavadlo is the lead instructor for Dragon Door’s Progressive Calisthenics Certification. Recognized worldwide for his amazing bodyweight feats of strength as well as his unique coaching style, Al is the author of five books, including Raising The Bar: The Definitive Guide to Pull-up Bar Calisthenics and Pushing The Limits! Total Body Strength With No Equipment. Read more about Al on his website:www.AlKavadlo.com.
Filed Under: Progressive Calisthenics, Tutorial Tagged With: Al Kavadlo, bodyweight exercise, calisthenics, Dragon Pistol, flexibility, how to, leg training, mobility, tutorial

Calisthenics Regressions for Strength Progress

June 23, 2015 By Matt Schifferle 29 Comments

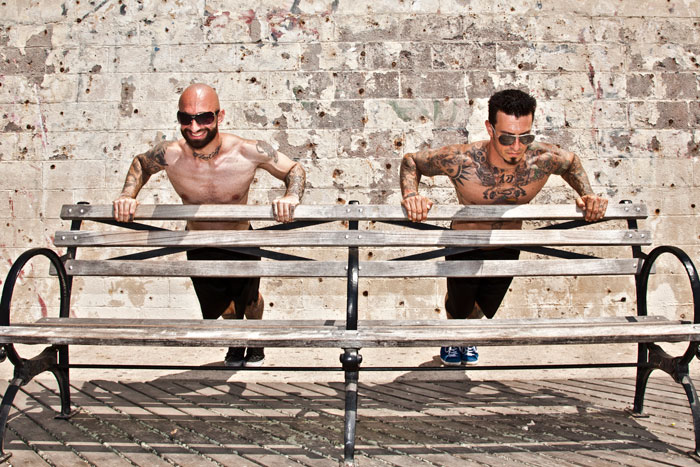
Al and Danny Kavadlo demonstrate regressed push ups

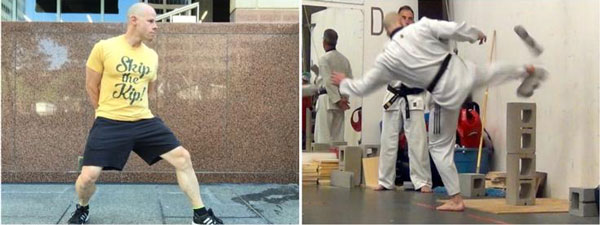
I once attended a very high level Taekwon-Do seminar taught by an Olympian ranked 3rd in the world. I was looking forward to learning a lot of advanced techniques–yet here we were, all of us black belts, simply learning how to stand still.

The instructor spent the rest of the day drilling us on how to improve the techniques we all learned years ago. Even though we never strayed beyond the “easy” kicks and punches, we all became much better by the end of the weekend. Since that seminar, I’ve taken that lesson to heart not only with Taekwon-Do but also calisthenics.

It’s always important to train your foundation no matter how advanced you become.

When I first discovered Convict Conditioning, I made the mistake of rushing into the more advanced steps. This was despite ample instruction not to do that in chapter 11! Even though I could (barely) meet a regression standard, I figured I had passed that level and no longer had any need for that technique. After all, I could do loads of close push-ups, so why would I ever need to practice push-ups on my knees?

But, just like my Taekwon-Do, I’ve learned that I’m never above the earlier steps. There are always a few nuggets to discover with the earlier steps no matter how many reps I can do of the more advanced techniques. Here are a few examples of how the earlier steps can still hold some value to your training.

1: Warming Up

It would be considered foolish to load a bar with your maximum working weight for your first set, yet that’s exactly what I used to do. I would go from 0-100 mph as I cranked out reps of the the hardest step I could muster. Is there any wonder why I was plagued with muscle control issues, balance issues, and sore joints after a few weeks?

These days I always start my workouts with some of the first level steps of each exercise. If I’m practicing bridges I still start with step 1 (short bridges) to wake up my posterior chain and loosen up my hips. As a bonus, this approach to my practice also allows me to fully dial in my mind-muscle connection. My body and mind will both be warmed up for the next steps. It also helps me get a feel for the state of my body, so I know if I can push hard or if I should take it easy that day.

2: Muscle Building High Fatigue Drop Sets

In Paul Wade’s article, “the Diesel 20”, he mentions using easier techniques to highly fatigue a muscle group towards the end of a workout.

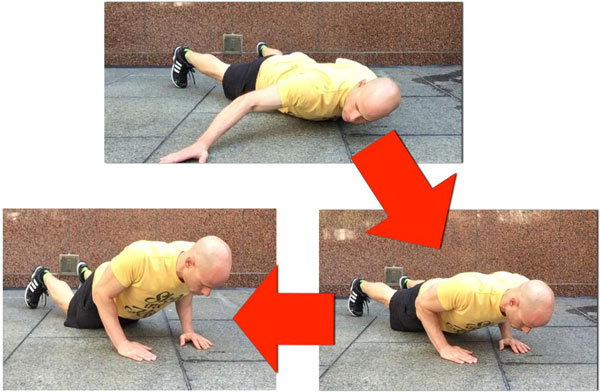
On of my favorite methods is to start with archer push-ups, then drop down to the narrow push-ups, then normal push-ups, and finally push-ups on the knees.

Like all drop sets it can be sort of funny to shake and struggle with an “easier” step. Watching myself struggle to get 6 knee push-ups is always a great way to keep myself humble.
Like all drop sets, it can be sort of funny to shake and struggle with an “easier” step. Watching myself struggle to get 6 knee push-ups is always a great way to keep myself humble.

3: Filling in Tension Gaps

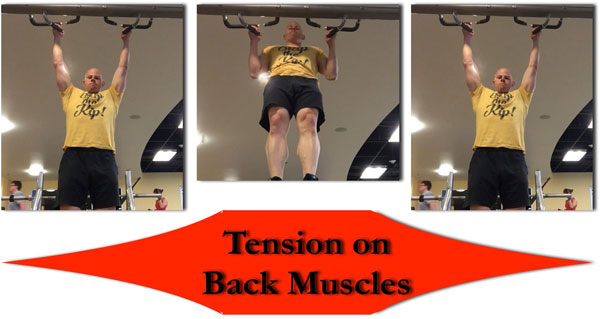
For the longest time I’ve always noticed my back and biceps muscles would fully contract at the top of a pull-up but they tend to relax a bit towards the bottom of each rep.

Mark Shifferle Keep Tension on Back Muscles

I refer to these points as tension “gaps”. These gaps can be detrimental to muscle development, strength, power and can place more stress on the joints.

One of the best ways to fill in these gaps is to use an easier technique and practice proactively tensing the muscles at these weaker points in the range of motion. By going to the Jackknife pull-up, I was able to work on maintaining the tension in my back while keeping my shoulders and arms tight at the bottom of each rep. This is much easier on the earlier steps because my muscles are not overridden by a much higher level of resistance.

4: Learn What’s Missing

Many times I’ve struggled to advance because I was missing a critical technical detail.

The worst example was my journey into single leg squats. Again, I was foolish and just breezed through some of the earlier steps thinking I was above them. Within a couple of months, I was doing 10 single leg squats on each leg. The catch was I was tilting and moving all over the place and sometimes had to slightly bounce out of the squat. I also had to do them on an elevated surface so my front leg could extend below the level of my supporting foot.

After a year, I developed tendonitis in my right knee and it got so bad I had trouble walking up stairs. I struggled to figure out what was wrong for months, and was sometimes on the verge of tears with frustration. As a mountain athlete I need strong and healthy legs to hike, ski and pedal and here I was hobbling around like an old man.

I finally swallowed my pride and started all the way back at step 1 in the squat progressions. By the time I had made it to narrow squats, I had learned that my legs had exceptionally unbalanced development in the hips and hamstrings.

I still make close squats a staple of my training to keep my muscles balanced

It’s been over a year now and I’m back to doing single leg squats. Now there is no bounce, no tipping or wobble and I don’t need an elevated surface. Even though my numbers are far lower than before, my legs have never been stronger or healthier. I would never have figured out where my technique shortcomings were unless I went back and explored the earlier steps to a deeper level.

5: Learning to Use the Body Better

I believe Progressive Calisthenics is more than just a system for building strength and muscle. To me it’s a vehicle towards understanding my own body and learning how to use it better. Using the earlier steps has always been exceedingly helpful towards doing this. I can always control myself and dial in cleaner technique with an earlier step than I can with an advanced step. My mission is to learn why the earlier steps are so much cleaner and more stable. Once I know why, I work on bringing those qualities up to the more advanced moves. Of course, as my advanced moves become better so do my earlier steps and the whole process starts over again. In this way the quality of the earlier techniques feeds into the more advanced moves and the advanced moves make it possible to learn even more from the earlier moves. It’s a cycle that’s infinitely progressive.

In the martial arts, the student is always encouraged to retain the lessons they learned at the previous ranks. There’s a reason why students are encouraged to have a “white belt mindset.” The color black is made up of all of the rank colors that come before it so when you wear a black belt you’re still wearing a white belt, a green belt and so on. The earlier belts, and the exercises they represent are never discarded. They simply remain in the mix. The same thing is true for calisthenics, the earliest steps are never discarded but are recycled and re-purposed.

Discard nothing and gain everything!


****

Matt Schifferle a.k.a. The Fit Rebel made a switch to calisthenics training 5 years ago in an effort to rehab his weight lifting injuries. Since then he’s been on a personal quest to discover and teach the immense benefits of advanced body weight training. You can find some of his unique bodyweight training methods at RedDeltaProject.com and on his YouTube channel: RedDeltaProject.

Filed Under: Progressive Calisthenics Tagged With: beginner's mind, calisthenics, drop sets, Matt Schifferle, progressive calisthenics, regressions and progressions

Simplicity and the Pragmatic Practice of Calisthenics

June 16, 2015 By Silvio Bauer 19 Comments

Silvio Bauer Dragon Flag

It is 6 o’clock in the evening. I’ve just come home from work. I slip out of my shoes and take off my backpack. I quickly get into the kitchen, pour myself a glass of water and drink it.

I head to my bedroom to change into a pair of comfortable shorts and a simple t-shirt. On a piece of paper, I briefly note four words: Muscle-ups, dragon flags, shrimp squats and handstands. I get my keys as well as the piece of paper and a pen.

Outside of the house, I start running at a steady pace. At this point, I’m already shaking off the worries of my day. I feel totally liberated, because for the next hour, all I need to focus on is the movement of my own body. Nothing can distract me. As I’m running, I’m getting further and further away from my phone, my digital leash. I soak in the environment.

In about 5 minutes, I stand before two pull-up bars. One of them I can only reach with a slight jump. My heart rate is already elevated from the run. The movements I’m about to practice will work pretty much every major muscle group, so I prepare for it accordingly.

First, I do some joint rotations for shoulders, hips, knees, ankles. I combine this with dynamic stretches like toy soldiers, arm circles and leg swings to prime my muscles.

The exercises I previously scribbled on the piece of paper are the exercises I will put my focus on today. I split them into two groups, muscle-ups + shrimp squats, then dragon flags + handstands.

For the first “super-set”, I get down into a deep squat and simultaneously do wrist circles. I do some push-ups, get up, do side lunges and then I jump up to the bar for some pull-ups. These “easier” exercises get my blood rushing through the muscles I’m going to need for my focus exercises. I never max out on these because I want to retain my strength.

After two rounds I’m warmed up and ready to rock. After a round of muscle-ups and shrimp squats, I shake out my legs and arms. I do a warrior pose to stretch my quads and hip flexors in order to improve my mobility for the next set of shrimp squats, then some shoulder mobility to help my muscle-ups. I count 5 deep breaths. Rinse and repeat.

While I am practicing these two movements, one at a time, my goal is to maximize the precision – not the effort – of each of them. When I feel I lose control over my form, I simply stop. On my piece of paper, I jot down my reps, not to impress anybody, only as a means to record my progress and to recalibrate my focus.

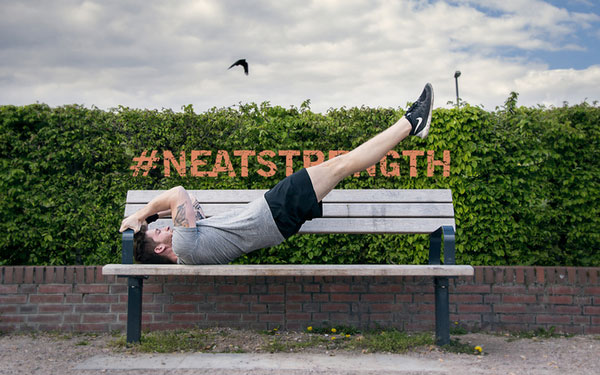
After 5 rounds I go to the nearest park bench. I am more than warmed up from the first two exercises, so I immediately get on the bench and do my dragon flags. After each set, I do a few kick-ups into a handstand, count 5 breaths and repeat.

After 3 sets of dragon flags, I shift my focus solely on debugging my handstand. After 15 more minutes, I call it a day.

To cool down from my practice, I get into a back bridge and counter that stretch with a forward bend. I do this once more and then I take a leisurely walk home.

As I walk, I contemplate over the quality of my workout and what I achieved. Some moves worked well today, with some I struggled a bit more than usual. But I know that this is part of the process. With consistency, I know I will get better over time.

When I approach the front door to our house, my mind gets filled with a rush of anticipation: I am going to enjoy a delicious and nutritious home-cooked meal.

-The End

The Moral of the Tale

Al Kavadlo prayer pushup

This story is not to brag about how Zen my workouts are, but rather to illustrate the key concept of calisthenics: simplicity.

In Convict Conditioning, Paul “Coach” Wade explained how he used advanced bodyweight exercises out of necessity while serving time. There was just no other way to get strong and survive but with his own body.

In our superfluous world with an abundance of options, practicing calisthenics can also enhance our “inner freedom”. By limiting options (not using machines, weights, apps or other equipment), we can liberate our training from being drawn in every direction.

But in order to make progress over time, we have to consistently apply this pragmatic approach to our training. With all the excellent information available about advanced bar calisthenics or bodyweight strength built with nothing but the floor, the variety of calisthenics exercises can be quite seductive to us enthusiasts.

Only by focusing on a few movement patterns at a time, we can ensure sufficient attention to each of these moves.

There is also no need to over-complicate the process of one’s training. Warm-ups are only needed for the specific body parts that come into play in a workout. If you follow an upper/lower body split routine, there is no need to warm up your legs on your upper body day.

The same principle applies to cool-downs. Static stretches are most effectively applied to the muscle groups that were used to generate mechanical tension. Flexibility does not need to be practiced for its own sake. It serves a purpose: making it possible for you to move the way you want to move. If you want to do pistol squats, insufficient ankle mobility will limit your ability to do so. However, if pistols don’t interest you, the necessity of ankle mobility drills is questionable.

The story above most probably differs from your own. It’s not necessarily better or worse than yours, it’s simply the template I found works best for me. It is merely an example of an application of the underlying pragmatic principles that calisthenics have to offer.

Everybody has a different story. What’s yours?

Move freely.

-Silvio

****

Silvio is a full time medical engineer who loves to practise and teach calisthenics in his free time. He enjoys creating workout plans for his friends and spreads the word about PCC over at his blog, neatstrength.com. You can follow him on facebook.com/neatstrength, twitter.com/neatstrength or on instagram.com/neatstrength/.

Filed Under: Progressive Calisthenics, Tutorial Tagged With: calisthenics, calisthenics workout, flexibility, outdoor workout, Silvio Bauer, simple workout, stretching, tutorial

Crow Pose and Beyond

April 14, 2015 By Grace Kavadlo 28 Comments

Grace Menendez Crow
Before I ever considered becoming a personal trainer, one of my earliest fitness breakthroughs was the first time I achieved a crow pose in yoga class. It blew my mind! Before then I had assumed hand balancing was reserved for gymnasts and acrobats. As far as I was concerned, it was not appropriate for me and my fitness goals. Man, was I wrong! After that yoga class, I felt inspired to improve my crow practice and learn more about the world of hand balancing.

Adding this powerful pose to your routine has more benefits than just showing-off. Crow pose strengthens your entire upper body, including your shoulders, arms, and even your abs. It can be a great way to train your brain, too!  If you have ever attempted to hold a crow pose for even a few seconds, you can attest to how much focus and concentration is involved in the process.

Crow-gressive Calisthenics
Like all bodyweight skills, you can vary the intensity of the crow pose in several ways to make the move more accessible to beginners, or challenge even the most advanced hand balancers.

Though the general idea remains the same – using the backs of your arms to support your lower body while you balance on your hands – there are a lot of subtleties that are often overlooked when learning how to perform the crow pose.

Before you begin, I suggest doing a few wrist rolls as well as opening and closing your hands and fingers as a warm-up. Placing your entire body weight on the smaller muscles of the wrists and hands can be pretty intense. Ease into your practice, listen to your body, and let’s have fun with the crow pose!

Froggy Bottom
The earliest progression toward the crow is what is sometimes known as a frog stand. Start in a deep squat position and place your hands on the floor in front of your feet. Your arms should be inside your legs with elbows pressing into your inner thighs. Keep your hand placement fairly wide when starting out.

From here, begin to bend your elbows to around 90 degrees as you tip forward, lifting your feet off the ground. You can also ease into it by lifting one foot off the floor at a time. Focus on keeping your chest lifted and squeezing your thighs into your arms as you attempt to balance. The more contact you have between your arms and legs, the easier it will be to balance. Think about looking in front of your hands rather than in between them. It can also be helpful to place a pillow or mat in front of your hands in case you are afraid of falling.

If you are finding it difficult to lift off, I suggest elevating your feet on a low platform with your hands on the ground to allow more clearance. I’ve also coached people into finding the balance by starting from a tripod position with their head on the floor and pushing off the mat back into frog stand.

Al Kavadlo Frog Stand

Crow Up
Once you’ve got the hang of the beginner version, you can try placing your hands in a narrower position to begin working toward minimizing the contact between your arms and legs. For this variation, which we can call a full crow, only your knees will be on the backs of your arms, instead of your inner thighs. You should also start working toward reducing the amount of flexion at your elbows. Point your toes and squeeze your thighs together to help generate enough muscle tension to allow you to balance. Remember to keep your eyes focused on a spot a few inches ahead of your hands to help you counter-balance.

Al Kavadlo Crow

Let It Crane
The next step in the series is what’s sometimes known as the crane pose. This variation may take a while to build up to as it requires serious strength, intense focus and extreme wrist flexibility. However, if you’ve been “milking” the earlier steps, you will eventually conquer this pose. For the crane variation, there is little bend at all in the arms, and the knees are placed further up the backs of the triceps, until they are practically in the armpits.

Start in the same squat position as before, only this time your arms will be locked. Stand on your toes and lift your hips high as you lean forward, bending your knees in towards your armpits (or as high as you can place them on the backs of your arms). Point your toes in towards each other as you tense your midsection and attempt to balance. Keep your gaze a few inches inches in front of your hands and lift your heels toward your butt. Focus on utilizing your abdominal strength to keep your hips nice and high.

AlKavadlo Crane Stand

And Beyond…
The above variations will give you plenty to practice in order to tighten up your hand-balancing game. However, there are still more progressions that you can work on to make even the advanced crane seem tame. You can practice the crow on your fingertips, with your hands reversed, or even on the backs of your hands! You can also work on single-leg variations. No matter where you fall in the crow continuum, you can always find a variant that will challenge and excite you.

Grace Menendez Crow Variations

****

Grace Kavadlo, PCC, HKC is a personal trainer and group exercise instructor located in New York City. She is a columnist for Bodybuilding.com and can be seen in several Dragon Door books, including Coach Wade’s Explosive Calisthenics. For more information about Grace, check out her website, www.DieselGrace.com

Filed Under: Tutorial Tagged With: calisthenics, crow pose, crow progressions, crow stand, Grace Menendez, tutorial, yoga

Strength Cycling for Continuous Improvement

April 7, 2015 By Juan De Jesus 35 Comments

Juan De Jesus Human Flag

Though progressive calisthenics training brings plenty of benefits, ranging from increased flexibility, control, and of course, strength, your body perceives it as a stress. As such, the body builds resistance toward it, which manifests in you getting stronger. Twenty push-ups today might force an adaptation, but twenty push-ups a month later might not.

One way to continue getting stronger on a consistent basis is to pick harder exercises as time goes by (you could begin with band-assisted pull-ups, then full pull-ups, then clapping pull-ups, etc), or by adding reps to your sets (do 3 sets of 30 squats today, 3 sets of 32 next time, etc). Most calisthenics trainers will recommend these two main variables in order to make their workouts harder and induce an adaptation.

At some point, however, our recovery cannot keep up with our want for reps or added difficulty. We’ve all been there: you were supposed to do 15 hanging leg raises today (couple more than last time), but you just could not go past 12. So what do you do?

If you can’t make the reps in one set, I propose simply adding more sets. Look at this cycle:

Juan De Jesus Calisthenics Chart

This is actually a personal example of a 7-week cycle I did with one-arm push-ups. I was only able to manage 3 reps in one set before week 1. Clearly, with such a hard exercise, doing 3 sets and adding reps on a weekly basis would burn me out incredibly fast. So instead, I chose sets of one less rep (sets of 2 reps), and did more and more sets each session! By the time week 3 rolls, doing sets of 3 is actually quite easy (you’ve gotten very strong after a 9 sets of 2!), so you cut the sets down, and begin doing sets of 3. Then add more sets. Repeat as necessary. Deload when you’re feeling fatigued.

I’ve actually started using this template for many of my exercises, and with amazing results! In 6 weeks, I was able to move my handstand push-ups from 4 rep-max (RM) to a 7 RM. For those math geeks out there (like myself), consider a 4RM is about 90% of a 1RM while a 7 RM is close to 82% of a 1RM. So the ratio of your new 1RM to your old 1 RM is of 0.9/0.82 = 1.10. You could say this is akin to boosting your 1RM in a barbell lift by 10% in a measly 6 weeks!

Juan De Jesus Handstand

I obtained a similar result by making my 3RM with one-arm pushups into a 6 RM in 7 weeks. I attribute these exceptional improvements to two main things. First, every session is somehow a bit harder than the one before. (As I mentioned before, your body sees training as a stress. In order to cause strength gains on a weekly basis, you need to train hard, rest well, and make the next session a bit harder somehow.)

Second, because I expect to build up to high volume with many sets, my choice of reps-per-set is conservative at the beginning. So for the first four weeks or so of these cycles, I stay away from failure and really get to concentrate on tension, technique and form. When the cycle gets tough and your sets are much closer to failure, you’ll find strength coming out of nowhere because you built up this foundation at the beginning of the cycle.

Once you’re satisfied with your max, switch to a harder exercise. This is a vital part of progressive calisthenics!

Juan De Jesus One Arm Chin

Note that the idea of adding sets instead of reps in order to get stronger is incredibly flexible. It is more suited towards max-strength exercises (one where you could perform 3-8 RMs) since adding reps on a weekly basis to the sets can be quite difficult when the exercise is so tough. But it certainly does not have to be twice a week as I’ve chosen to do. A routine that works an exercise 3-4 times a week would also work well. Here, you might prefer to just do 1 more set than the session before until you feel confident enough to increase the amount of reps on each set. Then you’d decrease the sets, do sets of more reps, and build back up.

To the beginner student of calisthenics, it is certainly advisable to stick to a few sets, concentrate on form, add reps, and switch to a harder exercise once you’ve squeezed all the strength gains possible from your previous exercise. However, the more seasoned calisthenics enthusiast might need one more tool in order to burst through plateaus. I’ve certainly needed it myself when I find my reps just won’t climb no matter how hard I push. At that point, manipulating the amount of sets might be exactly what you need to bring about continuous strength improvements.

****

Juan De Jesus is a Sophomore at MIT studying Electrical Engineering and Computer Science. His enthusiasm for bodyweight and minimalist training was born in high school with his workout club Body Strength by Calisthenics (BSC) and has stayed with him ever since.

Filed Under: Progressive Calisthenics, Tutorial Tagged With: calisthenics, Juan De Jesus, programming, programming your training, strength, strength training, training, training template, tutorial

Effective Body Language for Personal Trainers

March 10, 2015 By Al Kavadlo 15 Comments

Al Kavadlo Personal Trainer Body Language

It has been said that communication is ninety percent non-verbal. Sometimes our words say one thing but our bodies tell a different story. Paying attention to your body language when you are working with your personal training or group exercise clients can cause a subtle, yet significant shift in your success as a trainer or coach. You can also get a lot of feedback from the people you train without having to get them to speak a single word if you know how to read their body language. This can be especially important when you are working with a new or prospective client.

All Hands on Deck

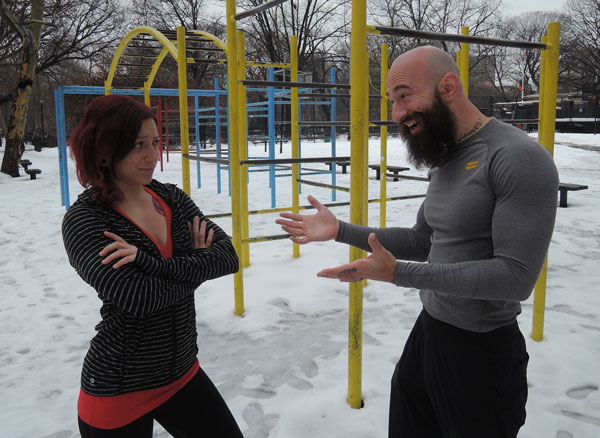
We often don’t realize it, but our hands and arms convey a lot to our clients. When we stand with our arms crossed, the message is “Stand back!” When it’s time for a client to get to work, this can be a good posture to take. However, if you are trying to ease someone into their session after they’ve had a stressful day at the office, an open palm gesture can be a lot friendlier and more inviting.

Al Kavadlo Personal Trainer BodyLanguage1
Hey hey hey!

Conversely, watch what happens when your client crosses their arms while you are trying to tell them something they might not want to hear. There’s a good chance it means they are getting defensive, so be careful! It’s important to be frank with your clients, but if they aren’t willing to hear you out, your words will fall on deaf ears. Conversely, when your client opens their arms and shows you their hands it is a sign that they are opening up to you. Listen carefully to what they say next.

Save your breath, she’s not listening.

Human Touch

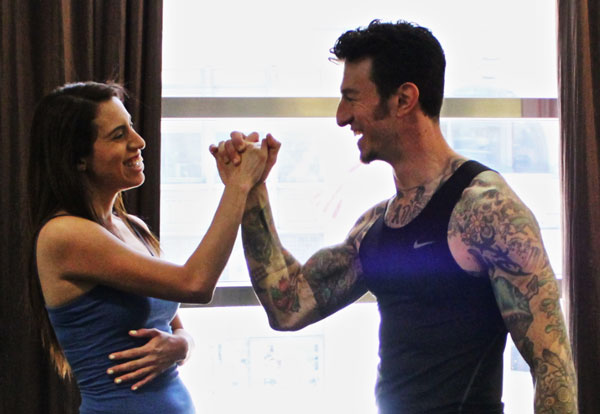
When a client has achieved a new move for the first time or set a personal best, it is fun and meaningful to celebrate the occasion. Whether it’s their first pull-up or their fiftieth, don’t just tell them “Good job!” – give them a fist-bump or a high-five! Physical contact is a fantastic way to strengthen your bond as trainer and client. And don’t forget to smile!

High-five!
High-five!

Stand Up for Yourself

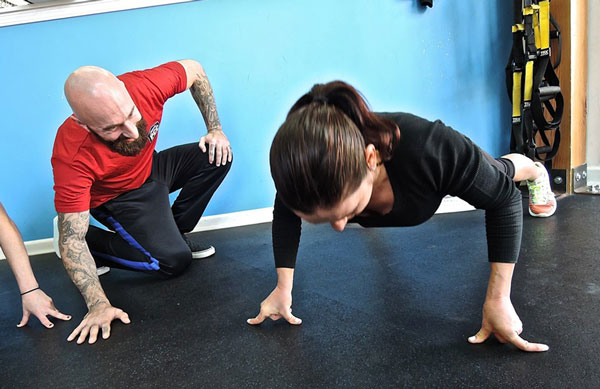
Unless you’re having a client do an exercise where they are lying on their back, I recommend you stand for the duration of every training session you conduct. Even when a client is lying down or in a plank position, I prefer to squat or kneel beside them rather than sit down. Sitting sends a message that you are not taking things seriously. You need to be focused and attentive the entire time when you’re training people; as soon as you take a seat, your body starts thinking it’s time to relax. It can also appear lazy to your client and other folks who may be working out in the vicinity.

I prefer to squat or kneel rather than sit down.

Look ‘em in the Eye, Speak from the Heart

Eye contact is the single most important part of effective communication. When you fail to look someone in the eye while speaking to them it makes you appear unconfident, which is the last trait anyone wants in their trainer. After all, they are coming to you for your expert advice! Diverting the eyes while speaking is also a hallmark of dishonesty. Maintaining eye contact helps establish trust.

Maintaining eye contact helps establish trust.

Furthermore, if you are looking at a clipboard, tablet or cell phone instead of your client, you are making a huge mistake. These objects act as a barrier that can prevent you from making a better personal connection with your clients. If you need to rely on a list of exercises that you have to look at in order to know what to do during the session, you might not be ready to be a professional trainer. Put down your iPad and keep your eyes on the person who is paying for your time.

Keep your eyes on the person who is paying for your time.

Whether you know it or not, you convey a lot to your clients with your body. While different trainers will ultimately find what works best for them, being aware of body language can make a big difference in all your interpersonal relationships. Start paying attention to what people are telling you with these subconscious signals and you will be well on your way.

***

About Al Kavadlo: Al Kavadlo is the lead instructor for Dragon Door’s Progressive Calisthenics Certification. Recognized worldwide for his amazing bodyweight feats of strength as well as his unique coaching style, Al is the author of four books, including Raising The Bar: The Definitive Guide to Pull-up Bar Calisthenics and Pushing The Limits! Total Body Strength With No Equipment. Read more about Al on his website:www.AlKavadlo.com.
Filed Under: Motivation and Goals Tagged With: Al Kavadlo, body language, calisthenics, fitness business, personal trainer, personal training, professional communication

Healing Powers

March 3, 2015 By Danny Kavadlo 56 Comments

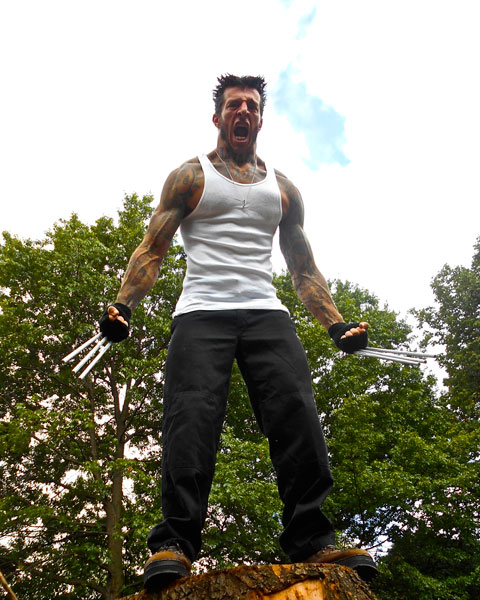
Danny Kavadlo Wolvie

Wouldn’t it be great if we all had healing powers? Think about it. If the perils of injury were non-existent? If the chances of maiming, straining or spraining any particular body part were a work of fiction, best suited for the comic books? What if the words “pain” and “gain” were not so frequently associated?

Marvel at a universe where getting hurt is not a major concern.

Well here’s the thing, bub: It’s NOT a major concern. Not much of one anyway. Now before you start freaking out, try hearing me out. Yes I acknowledge that it is possible that one can get injured doing a pull-up (or lifting weights, running, jumping, or even walking down the street). But it’s also possible to get hurt while cleaning your garage, giving birth, or driving a car. You can even choke while eating an organic kale salad. Does that mean we shouldn’t do these things?

Despite what some say, I’m a true believer that the chances of getting injured if you work out are much lower than if you don’t work out. Makes sense, right?

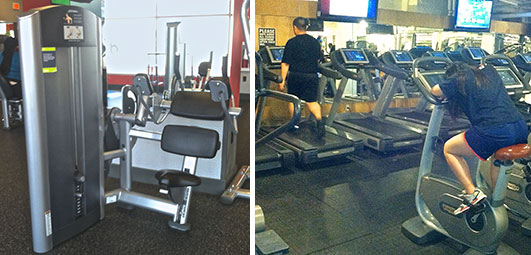
We are constantly subjected to fear-mongering tactics perpetrated by the media, even (especially?) the fitness industry itself. That’s right, my people: Most of the commercial fitness industry does not actually want you to work out! That’s why there is equipment (abs machines for example) that’s built to isolate muscles that are not made to be isolated! Or why treadmills are designed to give the illusion of exertion (fat burning zone???) but not get you in shape.

Ab Machine treadmill
These machines are not built to get you in shape.

It’s also why gyms sign up new members every day but never get any more crowded week to week. They’d go out of business if all their members actually got results. Better to sign you up, feed you some bullshit and send you on your way. Thank you, DON’T come again.

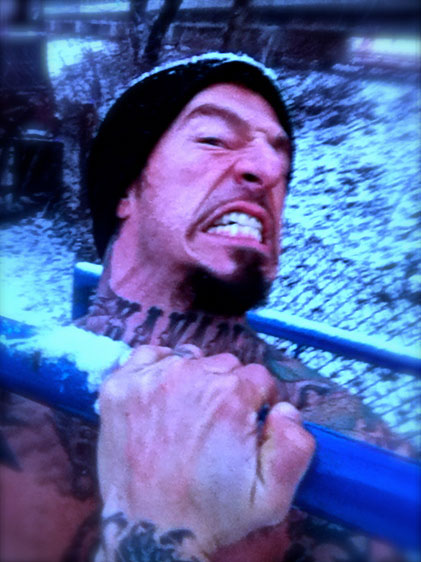
The real deal is that people respond to fear. When it snows, the news tells you to go out and stock up on groceries and shovels or you’re gonna die an icy death. (Conversely when it’s hot out–and a slow news day–similar threats are made about the perils of heat.) For shame.

Danny Kavadlo Snowy Pull-up
I’m not dead yet.

Ultimately, it’s the individual’s choice what to accept, inspiration or fear. The truth is that it’s very unlikely you will inflict bodily harm while calisthenics training. A plane can crash, but flying is still the safest way to travel. I’ve even fallen off my bicycle, but I still ride it every day. It’s still good for me. Don’t hate. Appreciate.

Danny Kavadlo One Arm Pull Up
Don’t hate. Appreciate.

Sure, a day (or even a week) off can be a good thing. But you don’t necessarily have to plan for it or measure it with a slide rule. And you certainly don’t need to be afraid to work out intensely or frequently. Let your body, life and experience dictate. Simply put, if your legs are aching, then train your arms. Listen to your body. It’s wiser than you think.

We all need to recover at times; I’d never deny it. As far as healing goes, respect your level. Though I sometimes feel like I have an adamantium skeleton, I don’t. So when those moments arise when I need to back off, I do. No biggie. Common sense prevails yet again.

Danny Kavadlo hmm
Hmmm… Try some common sense.

In fact, I’ve been practicing calisthenics for over 25 years and I’ve never suffered more than a few nicks and dings (mostly from bumping my head on the pull-up bar or other such carelessness). Some tendonitis is the worst injury I’ve ever gotten, which is relatively minor on the grand scale.

And if we do get injured, no we don’t have supernatural healing powers, so pay attention to what you’re experiencing. Embrace every moment with care. Be aware of what’s around you. These practices are helpful in all aspects of life, not just fitness. Living in the present goes a long way, my friends. Every body needs training!

Keep the dream alive,

-DK

***

Danny Kavadlo is one of the world’s foremost authorities on calisthenics, nutrition and personal training. He is the author of the Dragon Door titles Diamond-Cut Abs and Everybody Needs Training. Danny is known for his minimalist philosophy, simple approach and motivational talents.

A true in-person experience, Danny is a Master Instructor for Dragon Door’s Progressive Calisthenics Certification. He has been featured in the NY Times, TRAIN, Men’s Fitness and is a regular contributor to Bodybuilding.com. Learn more about Danny at www.DannyTheTrainer.com

Filed Under: Motivation and Goals, Progressive Calisthenics Tagged With: awareness, calisthenics, common sense, Danny Kavadlo, in the present, injury prevention, progressive calisthenics, safe training

Calisthenics, Injuries and Life

February 10, 2015 By Corey Howard 72 Comments

Corey Howard One Arm Aussie Pull-Up

On June 8 of 2014, I turned 40.  The following day I had surgery to repair a ruptured triceps in my right arm.  In late August, just 3 months later I was able to pass all of the skill elements for my RKC recertification using ONLY calisthenics for training.  But what happened in between those dates is where the magic of calisthenics lies.

Fitness gives me life.  It helps me stay in shape so I can help out my wife around the house and keep crossing things off the seemingly never ending to-do list.  Being in shape gives me the ability to play basketball with my son in the driveway, or throw soft toss to him in the batting cage.  In late May when I ruptured my triceps I was no stranger to working around injuries, but it still gave me a few new opportunities.  First, I was able to focus entirely on my lower body and write what turned out to be a fairly successful blog post about calisthenics leg training.  Second, it forced me to start my upper body training from ground zero and really dig deeper into the Convict Conditioning progressions.

How does an advanced lifter re-teach himself one arm push-ups?  I will admit, despite limited range of motion in my elbow and absolutely zero pushing strength in my right arm; I had retained most of my pulling strength.  After regaining complete active full range of motion in the joint I was able to start push-ups at an incline as well as horizontal pull-ups. Pairing the pushing and pulling together gave me a chance to work on regaining my tricep strength as well as the range of motion from the pulling movements.

Despite my youthful desire to challenge myself and rush to the next progression I made sure I was able to hit 20 quality reps with each movement before moving on to the next harder step.  I think this also helped strengthen the tendon as well as create movement proficiency.  Eventually I was able to do 20 quality narrow push-ups on the floor and 20 wide grip pull-ups with my ankles elevated on a support bar.

Corey Howard One Arm Raised Push-Up

The transition to a dead hang pull-up was surprisingly quick and easy, but moving to the one arm push-up proved to be a bit more challenging.  To accommodate the added weight and strain on the elbow joint I had to move to incline one-arm push-ups and follow a similar rep progression back to the ground.  I think it really helped practicing single arm push-ups at various heights and immediately following it with tight narrow push-ups on the floor.

I learned a couple things along the way.  First, patience is everything.  Don’t rush to get to the next progression until you’ve mastered the step you’re on.  As Paul Wade says in Convict Conditioning, earn the right to advance to the next step.  This pays dividends when you attempt the next step and find that you can actually control a few reps with quality technique instead of surviving and gutting out two or three sloppy injury risking reps.  Second, most of us are not professional athletes.  Yes, a lot of us think part of our identity comes from what we can do in the gym.  Our true identity is created by how we are as a husband and father.  My injury sucked.  It took away my ability to train upper body and I lost some of my hard earned muscle mass, but that paled in comparison to not being able to play catch with my son, or help my wife carry in the groceries.

On Friday January 9th, I ruptured my bicep in the other arm.  On Monday the 19th I had surgery to repair that. Click here for a photo during the repair process. Warning: Graphic medical photo.  Two major injuries in six months.  This time around I’m not worried about the lost training time, I’m upset that I won’t be able to go sledding with my son, or do everything my wife needs me to do.  I’ll admit I’m having a hard time dealing with this one. Three months from now I know I’ll look back and see countless blessings from this, including a deeper appreciation for the pull-up progressions, but right now I’m in the storm and it’s tough to see the shore over the tall waves.

Corey Howard Recovers From Surgery

I know there are tons of people dealing with worse situations than mine; those of us in the fitness world sometimes stake too much of our identity on our physical capabilities. Twenty years from now the only thing people will remember is how you treated your family and those around you. It’s easy to forget that we work out to be healthy and so we can have a good quality of life. I may have temporarily lost the use of my arm, but I’m not going to let myself lose sight of the big picture.

***

About Corey Howard, PCC, RKC, CK-FMS: Corey Howard strives to constantly become stronger, and to help others to achieve their fitness goals. He is the owner of Results Personal Training, and can be reached at fithubby.com, resultsptonline.com or coreyhoward.com.

Filed Under: Motivation and Goals, Progressive Calisthenics Tagged With: bodyweight exercise, calisthenics, Corey Howard, Injury, push-ups, recovery from injury, surgery

Technical Convergence

January 20, 2015 By Matt Schifferle 44 Comments

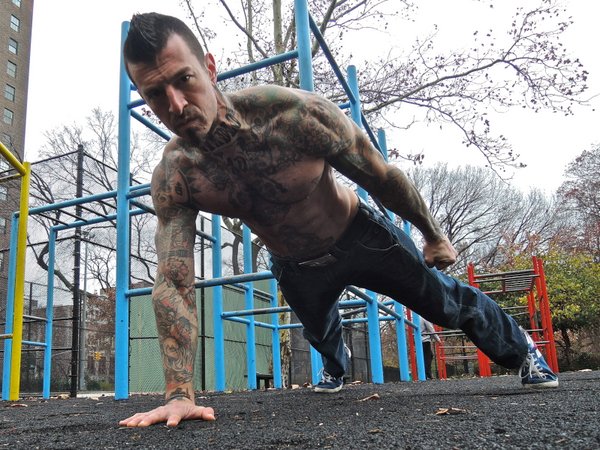
Al Kavadlo Push-up

Like many modern fitness enthusiasts, I first approached fitness in a very fragmented way. I used many exercises and different pieces of equipment to work on each separate muscle group with an individual focus. I also had a fragmented approach to conditioning. I had exercises for strength, exercises for endurance, exercises for flexibility, exercises for balance, exercises for rehab, and for muscle activation. I even had the same approach to my diet–individual supplements for protein, fats, carbs, vitamins and minerals.

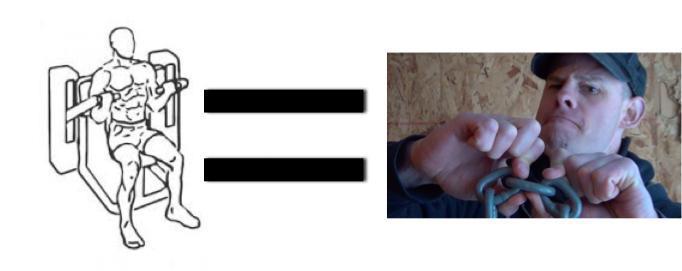
This approach was like taking a chain and trying to bend each single link at a time.

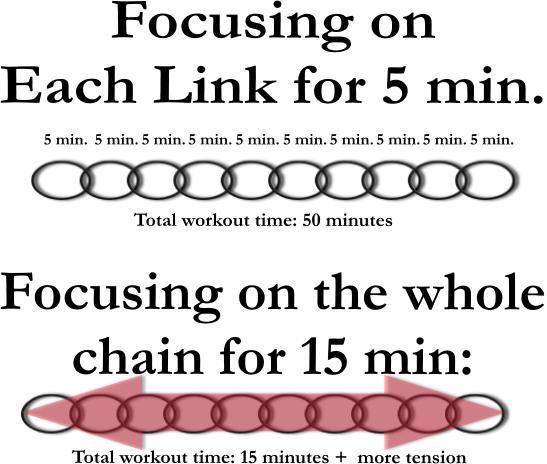
Matt Shifferle Chain MetaphorAs you can imagine, this approach has some serious disadvantages. While it is possible to emphasize a few choice links, the amount of actual workload you can place on those links is very limited. Compare this with pulling on the whole chain with your entire body, and placing far more total tension on each link.
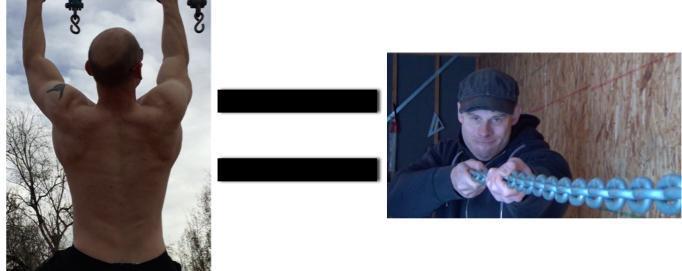
Matt Schifferle Pulling Diagram

The fragmented approach also uses up a lot of time and energy when starting at one end of the chain and pulling on each link for 5 minutes before progressing. It took a lot of time and energy to work down the entire chain. But, when I started pulling on the entire chain, I got much better results even though my total workout time and personal investment was substantially reduced. If I pulled the whole chain for just 15 minutes, the workout might be shorter but the total time and tension on each link was far greater.

Matt Schifferle Chain Diagram 1

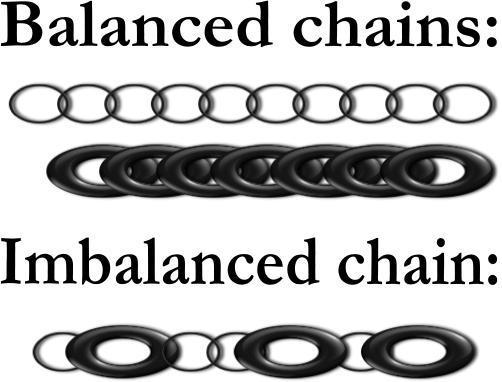
The other disadvantage to my segmented approach was that it caused imbalances to crop up over time. Like many eager young bucks in the gym, I started off wanting to grow bigger and stronger in some areas, like my arms and chest while other muscles like my hips and shoulders were neglected. This also went for certain aspects of my training where I was more interested in things like strength and power but not very interested in balance or flexibility. As a result, I had large imbalances due to less emphasis on certain links in my chain and an over emphasis on others.

Matt Schifferle Chain Diagram 2

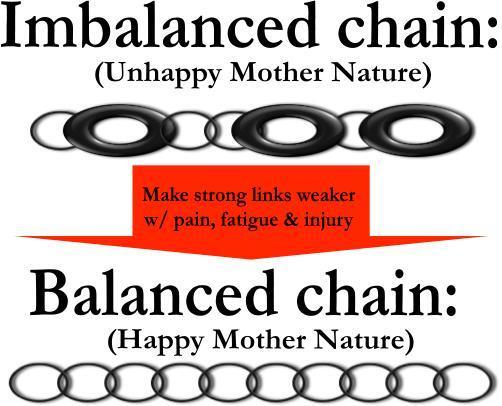
These imbalances caused many injuries and progress in my training became almost impossible. I didn’t know it then, but Mother Nature herself was holding me back. Over the years, I’ve learned that Mother Nature doesn’t care if someone is strong, fast and ripped or fat, slow and weak. Her priority is to keep the body in a state of balance or homeostasis. As I strengthened certain links Mother Nature would force me back into homeostasis by causing pain and fatigue. She weakened those strong links to balance them with the weaker ones. Even though this would weaken my entire body, nature’s priority was balance.

Matt Schifferle Chain Diagram 3

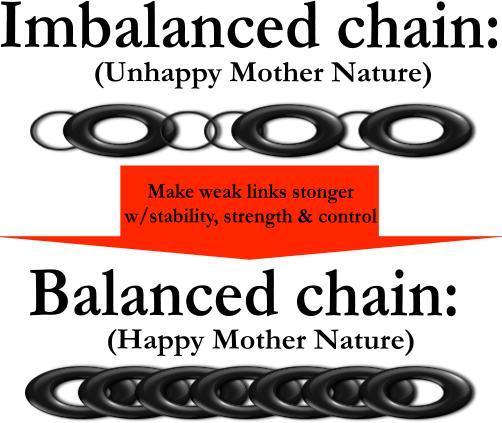
When I started with bodyweight training I was suddenly focusing on a more holistic approach that required me to develop all of my links at once. The results were simply astonishing! Pain evaporated like a puddle in the desert. Strength and speed came in waves and sports performance hit all time highs. Because I was pulling on entire chains, my weaker links finally started to get stronger. Now the powerful law of Homeostasis was helping me rather than holding me back. As those weak links became stronger they fell in line with the stronger links and reached that state of balance. Now I was balanced by making weak links stronger instead of forcing strong links to get weaker.

My training was also only taking a fraction of the time and energy compared to my previous approach.

Matt Schifferle Chain Diagram 4

Looking back, I recognize just how technically divergent my training was. Sometimes, I was even trying to limit the involvement of those weaker links! I used various supports and wraps to ensure my weak links were not holding me back. If I was trying to work my biceps, I isolated them and made sure not to use my back and shoulders. I used to think this meant I was really focusing on my goals, but now I realize I was just creating more imbalance and the potential for injury. I was also holding back my stronger links.

Short term sacrifice for long term gain

Using the entire chain is sometimes frustrating for people who are new to Progressive Calisthenics. Most of the time this frustration comes from folks who have built up some links to be stronger than others through fragmented training.

A chain is only as strong as its weakest link, so when many people start to pull on the entire chain they often get feedback from the weaker links. I hear this a lot when someone tells me that we’re doing “triceps push ups.” Or if I coach them to a narrow-stance squat, and they tell me it’s not a leg strengthening exercise but rather a balance exercise.

To a large degree, these individuals are correct because it is a triceps push up or it is a balance exercise because for that individual those are the weak links within their chain. However if they have the discipline to pursue the training long enough they will find that those links become stronger and then the next links will become the priority in their training. When this happens the triceps push up suddenly becomes a shoulder push up and the squat is no longer about balance but maybe more about flexibility or perhaps strength in the the muscles in the front of the shin.

The trick is sticking with the training long enough for the weaker links to catch up. It can take a lot of self control because someone might be focused on feeling their pecs get a pump, or their quads burning that they abandon the full chain exercises for a fragmented approach that easily satisfies the sensation of pumping up those target muscles. The down side is that while pulling on a single link may feel more focused, the long term potential of developing that link is limited.

Here’s a quick example:

Two guys want to get ripped for next summer’s beach vacation. Mr. Push Up can’t get to a gym so he’s stuck doing push ups in his basement. His buddy, Mr. Pec Fly, gets a membership to Bob’s Emporium of Pecs and Biceps and heads straight to the Chest-o-matic 9000 pec machine.

Al and Danny Kavadlo

At first it seems like Mr. Pec Fly has made the right choice. Every week he keeps adding weight to his machine and his chest is looking strong and pumped. Meanwhile, Mr. Push up is still struggling to build his shoulder stability and his triceps seem to be getting more of pump than his chest. However as beach season approaches, Mr. Pec Fly starts to wake up each morning with nagging aches in his right shoulder and can’t lift quite as much weight on the pec fly machine. He starts losing his motivation to train and his results back slide. Meanwhile Mr. Push Up has finally strengthened his weaker links, and now his push ups are pumping up his chest like crazy. Not only that, but his shoulders and triceps are also looking great and he’s sporting a hint of a 4-pack. Mr. Pec Fly wishes he could work his triceps but his sore shoulder won’t let him use any of the push-down machines and he usually skips his abs because he doesn’t have the time and energy at the end of a long workout to do a bunch of core exercises.

By mid-summer Mr. Pec Fly has quit the gym and keeps wearing loose fitting T-shirts while Mr. Push Up keeps looking for excuses to take his shirt off. He not only looks great, but feels great because all of his links are strong and healthy. While Mr. Pec Fly feels like his body is fighting him on every rep, Mr. Push Up senses that his body wants to keep getting stronger. He’s even come to expect progression with every workout! He’s working with his body, not against it.

While the push up is often used as a strength exercise for the chest and arms, it demands the strength of the core, hips and hands. It also requires flexibility in the wrists, stability in the shoulders, plus endurance, breathing, coordination and even awareness of where you are in space. As you progress in your training, you will not only develop more strength and muscle, but the advanced techniques also demand more of these other aspects of your conditioning. Technical convergence is the idea that the level of resistance you can place on a muscle is also directly in proportion to other aspects of your fitness required for you to perform a particular technique.

The technical convergence of progressive calisthenics requires every link to be strong. If any links are weak, they will be strengthened thus enhancing the stress the rest of the links in the chain can endure.

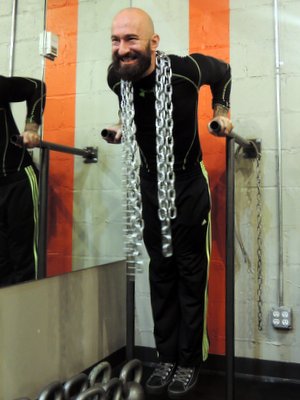
Al Kavadlo Chain Weighted Dips

People often tell me that the great thing about weight lifting is that you can increase resistance simply by placing more weight on the bar or moving a pin on a stack. I used to believe that adjusting the resistance with such ease was great, but my tune has changed. I spent so many years focusing on adding weight to the bar that I couldn’t tell that my technique was actually getting worse. I was technically divergent! Now I think “Yes, you can increase the resistance but you don’t have to improve anything other than your strength.” With bodyweight exercise, you have to earn that resistance, which is a built in safeguard to ensure you can control and use it in the most productive way.

Don’t avoid your weak links, seek them out and give them the love they deserve with the Big Six. They work every tiny link from one end to the other.

Right now, it’s -5 here in Denver but I promise you beach season is right around the corner and your weak links aren’t going to get strong on their own. The clock is ticking!

Tick tock………..

****

Matt Schifferle a.k.a. The Fit Rebel made a switch to calisthenics training 5 years ago in an effort to rehab his weight lifting injuries. Since then he’s been on a personal quest to discover and teach the immense benefits of advanced body weight training. You can find some of his unique bodyweight training methods at RedDeltaProject.com.

Filed Under: Progressive Calisthenics, Tutorial Tagged With: calisthenics, calisthenics training, fitness, fitness strategy, fitness training, Matt Schifferle, program design, workout design

The “Diesel 20”: Add Twenty Pounds of Muscle in One Year —Using Only Bodyweight

January 6, 2015 By Paul "Coach" Wade 255 Comments

Danny Kavadlo 1 Arm Push Up

Okay. It’s the New Year. It’s 2015—that means another year just slipped by you.

Another ****ing year.

That vague image you had of your ideal self: of jacking up to a dangerous, bone-shattering level of strength, and bulking up some serious muscle…you got there yet? Huh? Or are you still running around on a low setting, chasing your own ass?

Big changes need to be made, stud. And big changes require big personal challenges. A rich dude I knew back in the Bay once told me that it was EASIER to set—and meet—the goal of making a million dollars, than setting and meeting a goal of making a hundred thousand dollars. Why? Cuz the bigger goal is more inspiring. It unleashes more psychic energy; causes you to truly marshal ALL your forces to meet the challenge. The same principle that holds true for money holds true for your body. A big, inspiring, challenging goal is more likely to be met than a small, flimsy, pathetic one. So here’s a goal for ya:

I want to help you put on 20 pounds of muscle in a single year: using only bodyweight training.

Matt Schifferle Muscle
PCC Instructor, Matt Schifferle is a calisthenics master who exclusively uses bodyweight…does it look like he has a problem adding slabs of muscle? Check out the loaded guns!

Now, if you love training and that ain’t a goal to jack you up—you’re probably dead already. Twenty pounds of dense, solid muscle is an awe-inspiring amount of beef, and would totally revolutionize your body. Forget what you mighta seen on bodybuilding sites or magazines, where guys talk about putting on ridiculous amounts like fifty pounds in a year. That’s real rare, and when it does happen it is purely the result of huge amounts of steroids and other chemical poisons: it is mostly water, and what isn’t water is fake, artificial tissue that’ll disappear (taking extra with it) when the drugs are discontinued. That’s madness to me: if you want to look big using dumbass tricks, just stuff some goddam Kleenex in your sleeves. (In fact, modern bodybuilders are actually doing the equivalent of this. Google “synthol abuse” if you feel like laughing at the mentally challenged.)

What will twenty pounds of REAL muscle look like on you? Imagine a big, juicy quarter pounder burger patty. Now, remember that a quarter pounder burger is its raw weight: and that patty is at least a third bigger before cooked up. Now imagine four of these big, raw patties squashed together. That big, meaty lump is pretty much what a pound of muscle looks like. So imagine twenty of those lumps (that’s eighty large raw burgers).

It’s quite an amount, no? If you could plaster your torso, arms and legs with all that meat, you’d appear much, much bigger and more intimidating. (Remember, if you count bones, organs, skin and the rest, the average guy only has about forty pounds of lean muscle on his body anyway.)

And as for strength? Damn, son—if you really want to level up your raw power, getting diesel is a real good way to do it. Yep, there are some real pansy huge bodybuilders out there, and there are some tiny guys who can lift like Superman. But as a general rule, there is a direct correlation between muscle and strength. That’s why powerlifters and Olympic lifters move up through weight classes throughout their careers: as they gain strength, they gain lean muscle tissue. Plus, you’re not gonna be pumping out reps on silly machines, right? You are gonna be using the ultimate functional training tool: your body. You WILL become alpha-strong as a consequence of training for this goal.

How to really do it: six keys to success

You are probably expecting a routine here, right?

In truth, it’s very, very tough to work hard on just one routine for a year. Most athletes will get stale and bored, and quit. Thinking “programs” is not enough. Putting on the “Diesel 20” is a big ask—it’s kinda like going to war. Exercises and routines are your weapons and equipment. In war, the tactics you use are way more important than your weapons. We’ll talk programs a little later—let’s absorb the tactics first. Here are SIX Alpha-Building tactics to keep you on the straight and narrow:

  1. Joints first

If you are going into a year of hard training, you gotta be conditioned to it first. The job of a beginner—no matter what age they are—is to learn the correct calisthenics movement patterns, build basic strength, and condition their joints. If beginners launch into tough regimes designed to build maximum muscle, they will only end up hurt and frustrated. If you are a beginner and want a great starter routine for the New Year, I wrote one here just for you.

  1. Work the basics.

Despite what you might believe, tons of muscle is NOT built by working with dozens of exercises, working with isolation-type moves, or by working each muscle head “from every angle”. This might (or might not) be a method for putting the finishing touches on a physique that already carries plenty of beef—for actually building mass, its worse than useless. A better tactic is to structure your training around a handful of basic, compound movement-types, used progressively. I favor the “Big Six”: pullups, bodyweight squats, handstand pushups, bridges, leg raises, and pushups. (Some folks might choose to include dips as part of the pushup family.)

Al Kavadlo Bar Dips
I’m a pushup man myself, but I gotta say it:
dips can be an excellent upper-body builder.

Note that “structuring your training around” these six does NOT mean you are limited to six exercises. The Big Six are families of exercises: so when you are doing “pullups”, you might actually want to do two types of vertical pull plus a horizontal pull to work all your back muscles: three exercises, but they all come under the “pullup” banner. As long as you stick to the basics and work progressively, this is a good way to work everything to the max.

You can add other bodyweight work, certainly for the lower body: explosive jumps and plyo work goes well with squats, as does sprinting training. (Hill or stair sprints build more muscle on the legs than you might imagine: many UFC fighters actually favor this kind of work over barbell squats.)

Beyond this, if you want to throw in some different stuff into your sessions—maybe isolation movements or static exercises—sure you can. But use these things sparingly, as add-ons, rather than the backbone of your program.

  1. Mix low AND high reps.

High reps or low reps for maximum muscle gain? If you read my article, The Ten Commandments of Calisthenics Mass (Commandment X), then you know that you need BOTH. For upper-body, it’s a great idea to begin your sessions by using very hard pulling and pushing exercises which limit you to low reps. If you want, you can use more sets than usual. One useful method is to shoot for 10-15 reps over as many sets as it takes.

It doesn’t matter what exercise you use—dips, pullups, pushups, levers, handstand pushups, whatever—just use low reps for your primary push and pull movement, and constantly try to move up to harder and harder techniques. For the rest of the pulling/pushing exercises of your workout, you should shoot for higher reps, attempting to really drain the muscles. In the old days, this used to be called the “heavy/light” system. There are alternative equivalent methods, but this combination works very well over the long term.

You can use this approach for legs, too, but since the lower body has adapted to carrying you around all day, you can usually grow well using just higher reps.

  1. Sets and reps?

As I said above, if you are working with very hard exercises, where you can only get low (1-5) reps, you can use more sets to reach your rep goals. (If you can only do four strict pullups, for example, you might set a workout rep goal of ten reps, and do a set of four, a set of three, and three singles—or whatever you can manage.)

If you are pushing hard on muscle-building, higher rep sets (8-20) stick to one or two sets and just give it your all. (Extending your set—by changing grip, style, range-on-motion, speed or position—doesn’t count as a new set. It’s all one set, baby!) That’s miles better than just plugging away. Sure, for legs you can get away with adding more sets than this, but always emphasize quality over quantity.

  1. Hit it hard or go home.

If you want to transform yourself this year, work ****ing hard when you train. How hard? Hard enough to improve—it ALL comes down to this. “Improving” doesn’t mean “jumping to stuff that’s too difficult”. It means finding a baseline you find manageable but tough, and consistently improving form, adding a rep here or there, or making minor technical progressions. These all add up over the year to huge changes.

I’m not a generally huge fan of training to “failure” for most workouts. But the reality is that the harder you push yourself, the better your body adapts, to cope with the perceived effort. Eight reps is better than six reps. Fourteen reps is better than ten reps. If you are fired up and committed to gaining a LOT of muscle in the near future, you need to push yourself more than you might in regular strength training sessions.

  1. Stay away from the weights.

To those of you versed in modern fitness “culture”, this sounds nuts. Sacrilege, even. You gotta hit that bench, those heavy squats, or you can’t grow, bro! Sure. That’s why gymnasts are some of the most muscular natural athletes on the planet.

Yes—bodyweight training WILL jack you up.

In the REAL world, using weights makes training TOO EASY. That’s why most gym-trained folks never change. Any fat weakling can do bench presses or machine curls. But strict dips? One-leg squats? Hanging levers? One-arm pushups? Only for REAL athletes.

Bodyweight also keeps you honest. It’s simple to bulk up 20 pounds of fat and go do some deadlifts and convince yourself it’s “all muscle”. But when you are struggling to add reps to your pullups, you know the truth from the lies pretty damn quick.

Programs, Paulie?

Okay—that’s the tactics. What about the program?

Well, I can’t give you a program. That changes over a year. (For sure, the exercises you use MUST change, as you grow in power and mass.) There are plenty of programs you can apply these tactics to in Convict Conditioning, Raising the Bar and C-MASS.

Like I said, your program should ideally be based around six basic components (which are distilled into the Big Six). Pullup variations, bodyweight squats and leg work, bridges, handstand work, leg raises/midsection and pushups. They key is to work these six families hard. What does “hard” look like? Here’s a sample intermediate routine, containing just two workouts, cycled with a day off between each. The exercises may change if you are not this strong, but the flavor is there:

WORKOUT 1: Pullups, Squats, Bridges

Pullups

Everyone loves pullups! You warm up with two sets of five regular two-arm pullups and some hanging stretches, just to get everything loose. After that’s it’s archer pullups—an exercise you find pretty tough. You want to get ten cumulative reps in today: it doesn’t matter how many sets it takes. You begin with your weakest side, and manage to grind out four good reps. You repeat that on your stronger side, then get three reps on both sides. You finish with another set of two (both sides) and a single (both sides), making ten reps (4, 3, 2, 1). Not quite failure, but tough, stimulating work—you’re going for eleven reps next time, champ!

Not done yet, though. After some shoulder circling, you head back to the bar to finish off with regular, two-arm pullups. Your lats and biceps are so shot that strict, deep reps are out of the question now: so you only go ¾ of the way down, and swing yourself up. One set of nine of these, and there’s no point in doing any more vertical work: your lats are flash fried.

Al Kavadlo Shredded Back Pull Up
ACHIEVEMENT UNLOCKED: Shredded upper-back!

Your upper-back and traps could use some more training, right? So it’s back to everybody’s favorite, horizontal pulls. You set yourself under a low bar and pull yourself up until your chest touches, forcing your shoulder-blade muscles to contract almost painfully, even from rep one. A strict set of eight, followed by a set of seven leaves your upper-back tissues pumped and burning as hell.

By now, your entire upper-back has had a great workout—front-to-back, side-to-side. You are a Spartan though, and want to finish off with a little treat for your grip—hanging grip holds. To help work the entire hand, you throw a couple towels over the bar, turning a tough exercise into a real bastard. Your forearms are pretty thrashed already, so you can barely last a few seconds each hold—three sets and yer hands are cramping, with your forearms feeling so hot, you want to plunge them into ice water. Great work. You are doing something right! Thankfully, your arms can take a break now. Legs are up next.

Squats

After a warm-up of jogging on the spot and jackknife squats, it’s time for the perfect neural primer if you want big legs: explosive jumps. Three sets following the rules and progressions I set out in Convict Conditioning 3 (released soon!) and BANG—it’s suddenly time for squats.

Perfect one-leg squats are a little tough for the rep range you’re shooting for, so you start with a version of assisted squats, using a doorframe to help pull yourself up. You go tough on yourself, though—each rep is slow, strict, momentum-free, and with as little help as possible. Ten strict reps per leg, for three sets, leave your quadriceps feeling like they’ve been surgically removed, dipped in battery acid, then sewn back in.

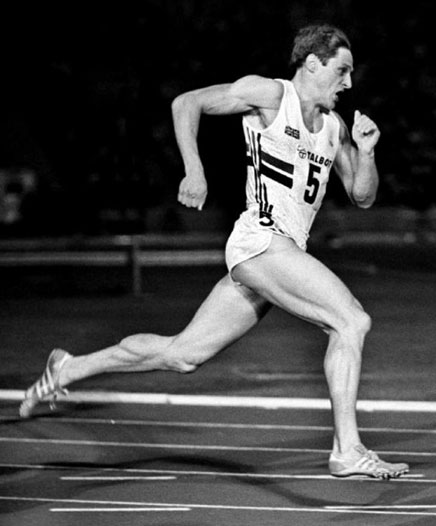
But you need more squats—for motor patterning and conditioning. (Don’t worry, those big leg muscles can take it.) So you work with deep, strict, perfect two leg squats—two sets of fifty reps leave those legs pumped and blitzed beyond belief. Not done yet though—you head outside for some sprints. (I’m betting you have a stretch of road. Somewhere.) You set a point around a hundred meters away, and hit it. At first it feels like you’re running through Jell-o, but you grit your teeth and somehow adapt. Five rounds of sprints with a minute in-between leaves those legs shot and shaky. You ever seen a sprinter’s legs, kid?

Allan Wells Sprinter Quads
Allan Wells is just one example of a champion sprinter with great legs who never touched a weight: he stuck to plyometrics and bodyweight circuits, and in the eighties his contemporaries said that when he flexed, his quads looked “like a road map”.

Bridges

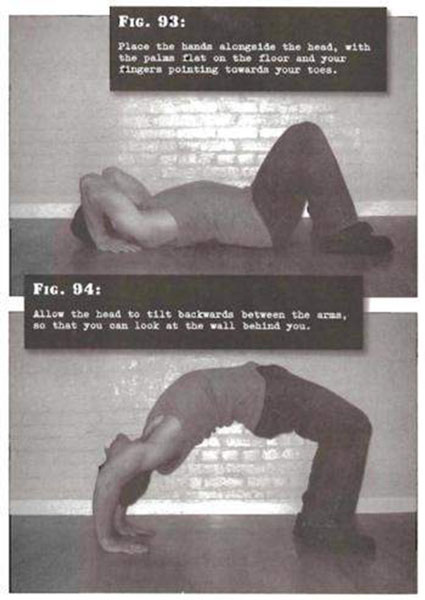
Back indoors and though you yearn to crash on the couch, you still have another exercise to go: bridges. Everything is warm now, so you head straight to bridge pushups: fifteen reps seem easy, so you stretch out and switch to gecko bridge pushups—one arm, one leg. Only for champions, this. You are shaking and trembling, but manage four reps apiece. It doesn’t feel like enough, so you go back to regular bridge pushups, and bang out a set of twelve: each rep with a three second pause, tensing at the top. Just to bulk up those back-legs, you finish with two sets of straight bridges—twenty-five and eighteen reps leave your hamstrings (and triceps) aflame.

Convict Conditioning Bridges
Classic bridge pushups. Not sure what the book is called.

By now, it’s time to call it a day. But there’s a nagging feeling in the back of your mind: you suspect that you worked your legs so damn hard—all the squats, jumps and running—that you couldn’t give your spinal muscles all they deserved during the bridges. Your legs gave out first. Sure, you gave them a good workout, but “good” won’t build the Diesel 20, right? So you rock up to the overhead bar again, jump up and spin round into a back lever. Yeah, it’d be ideal to lever up and down, but your body is so brutalized now, just holding the lever is an achievement. You hold it ramrod stiff for three seconds—spinal muscles like steel pythons…five seconds…body shaking…eight seconds, and down. You give yourself a goal of thirty seconds total, holding the back lever: it takes seven ruthless, cumulative sets to manage it. By the end of it, you are sweating and exhausted, and your spinal muscles are thrashed to hell.

Do you do any more for your legs and back? Any squats, deadlifts, leg curls, hacks, adductor band moves? NO! Not because you don’t want to, because you can’t. Your muscles are worked to the max!

Forget what the fools tell you that you can’t build muscle with calisthenics. If you can train like this once or twice a week for a year, you will revolutionize yourself. This stuff would add mass to a pencil! Go have a steak and a good night’s sleep—you earned it.

WORKOUT 2: Handstand pushups, leg raises, pushups

It’s 48 hours, ten hours sleep and several quality meals since your last workout: but your legs are still a little stiff. Must be time to hit it again with workout 2! We did pullups, squats and bridges last time: this time it’s handstand work, midsection and pushups. Mostly upper-body. Your legs shouldn’t have to work too hard.

Handstand pushups

A good warm-up is always a great idea before shoulder work. So you start with shoulder rolling, active stretches, plus a few handstands against the wall. That gets some blood in there. Time to hit handstand pushups: for your first set, you bust out a strict set of six—not too shabby. Two minutes rest and you’re back on it—five reps. Maybe you could have got six, but it’s not wise to push too hard when your skull is hovering above the ground, right? You still want more, so you add sets rather than doing lots of reps all at once. Another set of 3, then a final perfect single rep, and you call it a day (that’s 15 reps: 6, 5, 3, 1). On that final single rep you hold your arms locked out for a total of about twelve seconds—seems like forever. You don’t quite crumple to the floor after this, but you ain’t far off.

Arnold Handstand Push-Up
Yep. Even Arnold himself used handstand pushups from time to time—
the legendary Frank Zane spots him.

You can feel the deep stimulation in the deltoids and triceps as you wander around, shaking out your wrists and arms. How can your shoulders and arms NOT grow after a beating like this? Hell, your whole damn upper-body feels like it’s had a workout!

Leg raises

Need to stretch out those compressed torso and shoulder muscles—after a break and a sip of water, you head off to the horizontal bar.

Your body is already warm, so after a couple sets of light, stretchy, knee raises, it’s time for the real stuff: strict hanging leg raises. With your legs as stiff as ramrods and using zero momentum, you bust out a set of eighteen. On the next set you only get six reps before you need to start swinging and cheating, but fight your way to eleven anyway. Two sets and your abs, waist and hips are toast.

Al Kavadlo Six Pack
Al’s six-pack was built with bodyweight training and nutritional discipline. No machines, drugs or supplements are necessary for a stripped steel stomach like this.

You drop down and walk to the other side of the room, to give your grip a bit of a rest, then you’re back—this time for hanging knee raises. These should seem easy after the straight-leg stuff, but your abs are tired: you can manage one really, really tough, messy set of twenty-one. Your hanging strength is spent now, so you head to the floor. You get on your back, not for a rest, but to work on some lying leg raises. One set of twelve strict, wheezing reps and you are nearly done. There’s a little gas left in those abs, so you quickly hook your feet under the couch and move to fast sit-ups. Just ten reps in, your abs are ready for suicide. By fifteen, “fast” is out the window, and you are gulping breaths on the floor between reps. You shoot for thirty, but twenty three is your absolute limit today—not because you quit, but because your stomach muscles do. How do you know you’re done? You can’t even get up for a full minute—your abs won’t respond. So you lie down and get your breath until you can face the next movement.

Pushups

You take a few minutes to walk off the pain in your belly, stretching a little to let the blood and waste products in your tight abs dissipate, then it’s back to your true love: the floor. A couple of easy warm up sets of pushups, then you’re into the real stuff. Let’s work the arms and shoulders with close pushups—one strict, slow set of twelve leaves your pushing muscles hot, and your triceps swollen like balloons. So we repeat the feat! Or try—you manage an agonizing-but-strict ten reps. You could not do more close pushups if you tried. So you place your hands a few inches apart, and the shift allows you another three pushups. Then you move a few inches apart again—two more. By now your upper-body is screaming in pain, and you are huffing like the Little Engine That Could. But you are a warrior, and there is more in you. So you switch to regular pushups, and manage to grind out five okay reps—with a little body English. This last set has lasted twenty reps—but WHAT a set it was. For sanity’s sake, you take a ten second breather, shaking out your arms and shoulders. Still not done, you get back into the pushup position and pump out some partials—nine half reps, six quarter reps, and finally about a dozen “pulse” reps: just bumping up and down, to squeeze the last bit of juice from your muscles. If the floor was a 500lbs barbell, it wouldn’t be any easier to push!

By now, the triceps and shoulders are blown to bits. But the pecs—after a three minute rest they got a little bit left in the tank. You set up two chairs a little way apart, and place your palms of the seats for stretch pushups, setting your feet up on a box at hip height to make things even tougher. Ten reps and your chest muscles are in agony. You manage eleven. But instead of crashing down, you pop your feet down on the floor to improve your leverage and continue. You manage another four reps only, your chest screaming at you the whole way. You’re toast.

Clint Walker Stretch Pushups
In the fifties and sixties, actor Clint Walker had the best pecs in Hollywood. The stretch pushups didn’t hurt none, huh? (You’re right. He shoulda played Superman.)

It takes you five minutes of rest before you feel ready to hit the shower. Another killer workout in the bank—but look on the bright side. You got another 48 hours to rest before going back to workout 1 and kicking yourself in the ass again.

Got the idea?

Gentlemen, it’s training like this that builds SERIOUS MUSCLE. It’s not easy. It’s not really fun. But if you can train like this for a year you will look like all those guys you always dreamed of looking like. I’m not saying you should do this workout—you can use any workouts you like—I’m just trying to give you a taste of the kind of hard-ass, focused training that will ramp up your muscle mass quickly.

Another point is that you need to—always—vary the exercises you are using to reflect your strength and ability. For most people, the exercises in the above workouts, with those rep levels, would be too tough. For some hard cases, these exercises would be too easy. The exercises you use will change as you get stronger, fairly quickly: the athlete performing these exercises would “outgrow” them fairly soon, as he moves to harder and harder stuff over the year. (How do you “move to harder and harder stuff”? You meet rep goals on the exercises you are doing, then find ways to make ‘em a little harder. You got this thing, right?)

Fit Rebel Push-Up

Just Do It

If you are really up for this challenge—Beta to Alpha in twelve short months—one final piece of advice. Keep it secret. I don’t believe this modern bullshit that you should shout your goals to as many folks as possible. There is magic in secrecy, in knowing something nobody else does. Social media is one reason so few folks get in shape these days—they expend all their mental energy talking about their goals, and leave none for the goals themselves.

Shoot me a comment with questions or ideas—but don’t promise me you are gonna do it. Promise yourself. If you really want to go for this, get weighed, take a photo of your physique, and come back in one year to show me how awesome you got. I WILL publish it, and you WILL get famous.

I believe in you, kid.

A million thanks to the greatest calisthenics trainers on earth, Al and Danny Kavadlo, for providing most of the photos. Find Al at AlKavadlo.com and Danny at DannyTheTrainer.com. It was also an honor to be able to use shots of the Fit Rebel himself, Matt Schifferle. This guy is a master bodyweight bodybuilder, and really understands the science like nobody else in the world. Please check out his site, RedDeltaProject.com.

***

Paul “Coach” Wade is the author of Convict Conditioning, Convict Conditioning Volume 2, the Convict Conditioning Ultimate Bodyweight Training Log, and five Convict Conditioning DVD and manual programs. Click here for more information about the Convict Conditioning DVDs and books available for purchase from Dragon Door Publications.

Filed Under: Motivation and Goals, Progressive Calisthenics Tagged With: Al Kavadlo, Big Six, bodyweight exercise, C-Mass, calisthenics, Convict Conditioning, Danny Kavadlo, goals, how to gain muscle with calisthenics, Matt Schifferle, muscle building, Paul "Coach" Wade, Paul Wade, progressive calisthenics

  • « Go to Previous Page
  • Page 1
  • Interim pages omitted …
  • Page 3
  • Page 4
  • Page 5
  • Page 6
  • Page 7
  • Interim pages omitted …
  • Page 9
  • Go to Next Page »

Primary Sidebar

Featured Products

previous arrow
GetStrongBookCover
ConvictConditioningBookCover
StreetWorkoutBookCover
ExplosiveCalisthenicsBookCover
StrengthRulesBookCover
next arrow

Categories

Progressive Calisthenics Certification Logo
Click here for more information or to register for the PCC workshop

Get Strong Workouts TriadXP App
Get Strong Workouts App

Recent Posts

  • Top 5 Reasons Why an In-Person Workshop is the Best Way to Supercharge Your Training
  • HYBRID STRENGTH TRAINING IS HERE!
  • My Calisthenics Journey to the PCC
  • The Handstand Press: Complete Control Through the Handstand
  • The Get Strong App is Here!

Dragon Door Publications

Dragon Door Publications

Recent Comments

  • bross dandon on The Case for Curved Handstands
  • Johnny Flewellen Jr. on Strength for Life
  • Dan Earthquake on The Pursuit of the Daily Minimum
  • Johnny Flewellen Jr. on The Pursuit of the Daily Minimum
  • Johnny Flewellen Jr. on Yoga, Calisthenics and the Journey of a Lifetime
FOLLOW US ON TWITTER!

Copyright © 2025

Dragon Door Publications / The author(s) and publisher of this material are not responsible in any manner whatsoever for any injury that may occur through following the instructions or opinions contained in this material. The activities, physical and otherwise, described herein for informational purposes only, may be too strenuous or dangerous for some people, and the reader(s) should consult a physician before engaging in them.