• Skip to main content
  • Skip to primary sidebar
  • Home
  • Contributors
  • Resources
    • Q&A with Paul “Coach” Wade
  • Workshops
  • Products
  • Forums
  • Articles
  • Blogs
    • RKC Blog
    • Strong Medicine Blog
  • Archives

PCC Blog

Progressive Calisthenics - The Official Blog for the PCC Community

carryover

Push-ups for a Better Bench Press

April 8, 2014 By Corey Howard 9 Comments

Al Kavadlo Push-up
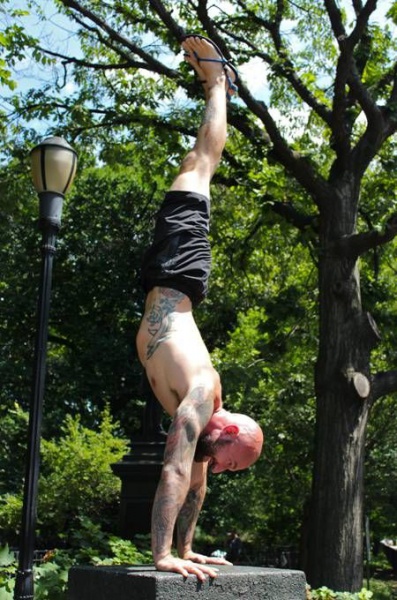
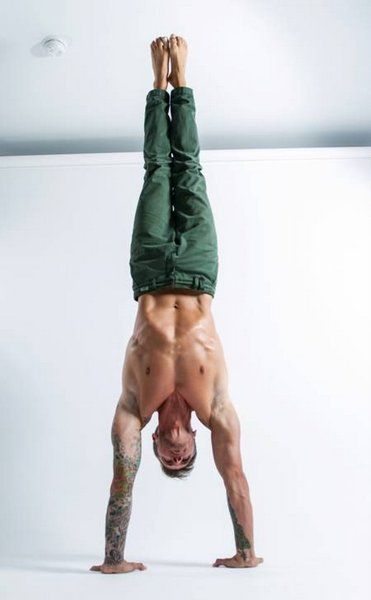
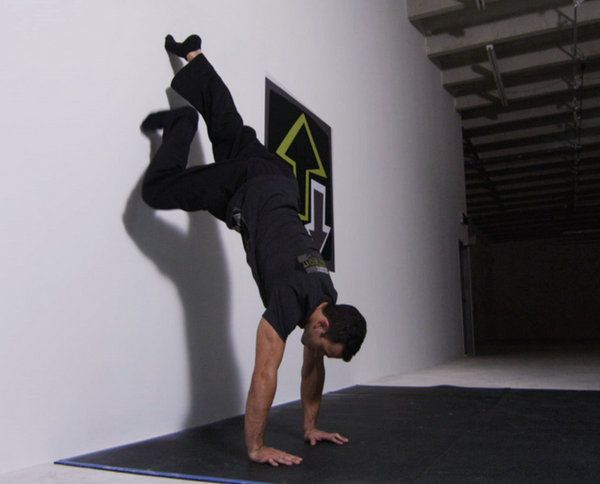
As someone who loves a challenge, I get excited when someone tells me it’s impossible to get strong using only calisthenics. Though at first I was skeptical, too, I’ve learned firsthand how effective bodyweight training can be.

Most coaches tell us that to get stronger you need to keep adding weight to whatever lift you want to improve on. If you want to bench press more, they say to use some sort of pyramid training and ramp up the weight each session. With the exception of Stanford, that’s what’s taught at most collegiate and high school strength programs. Imagine the frustration on a 16 year old kid when I tell him I won’t let him bench press until he can perform 20 quality push-ups off the floor!

As I was talking with a student of mine named Caden during his first session at my facility, the topic of bench pressing inevitably came up. We discussed my background in competitive powerlifting and, as you would expect, he wanted to know how much I could bench. After telling him my best competition lift he responded with a story about how some other kid at his school can supposedly press more than me. So of course I had to know what his own best effort was on the bench.

day_3_100_2“One hundred thirty-five pounds… once,” he stated. For those of you that have trained young teenage athletes, you know they need proof before they believe anything you say. So I decided to challenge him a bit. I told him I could help him improve on that 135×1 in only 4 weeks without even putting him on the bench. In fact we would be using a steady diet of push-ups. Caden scoffed at me. Why wouldn’t he? Remember the old school thinking at most high schools?

“Alright, but it’ll never happen,” he promised.

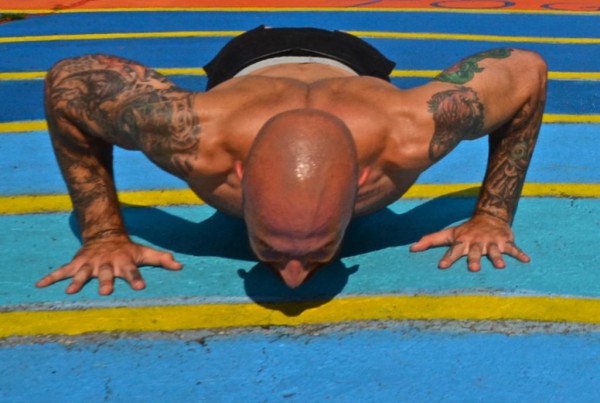
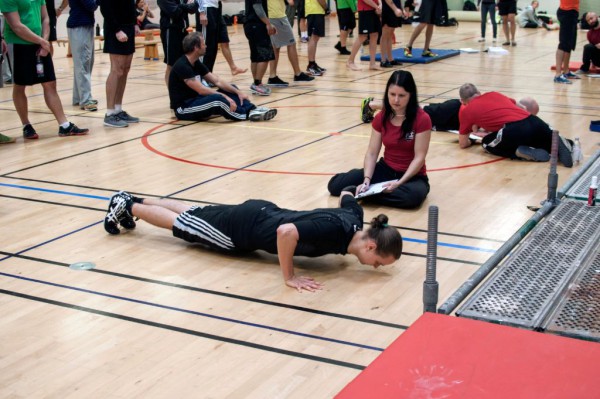
Let’s stop for a second and quickly compare a textbook push-up to a text book bench press. In a push-up, the hands are under your shoulders while the body is elevated and tight (abs, lats, glutes and thighs) to prevent any sagging or arching. As you descend it should feel like you are screwing your hands into the floor, the lats get tighter, and the elbows stay close to the body. Everything is tracking straight and tight. Then once your nose or chest touches the floor you reverse the motion as slow or fast as you want. Speed will build explosive strength and slow will teach you to grind out a heavy rep for strength.

Compare that to a textbook bench press; before you lower the bar to your chest, the shoulder blades should be retracted, glutes are tight and feet are driving into the ground. As the descent begins it should again feel like you are screwing your back into the bench, tightening the lats, and keeping the elbows near the body. Then after the bar touches the chest you can drive the meaty part of your thumbs into the bar almost as if you were rotating your elbows in and driving yourself away from the load to lock it out over head.

Notice any similarities?

CadenPush-up
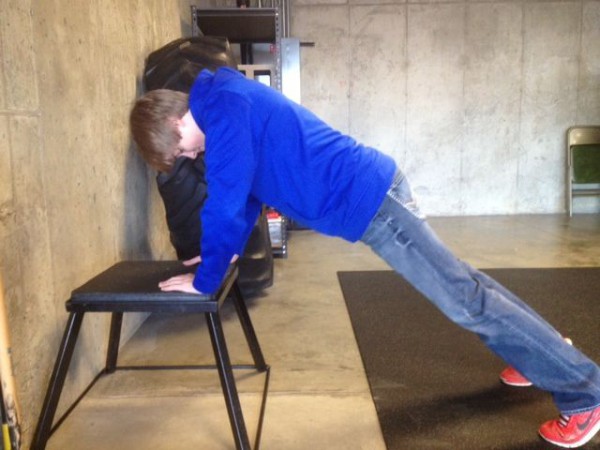
Now let’s take those same principles and apply them to Caden. On day one he could not do any of this. Once he was on the floor it kind of looked like a saggy banana getting tazed. We needed to tap into the Convict Conditioning principles and start teaching push-up technique against a wall. As he grew more proficient, his push-up got closer to the floor. It’s important to note that although we always had a specific number of reps in mind for each day, once technique failed, his set was over. Many times he wanted to crawl under the bar and “just try” the bench press again, I happily refused to allow that. Remember sometimes young teenage clients need proof or an “A-ha moment” before they buy into you or your system.

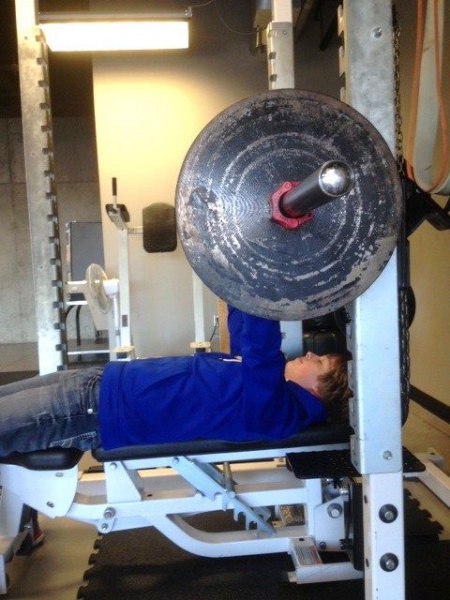
Caden’s “A-ha moment” came 4 weeks later. After dialing in the pushup similarities to the bench press in his warm ups, we loaded the bar with 135. He gave me a solid 5 rep effort. If you use one of those 1-rep max calculators, that’s roughly a 20lb increase in max effort strength in 4 weeks using nothing but pushups. For those of you that are wondering what other “assistance work” I had him do? It was all calisthenics- bridge progressions, bodyweight squat progressions, lying leg raises, and horizontal pull-ups. Caden never touched a weight his first 4 weeks in my facility.

Calisthenics work! Fire it up!!

Caden1 ***

About Corey Howard, PCC, RKC, CK-FMS: Corey Howard strives to constantly become stronger, and to help others to achieve their fitness goals. He is the owner of Results Personal Training, and can be reached at www.resultsptonline.com or www.coreyhoward.com.

Filed Under: Progressive Calisthenics Tagged With: bench press, carryover, Corey Howard, push-ups, strength training

Handstands Will Make You Better at Everything

February 4, 2014 By Mike Fitch 28 Comments

Mike Fitch Handstand

Yeah, it’s a bold statement, but hear me out. The mechanics of successfully performing a handstand will amp up all of your other exercise endeavors, making you stronger, more stable, and better coordinated, while the discipline required to master the move will make you a better human being overall. It will force you to take a long, hard look at the time you are willing to invest in reaching a specific goal.  It will also allow you to win money in a bar bet, steal the spotlight at any wedding and of course get the girl (or guy). Results may vary on the last three.

For thousands of years, athleticism has been demonstrated through feats of bodyweight strength and skill, with fit individuals judged not just by their bodies’ tone, but by how skillfully they could use their bodies.  Even in the golden age of bodybuilding, Arnie and the boys were known to challenge each other post workout with hand balancing and bodyweight strength contests.  We then saw a lull in these activities, with the popularization of the fixed-axis weight-lifting machine and single-plane isolation “robot training,”  but luckily for you and me (and the human race), the idea of skills practice and self-mastery is making its way back into fitness.

My favorite field, progressive bodyweight training, includes a multitude of exercises that are always sure to elicit an envious “I’ve always wanted to do that!”  Pistol squats, muscle-ups, human flags, HAND BALANCING – these moves are sure to catch the eye of any fitness enthusiast.  And the great thing is that any of these feats are possible to learn with the proper progression training, time commitment, and, most importantly, consistency.

Just as it takes a baby about 12 months of daily conditioning and practice to eventually stand on their own, it can take an adult months or years of repeated practice to build the neural grooves associated with a perfect handstand.  Are you willing to invest that kind of time?  I can guarantee that it will be one of the most humbling and gratifying journeys that you’ll experience.

While performing a great handstand is certainly a worthy goal unto itself, you’ll find that the skills you build in the process will transfer over into your other training, making you a better athlete and enhancing your quest toward a better body. Here are some examples of the tremendous carry-over you’ll see:

The Kinetic Chain

Let’s start with a simplified definition of the very complex concept of the kinetic chain: everything in our body is connected to everything else.   A handstand is a prime example of the connectivity of the kinetic chain, with each position, alignment, and movement requiring constant communication and neuromuscular efficiency in order to maintain that perfect balance. If just one thing changes during our hand balance, such as flexing our toes instead of extending them, then our body must immediately adjust to this new shift. 

Hand balancing is, obviously, performed on your hands, so that’s a great place to start thinking about how everything is connected.  Your fingers are some of the densest areas of nerve endings on the body, and have the best tactile feedback and positioning capability. Kicking up into your handstand initiates a sort of neuromuscular “super highway,” with all of those little finger receptors sending and receiving information throughout the body.  Your body’s communication must be perfectly orchestrated to keep you in balance, like a super effective emergency dispatcher taking calls, sending reinforcements, and keeping you safe (aka preventing you from crashing onto your head.)

The body has to adjust to the hand placement in relation to the shoulders; to the elbows being over the wrists but under the shoulders; and the hips, where are the hips in relation to the shoulders?; and it goes on.   So if we do this efficiently, and amp up our body’s abilities to communicate and make minute adjustments in a flash, you may already see how handstand training can benefit other athletic goals. But, I promised that handstands will make you better at everything, so let’s keep on going. 

Al Kavadlo Performs a Handstand

 Internal Tension

A tense body is a strong body.  Why is it so easy to balance a ruler or a bat vertically on your hand? Because the object is rigid, with no bends or “leaks.” Whether you are lifting your own body or grinding out a 1000 pound deadlift, the concept is the same – you need to create a rigid structure from which you can pull, push, lift or balance.  In Progressive Calisthenics, there is no room for any part of your body to lose connection or leak tension, and you learn very quickly about any leaks in your chain.  Mastering total body tension will not only accelerate your handstand training, but will be directly applicable to most of your other training as well.

 Grip Strength

In addition to “tense the whole body,” you’ll hear a lot of HB coaches tell you to “grip the ground.”   In our foot we have the luxury of a heel which plays a clever game of leverage to make walking and standing fairly easy tasks. Unfortunately, we don’t have the same advantage in our hands. So, the fingers must DIG into the ground, countering the body’s tendency to over balance (topple over), or let up to counter an underbalance.  It’s this constant battle between the finger extensors and flexors trading off between the rolls of agonist and antagonist that keeps us upright.   And along the way you’ll be conditioning for some brutal forearm strength.

Shoulder Stability

Few exercises can compare to a handstand for building shoulder stability. And let’s face it, nobody is going to be staring in amazement while you’re performing more band internal/external shoulder rotations.

 The shoulder – so incredible, so complex, and so commonly abused – can be an important source of power, but also a source of hidden weakness impacting your training in ways you don’t even realize.  Over repetition syndrome, poor form, and especially faulty postures can create imbalances that lead to injury or instability. But even if you don’t feel pain, if your body senses a weakness in the shoulder, it will automatically restrict the amount of power passing through that joint, and can actually dial down the surrounding muscle excitation.  I’m going to assume that everyone would rather be tapping into all of their strength for their efforts. As the saying goes, “you can’t shoot a cannon from a canoe.”

In Hand Balancing, the shoulder is the first line receiving all of that information from the sensors in the hands and forearm musculature, reacting to the head and hands below and the rest of the body above.  The muscles at the shoulder joint have to fire up like a synchronized light show to adjust to the constantly changing center of gravity over such a limited base of support, from the deeper muscles like Supraspinatus, Infraspinatus, Teres Minor, and Subscapularis (rotator cuff), to the bigger and more powerful Lats, Pecs, and Delts.  Even with the elbow completely locked, the heads of the Bicep and Triceps that cross the shoulder joint play a role in stabilizing the shoulder.  And that’s not even mentioning the other muscles that keep your Scapula strapped to your back.

 Simply put, handstands will make you stronger through increased activation and stabilization.

Free Standing Handstand

Spinal Stabilization

Handstands require not just spinal, or core, stabilization, but true multi-planar stabilization involving inversion of the body.

 Now, I realize there are many views on spinal stabilization and some debate over its efficacy and “functional” carryover to life or sport  (“You have to draw in to activate TVA!”  “No, bracing is the only way!”  “Let’s fight!”).  But we can probably all agree that the surrounding musculature of the spine (ie the core) needs to be able to properly stabilize to protect the spinal cord, and that the spine needs to be able to fight gravity’s constant pull, distributing the load while generating force and, more importantly, accepting external forces (whether that’s gravity, or a linebacker). It flexes, extends, rotates, laterally flexes and in the case of the handstand, stays perfectly still, and STABLE. 

When we are upright, we know that the core musculature should be firing to allow for gait pattern as in walking or running, or bending over to snatch up a kettlebell. But get inverted and everything changes.  The anchor or base is now the shoulder girdle, sitting on top of those mechanically disadvantaged hands. So now the spinal stabilizers have to figure out how to balance the pelvis over the shoulders, with the big legs riding on top.  This is true multi-planar stabilization! In a hand balance, all of the spine’s muscular units have to play their part to keep the spine in perfect alignment – i.e. spinal stabilization.

GETTING STARTED: TUTORIAL

I am constantly asked, “What’s the key to learning handstands?”  And there is a clear answer:  “To get good at handstands, you practice handstands.”   There is no other weighted exercise that will make you better at handstands – you just need to put in the time to practice the handstand-specific progressions and conditioning exercises. It IS skill specific training.

So here’s the part where you get to see what you’re made of.  Are you willing to put the time in to taking this challenge on? Are you ready to approach it with discipline, practicing often, even daily if necessary? You are no longer trying to merely increase your reps;  now you are working to improve yourself, master difficult skills, and achieve long-term goals.

I can tell you from my own experience that the handstand can be an allusive opponent.  I first learned an arch-back style handstand, which is common for most beginners, before I was challenged by a gymnast friend to learn the flat back style.  That process of re-educating took months! It was probably a year before I could easily switch between the two, along with other body positions, and stay up for multiple minutes. I learn more about Hand Balancing every single day and am humbled by it constantly.  I’m certainly a lot better now than I was a few years ago, and I definitely have more goals yet to reach.  It’s clear to me that it’s a life-long practice.  There’s no turning back now.

 Intro to Handstand Conditioning: The Wall-Assisted Handstand

Begin your handstand training with the simple Wall Assisted Handstand.  It may seem like the most basic conditioning exercise, but remember, a baby has to crawl before he could stand. The exercise itself is as simple as it sounds, but I have some tips to help make it wildly successful for you:

  1. First of all, you should have your front, not your back, facing the wall.  Otherwise you’re automatically training in an arch back handstand.  While the arch back is a legitimate handstand in itself, the mechanics are different and you may not get the same benefits I mentioned earlier.

  2. Follow these steps to get yourself safely into place:   Start by facing away from the wall. Bend forward and place your hands on the ground at roughly shoulder width.  Place your feet on the wall and walk them up until the body is elongated.  Walk your hands towards the wall until they are about 6 inches or so away from the wall (this may vary – just find a distance that feels comfortable psychologically).  The toes should be pointed with the top of the foot flat on the wall.

  3. Once in position, SET the body:  Grip the ground with your fingertips.  Lock the elbows completely, driving down into ground, creating as much space as possible between your toes and the ground.  When you successfully fire the traps, the space between your ears and shoulders will close.  Squeeze the glutes and quads, and draw in or brace the abdominal wall. Make sure not to hinge at the hips.

  4. Don’t forget to breathe!

  5. Time yourself to see how long you can hold this perfectly tensed handstand.  Your goal is to first work up to one minute, then two. Once you can hold for two minutes, begin bringing your hands closer and closer to the wall.

  6. And here’s an important Bonus Tip:   If you’re not used to twisting or summersaulting out of a handstand, be sure to leave enough strength to get back DOWN the wall!

Wall Walking Handstand

Expect to be humbled by this isometric conditioning.  But keep up with your handstand practice, and it will absolutely fast track your way to being better at EVERYTHING!

For more information on Hand Balancing, check out our new 5-part video series, Hand Balancing for the Bodyweight Athlete, available as downloads or on DVD.

Mike Fitch is the Founder/President of Global Bodyweight Training, a fitness company providing training, education, and promotion of bodyweight training disciplines, as well as creator of the popular Animal Flow program. Mike’s current interests lie in exploring how bodyweight training disciplines can be integrated with skills-based practices, and multi-planar, fluid movement. He’s been featured in Men’s Health, Shape, and Fitness Magazine, as well as on The Doctor’s, Good Morning America, and LIVE with Kelly and Michael.

Filed Under: Progressive Calisthenics Tagged With: carryover, coordination, hand balancing, handstands, Mike Fitch, progressive calisthenics, skill training, strength training

Primary Sidebar

Featured Products

previous arrow
GetStrongBookCover
ConvictConditioningBookCover
StreetWorkoutBookCover
ExplosiveCalisthenicsBookCover
StrengthRulesBookCover
next arrow

Categories

Progressive Calisthenics Certification Logo
Click here for more information or to register for the PCC workshop

Get Strong Workouts TriadXP App
Get Strong Workouts App

Recent Posts

  • Top 5 Reasons Why an In-Person Workshop is the Best Way to Supercharge Your Training
  • HYBRID STRENGTH TRAINING IS HERE!
  • My Calisthenics Journey to the PCC
  • The Handstand Press: Complete Control Through the Handstand
  • The Get Strong App is Here!

Dragon Door Publications

Dragon Door Publications

Recent Comments

  • bross dandon on The Case for Curved Handstands
  • Johnny Flewellen Jr. on Strength for Life
  • Dan Earthquake on The Pursuit of the Daily Minimum
  • Johnny Flewellen Jr. on The Pursuit of the Daily Minimum
  • Johnny Flewellen Jr. on Yoga, Calisthenics and the Journey of a Lifetime
FOLLOW US ON TWITTER!

Copyright © 2025

Dragon Door Publications / The author(s) and publisher of this material are not responsible in any manner whatsoever for any injury that may occur through following the instructions or opinions contained in this material. The activities, physical and otherwise, described herein for informational purposes only, may be too strenuous or dangerous for some people, and the reader(s) should consult a physician before engaging in them.