• Skip to main content
  • Skip to primary sidebar
  • Home
  • Contributors
  • Resources
    • Q&A with Paul “Coach” Wade
  • Workshops
  • Products
  • Forums
  • Articles
  • Blogs
    • RKC Blog
    • Strong Medicine Blog
  • Archives

PCC Blog

Progressive Calisthenics - The Official Blog for the PCC Community

Corey Howard

Never Stop Learning: My Top 3 Training Tips

August 11, 2015 By Corey Howard 21 Comments

Corey Howard Pull Ups

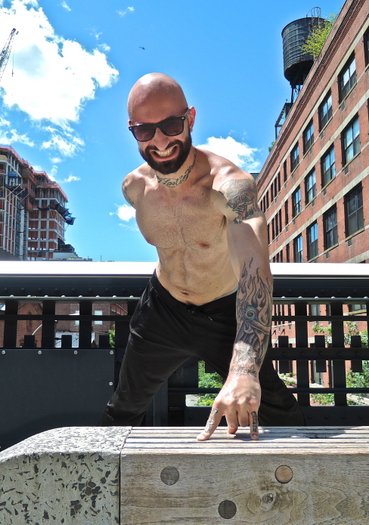
At the age of 41, I can honestly say I’m still learning something new all the time.  There is no straight path to success; it is a crooked and curvy line.  I’ve learned some lessons the hard way in my training, but each setback yields another opportunity to refine my craft.

Here are 3 of the most valuable lessons I’ve learned (and relearned) throughout my time as a trainer and fitness enthusiast:

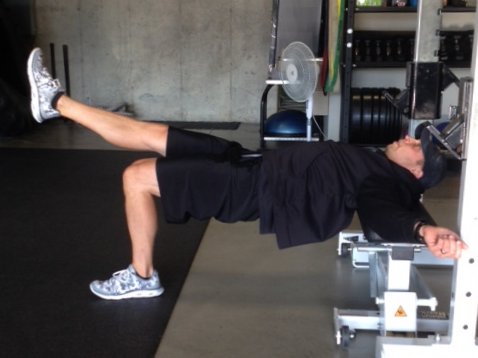
1. Work Your Legs and Glutes

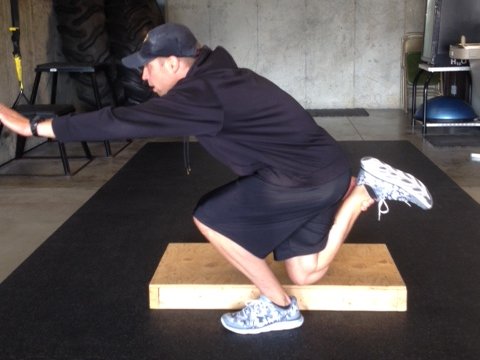
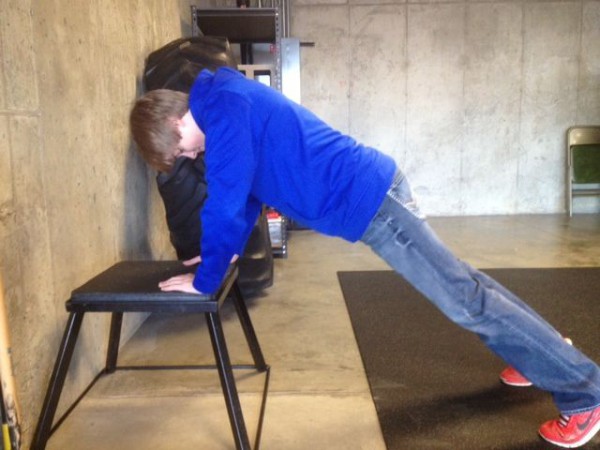
If you were to look through my training log over the past year, you would see most of my workouts are focused on my lower body.  Unfortunately, this is due to having ruptured my triceps and biceps in the last year, but honestly it’s been the best thing ever.  Even when my upper body has been healthy, I still make my lower half 60-70% of my focus… EACH time I train! Most people would hate this because it’s so physically taxing but focusing on your lower half improves your testosterone levels, builds lower body muscle which helps burn more fat, improves stability in your midsection, improves mobility and helps create more explosive power for sprints and jumps. You just can’t ignore pistol squats, shrimp squats, bridges, lunges, hyperextensions or anything else that puts a beating on your lower half.

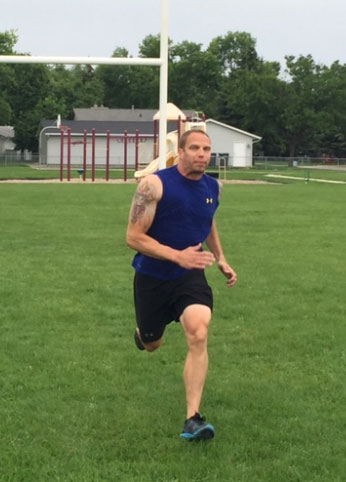
Sprinting is also a fantastic way to work your legs with only your bodyweight.  If you truly want to feel the benefit of sprints, don’t sprint on a treadmill! The treadmill takes away from you actively creating force.  Get outside and make your legs plant and propel you forward. Training outside is awesome, and running as fast as you can for a short period is even better. Again, the research on sprint work is off the charts (Coach Wade talks about it as a finisher in his book C-Mass). Sprints will thoroughly cook your lower half quickly and effectively, plus they help build size and burn fat at the same time.  So get out and sprint 20, 30, 40 or 50 yards, in a field, through a parking lot, or up a steep hill. No matter where you do it, make your body move as fast and explosively as you can once or twice a week.

Corey Howard Running

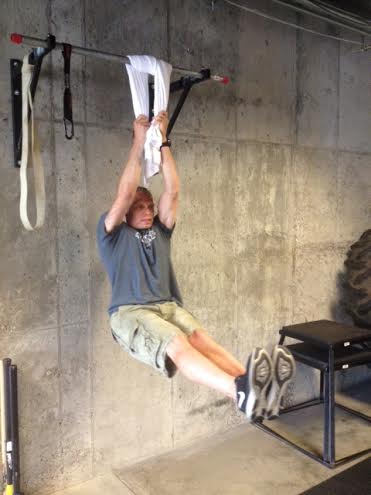
2. Refine The Basics Using Regressions

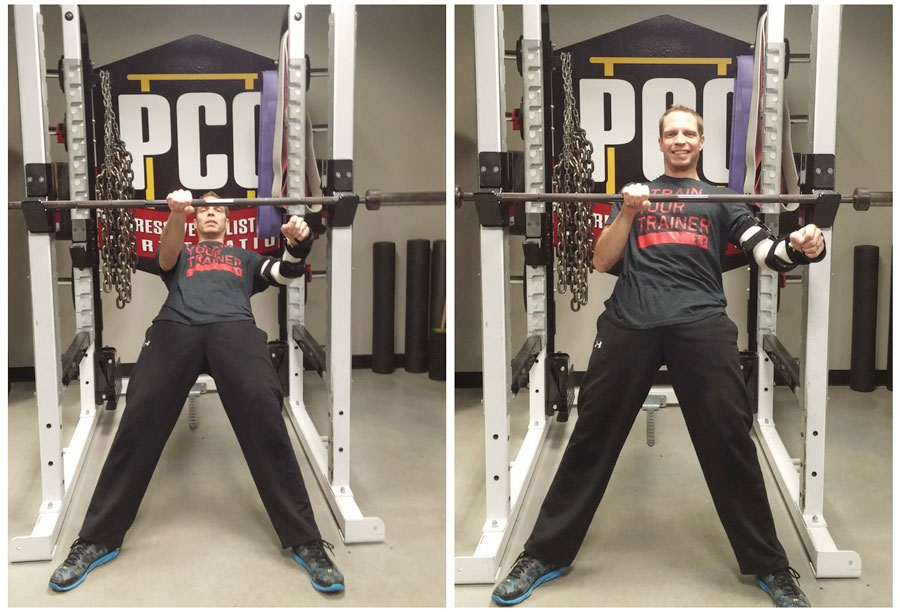
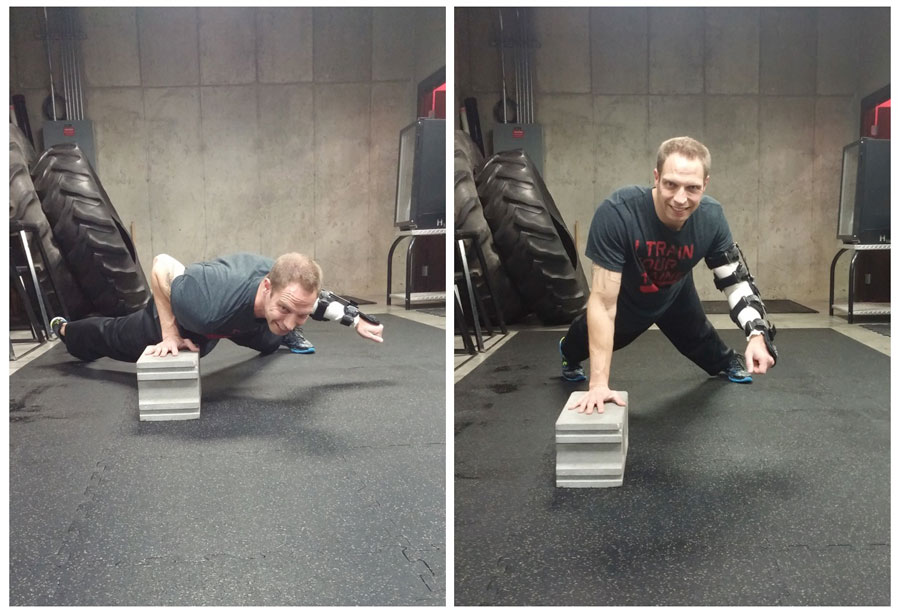
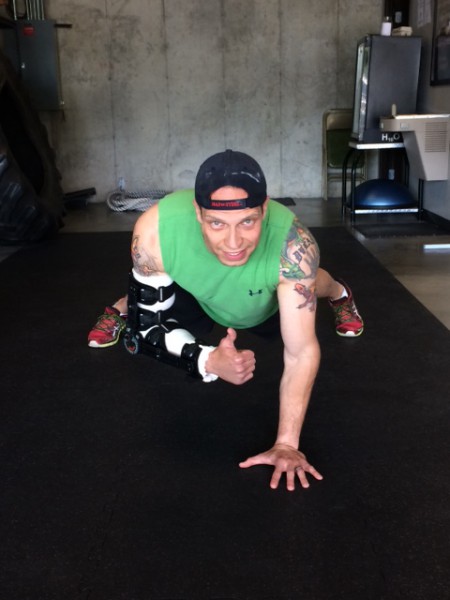
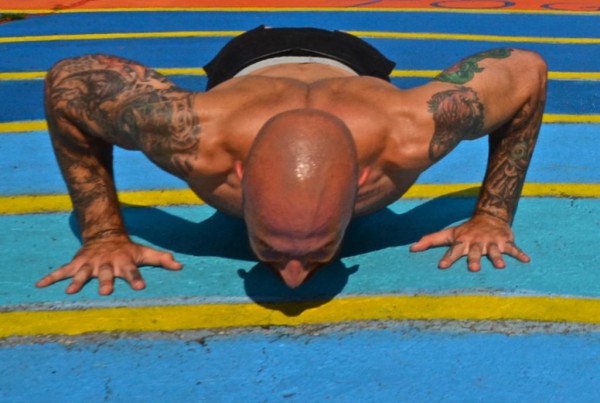
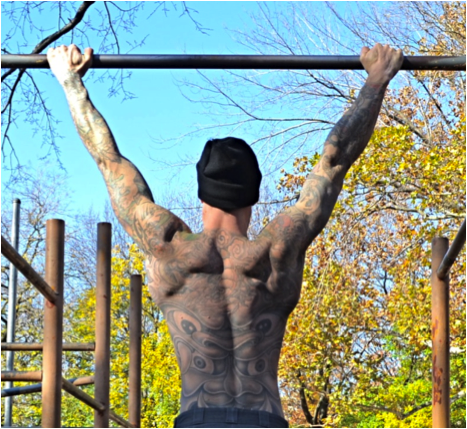
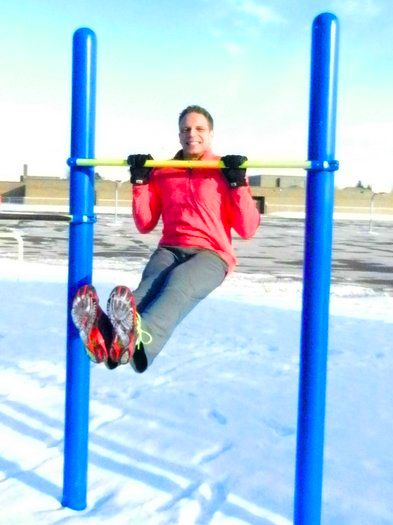
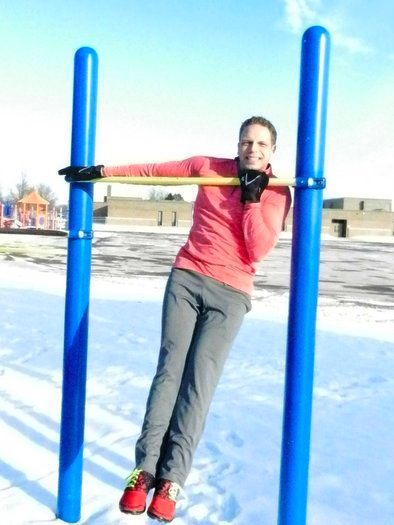
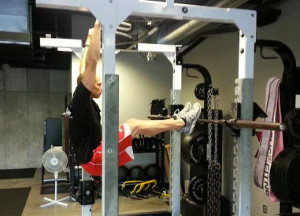
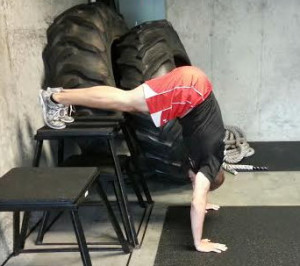
Two of my favorite exercises are jackknife pull-ups and pike push-ups.  These two are simply amazing for adding size in the lats and shoulders, plus they give you a chance to perfect your pulling and pressing groove. The jackknife pull-up has really helped me re-learn pull-ups.  It’s given me a chance to work on my height at the top as well as given me an opportunity to work various grips without completely loading my freshly repaired elbows. The pike push-up has done the same thing; given me a chance to work on various pressing widths as well as practice my groove.  Don’t scoff at either of these; pairing these two for 5 alternating sets each will leave your lats, shoulders, and triceps feeling it the next day.

Corey Howard Jacknife Pull-Ups
Corey Howard Pike Push Ups

3. Stretch!

When I was younger, I mistakenly thought that stretching was a waste of time. Now that I’m older, if I don’t stretch out I’m practically crippled the next day. If you stretch the working muscle group in between sets it not only speeds up recovery but some studies have shown it helps with hypertrophy too.  A healthy person should be able to comfortably squat below parallel with their hands behind their head.  If you can’t physically do this, you need to spend some time working on your movement quality.  I don’t know everyone’s personal movement issues or pains but if I could suggest a few areas to spend some time stretching out: the ankles, hips, shoulder complex and neck.

I’m not going to tell you to spend an hour on this every day, but 10 minutes before and after your workout is a great start.  For the ankles, find a step and stretch out your Achilles.  If your ankles can move appropriately then chances are your knees will move and feel better.  For the hip complex, I’d strongly suggest the pigeon for your glutes and the half kneeling hip flexor stretch.  Healthy hip mobility will allow the body to stabilize itself and let your hamstrings and low back relax.  As for the shoulder complex, I like to use a stretchy band hanging from a pull-up bar.  Hinge yourself forward and let the band pull your arm forward stretching through the lats, then turn around and let it pull your arm back to open up the chest.  Healthy shoulder movement will also help the body stabilize and improve your posture.  Finally some simple head nods and slow rolls will go a long way to ease tension.  Again, this is very elementary but just making time for this will be a great start. For more information, I recommend Al Kavadlo’s Stretching Your Boundaries.

Al Kavadlo Overhead Squat

Tony Robbins once said, “The secret to success is learning how to use pain and pleasure instead of having pain and pleasure use you.  If you do that, you’re in control of your life.  If you don’t, life controls you.”  I have chosen to use my pain as speed bumps or opportunities to improve.  I can’t stress it enough: train your lower body three times each week, get outside and run like you’re fleeing the scene, don’t be afraid to take a step back to refine the easier progressions, and stretch out!  It will pay huge dividends on the harder stuff.  Fire it up!


***

About Corey Howard, PCC, RKC, CK-FMS: Corey Howard strives to constantly become stronger, and to help others to achieve their fitness goals. He is the owner of Results Personal Training, and can be reached at fithubby.com, resultsptonline.com or coreyhoward.com.

Filed Under: Progressive Calisthenics, Tutorial Tagged With: Corey Howard, glute training, leg training, regressions, stretching

Calisthenics, Injuries and Life

February 10, 2015 By Corey Howard 72 Comments

Corey Howard One Arm Aussie Pull-Up

On June 8 of 2014, I turned 40.  The following day I had surgery to repair a ruptured triceps in my right arm.  In late August, just 3 months later I was able to pass all of the skill elements for my RKC recertification using ONLY calisthenics for training.  But what happened in between those dates is where the magic of calisthenics lies.

Fitness gives me life.  It helps me stay in shape so I can help out my wife around the house and keep crossing things off the seemingly never ending to-do list.  Being in shape gives me the ability to play basketball with my son in the driveway, or throw soft toss to him in the batting cage.  In late May when I ruptured my triceps I was no stranger to working around injuries, but it still gave me a few new opportunities.  First, I was able to focus entirely on my lower body and write what turned out to be a fairly successful blog post about calisthenics leg training.  Second, it forced me to start my upper body training from ground zero and really dig deeper into the Convict Conditioning progressions.

How does an advanced lifter re-teach himself one arm push-ups?  I will admit, despite limited range of motion in my elbow and absolutely zero pushing strength in my right arm; I had retained most of my pulling strength.  After regaining complete active full range of motion in the joint I was able to start push-ups at an incline as well as horizontal pull-ups. Pairing the pushing and pulling together gave me a chance to work on regaining my tricep strength as well as the range of motion from the pulling movements.

Despite my youthful desire to challenge myself and rush to the next progression I made sure I was able to hit 20 quality reps with each movement before moving on to the next harder step.  I think this also helped strengthen the tendon as well as create movement proficiency.  Eventually I was able to do 20 quality narrow push-ups on the floor and 20 wide grip pull-ups with my ankles elevated on a support bar.

Corey Howard One Arm Raised Push-Up

The transition to a dead hang pull-up was surprisingly quick and easy, but moving to the one arm push-up proved to be a bit more challenging.  To accommodate the added weight and strain on the elbow joint I had to move to incline one-arm push-ups and follow a similar rep progression back to the ground.  I think it really helped practicing single arm push-ups at various heights and immediately following it with tight narrow push-ups on the floor.

I learned a couple things along the way.  First, patience is everything.  Don’t rush to get to the next progression until you’ve mastered the step you’re on.  As Paul Wade says in Convict Conditioning, earn the right to advance to the next step.  This pays dividends when you attempt the next step and find that you can actually control a few reps with quality technique instead of surviving and gutting out two or three sloppy injury risking reps.  Second, most of us are not professional athletes.  Yes, a lot of us think part of our identity comes from what we can do in the gym.  Our true identity is created by how we are as a husband and father.  My injury sucked.  It took away my ability to train upper body and I lost some of my hard earned muscle mass, but that paled in comparison to not being able to play catch with my son, or help my wife carry in the groceries.

On Friday January 9th, I ruptured my bicep in the other arm.  On Monday the 19th I had surgery to repair that. Click here for a photo during the repair process. Warning: Graphic medical photo.  Two major injuries in six months.  This time around I’m not worried about the lost training time, I’m upset that I won’t be able to go sledding with my son, or do everything my wife needs me to do.  I’ll admit I’m having a hard time dealing with this one. Three months from now I know I’ll look back and see countless blessings from this, including a deeper appreciation for the pull-up progressions, but right now I’m in the storm and it’s tough to see the shore over the tall waves.

Corey Howard Recovers From Surgery

I know there are tons of people dealing with worse situations than mine; those of us in the fitness world sometimes stake too much of our identity on our physical capabilities. Twenty years from now the only thing people will remember is how you treated your family and those around you. It’s easy to forget that we work out to be healthy and so we can have a good quality of life. I may have temporarily lost the use of my arm, but I’m not going to let myself lose sight of the big picture.

***

About Corey Howard, PCC, RKC, CK-FMS: Corey Howard strives to constantly become stronger, and to help others to achieve their fitness goals. He is the owner of Results Personal Training, and can be reached at fithubby.com, resultsptonline.com or coreyhoward.com.

Filed Under: Motivation and Goals, Progressive Calisthenics Tagged With: bodyweight exercise, calisthenics, Corey Howard, Injury, push-ups, recovery from injury, surgery

Lower Body Calisthenics

September 9, 2014 By Corey Howard 50 Comments

Corey Howard One Arm Plank With Cast

One of the best things that happened to my training was rupturing my triceps in late May. It was devastating! Right after the injury happened, on the way to the ER my 10 year old son said, “Dad now you won’t be able to do push-ups for a long time!” He was right. After surgery it was 3 full months before I could do anything upper body related and even then that would only be light pulling movements. That being said, it was the best thing to happen to my training. I couldn’t do any upper body training, I couldn’t touch any weights, and the only thing left to train was calisthenics only for legs and abs. To most people that sounds like Hell, but to me it sounded like fun!

When you look at some of the calisthenic practitioners online, you notice they have a lean muscular athletic look, yet typically don’t carry a ton of thick lower body muscle. The week of my surgery, Dragon Door published Paul Wade’s book, C-Mass, where he shows how to add size using calisthenics. This ignited my plan. For 12 weeks I would train legs and abs twice a week using only bodyweight movements. My goal was to gain two full inches on my thighs and glutes, and at least an inch on my calves. I emailed Al Kavadlo, told him about my injury and to expect an article about my journey. Here are some things I learned over the last 12 weeks…

First, know your progressions! Paul Wade gave us all an excellent training guide in Convict Conditioning. For success, you need to know what level you’re at in the pistol squat progression, and how many reps you can do. This way, if you can only do three reps, you know to work on adding reps. Or if you’re proficient with a movement, you can pair it with an “easier” exercise to thoroughly exhaust the muscle. An example of how this worked for me was pairing sissy squats with shrimp squats, or pistol squats with split squat jumps. Over time I developed some proficiency with shrimp squats, so I did sissy squats first to make them more difficult. This exhausted my quads and cut the total number of shrimp squats I could do in half.

Corey Howard Shrimp Squat

Adding a plyo movement immediately after a high skill movement like pistols also pushed the limits of my ability. Remember, your body has no idea if you’re holding a dumbbell or simply tweaking a calisthenic movement, it just knows you’re asking it to work harder and generate more force. By pairing various squat or bridge progressions, you can really push the limits of your lower body.

Second, don’t be afraid of reps. It frustrates me when someone says, “Any more than 5 reps is cardio.” Really!!! If you want to add size, anywhere from 1-20 reps should be performed. Embrace reps. Think about bodybuilders, typically they perform 4 sets of 12 with a shorter rest period between sets. Basically they are increasing the amount of time the muscle is under tension.

Corey Howard Single Leg Bridges

So if you do 20 single leg bridges per leg, then immediately follow it up with 15 glute-ham raises you’re increasing the time under tension for your posterior chain. Things like this will create muscle growth as well as a deep soreness the next day! Don’t be afraid to push a set to failure, especially with lower body calisthenics. What’s the worst that can happen? Maybe you fall on your butt while doing pistols? If you’ve been doing your bridges it will only cushion the blow! This simple philosophy reminded me what it’s like to step off a curb and have my legs collapse!

Third, two sets will work. Why on earth do we need 4 sets of anything? For the last 12 weeks I never took a movement past 2 sets. Once you’re warmed up and locked in, fire up the grueling sets. After pushing the reps to as many as possible and doing it twice, the muscle gets the message that you need it bigger and stronger. Two working sets also gives you time for other movements, and that means you can play with some variety.

So what happened at the end of 4 weeks? I added an additional 2 inches on my thighs and glutes, and an inch on my calves. Twenty-four ab and lower body calisthenic workouts later and I have a meatier, stronger, more powerful lower body than I ever have. Keep in mind, I’m not a newbie to strength training. I’ve been working out for 22 years! After all that time, even I can add size using only calisthenics!

A side benefit from this has been the carry over. As I start with some upper body work I’m noticing that I really haven’t lost much strength, despite surgery, a cast, and upper body inactivity. If your foundation is strong, you will be strong. If anyone is interested in what I did or would like to see some of my workouts, just message me or comment below. I’d love to help. I will warn you though, none of it was easy! Fire it up!

Corey Howard added 2" to his legs after 12 weeks calisthenics only leg training

***

About Corey Howard, PCC, RKC, CK-FMS: Corey Howard strives to constantly become stronger, and to help others to achieve their fitness goals. He is the owner of Results Personal Training, and can be reached at www.resultsptonline.com or www.coreyhoward.com.

Filed Under: Motivation and Goals, Progressive Calisthenics Tagged With: C-Mass, calisthenics mass, Corey Howard, leg training, muscle mass, pistols, programming, shrimp squats, squats, training strategies

Calisthenics Grip Training

July 22, 2014 By Corey Howard 31 Comments

Handshake

I’ll never forget Gary. It’s not that Gary was such an amazing person, in fact he was quite bland. Imagine shaking hands with someone’s limp lifeless, overcooked soggy noodle hand. That was what made him disappointingly unforgettable. We’ve all met someone like that, and it creeps most people out. Shake my hand like you mean it!

On the other side of the spectrum is Rich. Rich has been crowned the World Arm Wrestling Champ many times. After introducing him to my father, my dad said, “that was like sticking your hand into a bunch of bananas! I wasn’t sure I was getting my arm back!” Your handshake says a lot about you. Grip strength says even more.

Al Kavadlo Human Flag
Grip strength is an essential part of many advanced calisthenics exercises, such as the infamous human flag, demonstrated here by PCC Lead Instructor Al Kavadlo.

How can a strong grip help?  First, your grip is the linkage between your body and whatever it is you’re trying to control.  If you’re trying to put heavy objects overhead, a crushing grip can actually tighten the linkage in your shoulder and give you a safer press.  If you’re a calisthenic ninja, killer grip can keep you on the bar for more pull-ups or help your handstands as you grip the ground and drive upward.  But how on earth can you develop card tearing grip strength using only calisthenics?  According to Paul Wade in Convict Conditioning II, finger tip push-ups and towel hangs are all you need.  From my own experience, he’s right!

Finger tip push-ups are simple; just do a push-up on your finger tips!  Well, there’s a bit more to it than that.  This one killer exercise strengthens the entire hand from the fingers up through the forearms.  It’s easy to let your ego get in front of you with this one, so be sure to progress slowly and cautiously. I recommend starting these as incline push-ups.  This enables you to keep your technique spot-on and stay injury free.

Fingertip Setup Hand Position
Make sure you set your hand up with your fingers locked and spread.

It’s important to make sure you set your hand up with your fingers locked and spread.  Try and create a tall wide support structure with your fingers.  Ideally you want your fingers to look like they are flowing right up into your arm, there should be no odd bends or strains.

As you make progress with these just keep moving closer to the floor, and once you’re able to do 8-10 quality fingertip push-ups, try one arm push-ups, or 3 finger push-ups.

AlKavadlo Three Finger Incline Pushup
PCC Lead Instructor Al Kavadlo demonstrates a 3-finger incline one arm push-up, unofficially known as the “Heavy Metal” push-up.

Towel hangs can start out easy, then progress to a battle of will between your body and your mind.  These work amazingly well for developing grip endurance as well as thick muscled forearms.

Again I strongly suggest starting out with a grip training drill you can do fairly well and slowly progress to the harder stuff like one arm hangs, thicker towel hangs, longer hangs, or even pull-ups or leg raises with a towel.  I would also encourage you to pull the shoulders down away from your ears while you hang.  This tightens up the shoulder complex and creates more stability.  Once you can hang for about a minute I’d suggest you bump it up a bit.  Remember, everything can be made more challenging with simple calisthenics tweaks.

Corey Howard Towel Hangs for Grip Strength
I love to use towel hangs for developing my grip!

I caution you about pushing too hard and trying to progress too fast.  Sometimes you can overwork these smaller muscles and not even know it until you have a painful case of tennis elbow.  Remember for most people, grip is the smallest link in the chain.  The last thing you want to do is allow your brain and larger muscles to overpower your grip work and cause an injury.

Grip training can be tricky but the rewards are huge! I can tell you from my own experience, Paul Wade’s combo rocks!  After doing these two movements fairly consistently I’ve had to add a link in my watch, and can no longer slip my wedding ring off for any pull-up work.  My forearms, wrists and fingers have thickened up a bit.  If you increase the size of the motor, most of the time you increase the output as well…. More grip strength!  More pull-ups!  Fire it up!!

***

About Corey Howard, PCC, RKC, CK-FMS: Corey Howard strives to constantly become stronger, and to help others to achieve their fitness goals. He is the owner of Results Personal Training, and can be reached at www.resultsptonline.com or www.coreyhoward.com.

Filed Under: Progressive Calisthenics, Tutorial Tagged With: bodyweight exercise, Convict Conditioning, Convict Conditioning Vol 2, Corey Howard, grip strength, grip training

Push-ups for a Better Bench Press

April 8, 2014 By Corey Howard 9 Comments

Al Kavadlo Push-upAs someone who loves a challenge, I get excited when someone tells me it’s impossible to get strong using only calisthenics. Though at first I was skeptical, too, I’ve learned firsthand how effective bodyweight training can be.

Most coaches tell us that to get stronger you need to keep adding weight to whatever lift you want to improve on. If you want to bench press more, they say to use some sort of pyramid training and ramp up the weight each session. With the exception of Stanford, that’s what’s taught at most collegiate and high school strength programs. Imagine the frustration on a 16 year old kid when I tell him I won’t let him bench press until he can perform 20 quality push-ups off the floor!

As I was talking with a student of mine named Caden during his first session at my facility, the topic of bench pressing inevitably came up. We discussed my background in competitive powerlifting and, as you would expect, he wanted to know how much I could bench. After telling him my best competition lift he responded with a story about how some other kid at his school can supposedly press more than me. So of course I had to know what his own best effort was on the bench.

day_3_100_2“One hundred thirty-five pounds… once,” he stated. For those of you that have trained young teenage athletes, you know they need proof before they believe anything you say. So I decided to challenge him a bit. I told him I could help him improve on that 135×1 in only 4 weeks without even putting him on the bench. In fact we would be using a steady diet of push-ups. Caden scoffed at me. Why wouldn’t he? Remember the old school thinking at most high schools?

“Alright, but it’ll never happen,” he promised.

Let’s stop for a second and quickly compare a textbook push-up to a text book bench press. In a push-up, the hands are under your shoulders while the body is elevated and tight (abs, lats, glutes and thighs) to prevent any sagging or arching. As you descend it should feel like you are screwing your hands into the floor, the lats get tighter, and the elbows stay close to the body. Everything is tracking straight and tight. Then once your nose or chest touches the floor you reverse the motion as slow or fast as you want. Speed will build explosive strength and slow will teach you to grind out a heavy rep for strength.

Compare that to a textbook bench press; before you lower the bar to your chest, the shoulder blades should be retracted, glutes are tight and feet are driving into the ground. As the descent begins it should again feel like you are screwing your back into the bench, tightening the lats, and keeping the elbows near the body. Then after the bar touches the chest you can drive the meaty part of your thumbs into the bar almost as if you were rotating your elbows in and driving yourself away from the load to lock it out over head.

Notice any similarities?

CadenPush-upNow let’s take those same principles and apply them to Caden. On day one he could not do any of this. Once he was on the floor it kind of looked like a saggy banana getting tazed. We needed to tap into the Convict Conditioning principles and start teaching push-up technique against a wall. As he grew more proficient, his push-up got closer to the floor. It’s important to note that although we always had a specific number of reps in mind for each day, once technique failed, his set was over. Many times he wanted to crawl under the bar and “just try” the bench press again, I happily refused to allow that. Remember sometimes young teenage clients need proof or an “A-ha moment” before they buy into you or your system.

Caden’s “A-ha moment” came 4 weeks later. After dialing in the pushup similarities to the bench press in his warm ups, we loaded the bar with 135. He gave me a solid 5 rep effort. If you use one of those 1-rep max calculators, that’s roughly a 20lb increase in max effort strength in 4 weeks using nothing but pushups. For those of you that are wondering what other “assistance work” I had him do? It was all calisthenics- bridge progressions, bodyweight squat progressions, lying leg raises, and horizontal pull-ups. Caden never touched a weight his first 4 weeks in my facility.

Calisthenics work! Fire it up!!

Caden1 ***

About Corey Howard, PCC, RKC, CK-FMS: Corey Howard strives to constantly become stronger, and to help others to achieve their fitness goals. He is the owner of Results Personal Training, and can be reached at www.resultsptonline.com or www.coreyhoward.com.

Filed Under: Progressive Calisthenics Tagged With: bench press, carryover, Corey Howard, push-ups, strength training

Who Needs Weighted Pull-Ups?

March 11, 2014 By Corey Howard 13 Comments

DannyKavadloHang

Back in late October I started experiencing pain in my right shoulder. Like most of us that place a large priority on our fitness, I ignored it. Dumb move!

As the next few weeks progressed, the pain expanded to my right trap, lat, pec, entire shoulder complex, bicep, plus numbness in my fingers. I’m not sure about the rest of you, but when I’m experiencing pain throughout that much real estate I get concerned and the workouts become kind of nonexistent.

After many doctor appointments over the last couple of months, I’m disappointed to report they still don’t have any idea what’s going on. However, after sitting around hurting, feeling sorry for myself, and not moving, I knew something had to change. My life is fitness. I tell people all the time how important it is to move. When something hurts, there are always ways to keep moving forward. And move forward I have, except this time it’s been exclusively with calisthenics.

As I returned to the gym after a 2 week layoff, I was forced to deepen my calisthenics knowledge. The basic movements were thankfully still easy for me, but I could no longer do weighted pull-ups, which had previously been a big part of my routine. I needed to find a way to keep getting stronger in pull-ups without hanging any weight off my body.

One of the first modifications I used was the “L-Sit Pull-Up”. This movement shifts the body’s balance just enough to make a regular pull-up harder. Not to mention it’s awesome for teaching ab tension throughout the motion!

The L-Sit Pull-Up is done by holding the top of a hanging leg raise, then doing your pull-ups while maintaining the L-sit position the entire time. I must warn you there are a few things you need to keep in mind while performing these. It’s imperative you begin by pulling your shoulders tight into the sockets to create the necessary stability so you don’t swing on your leg raise. Second, keep your legs straight and raise them up under control so you don’t create any upward momentum when you begin your pull. Remember Coach Wade likes slow controlled movements. Third, as you pull yourself up; pull your elbows in toward the midline so your arms aren’t flaired out. This does a couple of things; first, it mirrors the handstand push-up groove and second, it engages the pecs with the lats and creates a solid stable shoulder complex. I’ve seen many clients go from 20 dead hang pull-ups to only 5 on this one. Fire it up!

Corey Howard Performs an L-Sit Pull Up

The next change I made was to toss in some Archer Pull-Ups. We’ve all seen Al Kavadlo do these on his YouTube channel. The Archer Pull-Up is where you pull yourself up to one side then the other. Besides, we all are trying to achieve the one arm pull-up, and this is an amazing progression towards that!

When starting with these I strongly suggest alternating your grip. Turn your palm towards your face on the side you will be pulling towards and your palm away from you on the arm you plan on keeping straight. Next as you begin your pull, think about pulling your elbow to your opposite hip. This is where that L-Sit Pull-Up foundation will come in handy. In other words, if you’re pulling yourself to the right side, pull your right elbow to your left hip. Try and use your straight arm as a guide to keep you moving sideways. I’ve found a false grip or muscle-up hand position works best. Once you can comfortably knock out 7 quality reps or more per side without resting then you’re ready for the final pull-up challenge.

Corey Howard, PCC and RKC Instructor Performs an Archer Pull Up

The last tweak I used to make pull-ups evil is by modifying the grip heights. Paul Wade suggested you use a towel in the Convict Conditioning book, but I like to grab the pull-up bar with one hand and the vertical support structure of the pull-up rig with the other hand. This is similar to an Archer Pull-Up except with a lower non-dominant hand position. You have a few options here to make it harder as you progress. You can either move your hand lower on the pull-up rig, or… If you think this is just simply too easy for you, feel free to hang a stretchy band from the pull-up bar and grab that with your non-dominant hand! The stretchy band will refuse to provide you much for assistance and will scoff as you pull harder against it seeking help. Once you master these I promise you will have the upper body pulling strength of Samson!

Corey Howard, PCC and RKC Instructor Performs a Pull Up with Varying Grip Heights

There you have it. The 3 pull-up variations I switched over to so I could keep building pulling strength. The best part–not a single one of these pull-ups seem to aggravate my shoulder or arm. I’m just like you, and really at the end of the day we all like to get stronger. Grabbing a pull-up bar and pulling your body up with two arms is unfortunately something that many people still can’t do. However there are a few of us crazy dreamers out there that want to defy “normal.” We need to push the envelope and make pull-ups look insanely easy and maybe even knock out a few one arm pull-ups if possible. So go fire up some L-Sit, Archer, or Mixed Grip Pull-Ups. I guarantee you’ll get stronger, and you won’t have to hang weights off your body while doing it!

***

About Corey Howard, PCC, RKC, CK-FMS: Corey Howard strives to constantly become stronger, and to help others to achieve their fitness goals. He is the owner of Results Personal Training, and can be reached at www.resultsptonline.com or www.coreyhoward.com.

Filed Under: Progressive Calisthenics Tagged With: advanced, Al Kavadlo, archer pull-ups, calisthenics, Convict Conditioning, Corey Howard, Injury, progression, pull-up progressions, pull-ups, Raising the Bar, strength training

My Unique Path to Calisthenics

July 16, 2013 By Corey Howard 6 Comments

corey3

Corey Howard ‘hangs out’ with his 9 year old son, Dylan Howard

“I’ve had the same training program for the last 6 months.” That’s what I told the gentleman sitting next to me on the shuttle back to the hotel after day 1 at the PCC (Progressive Calisthenics Cert). He seemed a bit confused but very intrigued. “What is it!?”

My road to Calisthenics is a unique one. My training roots are in powerlifting. Six month training cycles that incorporated max efforts and speed work have been normal to me for many years. After tearing my tricep and experiencing a badly herniated disc in my low back, I discovered kettlebells. Kettlebells took me through the RKC (Russian Kettlebell Certification) and gave me an outlet to train heavy and hard while still getting in my explosive work. Recently though, due to a severe case of Scoliosis, my back issues flared up and have forced me to limit my kettlebell practice. Since giving up strength training simply isn’t an option, Paul Wade’s “Convict Conditioning” book provided an outlet for strength.

Anyone that says you can’t build insane levels of strength using old-school calisthenics just simply doesn’t understand bodyweight training. If we all agree that you can build crazy levels of strength by simply increasing the tension or load placed on the body then we should agree calisthenics work. For example – with a deadlift, you can simply add more weight. With push-ups you can begin with standing wall push-ups and end with a one-arm, one-leg push-up, or even progress to a handstand push-up off cement blocks! The basic rule of thumb is knowing how to manipulate the load or tension placed on your body. Once you figure that out, the kingdom can be yours!

So how did I take my powerlifting background and apply it to a ‘simple’ bodyweight training program and still get stronger?

First, I always begin with a simple joint mobility routine to warm-up.  Then I follow it with some basic rolling and crawling patterns to get the body firing, centered and stabilized.  How you do this is entirely up to you.  I always begin with 15-20 minutes of Primal Move.

corey4

Second, move on to strength work. After an efficient warm-up and firing up our nervous system with Primal Move, spend some time practicing your high tension drills. For example, this might be a handstand push-up paired with an assisted one-arm pull-up.

It’s also very important to pair movements that complement each other here. For example, I like to pair a horizontal push with a horizontal pull, a vertical push with a vertical pull, or a squat movement with a high total body tension drill, like a plank or hanging toe touch. I always limit my strength work to 3 sets and generally never go any higher than 3 reps. It’s also very important to take your time with your strength work. Rest up and begin each set fresh.

Third, we need to understand conditioning is important. Strength will make the easier tasks crazy easy, but we also need to spend time getting the heart rate up and practicing the basic calisthenics movements. I like to combine a few things for high reps.

As Paul Wade and Al Kavadlo tell us, practicing the basics helps build up tendon strength. Pay your dues on the fundamentals! An example for this portion would be 50 bodyweight squats paired with 30 lying leg raises for 3 consecutive sets of time. Or you could combine 20 kneeling push-ups with 10 horizontal pull-ups for 5 consecutive sets of time. This gives you some metabolic work and lays a foundation of the basics.

corey2

Fourth, don’t be afraid to sample various progressions. Once you’ve nailed one arm push-ups on a box for 3×3, don’t be afraid to go a little closer to the floor. Or once you’re able to do 200 basic bodyweight squats and 100 hanging knee raise in 5 minutes, fire up more reps or try the next progression and switch to straight leg raises.

So what’s a sample program look like?

Day 1

Warm-up: Primal Move for 20 minutes

Strength: 2 board depth handstand push-ups paired with uneven pull-ups

Conditioning/Basics practice: 50 bodyweight squats paired with 25 hanging knee raise, 3 sets for time.

Cool Down: Joint mobility work in areas specific to my needs followed by a half kneeling stability drill.


Day 2

Warm-up: Primal Move for 20 minutes

Strength: Pistol Squats paired with hanging toe touches

Conditioning/Basics practice: 20 kneeling push-ups paired with 10 Horizontal pull-ups, 5 sets for time.

Cool Down: Joint mobility work in areas specific to my needs followed by a half kneeling stability drill.


Day 3

Warm-up: Primal Move for 20 minutes

Strength: One-arm push-ups on a low box paired with one-arm horizontal pull-ups

Conditioning/Basics practice: Walking lunge paired with sledge hammering a tire for 10 min total.

Cool Down: Joint mobility work in areas specific to my needs followed by a half kneeling stability drill.

So there you have it. Always pair complimentary movements together for strength work and alternate the basics with the strength movements from session to session. With this basic outline I guarantee consistent progress. As you get stronger, your conditioning will get easier. Practicing and drilling your basics makes your strength better. It all fits together like pieces of a puzzle… Fire it up!

corey1

***

About Corey Howard, RKC, CK-FMS: Corey Howard strives to constantly become stronger, and to help others to achieve their fitness goals.  He is the owner of Results Personal Training, and can be reached at www.resultsptonline.com or www.coreyhoward.com.


Filed Under: Motivation and Goals Tagged With: calisthenics, Corey Howard, father and son, injuries, motivation, PCC, RKC

Primary Sidebar

Featured Products

previous arrow
GetStrongBookCover
ConvictConditioningBookCover
StreetWorkoutBookCover
ExplosiveCalisthenicsBookCover
StrengthRulesBookCover
next arrow

Categories

Progressive Calisthenics Certification Logo
Click here for more information or to register for the PCC workshop

Get Strong Workouts TriadXP App
Get Strong Workouts App

Recent Posts

  • Top 5 Reasons Why an In-Person Workshop is the Best Way to Supercharge Your Training
  • HYBRID STRENGTH TRAINING IS HERE!
  • My Calisthenics Journey to the PCC
  • The Handstand Press: Complete Control Through the Handstand
  • The Get Strong App is Here!

Dragon Door Publications

Dragon Door Publications

Recent Comments

  • bross dandon on The Case for Curved Handstands
  • Johnny Flewellen Jr. on Strength for Life
  • Dan Earthquake on The Pursuit of the Daily Minimum
  • Johnny Flewellen Jr. on The Pursuit of the Daily Minimum
  • Johnny Flewellen Jr. on Yoga, Calisthenics and the Journey of a Lifetime
FOLLOW US ON TWITTER!

Copyright © 2025

Dragon Door Publications / The author(s) and publisher of this material are not responsible in any manner whatsoever for any injury that may occur through following the instructions or opinions contained in this material. The activities, physical and otherwise, described herein for informational purposes only, may be too strenuous or dangerous for some people, and the reader(s) should consult a physician before engaging in them.