• Skip to main content
  • Skip to primary sidebar
  • Home
  • Contributors
  • Resources
    • Q&A with Paul “Coach” Wade
  • Workshops
  • Products
  • Forums
  • Articles
  • Blogs
    • RKC Blog
    • Strong Medicine Blog
  • Archives

PCC Blog

Progressive Calisthenics - The Official Blog for the PCC Community

crow stand

Crow Pose and Beyond

April 14, 2015 By Grace Kavadlo 28 Comments

Grace Menendez Crow
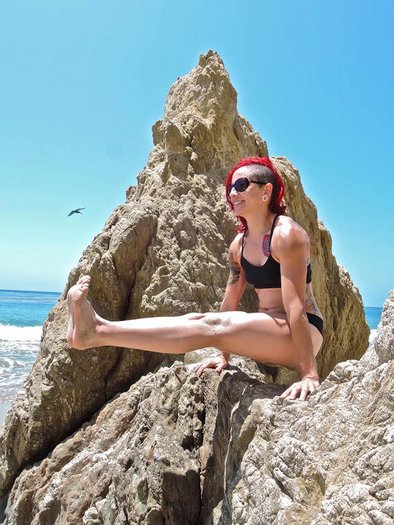
Before I ever considered becoming a personal trainer, one of my earliest fitness breakthroughs was the first time I achieved a crow pose in yoga class. It blew my mind! Before then I had assumed hand balancing was reserved for gymnasts and acrobats. As far as I was concerned, it was not appropriate for me and my fitness goals. Man, was I wrong! After that yoga class, I felt inspired to improve my crow practice and learn more about the world of hand balancing.

Adding this powerful pose to your routine has more benefits than just showing-off. Crow pose strengthens your entire upper body, including your shoulders, arms, and even your abs. It can be a great way to train your brain, too!  If you have ever attempted to hold a crow pose for even a few seconds, you can attest to how much focus and concentration is involved in the process.

Crow-gressive Calisthenics
Like all bodyweight skills, you can vary the intensity of the crow pose in several ways to make the move more accessible to beginners, or challenge even the most advanced hand balancers.

Though the general idea remains the same – using the backs of your arms to support your lower body while you balance on your hands – there are a lot of subtleties that are often overlooked when learning how to perform the crow pose.

Before you begin, I suggest doing a few wrist rolls as well as opening and closing your hands and fingers as a warm-up. Placing your entire body weight on the smaller muscles of the wrists and hands can be pretty intense. Ease into your practice, listen to your body, and let’s have fun with the crow pose!

Froggy Bottom
The earliest progression toward the crow is what is sometimes known as a frog stand. Start in a deep squat position and place your hands on the floor in front of your feet. Your arms should be inside your legs with elbows pressing into your inner thighs. Keep your hand placement fairly wide when starting out.

From here, begin to bend your elbows to around 90 degrees as you tip forward, lifting your feet off the ground. You can also ease into it by lifting one foot off the floor at a time. Focus on keeping your chest lifted and squeezing your thighs into your arms as you attempt to balance. The more contact you have between your arms and legs, the easier it will be to balance. Think about looking in front of your hands rather than in between them. It can also be helpful to place a pillow or mat in front of your hands in case you are afraid of falling.

If you are finding it difficult to lift off, I suggest elevating your feet on a low platform with your hands on the ground to allow more clearance. I’ve also coached people into finding the balance by starting from a tripod position with their head on the floor and pushing off the mat back into frog stand.

Al Kavadlo Frog Stand

Crow Up
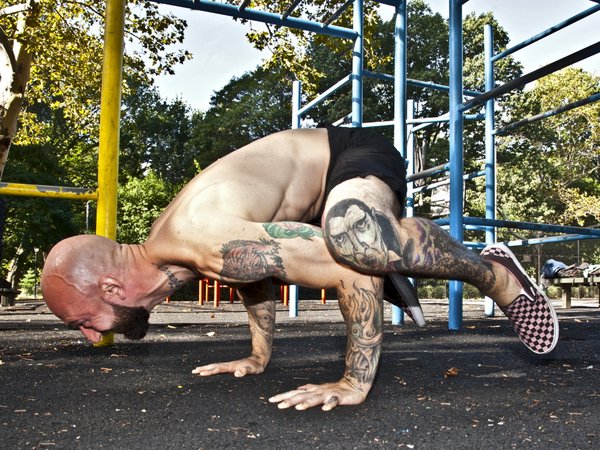
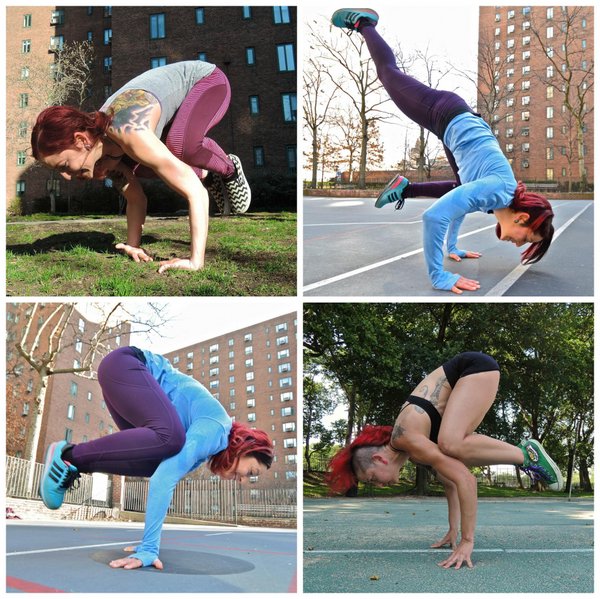
Once you’ve got the hang of the beginner version, you can try placing your hands in a narrower position to begin working toward minimizing the contact between your arms and legs. For this variation, which we can call a full crow, only your knees will be on the backs of your arms, instead of your inner thighs. You should also start working toward reducing the amount of flexion at your elbows. Point your toes and squeeze your thighs together to help generate enough muscle tension to allow you to balance. Remember to keep your eyes focused on a spot a few inches ahead of your hands to help you counter-balance.

Al Kavadlo Crow

Let It Crane
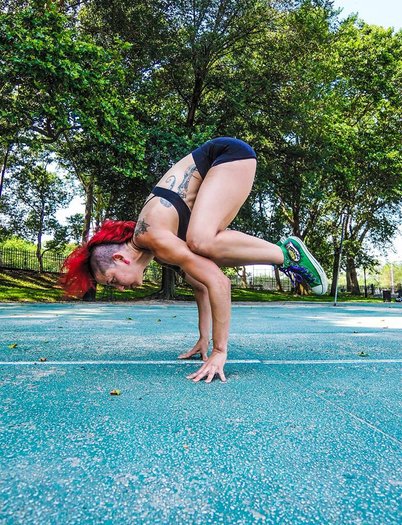
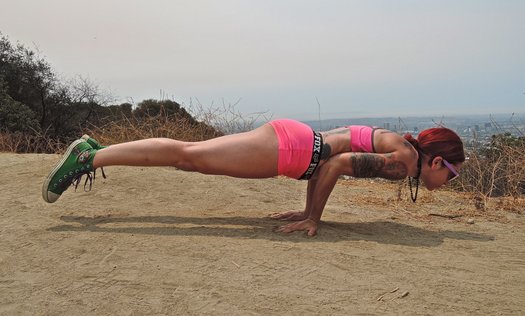
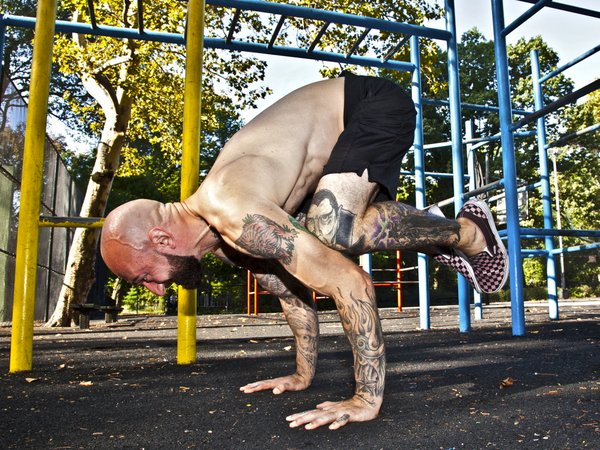
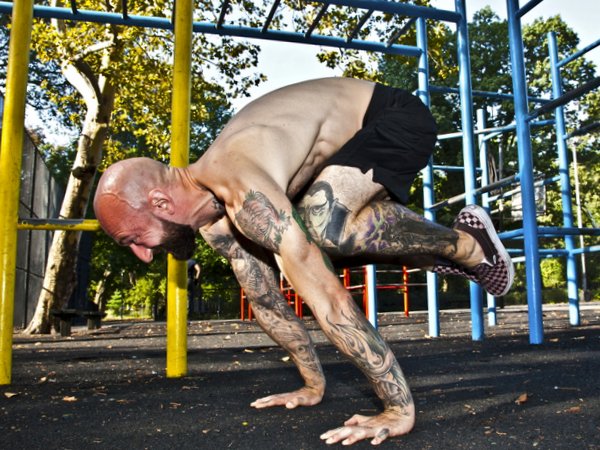
The next step in the series is what’s sometimes known as the crane pose. This variation may take a while to build up to as it requires serious strength, intense focus and extreme wrist flexibility. However, if you’ve been “milking” the earlier steps, you will eventually conquer this pose. For the crane variation, there is little bend at all in the arms, and the knees are placed further up the backs of the triceps, until they are practically in the armpits.

Start in the same squat position as before, only this time your arms will be locked. Stand on your toes and lift your hips high as you lean forward, bending your knees in towards your armpits (or as high as you can place them on the backs of your arms). Point your toes in towards each other as you tense your midsection and attempt to balance. Keep your gaze a few inches inches in front of your hands and lift your heels toward your butt. Focus on utilizing your abdominal strength to keep your hips nice and high.
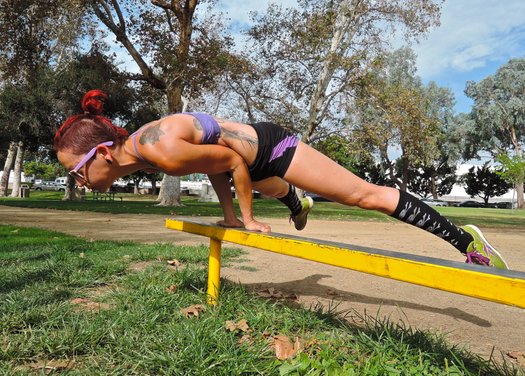
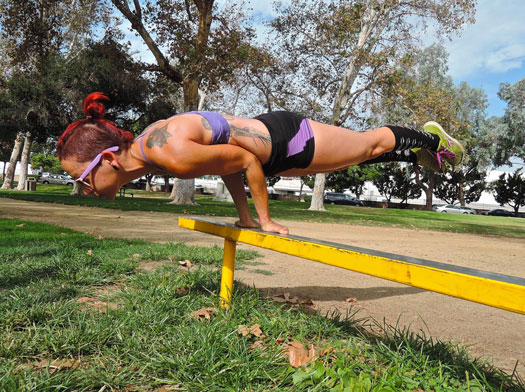
AlKavadlo Crane Stand

And Beyond…
The above variations will give you plenty to practice in order to tighten up your hand-balancing game. However, there are still more progressions that you can work on to make even the advanced crane seem tame. You can practice the crow on your fingertips, with your hands reversed, or even on the backs of your hands! You can also work on single-leg variations. No matter where you fall in the crow continuum, you can always find a variant that will challenge and excite you.

Grace Menendez Crow Variations

****

Grace Kavadlo, PCC, HKC is a personal trainer and group exercise instructor located in New York City. She is a columnist for Bodybuilding.com and can be seen in several Dragon Door books, including Coach Wade’s Explosive Calisthenics. For more information about Grace, check out her website, www.DieselGrace.com

Filed Under: Tutorial Tagged With: calisthenics, crow pose, crow progressions, crow stand, Grace Menendez, tutorial, yoga

Elbow Levers For Superhero Strength

August 5, 2014 By Grace Kavadlo 26 Comments

Grace Menendez One Arm Elbow Lever

Growing up, I was a scrawny, geeky kid who spent my free time reading comic books, fantasizing about having mutant powers and dreaming of looking shredded like my heroes in the stories. The first time I ever saw an elbow lever, the kid in me got excited. I’d always wanted to be a superhero, and this was the closest thing to flying that I’d ever seen. I had to try it myself!

Unfortunately on my first attempt, instead of flying I ended up face planting instead! After scarfing that slice of humble pie, I did what any intelligent athlete would do: I took a step back and started practicing foundational movements to help me earn my wings!

#1 – The Plank

As played out as this exercise may seem, it is the perfect place to start. The plank position puts you in the same plane of movement as a lever and helps you build the necessary core strength. Emphasize keeping an open chest while broadening through the collar and retracting the shoulder blades down and back. “Zip-up” your mid-section by squeezing your glutes, engaging your quads and evenly distributing the weight between the top and bottom of the body. Eventually when you can hold the pose for 2 minutes, experiment with gecko plank variations, which involve lifting a leg and/or arm.

Grace Menendez Gecko Plank

#2 – Back Bridge

In a culture where flexion is the norm (sitting for prolonged periods, driving, etc.) the bridge liberates the spine from excessive upper back arching, as well as from a variety of other back pathologies. How does this apply to levers? In order to hold the body upright, you need to have a flexible upper back and strong spinal muscles–and the bridge addresses both! Take your time with this movement as it can be very intense for beginners. There are less difficult variations you can practice like the straight or table bridge, neck bridge, etc.

Grace Menendez Bridge

#3 – Bound Eagle

One of the gnarliest sensations you need to get past when first practicing this move is getting used to having your elbows jammed in your guts! If you have never tried it before, go ahead and try! Not as easy or comfortable as you thought? No sweat! Master PCC Al Kavadlo, suggests in his book Stretching Your Boundaries (definitely a must-have for every regular calisthenics practitioner) a helpful preparatory pose could be the Bound Eagle. This pose can help you gradually develop the flexibility needed to turn your elbows inward.

Stretching Your Boundaries Bound Eagle

#4 – Midsection Holds

Speaking of jamming your elbows into your midsection, the L-Sit progressions are ideal to get your abdomen prepped to take all your bodyweight. These holds involve tensing almost every muscle in your body, specifically the abdominal region, much like you’ll need to in order to perform a successful elbow lever. Start with a tucked L-sit and progress from there. I also like to include the frog stand here as it emphasizes lifting the chest while balancing on the hands just like in the lever!

Grace Menendez L-Sit At Beach

Grace Menendez Fingertip Frog Stand

#5 – Elevate yourself

Start practicing your elbow lever on elevated surfaces like plyo boxes, tables, counters, park benches, paralletes, etc. Be creative; the sky’s the limit! Start by letting your legs hang over so your form will resemble less of a straight line and more of an arch. As you get stronger, just like in your midsection holds, you can work from a tuck to a straddle and eventually that perfect expression of the pose with long extended legs!

Grace Menendez Elevated Straddle Elbow Lever

Grace Menendez Elevated Elbow Lever

#6 – Get Grounded

If you’ve mastered step 5 and you’re ready to attempt the elbow lever on level ground, you may still find it difficult to completely clear your legs from the floor. It may be helpful at this point to use a wall-assisted regression, in which you press one or both feet into the wall to spot yourself. From there, it’s just a matter of taking a leap of faith and going for it. If you’ve done the work, it should come without too much of a struggle.

Grace Menendez Elbow Lever On Ground

#7 – Next Level Levers

What’s great about progressive calisthenics, is that even after you are finally able to perform the elbow lever, there are even more advanced variations to be conquered! You can try doing an elbow lever on your fingertips, or even just one arm. Be patient during the earlier steps and focus on form. It takes consistency and synergy for your body to learn this unique movement!

Elbow levers are truly the stuff of Superheroes. They take skill, courage, and strength to perform properly! Don’t be shy! Embrace your inner hero and get your lever on!

Grace_POW

***
Grace Menendez, PCC, HKC is a personal trainer, group exercise instructor and massage therapist located in Los Angeles. For more information about Grace, check out her website, www.DieselGrace.com

Filed Under: Progressive Calisthenics, Tutorial Tagged With: abdominal training, abs, Bound Eagle, bridge, crow stand, elbow lever, elbow lever progressions, Grace Menendez, how to, L-sit, midsection training, plank

Primary Sidebar

Featured Products

previous arrow
GetStrongBookCover
ConvictConditioningBookCover
StreetWorkoutBookCover
ExplosiveCalisthenicsBookCover
StrengthRulesBookCover
next arrow

Categories

Progressive Calisthenics Certification Logo
Click here for more information or to register for the PCC workshop

Get Strong Workouts TriadXP App
Get Strong Workouts App

Recent Posts

  • Top 5 Reasons Why an In-Person Workshop is the Best Way to Supercharge Your Training
  • HYBRID STRENGTH TRAINING IS HERE!
  • My Calisthenics Journey to the PCC
  • The Handstand Press: Complete Control Through the Handstand
  • The Get Strong App is Here!

Dragon Door Publications

Dragon Door Publications

Recent Comments

  • bross dandon on The Case for Curved Handstands
  • Johnny Flewellen Jr. on Strength for Life
  • Dan Earthquake on The Pursuit of the Daily Minimum
  • Johnny Flewellen Jr. on The Pursuit of the Daily Minimum
  • Johnny Flewellen Jr. on Yoga, Calisthenics and the Journey of a Lifetime
FOLLOW US ON TWITTER!

Copyright © 2025

Dragon Door Publications / The author(s) and publisher of this material are not responsible in any manner whatsoever for any injury that may occur through following the instructions or opinions contained in this material. The activities, physical and otherwise, described herein for informational purposes only, may be too strenuous or dangerous for some people, and the reader(s) should consult a physician before engaging in them.