• Skip to main content
  • Skip to primary sidebar
  • Home
  • Contributors
  • Resources
    • Q&A with Paul “Coach” Wade
  • Workshops
  • Products
  • Forums
  • Articles
  • Blogs
    • RKC Blog
    • Strong Medicine Blog
  • Archives

PCC Blog

Progressive Calisthenics - The Official Blog for the PCC Community

Grace Kavadlo

PCC Goes Commando

May 23, 2017 By Grace Kavadlo 4 Comments

PCC London 2017

I’d heard big things about the Commando Temple gym in London from Al and Danny after the previous Progressive Calisthenics Certification there, so I had high expectations going into last weekend’s event.

This would be the third time the PCC was happening in Great Britain, but it was my first time visiting the legendary Commando Temple. Despite the hype, it was even better than I expected!

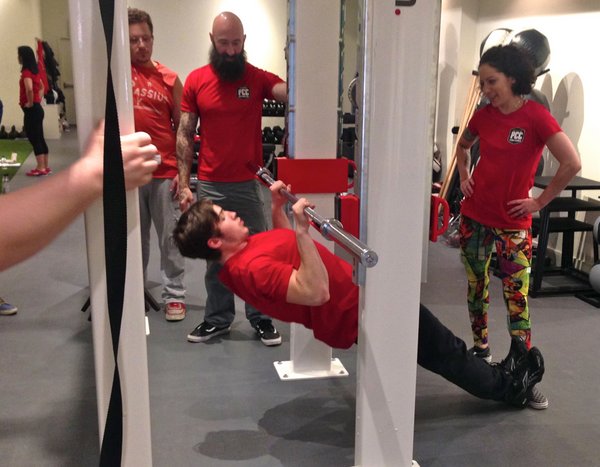
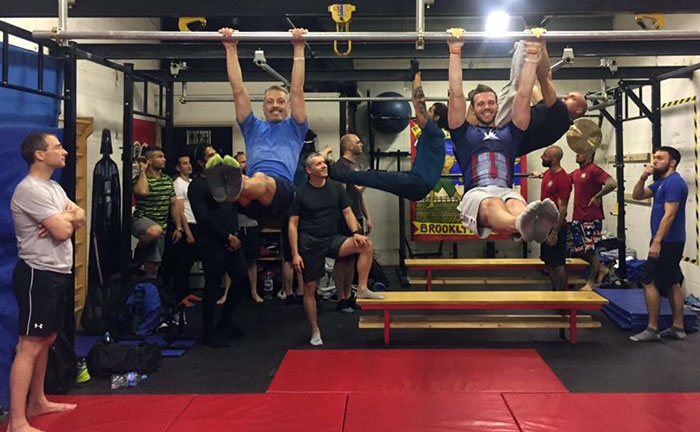
The Temple is nothing like your typical gym, which tends to be bloated with treadmills, stationary bikes, and machines. It is truly a playground for DIESEL people! There is tons of floor space, pull-up bars of every width, a Swedish ladder, full-sized parallel bars and even customizable human flag handles.

I was immediately impressed and knew it was going to be an event of epic proportions. Still, nothing could prepare me for the energy and excitement that took place throughout the weekend.

PCC London Al Kavadlo Flag

As a self-professed geek, I was thrilled to see that the walls are covered in comic book and superhero art. Everywhere you look there’s a figurine or picture with inspirational action icons!

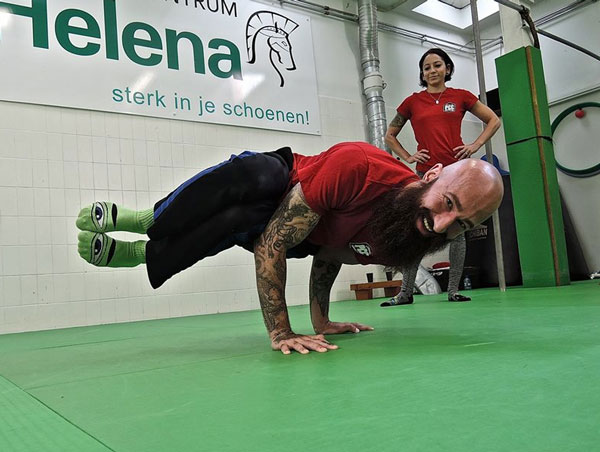
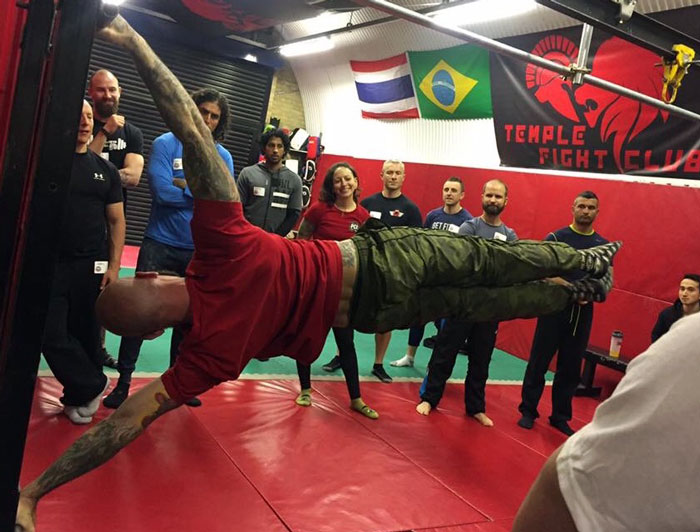
The superheros pictured on the walls weren’t the only superheros in the room. Just like the unassuming Clark Kent turns into Superman at the blink of an eye, these polite British chaps turned into full-blown calisthenics beasts once they were unleashed on the bars!

PCC London Hanging Leg Raises

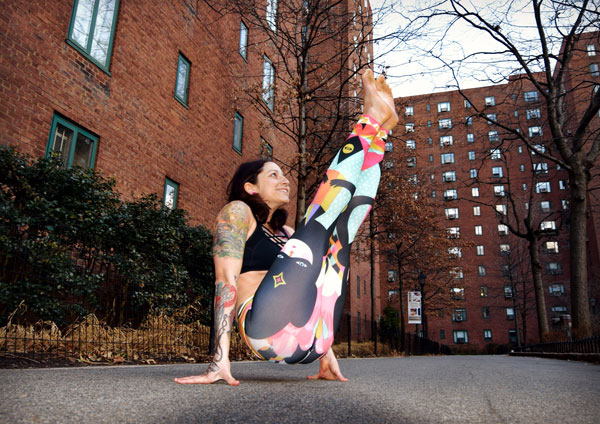
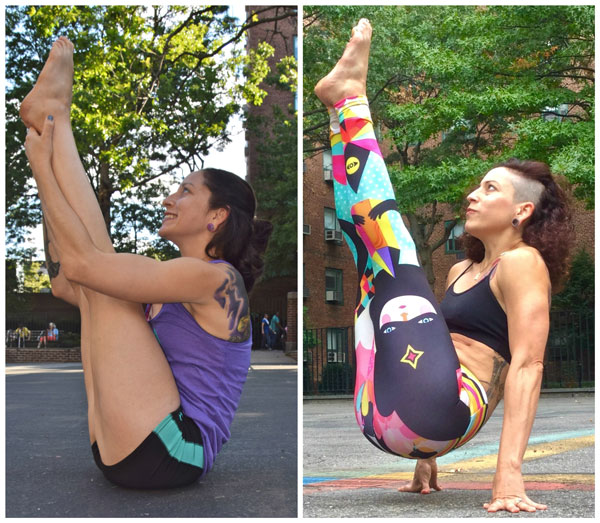
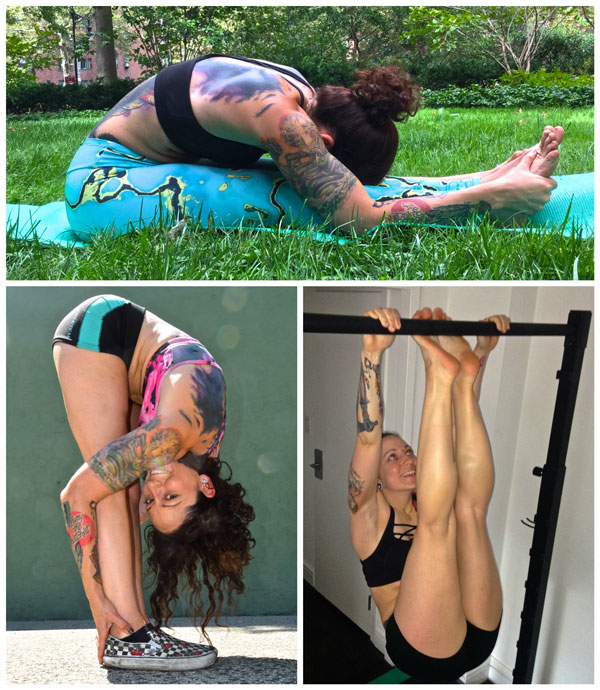
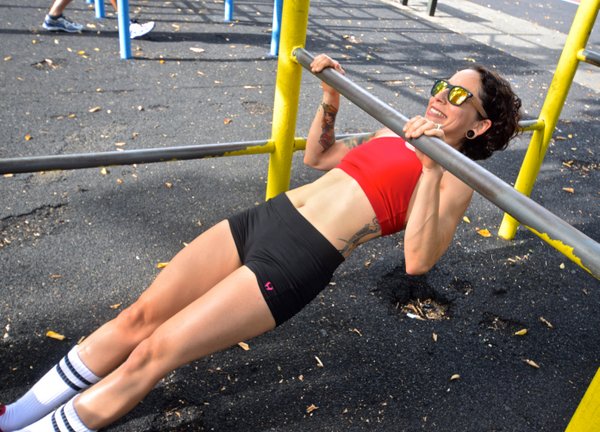
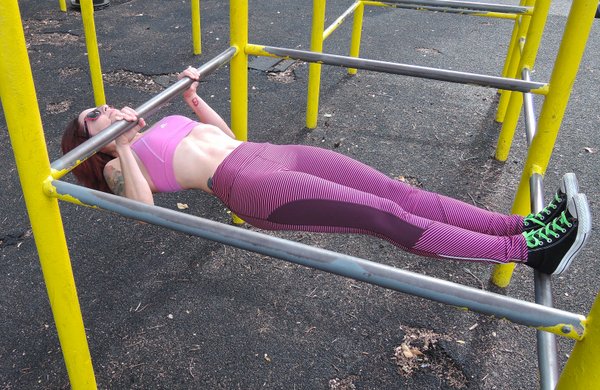
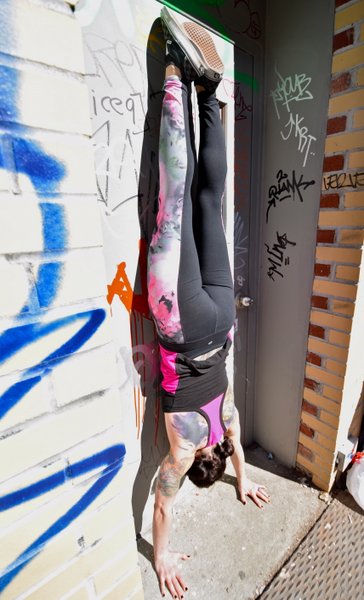
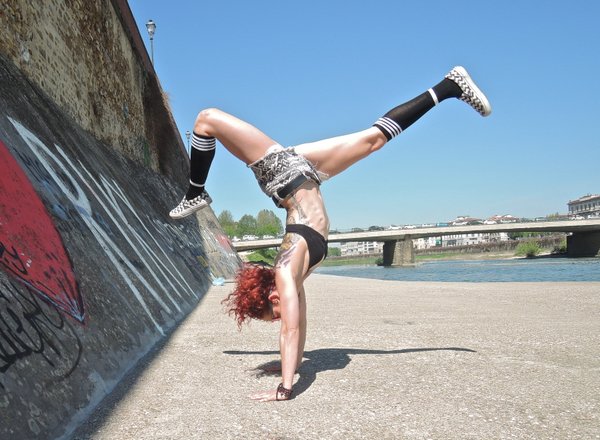
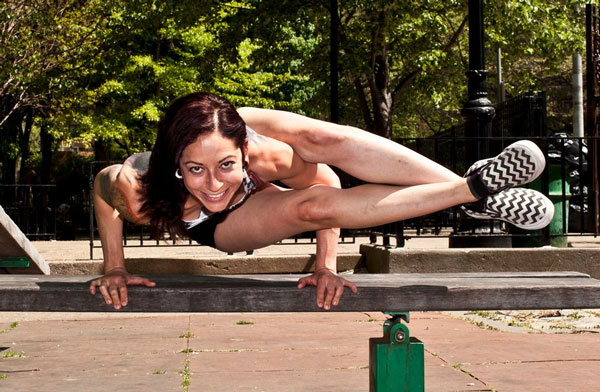
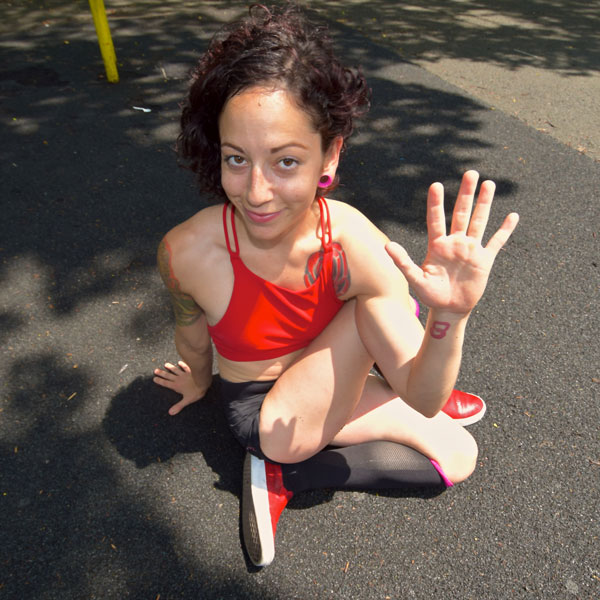
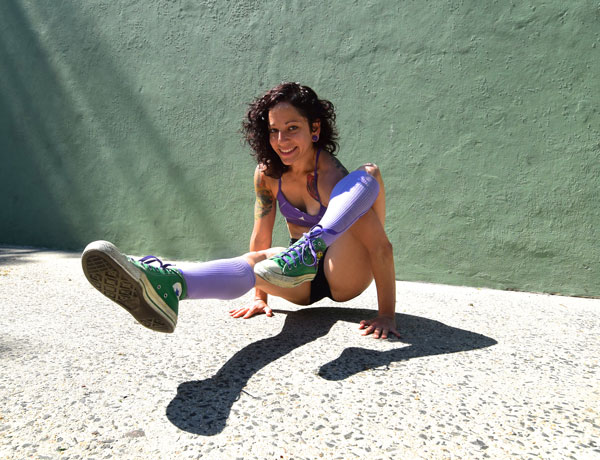
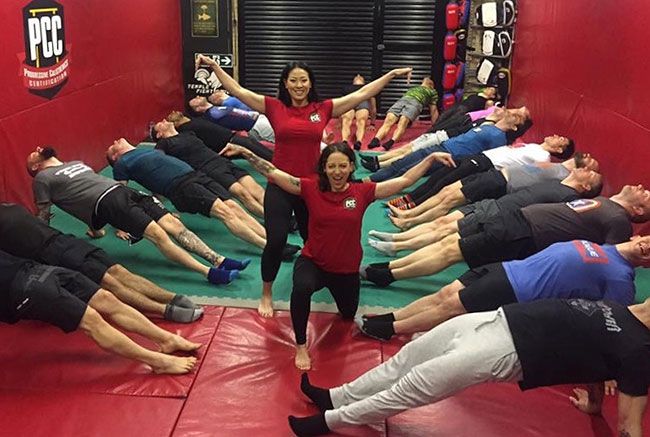
The guys weren’t the only ones getting in on the action, either. There were some Wonder Women in this group as well. I love connecting with other ladies who share my passion for calisthenics. As a female, it’s empowering to be on the forefront of a movement that is typically dominated by men. However, at every PCC we are spreading the word that pull-ups and push-ups aren’t just for the boys. The ladies of PCC never fail to impress me with their strength and solidarity.

PCC Ladies Group Photo

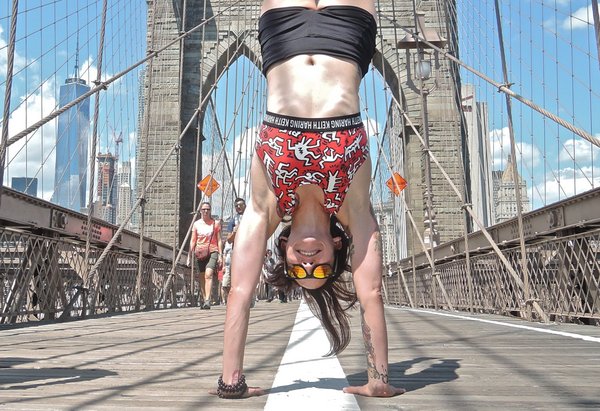
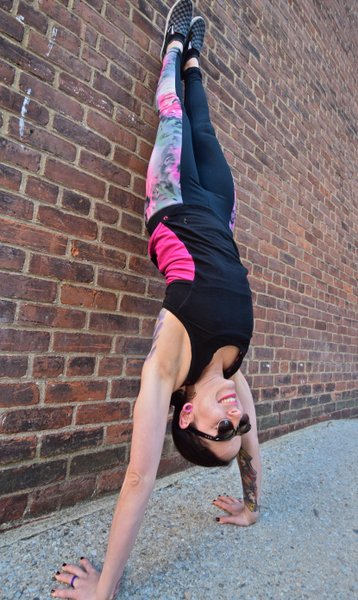
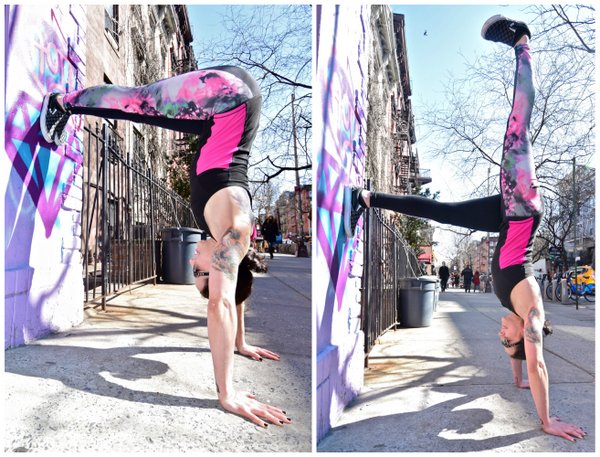
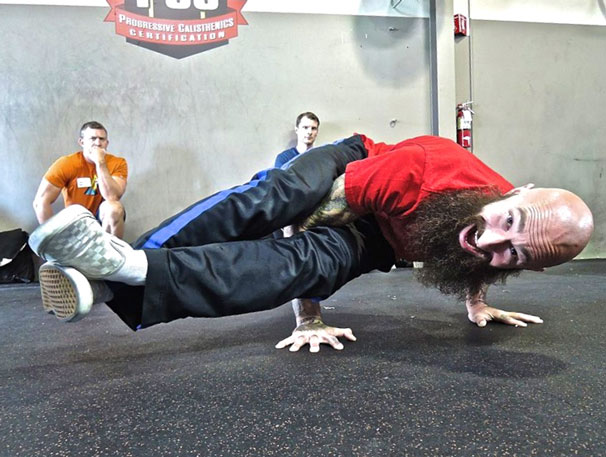
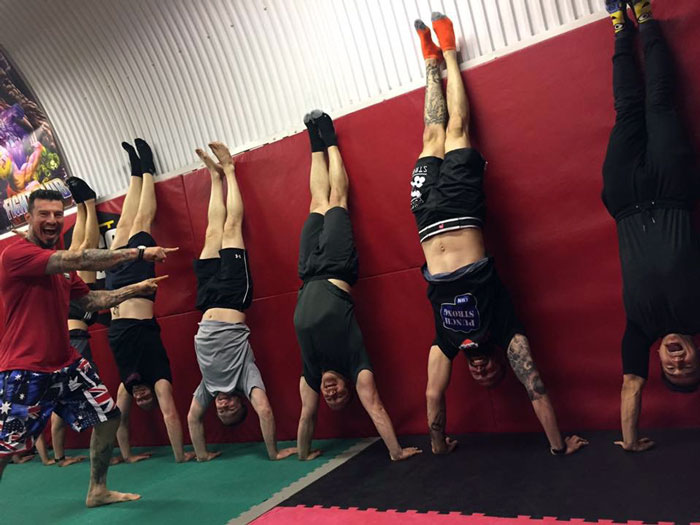
As always, the PCC brings people together from all over the world. Though there were many local Londonites in the house, attendees came from places as far and varied as Senegal, South Africa, Italy, Greece, Belgium and Ireland. We were all united by our passion for calisthenics and our desire to improve. And improve we did! There were more PR’s set than I can ever recall seeing at a PCC workshop. Pistols were firing, flags were flying and handstands were happening everywhere.

PCC London Handstands

The whole weekend went by in a flash! When all was said and done, we were left with new friends and a great group of newly certified progressive calisthenics trainers. It’s an honor to teach and share what I’ve learned so far in my journey, and it’s a privilege to be a part of this wonderful movement. My favorite thing about the PCC is how it brings out the best in people. We all have a superhero inside of us.

PCC London 2017 Group Photo


***

Grace Kavadlo is a PCC Team Leader, personal trainer and group exercise instructor located in New York City. She is a columnist for Bodybuilding.com and can be seen in several Dragon Door books, including Al Kavadlo’s Zen Mind, Strong Body and Paul “Coach” Wade’s Explosive Calisthenics. For more information about Grace, check out her website, www.DieselGrace.com.

Filed Under: Progressive Calisthenics, Workshop Experiences Tagged With: Grace Kavadlo, PCC London, PCC Workshop, PCC Workshops 2017, workshop experience

Five Tips for Training the V-Sit

February 21, 2017 By Grace Kavadlo 10 Comments

Grace Kavadlo V-Sit

When I attended my first Progressive Calisthenics Certification, learning to hold an L-sit was one of my goals. It’s a tough move, but I surprised myself and was able to nail it for a few seconds that weekend. Of course once I got the L-sit, I needed a new challenge.

Such is the nature of progressive calisthenics.

This was how I began my journey toward the V-sit, a move which progresses the L-sit by lifting the legs and hips higher, changing the shape of the body from a position resembling the letter “L” to one that looks like a “V.” Due to the shift in balance and leverage, it’s also a lot harder.

I mean A LOT harder.

It’s been almost 3 years since I went to my first PCC, and I’m just finally starting to get comfortable holding a proper V-sit. Like many advanced calisthenics exercises, training for this move requires a lot of patience. It also forced me to reassess several aspects of my training that I did not realize had been lacking.

Here are 5 things I learned along the way that helped me achieve this difficult feat:

1 – Make A Good “Compression”
Before I started working toward the V-sit, I thought I already had a very powerful core. Whereas conquering the L-sit bolstered my confidence, starting over with the V-sit was a humbling reality check. The two moves may not look substantially different, but the amount of abdominal strength required to perform a V-sit is exponentially greater.

Transitioning from an L-sit into a V-sit is not just about lifting your legs higher – you also need to bring your hips farther forward. This means compressing your trunk by drawing your pelvis toward your sternum, and that requires significant abdominal activation, particularly when your legs are above you in the air. It can help to practice other exercises that involve this type of abdominal compression, like “toes-to-bar” hanging leg raises, to better get a feel for this.

I also recommend the “boat pose” from yoga, as it mimics the V-sit, while allowing you to stay seated on the ground. This makes the exercise considerably less difficult while still letting you get a feel for the body alignment needed for the V-sit.

V-sit Variations Collage 2

2 – Elevate Your Training
Practicing this move with your hands elevated on parallettes or yoga blocks can be helpful during your journey to the V-sit. Not only does holding onto something make it less brutal on your wrists, but it also gives you extra room for your hips and legs.

When I first started toying with the V-sit, I would begin by holding a bent-knee L-sit on my parallel bars. From there I started experimenting with sliding my hips forward in front of my hands. This helped me figure out that I needed to shift my weight back in order to move my hips into the proper position. From there I could practice leg extensions, gradually reaching my legs farther in the air each time.

3 – Stretch Your Way to Success
Though many people tend to skip this portion of their training, if a V-Sit is one of your goals then you will probably need to improve your hamstring flexibility.

The classic toe touch or forward fold is a great way to loosen the backs of your legs in preparation for the V-sit, and there are several ways in which you can approach it: You can bend over from a standing position, practice the gym-class style “sit and reach” while on the ground, or even try it hanging with your legs raised and feet hooked beneath the bar. I recommend spending some time in all of these positions as a warm-up for your V-sit practice, as well as throughout the day.

In the beginning, these moves can be practiced with a slight bend in your knees, or with your legs slightly apart. As your flexibility increases (where you can touch your toes without overly rounding your back), you can start to slowly straighten your knees and/or bring your legs together until you are in the full expression of each pose. You may find it helpful to exhale fully as you fold forward. When you reach your “edge,” focus on drawing your abdominal muscles inward to go deeper. It may be helpful to repeat this process several times.

Forward Bend Collage

4 – Use Helping Hands
When performing this move, proper hand positioning is important for success. If your hands are placed too far away from your body it will be difficult to generate tension between your arms and your torso. Furthermore, turning your hands out and pointing your fingers to the sides (or behind you) can allow you better leverage to lean back farther without tipping over. You can also practice “tenting” your hands to help you find a little extra clearance when you begin practicing the V-sit on the floor.

5 – Don’t Forget to “Tri”
There is an immense amount of triceps strength needed in order to do any type of L or V-Sit. You also need strong lats, a powerful chest and iron forearms. One of the best pieces of advice I’m continually reminded of every time I’m at a PCC event is to “get great at the basics.”

This means you need to do your push-ups, pull-ups, squats and knee raises. Anytime you find yourself at a plateau with a new skill, you can always return to these foundational exercises. Yes, you need proper technique and training to conquer the V-sit, but that journey begins with perfecting the basics.

The V-sit takes practice and patience to achieve, but you’ll never get there if you don’t try!

****

Grace Kavadlo is a PCC Team Leader, personal trainer and group exercise instructor located in New York City. She is a columnist for Bodybuilding.com and can be seen in several Dragon Door books, including Al Kavadlo’s Zen Mind, Strong Body and Paul “Coach” Wade’s Explosive Calisthenics. For more information about Grace, check out her website, www.DieselGrace.com.

Filed Under: Progressive Calisthenics, Tutorial Tagged With: abs, abs exercise, calisthenics, Grace Kavadlo, L-sit, PCC, progressive calisthenics, tutorial, V-sit

Strength from Down Under – Aussie Pull-ups & Beyond

May 3, 2016 By Grace Kavadlo 13 Comments

Aussie Pull Up

“We all came here for the pull-ups!”

I love to see faces light up when Al or Danny say these words at the start of the PCC pull-up module. But before even getting into full pull-ups, we begin by practicing some lead-up steps, including the bodyweight row, aka the Australian pull-up.

Often dismissed by advanced calisthenics practitioners who can already perform full pull-ups, the Aussie is a viable and underrated exercise in its own right. Aussie pull-ups strengthen your arms, abs and even your grip. They can also help improve your posture, specifically countering the forward-head position that is prevalent in our texting, typing, and sedentary society, by strengthening the muscles of the upper and mid-back, including your rhomboids, lats, and traps.

While it may not be the sexiest or most eye-catching exercise, as a trainer, the Aussie pull-up is money! If you work at a gym, you will most likely be working with the general population, not a bunch of calisthenics ninjas. Unfortunately many folks cannot even do one full pull-up – guys or gals. For these clients, the Aussie is a fabulous option for increasing upper body pulling strength. This exercise is also of particular significance due to the fact that women are required to perform 10 consecutive repetitions in order to complete the PCC Century Test.

The Reverse Push-Up

An Aussie pull-up begins with the body suspended horizontally below a bar that is positioned at approximately waist height. In the bottom position of the Aussie, your arms should be fully extended with your body in a straight line, almost like an upside-down push-up. Just like push-ups, you’ll need to engage your abs, legs, and glutes during every inch of the Aussie in order to maintain proper body alignment.

The similarities don’t end there. In push-ups, your shoulder blades should come together as you lower down (eccentric phase), and spread apart as you extend your arms and push back up (concentric phase). The same principles apply to the Aussie, only with the positive and negative phases reversed: The shoulder blades should come together as you pull yourself to the bar (concentric phase) and spread apart as you lower down (eccentric phase).

Similar to the push-up, beginners often mistakenly initiate the movement by extending their head forward. Remember to cue your clients to allow their head to relax in a more neutral position so their neck is in line with their spine. The body should be in a straight line from the ears all the way down to the heels.

Aussie Pull-Ups at the PCC

Scaling Back

Thanks to the principles of progression outlined in the PCC curriculum, even the Aussie can be regressed for your more deconditioned clients. By shortening the length of your body, you can make this exercise less challenging. As with the push-up, bending the knees is a very simple way to accomplish this. Furthermore, the bent knee position allows the practitioner to push through their feet and create more favorable leverage. You can also flip your grip to an underhand position for the Aussie if you are having a hard time with the overhand grip. You can further regress the exercise by increasing the height of the bar, thereby distributing more of your weight in your feet.

Next Level Aussies

Just how elevating the bar can make the Aussie easier by placing your body in a more vertical position, raising your feet can make this exercise more challenging as you shift more of your weight into your hands and upper body. You can prop your heels on an opposing bar or a bench to use as an incline.

Aussie Pull-Up Variation

At the PCC, we also teach various grips for pull-ups in order to emphasize different muscle groups. These same methods can be applied to the Aussie. Experiment with placing your hands wider for more lat/back recruitment or closer together for more arm action. You can even try a variation on the Archer pull-up, which incorporates lateral movement in addition to the standard up and down motion. If you’re working towards a one-arm pull-up, you can even hone your unilateral skills in Aussie form, too. The variations on the Aussie are endless and fun to practice on your own, or with your clients.


Speaking of Aussies, I am excited to be teaching at the first ever PCC in Sydney, Australia this September along with PCC Lead Instructor Al Kavadlo. It’s always a pleasure to connect with you guys in person, and I can’t wait to do lots of Aussie pull-ups with my friends from down under.

I hope to see you there!

****

Grace Kavadlo is a PCC Team Leader, personal trainer and group exercise instructor located in New York City. She is a columnist for Bodybuilding.com and can be seen in several Dragon Door books, including Coach Wade’s Explosive Calisthenics. For more information about Grace, check out her website, www.DieselGrace.com

Filed Under: Progressive Calisthenics Tagged With: Aussie Pull Up Progression, Aussie Pull Up regression, Aussie Pull-Up, bodyweight row, Grace Kavadlo, PCC, progressive calisthenics, regressions, reverse pushup, row

Training Handstands For Strength

March 1, 2016 By Grace Kavadlo 26 Comments

Grace Kavadlo Handstands 1

When many people think of the handstand, they think of a bodyweight skill. In other words, if your goal isn’t to hold a freestanding handstand, somehow it’s not a worthwhile exercise. While learning to balance on your hands is certainly a noble pursuit, a lot can be gained from approaching the handstand from a pure strength training perspective by using a wall for support. In calisthenics, we encourage all types of isometric holds from elbow levers to L-sits. You can think of the wall handstand as just being the inverted variety.

Wall handstands take the balance element out of the exercise and are excellent for building overhead pressing strength. Practicing wall handstand holds is also a great way of building shoulder stability and increasing static strength. Handstands strengthen your triceps, delts, rhomboids, traps, and the extensor muscles of your forearms which can help build strong, healthy wrists. When you tense your entire body in a wall handstand, similar to how you would in a plank, you can also target your quads, glutes, and even your abs.

Below are 3 different wall handstand variations that you can try. Aim to hold each pose for as long as you can, ideally working up to one full minute. It’s not uncommon to feel dizzy or slightly disoriented after performing long holds, so ease in slowly and rest as needed between efforts.

Back-to-the-Wall Handstand
This is a great place to start if you are new to handstands. Begin by facing a wall with both hands on the ground, your front knee bent and the other leg extended behind you. Hop off your bent leg and reach your extended leg towards the wall. It may take a few hops before you finally hit the wall. Make sure your arms are straight with your elbows fully extended. A common mistake beginners tend to make is to bend their elbows as they kick up which makes them fall on their head and never want to attempt a handstand again. Remember “when the elbows bend, the power ends.”

Once you’re up, allow your head to relax between your shoulders as you actively press into the ground. It is normal to have a slight arch in your back when you are practicing this exercise, but aim to minimize this pressure on your low back by actively squeezing your glutes, engaging your abs and pushing your head and chest through your arms. When you’re ready to come down, release one leg at a time back to the ground, doing your best to land gently.

Grace Kavadlo Handstands

L-to-the-Wall Handstand
Begin in a push-up position with your heels touching the wall behind you. Slowly begin to crawl your feet up the wall as you fold at the waist, walking your hands in closer until your hips are aligned above your shoulders. Your body will wind up in an inverted capital letter L-shape. It may help to have a pair of eyes on you to let you know when you are in position, as it can be hard to tell at first.

In addition to upper body strength, there’s a lot of flexibility needed in your hamstrings to fully extend your legs. If you don’t have the mobility to achieve a full lockout, you can practice with a slight bend in your knees and/or allow your heels to come off the wall slightly. This is also a really intense exercise for your shoulders. It can help to alternate extending one leg upwards at a time in order to take some of the pressure off your shoulders if it starts to get too intense.

Grace Kavadlo Handstands

Face-the-Wall Handstand
Similar to the L-to-the-wall, begin in a push-up position with your heels against the wall, then start crawling your feet up and walking your hands in. This time, the idea is to get the entire front of your body pressed flat against the wall. When you reach the wall, tuck your chin to your chest, tense your glutes, squeeze your quads, point your toes and engage your abs. Think about lengthening your body as much as possible by actively shrugging your shoulders, pressing into the ground and reaching your legs upward.

You can ease into this variation by walking in as close to the wall as you feel comfortable and then walking back out. Gradually you will build the strength and confidence to bring your hands all the way the wall.

Grace Kavadlo Handstands

Upside Down and Inside Out
From an overall health perspective, inversions have a lot more to offer than strength or skill alone. Due to the effect gravity has on the body, practicing inversion holds can be beneficial for the circulatory, lymphatic, and nervous systems. Your body has many valves and veins all transporting lymph fluid, nutrients, and blood constantly. By inverting yourself, you are in essence helping these natural processes by encouraging venous return from the lower extremities back to your heart, brain, lungs, and lymph nodes. As such, there are many folks in the yoga community who consider handstands to be the fountain of youth, so don’t neglect them!

See you on the flip-side, ninjas!

Grace Kavadlo Handstands

****

Grace Kavadlo is a PCC Team Leader, personal trainer and group exercise instructor located in New York City. She is a columnist for Bodybuilding.com and can be seen in several Dragon Door books, including Coach Wade’s Explosive Calisthenics. For more information about Grace, check out her website, www.DieselGrace.com

Filed Under: Progressive Calisthenics, Tutorial Tagged With: calisthenics, Grace Kavadlo, handstand, handstand tutorial, handstands, how to, wall handstand variations, wall handstands

Side Crow and Crooks Pose

November 3, 2015 By Grace Kavadlo 19 Comments

GraceYogaLead-Pic

The world of hand balancing encompasses much more than just the traditional handstand. Moves like the side crow and crooks pose are excellent additions to your Progressive Calisthenics routine. These hand balancing skills cultivate synergy in the body between the upper and lower extremities and help foster improved body awareness. Although they may seem like just a party trick, they are actually a great way to build strength throughout your entire body, especially in areas like our hands, wrists and fingers, which are often overlooked in strength training. They can also be a great way to work on mobility.

Beyond the physical benefits, adding hand balancing to your regimen can be a wonderful way to hone your powers of concentration. We live in a culture where people drown out the sounds of their own breathing during training with iPods and other distractions. Learning the crooks pose requires you to be completely present and focused. This practice of mindfulness and attention can really extend into every aspect of our lives and allow us to learn to live fully in every moment.

Is this dude even working out?

The side crow and crooks pose are eye-catching exercises that will challenge your mental fortitude, physical strength and flexibility. These moves are a beautiful expression of what it means to be mobile, strong, and healthy! Before you attempt either of one, however, you should have a solid grasp on the basic crow pose. If you need to work on getting into your crow, check out my tutorial here.

Once you have gotten comfortable in the crow pose, we can continue using the system of progressive calisthenics to systematically break down these more advanced variations and help you along the journey.

GraceYoga3

Let’s Get Twisted
Since both the side crow and crooks pose involve intense trunk rotation, we will start off with a stretch to prep the lateral sides of your body. Sit on the ground with your left leg extended and cross your right leg over. Begin to twist your entire torso to the right side, placing your right hand on the ground behind you to help extend your spine upwards. Place your left elbow outside your right knee to actively push your body deeper into the twist. You should feel this stretch around your lower back, sides and midsection. Repeat on both sides.

Al Kavadlo Side Crow

The Side Crow
For many people, the side crow will be a helpful lead-up step before attempting crooks pose. Start in a squat position, then twist to one side and place your arms on the outside of one leg with your hands on the ground. Similar to crow pose, your elbows should bend back toward your legs, except this time making contact with only one leg and at two points: near your knee and the other by your hip. Lift your hips up and shift all your weight onto your hands, with your knees stacked together.

If you do not have the mobility to do the above variation, you will start by placing your hands further apart and only use one elbow as a contact point. Try to line up your elbow mid-thigh, before lifting your hips and shifting your weight onto your hand. Make sure to practice the balance on both sides!

Bow & Arrow Stretch
After you’ve conquered the side crow, you are ready for the crooks pose. Once again, we will start off with a preparatory stretch. Begin in a seated position with both legs extended. With your right hand reach for the toes of your right foot and pull your leg back, bending your knee. Wrap your leg around your shoulder and resist the urge to round your spine forward by propping yourself up with your left hand. Breathe easy and hold the position for 30 seconds before repeating on the opposite side.

GraceYoga5

Floating Bow & Arrow
This move is similar to an L-Sit in that it requires monster wrist, triceps and core strength to perform. Begin by getting into your bow and arrow stretch, but place both hands on the ground at your sides. Tense your abs and lock out your elbows to lift your butt off the ground. Actively point your toes and lean slightly forward in order to stay afloat.

Crooks Pose
Now it’s time to put it all together! From the floating bow and arrow, cross your ankles, bend your elbows and lean forward. Extend your legs to the side where you threaded your leg through and squeeze your knees together to create tension throughout the entire body.

AlYoga6

Often our own minds create a blockage as a way to shield us from the unknown. Practicing hand balancing gives you the opportunity to move past some of these self-imposed limitations. As Bruce Lee once said: “If you always put limits on everything you do, physical or anything else. It will spread into your work and into your life. There are no limits. There are only plateaus, and you must not stay there, you must go beyond them.”

Thanks for joining me on this journey into hand-balancing. Til next time, peace, love and ninja kicks!

***

Grace Kavadlo, PCC, HKC is a personal trainer and group exercise instructor located in New York City. She is a columnist for Bodybuilding.com and can be seen in several Dragon Door books, including Coach Wade’s Explosive Calisthenics. For more information about Grace, check out her website, www.DieselGrace.com

Filed Under: Tutorial Tagged With: crooks pose, Grace Kavadlo, hand balancing, side crow, yoga

Primary Sidebar

Featured Products

previous arrow
GetStrongBookCover
ConvictConditioningBookCover
StreetWorkoutBookCover
ExplosiveCalisthenicsBookCover
StrengthRulesBookCover
next arrow

Categories

Progressive Calisthenics Certification Logo
Click here for more information or to register for the PCC workshop

Get Strong Workouts TriadXP App
Get Strong Workouts App

Recent Posts

  • Top 5 Reasons Why an In-Person Workshop is the Best Way to Supercharge Your Training
  • HYBRID STRENGTH TRAINING IS HERE!
  • My Calisthenics Journey to the PCC
  • The Handstand Press: Complete Control Through the Handstand
  • The Get Strong App is Here!

Dragon Door Publications

Dragon Door Publications

Recent Comments

  • bross dandon on The Case for Curved Handstands
  • Johnny Flewellen Jr. on Strength for Life
  • Dan Earthquake on The Pursuit of the Daily Minimum
  • Johnny Flewellen Jr. on The Pursuit of the Daily Minimum
  • Johnny Flewellen Jr. on Yoga, Calisthenics and the Journey of a Lifetime
FOLLOW US ON TWITTER!

Copyright © 2025

Dragon Door Publications / The author(s) and publisher of this material are not responsible in any manner whatsoever for any injury that may occur through following the instructions or opinions contained in this material. The activities, physical and otherwise, described herein for informational purposes only, may be too strenuous or dangerous for some people, and the reader(s) should consult a physician before engaging in them.