• Skip to main content
  • Skip to primary sidebar
  • Home
  • Contributors
  • Resources
    • Q&A with Paul “Coach” Wade
  • Workshops
  • Products
  • Forums
  • Articles
  • Blogs
    • RKC Blog
    • Strong Medicine Blog
  • Archives

PCC Blog

Progressive Calisthenics - The Official Blog for the PCC Community

Matt Beecroft

Organizing a Group Calisthenics Class

February 28, 2017 By Matt Beecroft 4 Comments

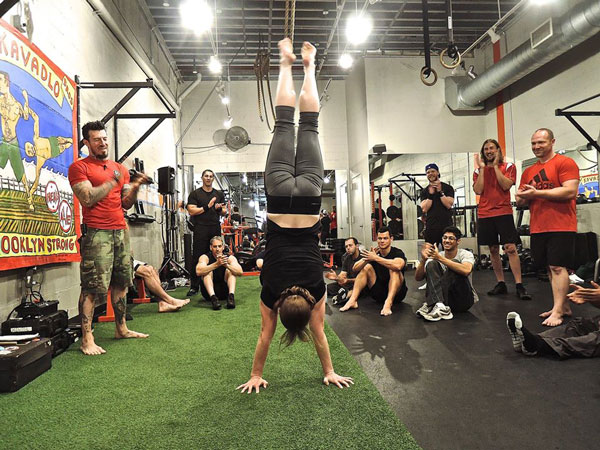
Al Kavadlo Leading Group Fitness
I can still remember my anxiety as I was about to teach my first Progressive Calisthenics class. I found it challenging to train myself, let alone a group of people with varying backgrounds, limitations (both psychological and physical) and fitness levels!

Perhaps you have recently qualified at a PCC, love calisthenics and are looking to share your passion in a group environment. Good luck, my PCC brothers and sisters; teaching calisthenics in a group setting can be tough! Given that most classes are 60 minutes long, devising a system to help people learn new skills and improve their fitness as expediently as possible can be very challenging.

The truth is there is no one “correct way” to structure a calisthenics workout, but there are some basic guidelines and principles that you can follow to ensure your classes are safe, fun and effective.

Here is a 5-step basic blueprint that I use for a one hour class that I hope will help you teach calisthenics in an intelligent and organic way.

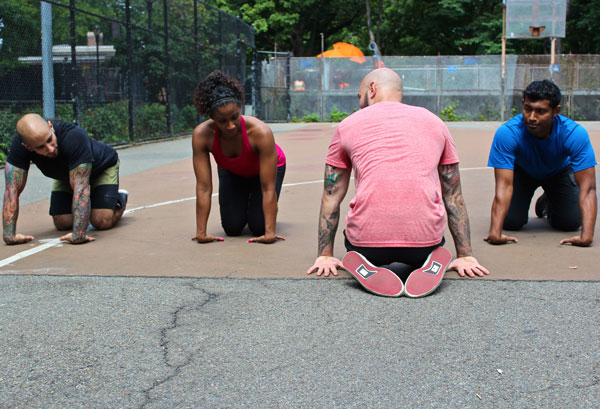
The Warm-up

The warm-up serves a number of purposes, yet is often overlooked as a valuable use of time. It’s a great opportunity to check in with the body and the mind to prepare for training. The overall goals of the warm up are to increase body temperature and blood flow, making the muscles more elastic and pliable, and to increase the ROM of joints and start to “dial everything in” for the workout that is to follow.

The warm up should include mobility and flexibility exercises, including thoracic/shoulder, hip and ankle mobility and often the wrist, hands and forearms to prepare the joints and connective tissues for what is to follow.

The warm-up can also include “activation” sets, which involve a few reps of regressions leading up to the primary exercises you are about to practice. For example, you might use a few sets of squats and lunges to warm before working on single leg squat progressions.

Approximate time = 10 minutes
Al Kavadlo Leading Group Fitness
Strength First?

If you are working with beginners, building a proper foundation of strength needs to be your first priority.

For newcomers, following a structured set and rep scheme just like traditional strength training is paramount. Mastering basics like push-ups, pull-ups, squats and lunge variations are the bread and butter of calisthenics training. They have crossover into everything else.

Furthermore, if your students are planning to eventually work up to advanced holds such as bar levers, flags, or freestanding handstands, it is imperative to be looking to increase their time on more rudimentary holds. This means spending time on things like planks, frog stands and elbow lever progressions. The training needs to be structured in order to move to the next progression. A foundation of strength is crucial to achieve those higher level skills.

Or Skills First…

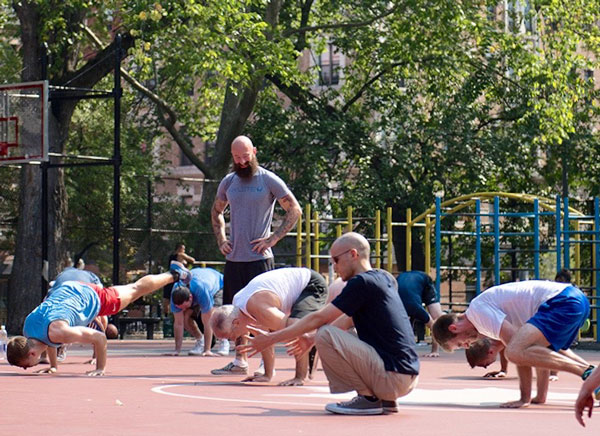
If your students have worked their fundamentals and strength for a while already, then the exercise that requires the highest skill, balance or power demand should be practiced when they are the freshest.  Or alternatively, whatever is your highest priority should come first.

If your focus is something like muscle-ups, handstands or elbow levers, then trying to practice them after fatiguing your upper body will likely leave you too tired.

Once you have finished your “skills practice” at a particular progression, you can then do some “work sets” of reps/holds of some of related regressions or move onto other exercises.

Approximate time = 30 minutes
Al Kavadlo Leading Group Fitness
Finishers and Conditioning

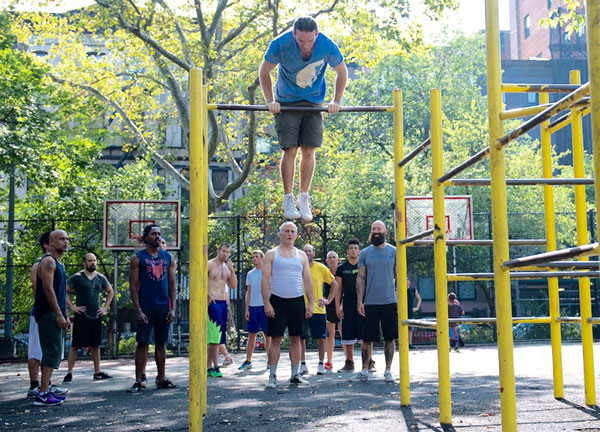
I am a big fan of finishers and conditioning work at the end of sessions. Finishers and conditioning can be loads of fun and add variety to sessions whilst being very effective for skill and strength transfer. Exercises like bear crawls, inchworms, crab walks, frogger variations, etc. are all great choices. I also like to turn these types of movements into games whenever possible. Something like “crab walk soccer” can be a nice way to make your students forget how hard they are working because they are having fun!

Approximate time = 10 minutes

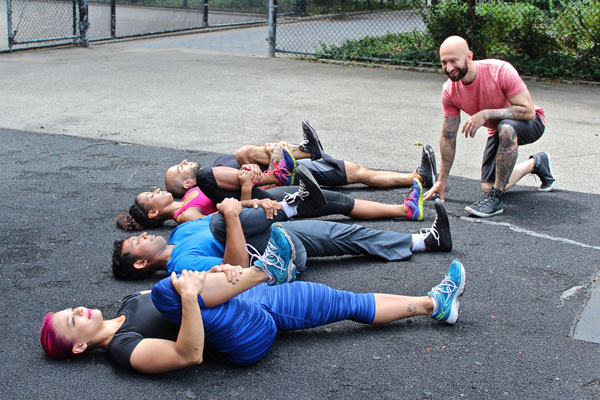
Cool Down

Not unlike the warm-up, the cool down is often glossed over by many people. It’s a great time to work those flexibility restrictions that might be inhibiting your practice as well as letting your body know that the workout is winding down and it’s time to shift into recovery mode. In addition to stretching, you cool down may consist of joint mobility, diaphragmatic breathing exercises and other body awareness drills.

Approximate time 5-10 minutes
Al Kavadlo Leading Group Fitness

Going out into the world to teach progressive calisthenics can be a daunting task. I’ve been doing it for a while now and still find it challenging. However, it is a lot of fun and highly rewarding to see your clients making progress.

Goals are important, but the process is even more important. Hopefully this basic blueprint will give you a structured approach to your classes while giving you ample scope to make them fun and effective.

Drop me a line a let me know how it goes!

****

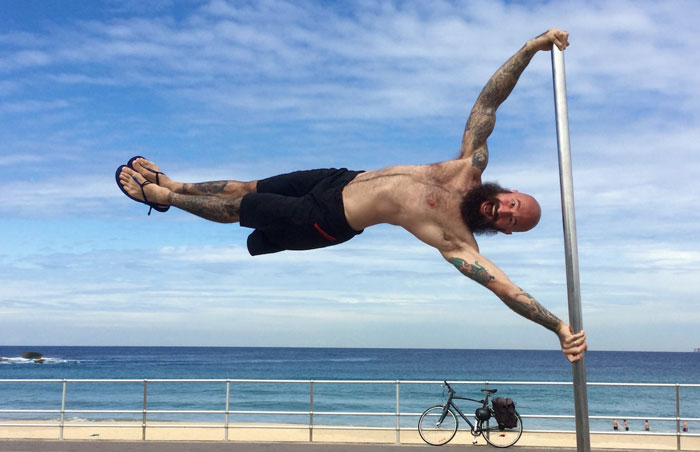
Matthew Beecroft is a PCC Team Leader, Senior RKC, and CK-FMS certified instructor. He is also a GFM and Animal Flow instructor and Expert Level 2 instructor with Krav Maga Global and a Muay Thai coach who has trained amateur and professional Muay Thai champions. He can be contacted through his website www.realitysdc.com.au or his Facebook page facebook.com/MeetLifeHeadOn
 

Filed Under: Progressive Calisthenics, Tutorial Tagged With: calisthenics group training, group fitness, how to lead a group class, Matt Beecroft, PCC, progressive calisthenics

Five Ways to Gauge Your Calisthenics Progress

December 20, 2016 By Matt Beecroft 6 Comments

Calisthenics Progress by Matt Beecroft

When someone asks me how long will it take to learn an elbow lever, human flag, handstand or any other intermediate/advanced level calisthenics move, my response is always, “It will take as long as it needs to.”

For the most part, if your only concern is how long it will take to achieve your goal, I believe you are in it for the wrong reasons. Immersing yourself in a healthy daily practice of self-improvement is really where the gold is. Not the destination—although it is totally sweet when you do get there.

When it comes to learning calisthenics, everyone has different athletic backgrounds and everyone learns at their own pace. It also depends on the coaching and the cues that are used.

For example there is no “one” way to learn a handstand. There is no secret or holy grail. Some of the best hand balancers are self-taught, and while their methods may have worked for them, they may not work for you or your athletes.

Most gymnastic coaches will swear to you that their way is the best way and yet they all differ in their approaches. The background of the trainer, whether it is gymnastics, calisthenics, yoga, circus or b-boy will usually determine how the handstand is taught. So the cues that coaches use, and how that resonates with the student can heavily influence the learning outcome.

So the, “How long will it take me?” question is an impossible one to answer.

I’ve also been blown away by my own assumptions. Some people, because of their athletic background, I have assumed would progress very quickly, and have not, and others with no athletic background, have surpassed my expectations very quickly.

Such is the complex nature of skill training and calisthenics.

Advanced calisthenics exercises are skills, and skill work does not always progress in a sets-and-reps mentality, as other strength based training often does. That approach can work with early progressions, but as you get closer to your end point—be it a handstand, human flag, pistol squat or other such feat—the training needs to be more organic.

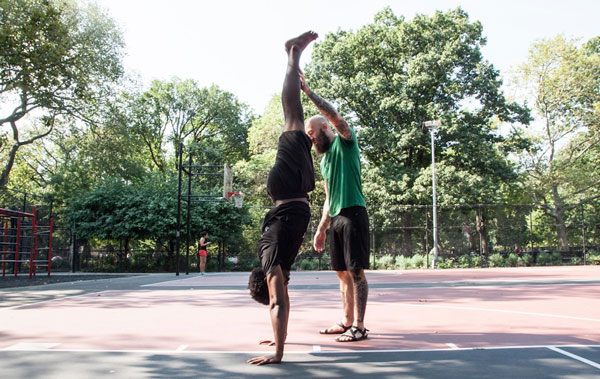
Al assisting handstand

So once you can kick up into a handstand, or perform any other calisthenics position, exercise or hold, how do you know that you are improving?

As you progress there are subtle things that you will observe. It’s not just whether you can hold the progression or do a number of repetitions that is important as you work towards mastery. And sometimes it can be really hard to know if you are improving or not.

Here are five questions to ask yourself in any of your exercises in order to gauge your progress:

  1. How does it feel?

First, how hard do you feel like you are working on a scale of 1-10? This is known as the rate of perceived exertion (or the Borg scale or RPE) and ultimately we would like it to be a 6 or lower (10 being the highest). In other words, the hold or repetitions should feel “moderately easy” before you move onto a harder progression.

Similarly, I believe a progression generally isn’t achieved unless the participants perceived exertion level is a 7 or lower on a scale of 1 to 10, while their rate of perceived technique is a 7 or higher. And a rate of perceived discomfort (10 being agony and 1 being insignificant annoyance) should be no higher than a 3 out of 10, and there should certainly be no pain. Once all these things are roughly in line, then we are ready to move along to the next level as some proficiency has been achieved. If you feel you have plateaued at a certain number of reps or time for a hold, look for these three parameters. You are probably improving and didn’t even know it!

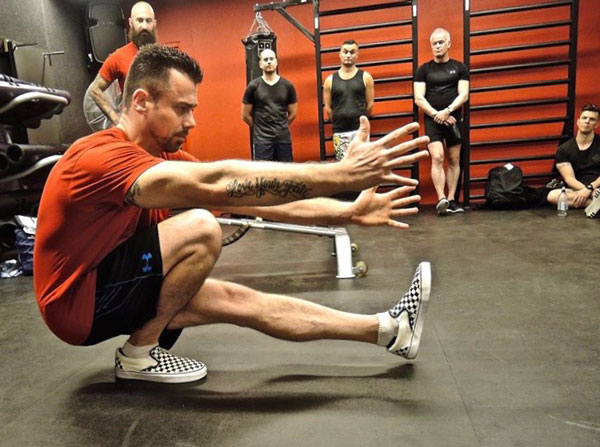
Matt Beecroft pistol squat

  1. How is your breathing?

Here’s my best advice on breathing: don’t stop! Breathing is a big indicator of a person’s overall comfort level. When a participant is in fear or working at the edge of their threshold, they will typically inhale and hold their breath, bracing the body. This is a high threshold training strategy and it’s not typically sustainable for longer sets or holds. When breathing is synchronous with the movement performed, we have moved into a higher level and are one step closer to mastery of an exercise. If your breathing is comfortable and controlled, you are winning!

  1. Are you in control?

Calisthenics is all about being able to control your body. If we look at the example of the handstand, many people are very heavy whilst kicking up and coming down from the wall. Being able to come into a position and out of a position softly, slowly and with ease shows true movement competency. When learning the handstand, kicking up against the wall too hard teaches you to over-kick, which will make learning the freestanding handstand more difficult.

As skills progress, your body awareness improves as does your awareness of your surroundings. This may mean your ability to gauge your distance from a wall correctly, or a fellow practitioner (scissor kicking someone in the head while coming down from a handstand is never a good move.) So if your calisthenics are becoming more controlled, and you are becoming more aware of your body and your training environment, then you are certainly improving.

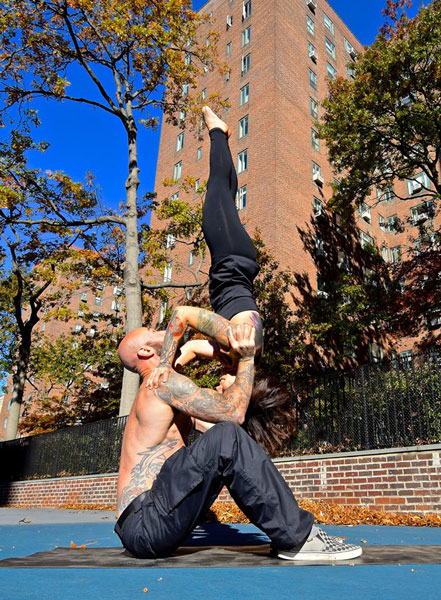
partner headstand

  1. Do you need a lot of preparation time or recovery?

What you will notice is that as you continue to work your calisthenics, the soreness and stiffness you once experienced isn’t the same. The body is an adaptive survival machine and it gets efficient quite quickly, so recovery from exercises you are used to doing is more expedient.

Secondly, as our skills improve we need less time to prepare the body. It has always amazed me that masters can often just go into a position, hold or perform repetitions or display amazing skill with no prior preparation – the body just “knows” it. That’s not to say they don’t warm up or do preparation work but the skill is performed on command. So as you progress in your training you will feel that you can move into a hold or do a certain number of reps when you feel like it without all the preparation, and depending on what your training entails, your recovery will be quicker too. This means you are making progress!

  1. Is it repeatable?

To go back to our example of the handstand, being able to hold a consistent and repeatable 10 second handstand is what I consider actually being able to do a handstand. Not a fluke hold for a second or two depending on which direction the wind is blowing.

An “on command” and consistently repeatable 30 second freestanding handstand is considered a benchmark before moving onto more advanced balancing variations by many professional hand balancers. This is considered to be an amateur balancer!

Some days or weeks you will feel like you are not progressing at all, and then others you will feel like you are really getting somewhere. There are going to be lots of peaks and valleys that will be part of your journey. It is all just feedback. Please don’t worry about failure with your training. Often when you feel you aren’t getting anywhere or you have plateaued, is often where you are learning most. Just keep on turning up. It is all about the positive mental attitude.

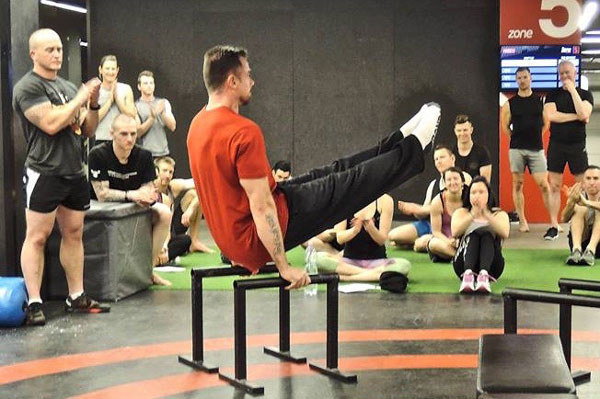
Matt Beecroft L-sit

If you look for these markers of improvement listed above, you may be more dialed into the subtleties of your training, which in itself is a form of growth. Progress is not always set, rep or time orientated. It’s not always about the numbers!

There will be light bulb moments in your training but the real magic is in the small improvements from day to day, week to week and month to month. Learning calisthenics is never a linear progression. If you are like me, longevity is the ultimate goal and this is measured in years, not workouts.


****

Matthew Beecroft is a PCC Team Leader, Senior RKC, and CK-FMS certified instructor. He is also a GFM and Animal Flow instructor and Expert Level 2 instructor with Krav Maga Global and a Muay Thai coach who has trained amateur and professional Muay Thai champions. He can be contacted through his website www.realitysdc.com.au or his Facebook page facebook.com/MeetLifeHeadOn
Filed Under: Motivation and Goals, Progressive Calisthenics Tagged With: calisthenics, calisthenics progress, Convict Conditioning, goals, Matt Beecroft, measuring progress, PCC, progressive calisthenics

Five Ways to Fast Track Your Freestanding Handstand

November 22, 2016 By Matt Beecroft 18 Comments

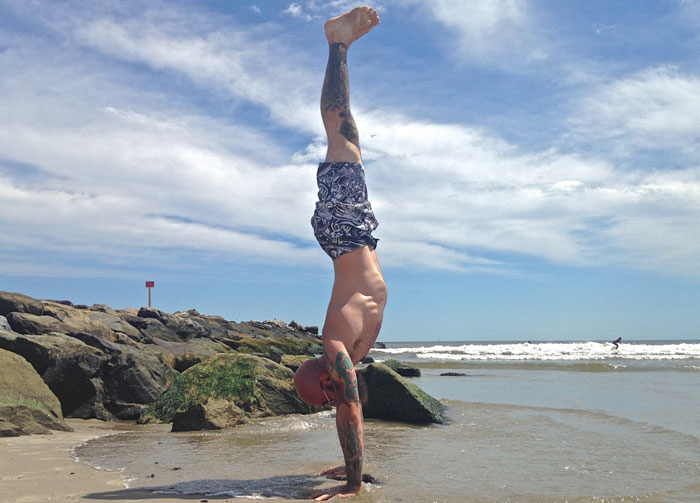
Al Kavadlo handstand beach

As an adult you’ve decided to embark on an inversion and hand balancing journey. Seriously, are you crazy?

If you think about it, children with amazing mobility, breathing, reflexive stability and perfect natural movement still can take 18 months to learn how to stand on their feet. And you have decided that you want to balance on your hands!  Are you out of your mind?

Read ahead, because I am too.

At 40 something years of age, 6 foot 3 inches and 90 kilograms (hardly genetically blessed to do anything in the calisthenics or gymnastics arena), I decided to do the same thing. Yep, I looked at what someone else was doing, and said to myself, “that looks like fun, if they can do it, I can.” That was on my first Progressive Calisthenics Certification or PCC in the US back in 2013 with the infectious spirit and great vibes of Al and Danny Kavadlo. I was hooked.

But little did I know of the journey I had decided to undertake.

Unlike a lot of other adults who embark on achieving the freestanding handstand, I wasn’t exposed to gymnastics as a kid, nor did I have friends into gymnastics. I also wasn’t a kid that spent time cartwheeling with my mates in the park. So let’s just say inversions and hand balancing were completely foreign to me until I started playing around with my first crow pose at the PCC in 2013.

Zip, zero, nothing, nada.

What do I love about the handstand?  Everything gets better from learning how to handstand.

Whilst nailing your freestanding handstand may be the long term goal (and it’s so sweet when you finally get there!), the journey is where the real gold is. Improved strength and mobility in the hands, wrists, shoulders and thoracic spine, as well as improved proprioception are just some of the physical attributes developed.

The mental aspects however, were more surprising to me. Overcoming my fears of falling, being upside down or simply self-preservation were surprising, considering my background as an Expert Level 2 Krav Maga instructor and Muay Thai coach. I think I was more comfortable being punched in the head rather than landing on it. It also taught me how impatient I was, and a lot about perseverance and persistence. Some days you will feel great and find your balance without much trouble. Other days, it just won’t be there. The handstand can be an elusive beast.  The handstand was a reminder to me about attitude, and how just turning up and doing the work is where it’s at.

Though I could write further about my journey, what’s more important is that I have been successful in helping others, some in their forties as well, achieve their first handstands in a relatively short time. Repeatable, expedited results with others as a coach, is what I endeavor to achieve

So here are 5 tips that will help you fast track your way to your first freestanding handstand.

1. Volume: Do the work

It maybe not what you want to read, but you have to do the work. Regardless of the discipline – calisthenics, circus, yoga or gymnastics, the best hand balancers do it most days of the week. Hand balancing is a very specialized skill. Regardless of my time spent with the Kavadlos on my handstand journey or engrossing myself in material from other experts in the field, they all advocate the same thing: volume. Many serious advocates will say to practice 5 days a week, though I’ve found that following a structured program just 3 days per week for an hour had a few of my students hitting their freestanding handstands in just 6 months with no prior experience. Repetition is your teacher. Even if it’s just cranking out a crow pose on the office floor for a few minutes, or the kitchen bench a couple of times per day, you need to spend more time, you know, balancing on your hands if you want to get good at balancing on your hands.

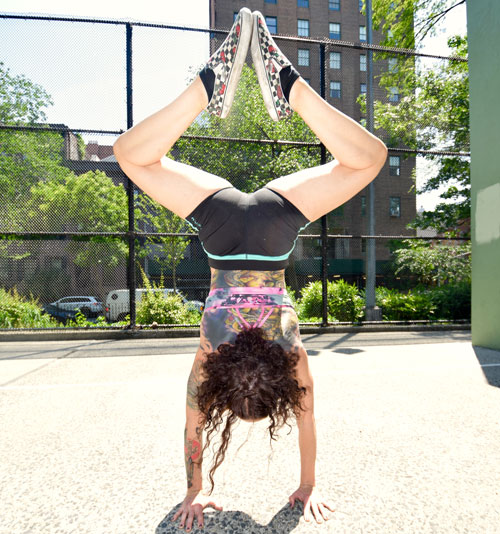
Grace Kavadlo Handstand variant

2. The Wrists, Hands and Fingers

While it would seem really obvious as you are putting your entire body weight through, and making fine adjustments with your hands, wrists and fingers, I am still surprised at the number of people who don’t spend enough time looking after these areas. Adequate time must be spent mobilizing and strengthening these areas properly. The most common complaint when working any handbalancing is soreness of the wrists, and though it will certainly take time for your joints, muscles, tendons and ligaments to adjust to the load, you still need to spend time looking after those areas every session.

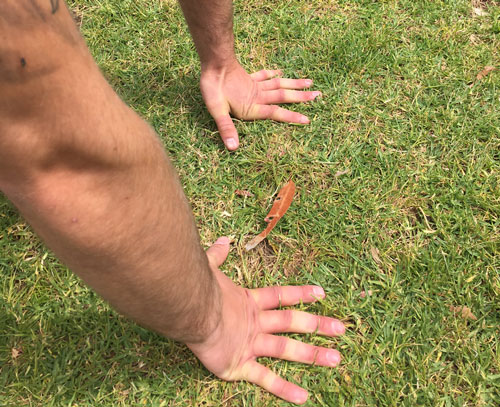
For me personally, the “first knuckle push-up” is one of the most important drills in my warm up.  Having the fingers spread, index fingers pointing straight ahead, shoulders above the wrists and in a kneeling or push-up position, raise the heel of the palm while keeping the knuckles and fingers on the ground, with a 4 second lowering eccentric on each rep for 3 sets of 10-20 reps. And if you have a problem getting good ROM because your knuckles are all banged up from hitting stuff, it can be assisted by using your other hand to anchor or press your fingers and knuckles down whilst you raise the heel of the palm off the floor.

handstandhandplacement3

3. Face the Wall

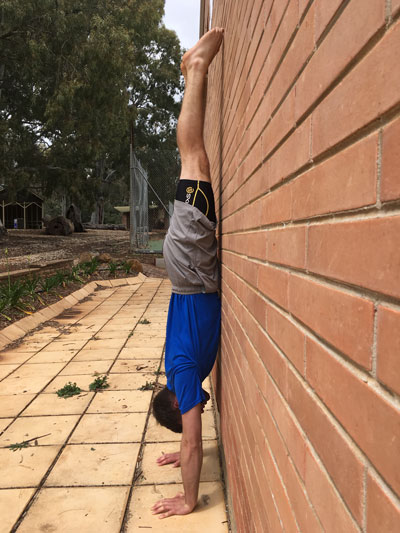
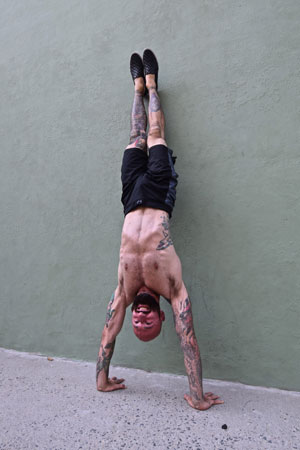
Facing the wall handstands are an absolute necessity if you want to achieve a great handstand. While facing away from the wall also has its advantages, facing the wall helps to achieve a straighter looking handstand and a nicer “line” or shape. About 50 years ago circus performers and strongmen performed mainly “banana back” or arched back handstands, but with the advent of modern gymnastics aesthetics, artistry and scoring criteria, it’s meant that the straight line handstand with the toes pointed is often the preferred method. Try working up to 5 sets of 45s-60s holds thinking about your “shape” or “line”. That usually means hands a few inches from the wall, shoulders open, the rib cage pulled down to a posteriorly rotated pelvis with the chest and hips against the wall.

Patrick Madigan handstand towards wall

4. Don’t Face the Wall

I am totally going to contradict myself both with this point and the next, but hear me out. One of the few drills that will really help you start to build the strength and motor control required in the hands is the heel pull. This is done facing away from the wall with your hands roughly a foot away. Gently kick up to rest against the wall, then using only your fingers, hands and forearms, pull your entire body off the wall, without using your feet at all. This is the most important point – do not use your feet to push off. Besides getting an amazing pump through the hands and forearms, it will also show you where you are leaking force through your body, and require you to tighten everything up into a straight line.

When done correctly, your entire body will float away from the wall as one unit, and pull you into your handstand. This is a crucial exercise as it teaches you that you cannot use your feet to push against anything when you kick up into a freestanding handstand. The only things that can balance and stabilize you are your fingers, wrists and forearms. It is also exciting as many will feel what it is like to achieve their first handstand and it is crucial for building confidence. Work up to 15-20 sets holding your handstand for as long as possible each time. Once you hit a few handstands like this, you should feel ready to do a freestanding one!

al kavadlo handstandwall5

5. Get Off the Wall

Yes, it’s another contradiction, but the wall and its security are also going to be your crux or vice if you don’t get away from it. Right from the beginning, you need to play around with just kicking up into a freestanding handstand. Children usually just play and catch on pretty quick. I know what you are going to say, you aren’t a spring chicken any more. I get it. There is the fear of falling on your head, which is why learning to cartwheel and bail out is really going to help here. The problem with the wall is that it’s there. When people practice against the wall, they usually kick up haphazardly and without any control. The issue with this is that it teaches you the complete opposite of what you need to do when finally kicking up into a freestanding one. When you kick up into a freestanding handstand, it needs to be done softly, gradually, and under control. The problem with a lot of the facing away from the wall handstand work is it teaches the total opposite of this. The wall also becomes a security blanket that people struggle to wean themselves away from. You need to get away from the wall if you ever want to hit your freestanding handstand.

Kirsty Grosart PCC handstand

****

Matthew Beecroft is a PCC Team Leader, Senior RKC, and CK-FMS certified instructor. He is also a GFM and Animal Flow instructor and Expert Level 2 instructor with Krav Maga Global and a Muay Thai coach who has trained amateur and professional Muay Thai champions. He can be contacted through his website www.realitysdc.com.au or his Facebook page facebook.com/MeetLifeHeadOn
Filed Under: Progressive Calisthenics, Tutorial Tagged With: handbalancing, handstand technique, handstand tutorial, handstands, Matt Beecroft, progressive calisthenics

Primary Sidebar

Featured Products

previous arrow
GetStrongBookCover
ConvictConditioningBookCover
StreetWorkoutBookCover
ExplosiveCalisthenicsBookCover
StrengthRulesBookCover
next arrow

Categories

Progressive Calisthenics Certification Logo
Click here for more information or to register for the PCC workshop

Get Strong Workouts TriadXP App
Get Strong Workouts App

Recent Posts

  • Top 5 Reasons Why an In-Person Workshop is the Best Way to Supercharge Your Training
  • HYBRID STRENGTH TRAINING IS HERE!
  • My Calisthenics Journey to the PCC
  • The Handstand Press: Complete Control Through the Handstand
  • The Get Strong App is Here!

Dragon Door Publications

Dragon Door Publications

Recent Comments

  • bross dandon on The Case for Curved Handstands
  • Johnny Flewellen Jr. on Strength for Life
  • Dan Earthquake on The Pursuit of the Daily Minimum
  • Johnny Flewellen Jr. on The Pursuit of the Daily Minimum
  • Johnny Flewellen Jr. on Yoga, Calisthenics and the Journey of a Lifetime
FOLLOW US ON TWITTER!

Copyright © 2025

Dragon Door Publications / The author(s) and publisher of this material are not responsible in any manner whatsoever for any injury that may occur through following the instructions or opinions contained in this material. The activities, physical and otherwise, described herein for informational purposes only, may be too strenuous or dangerous for some people, and the reader(s) should consult a physician before engaging in them.