• Skip to main content
  • Skip to primary sidebar
  • Home
  • Contributors
  • Resources
    • Q&A with Paul “Coach” Wade
  • Workshops
  • Products
  • Forums
  • Articles
  • Blogs
    • RKC Blog
    • Strong Medicine Blog
  • Archives

PCC Blog

Progressive Calisthenics - The Official Blog for the PCC Community

pushup

The 100 Push-Up Program

March 15, 2016 By Al Kavadlo 37 Comments

Al Kavadlo 100 Push-up Challenge

There’s a famous Zen parable that says, “If you want to be a monk, you’ve got to cook a lot of rice.” In other words, you can’t get to the destination without doing the work.

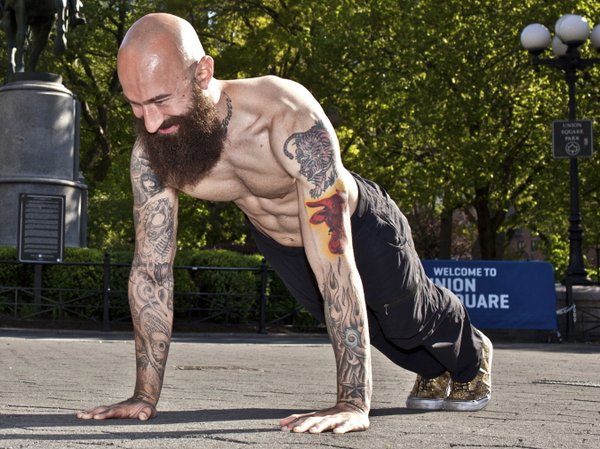
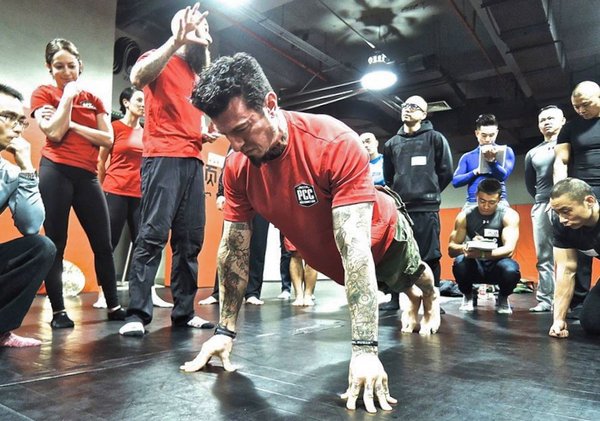
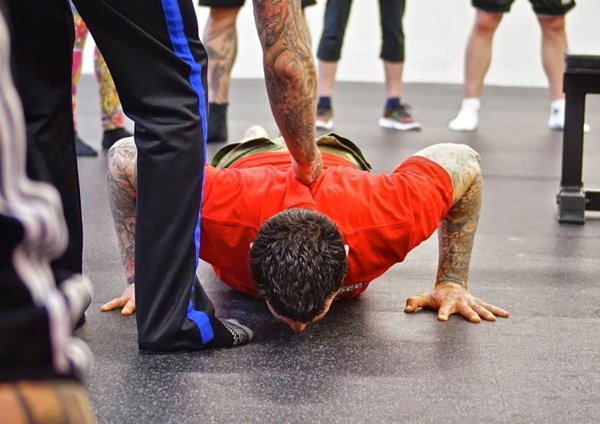
Well if you want to be a PCC, you’ve got to do a lot of push-ups. If you’re into calisthenics, chances are you’re no stranger to this classic exercise, but have you ever attempted 100 of them in a single session?

This 100 Push-Up Program consists of doing just that, no matter how many sets it takes. Even if it means you are doing sets of just one rep by the end. For example, you might start out with a set of 20, followed by two sets of 15, then do a couple sets of 10, before finishing with several sets of just 5 reps or less. You are allowed as long of a break in between sets as you need. Focus on keeping your form clean and avoid going to failure.

Completing all 100 reps could take a while at first, but with repeated efforts the amount of sets required to reach that target should start to decrease. Eventually you might even complete all 100 reps in a single unbroken set. Just be careful not to sacrifice good form to get there.

Furthermore, if you feel that standard push-ups are not challenging enough, choose a more difficult variation. Fingertip push-ups, close push-ups or archer push-ups are all viable options. Conversely, you can adjust this workout for a beginner by using knee push-ups or push-ups with the hands elevated.

If you feel standard push-ups are not challenging enough, choose a harder variation.

Here are a few more things to keep in mind:

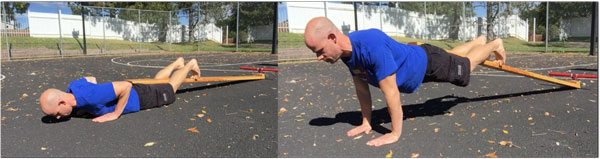
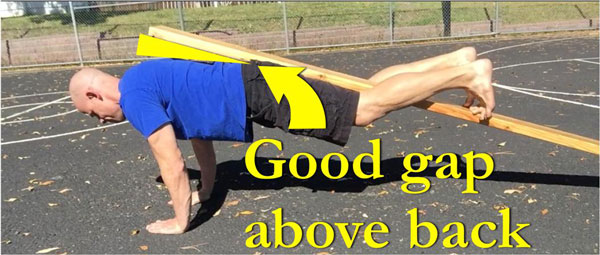
– A full push-up requires a minimum of 90 degrees of flexion along the outside of the elbow at the bottom of the rep, and a full extension of the arms at the top.

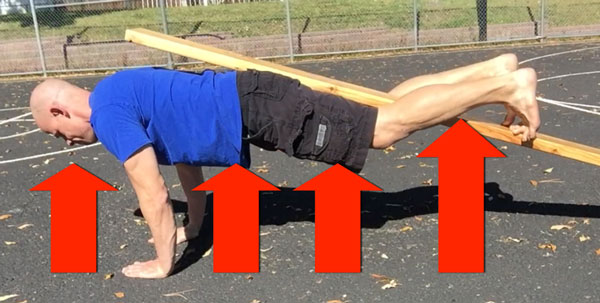
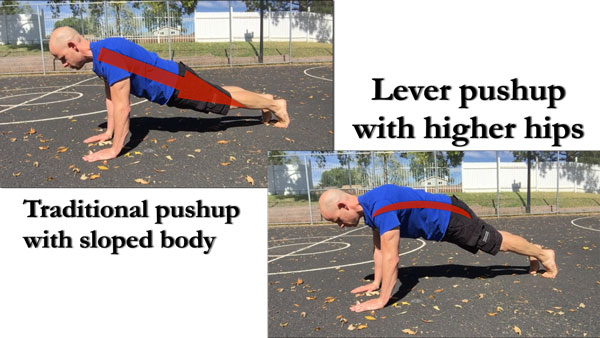
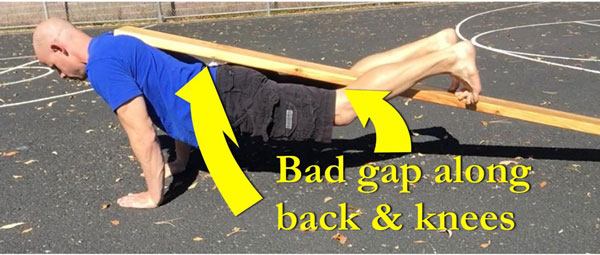
– Make sure you maintain a straight line from your heels to the back of your head throughout the entire range of motion.

– Keep your elbows relatively close to your body; do not flare them out to the sides.

– Your shoulder-blades should come together at the bottom of your push-up, but make sure to spread them apart at the top to get the most from each rep.

Danny Kavadlo Demonstrating Push-up form

Don’t feel constrained to using this training tactic with push-ups only. This simple program is a fantastic way to increase your strength and endurance on any basic calisthenics exercise: squats, pull-ups, dips, etc. are all fair game. Advanced trainees can even use this template for more difficult exercises like muscle-ups and pistol squats.

At first I would recommend only doing this once a week per body part, as it can be a bit of a shock to your system. Eventually, however, you can condition yourself to doing this type of thing regularly. When 100 is no longer a challenging number, pick a harder exercise or raise the total reps to 200 or more. Additionally, if 100 reps is just not realistic for you right now, then pick a smaller number (maybe 50?) and build up from there.

Programming your workout does not have to be complicated. No matter your fitness level, this infinitely scalable template is a great way to increase strength and endurance on any movement. Just remember, you have to train consistently to get results. You don’t become a monk without making a lot of rice.

***

Al Kavadlo is the lead instructor for Dragon Door’s Progressive Calisthenics Certification. Recognized worldwide for his amazing bodyweight feats of strength as well as his unique coaching style, Al is the author of five books, including Raising The Bar: The Definitive Guide to Pull-up Bar Calisthenics and Pushing The Limits! Total Body Strength With No Equipment. Read more about Al on his website:www.AlKavadlo.com.

Filed Under: Motivation and Goals, Progressive Calisthenics Tagged With: 100 push up challenge, Al Kavadlo, Al Kavadlo Push Up Challenge, press-up, press-ups, push up challenge, push-up, push-ups, pushup

The Push-Up Lever

November 17, 2015 By Matt Schifferle 36 Comments

Push Up Lever Lead

Give me a lever, and a place to lay, and I shall make crazy gains.
– Archimedes (probably)

There are a million reasons why I love calisthenics. Aside from the obvious, calisthenics has allowed me to unleash my inner mad scientist and build a variety of “devices.” It’s amazing what you can create with a little imagination and a few trips to the hardware store.

Most of my designs are home made versions of commercially available products such as suspension straps and calf blocks, but one of my favorites is a unique way to load extra resistance onto a standard push-up that I call the Push-up Lever.

PushUpLever
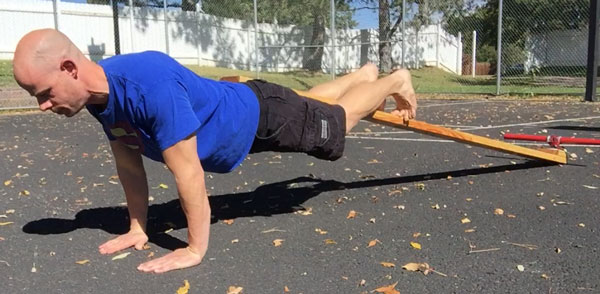
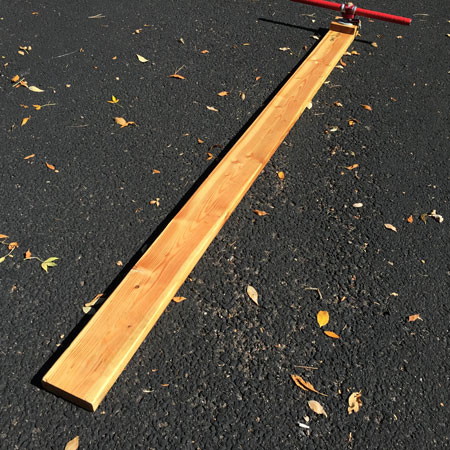
The struggle to load the push-up…

She may not look like much, but that simple plank of wood solves many issues that have plagued anyone who’s tried to add resistance to a standard push-up.

In the time of 10-15 B.C. (Before Calisthenics) I used to do a lot of weighted bodyweight exercises. Most moves were pretty simple, like using a dip belt to load pull-ups, but push-ups were always a struggle for me. I’ve used weight vests, weighted backpacks, stretch bands and stacking weight plates on my back. While all of these methods did produce more resistance, that hard work came at a steep price. Loading the back or neck produced a lot of stress on the spine which felt unnatural and awkward. In some cases, like with sandbags or plates, the weight was difficult to load on my back, plus the load was always prone to shift forcing me to compromise my technique. Using items like bands or chains caused loading on sensitive pressure points like the neck or lower back.

Weight vests seemed to be an ideal solution, but they were expensive and hard to adjust. Even adjustable weight vests required opening numerous pockets and removing small weights. It just wasn’t worth the hassle so I seldom adjusted the load. Despite my effort, I always felt most methods didn’t work very well. I wanted some serious resistance and a plate on the back or a chain around the neck only brought marginal difficulty.

I figured there had to be a better way, so I started to meditate on the ways progressive calisthenics makes push-ups harder. One of the classic methods is to do push-ups on the knees and then make the lever of the body longer by doing them on the toes. So I asked myself, is it possible to further extend the lever of the body out beyond the toes?

That question was the inspiration the Push-up Lever.

What is a Push-up Lever?

The Push-up Lever is the world’s first complete push-up amplification device. Unlike methods that simply load more resistance on pushing muscles, the push-up lever amplifies all of the technical requirements of the push-up. This includes not only the muscles in the arms and chest, but also improving the strength in the core, hips, and legs. It also requires greater scapular control and even more tension in the feet. Many people claim they are sore in their abs and hips the next day after trying it for the first time.

The beauty of the lever is it doesn’t place any excess weight or pressure on your spine, but instead places it on your hips, which can handle the load in a much safer way and with far more control. It’s also something you can easily adjust by sliding where your hips are on the lever. The more you extend the lever out beyond your toe,s the more difficult it makes your push-up.

The further you slide the board up your hips the easier the move becomes!

Not only is the lever easier to use and adjust, but it can challenge even the strongest athletes. This is because it makes the traditional push-up more difficult in 2 ways. It makes the lever of your body longer so you have to work against more resistance. It also makes your whole body lift against gravity. So not only are you working with a mechanical disadvantage but you’re also lifting more of your own body weight.

The Lever forces you to lift your entire body directly against gravity, not just your upper torso.

You can use any long slender object as a push-up lever. Pipes, barbells and even small trees can suffice, but I much prefer a 2 x 4 or a 2×6 plank of wood. Make sure any board you use is straight and not warped. Also look out for splinters. You may wish to sand it down and varnish it for a nice finished look.

How do you use a push-up lever?

Using the push-up lever requires a slightly different technique than a standard push-=up. Since the board rests on your hips, you need to slightly elevate your hips so they are the same height as your shoulders throughout the full range of motion. It can take a little bit of practice to use this type of push-up, however I find it to be natural and very useful.

Push Up Comparison

Also, be sure you have the strength to do your push-ups from the floor up. If you struggle to maintain control of your push up while “kissing the baby” with your chest to the floor, you may want to work on the lower range of your push-up for a few weeks before giving the push-up lever a try.

To use a push-up lever, simply lay down as you would in a push-up position and place the board against your hips at the appropriate length. Wrap your feet around the board so you’re “hugging” it with your thighs and the back of your knees. Some people prefer to use a flat foot against the board but I’ve always found more control through dorsi-flexing my feet and pressing my toes straight into the board.

Push-Up Lever Up and Down

Place your hands in the position you would normally do a push-up with and make your entire body tight, especially your quads, hips, and core. From there, simply do a push-up while pressing your hips up against the board and holding it tight with your legs. The first few times you do this you might feel like you’re sticking your butt up in the air, but I promise you’ll quickly become used to the new position.

Beware of the pressure from the lever pushing your hips down causing your back to sag.

If you’re using the lever at the half point of the board you should have a gap between your upper back and the lever as you push upwards. If the board is touching against your upper back you’ll need to lift your hips up even more to prevent the pressure of the lever going to your spine.

Notice the end of the board against my upper back and the gap between the board and my hips and knees. This places the pressure against my shoulders and causes pressure along the spine.
Here the gap between the board and the upper back is seen while my hips and legs are locked into the lever.

As you lower yourself down to the floor you want to “lead with your chest” so your hips stay at the same height of your shoulders through the full range of motion. Ideally, both your chest and hips should arrive at the ground at the same time and then lift up at the same rate of speed.

Once you have the technique down you can use the push-up lever for any push-up variation you normally use. Wide push-ups, close push-ups, alternating push-ups, medicine ball push-ups, etc.

Want even more resistance?

The classic push-up lever will offer a substantial amount of resistance and challenge to your classic push-ups. If you’re of the masochistic type and want even more resistance you can use the lever to safely add actual weight through the power of leverage.

This is done through adding weight pegs on one end of the lever with a small carabiner to suspend it off of a set of suspension straps or gymnastics rings.

PushUpLeverWeightPegs

In this position, you’ll use the lever backwards as the weight is suspended above and forward of your body. You’ll use the pivot point very close to your feet but still keep the load of the lever on your hips.

Be aware that it won’t take much weight to significantly load your push-ups. Most of the guys I’ve introduced this set up two will use no more than 10 to 15 pounds of weight. I’ve had powerlifters max out through as little as 40 pounds!

These chains only weigh about 12 pounds but they feel like a 225# bench press!

Using the lever in this way is the same as before where you will place yourself underneath and tighten your legs around the lever and push yourself up off the floor while driving your hips into the board.

While the push-up lever can be a great addition to your push-up program, it’s in no way a substitute for good old fashioned progressive calisthenics. When I first discovered it I made the mistake of using the lever for most of my workouts while neglecting the progressive steps towards the one arm push-up. Even though the lever helped me grow much stronger, I still had to fight to rebuild some of the muscle control and coordination I had lost from neglecting the advanced push-up techniques. Ultimately, the push-up lever is just one more tool for your toolbox. It can help you get stronger, but you still have to do the work.

***

Matt Schifferle a.k.a. The Fit Rebel made a switch to calisthenics training 5 years ago in an effort to rehab his weight lifting injuries. Since then he’s been on a personal quest to discover and teach the immense benefits of advanced body weight training. You can find some of his unique bodyweight training methods at RedDeltaProject.com and on his YouTube channel: RedDeltaProject.

Filed Under: Progressive Calisthenics, Tutorial Tagged With: homemade fitness equipment, Matt Schifferle, progressive calisthenics, push-up, Push-Up Lever, pushup, simple gym equipment

Primary Sidebar

Featured Products

previous arrow
GetStrongBookCover
ConvictConditioningBookCover
StreetWorkoutBookCover
ExplosiveCalisthenicsBookCover
StrengthRulesBookCover
next arrow

Categories

Progressive Calisthenics Certification Logo
Click here for more information or to register for the PCC workshop

Get Strong Workouts TriadXP App
Get Strong Workouts App

Recent Posts

  • Top 5 Reasons Why an In-Person Workshop is the Best Way to Supercharge Your Training
  • HYBRID STRENGTH TRAINING IS HERE!
  • My Calisthenics Journey to the PCC
  • The Handstand Press: Complete Control Through the Handstand
  • The Get Strong App is Here!

Dragon Door Publications

Dragon Door Publications

Recent Comments

  • bross dandon on The Case for Curved Handstands
  • Johnny Flewellen Jr. on Strength for Life
  • Dan Earthquake on The Pursuit of the Daily Minimum
  • Johnny Flewellen Jr. on The Pursuit of the Daily Minimum
  • Johnny Flewellen Jr. on Yoga, Calisthenics and the Journey of a Lifetime
FOLLOW US ON TWITTER!

Copyright © 2025

Dragon Door Publications / The author(s) and publisher of this material are not responsible in any manner whatsoever for any injury that may occur through following the instructions or opinions contained in this material. The activities, physical and otherwise, described herein for informational purposes only, may be too strenuous or dangerous for some people, and the reader(s) should consult a physician before engaging in them.