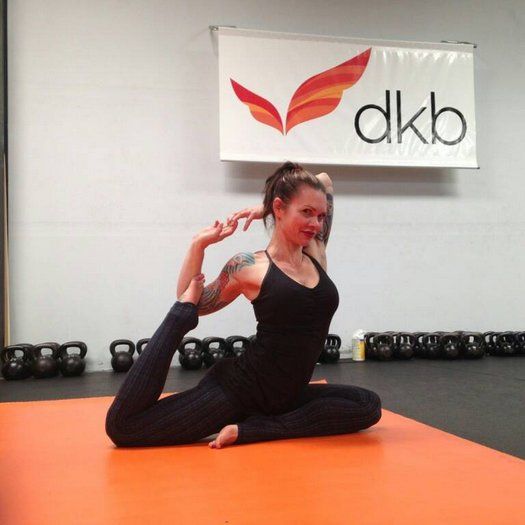
We get frustrated when flexibility work is just an afterthought in an athlete’s program, something done for only a few minutes after the main workout without a lot of thought or effort. The truth is that proper and focused flexibility training especially for your spinal flexibility, can help you get stronger!
Getting stronger from stretching sounds great, doesn’t it?
How is that? One of the ways flexibility work can make you stronger is immediately apparent in terms of form and technique. If you are so bound up in your upper back that you can’t pull your shoulders back in a proper line, your pressing is not going to be as strong, whether it’s pressing a kettlebell or your bodyweight in a handstand.
For instance, Keira remembers when she first started working seriously on her flexibility, that although her shoulders were pretty mobile, her upper back wasn’t. By working on that specifically, she was able to improve her shoulder positioning, and found her pressing strength immediately improved, as well as her hand balancing. Being able to extend correctly at the upper back placed her shoulders in a much better mechanical advantage and she was able to use her strength from a better foundation.
She also recalls one of her teaching sessions with an experienced RKC who was having trouble with her pull-ups. Keira gave her some corrective thoracic mobility exercises and she went from barely doing one, to doing sets of multiple reps. The flexibility work put her in a better position for her pull and she broke out of that plateau. She was working hard and putting a lot of effort in her pulls, but her mobility was holding her back. Once that was freed up, she was able to gain so much more from her efforts.
High tension techniques for strength and power are great. There’s no denying that those techniques work for getting people as strong as possible, but you have to balance out that tension with proper mobility to get the most out of your body. It’s not the act of stretching that will give you strength, but it’s the new options your body will have to get in the best positions to utilize the power and strength that you already have.
A Flexible Spine is a Powerful Spine
There’s a reason the word “backbone” is associated with strength and courage. A strong and flexible back is the foundation for power in the upper body, just as the hips are for the lower body. Thoracic spine (mid-back) mobility affects how well you can use your shoulder girdle and arms, by placing them either in resting positions of weakness or strength.
A kyphotic (flexed) thoracic spine puts your shoulders well forward of the vertical midline of your body and away from your power posture. It’s like trying to push from an unstable platform. You won’t be able to use your strength properly no matter how powerful your muscles.
Most of our full body rotation comes from the thoracic spine, so when you think of rotational work, that involves a great deal of thoracic function. Stiffness here reduces not just your mobility but your ability to apply the proper leveraging and angles for a lot of different strength skills.
Below we will show you comprehensive routines for improving your spinal mobility for forward bending, rotations, and backbending. You’ll probably find that some of the moves here will be easier for you while others will jump out and kick you in the butt! (Guess which ones you should work on more…)
We advise you to go through all of these movements and discover for yourself what you need to improve the most.
Forward Bending Sequence
Forward bending involves spinal joint and hip flexion, and the associated flexibility of the muscles and other soft tissues of the posterior chain. It can be difficult to isolate one specific cause as the key issue if you have tightness. While it’s very easy to say you have tight hamstrings, the fact is that the sensation of tightness in the hamstrings may very well come from an issue in your low back.
This sequence is a demonstration of “covering all the bases,” with a comprehensive approach that can be pared down as you practice and figure out what you need to work on for yourself. A quick run-through of the sequence can give you a baseline as well, and act as a measure for progress.
We begin with a full spinal flexion movement, from your neck all the way to your pelvis. You want to round out as much as possible, then move into full extension (back bending). Though the emphasis is on the forward bend, you’ll want to move into extension as a break in between. It takes the spine through a full range of motion and is a good warmup for the sequence.
In the squat, point your toes out at around 45 degrees. This positioning assists in helping you round out your lower back and go into a posterior pelvic tilt (the pelvis tucking under you). Get your chest between your knees and tuck your chin down, as well as letting your tailbone sink down. Play with rocking back and forth between your toes and your heels. Then sit back and drop down even further. Next, jump into a push-up position. Then drop your hips down to the floor and lift your chest up and out, locking your elbows out if possible. Remember to look up as well, for extension throughout the entire spine.
Do ten repetitions, or more if you feel up to it.
 Next is a standing forward bend, where you bring your hands to one side and keep them on the ground as you stand up. This is a combined forward bend and rotation. Another variant is to sit back into the opposite hip. So if your hands are to the right of your body, you’ll sit back to the left. Spend a couple minutes going between one side and the other.
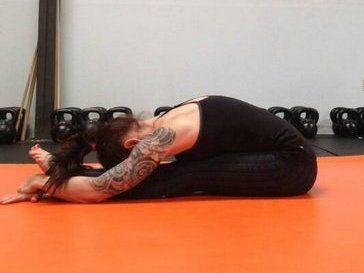
The last move in the forward bending sequence is the seated forward bend. With this move, you’ll add a rotation to the forward bend, just as you did in the standing forward bend. With your legs locked out straight in front of you, pick a side and fold forward at a diagonal on that side. Move in and out of the stretch at least ten times on each side, as well as straight forward, and hold the stretch on one side for upwards of a minute.
Back Bend Preparation
Backbending (spinal extension) can be a very uncomfortable and difficult motion for many people. When you add up all the hours we sit, drive, and are parked in front of the computer, you’ll see how rarely we get into backbending positions during our normal daily activities. So it’s no surprise that a full backbend like the bridge posture can be so daunting.
With this in mind, it helps to go through a thorough preparation before going to the limits of your spinal extension range of motion.
The first emphasis is on the thoracic spine (your midback), and improving extension and rotation in this region. Improving mobility in this part of the spine prevents undue strain on the lower back by distributing the motion throughout the spine rather than all on the lower back. In the first exercise in this video, you’ll see that Keira has to emphasize the motion, not straight down but also forward, as her shoulders are so flexible that she isn’t moving at the spine. When she improves her direction of force, you can see that the stretch is now where it needs to be. Work on this for three sets of one minute each.
Next is thoracic rotation, which is essentially extension at the side of the spine you are rotating towards. This in combination with sidebending takes you to the end-range of the extension motion. So you’ll be working on all the structures that need to be pliable for a good backbend.
Keira is demonstrating two movement variations: the first is up on forearms and knees with the back starting in a neutral position, and the second is more on the back of the upper arm and shoulder with the torso bending to the side. When you try these out, you’ll notice that the second variation places you in a sort of pre-stretched position, so you won’t be moving as far. You may skip the first variation if you are already flexible, but even then, the first one is a good warm-up to do. Play with shifting your weight more onto your knees or your arms to find the best angle for you. Start with three sets of 30 seconds on each side.
Last in this video is a more direct back bend preparation and is adapted from a sequence taught by Jarlo’s Ashtanga yoga teacher, Cathy Louise Broda at http://www.purpleyoga.com. It starts with a kneeling back bend, then works on the hip flexors, quadriceps, and shoulder bridges, to fully warm up and prepare the body for more intense spinal extension postures.
In the kneeling backbend, it is key to elongate and lift the spine as you lean back. Pushing your hips forward and lifting your chest up and back will create this “open” spine, and will prevent a jammed up feeling in the low back. Relaxing your hips and buttocks will be difficult at first, but that is another key to a good backbend. 10 – 12 slow repetitions here will do you well.
Next up are lunge stretches with rotation to the side of the front knee. Adding rotation to this position adds depth to the stretch and is a great concept to employ in almost any exercise. You don’t have to do this in full splits like Keira is showing, just go into as deep a lunge as you are comfortable. The effect is still the same. Do three sets of 30 seconds on each side.
The camel pose in yoga is a backbend with arm support, and can allow you to improve your backbending technique with relatively little strain. With the support of your arms you can stay in the position a bit longer than you could just bending back. Remember the details of pushing your hips and chest away from each other to open up your spine. Work up to three sets of 30 seconds on this posture, as that’s a good amount of time to experience this position.
Following the camel is the kneeling quadriceps stretch. If your knees bother you in this position, you can sit on a small stool or a few cushions to take some pressure off. If this doesn’t help, don’t force it and try a standing or side lying quad stretch instead. You’ll be able to do this later, but don’t hurt your knees and put yourself out of commission. The key point here is to avoid a low back arch. Keep your back flat, so the forces of the stretch will be on the upper thighs and not on your back. Take your time and gradually lean back further when you can do so without pain. Three sets of 30 seconds to a minute will work well here.
Lastly, shoulder bridge practice starts you on a more active backbend and is a great way to get a lot of repetitions in with good technique. You’ll pull all of what you’ve practiced so far in the sequence and work on a smooth spinal curve, relaxed hips, and good mobility and strength in the quads. Choose the shoulder bridge variation that works best for you, and perform a couple sets of 10 repetitions to improve your bridge.
Full Bridge
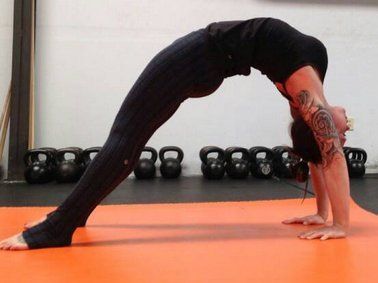
In the full bridge, or “wheel pose” in yoga, you’ll need good flexibility in your shoulders, hips, and the entire back. But you’ll also need proper technique. Important details here are to create that smooth curve and arch, like an archway in a building that can support weight evenly, and simply looks good. You can tell when a person does a bridge and there is a sharp angle in one part of the spine – in that case, there will be more of a strain rather than a curve that distributes forces evenly.
 For a proper bridge, your arms and legs are the support structures and your hips and back should be relaxed and open. Your chest should be projected up and back, toward the top corner of the wall behind you, and your hips should be lifted up and forward, toward the top corner of the wall in front of you. This aiming in opposite directions creates that “openness” in the spine. Breathing should be steady and even, and you should hold the position for 5 to 10 breaths. Again, don’t force things. Take your time and improve steadily.
 As you improve you can play with shifting your weight more toward your feet or toward your hands. You’ll find which way is more difficult, and that’d be what you need to work on! It will also lead you back to which of the preparation exercises to focus on. It may be the thoracic extension, or your hip flexors and quads if they are holding you back.
Invest in Your Flexibility
What we’ve shared above will improve your back flexibility and consequently improve your body positioning for every exercise and skill you practice.
It does take time and patience to increase your flexibility, especially if it’s been long neglected. But the payoff is well worth the effort. Set aside some time in your routine to make flexibility a priority and you will be more than happy with the benefits in your strength and power.
***
Keira Newton is an accomplished trainer with many certifications including that of Master RKC, Feldenkrais, FMS, and Z Health. Her combined knowledge of strength training along with flexibility and mobility work has helped hundreds of her clients at dkb Fitness and seminar students to help them achieve their maximum potential.
Jarlo Ilano,PT, MPT, OCS has been a Physical Therapist since 1998 and is a Board Certified Orthopedic Clinical Specialist. He has special interests in the neck and back, shoulder, and flexibility work, combining his clinical expertise with his own training in martial arts and yoga to provide practical and cutting edge knowledge for GMB Fitness.