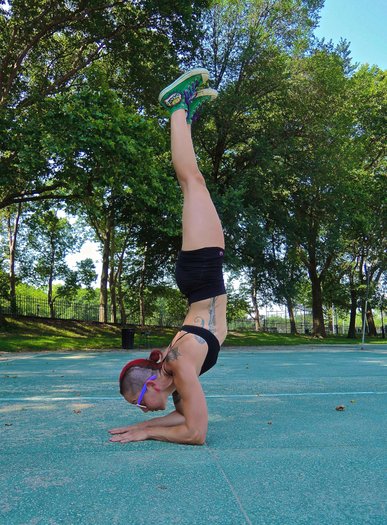
Are you frustrated with conquering the freestanding handstand?
We all want to progress quickly, but the jump from a wall handstand to a free-balancing one can be a huge hurdle! Enter the Forearm Stand – a relatively unknown movement in the PCC world – and a great “hidden step” on your way to the handstand!
When one of my clients recently told me her goal was to nail the forearm stand, I naturally turned to my PCC Instructor Manual, searching for a regression. At over 600 pages, the PCC manual is by far the most comprehensive guide to calisthenics I’ve ever seen, so I was surprised to find barely any mention of the forearm stand! Luckily, I had plenty of experience with this move from my Yoga training.
Take A Stand
The forearm stand is a great intermediate step between a beginner’s headstand and a freestanding handstand. Known as Pincha Mayurasana (Peacock Pose) in Yoga, this move is great for strengthening your arms and shoulders while also stretching your neck, chest, abdomen and back.
Inversions are also beneficial for improving circulation throughout the body, as well as challenging the practitioner’s balance. Though a difficult move in its own right, the forearm stand is more accessible than a handstand because you have more points of contact to assist in balancing.
Here’s how to nail this move in just 3 easy steps!
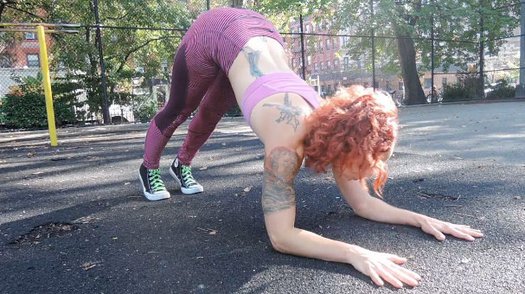
#1 Dolphin Pose
This pose is similar to Downward Facing Dog from Yoga but it is practiced on the forearms rather than the hands. Start in a plank position with your forearms shoulder-width apart, then spread your fingers and align your shoulders over your elbows as you gaze between your hands. Slowly begin to walk your feet in towards your hands as you raise your hips towards the sky. If you are new to this pose, you may only be able to walk a few steps before stopping. Your body should resemble as close to an inverted V as possible. Actively press through your hands and forearms to lift your head further off the ground and hold this position for time.
#2 The Kick-Up
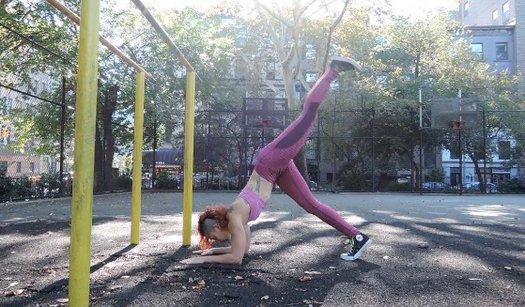
Begin in Dolphin pose and extend one leg up towards the sky. The closer you can walk your feet to your elbows, the more aligned your spine becomes. This alignment allows you to “float” into this pose rather than having to rely on a significant jump. The more mobility you have in your hips and hamstrings, the less difficult this becomes. Push off the base leg as you kick upward with the extended leg. If you are unable to hold the balance at first, I suggest practicing this variation against a wall or other sturdy object until you build the confidence to try it freestanding.
#3 Forearm Stand
Once you are able to kick up and hold for a few breaths, you’re golden! Keep increasing your hold times by simultaneously squeezing your inner thighs and ankles together and pointing your toes towards the sky to create stability throughout your body. The key to finding the “sweet spot” is to grip the ground with your fingers while “wrapping” your triceps around the arm bones and pressing through your elbows as you balance.
Scorpion Pose and Beyond
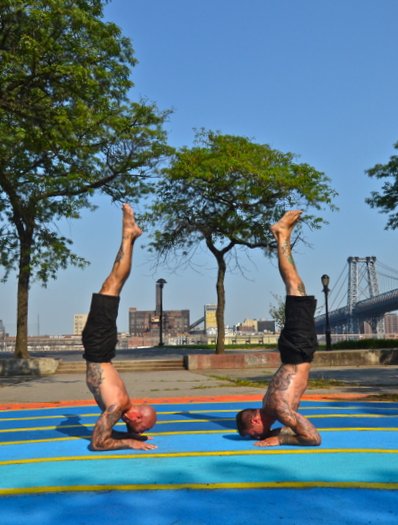
Initially when I began practicing forearm stands, I found it easier to hold the pose by bending my knees and allowing my heels to drop as a counterbalance. This is also known as Scorpion Pose. I must warn you this is an intense back bend, however! If you are having difficulty balancing in a regular forearm stand and want to try the scorpion variation, be sure to fit in some preparatory bridge work to warm up your spine.
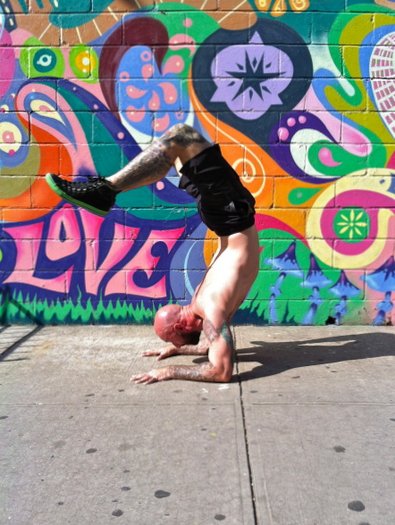
Be patient with yourself and prepare to put in some work if you want to nail this move. You might experience a “crash-landing” when first attempting freestanding forearm stands but by learning to safely fall out, you’ll gain the confidence to keep trying again. If you have the flexibility you can transition into a bridge if you feel yourself tipping over. If not, try to turn your hips and fall to the side. Stay the course and eventually this move will be yours!
Watch the video for more:
