• Skip to main content
  • Skip to primary sidebar
  • Home
  • Contributors
  • Resources
    • Q&A with Paul “Coach” Wade
  • Workshops
  • Products
  • Forums
  • Articles
  • Blogs
    • RKC Blog
    • Strong Medicine Blog
  • Archives

PCC Blog

Progressive Calisthenics - The Official Blog for the PCC Community

Archives for April 2014

PCC is Taking Over The World

April 29, 2014 By Al Kavadlo 52 Comments

PCC_ConventionCenterSignLast weekend my brother Danny and I led Dragon Door’s fifth-ever Progressive Calisthenics Certification along with PCC Team Leader Adrienne Harvey. With the rapid growth of the PCC, it’s amazing to think that it’s been less than a year since our first certification course last June in St. Paul, Minnesota.

In that time, we have certified nearly 200 trainers in 3 different continents. Every one of those new PCCs is now sharing their knowledge with others and spreading the word about calisthenics. It blows my mind sometimes to think about the impact that PCC has already had on the fitness world, but we are still just getting started!

In the months ahead we have workshops booked all over the world including Ireland, Germany, Holland and Egypt. It’s amazing to travel the globe teaching calisthenics, but I’m also very excited about my hometown gig in NYC this summer.

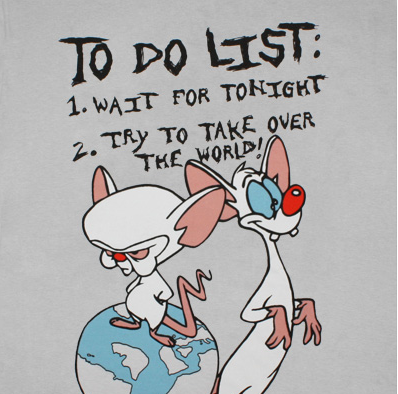
It’s beginning to feel like PCC is taking over the world!

PCC_St_Paul_2014_2

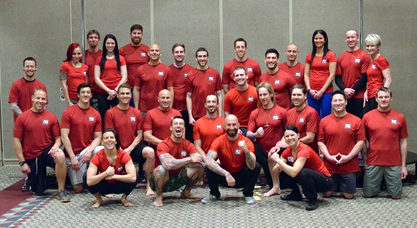
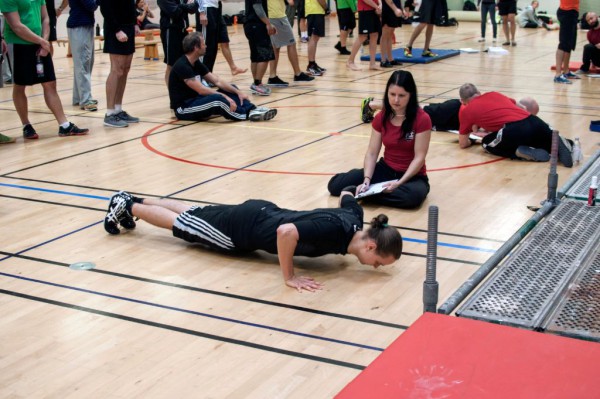
For our most recent certification, we returned to the Twin Cities. This time the event was held in Minneapolis at the city’s downtown convention center. Once again, an extremely impressive group of fitness enthusiasts, fanatics and aficionados showed up to hone their skills, inspire one another and attempt to take on The Century test to earn the title of PCC instructor. I’m proud to say that this group had our highest passing percentage yet since beginning the certification!

The caliber of candidates we’re seeing at each PCC seems to be continually improving. It’s an amazing feeling to be in a room with so many incredible bodyweight athletes who all have the same love for calisthenics. Everyone at PCC comes away with a unique experience, having both shared their own knowledge and received new ideas in return. We can all learn from one another and I am continually learning more myself each and every time we do the PCC.

If you’d like to attend (or host) a PCC event in your city, let us know in the comments section below. In the years ahead, we want to bring the PCC to as many places as possible! There’s nothing quite like the in-person experience of spending 3 intense calisthenics-filled days with other like-minded individuals.

We’re Working Out!

Al

PCC_St_Paul_2014_3
***
Al Kavadlo is the lead instructor for Dragon Door’s Progressive Calisthenics Certification. Recognized worldwide for his amazing bodyweight feats of strength as well as his unique coaching style, Al is the author of four books, including Stretching Your Boundaries,  Raising The Bar: The Definitive Guide to Pull-up Bar Calisthenics and Pushing The Limits! Total Body Strength With No Equipment. Read more about Al on his website:www.AlKavadlo.com.


Filed Under: Workshop Experiences Tagged With: Adrienne Harvey, Al Kavadlo, Century Test, Danny Kavadlo, Kavadlo brothers, Minneapolis, motivation, PCC Workshop, Progressive Calisthenics Certification Workshop, Twin Cities, Upcoming Workshops, world wide

Developing Powerful Abs with the Dragon Flag

April 22, 2014 By Adrienne Harvey 32 Comments

PCC Team Leader Adrienne Harvey Dragon Flag in Sweden

Anyone who’s familiar with extreme calisthenics already knows the infamous human flag exercise; the dragon flag variant, however, is an equally awesome move that fewer people are aware of. It looks cool, it’s commonly associated with Bruce Lee, and there’s so much that can be learned by working up to and practicing it. The other great thing about the dragon flag is that learning to do one means learning how to create an incredible amount of tension throughout your whole body—an essential skill for all advanced calisthenics. While there are many different paths to the dragon flag, the multi-faceted one shared below has worked well for a few clients and myself. Some of these drills led me to the dragon flag before I was ever really trying for it. Oddly enough, even though they require very maximal effort, I’ll usually leave dragon flags for the end of the workout, or focus on them at a separate time of day from my main workout. Regardless, it’s also a good idea to be warmed up. The Trifecta from Convict Conditioning 2 using the bridge, L-sit, and twist is a great sequence to practice before and after your calisthenics work, especially high tension moves like the dragon flag!

It seems like all forms of the flag require an extreme level of tension. Whenever I catch myself not properly respecting that fact on any flag progression, I remember watching Danny Kavadlo psych himself up for one of his human flag demonstrations—that fierce-looking (and sounding) process is nearly as impressive as the feat itself! But the good news is that since most serious bodyweight enthusiasts will naturally already have some of the requisite abdominal strength, the dragon flag may be a little bit “easier” to achieve than a full human flag. It certainly requires a little less skill since it’s usually performed on a solid bench, or from the ground with a low bar, instead of self-suspended in the air while gripping a pole!

Al Kavadlo performs a Dragon Flag on a pole
Al Kavadlo performs a dragon flag on a pole

The dragon flag can also be performed on a pole, but it requires a bit of pain tolerance (pick which trap you want to jam the side of the pole into) and extra time practicing the correct grip—plus you’ll also have to fight the rotation from that off-centered pole! For comfort and simplicity—especially at the beginning—using a bench, a well-secured very low bar, or similar set up is best for learning the dragon flag. Certain types of very simple ab stations on fit trails (look for a flat platform with a low bar attached at one end) can also be appropriate for flags, though I would recommend padding the surface under your shoulders.

Fit Trail ab bench

For safely make sure that whatever you are using, grabbing, and pushing against is sturdy and can support your entire body weight or more.

Alternately, on a flat bench, you can choose to place your hands on the sides of the bench (usually near the ears, but everyone’s placement will be slightly different) or behind your head as shown below:

Hand position choices for dragon flags on a bench

Since the dragon flag requires a lot of tension, proprioception and skill, I’ve used multiple steps and strategies to progress towards it. Many of these moves are good for warming up when you’re able to do the full flag too.

1. The “Hardstyle” plank: The ability to really own the full body tension in this intense version of the plank is crucial. To me the dragon flag feels like an extra serious, less unsupported Hardstyle plank. (Think of doing a plank on just your arms.) The Hardstyle plank differs from the regular variety because the whole body is tensed, the elbows are pulling towards the toes really engaging the abs, and the heels are pushing outwards as well. Similarly, the glutes are engaged too—as they are in the dragon flag!

Hardstyle Plank

2. Lying leg raises from the floor—while these are a LOT easier than a dragon flag, remaining tense with your legs just a few inches off the ground while fully engaging your abdominals will really help you towards the goal of the dragon flag.

Flat Leg Raises Demonstration

3. A yoga-like shoulder stand—learning to balance up on your shoulders and NOT your neck will help you get into the right position at the midpoint of the dragon flag, or the starting point of the negative version. Familiarity with the feeling at this position can help insure that you’re keeping the body in a straight line as you descend, and eventually ascend too. The more balanced you can be at this midpoint, the more chance you have for a little “rest” between the grueling ascent and descent of the full dragon flag.

Shoulder stand demonstration

4. Tuck-flags or roll-ups (I’m sure someone has a better name for this drill). As we know from many other bodyweight exercises (L-sits, front and back bar levers) if we shorten the length of our legs, then the more favorable leverage makes the move much easier. While in a tuck position, use your abs to slowly pull your tucked body up off the floor onto your shoulders while firmly gripping the bench or very low bar, slowly lower back down until your abs are almost screaming! This move is not to be done quickly, and is surprisingly difficult if performed correctly—especially for reps! Gradually straighten the legs more and more to increase difficulty.

Tuck raises demonstration

5. Negative dragon flags. Grasp the bench or very low bar and begin from the shoulder-stand-like top position. After making sure you’re resting on your shoulders, not your neck, tense the whole body (torso, glutes, legs, etc.) and try to lower yourself slowly, and under control without bending at the hips. You may feel like you’re supporting most of your body through your arms at first, but try to mitigate that feeling by really keeping the body tight during every second of your descent. This takes an amazing amount of tension. The closer your legs get to the ground, the more difficult the move becomes. Try to maintain the straight body position and the tension as long as you can without just dropping your legs at the bottom of the movement. The abs, glutes, legs and everything in between are strongly engaged (I’ve even managed to cramp up one or both feet while practicing these!)

Negative dragon flags

6. Full dragon flags up from the ground, towards the shoulder-stand-like position, then descending. It’s very easy to accidentally cheat these on the way up, as your hips will want to fold to help you out. Instead, think of maintaining a slightly flatter version of a hollow position while focusing on keeping the body as one solid plank. I think the most difficult part of this move is initiating the movement from the ground. The first few seconds feel nearly impossible on some days!

Steps 1-4 can be practiced together, but practicing the negative flags and full flags is incredibly taxing. I typically won’t do more than 1-2 per set for negatives, and only 1 full dragon flag per set, for a session total of 3-5 sets. That’s ten reps total for the day at most. You may be able to work up to more over time, but this move takes practice, patience, and long term dedication, so best to ease in gradually.

While some may dismiss moves like the dragon flag and human flag as “party tricks,” these very cool looking moves are rewarding to conquer as they challenge our patience along with building strength, skill, and control. Thankfully, these hard-won concepts will carry over directly and indirectly to many other bodyweight drills, skills and feats of strength.

 ***

About Adrienne Harvey, PCC Team Leader, RKCII, CK-FMS, Primal Move Nat’l Instructor: Originally RKC Certified in 2010, and RKC Level 2 certified in 2011, kettlebell and bodyweight training have been crucial in Adrienne’s personal quest for fitness. A core member of the PCC team, Adrienne loves sharing her knowledge with small groups and individuals. She also loves to develop recipes and workout programs to further support performance, body composition, and of course—FUN.  Go to http://www.giryagirl.com for more information about Adrienne!

Filed Under: Progressive Calisthenics, Tutorial Tagged With: abdominal training, abs, Adrienne Harvey, dragon flag, full body tension, human flag, tension, tutorial

The Bodyweight Revolution

April 15, 2014 By Paul "Coach" Wade 146 Comments

Al and Danny Kavadlo
The Kavadlo brothers are the face of
the Dragon Door bodyweight revolution!

If you have been keeping track of the fitness world over the last five years, you have definitely heard the term bodyweight revolution used by writers and teachers.

Lots of folks have used this term, but few—if any—have defined it.

To me, if there is a common theme behind the modern bodyweight strength revolution, it’s this:

Cutting edge athletes and coaches are starting to break down the distinction between bodyweight training and externally-weighted methods for adding strength and muscle mass.

What does that mean?

Well, up till fairly recently, the fitness “status quo” treated bodyweight training and, say, weight-training very differently. Weight-training was done to get ya big and strong as possible. To achieve this, you were supposed to follow three basic rules:

  1. Train hard for strength and mass. (A given. No pain, no gain, bitches!)
  2. Be progressive. (The goal is always: add weight to the bar!)
  3. Focus on load, not reps. (Folks will ask: how much can you bench? Not; how many reps?)

Fairly simple, huh?

And it worked, too. For the last fifty or so years, barbells and dumbbells have been the “go-to” method for bodybuilders and strength trainers alike. Some coaches and exercise ideologists have gotten so wrapped up in the romance of the iron, that they have told us that these tools are the only way to maximize muscle and power. (This is horseshit, but you know that already, right?)

Compare this model with bodyweight training. Over the last forty-plus years, personal trainers, writers and fitness coaches have been force-feeding the world with a philosophy of bodyweight training which is built on the following three principles:

  1. Train moderately for skill or conditioning. (e.g., soccer drills, circuit training)
  2. You can’t be progressive with load. (Sure, you can add weight to pullups, but then you are weight-training, right?)
  3. Build to high reps. (How many pushups can you do?)

Notice something? The bodyweight training principles are pretty much the diametric opposite of the weight-training principles! Why? Because it was figured that there was no point in treating calisthenics like a PROPER strength and muscle discipline, coz there was no way to make the load progressive. For this reason, bodyweight training ceased to be viewed as a power and strength method. It became relegated to a “fitness” method, or for a warm-up, prior to the weights. Worse still, it was viewed as a means for “light toning”. (Puke now, ye who have the buckets readied.)

Recent conditioning icons have shattered this illusion, and are actually bringing intelligent athletes round to the notion that you can break any bodyweight exercise into progressive chunks—all the way from easy rehab work, up to the hardest strength exercises know to mankind. I’m talking about revolutionary books like Al Kavadlo’s Pushing the Limits! and Raising the Bar; Brooks Kubik’s wonderful Dinosaur Bodyweight Training; and Pavel’s breakthrough Naked Warrior.

Bodyweight can’t build total-body strength? Give me a break!
Bodyweight can’t build total-body strength?
Give me a break!

This is the idea at the very heart of the modern bodyweight revolution. If you can use external weights progressively—in hard sessions designed to build load over time—why can’t you do the same using your body’s own weight? The answer is, of course, you can. You don’t need to treat bodyweight as a gymnastics or sports skill, or as a warm-up, or as a simple endurance discipline. You can do it progressively, just like weight-training. All you need is a solid understanding of the science of bodyweight progressions. And this is why the Progressive Calisthenics Certification (PCC) organization was born, to catalog and disseminate this traditional knowledge to anyone in the fitness world who wants it.

A lot of athletes—specially those already in the bodybuilding or powerlifting world—have taken this breakdown in the barriers between regular lifting and bodyweight training approach real literally. Hell, why not apply regular lifting templates to bodyweight training? This is what many have tried to do; and in this article I’ll discuss some ways of doing it. I’ll also show you a good alternative used by my own teacher, Joe Hartigen.

The CC-Style Template

When it comes to sets and reps, I generally prefer a real simple, old school, American-style double progression. You warm up with some fairly easy exercises, then hit your major technique hard for two-to-three sets. When you hit your rep goal, you move to a tougher exercise. Don’t go to failure—always leave a little energy left in your limbs to complete an exercise safely, or in case you need to defend yourself. That’s the Convict Conditioning approach—and trust me, it works just as well for weight-training as it does for calisthenics. Many old school bodybuilders and strength athletes have used this kind of program with great success—it’s not a million miles away from the sort of training performed by old school strength marvels like Doug Hepburn, or modern-day bodybuilding champions like Dorian Yates.

Dorian Hepburn
Hepburn—like all the ultra-strong old-timers—used bodyweight training alongside his lifting. He also trained infrequently, going all-out with low sets. Sound familiar?

Popular Strength/Mass Templates

Of course, there are other rep/set formats than the CC approach. Dozens. Here’s a roll-call of a few well-known ones:

  • The 5×5 system
  • Pyramid training
  • Ladders
  • Heavy singles

All of these popular weight-training approaches can be used with bodyweight—in fact, they are being used right now. But no method is perfect, and there are problems when applying these methods.

Using singles is a good example. A heavy singles workout might consist of, say 10 sets of 1 rep, using 85% of your max. This is pretty easy to accomplish if you are working with your bench press; but it’s a lot tougher to translate it to your bodyweight pushups. For a start, how do you define “85%” of effort accurately? Which pushup progression do you select? With the bench press, you can add a tiny increment, maybe 2lbs to the bar every so often. How do you add such microscopic increments to your pushup form? How do you maintain this system, long-term with such fuzzy variables? You are kinda pissing in the wind here.

A bigger problem with most training systems is that they waste the athlete’s precious energy. A really great rule of thumb in muscle and strength work is that the degree to which your body adapts is proportionate to the stress you put it through. But what athletes constantly forget is that the muscle-building and strength stimulus is based on your best set, it’s not spread over your other sets! As I’ve said elsewhere:

Paul_Blog4To put that shit simply, if you want to get diesel, you need to do a lot of work in a single, relatively brief set. Your peak set! Trouble is, a lot of athletes are in the habit of exhausting themselves before they reach that peak set.

Bodybuilding is possibly to blame for this. Back in the seventies and eighties, it was all about “pyramiding”; you would typically warm up with 15, 12, 10 and 8 reps before knocking out a few peak sets of 6-8—then you would reverse the process. (You go up in weight, then down, hence the term “pyramid”.) The problem with this was that by the time you had done the first four sets you were too shot to do very much in your peak sets! Then you would repeat all those lighter, higher-rep sets again, just adding more volume to eat into an already overloaded recovery system.

The same problem is true of the popular “ladders” method of training. With ladders, you start with one rep—say, a pullup—then take a short break, and do two pullups. Break, then three. All the way up to your peak set, of, say, five reps. Then you take a short breather, do four reps, then break, then three, and so on down to one rep. See the problem with this? If your peak/best set here is the five rep set, you will have already done TEN reps of that exercise before you reach it! If the five reps really represent your best, then doing ten reps of the same beforehand is definitely going to adversely affect your performance in the five. In essence, ladders are a good way of doing a lot of work, but a pretty imperfect way of doing high quality sets.

5×5 is a more traditional method—it was used by Arnold’s hero, Reg Park, back in the fifties.

Big Reg Park
Bodyweight back work: Big Reg Park
rocking some behind-the-neck pullups.

Park’s method was to use two warm-up sets of five, then three sets of five with the heaviest weight you can handle for a particular exercise. Once you can hit the 3×5, you go up in weight.

It’s a simple (and pretty effective) idea. The problem—in terms of hitting one great, “peak” set—is that it makes you hold yourself back. You are inevitably (even if only subconsciously) holding yourself back from giving your all on the first hard set, in order to get the five reps on the final two sets. You need to do this, because if you really gave your all grinding out five reps on the first heavy set, you would be pretty unlikely to be able to repeat that twice. So with 5×5 you never have the motivation to really give your all and hit that one peak set.

Enter the Mentor: Joe Hartigen

One template which doesn’t contain any of these problems was taught to me in the 1980’s by my mentor, Joe Hartigen. Joe was a bona-fide calisthenics master, and although he was in his seventies when I met him, he was much more powerful than me, and remained incredibly strong in pulling movements right up to the final year of his life. Joe had forgotten more about training methods and the history of physical culture than I will ever know, and I learned virtually all the progressions in Convict Conditioning from him.

Despite the fact that Joe was an icon to me—and several others in San Quentin—we didn’t train in exactly the same way. We had different backgrounds, for one thing. I came from a “new school” calisthenics approach, one based on building up high reps in squats, sit-ups, pullups and (especially) pushups. In fact I would often return to these high-rep workouts—often ultra-endurance bodyweight work—throughout my time inside, particularly in Angola. (Think “thousand pushup days” and you got the idea.)

Joe was very much a man who favored lower, more intense, higher quality reps. He typically shook his head when he looked at my training journals, and—likewise—I must admit that when I was younger and dumber, I possibly looked down on his methods as a bit old-fashioned. Like a cool photograph, but colored in sepia. In later years, I realized he was right on the money, and although I modified my own training to better match his thinking, our workout styles were never quite the same.

The Hartigen Method

When it came to sets and reps, Joe had a pretty fixed method for working out. I’ve never heard a name for this scheme, so I’m gonna call it The Hartigen Method (although there’s no way he was the first to use it). This approach is simple to apply, allows for the use of real hard exercises, and is progressive—so I thought I’d put it out there for any ex-lifters or strength athletes looking for a new way to work with bodyweight exercises.

Here’s how it works:

1. Pick the hardest exercise you can do for 5 reps in good form.

2. Warm up, and perform a 5 rep set.

3. Rest approximately 1 minute. Shake your muscles loose as you rest.

4. Perform 4 reps of the same exercise.

5. Rest approximately 1 minute. Shake your muscles loose as you rest.

6. Perform 3 reps of the same exercise.

7. Repeat this procedure until you have performed a single rep.

That’s it! In essence, Joe picked an exercise he could do five good, strict reps with, and did 5, 4, 3, 2, 1.

It’s that simple. Joe’s theory was that if you could bust out five reps of an exercise you were working on, then after a minute’s rest, you should be able to do four reps. After another minute, you should be able to do three, and so on. Joe felt this rep scheme offered low reps for strength and muscle, but also enough reps—fifteen total—to give an athlete plenty of hard practice on an exercise, but without burning out.

Plus, using this method you can hit an exercise hard in under ten minutes. Even if you were working with four exercises in a workout (two or three would be better!) you could be done in half an hour. Joe’s method works great with weights, too—kettlebell presses and rows would be a wonderful superset, if you’re that way inclined. (5 presses, a minute’s rest, 5 rows, a minute’s rest, 4 presses, etc.) You could superset pushup and pullup exercises the same way.

Making progress
Progression couldn’t be simpler with this method. When you can do all 15 reps—that is, 5, 4, 3, 2, 1—for three workouts in a row, you move to a slightly harder version of the exercise. As with all bodyweight strength, having an extensive toolbox of progressions is key to moving forward; it’s also why the PCC Instructors’ Manual includes hundreds of progressive exercises.

There will be times you don’t get 5, 4, 3, 2, 1. You may only get 5, 3, 2, 1, 1. That’s fine, and to be embraced. When you don’t get the full 15, use these principles to move forward:

Try to add a rep (or two) next time; shoot for 5, 4, 2, 1, 1, then 5, 4, 3, 1, 1, and so on.

Whatever you get, always push yourself hard on the first set—that’s your peak set.

Adding reps on the earlier sets is more valuable than adding reps on the final sets.

Never do more reps than you are aiming for; stick with 5, 4, 3, 2, 1.

Aim to perform ALL five sets, even if those sets are very low rep; e.g., 3, 2, 1, 1, 1.

Exercises, post-set work and warm-ups

Joe often performed more exercises than I stuck to. Most people today would probably call his routine imbalanced. In particular, he loved hanging exercises, and would do all kinds of weird variations of pullups, leg raises, levers, holds and hangs. Strangely, despite being such an aficionado of hanging work, he would typically do only three exercises for the rest of his body—one-leg squats, flat one-arm pushups, and some kind of inversion; handstands, but often headstands (I rarely saw him do inverse pressing, these were typically static). I have watched Joe do bridges, and do them easily, but like the man himself, these were an exception rather than a rule.

Whatever his last exercise of the session was, Joe would often make his very final set harder by completing a ten second dynamic-tension isometric at the top position of that very last rep. He’d follow this with a slow negative of about ten seconds. He claimed that this little “trick” for finishing his workout told his body that the session was over, and increased his hormonal profile. I’m not sure that’s true, but if Joe’s physique—at over seven decades—was testament, then he knew what he was talking about.

Al Kavadlo Push-Up
No matter what exercise you finish with,
you can squeeze it at the top for an isometric benefit.

What about a warm-up? Interestingly—like Reg Park—Joe never went over five reps on his warm-up sets. He would typically do two or three warm-up sets of five reps, and he always applied Charles Atlas-style dynamic tension during his warm-ups. If he was doing an exercise like one-arm pullups, he would perform an exercise about half as tough on his warm-ups—two-arm pullups. Always five reps. Why not more? Joe felt that you should always train to meet your goals. His peak sets were always five reps, so he thought if he did more in his warm-ups, his body would get confused and start adapting to higher reps instead! I’m not certain I agree with that, but it gives you some food for thought, eh?

I often advocate using progressive exercises when warming up—maybe start with a real easy exercise for high reps, then follow with a slightly harder exercise for less reps. But Joe only ever used one exercise technique in his warm-ups, no matter how many warm-up sets he did. I used to wonder why, for example, he’d perform two sets of regular pullups before his one-arm work; why not one set of regular two-arms, then something harder, like assisted pullups? I asked him once. Because I can make the two-arms as hard as assisted pullups, dumbass! he replied. And it was true. His capacity to tense his muscles during training—dynamic tension—was so profound, he could make seemingly easy exercises as seem as hard as advanced ones. He was able to adjust the intensity of any exercise by 100% or 1%, just using the power of his mind.

That was how profound his body wisdom was. Not many athletes could aspire to this level, although it’s possible with time and patience. I still admire the man to this day!

Lights Out!

Well, that’s it from me. Thanks again for reading—it means a lot to this dopey fella that you guys and gals still take the time to read my weathered musings. I hope this article has given you a new idea to play with. Looking for a lower-rep strength and mass routine that fits well with bodyweight? Give The Hartigen Method a try…tonight!

Oh, and if you liked hearing about Joe’s attitude to training, check this article out. I wrote it for my good buddy Neil Bednar.

You could do a lot worse than modeling your training around old Joe’s philosophy. That brother was something else!

***

Paul “Coach” Wade is the author of five Convict Conditioning DVD/manual programs. Click here for more information about Paul Wade, and here for more information on Convict Conditioning DVD’s and books available for purchase from the publisher.

Filed Under: Progressive Calisthenics Tagged With: Al Kavadlo, bodyweight exercise, calisthenics, Danny Kavadlo, Kavadlo brothers, Paul Wade, PCC, PCC Workshop, Progressive Calisthenics Certification Workshop, pull-ups, push-ups, Raising the Bar, squats, strength training

Push-ups for a Better Bench Press

April 8, 2014 By Corey Howard 9 Comments

Al Kavadlo Push-upAs someone who loves a challenge, I get excited when someone tells me it’s impossible to get strong using only calisthenics. Though at first I was skeptical, too, I’ve learned firsthand how effective bodyweight training can be.

Most coaches tell us that to get stronger you need to keep adding weight to whatever lift you want to improve on. If you want to bench press more, they say to use some sort of pyramid training and ramp up the weight each session. With the exception of Stanford, that’s what’s taught at most collegiate and high school strength programs. Imagine the frustration on a 16 year old kid when I tell him I won’t let him bench press until he can perform 20 quality push-ups off the floor!

As I was talking with a student of mine named Caden during his first session at my facility, the topic of bench pressing inevitably came up. We discussed my background in competitive powerlifting and, as you would expect, he wanted to know how much I could bench. After telling him my best competition lift he responded with a story about how some other kid at his school can supposedly press more than me. So of course I had to know what his own best effort was on the bench.

day_3_100_2“One hundred thirty-five pounds… once,” he stated. For those of you that have trained young teenage athletes, you know they need proof before they believe anything you say. So I decided to challenge him a bit. I told him I could help him improve on that 135×1 in only 4 weeks without even putting him on the bench. In fact we would be using a steady diet of push-ups. Caden scoffed at me. Why wouldn’t he? Remember the old school thinking at most high schools?

“Alright, but it’ll never happen,” he promised.

Let’s stop for a second and quickly compare a textbook push-up to a text book bench press. In a push-up, the hands are under your shoulders while the body is elevated and tight (abs, lats, glutes and thighs) to prevent any sagging or arching. As you descend it should feel like you are screwing your hands into the floor, the lats get tighter, and the elbows stay close to the body. Everything is tracking straight and tight. Then once your nose or chest touches the floor you reverse the motion as slow or fast as you want. Speed will build explosive strength and slow will teach you to grind out a heavy rep for strength.

Compare that to a textbook bench press; before you lower the bar to your chest, the shoulder blades should be retracted, glutes are tight and feet are driving into the ground. As the descent begins it should again feel like you are screwing your back into the bench, tightening the lats, and keeping the elbows near the body. Then after the bar touches the chest you can drive the meaty part of your thumbs into the bar almost as if you were rotating your elbows in and driving yourself away from the load to lock it out over head.

Notice any similarities?

CadenPush-upNow let’s take those same principles and apply them to Caden. On day one he could not do any of this. Once he was on the floor it kind of looked like a saggy banana getting tazed. We needed to tap into the Convict Conditioning principles and start teaching push-up technique against a wall. As he grew more proficient, his push-up got closer to the floor. It’s important to note that although we always had a specific number of reps in mind for each day, once technique failed, his set was over. Many times he wanted to crawl under the bar and “just try” the bench press again, I happily refused to allow that. Remember sometimes young teenage clients need proof or an “A-ha moment” before they buy into you or your system.

Caden’s “A-ha moment” came 4 weeks later. After dialing in the pushup similarities to the bench press in his warm ups, we loaded the bar with 135. He gave me a solid 5 rep effort. If you use one of those 1-rep max calculators, that’s roughly a 20lb increase in max effort strength in 4 weeks using nothing but pushups. For those of you that are wondering what other “assistance work” I had him do? It was all calisthenics- bridge progressions, bodyweight squat progressions, lying leg raises, and horizontal pull-ups. Caden never touched a weight his first 4 weeks in my facility.

Calisthenics work! Fire it up!!

Caden1 ***

About Corey Howard, PCC, RKC, CK-FMS: Corey Howard strives to constantly become stronger, and to help others to achieve their fitness goals. He is the owner of Results Personal Training, and can be reached at www.resultsptonline.com or www.coreyhoward.com.

Filed Under: Progressive Calisthenics Tagged With: bench press, carryover, Corey Howard, push-ups, strength training

Shoulder Opening: Stretches for Tight Shoulders

April 1, 2014 By Benji Williford 13 Comments

benji_williford_demonstrates_a_shoulder_opening_stretch

Continued progression toward getting stronger and improving performance requires a body that is “open” to the challenge.  One of the biggest complaints that I consistently get from clients is about tight shoulders. It’s simple, you can’t move well if you can’t move. Some clients can’t hang from a bar without pain as they can’t even get their arms over their heads to get into position to do a pull-up; whereas other clients have a hard time in a plank to start push-ups without feeling neck pain (and everything in-between).

Opening up the shoulders and consequently the upper body will improve performance and help prevent injury. The shoulder joint is a ball and socket joint that really could be considered more of a ball and plate joint as it relies on the muscularity of the joint to keep it from dislocating.  It is formed by the articulation of the head of the humerus with the scapula and is the most freely movable joint in the body. The main movements of the shoulder:

  • Flexion-Lifting the arm forward in front of the body. The primary movers to this position are the anterior and medial deltoid, biceps brachii, coracobrachialis, and the upper pectoralis major.
  • Extension-Pulling the arms back down and toward the back of the body. The primary movers are the latissimus dorsi and the teres major.
  • Adduction-Holding the arms out and pulling them toward the midline of the body. The primary movers are the pectoralis major and the anterior deltoid.
  • Adduction-Opening the arms away from the midline of the body. The prime mover is the posterior deltoid.
  • External rotation-Holding the arms by the side, rotate the shoulders outward so that the palms are facing up and the thumbs are pointing to the back using the posterior deltoid, infraspinatus, and teres minor.
  • Internal rotation- Holding the arms by the side, rotate shoulders inward so that the thumbs turn in toward the body using pectorailis major, latissimus dorsi, anterior deltoid, and the teres major.

Although shoulder movements can be placed in specific categories, exercises often times use combinations of those movements to complete a rep. For example in order to perform a muscle-up, the shoulders extend and external rotate to hold on to the bar. The shoulders will then go into flexion to pull the body to the bar and push the bar to the waist. Internal rotation also happens along the way. When looking at a get up, the shoulder will start in flexion with slight external rotation and will go through farther extension, abduction, internal rotation, external rotation, and extension again just to go from the floor to standing (1/2 the rep).

When stretching the shoulders, all of these movements should be taken into account in order to ensure that imbalances are fixed.  The following video will demo a series of stretches that can be incorporated in a yoga practice, used for static stretches after a workout or any time after warming up the shoulders with some mobility work.

The additional benefits are that they will also open the chest, back, neck, and thoracic spine.

***

Benji Williford, PCC, RYT, CF-L1 is a Personal Fitness Trainer located out of Eau Claire, WI. Benji believes that, “A successful fitness program is based on positive dialogue between the mind and body.” He can be reached through his website: http://www.benjiwilliford.com/, or by email: Benji@ChainReaction-Fitness.com.

Filed Under: Flexibility Tagged With: Benji Williford, flexibility, shoulder mobility, shoulder stretches

Primary Sidebar

Featured Products

previous arrow
GetStrongBookCover
ConvictConditioningBookCover
StreetWorkoutBookCover
ExplosiveCalisthenicsBookCover
StrengthRulesBookCover
next arrow

Categories

Progressive Calisthenics Certification Logo
Click here for more information or to register for the PCC workshop

Get Strong Workouts TriadXP App
Get Strong Workouts App

Recent Posts

  • Top 5 Reasons Why an In-Person Workshop is the Best Way to Supercharge Your Training
  • HYBRID STRENGTH TRAINING IS HERE!
  • My Calisthenics Journey to the PCC
  • The Handstand Press: Complete Control Through the Handstand
  • The Get Strong App is Here!

Dragon Door Publications

Dragon Door Publications

Recent Comments

  • bross dandon on The Case for Curved Handstands
  • Johnny Flewellen Jr. on Strength for Life
  • Dan Earthquake on The Pursuit of the Daily Minimum
  • Johnny Flewellen Jr. on The Pursuit of the Daily Minimum
  • Johnny Flewellen Jr. on Yoga, Calisthenics and the Journey of a Lifetime
FOLLOW US ON TWITTER!

Copyright © 2025

Dragon Door Publications / The author(s) and publisher of this material are not responsible in any manner whatsoever for any injury that may occur through following the instructions or opinions contained in this material. The activities, physical and otherwise, described herein for informational purposes only, may be too strenuous or dangerous for some people, and the reader(s) should consult a physician before engaging in them.