• Skip to main content
  • Skip to primary sidebar
  • Home
  • Contributors
  • Resources
    • Q&A with Paul “Coach” Wade
  • Workshops
  • Products
  • Forums
  • Articles
  • Blogs
    • RKC Blog
    • Strong Medicine Blog
  • Archives

PCC Blog

Progressive Calisthenics - The Official Blog for the PCC Community

Adrienne Harvey

Borrow These Calisthenics Cues From the Recent NYC PCC

November 21, 2017 By Adrienne Harvey 6 Comments

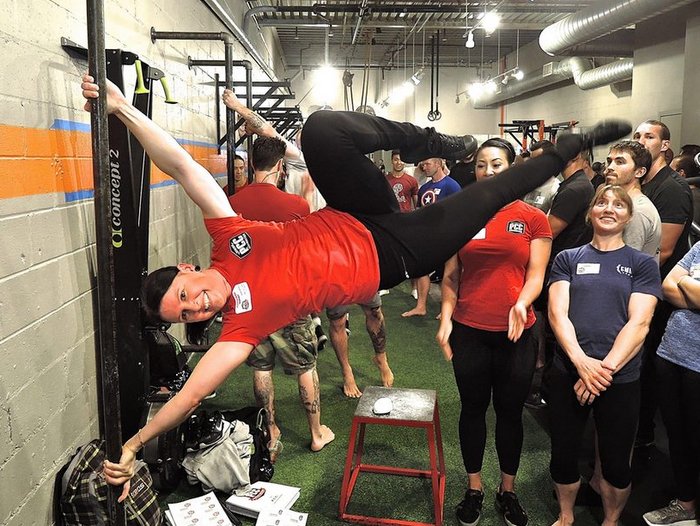
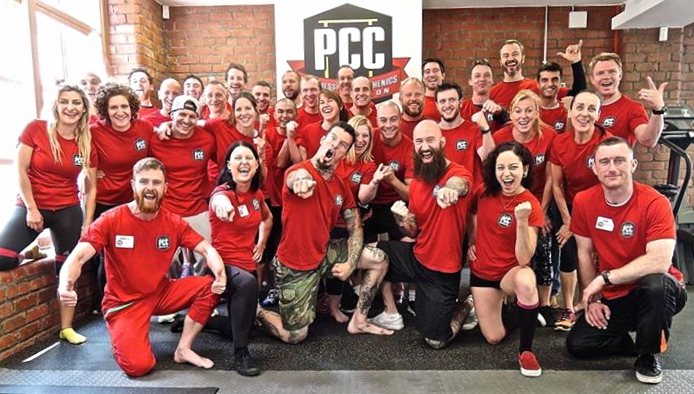
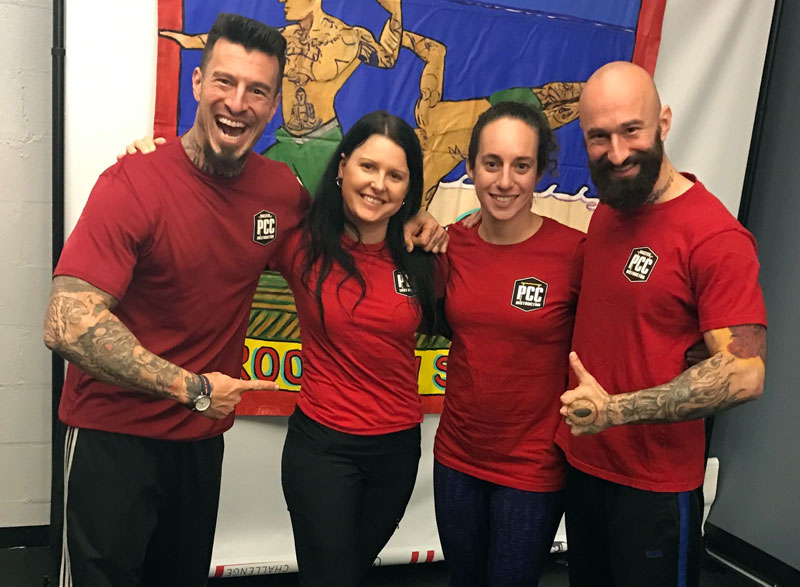
NYC PCC Instructors Team Danny Kavadlo, Adrienne Harvey, Julie Briggs, Al Kavadlo

One of my absolute favorite parts of any teaching situation is the opportunity to troubleshoot and help teach the troubleshooting process. This not only helps the participants with their own workouts, but teaches them how to help their clients make big changes quickly.

And whenever there’s a new group of people at a PCC, there are new questions, issues, and viewpoints. This was certainly the case at the most recent PCC held at Crunch Gym’s flagship location on 59th Street in Manhattan. As the Kavadlo brothers always say—and they’re totally right about this—on the first day we enter the room as strangers, but leave as friends. The amount of networking, cooperation, and brainstorming among the participants this time was especially high. Can’t wait to see what comes of these new friendships and alliances.

While it’s unrealistic to claim that everyone who attends a PCC workshop is guaranteed to experience a big breakthrough in their training, it seems to happen frequently. People attending a PCC are usually either trainers, instructors or serious enthusiasts, but we all have our blind spots. The combination of the demonstrations, lectures, Q&A, and the partner practice sessions on all three days of the PCC creates a powerful learning environment. Even though I’ve been involved with the PCC since the very first workshop back in 2013, I still learn something new every time. Should also add that since even the most recent time I helped instruct, the curriculum has continued to evolve and improve.

All of that being said, it is extremely rewarding to give someone a game changer cue or idea that almost instantly takes them to the next level. So, in this recap of the NYC PCC workshop I’d like to revisit a couple of my favorite cues that came up at the workshop. To those who might think I’m giving away too much, understand that these ideas really are best absorbed real-time in the context of a PCC workshop.
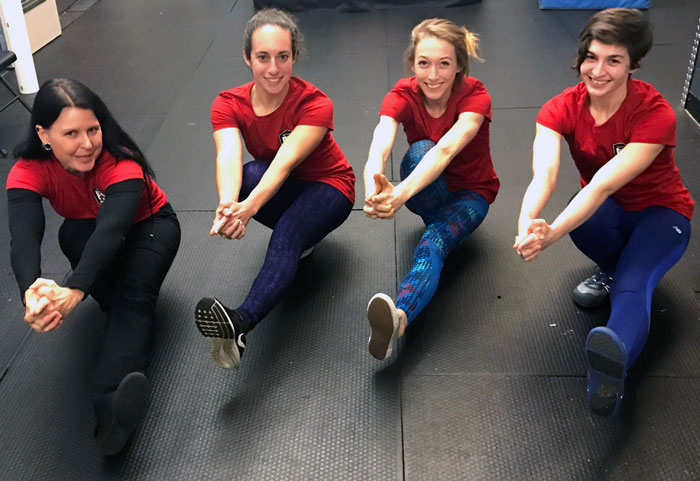
PCC NYC Ladies Pistols: Adrienne Harvey, Julie Briggs, Erica Dohring, Meghan Daly

“Point at Yourself” and “Pew-pew!”

Something I’ve seen both online and at PCC workshops with people who are so close to performing a perfect pistol squat is a slack looking foot on the leg held in front. Often, these same people will have the idea that they somehow aren’t strong enough to do it. But with one (or both) of the following cues they are often able to generate enough tension to pull off the move with precision.

The first cue is a personal favorite, it’s simply to think of pushing through the heel of the suspended leg while pointing the toe back TOWARDS you. “Point your toe back at your nose.” You’re basically flexing the foot as hard as you can, which causes the quad to contract very strongly, keeping the straight leg straight out in front of your pistol squat. You will want to stretch out the quad a little after this, and some folks (myself included, especially if I’m a little dehydrated) may actually get a little cramp in the quad. Common sentiment, “Oh I didn’t know I needed to contract the quad THAT hard”

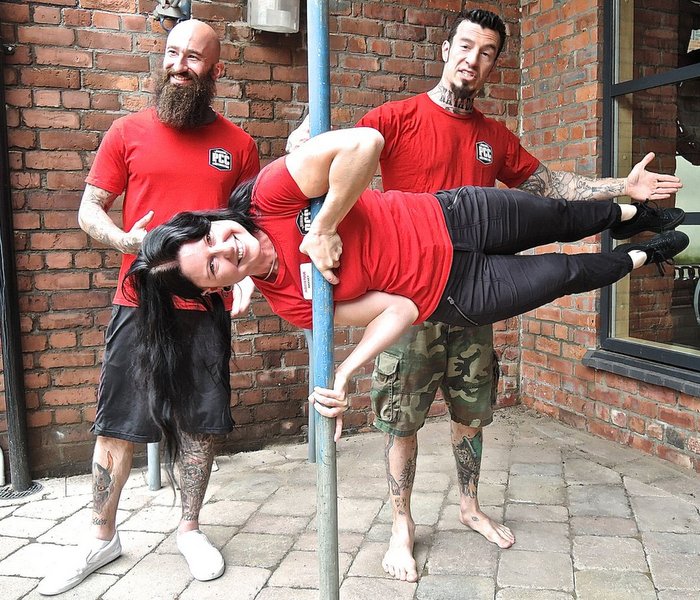
Al also reminded us that generating extra tension from the upper body can also really help the pistol squat. Get in touch with your inner 007 and make the “pew-pew” fingers while strongly clasping your hands together. This can make for much more stable pistol squats in terms of tension and balance, and as in the example above, cute photos.
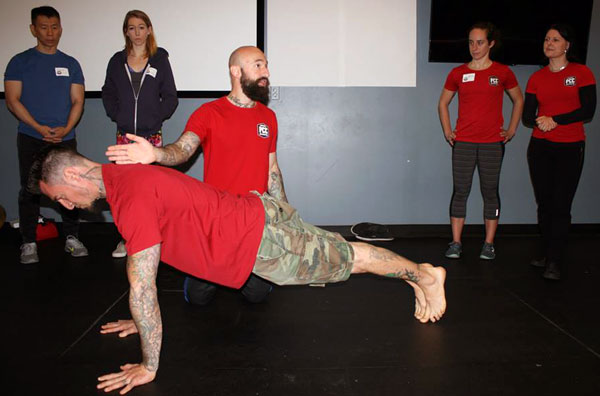
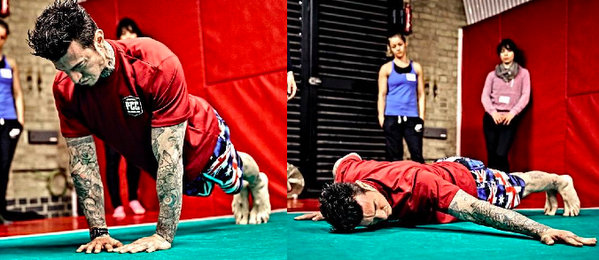
Al and Danny demonstrate the push-up

“I’m gonna hit you in the tummy, ok?” 

By the time someone attends a PCC workshop, they’ve done a LOT of push-ups in preparation for the Century Test. But, changing the angle or the points of contact from a standard pushup in one of the many advanced progressions taught at the PCC can make the exercise feel brand new again. Old habits can sometimes creep back when the focus moves from the familiar standard pushup. The novelty of trying a new progression can cause even the most advanced of us to forget the crucial basics.

Such was the case with a participant I helped at the workshop. He had been repping out fantastic standard push-ups and all the other variations perfectly until this point. While raising one hand high on a platform to try a nearly one-arm uneven push-up, he seemed to forget about his midsection. But, without trunk stability, this advanced push-up would be impossible. I knew he could do it based on previous performances, and after seeing his lower back sagging on the attempt, I said, “Wait! Use your abs, I’m going to hit you in the tummy, ok?”

He said, “OK,” so I gently gave him a couple little chops right in the tummy. The first one let both of us know that he had let his core go slack, and the second one revealed that he’d fixed the situation. His back was suddenly straight again and he was able to successfully complete a rep of this difficult and frankly extreme push-up variation.

No matter what push-up variation we’re discussing, the push-up at its heart is a moving plank. And that of course requires abdominal stability The more advanced the progression, the more extreme the stability requirement.
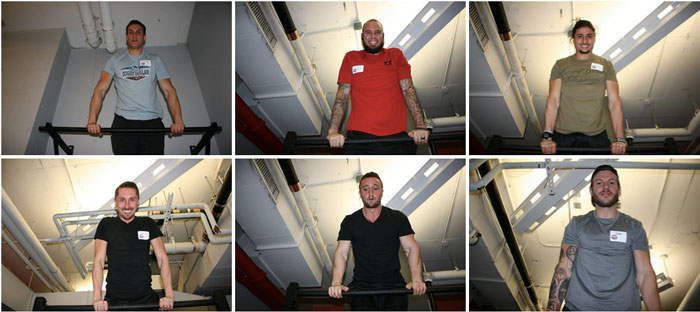
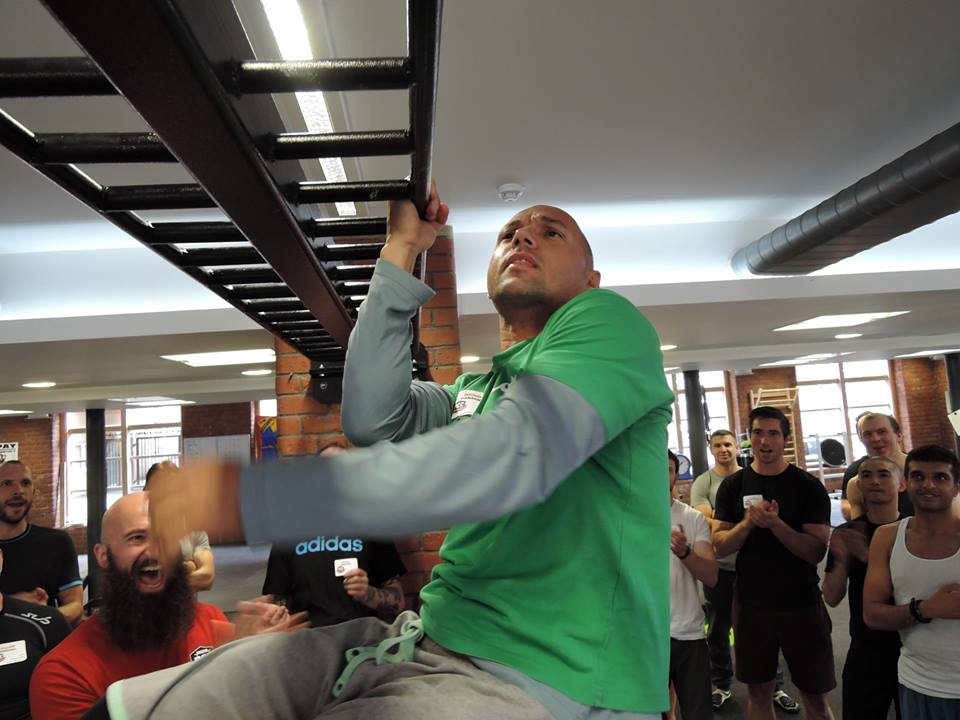
PCC NYC Participants Muscle-Ups

One Last Thing…

At the workshops I’ve been invited to help teach over the years, I’ve noticed that while we have a ton of fitness professionals attend, we also have many people from other fields. As someone with a computer science background I’m always pleased to see developers, engineers, and other technical professionals show up to a PCC and perform extraordinarily well. The idea that they are setting such a strong example in their lives outside the fitness industry is also excellent for public health. Fitness and the ideas in the PCC and Convict Conditioning really are for everyone.
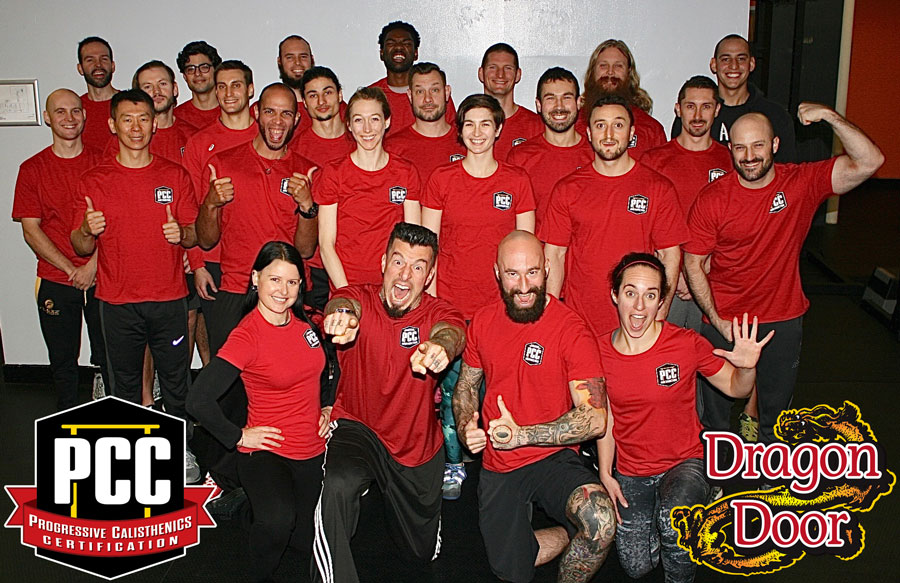
NYC PCC November 2017 at Crunch Gym 59th Street

While we may all admire and aspire to the most advanced steps, and videos and photos of those feats are typically the ones that go viral, the bread and butter basics of calisthenics are applicable to all human bodies. The early progressions, especially as taught at the PCC and in Convict Conditioning are powerful for any level. And the newly certified PCC Instructors from this most recent NYC PCC at Crunch’s flagship gym are ready to bring these transformative ideas to the world.

****

Adrienne Harvey, Senior PCC Instructor, RKC-II, CK-FMS, has been RKC Certified since 2010, and RKC Level 2 certified since 2011. Kettlebell and bodyweight training have been crucial in Adrienne’s personal quest for fitness. A core member of the PCC team, Adrienne loves sharing her knowledge with small groups and individuals. She has modeled in multiple Dragon Door titles including The Neuro-Grip Challenge, Rings of Power, DVRT, Neuro-Mass, Pushing the Limits, and several others.  For her recipes and workout programs to further support performance, body composition, and of course—FUN, check out her website: http://www.giryagirl.com.
Filed Under: Progressive Calisthenics, Tutorial, Workshop Experiences Tagged With: Adrienne Harvey, calisthenics, Crunch Gym, cues, New York City, NYC PCC, pistol squats, progressive calisthenics, push-ups, top tips, tutorial, workshop experience

How to Restore Desk-Damaged Physiques with Calisthenics

May 9, 2017 By Adrienne Harvey 23 Comments

Adrienne Harvey UnDesk Lead Photo

Years ago, well before the PCC, and just after Convict Conditioning began to get extremely popular, I heard Andrea Du Cane say that we shouldn’t live in the posture of our sport. In many cases, we should also not live in the posture of our work.

It seems as though many of our clients (and in some cases ourselves) spend the majority of their working hours seated at a desk looking at a screen, then spend hours staring at a small screen. So, let’s take a moment to work with some do-anywhere calisthenics exercises to help build healthy habits while undoing some of the desk-damage so we can continue to help our students, clients, and ourselves safely build strength.

In 6th grade, a brilliant friend (math genius and fellow computer nerd) and I would get to school early to boot up a lab of dinosaur-era computers. Already at that young age, my friend had the dreaded forward leaning head, hunched shoulders, and rounded upper back from hours and hours of programming. Thankfully, I was still spending a reasonable amount of time playing in the backyard on the monkey bars—while getting regular reminders from Mom to stand up straight and keep my shoulders back—which saved me from the same situation.

But, pulling long hours at work, then tapping at tiny screens has left almost everyone pretty susceptible to bad habits and weaknesses that can hold us back in our calisthenics training—and in our everyday enjoyment of life.

First, for those of us who are instructors, it’s important to remember our scope of practice. If a student or client is in pain or has a medical issue—or even if you’re just unsure about the situation—always refer them to an appropriate medical professional.

As much as it would be great to think that a standing desk would solve all the sitting related problems of the world, some of us have noticed that intense cognitive tasks requiring full concentration and extreme focus just don’t seem to go as well when working at a standing desk. That has definitely been my experience, as my typing speed and overall productivity seem to suffer if I try to do highly mental tasks at a standing desk. So, under the assumption that we or our students/clients will need to work at a desk for a significant period of time most workdays, let’s discuss how we can help.

We already know that it’s important to take breaks from seated work. I’m a huge fan of the Pomodoro technique—it can also boost productivity at the same time. Basically, set a timer for 25 minutes of work, then take a 5 minute break to walk around, do a few movement exercises, then repeat the 25min, 5min cycle four times before taking a longer break.

Poor posture habits while standing and sitting often stem from a lack of core or (as Paul “Coach” Wade would say) midsection strength. It’s also pretty common for people with weak midsections to have or develop back issues. Think of the midsection as a cylinder, if the “front half” isn’t doing its fair share, then the back half will be carrying an extra burden. If the abs aren’t able to hold us upright while standing or seated, then the back has to compensate that much more—often leading to discomfort or worse.

The great news is that instead of doing endless questionable crunches, the PCC and Convict Conditioning methodology emphasize training the midsection specifically, and instruct us to engage it when performing most (if not all) of the other calisthenics exercises. For example, It’s hard to even imagine performing a pistol squat without abdominal involvement—the same is true with any advanced push-up (it’s critical for Neuro-Grip push-ups)—and just about every other exercise in the PCC and Convict Conditioning curriculum.

While many different schools of training have their own approaches to counteracting the very modern problem of too much sitting, in this post I’ll mainly focus on calisthenics strength, and very basic mobility. Nothing too fancy is necessary for most of our general population clients to work on counteracting the dreaded desk body. But, if you are inclined to work more on mobility and flexibility alongside your calisthenics strength, definitely check out Al Kavadlo’s Stretching Your Boundaries.

I think of “un-desking” as having the following components:

  • Unlocking the hips and hip flexors
  • Abdominal/midsection strengthening
  • Stretching and strengthening the shoulders and upper back

Unlocking the Hips and Hip Flexors

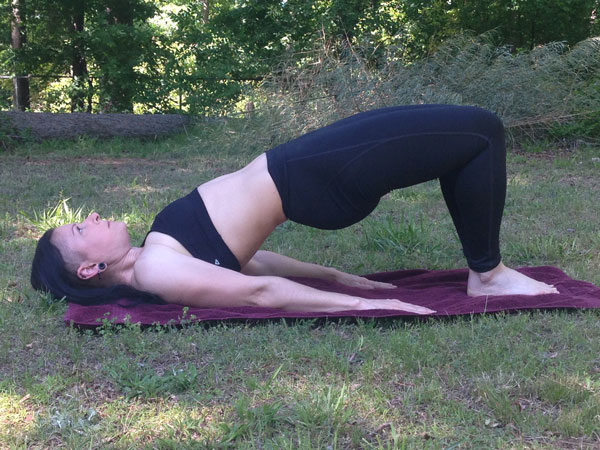
The short bridge (also sometimes called the hip bridge or shoulder bridge) is a regular part of my mobility warm-ups and those I teach to others. It’s accessible for nearly anyone. When practicing the short bridge, the beginner is comfortable and in control as they work towards bringing the hips higher while engaging their glutes.

Start on the ground with your hands at your sides. Push down hard through your heels and strongly activate your glutes to get your hips as high as possible. This is nearly the opposite of slumping over at a desk. It’s sometimes helpful to think of pushing the hips up and over towards your head (but only THINK this, your feet need to stay on the ground).

Adrienne Harvey Short Bridge

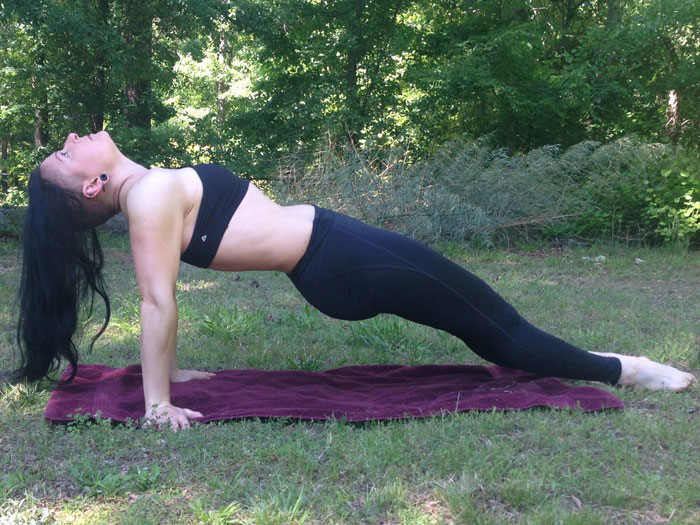
The straight bridge is another extremely valuable early step toward a full bridge in Convict Conditioning that is very useful long after achieving a full bridge. Like the short bridge, you may also know it by other names. Those of use who spend a lot of time typing—and who are also pull-up enthusiasts can greatly benefit from this move. I love it and love to hate it. At the top of this bridge variation, be sure that the shoulders feel rotated back and down. Experiment with different hand positions (fingers facing forward, to the side, backwards) while working to bring your chest and body high off of the ground in a reverse plank position.

Adrienne Harvey Straight Bridge
Remember to try different hand positions when trying the straight bridge: fingers pointing towards the toes, out to the sides, or pointing backwards.

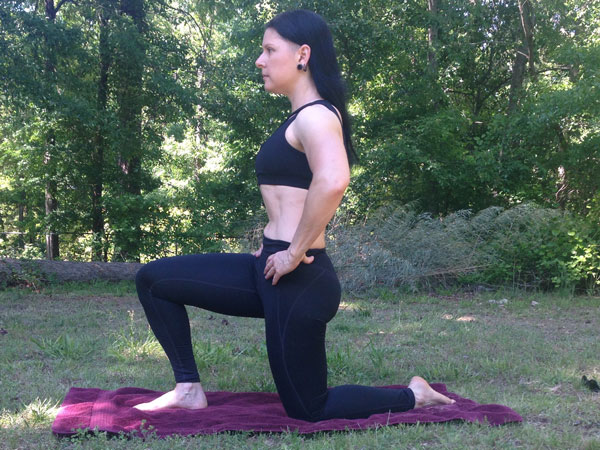
A favorite bodyweight stretch from the RKC curriculum also has great value for calisthenics practitioners. It’s no secret that I love kettlebells as much as I love calisthenics, and I’ve found that including this RKC hip flexor stretch in bodyweight only workout warm-ups can do wonders for bridging. If you find your hip flexors are tight and have never tried this drill before, give it a go! It’s a lifesaver after long car rides, or marathon writing sessions at the computer.

On a padded surface, get in a half-kneeling position. Without pushing forward in any kind of extreme lunge, simply think of tucking your tailbone while strongly activating your glutes. The front of your hip and thigh on the leg with the knee on the mat should feel a strong stretch. Take time with this powerful move and be sure to try it on both sides.

Adrienne Harvey RKC Hip Flexor Stretch

Abdominal/Midsection Strengthening

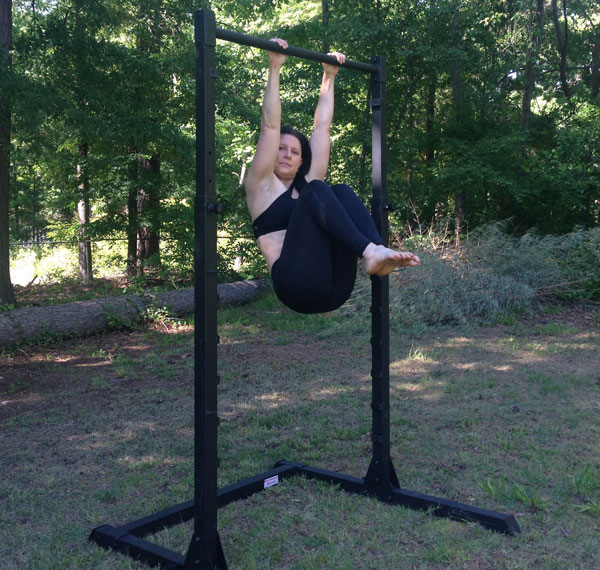
As mentioned earlier in this post, most if not all of the calisthenics exercises in the PCC curriculum and Convict Conditioning involve the abdominals. But if you or your students are having desk-related issues, focused abdominal strengthening can really help. The leg raise series beginning on the ground all the way up to the most exotic lever strongly impact the abs. Since the midsection recovers quickly, it can be trained much more often than most muscle groups—some may opt to train the midsection daily.

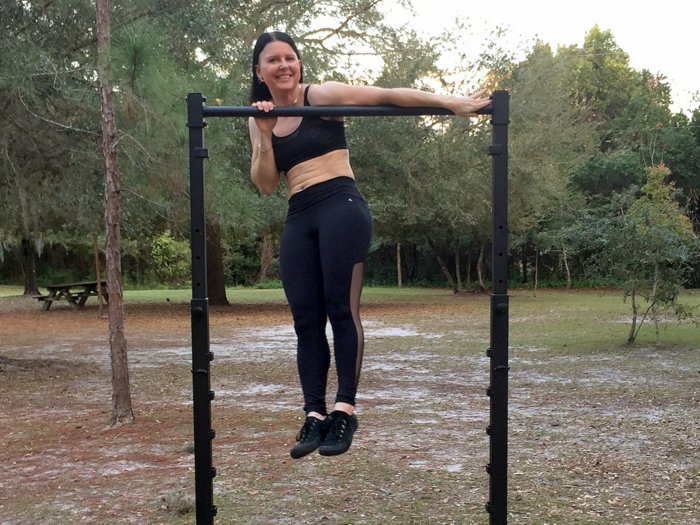
Adrienne Harvey Hanging Knee Raises
Double down on “un-desking” by combining slow and controlled hanging knee raises with a timed active hang. How slow can you go?

Stretching and Strengthening the Shoulders and Upper Back

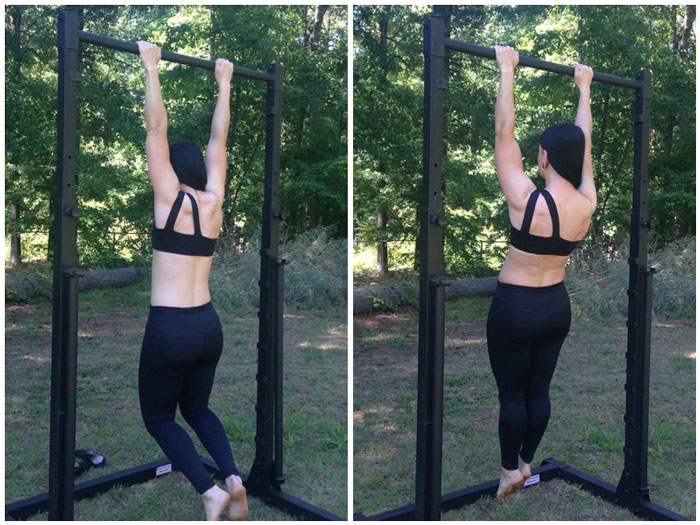
Weak upper backs and weak shoulders tend to round forward during desk work—but so do the shoulders of active people—especially boxers and pull-up addicts! Spending time hanging from a pull-up bar can not only greatly increase grip strength, but it’s an opportunity to relax and activate the back with dead and active hangs—done for reps, this move is sometimes called a “scap-up” referring to the movement of the scapula. (In a past PCC blog post I outlined several different bar hang grips but in this case, even the most basic bar hang grip will fit the bill.)

Pay particular attention to how your shoulders and upper back are feeling, and if you’re a beginner, take it easy.

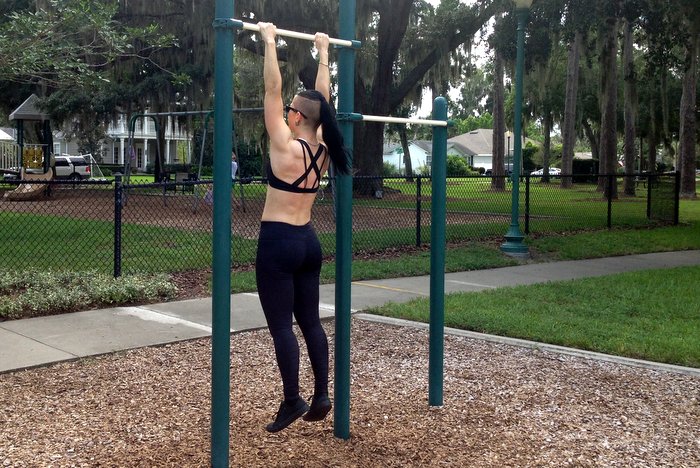
Adrienne Harvey Bar Hangs
The dead hang and active hang look and feel completely different!

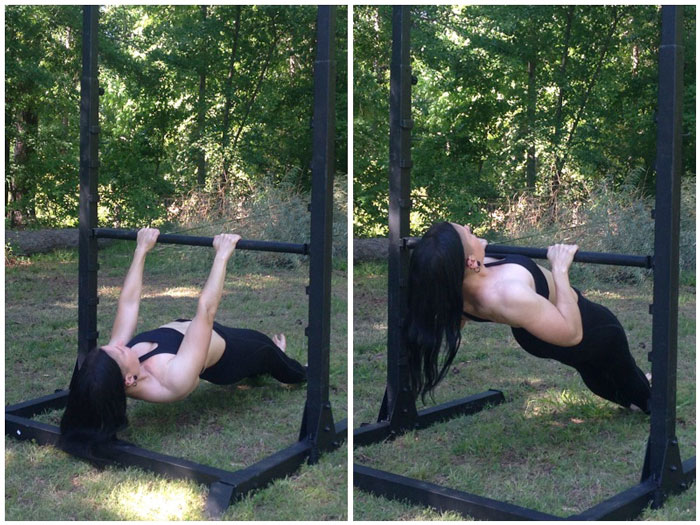
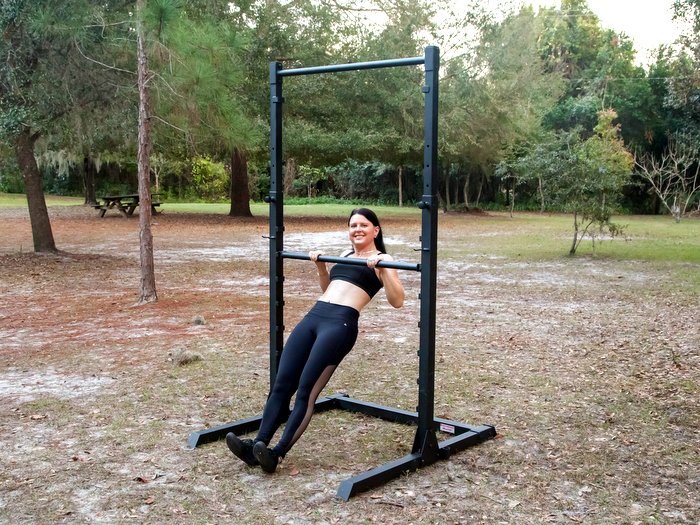
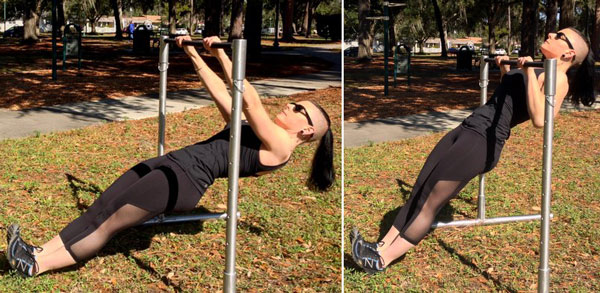
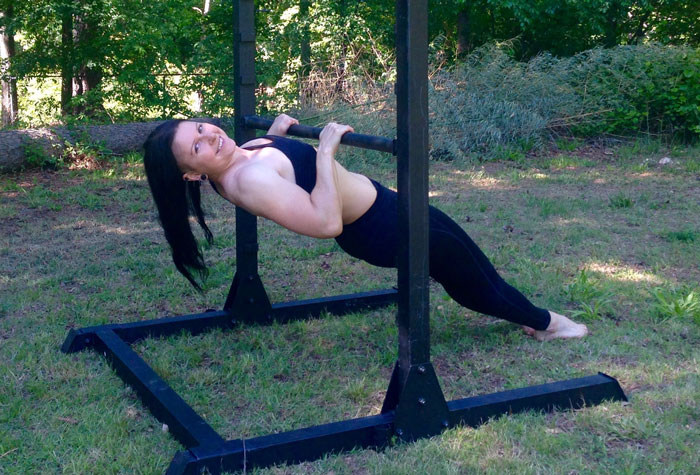
Last but certainly not least, the Aussie pull-up, especially performed to the chest can help remind our shoulders to stay back where they belong. Far from being just a step on the way to the pull-up, the Aussie pull-up (aka bodyweight row) performed slowly with a nearly isometric hold at the top can help posture, upper back strength and lead to better lockouts at the top of standard pull-ups. Be sure to experiment with lower bars of various heights. The Aussie can be further regressed for beginners or deconditioned students by bending the knees. This shortens the lever of the body and places some of the body’s weight on the feet.

Adrienne Harvey Aussie Pullups, Bodyweight Rows

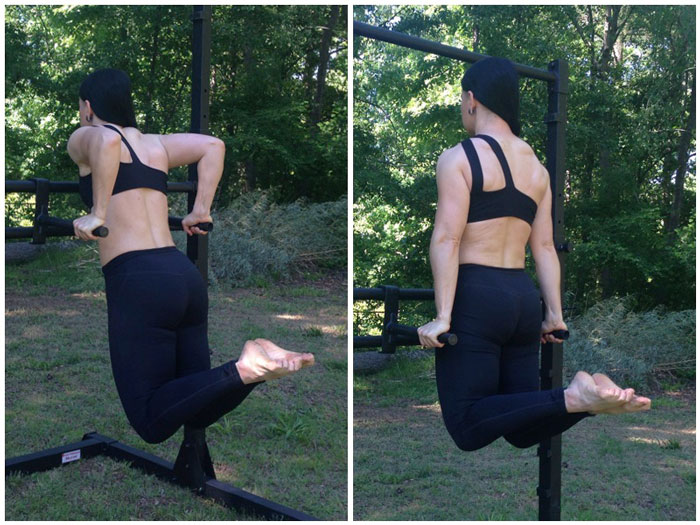
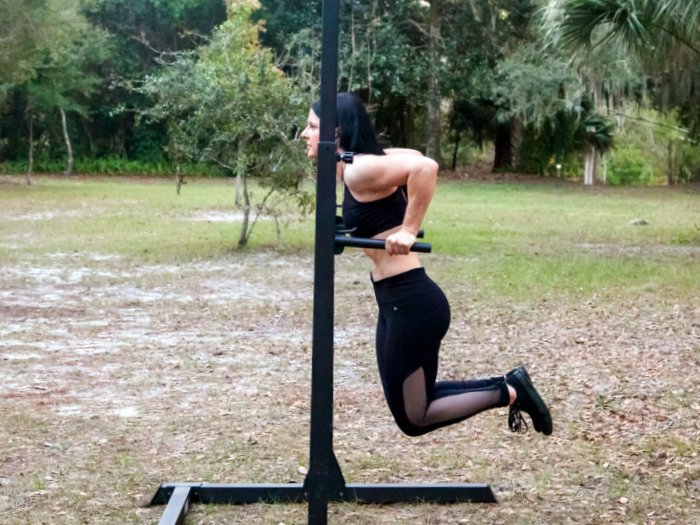
One of the great and occasionally frustrating things about progressive calisthenics is that there are so many options and there’s never time to talk about or do them all! I’ll just briefly mention dips here for intermediate folks, since the delightful chest stretch at the bottom of the dip (don’t dip so low as to risk impingement) is great after a day at the desk. Likewise a strong active hold at the top awakens many of the upper body muscles that suffer when we sit and slouch.

Adrienne Harvey Bodyweight Dips

Example Un-Desk Warm-Up Sequence (repeat for a few rounds if you have time):

Optimally begin by taking a short walk.

  • Short bridges: 5 reps, pausing for height and max tension at the top
  • RKC hip flexor stretch 1-2 per side
  • Dips and/or straight arm holds above dip bars
  • Bar hang alternating between dead hang and active hang (scap-ups) + a few pull-ups if they’re not maximum effort for you. This is not PR time.
  • Aussie pull-ups (aka bodyweight rows) 5 slow reps with max tension at top of each rep.
  • Short Bridge a few test reps to note improvement.

While it would be ideal for all workplace settings to have space for—and the social acceptance of—spontaneous exercise sessions, coming up with minimalist sequences for the work day can at least alleviate some of the issues until you can destroy the stress of the day at the gym or at home.

Bonus Slouch Slayer:

If you’re not sure if/when you’re slipping into a slouch at the desk, Place a mirror to the right or left of where you’re seated. While you work, take a second to catch a glimpse of your profile. Catching myself slouching a couple times was enough to build great upright posture habits at the desk. The moment you catch yourself in a really hunched slouch in that mirror, you’ll be motivated to sit up straighter, check your shoulders, abs, etc. At that point I’d also encourage you to stand up, and try a few of the calisthenics “un-desk” moves.

My home office is always a work in progress, but if I feel like I’m slumping, I’ll place that mirror to my left for a day or two – sure enough that fixes the problem!

****

Adrienne Harvey, Senior PCC Instructor, RKC-II, CK-FMS, has been RKC Certified since 2010, and RKC Level 2 certified since 2011. Kettlebell and bodyweight training have been crucial in Adrienne’s personal quest for fitness. A core member of the PCC team, Adrienne loves sharing her knowledge with small groups and individuals. She also loves to develop recipes and workout programs to further support performance, body composition, and of course—FUN. Go to http://www.giryagirl.com for more information about Adrienne.

Filed Under: Progressive Calisthenics, Tutorial Tagged With: Adrienne Harvey, calisthenics, calisthenics strength, desk neck, posture, progressive calisthenics, sitting, strength, tutorial, undo damage of sitting

Chaos-Proof Calisthenics Workouts For Long Term Success

January 3, 2017 By Adrienne Harvey 26 Comments

Adrienne Harvey Archer Pull-Up

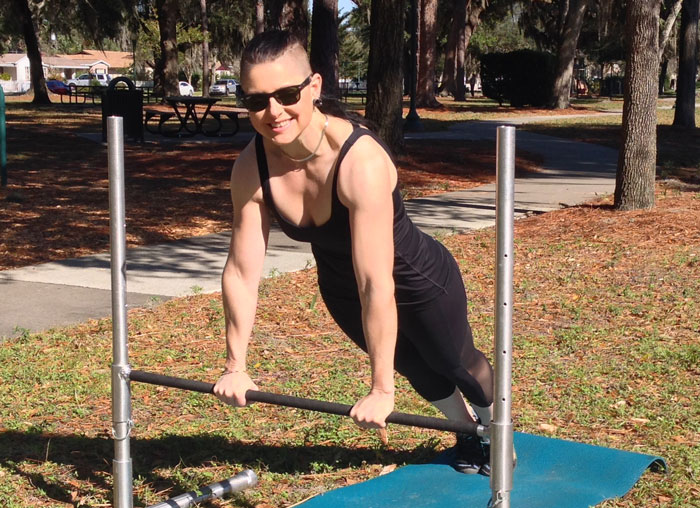
One of the greatest things about Convict Conditioning style progressive calisthenics exercises are their extreme portability. We no longer need a giant gym stuffed full of highly specific machines to get a workout. For many of the exercises, we just need a floor. As the now-famous line from Pushing the Limits goes, remember, “if you don’t have a floor to work with, then you’ve got bigger problems!” On any given day, you may see me or one of my neighbors working out using the apartment building itself. In fact, one neighbor in particular has been giving the railings a heck of a workout with high rep, raised pushups—not bad for a guy that chronologically qualifies as a “senior citizen”.

A pattern I have seen—and have personally experienced—for long term success in strength, health, and maintenance of body composition is thinking beyond time-bound programs. Most people who have maintained a strong, fit, and healthy body for a lifetime have done so by seamlessly making training part of their lifestyle. On the flip side, we’ve probably all observed others jumping from program to program or from diet to diet without experiencing much success at all. I bet a number of us here have done that too. While it’s a great idea to try new things, we must give them a real, fair try at the same time instead of becoming human yo-yos! Fortunately, simple but challenging workouts with calisthenics and minimal equipment are extremely sustainable for a lifetime, regardless of how busy we get with life’s responsibilities.

Evolving and Refining a Lifestyle

When we strive to make strength activities part of a lifestyle, the pressure of “all or nothing” doesn’t loom as large. This can be especially useful for your new clients or students who have been overwhelmed by the prospect of extreme fitness programs in the past. And from time to time, some of us may also stack up too many changes to try all at once. Many beginners who come to us for training and advice will need to ease into calisthenics training for a while until they even enjoy it. A few sets of the beginning Convict Conditioning progressions coupled with being more mindful about food is a smaller starting hurdle than a written-in-stone hour or longer workout and specific meal plan for each and every day.

Also, when working with a specific goal or program, it’s very handy to have a backup plan for your workouts between programs, or when life gets in the way. So, even when we aren’t leaping forward toward that goal, we’re still moving in the right direction. More importantly, even with a shorter, simpler workout than what we should have been doing with our specific program, we’re still making a long term investment in our health, habits, strength, and fitness.

Adrienne Harvey PCC Dips

I will describe these highly sustainable training approaches in detail in my upcoming book with Dragon Door, Eat Strong, Lift Strong, Move Strong: Proven Secrets for Strength, Power and Robust Energy. But, the general idea is to work towards a given skill or strength goal while allowing for flexibility within a few parameters. In this blog post, I’ll outline a few general workout strategies to weave into your lifestyle or around a program. Many of these ideas are great to have as safeguards against life’s chaos wrecking our goals. As instructors and/or business owners, we may also spend so much time working and training others that we’re left in the frustrating and perilous position of having little time for our own workouts.

Full Body Tension, Full Body Results…

No matter what plan you choose, or how many different exercises you do—or don’t do—be sure to get the most out of your time and effort by using full body tension. Far from being isolation exercises, movements like pull-ups, squats (especially the advanced versions), and lateral work with flags require full body muscular participation for ultimate success. The good news is, you’re training your whole body at this time too. A few minutes of exercises performed with full, high tension effort is time well spent. Gripping the pull-up bar hard, gripping the ground with your hands and/or feet, engaging the glutes and midsection—all activate more muscle fibers and teach us to move and lift safely in life outside of training, too.

Adrienne Harvey Neuro-Grip Push-ups
Neuro-Grips pretty much force you to use full body tension, and I love them for it!

So this year, instead of a New Year’s resolution, consider a goal of consistency. Below are some of the approaches I take on very busy days, when otherwise I’d be tempted to neglect my training.

Recipes for Consistency:

Paul Wade’s “Consolidation Training” (some may know this as GTG, Grease the Groove) is described in Convict Conditioning Vol. 1 for building skills and strength. Using this strategy, you’ll perform an exercise several times on the same day without maxing out. For example, I may work on singles or doubles of the human flag progressions on the hour. Later in the day I’ll do a simple full body workout which might just be a few runs through the Century Test performed slowly and with extreme precision. Consolidation training works fantastically for any of the very high tension, high technique, and advanced bodyweight exercises like bar levers, dead hang muscle-up progressions, advanced pull-ups, and generally anything that’s very difficult for you. On the days that I have focused on bar exercises, my short supplemental workout might consist of squats, jump-squats, and sprints. High skill and balance movements like handstands also really benefit from the consolidation training approach.

At Home Training Variations

As an entrepreneur, I work a lot at my home office, and on heavy deadline days or product launches, I may not really have time to venture too far from that home office at all for my own training. Luckily, I’ve set up a pull-up bar in the hallway among other things, and of course have full use of the floor. I love to use the idea of “exercise snacks” along with Pomodoro technique productivity intervals: I work for 25 minutes, then practice an exercise or movement sequence for 5 minutes. At the end of the 4th 25 minute stretch, I take a full 10 minutes to do a more concentrated mini-workout. If you work at an office, depending on the corporate culture (and the exercises you choose), you may also be able to implement this at work.

Those who’ve read my website in the past already know about the “chores workouts” where I pit near max sets of a given exercise against a rest period of folding clothes or another short household task. This is a great way to build up higher reps on your chosen exercise. Have you tried it?

I recently read about a simple variation of consolidation training. A famous model placed a post-it note in a high traffic area of her house that simply read “15 squats”. Whenever passing near the note, she did 15 squats. Easy. I sometimes do a more involved version of this which includes the pull up bar and a designated area for mobility and floor based exercises. A lot can add up during the day.

Errands Circuit

One of my fondest memories of the early days of the PCC Workshops back in 2013 was when Al, Danny, John Du Cane, and myself were walking to a restaurant in St. Paul, MN. While we were enjoying a lively discussion, each of us kept pausing to point out “Street Workout-able” features in the landscape. We saw low bars for advanced raised feet push-ups, medium railings for Aussie pull-ups, skinny curbs for balance-challenging pistols, an edge of a planter for elbow levers, a round sign post for clutch flags, along with any number of poles, bars, railings for pull-ups and pull up variations… you get the idea. Developing a keen eye for these features (while keeping safety in mind, please) can turn most errand-related walks down the street into your own personal strength and skill obstacle course.

Adrienne Harvey Aussie Pull-Up
Caption: Look around for bars and railings that are approximately this height for an impromptu Aussie Pull-Up challenge!

Alternately, I also like to time my errands and workouts together. If I have to go to Whole Foods (which happens a lot) I’ll make sure my route to get there includes a short stop at a park so I can knock out a workout (usually a circuit including pull-ups, push-ups, squat variations, and a cardio component like sprints, burpees, or mountain climbers), then grab dinner or a snack at the hot bar before grocery shopping.

A Full-Body Format: Push, Pull, Legs, Plus….

The last paragraph in the errands circuit hinted at this approach. It’s been described in many great strength and fitness books for calisthenics as well as kettlebells and other forms of weightlifting. I am especially fond of the way Max Shank describes using push-pull as an approach to programming in Master the Kettlebell. On a day with minimal time to workout, this super-set strategy gets a lot of work done quickly, and allows you to work on a variety of skills in the same session.

Here’s one of many examples of this type of workout (choose number of rounds based on your fitness level and available time):

  • 15 Push-ups
  • 15 Aussie pull-ups (bodyweight rows)
  • 30 Bodyweight squats (actively pull yourself down under tension)
  • 1 Quick sprint or 30 mountain climbers
  • 5-10 Pull-ups
  • Practice crow or handstands/handstand push ups resting as needed for one minute total

When I have time, after 3-5 intense rounds with minimal rest, I’ll end with sets of abdominal focused exercises like dragon flags (or the progressions up to) or hanging leg raises, and maybe even a set of twisting mountain climbers until I nearly face plant. Whew!

Adrienne Harvey Hanging Leg Raises
Full hanging leg raises near the end of a workout can be brutal!

If you’re ready to advance in skills and strength in 2017, I hope you have found these ideas help. On a tough day full of obligations, there are still plenty of options to keep moving forward towards your goals, and to maintain a healthy active lifestyle.

Have you tried some of these ideas before? Do you have some of your own to add? I would love to hear from you in the comments section below.

Here’s to a happy and successful 2017!
I hope your training is going better than ever,
Adrienne Harvey, Senior PCC


****

Adrienne Harvey, Senior PCC Instructor, RKC-II, CK-FMS, has been RKC Certified since 2010, and RKC Level 2 certified since 2011. Kettlebell and bodyweight training have been crucial in Adrienne’s personal quest for fitness.  A core member of the PCC team, Adrienne loves sharing her knowledge with small groups and individuals. She also loves to develop recipes and workout programs to further support performance, body composition, and of course—FUN. Visit her website, GiryaGirl.com for workouts, recipes, and more.

Filed Under: Motivation and Goals, Progressive Calisthenics Tagged With: Adrienne Harvey, Adrienne Harvey Senior PCC, bodyweight workout, calisthenics, calisthenics workouts, example workouts, exercise snacks, fitness, goals, motivation, PCC, Pomodoro technique, SCC, staying on track, time management, training strategy, workout strategy, workouts

Grip Strength for Greater Triumphs

September 6, 2016 By Adrienne Harvey 13 Comments

Adrienne Harvey Senior PCC Grip Training

Many times we associate grip strength and grip training with those ubiquitous spring-tension grippers and strongman training. While I really enjoy grip training with heavy odd objects, giant kettlebells, etc. it’s also very possible to train for a monster grip using bodyweight training only. With just a little creativity, bodyweight grip training presents infinite variations and challenges—and you can do most of it just about anywhere.

Having a strong grip is a prerequisite to so many bar-based calisthenics exercises—if you can’t hang on long enough, then you won’t be able to do a meaningful number of reps. Beginners will often need to build up their grip strength, as modern life and desk-based jobs don’t seem to test or build our grip.

As many PCC instructors and instructor candidates already know, grip strength is essential to passing the Century Test—you’ve got to be able to hang out on that bar for a while to do those twenty knee raises. In the excitement of testing, those twenty knee raises can seem to take a very long time, and you’ve got to hang on for every single one of them. Then, after the knee raises, the guys still need to do 10 pull-ups, and the ladies have to do their 10 Aussie pull-ups as well.

Convict Conditioning Vol. 2 remains one of my absolute favorites, and that’s not just because of the flags, it’s also the focus on grip training. The book begins with a comprehensive guide to hand and grip strength, and every time I look at it, it gives me more new ideas for training, some of which are presented below.

All Angles and Surfaces

At the PCC and in the Convict Conditioning book series, you’ll notice that there’s a variety of grips demonstrated—the “tactical” no-thumbs overhand grip most commonly seen on pull-ups, overhand with thumb wrapped, the chin-up grip with palms facing you, neutral grip with palms facing each other, wide grips, narrow grips, just a few fingers on each hand, two-arm, one-arm, finger-tip grips, and more.

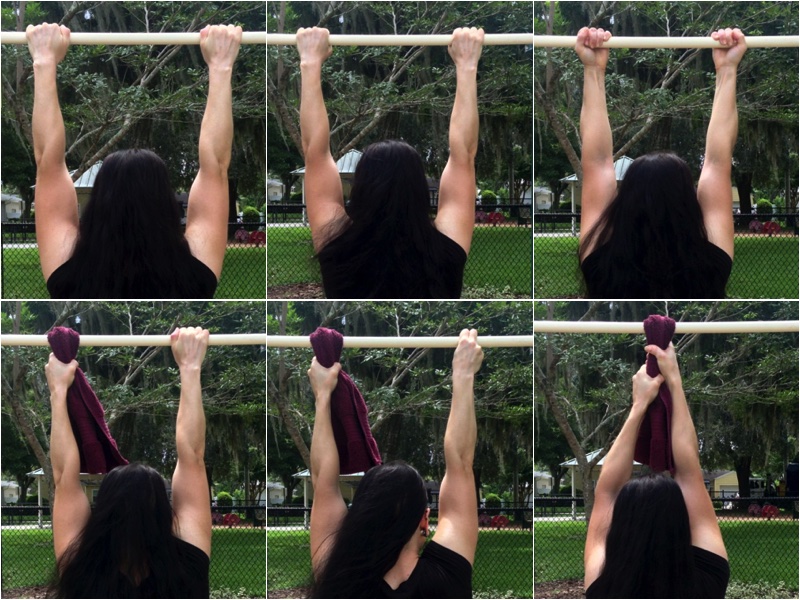
Adrienne Harvey Bar Grip Training Collage
A few examples of the nearly infinite number of bodyweight grip training options.

Inspired by old time strongman training—which, properly scaled, is great for absolutely everyone—Paul Wade even includes adding a towel (and later two towels) to timed hangs for an extra challenge. A towel is hard to grip and hang from given its large diameter when bunched up, and because the hand is challenged in a less-familiar and surprisingly challenging vertical orientation.

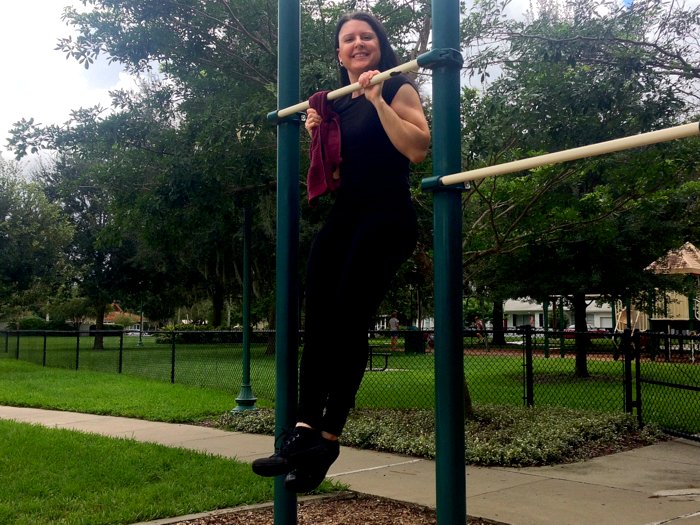
One day, frustrated by the lack of a plain straight pull-up bar in a commercial gym, I came up with the following variation. I put one hand on one handle, but then looped a small hand towel around another one, then did a short set of 5-6 pull-ups. I made sure to switch sides every other set. It was a great grip challenge and can be done most anywhere.

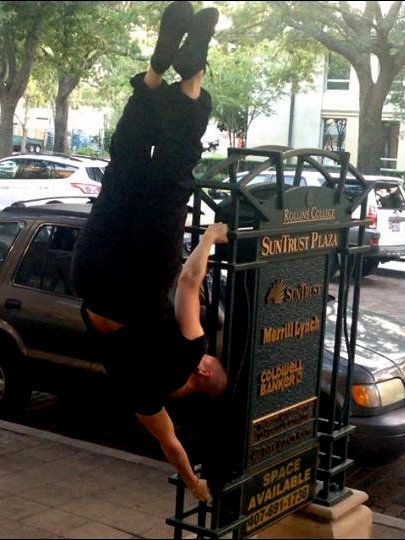
I’m always looking for new places to do pull-ups. While my city is not constantly covered in scaffolding like NYC, I have been able to find great grip-challenging pull-up spots like I-beams, vertical rafters (very difficult, just doing short hangs there), open stairwell stairs, hand-only rope and pole climbs and more. The next time you visit a playground with young relatives, look around for grip challenge opportunities.

Chamber Press Neutral Grip
This is a favorite place to practice flag regressions like the chamber press. The “easier” neutral grip lets me focus on the rest of the movement.

One of my all-time favorite tips from Zach Even-Esh, author of The Encyclopedia of Underground Strength and Conditioning, is to vary the grip on each set of pull-ups (or push-ups) in a workout. Towards your last sets, you might be forced to get very creative.

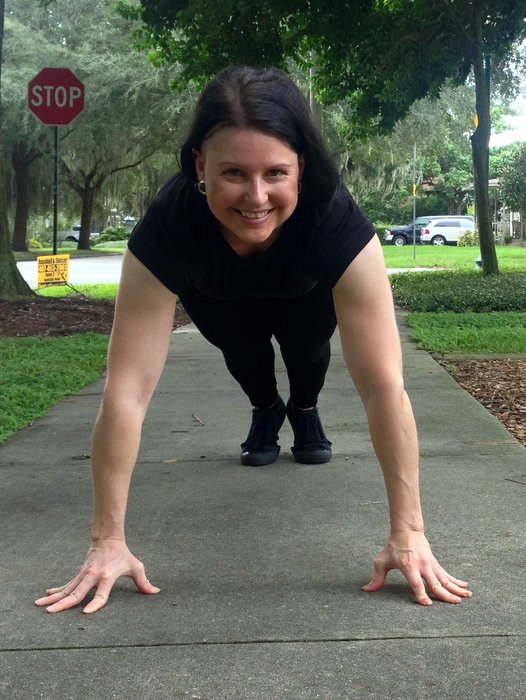
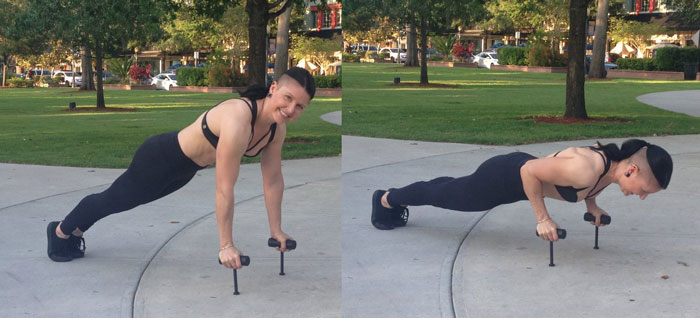
Speaking of push-ups, if you haven’t tried, them, Neuro-Grip push-ups are a fantastic challenge of yet another angle of grip strength and training. I’ve found that the focus and strength required from them has helped with other exercises like dips, etc. on rings and even when performed on parallel dip bars.

Neuro-Grip push-upsYour Grip = Your Health?
Recent studies have found that grip strength is often an indicator of health. While it seems to be generally accepted that our grip strength declines as we get older, this is yet another opportunity to rebel against the mainstream. We can build up, increase, and maintain our grip strength into our later years if we keep training intelligently. Good health, grip strength and general strength will help us remain safe and independent in our senior years. That sounds good to me even now.

It Goes Both Ways: Train Your Extensors!

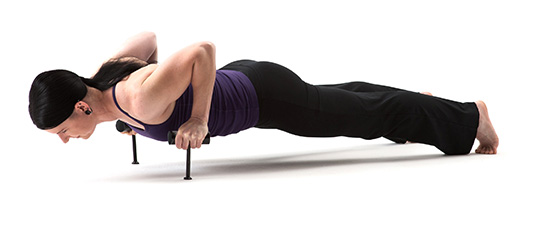
Adrienne Harvey Fingertip Pushups

Keeping our hands healthy means that it’s also important to “go the other way” too. In workouts which really emphasize grip training, I like to pair a grip intensive exercise with another exercise that either stretches or challenges the extensors—basically a superset. The extensor exercise can be something as simple as a well executed straight arm plank for time, push-ups, frog or crow stand, handstands if appropriate—or if you’re ready for it, you may want to experiment with fingertip straight arm planks or push-ups at this time too. There’s really no limit to the level of difficulty. It’s important to be patient and gentle though, as fingers seem to take a while to strengthen, and just a second to injure.

Here’s a sample combination from the last part of a favorite at-home workout:

  • 45 second pull-up bar straight arm hang
  • 30 second or longer crow stand
  • rest
  • 60 second pull-up bar straight arm hang
  • 45 second or longer crow stand
  • rest
  • 90 second (or keep going for a max PR) pull-up bar straight arm hang
  • 45-60 second straight arm plank

Grip Confidence and Breaking Through Mental Barriers

This last section might not apply to everyone, but I’ve observed both with myself and others that once we really begin to work on—and TRUST—our grip strength, then we’re often suddenly able to make a lot more progress on the skills which were otherwise right at the edge of our abilities. Getting the vertical chamber press and the next few human flag steps after it (human flag with one leg straight, one leg bent) were absolutely dependent on my confidence in my grip. I knew I had the strength, especially through the core, but in the past, kicking all the way up to vertical was fairly iffy. Turns out, my brain was putting the breaks on. Training my grip while still working on the rest of those progressions (but with a stall-bar-based neutral grip) was key. After finally putting the pieces back together, I’ve been able to reliably do the move on the first try and I’ve still been (slowly) progressing forward.

Adrienne Harvey PCC One Leg Flag

Is there a bar or vertical pole move that’s proved extra challenging for you? Could it be improved with a stronger grip and/or greater grip confidence?

Please share your experiences and questions in the comments below.

Train STRONG!
Adrienne

****

Adrienne Harvey, Senior PCC Instructor, RKC-II, CK-FMS, has been RKC Certified since 2010, and RKC Level 2 certified since 2011. Kettlebell and bodyweight training have been crucial in Adrienne’s personal quest for fitness.  A core member of the PCC team, Adrienne loves sharing her knowledge with small groups and individuals. She also loves to develop recipes and workout programs to further support performance, body composition, and of course—FUN. Visit her website, GiryaGirl.com for workouts, recipes, and more.

Filed Under: Progressive Calisthenics, Tutorial Tagged With: Adrienne Harvey, Adrienne Harvey Senior PCC, bodyweight strength, calisthenics strength, grip strength, grip training

Coaching and Using Powerful Push-up Elbow Positions

May 17, 2016 By Adrienne Harvey 29 Comments

Adrienne Harvey One-Arm Push-Up

I’m pretty sure there hasn’t been a PCC or SCC workshop where the following question hasn’t come up:

“Where do I put my elbows during the push-up?”

Or if it isn’t asked, there’s always more than a handful of people who need some coaching on elbow placement with the push-up.

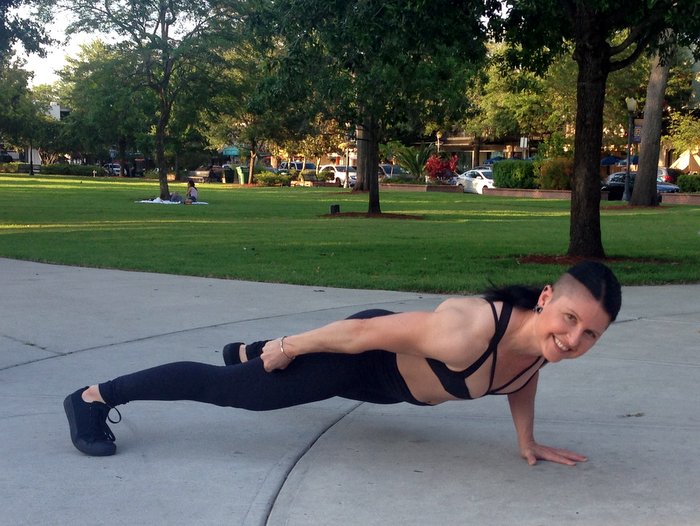
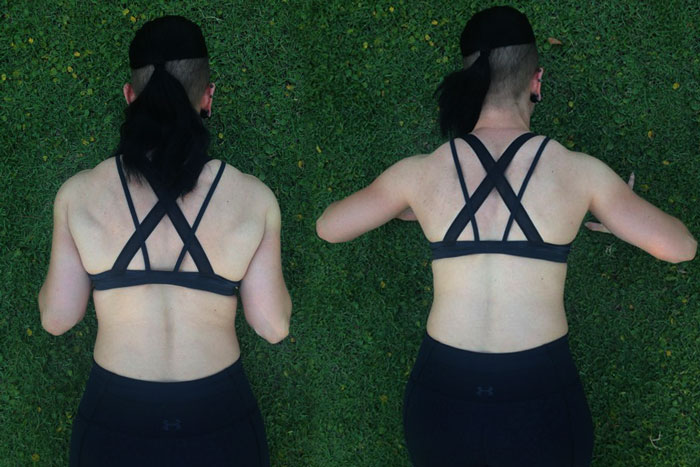
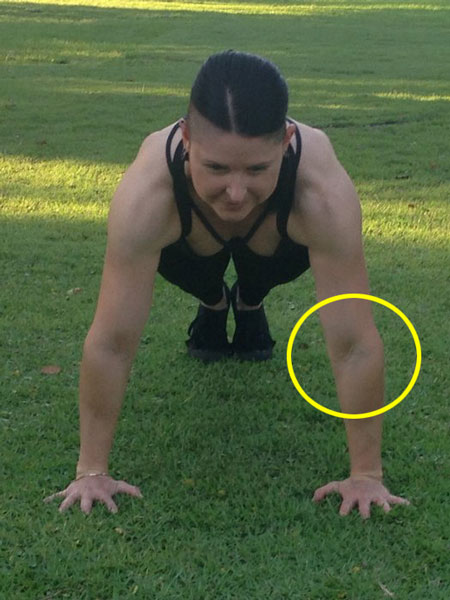
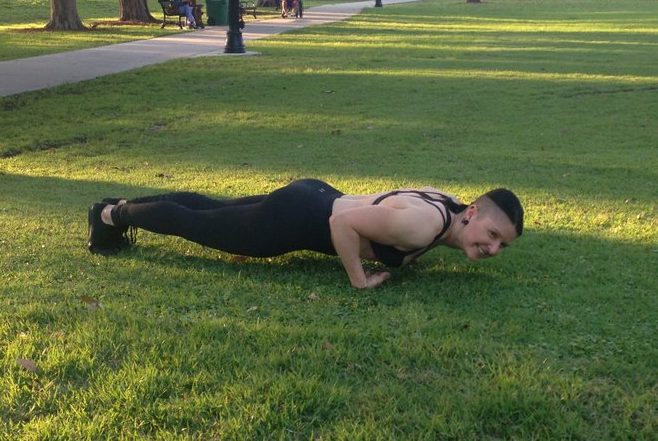
Al’s answer is a real winner, and we can all benefit from hearing and reviewing it. Basically, you want to make sure your elbows stay below your shoulders. Keeping them way out at a 90 degree angle to your torso is not ideal, but they don’t have to be right next to the body either. For most people, the ideal arm position will create somewhere between a 0-60 degree angle between the upper arm and the torso.

Push-Up Elbow Range 0-60 degrees

The good news is the range of 0-60 degrees allows each of us to find a strong and comfortable place, but by intentionally varying the angle in our sessions we can recruit different muscle groups more intensely. Generally speaking within this safe range, when the elbows are close to the sides as on the left photo above, there’s more emphasis on the triceps and front delts. When the degree is greater, we can experience a little more recruitment of the pectorals.

There’s several reasons that the elbow issue keeps coming up, and will probably continue to be up for discussion with trainers and enthusiasts alike. Here are three of the bigger reasons:

  1. There are a LOT of heavily used stock photos of people doing push-ups with their arms way out at big 90-degree angles. This is actually a huge pet peeve of mine because you’ll see these photos in well known, famous magazines and advertisements for everything from workout wear to every supplement you can imagine. The most extreme example I’ve seen was a (at least we were told) highly converting photo chosen to promote my friend’s boot camp. The woman in the stock photo had her elbows cranked out to such a degree that doing a push-up from that picture-posed position looked physically impossible!I could continue with more examples, but you get the idea—we’re all surrounded by tons of strange visual examples of something as simple as a push-up. It’s easy for even experienced exercisers to start thinking that this super-wide elbow angle is a preferred position, considering how often we see it in supposedly authoritative mainstream books, magazines, ads, etc. for men and women!
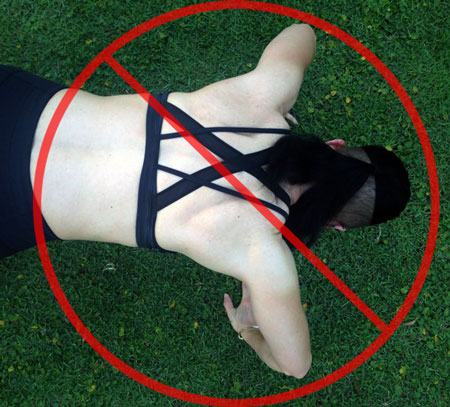
Elbows up too high can put shearing force on the shoulder joints, etc. I hated even taking this picture. OUCH!
  1. The elbows can sneak out and up when someone has moved ahead to a more difficult variation too quickly. I’ve also seen many people start out with a great elbow position, then as they fatigue, the elbows start coming forward as compensation. At the same time, you’ll see their head jut forward to the ground as another, often simultaneous compensation. Beginners can sometimes be so focused on hitting a particular rep goal, that they won’t even feel these compensations happening.That’s where you, as a great instructor can help out.

    If you are training on your own, check in from time to time by shooting a short video (just for you) on your phone and checking your form. Whenever I feel like something is “off” with any given exercise, I get out the camera, it’s a great tool. When you’re coaching a client and they’re doing well, you can also shoot short videos of them on their own phones—they will now have that as a reference (they’ll also probably proudly show it to their friends and end up sending you referrals). It takes everyone some time to build the body awareness to know when the form is breaking down. This is part of why it’s so important NOT to rush through the beginning steps of any calisthenics exercise.

  1. I’m sad that we need to bring up this third reason. As with the “squat depth” debate there still are still plenty of dogmatic trainers out there who are insisting that “there can only be one” (true for the Highlander, but not for elbow position) correct elbow position for everyone all the time. So, feel free to break free from the “right and wrong” dogma and find your effective elbow placements within that generous 0-60% angle area. Experiment, have fun, and don’t do anything that hurts!

The important thing to remember (and which is stressed at both the SCC and PCC) is that the exact elbow position will vary with each person. It can even be fun to challenge yourself within this range after you’re comfortable with your own ideal elbow position. Always remember to think of pointing your “elbow pits” forward at the top of the push-up, and the points of your elbows aimed at your feet or toes. This will help maintain your position and keep the reps nice and productive for building strength and habits.

Point the elbow pits forward at the top of your push ups

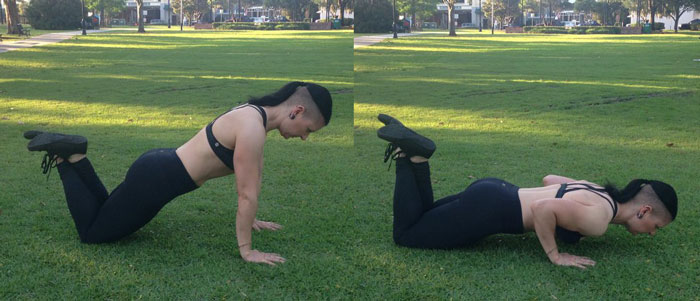
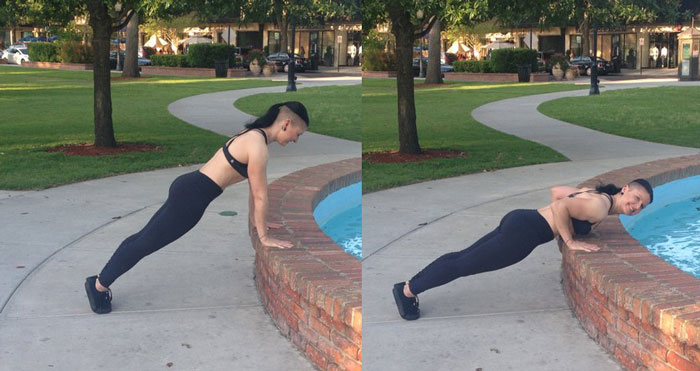
What if someone can’t perform a push-up without putting the elbows way up high with their shoulders crushing their ears? This simply means they’ll need to work on an earlier step in the progression until they have enough strength. Push-ups on railings are great for teaching the elbow position while building the requisite strength. Be extra sure that the hands are placed in line with and below the shoulders, no matter what surface is used. Knee pushups performed with absolute precision are also very useful for gaining the strength and habit of a healthy elbow/shoulder position.

The same idea applies for the often-maligned, but still very effective knee push up…
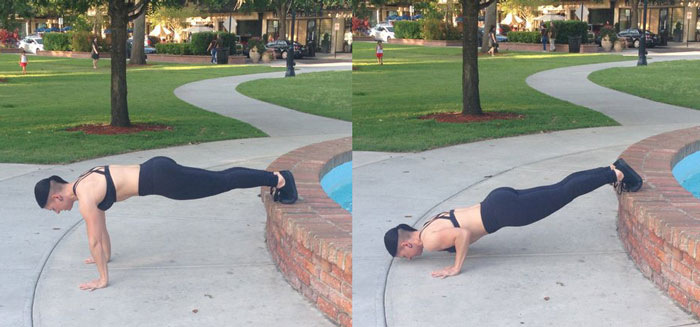
It also applies to the raised push-up step…

Let’s start with the “smallest” angle. This is with the arms right next to the body—even touching. Yoga enthusiasts may recognize this position as similar to when they perform the chaturanga series of movements. The hands are almost automatically placed right under the shoulders with this position too. It’s a very stable feeling for most people. If I’m going for high reps, or am helping a student activate and use the whole of their torso (lats, serratus), then this is a great go-to position.

People with large lats from serious pull-up habits, as well as those who may have a few pounds to lose will naturally need to take their arms a little further away from the body. They will of course need to still be sure to engage the lats, keep the shoulders away from the ears and maintain a plank position and tension throughout the body.

Paying attention to elbow placement VERY much applies for the more advanced variations like this feet raised push up. A good elbow angle will ensure that you don’t face plant when you first progress to this variation.

Taking the elbows out to a 45 degree or larger angle will usually be a choice of personal preference given physiology, or a choice made to make the exercise different or a little more difficult. We know that taking the hands out wider past the shoulders will be more challenging for most as well. When you’re ready, explore different hand positions, and then prepare to progress to a really fun intermediate/advanced push-up, the archer push-up.

Danny Kavadlo performing a precision demonstration of the archer push-up at a recent PCC workshop.

No matter what elbow angle is best for you, a real power-booster with the push up is the idea of having a spiraling feeling throughout the arm, and especially with the hands through the ground. A useful cue for this is to have your fingers pointing forwards, but at the top of the push-up, your “elbow pits” (see earlier phoot) will also be pointing forward. In a pinch—like those last few crucial reps of the Century Test—this spiraling feeling can make the difference between pass and fail.

Figuring out your optimal elbow angle can also lead to great success with the intermediate/advanced variations below, and of course your path to the one-arm push-up:

Close push-ups are safer and more effective when the elbow placement is right for you.
Neuro-Grip Push-Ups are nearly impossible without good elbow placement.
Neuro-Grip push-ups are nearly impossible without good elbow placement.
And the scary-looking back of the wrist push-ups (work up to these gently and only if appropriate for you) simply DEMAND proper form…or else!

Hopefully these ideas will help you and your clients/students continue to get strong and progress with the eternally useful, do-anywhere push-up. Please share your experiences in the comments below.

Train STRONG!
Adrienne

****

Adrienne Harvey, Senior PCC Instructor, RKC-II, CK-FMS, has been RKC Certified since 2010, and RKC Level 2 certified since 2011. Kettlebell and bodyweight training have been crucial in Adrienne’s personal quest for fitness.  A core member of the PCC team, Adrienne loves sharing her knowledge with small groups and individuals. She also loves to develop recipes and workout programs to further support performance, body composition, and of course—FUN.

Adrienne will be leading a one-day SCC (Strength Calisthenics Certification) Workshop in Gaithersburg, MD next month, and joining the Kavadlos at the PCC in New York next month as well. There are still a few spots available for each workshop, sign up today.

Filed Under: Progressive Calisthenics, Tutorial Tagged With: Adrienne Harvey, calisthenics, elbow placement, PCC, progressive calisthenics, push-up, push-ups, SCC, technique

Building the Foundation for Spectacular Progress, Programming with the SCC

February 9, 2016 By Adrienne Harvey 22 Comments

Raised Push-up Adrienne Harvey

After reading an online article last week, I had a brief flashback from my early days of strength training—or what I thought was strength training. In the 80s, bodybuilding came into the popular consciousness (along with aerobics and some of the most regrettable workout wear ever) and took its seat as the basis for mainstream strength training. For decades, the general public (which included me in the late 1990s, early 2000s) didn’t know that we were trying to use the ideas of this physique-based sport-specific training to build strength and general health. Most of us thought that doing these moves would help us to get stronger, more in shape, and improve our health—and they did to a point. But like many others, I was often confused because my real-world strength had only mildly increased along with my improved body composition and heavier machine-based lifting.

Also unfortunately, being short meant that many of these “standard” machines just barely fit me. Come to think of it, I remember seeing people of all shapes and sizes fidgeting with the machines in vain attempts to make them “fit”. The other even more frustrating effect was that I felt clumsy, both in and outside the gym. I’d trip over my own feet and just generally felt disconnected… and didn’t know what to do about it. Maybe I just wasn’t a coordinated person?

Fortunately, I eventually learned that I just needed to change the way I was training.  And soon after, I noticed my pull-up numbers began to increase as I learned to use my whole body for the lift, not just my arms and upper body as I’d learned to with the bodybuilding approach. And while it was still good that I could even do pull-ups that way, I’d been stuck on the same 3-4 satisfactory reps for a very long time.

When Convict Conditioning was first published, I balked at the early steps, thinking I was somehow magically beyond them. I couldn’t have been more wrong! I needed to start from the beginning and fill in the missing pieces of my training. It was necessary to “get over myself” to realize the extreme value of those beginning steps—especially when building the strength foundation necessary for advanced moves down the line. There are no “hacks” or “shortcuts” that can take the place of a solid foundation.

With all of that being said, it is still difficult for people to know how and where to start with bodyweight training, even if they are experienced with weight training or even if they’ve been training with kettlebells. In Convict Conditioning as well as Al Kavadlo and Danny Kavadlo’s books there are suggested workouts, examples, and instructions on how to customize your own programs. Yet somehow many of us still struggle to know where to start, or how to program a lot of this almost too-simple-to-be-true training for our clients or groups.

In Convict, we’re told to simply work through the progressions, only moving ahead when the reps are comfortably met… not barely met. Over time, we learn not to cheat ourselves when rushing through the progressions. It’s the beginner’s mind concept… and it works! But how do we teach it to others in the context of a session?

The other so-called “problem” with bodyweight training often comes from the lack of restrictions and the fact that it really can be done anywhere. With so few “rules” it can be easy to feel lost instead of liberated at first. This is one of the many reasons I’m thrilled with the new one-day Strength Calisthenics Certification workshops. They teach precisely what you need from the beginning… and more importantly, how to teach it to others. At the first ever SCC in New York, even experienced trainers and exercise enthusiasts found themselves “filling in the gaps” of their training with these powerful basics and the philosophy behind them. We never really outgrow the “classics”.

Aussie Pullups How To

Many of us (and our clients) may first come to basic bodyweight exercises with some baggage and the feeling that we “already know what we’re doing.” We often find that our ideas might actually be stuck back in high school PE class, or from following along with an old exercise video! What a client may remember from PE might be fuzzy at best, and you may find out that they have a bad attitude towards the exercises because sub-standard form has been causing pain! As a trainer (even if you’re training yourself), you need to understand and communicate the value of starting back at the beginning.

The SCC has all the basic building blocks for your own training, and for training others. The 400+ page manual also includes a programming guide for all levels and for multiple goals (including of all things, bodybuilding!) The SCC guide will help you get the coordination-boosting, real-world-strength-boosting, foundation–building benefits for yourself and your client/students. While your creativity will still need to be applied, these ideas will help you create workouts with skill building and movement pattern improvement—along with strength and conditioning.

Below is an example of a workout heavily inspired by the SCC materials and which could be adapted for a variety of beginner-to-intermediate situations.

Start with a warm up. At the PCC and SCC, we teach to warm up with the earlier, and often earliest progressions for the various movements we’ll be training in a given session, I also like to apply this to the Trifecta movements from Convict Conditioning Vol2 (when you go to the SCC, you’ll notice that the bridge and midsection hold moves also appear in the SCC manual), and scale it in much the same way. Some people have been confused with the Trifecta and have tried to jump right in with the later steps, even if they have not yet worked up to them in their regular sessions. Short bridges, beginner seated twists and bent-leg raised holds are great “warm-up” versions of the bridge, twist, and l-sit specified in Paul Wade’s Trifecta… even if you’re advanced or working with advanced students, revisiting those early steps for the first few reps is a great warm-up and “check in” with the body on a given day. Remember, these are active movements requiring active tension for full benefits. The other function of this focused warm up is to get our minds ready to work. Even a loosely structured warm-up can focus our attention on the task at hand, while breaking us away from our minds chattering away about the experiences of the day. In my own training, I think I do warm-ups as much for my mind as for my body!

Shoulder Bridge

Trifecta “Warm-Up” Example:

  • Short bridge and 5-second holds for three reps
  • Raised or knuckle-based N-hold (5-10 second holds) for three reps
  • Straight leg hold or easy twist hold (5-10 second holds) for three reps

Repeat (with the same versions of the exercises, or if you have progressed in your training, you have the option to move up a step or two)*

The SCC-Inspired “Beginner” workout example below uses a blend of the approaches given in the programming guide, but the core of the ideas below were from the section for deconditioned exercisers. The original form of this workout was designed for a deconditioned client with a fair amount of retained strength. I’ve adapted it for a more general purpose, but please tailor it to your own situations.

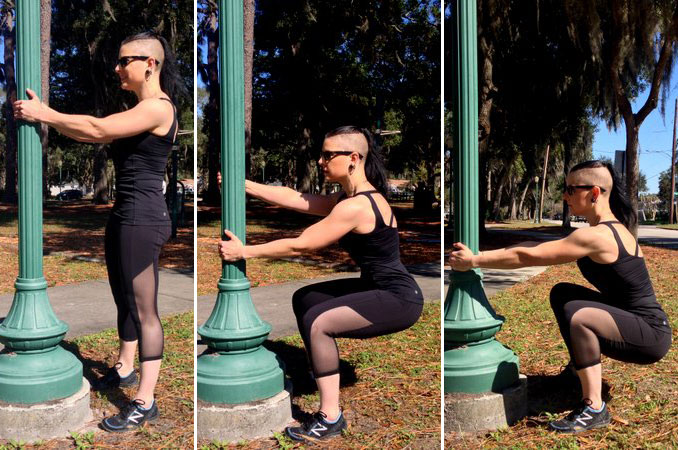
Senior PCC Adrienne Harvey Self-Assisted Squat

Review the movement patterns of each exercise for a few reps before starting, this will allow you to take extra time to make any changes before starting the real work sets. You’ll soon know whether there will be an opportunity to move forward in this session or the need to revisit an earlier step. For this workout, we did just a few reps of the assisted squat (with vertical pole or partner), horizontal pulls (Aussie pull-ups, bodyweight rows), incline (hands raised) push-ups, leg raises from the floor. While this can be progressed to any more advanced level, the original intention of this 3x week workout was to build up a reasonably deconditioned person—it can also be a nice way to come back to working out after illness.

Here are the work sets (do two rounds):

  • Self-assisted squats, 10 reps
  • Aussie pull-ups, 10 reps
  • Incline push-ups, 10 reps
  • Leg raises from the floor, 10 reps

Following this section, some may wish to follow up with some basic conditioning exercises such as jumping rope for time, or a brisk walk home from the park.

Finally, I find that “cooling down” with the version of the Trifecta I described above can be not only a useful way to end the workout, but a way to assess how you feel about the work sets, and to note any improvements as well. It’s subtle, but this “cool down” can really be a big motivator to stay the course!

This is just one example adapted from the SCC programming section, and while most people who train others will agree that most of our clients will be deconditioned, general population people, the SCC programming can also ramp up to spectacular levels of difficulty and challenge.

I hope to see you at a future SCC or PCC workshop!

*Trifecta progression examples for the second round: wrestler’s bridge or full bridges, L-sit from the floor, full twist hold… but remember there’s no reason to rush forward.


****

Adrienne Harvey, Senior PCC Instructor, RKC-II, CK-FMS, has been RKC Certified since 2010, and RKC Level 2 certified since 2011. Kettlebell and bodyweight training have been crucial in Adrienne’s personal quest for fitness.  A core member of the PCC team, Adrienne loves sharing her knowledge with small groups and individuals. She also loves to develop recipes and workout programs to further support performance, body composition, and of course—FUN. Go to http://www.giryagirl.com for more information about Adrienne.

Filed Under: Progressive Calisthenics, Tutorial Tagged With: Adrienne Harvey, beginner workout, bodyweight exercise, calisthenics, how to write workout programs, PCC, program for beginner, program for deconditioned, progressive calisthenics, SCC, Strength Calisthenics Certification, Why SCC, workout

The Hidden Powers of Short Bridges and Shoulder Stand Squats

September 29, 2015 By Adrienne Harvey 35 Comments

Shoulder Bridge

Over the past few weeks, I’ve been conducting a little experiment. Due to an intense work schedule, combined with not getting enough sleep, I found myself in a condition that was not optimal for intense workouts. So, I decided to revisit a few of the early steps of Coach Wade’s “Big Six.”

In Convict Conditioning, as well as at the PCC, the warm up for the work sets of our training can come from practicing earlier steps of the movements. For example, if our work sets consist of knocking out reps of full bridges, we would warm up for them with a few meaningful sets of short bridges or straight bridges (the first and second steps of the progression in Convict Conditioning).

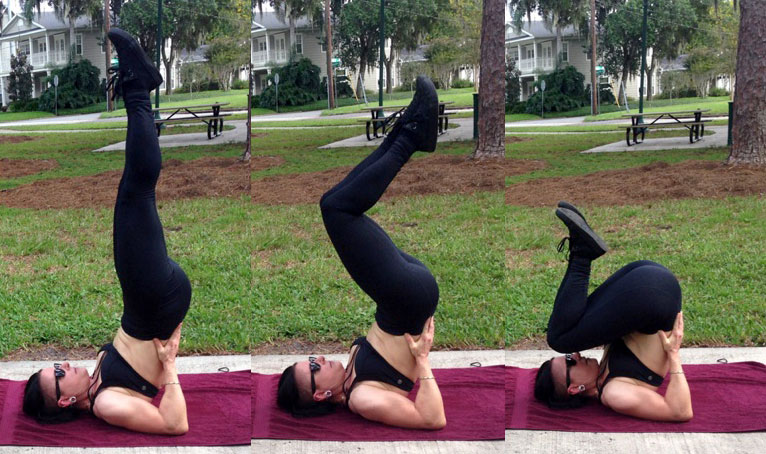
The first step of the Convict Conditioning squat sequence is the shoulder stand squat. This step is outlined in the original Convict Conditioning book, but explained in a little more detail in the Convict Conditioning Ultimate Bodyweight Squat Course DVD and Manual. This move is controversial because for many beginners (especially those who are overweight), getting down on the floor, and essentially getting upside down, will present a big obstacle right away. Then, if they’ve managed to get into the shoulder stand, it can be difficult for some larger people to get into the end position simply because they may be in their own way. This can be a major obstacle and it really doesn’t take that much extra weight to cause either of these issues. So at the PCC, we teach some other beginner drills which are more easily applicable to people of all shapes, sizes, ages, and fitness levels.

However, I’d recently managed to mildly annoy—but not injure—my left knee. In general, I tend to err on the side of caution and will make no apologies for stopping an exercise or movement if I feel a certain type of discomfort. Over the years I think this attitude this has helped me remain uninjured even while doing a fair amount of intense training and advanced drills. Exercise should make us stronger, not screw us up!

Shoulder Stand Squat Sequence

Though accidents happen, avoiding injury during training should be a top priority. While we are all continually encouraged to “get outside our comfort zone,” part of our own individual fitness journeys should include learning to carefully monitor our physical selves. This of course will be different for everyone, and will change as we age. I’m not saying that we should be afraid of what we’re doing in the gym or in life, only that it’s a good idea to start paying attention to, and learning to understand the subtle signals from our bodies.

So I wondered what kind of benefits my annoyed left knee could gain from the shoulder stand squat—and if the unweighted movement might give me the chance to analyze what might have happened in the first place, or at the least identify some trouble spots. I also started to consider what some of the other beginner steps could bring to my other challenges and goals.

The following is what I did, at a reasonably slow speed, which took a lot of control:

Two rounds:

  • Short bridges – 25 reps
  • Shoulder stand squats – 25 reps
  • Bar Hang – 1 minute
  • Full bridge
  • Plow stretch

The rep range in my example above was chosen since those were the Convict Conditioning “intermediate standards” for the short bridges and shoulder stand squats. This wasn’t meant to be an especially taxing workout, but I did find parts of it surprisingly challenging, in a way that indicated I might be working with my nervous system as much as my muscles. The above rep ranges are not necessarily appropriate for everyone, and will take some experimentation. When in doubt, do less on the first round to figure out where you stand (and where you stand on that particular day).

Adrienne Timed Bar Hangs

Intrigued by the CNS response of the above example, on a day following a very challenging kettlebell workout in the same week, I decided to make a different version but with the same general ideas:

First round :

  • Short bridges – 25 reps
  • Shoulder stand squats – 25 reps
  • Crow stand – 1 minute
  • Full bridge
  • Plow stretch

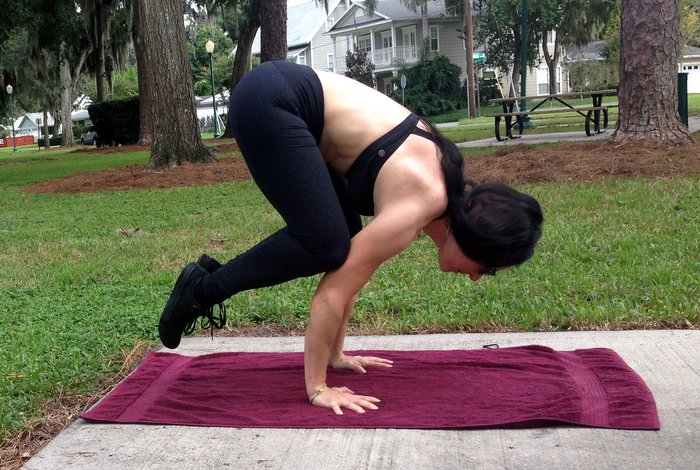
Adrienne Crow Stand

Second round:

  • Short bridges – 25 reps
  • Shoulder stand squats – 25 reps
  • Wall handstand – 1 minute
  • Full bridge
  • Plow stretch

I ended with Coach Wade’s “Trifecta” and some deep squats. Everything felt easier and better executed.

Going back to the more advanced drills the next day, I had a new confidence, and could tell that progress was made that week, just from the two small sessions with the earlier steps. Since then, I’ve made it a point to have more sessions like these during a typical week.

I encourage you to revisit earlier steps you have learned from Convict Conditioning and/or the PCC Workshop. Even if you feel like you’ve long-since outgrown them, they still hold their own challenges and can teach you a lot (especially if you go purposefully slow). For those of us who are instructors, they also help us stay sharp and empathize with our clients when explaining and working through those beginning progressions. Never underestimate the power of those early steps!

***

Adrienne Harvey, Senior PCC Instructor, RKC-II, CK-FMS, has been RKC Certified since 2010, and RKC Level 2 certified since 2011. Kettlebell and bodyweight training have been crucial in Adrienne’s personal quest for fitness.  A core member of the PCC team, Adrienne loves sharing her knowledge with small groups and individuals. She also loves to develop recipes and workout programs to further support performance, body composition, and of course—FUN. Go to http://www.giryagirl.com for more information about Adrienne.

Filed Under: Progressive Calisthenics, Tutorial Tagged With: Adrienne Harvey, Bridges, Convict Conditioning, PCC, progressive calisthenics, Shoulder Stand Squats

PCC in the UK

June 30, 2015 By Adrienne Harvey 18 Comments

Al and Danny Kavadlo with Senior PCC Adrienne Harvey

After the first ever Progressive Calisthenics Certification Workshop in the UK (Newcastle England), Al, Danny, and I agreed that while every PCC workshop has been fantastic—including the very first one in St. Paul, MN just a little over 2 years ago—it seems like each and every one continues to improve. By now, the news about the PCC and Convict Conditioning has spread around the world, allowing Dragon Door to bring this information to even more locations. While the Newcastle PCC was the very first held in the United Kingdom, it’s already very apparent that will be the first of many.

It is always an extreme honor to have the opportunity to teach, coach, and contribute a little of my own experience to the PCC. And when the participants are so eager, prepared, and able to instantly understand and apply the cues and information, then it is that much more rewarding! This group brought so much strength, skill, and bravery that every participant had at least one major PR. More importantly, they also had insights and realizations which will exponentially increase their value and effectiveness as instructors.

The overall strength of everyone in the group was demonstrated with the unprecedented lists of groundbreaking personal achievements. A full 1/3 of the group performed their very first human flags at the workshop! Among the other standout first time accomplishments were six first one arm push-ups, fifteen first clutch flags and even a first one arm pull-up!

One Arm Pull-up PCC UK

While almost everyone attending the Newcastle PCC was a fitness instructor, trainer, or fitness business owner, there were a few highly dedicated enthusiasts in attendance as well. I am always impressed by the dedication and enthusiasm of these participants, many of who may be stepping far outside the usual territory of their day job. It seems successful professionals in all fields recognize the value, efficiency, and convenience of bodyweight exercise as taught at the PCC.

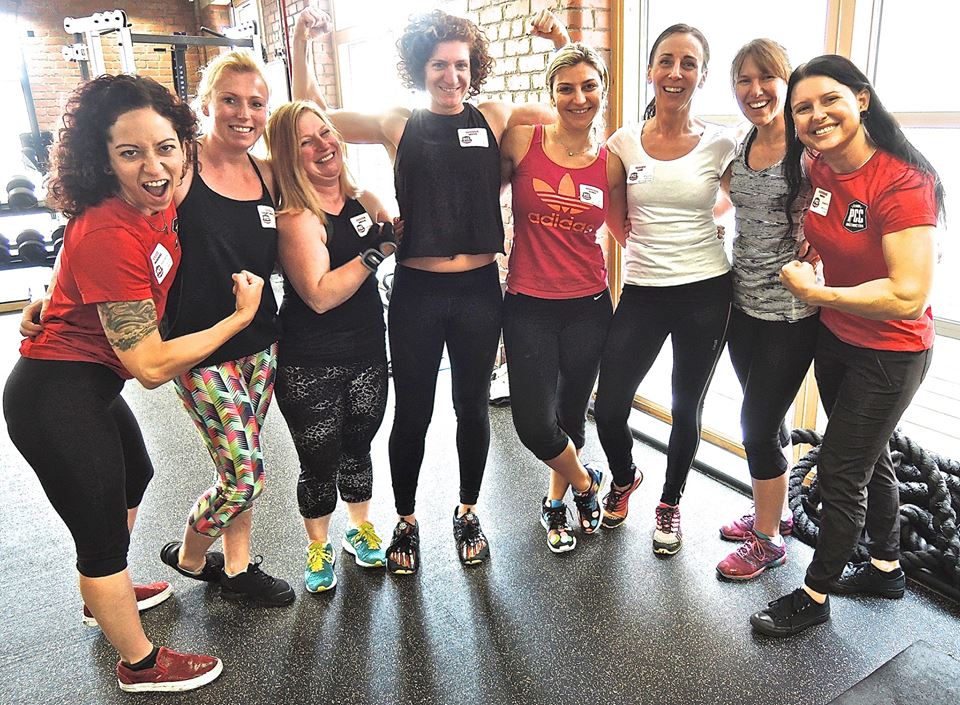
The large group of well-prepared participants included an impressive number of women. Far from being intimidated, these women were strong, did pull-ups, and performed advanced variations of nearly every exercise.

PCC UK Ladies

GymNRG was already an ideal location for the PCC (including a custom indoor pull up apparatus that I would LOVE to duplicate), but host Steven Hope went the extra mile and had a scaffolding structure erected just behind the studio. For the first time ever (even the weather cooperated) we were able to hold the flag and muscle-up portion of the workshop outdoors on this optimal setup.

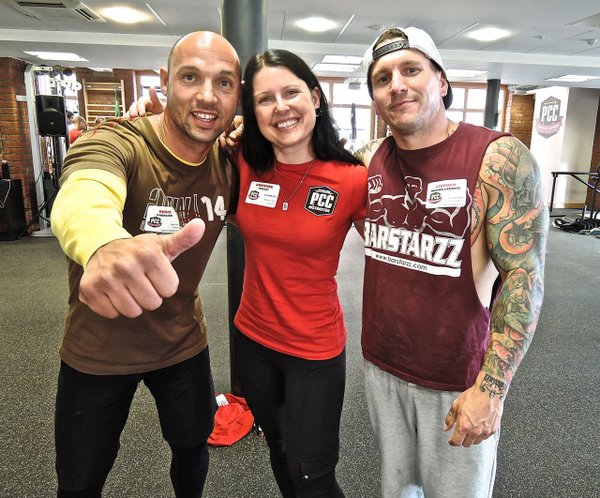
This authentically reproduced “street workout” setup was further put to the test when Barstarrz athlete, Stephen Hughes-Landers (Lambarstarzz), Adrian Harrington, and Fitz Dubova performed some impromptu freestyle demos for us after the workshop.

Renos Panagidis and I with Barstarrz World Champion, Stephen Hughes-Landers

I am proud of each and every one of the newly certified PCC Instructors (as well as those who need to complete their video tests), especially since they will now be representing our PCC program and hopefully encouraging others to train in this fun and effective way.

PCC UK Group

***

Adrienne Harvey, Senior PCC Instructor, RKC-II, CK-FMS, has been RKC Certified since 2010, and RKC Level 2 certified since 2011. Kettlebell and bodyweight training have been crucial in Adrienne’s personal quest for fitness.  A core member of the PCC team, Adrienne loves sharing her knowledge with small groups and individuals. She also loves to develop recipes and workout programs to further support performance, body composition, and of course—FUN. Go to http://www.giryagirl.com for more information about Adrienne.

Filed Under: Progressive Calisthenics, Workshop Experiences Tagged With: Adrienne Harvey, Newcastle England, PCC, PCC Workshop, PRs, UK PCC, what to expect at a workshop, Workshop Experiences

Upgrade your Life and Looks with the Knee and Leg Raise Chain

May 5, 2015 By Adrienne Harvey 46 Comments

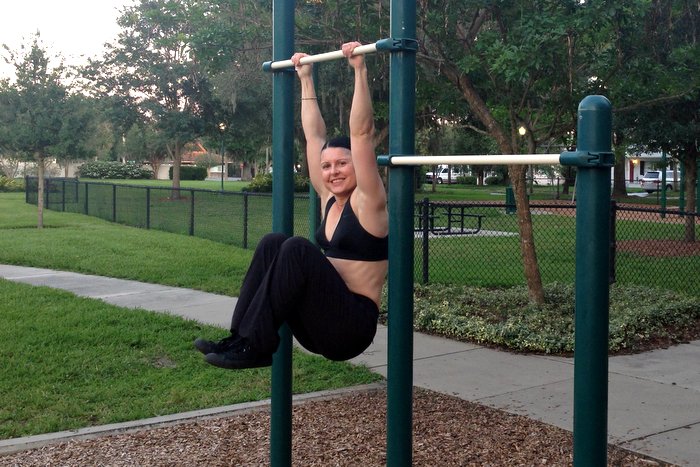
Adrienne Harvey Hanging Knee Raise

The humble but powerful knee and leg raise progressions featured in the PCC Workshop and Convict Conditioning don’t always get as much attention as some of the more visually intense exercises. Even though these moves might not be tailor-made for showing off online, don’t underestimate their importance. These progressions are the sort of “strong silent type” movements which build the muscles and coordination necessary to attempt many more advanced moves. In the context of the Century Test, the 20 knee raises also (along with the bodyweight squats) have the same requirements in the men’s and women’s tests. These 20 knee raises have sometimes been or directly led up to the make-or-break moment in a Century Test.

Testing aside, the hanging knee raise and leg raise progressions are not only great for working on your midsection, they’re a great reason to spend more time hanging on the bar and strengthening your grip. In the video at the end of this blog post, you’ll see just one of the many possible grip variations you can use when practicing hanging knee raises. Almost by accident I started doing a challenging fingertip variation—just because the available overhead support happened to be an I-beam. It was a fun challenge that really raised the difficulty of a few sets of 25 knee raises in my workout that day. Hanging knee and leg raises are also a great way to determine what you need to work on most. What “gives out” first? Your abs? Grip? Shoulder engagement? Start in on a max or near-max set of hanging knee or leg raises and you’ll soon find out!

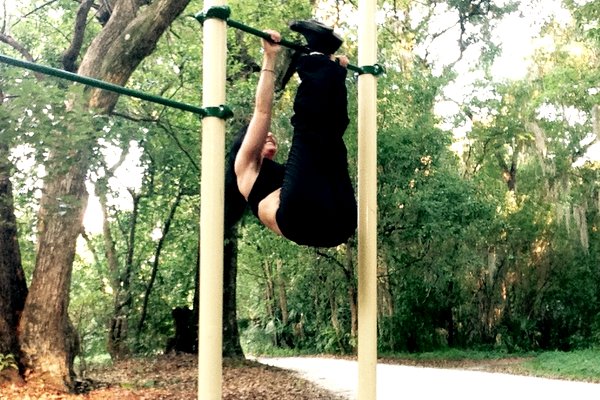
In a crowded gym with people fighting over the more “traditional” or ab-specific items, all you’ll need to do is find a good overhead bar and you’re set. Out in the “the wild”—on a municipal fit trail (like the one in my video) or even a playground, you can easily get in some ab work, without having to lay on the ground that might be muddy. The powerful knee and leg raise drills leading up to the hanging bar work in Convict Conditioning are extremely valuable, can be practiced anywhere at all, and start at a level where literally anyone can begin and benefit. If you’re still “on the ground” with your knee and leg raise progressions, you can always still work on your strength and strategy with timed hangs on the bar.

To meet PCC standards, you shouldn’t be swinging around with your hanging knee raises. A quick but not-so-easy way to make sure you don’t swing is to really control your grip on that bar. RKC kettlebell enthusiasts will recognize the idea of trying to “bend” or “break” the bar (or in their case the kettlebell handle). In the video below I break some sticks to give you the idea. Thinking of bending the bar in this way will stabilize your upper body and give you a solid foundation for hanging knee raises, hanging leg raises and any number of twisting variations that would otherwise have you looking like an out of control set of human wind chimes. Keeping yourself in control on the bar is a great habit to start developing and to have in your personal toolkit.

Adrienne Harvey Hanging Pike Raise

You can use the hanging knee and leg raises to a work on your grip, and to strengthen your other moves. Really, any time spent working on the bar will have positive effects on your training, strength, and physique. While many of us don’t publically talk about this last item—our physical appearance—let’s get honest about it for a minute. It’s simply human nature for us to want to look our best (at least to our own definitions). While the real benefits of these hanging knee and leg raise progressions are increased usable strength, a great side effect is some muscular development in the midsection. Provided your nutrition is in line, this can result in the coveted six pack, or the “flat tummy” touted in women’s fitness marketing. While I personally think performance and strength are better long-term motivators, having those positive visual side effects certainly doesn’t hurt! I will say that most people seem to have better long term training commitment if outward appearances are not their ONLY motivator.

Having a strong, trained midsection really sets you up for success (and safety, since a strong abdomen protects your back) with all kinds of lifting and other fun activities. I could even go so far as to say that having a strong midsection can generally improve your quality of life. (You can do everything from lift everyday heavy objects without injury to holding your own while trying a new activity like stand-up paddleboarding.)

Once you’re comfortable doing a few hanging pike raises (the PCC term for a leg raise taken up to shins to the bar) and have a reasonable grasp on pull ups, you can also try a fun and useful move called the “rollover”. While some people like to kip into this move, if you have the requisite strength, you don’t have to! Perform about ½ of a pull up, then pull your straight legs up and slightly past the bar, you’ll easily roll right over and be on top of the bar. This is a great way to practice bar dips or negative muscle-ups without burning yourself out trying to get on top of the bar. It’s also a lot of fun and looks cool! Towards the end of the video below, I demonstrate the rollover somewhat slowly so you can see what’s happening. While I had the necessary strength to do this move for a very long time, figuring out the timing of it was the crucial key.

This video is a medley of hanging knee and leg raise tips, variations, and training ideas I’ve put together just for you:

How are you using the hanging leg raise chain in your training?

***

Adrienne Harvey, Senior PCC Instructor, RKC-II, CK-FMS, originally RKC Certified in 2010, and RKC Level 2 certified in 2011, kettlebell and bodyweight training have been crucial in Adrienne’s personal quest for fitness. A core member of the PCC team, Adrienne loves sharing her knowledge with small groups and individuals. She also loves to develop recipes and workout programs to further support performance, body composition, and of course—FUN. Go to http://www.giryagirl.com for more information about Adrienne!

Filed Under: Progressive Calisthenics, Tutorial Tagged With: abdominal training, abs, Adrienne Harvey, Century Test, Convict Conditioning, Hanging knee raises, Hanging leg raise, midsection, midsection training, PCC, PCC Workshop

Unstoppable: PCC Encinitas Wrap-Up

January 29, 2015 By Adrienne Harvey 12 Comments

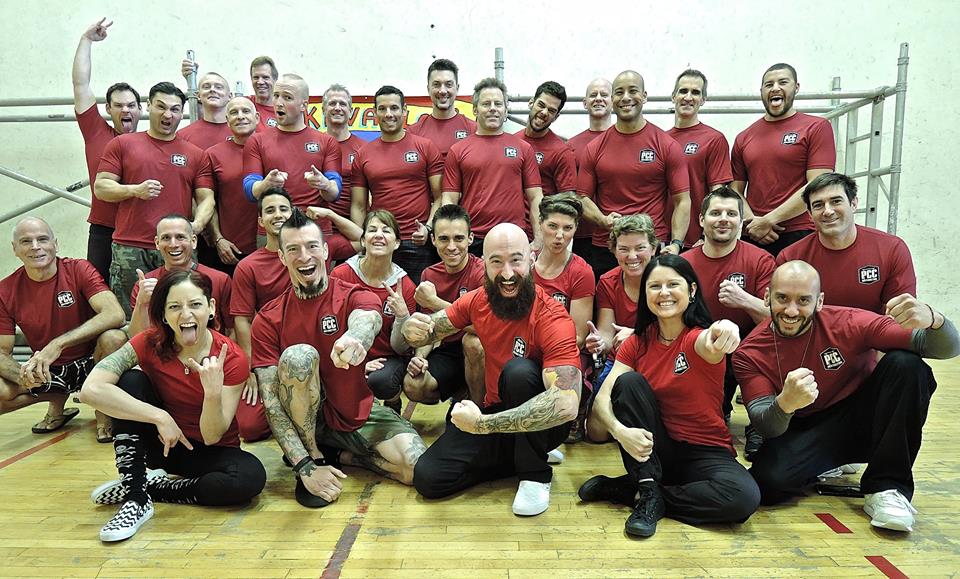
PCC Encinitas 2015 Group Photo

Since the very first PCC workshop in St. Paul, MN in June 2013, Al, Danny, and I have continually been impressed by the people who are attracted to the PCC. It may sound like a cliché, but even though we are the instructors, we always learn tons from the attendees. This PCC in Encinitas, California was no exception, and possibly one of the most inspiring and educational workshops yet. One of the things that I most admire about Al and Danny as Master PCC Instructors is their continued commitment to constantly honing and improving how they teach and present the PCC. Since I haven’t had a chance to teach alongside them in several months, it was even more obvious to me how much they had tightened up the already great curriculum for maximum results.

The group of participants at the Encinitas workshop was especially unique. For starters, some came from the immediate area, but others arrived from as far away as the East Coast, Japan, Brazil, and Puerto Rico. While the majority of participants are usually fitness professionals, this group also included an IT security expert, people working in construction, retired law enforcement officers and firefighters, a current firefighter, active and former military, physical therapists, a research scientist, an attorney, a teacher, a US Marine MAIT (Martial Arts Instructor Trainer), along with many very accomplished personal trainers and coaches. Even beyond that, the age range of the participants (18 to late 60s) was nearly as impressive as the extreme skills and strength exhibited by the older attendees.

John Fletcher Performs a fingertip L-Sit
John Fletcher Performs a Fingertip L-Sit

Danny and I had a funny conversation over the past weekend about how we’ve both started to see our ages as a bragging point—not unlike when we were kids on the playground! (“Oh yeah? I’m TEN so I get to go on the monkey bars first!”) But we also both agreed that because of our training and lifestyles, we feel as good now—if not better—than when we both were younger. Personally, I know for a fact I’m far better coordinated, stronger and more skilled than when I was just thirty. Age does not have to mean a decline in strength or ability—regardless of what the mainstream media constantly tells us. The attendees in their 40s, 50s, and 60s were not slowing down at all, it was very clear that their ages were just an indication that they’d had more time to practice! They were irrefutable proof that you really can train with progressive calisthenics for a lifetime—a strong, able, enjoyable and healthy lifetime.

Larry Berry Performing One of MANY Front Levers of the Day
Larry Froley Performing one of MANY front levers he did that day

Another pattern with this group were some of the incredible comeback stories (which you will be hearing much more about in future interviews on DragonDoor.com). The participants in Encinitas were so driven that age, an accident, life-threatening incident, or even the loss of a limb in the past could not stop them from excelling at their training—and getting the most out of this workshop.

During the Century, Al, Danny and myself each had a testing station, and the number of participants was such that one person would be testing on their own at the end with Al Kavadlo. David Rodriguez who had been inspiring everyone all weekend, waited until the very last to take his test. David (pictured below) has one prosthetic leg, but was so strong, skilled, and agile that I honestly kept forgetting that anything was different about him at all. His incredible attitude effected the group on a very deep level, which was fully evidenced during his test. David not only passed, but SMASHED each part of the Century Test to a soundtrack of our cheers and short periods of awed silence. As he strongly completed the 10th pull up (and looked like he could go for at least 10 more) the emotions in the room ran strong. David’s hand is probably still sore from all the high-fives…

David Rodriguez completing the Century Test

In addition to the curriculum, other benefits of attending the PCC of course includes networking with other fitness professionals and enthusiasts. And while friendships are always formed at the PCC, this time they seemed to happen right from the beginning. Normally it takes about a day for a group to gel, but for some reason, at the Encinitas PCC, this process started right on the first day. At one point I nearly mistook a pair of training partners for old friends or even family. It’s actually a shame that these two guys live across the country from each other because they are ideal workout partners. Originally, Russell Demczak and Alex Martinez paired up for some of the drills because they have similar builds, then continued to train and excel together during the whole weekend. During the extremely advanced back lever portion of the workshop, despite it being near the end of the day, each of their reps showed marked improvement.

Steady improvement was another universal theme for the weekend. While we always see drastic improvements, PRs, and other victories great and small, I was particularly impressed with the sheer volume of incremental and steady improvement from everyone. Can’t wait to see what these people are doing six months from now!

I don’t like to speak for others, but feel safe to say that all the PCC instructors this past weekend were honored to teach such a fun, accomplished and inspiring group at the Encinitas PCC.

Moments from the Encinitas PCC

Hope to see you at a PCC Workshop soon,
Adrienne Harvey, Senior PCC Instructor

***

About Adrienne Harvey, Senior PCC Instructor, RKC-II, CK-FMS, Primal Move Nat’l Instructor: Originally RKC Certified in 2010, and RKC Level 2 certified in 2011, kettlebell and bodyweight training have been crucial in Adrienne’s personal quest for fitness. A core member of the PCC team, Adrienne loves sharing her knowledge with small groups and individuals. She also loves to develop recipes and workout programs to further support performance, body composition, and of course—FUN. Go to http://www.giryagirl.com for more information about Adrienne!

Filed Under: Workshop Experiences Tagged With: Adrienne Harvey, Al Kavadlo, California, Danny Kavadlo, Encinitas, PCC Workshop, progressive calisthenics, workshop experience

  • Go to page 1
  • Go to page 2
  • Go to Next Page »

Primary Sidebar

Featured Products

previous arrow
GetStrongBookCover
ConvictConditioningBookCover
StreetWorkoutBookCover
ExplosiveCalisthenicsBookCover
StrengthRulesBookCover
next arrow

Categories

Progressive Calisthenics Certification Logo
Click here for more information or to register for the PCC workshop

Get Strong Workouts TriadXP App
Get Strong Workouts App

Recent Posts

  • Top 5 Reasons Why an In-Person Workshop is the Best Way to Supercharge Your Training
  • HYBRID STRENGTH TRAINING IS HERE!
  • My Calisthenics Journey to the PCC
  • The Handstand Press: Complete Control Through the Handstand
  • The Get Strong App is Here!

Dragon Door Publications

Dragon Door Publications

Recent Comments

  • bross dandon on The Case for Curved Handstands
  • Johnny Flewellen Jr. on Strength for Life
  • Dan Earthquake on The Pursuit of the Daily Minimum
  • Johnny Flewellen Jr. on The Pursuit of the Daily Minimum
  • Johnny Flewellen Jr. on Yoga, Calisthenics and the Journey of a Lifetime
FOLLOW US ON TWITTER!

Copyright © 2023

Dragon Door Publications / The author(s) and publisher of this material are not responsible in any manner whatsoever for any injury that may occur through following the instructions or opinions contained in this material. The activities, physical and otherwise, described herein for informational purposes only, may be too strenuous or dangerous for some people, and the reader(s) should consult a physician before engaging in them.