I didn’t grow up as a gymnast.
As a kid, I played basketball and soccer, but was fairly uncoordinated and had very little body awareness. In fact, handstands didn’t even come on the radar for me until my mid 20’s, and at that time I had just barely built up the strength to do proper push-ups and my first pull-up. Handstands seemed like something only superheroes could do.
Fast forward to today, and I’m happy to say I’ve built a pretty solid handstand. It’s one of the things I get asked about most when I’m training (I also get asked a lot if I’m a gymnast, which always makes me laugh because at 5’9” with fairly long limbs I don’t exactly have the ideal gymnast build).
But it hasn’t been easy. It’s taken me around three years of extremely consistent training to get where I am today, and while I probably could have progressed faster if I knew what I know now from the start, I’ve actually really enjoyed the ups and downs of the journey. It’s been frustrating and yet incredibly satisfying at the same time—and the constant challenge has meant that I’ve never been bored or lost interest in practicing.
If your goal is to learn to handstand, here are my best tips on making progress, whether you’re just starting out or you’ve been struggling to make progress for a while now.
No One is Too Good for the Wall
I train outside a lot, and out of everything I’m doing the main thing people like to stop and ask me about is my handstand and how they, too can work up to a freestanding handstand one day.
Without a doubt, my biggest piece of advice is to use the wall.
When I first started seriously working on handstands, I spent around six months practicing solely on the wall, and it made the absolute biggest difference in my handstand progression.
Now, I totally get that some of you will want to bypass the wall. After all, for a strong, athletic person, relying on the wall may seem like an unnecessary step. But working on the wall has countless benefits, including helping you to build endurance, establish a straight, solid handstand line, teaching you the beginnings of balancing in a handstand, and much more.
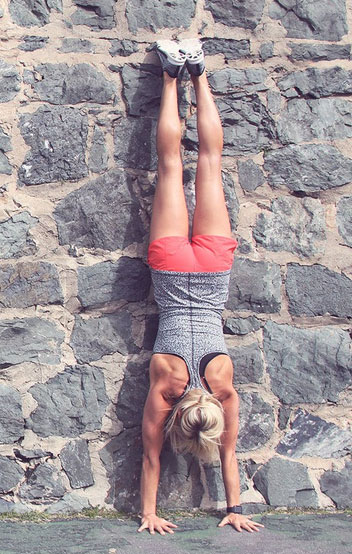
When getting started with wall handstands, most people will practice with their back to the wall. However, I’ve personally found that practicing with my chest facing the wall has been even more helpful.
Start in a plank with your feet touching the wall, then walk your feet up the wall until your body is completely vertical and your hands are only a couple of inches away from the wall (if it’s too scary to get that close at first, don’t worry, just work up to it). Once you’re there, push up through your shoulders as much as you can, tighten your core and glutes, and hold for time. This is going to help you build endurance upside down which is absolutely necessary to hold a longer freestanding handstand down the road.
Wall Handstand Balancing Drill
Once you’re able to hold a handstand for at least 30-45 seconds against the wall, you can start working on figuring out the balance portion of the handstand.
Here’s one of my favorite drills for balance:
- Start by walking up the wall as described above.
- Walk your hands away from the wall so that they’re about a foot away
- Slowly remove one foot from the wall and balance it overhead so that your shoulders and hips remain in a straight line. It’s okay if your leg goes slightly past your hips, just focus on your hips being directly over your shoulders.
- Even more slowly, remove the other foot from the wall and try your best to hold your handstand briefly. If you fall backward, just put your feet back on the wall. If you fall forward, simply cartwheel out.
- Split your legs back and forth, working to feel the balance in your fingertips and the alignment in your shoulders and hips.
You can practice this drill for time to build even more endurance. Just be patient with it and go slowly—this type of training can’t be rushed.
It also really helps to film yourself doing the exercise so that you can see whether you’re actually as aligned as you think you are. Videos don’t lie!
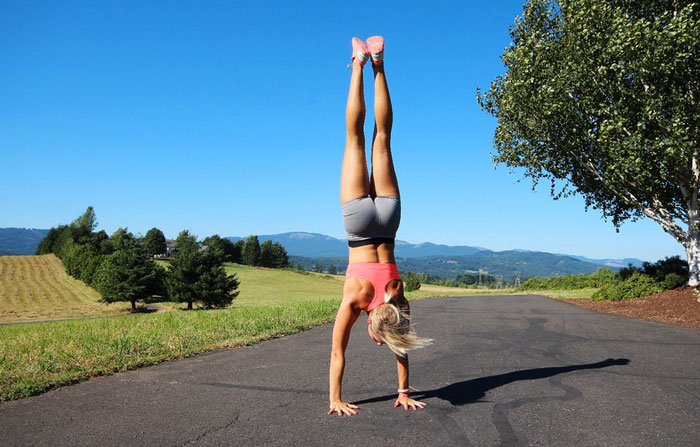
Working Away From the Wall
Once you start to feel the balance against the wall, it’s time to start working on getting away from the wall.
There are countless ways to get into a handstand, but most people will start with the basic kick up. This can be frustrating at first, and you’ll have to work on figuring out how hard to kick up to hit that sweet spot. If you don’t kick hard enough, you won’t make it to vertical—if you kick too hard, you’ll fall or cartwheel over. It just takes time and practice.
Even when you start working away from the wall, don’t give up your wall training all together. While working your freestanding handstand is a necessary step in handstand training, you should still work on the wall to keep building up endurance and working on your balance and alignment in a handstand.
A good recommendation is to spend about half of your time practicing on the wall and half of your time working on kicking up into a freestanding handstand until you get really consistent with your freestanding handstand—then you can spend most (if not all) of your practice away from the wall.
Consistency is Key
If you’re serious about being able to rock a handstand, the number one thing to keep in mind is that you have to be consistent with your training. Since handstands are more of a skill than a strength exercise (although don’t get me wrong, they can definitely tire you out!), you can practice handstands nearly every single day.
And you should—even spending 5-15 minutes a day working on your endurance and balance holding a handstand will make a huge difference towards your progress.
Ultimately, though, you have to really want a handstand and be patient with the process. It can take a great deal of time before you feel consistent and comfortable in a handstand, but take it from me, the process is absolutely worth it.
And of course, it you want to learn more about handstands, come to the PCC!
***
Krista Stryker, PCC is an NSCA certified personal trainer and the founder of 12 Minute Athlete, a popular website and app helping thousands of people get fit in as little time as possible. Krista has been featured in The Washington Post, SHAPE Magazine, Muscle & Fitness Hers and MindBodyGreen. Find out more about Krista on her blog and connect on social media @12minuteathlete.