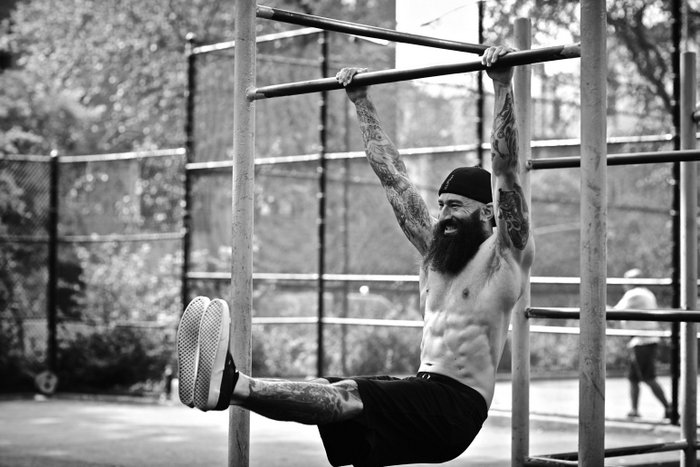
My beloved bodyweight brothers and sisters!
2016 is here, and that means I get to quit that set of pushups, blow the dust off my old laptop (my computer, not my junk) and write an article for the folks who really matter—you guys! Jeez, have I missed ya! How you been? Good? Staying out of trouble? …Why not?
I know the drill. Every time New Year rolls around, dudes and dudettes promise themselves one of two things: they either promise that THIS is the year that they’ll start working out; or—if they already work out—THIS is the year they’re gonna make those big-ass changes they really yearn for.
Well, I’m not gonna help you with any of that. Sorry. (But if you do want to make this year the year you begin bodyweight, I wrote an article for you here, or if you want to make this the year of the big transformation, read this.)
Don’t get the wrong idea. I still love ya, baby. But this year I want to try and help you with a third kind of promise. It’s not as big a leap as starting out, or as sexy as a transformation, but it’s possibly the most important thing you can do if you want to really get anywhere with calisthenics.
What am I talking about? Keeping at it.
It’s sad but true, but just keeping working out—week-in—week-out—is something that a HUGE number of potentially legendary athletes really struggle with. They might have great genetics, massive pain tolerance, and a perfect program, but most folks seem to just suck at not quitting.
So what’s the solution? In reality, athletes quit bodyweight training not because they are injured, and not because they don’t get results. Consistency in training is a mental game. The late, great Vince Gironda once said that most athletes should train hard on a program for three weeks, then take a week off (!) and begin a totally new program, repeating this every single month. Vince understood that although an athlete’s BODY can absorb repetitive training almost indefinitely, the MIND gets easily stressed or bored with a given method of training very quickly.
Now, I don’t believe you need to lose a quarter of your training time every month, but Vince had a point. Variety—freshness, freedom, novelty—is the best possible solution for the kind of mental stress or staleness that makes folks layoff or quit their training. So that’s exactly what this blog post is gonna focus on. I’m gonna add to your training toolbox here, kid—in Part One of this post, I’m going to give you TWENTY fresh ideas—techniques, challenges, tips and tools—to throw into your training to shake sh** up when you start to get bored. In Part Two, I’m gonna give you SIXTEEN programming approaches—sometimes complete templates, sometimes more focused concepts to help you explore rep ranges, frequency, and so on.
Twenty/sixteen…2016…see what I did there?
Let’s hit it, gorgeous!
#1. GO CAVEMAN
Remember when you were a kid, and bodyweight training was natural—and fun? You ran, climbed trees, played games. And you didn’t even know you were doing calisthenics, right? Let’s learn a lesson from this. If you are starting to feel stale, trapped and bored with the old straight sets of the same movement-families, how about shaking things up and going “caveman”?
What I mean by “go caveman” is simple; look at your regular strength exercises, and try to see what functional movement patterns lurk underneath those joint movements. For example: in the real world, nobody needs to do a perfect one-arm chin. But they may need to use their arms in a similar way, by climbing. Nobody does a perfect one-leg squat, but you do need to sprint. And so on.
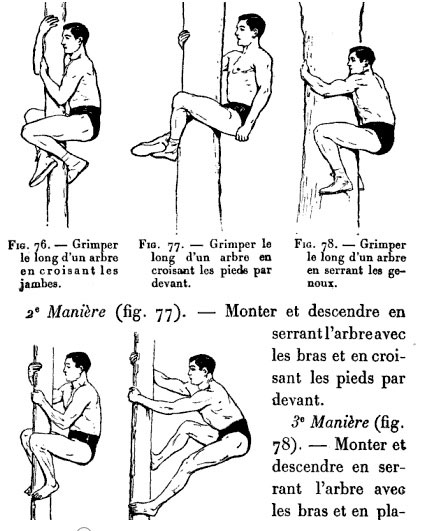
Here’s a list of some “caveman” calisthenics:
- Climbing: Use a climbing wall, a tree, or natural terrain. Develops the pulling muscles of the back and arms, finger strength, coordination and mobility.
- Running: Use sets of sprints, or better still hit a natural terrain with inclines, declines and stuff to duck under and jump over. Turning on the speed or hitting those hills will strengthen every lower body muscle, from toes to hips.
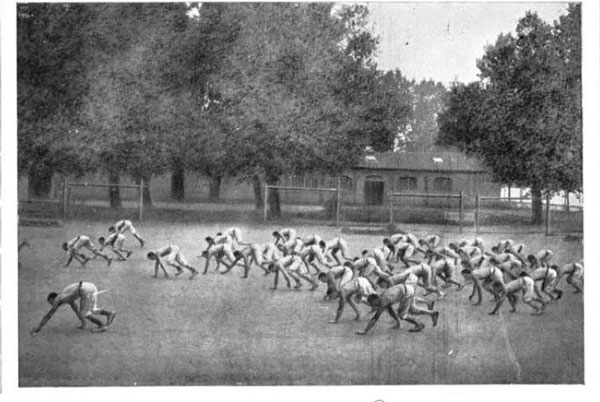
- Quadrupedal movement: Get on the floor and crawl; run; roll—just use all four limbs. There are dozens of movements to try here, and they all build excellent arm and should strength, while ironing up that midsection.
- Swimming: The above three activities will give anyone a total-body workout—you want to add an X-factor, go for swimming. Awesome for the joints, great stamina, and bulletproofs and heals sore shoulders. Hell yes, it’s bodyweight!
How should you use this list? Here’s a good way. When your regular training gets too stale—too heavy, stressful, or monotonous—take a month off your regular calisthenics work, and spend 4-6 sessions a week doing nothing but these four types of caveman “play”. Don’t try to be too systematic about it—just put the time in, and make it fun. In four weeks, you will have retained all your strength, but added extra balance, coordination and new skills, while refreshing your joints. Plus, you’ll have lit a fire, and be raring to get back to the regular movements.
These are just the basics—you can get much more sophisticated in your caveman work, which has a long history in physical culture. The PCC Instructor’s Manual has an in-depth chapter on “Natural Movement Patterning”. If you want to get more into this side of things, you could do worse than research the philosophy of the modern master of natural body-movement, Erwan Le Corre. Erwan is a training genius, and long-time friend of the PCC—check out my interview with him here.
#2. EXPLORE HAND-BALANCING
This concept comes in the “something different” category.
If there is an “art within an art” in calisthenics, then it’s gotta be hand-balancing. Back in the first half of the 20th century, hand-balancing ability was seen as a sine qua non of a strength athlete. Weightlifters and bodybuilders (like Doug Hepburn and John Grimek) did their thing with bars and weights, but they worked hard at hand-balancing too. If you couldn’t hold a handstand, then you were a goddamn pussy!
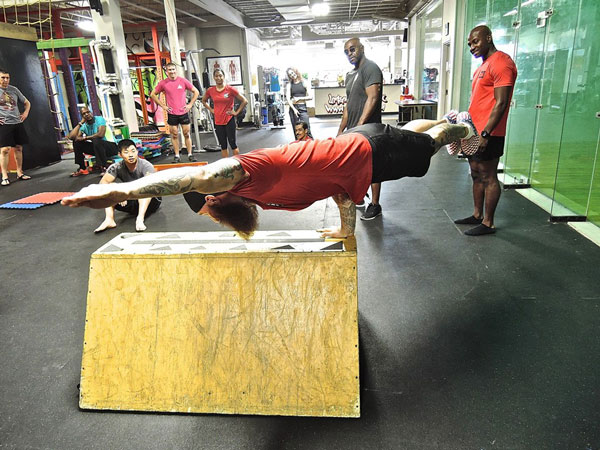
Hand-balancing involves an entire catalog of techniques involving bodyweight inversion via strength and balance. It’s a discipline, almost a system, of itself. It’s not just holding a handstand. It involves all kinds of free handstands, tiger bends, various floor levers, hand-walking styles and techniques, partner tricks, and the crucial transition between hold sequences. It also includes preliminary drills such as the crow stand.
I spent many years obsessed with the art of hand-balancing: particularly the technique of kicking up into a handstand from a one-arm elbow lever. For a long time that technique, to me, was a “one-arm handstand”—and I thought I was the only person in the world who could do it. I later learned that countless others could: and better!
A long time after my experience with that technique, when I began teaching bodyweight to more newbies, I eliminated almost all hand-balancing from my system (although you still see the crow stand in there, a little throwback). Why? Because I discovered that handstands were more effective for strength-building when you took the balance element out. I stand by that principle, but it still doesn’t lessen the awesome respect I have for hand-balancing.
In addition, hand-balancing is exciting. Fun, in a way many “safer” calisthenics skills aren’t. If you’re looking to insert something new and powerful into your training, hand-balancing may be the way to go.
For decades, the greatest resource for the old-school hand-balancing philosophy and training was the iconic York course #1 and #2. These beauties used to be available on the old Sandowplus website, however sadly this is no longer the case. Luckily, full copies have been preserved on David Gentle’s site:
York Hand-Balancing Course No. 1
York Hand-Balancing Course No. 2
Even if you aren’t interested in pursuing the training, these old courses make for a great read. David is doing the world of physical culture a HUGE service by preserving lots of invaluable old texts like this alive (and FREE) in his online library. If you read the courses (and if you do Facebook) please go and like his page on Facebook to let him know you’re supporting the great work he’s doing.
#3. GO MOBILE
Sometimes when we want to call Time Out on our strength training, it’s not due to staleness or boredom. One big reason is joint pain. Calisthenics is the safest form of training for your joints and soft tissues, but even so sometimes you’ll get aches and pains. It makes you paranoid.
Provided you aren’t carrying an acute injury—which needs to heal—the solution is usually to check your form. If that doesn’t get the job done, reducing frequency and volume probably will.
That said, there are times you will feel the need to take a brief layoff from hardcore, ball-busting strength movements. If you are doing it to save your joints, the best strategy is to devote 3-6 weeks to pure mobility training.
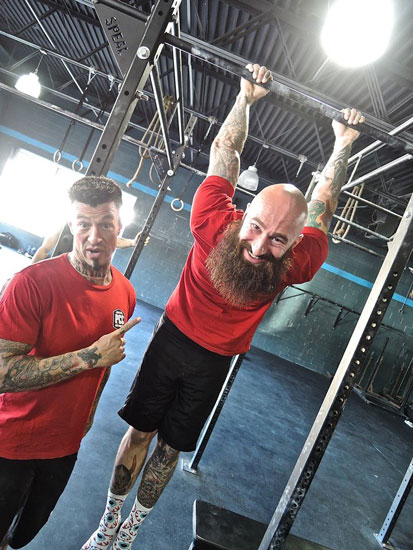
“Mobility” is different from “flexibility”—which, frankly, I have no use for outside of a rehab context. Mobility involves the use of strength to increase a joint’s range-of-motion. Working on mobility movements every day (or maybe 6 days per week) will not only refresh your joints and increase your range-of-motion; done properly it will increase your neural efficiency and your ability to use your bodyweight when you return to the hard stuff.
Mobility work should feel natural—and, done right, it should complement and mirror other bodyweight training to a remarkable degree. All bodyweight aficionados who want to master mobility should go right to the source: Stretching Your Boundaries by Al Kavadlo.
That book is an incredible, next-level view on bodyweight mobility! I’m not saying this to sell you another Dragon Door book—just the opposite, that book has cost me money. When it came out, I was lining up to produce a book on mobility; but once I read Stretching Your Boundaries, I realized, genuinely, that it was the last word: simple, elegant, perfect. Better than anything I could write on the subject.
Thinking of quitting because of sore joints? Get this book, absorb it, and take five weeks using it every day. It’ll revolutionize you. Then get back in the War, soldier.
#4. PUT AN INCH ON YOUR PIPES
Oh yeah—now we’re talkin’, kid.
Sometimes when your training is in a slump, you need to back off. Sometimes, you need to change things. But sometimes, what you REALLY need is to double down, and work harder—really kick yourself in the ass. The best way to do this is set a challenge you really want to meet. Putting an inch on your guns in a month? Sounds good to me!
Here’s how we’re gonna do it.
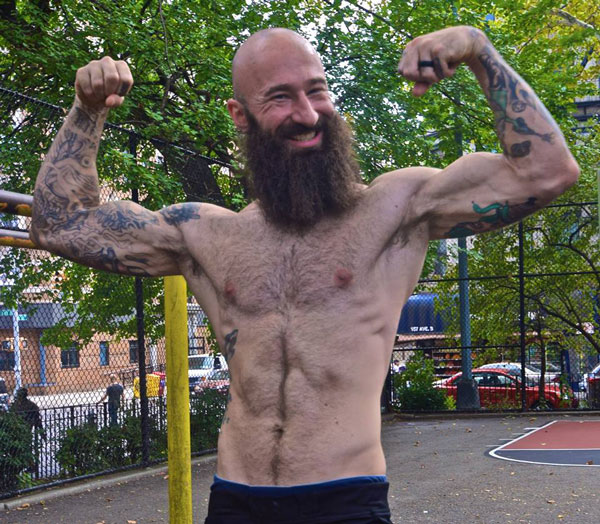
Pick two triceps exercises, and two biceps exercises. The first biceps/triceps exercise should be TOUGH—five reps should be a struggle. The second should be a “FEEL” exercise—that you can control well, to burn the hell out of your muscles. You should be able to get about 10-15 reps on these.
Good choices for “tough” triceps work: handstand pushup variations, one-arm pushup variations, etc. For tough biceps work, stick with asymmetrical vertical pullups. Find progressions that match your own strength level.
Good choices for “feel” triceps work: incline French presses on a low bar, tiger bend pushups, close grip pushups. For biceps, some kind of horizontal pull, with your palms supinated (facing you).
Your arms workout will be the same for the next two months:
- TOUGH TRICEPS EXERCISE: Warm up, then: 5, 4, 3, 2, 1
- TOUGH BICEPS EXERCISE: Warm up, then: 5, 4, 3, 2, 1
- FEEL TRICEPS EXERCISE: 4 sets of 8-15
- FEEL BICEPS EXERCISE: 4 sets of 8-15
- Horizontal bar hang: 1 x minute
- Take about a minute’s rest between tough sets; 20 seconds on the feel exercises.
- Perform the tough exercises as straight sets; do the feel exercises superset (i.e., a triceps set, then a biceps set, etc).
- As you get stronger, you may need to switch to harder exercises to keep the rep range right. That’s cool.
- Forget torso work—you’ll get plenty of it with the arm pushing and pulling.
- Train lower body just once a week: a few hard sets of squats, light bridges superset with lying leg raises, and possibly some calf work and mobility.
How often do you do this workout?
-Week 1, do it twice.
-Week 2, do it three times.
-Week 3, do it four times.
-Week 4 do it twice.
Then—on the final day of week four—perform the workout three times in a single day, with at least two hour’s rest between sessions. I know this sounds nuts, but the stress it puts on your arms is unbelievable. Eat plenty.
Don’t blame me if your t-shirts don’t fit this Spring, stud.
#5. LORD OF THE RINGS
Sometimes the key to kick-starting your training involves a new tool. Now—generally speaking, dude—I am a bodyweight purist. To me, the bulk of your training should involve the floor, a horizontal bar, and maybe a wall and a basketball. Run to the hills if someone says you NEED something more than this to assist your bodyweight training, because, 9 times out of 10, that item will actually water down your training and make it worse.
There are times, though, when sprinkling in a new bit of kit is the spark plug you need to set your training alight. In these cases, using new gear might be acceptable. One example might be parallel bars. I’m not a big fan of them, but hell—a lot of advanced athletes swear by them. Another example of an ancient bodyweight tool—and one I mentioned in Convict Conditioning—are hanging rings.
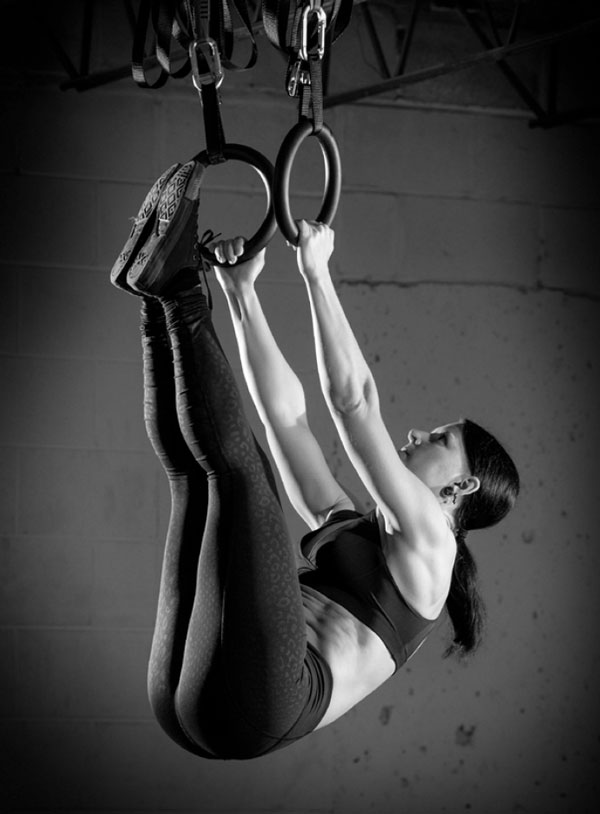
Hanging rings are fairly affordable now. They are available on the internet, they’re easily and rapidly adjustable, and can be slung from plenty of different locations. You can do pressing exercises (pushups, dips), pulling work (pullups, horizontal pullups, levers), hanging leg raise stuff, and assistance squat work (assisted squats, one-leg squats), etc.
Best of all, you can use progressions on these beauties: the higher the rings, the less the angle of your body and the easier the pushups are. Likewise for pulls. Can’t do a ring pullup? Sling the rings low enough to reach while sitting, with your legs extended. Then try a seated pullup, keeping your heels on the floor as a pivot.
I could give you dozens of progressions, but there just ain’t the space here. Want to know the best place to start? Get Gillette’s now-classic Rings of Power. The best part of the book? It stars our very own PCC wonder girl, Adrienne Harvey!
#6. BODYWEIGHT ISOMETRICS: “THE LITTLE 3”
Training getting boring because the exercises ain’t challenging enough? You stud! Now that’s what I love to hear!
I’m a big fan of an up-down-up-down lifestyle. And I don’t just mean in the bedroom, you dirty birds. I mean that, for muscle and functional strength, I love exercises with nice ranges of motion where you lift, pull or push yourself up and down for reps. Plenty of reps!
For those of you getting bored with the up-down-up-down stuff, throw some isometrics into your game. Now, as a known bodyweight zealot, I’m often asked my option on isometrics. Isometrics just means “same length”, and refers to exercises where you don’t move. The first basic kind is where you just tense your muscles, unloaded—bar pulls are an example. The second kind is where you load your muscles with a proportion of your body’s weight, and try like hell not to fall over—an elbow lever is an example. As for whether I dig isometrics? Well, I like the first kind…but I LOVE the second kind!
For the second kind of isometrics, you are typically (though not universally) looking at a group of exercises called levers. Levers involve supporting the body extended non-vertically from a limited fulcrum point. (Phew.) Levers not only require total-body strength to keep aligned; they also demand impressive trunk and limb strength, balance, coordination, and intense concentration. Levers are great!
You bodyweight strength princes and princesses looking to explore isometric levers should start with the “Little 3”. The Little 3 are basic levers which work the entire body, front, back and side:
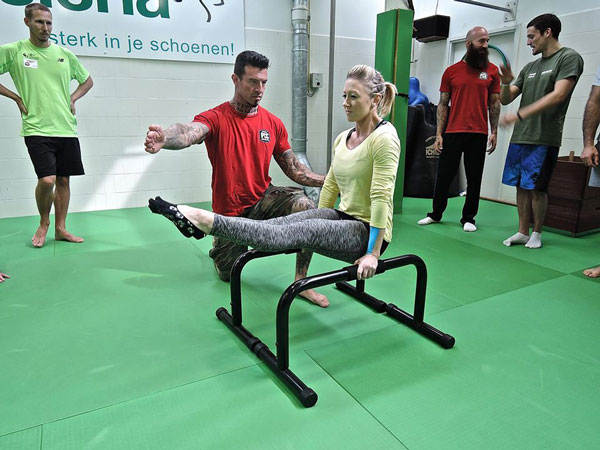
L-hold. This is a midsection classic! Just push down through the floor (or bars, in the photo) and lift your locked legs off the ground. A killer for the abs, hips and thighs; but the pressing motion also works the lats, triceps and pecs. This one can feel impossible at first—the abs just aren’t accustomed to pulling the pelvis up so high—but with diligence it will become easy as pie.
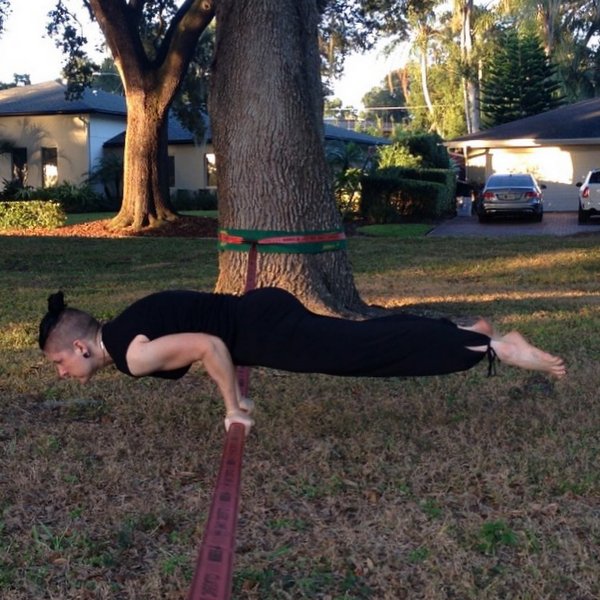
Elbow lever. Another trick too cool for school. Just lean forward on your palms and tilt your straight body off the floor. More balance than strength, but it does work the shoulders, chest and arms, as well as the entire back of the body, which has to tense to stay aligned. If you have any weak spots or shitty muscular coordination—forget it.
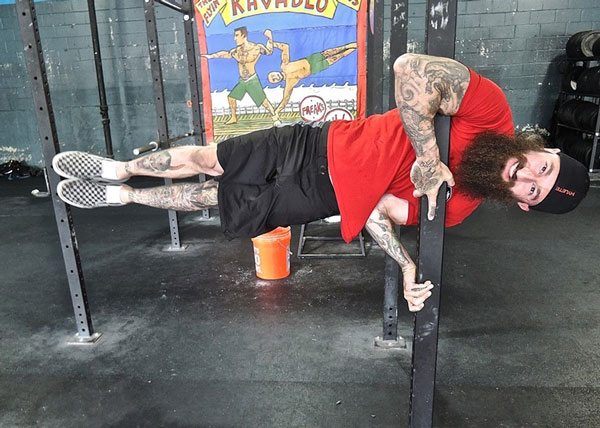
Clutch flag. The front and back of the body is done a deal—howabout the sides? Hug that bar and lift! Another really neat trick that builds strength in the hard-to-reach lateral chain of muscles.
Don’t tell me these are too goddam tough. You should know the drill by now—NOTHING is too tough for us, Kojak! We just use progressions to get there. Can’t perform an elbow lever? Do a plank. Do a lever from a table, with your feet dangling off the ground. Can’t do an L-hold? Do it off a chair with the knees bent. Straighten them over time. As you get stronger, return to the floor and try again with bent knees. No clutch flag? Again, bend those knees until you can extend just ONE leg. You’ll get there. A benefit of levers compared with most up-and-down work is that you can perform them more frequently; sometimes every day. Explore. Experiment.
The Little 3 are wonderful basic holds which are interesting, productive, fun to learn and impressive to non-trainees. They also work real well together; you can learn all three together much quicker than if you learn them separately, as much of the lever patterns carry-over. What are you waiting for? Go master them. When you’ve achieved all three I’ll show you how to level up in your isometrics work to “goddam!” status. (You guessed it. There’s a “Big 3.”)
#7. EXPLOITING EXPLOSIVES
In Convict Conditioning, I advised all my bodyweight students to perform the bulk of their movements slowly and under control. Why? Because if momentum is moving the weight, then your muscles aren’t. Slower movements not only build peak strength, they also fatigue the muscle cells more rapidly, for max size gains.
But—and, like that Kardashian chick, it’s a BIG but—there are exceptions to the rule. Those of you paying attention will have noticed that in every exercise chapter of that book, I also included an explosive exercise, to be performed at high speed, with maximum power.
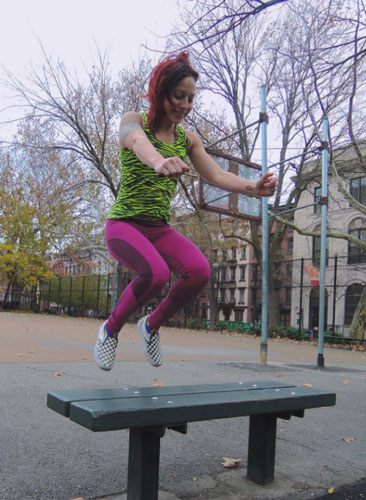
Spending some time training this way is useful for a number of reasons. Firstly—it makes you fast and explosive. That should be enough! But it also makes you agile, increases coordination, builds up joint resistance, and “primes” the nervous system for greater strength gains down the road. Bodyweight explosives are also interesting—a challenge, and real fun to perform. This makes knowledge of PROPER explosives training a real useful tool for that toolbox on a rainy day. Although why you’d need your toolbox more on a rainy day, I got no idea. Maybe the roof is leaking? Whatever.
So how do you go about explosives? Here’s a good way to start: add one solid power movement to each of your sessions. Apart from that, follow these simple rules:
- Always use explosives at the beginning of your session, when you’re freshest. Trying to jump on tired muscles can lead to accidents. Also, proper explosives rev up your nervous system and help with later, slower sets.
- Warm up well before any explosives.
- Beginners should avoid exotic stuff and work mainly on a power diet of jumps and explosive pushups.
- Limit reps on explosive work. You’re looking for stimulation, not exhaustion. Once the crispness and spring is gone, you is done.
- Start slow and be progressive. One clap pushups become two claps, become behind-the-back claps, and so on.
Explosives are pretty cool. Looksee.
Over time you should begin to move from simple power work—the jumps and explosive pushups—to more sophisticated movements like kip-ups, muscle-ups, and flips. What’s that you’re saying? Paulie, there’s no way I could ever do ninja stuff like a backflip! Well, you’re wrong, knucklehead. You just need to start slow and—like all bodyweight—use the right progressions. And because I love the hell out of you all, I wrote those progressions down for ya in minute detail in Convict Conditioning 3: AKA Explosive Calisthenics.
Please check it out—it’s my personal favorite-ever book that I wrote, apart from all them other books.
#8. JOIN THE CIRCUITS
A couple years back I had a middle-aged athlete write and say he was laying off his training for six weeks coz he’d broken his wrist. I asked him: Too much jerking off? He responded, correctly, by telling me that there was no such thing as “too much”.
I always advise folks to keep training through injuries where they can. But what do you do with a busted wrist? No pullups. No pushups. No bridges. Damn. At least you can jerk off with Mr Lefty and pretend it’s a foreign chick.
What I advised this guy to do while his wrist was healing was to focus on leg work. Let’s face it—calisthenics athletes often get “chicken legs” bull thrown at them. Working a little extra on those legs can’t hurt at all. My student followed the routine I wrote for him, and in six weeks put an inch on his thighs, a quarter inch on his calves, and massively increased his definition in his lower body. Plus, he actually improved his stamina and cardiovascular capacity during his “layoff”.
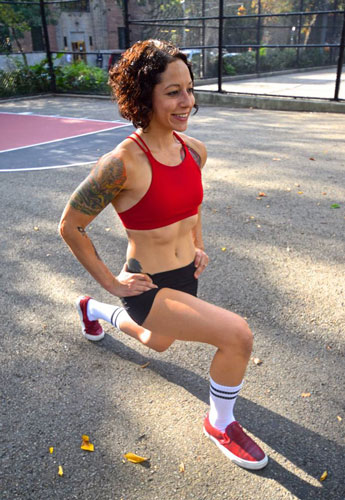
This was the program I gave him: to be performed with two days off between workouts.
Warm-up: mobility exercises/light squats-5 mins
- One-Leg Squat: 5 sets x max reps (per leg)
- Straight bridges (performed off forearms, not palms): 3 sets x max reps
- Vertical leaps: 5 sets of 2
- Sprints (100—200 feet): 5 sets x max effort
- Leg circuits: pick 5 exercises and perform each for ten reps. 3-5 circuits
Exercises for leg circuits (pick five at random each session):
- Bodyweight squats
- Hindu squats
- Sissy squats
- Half-squat with calf raise (two second hold at top)
- Tuck jumps
- Side kicks
- Side-to-side squats
- Alternating high steps (on a bench)
- Alternating lunges
- High kicks
- 180 degree spin jumps
- Wide stance squats
#9. BODYWEIGHT ISOMETRICS: “THE BIG 3”
What’s that? You’ve already mastered the Little 3 levers I gave you in tip #6?! But that was only three tips back! How did you…?
Ah, never mind. I trust ya.
When you’re at the point where the Little 3 are easy—you can hit them for a few seconds any time of the day, and they feel more like warm-ups than real “work”—you’re ready to move up to the big boy stuff: the “Big 3”. The Big 3 are the most impressive and valuable levers in calisthenics—the front lever, the back lever, and the side lever (more commonly known as the press flag):
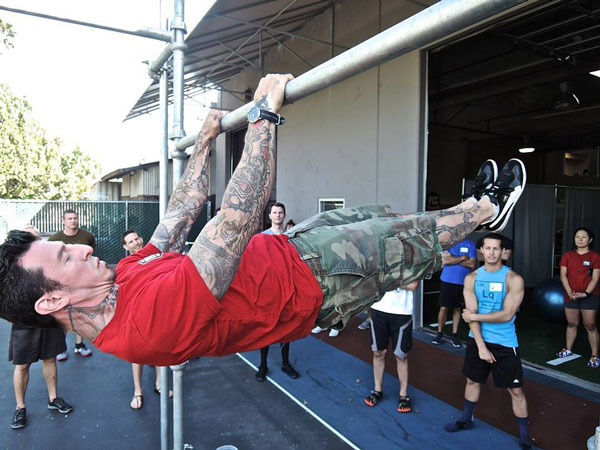
The front lever. On an overhead bar, pull your knees up over your chest, and extend them until the body and arms are straight. Simple as hell, difficult as f***. If you are getting bored with leg raises as an ultimate front-of-body builder, this needs to be the next step. Try it and find out why.
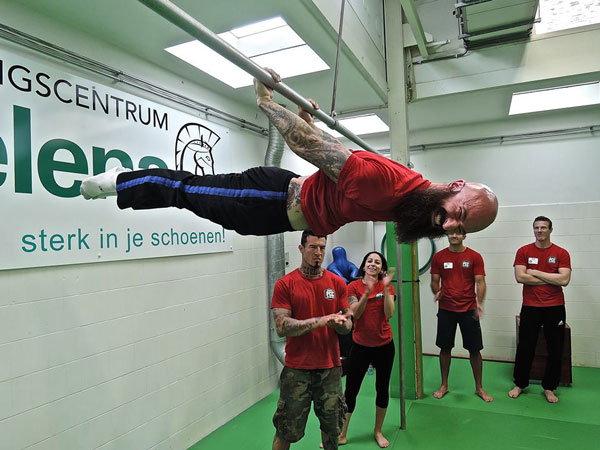
The back lever. Opposite of the front lever. Grab an overhead bar, and spin your legs through your arms, straightening your bod to razor-like perfection. All muscles have to work to maintain position, particularly the spine and upper-back. A legendary exercise for building mobility and strength in the shoulders.
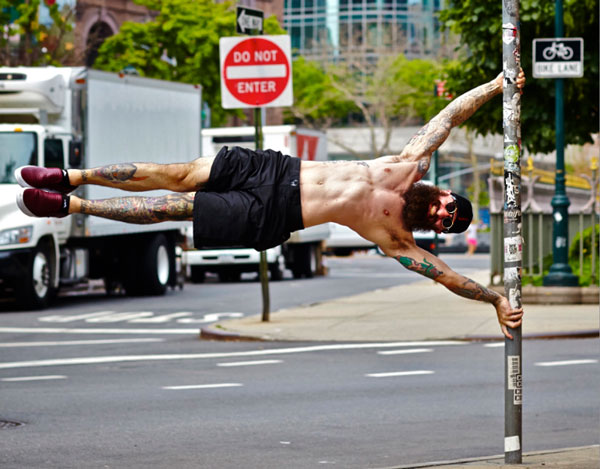
The press flag. Grab a vertical bar as in the photo, and jump/swing your legs out to the side, then hold. What? You can’t do it? Only one in a hundred thousand people can, because you need the kind of shoulder, arm and side strength (lats, obliques, serratus, hips) that you normally only find on folks who have turned green after getting pissed off.
As you have probably figured out by now—you read my stuff, so I KNOW you are intelligent, as well as good-looking—working your way up to these levers is about increasing leverage. Start with the body as squashed, as compact as possible, and “unfurl” to become as straight as possible, as in the photos. Begin the front and back levers hanging with your knees tucked in; extend them over time. Eventually, you’ll be able to extend just one leg. Then two legs, bent at the knees. Then you’re there. The principles are similar for press flags—a full progression system (including clutch flag progressions) are included in Convict Conditioning 2.
#10. SPICY SPICY GRIP
Productive training is all about those damn basics—the bodyweight squats, pushups, pullups, bridges and so on. Everyone who wants to become a calisthenics master needs to learn to love these bastards, but there’s no doubt about it—if you are performing them day in, day out, they can start to get pretty boring.
At times like this—when your training is going well, you’re adding reps and strength, but you’re getting a bit bored—ya gotta add some variety. Training can be like food: throwing a dash of spice into a bland meal can revolutionize a dish. Why not pepper some grip specialization into your training to shake things up and add variety? Often this kind of little trick is enough to keep you training through the grey times.
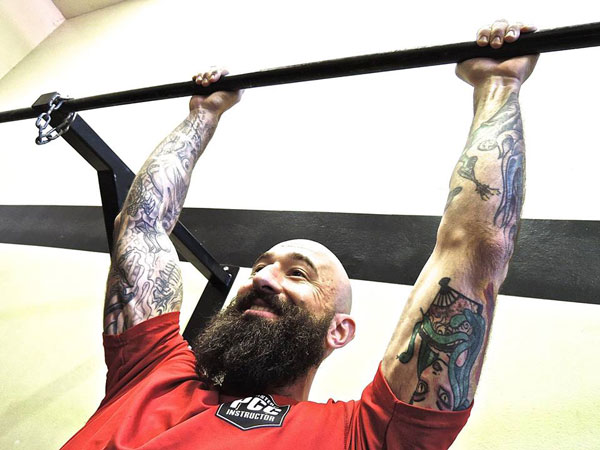
Grip work is best at the end of a session, so you don’t screw up your other upper-body work. Other than that rule—you can make this stuff up! I talk progressions and workouts in Convict Conditioning 2, but you don’t need that to get started. Keep it fun and challenging.
Howabout:
- Timed hangs: Hang from the bar. How long can you manage? Add a second every session, and soon you’ll have grip stamina that would beat the hell out of a powerlifter or bodybuilder.
- Towel work: Hanging from a bar is tough for most people. Try it from a towel! Loop a big towel over a bar and hang on for dear life. Unlike most hanging, towel work requires giant thumb power to complete the chain. Try it with one hand and you’ll see.
- Fingertip pushups: So many styles—so many progressions to choose from. If the floor is impossible, go for a wall or an incline. If the floor is easy, howabout an asymmetrical position? One-handed? What about using individual fingers, or thumbs? If it was good enough for Bruce, it’s good enough for you.
- Finger holds: In the barbell world, grip monsters love one-finger deadlifts and pulls to unleash the full potential of each digit. The bodyweight version is even better—digital hangs. Can you hang from a horizontal bar with just your index and inner fingers on both hands? Just the index? Pinkies and middle fingers? For huge tendon power, better get testing.
A little grip work is fun and very beneficial for strength—one or two exercises per session is enough, as long as you balance out the holds with fingertip pushup sets. Think you’re a real champ? Pick an exercise from each of the four categories above, and perform all four in circuit fashion, as hard as you can. Do five circuits and I promise you, you’ll know what your forearms are for tomorrow morning.
#11. EQUILIBRIUM TRAINING
Now this one is real interesting. Just throwing it out there, to see what you all think. It may intrigue ya—you may have no interest. That’s cool, too.
You train for strength, right? And speed. And maybe endurance. But who out there is seriously training their vestibular and proprioceptive systems? In other words, who is training for balance?
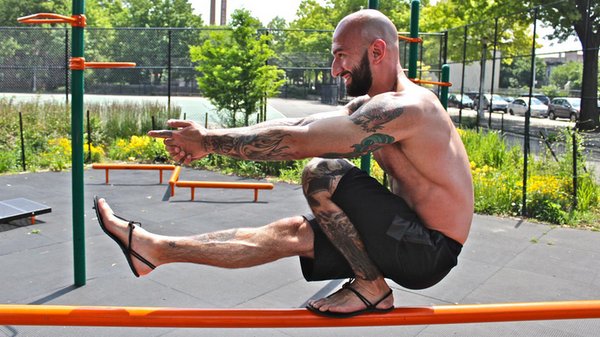
Equilibrium, or balance, is a crucial aspect of health and fitness. In fact, one of the more reliable indicators of biological age is the simple one-leg test—if you can stand on one leg with your eyes closed for more than twenty seconds, you’re doing okay. Check this here chart to discover your “Balance Age”.
Balance is essential in all athleticism. But I know hardly any athletes who train for it. If you are interested in this approach, it might prove to give you some supplementary work that’ll bring some fun into your workouts.
Ideas:
- One-leg balances for time
- Asymmetrical yoga positions (on one leg or otherwise)
- Side planks with one arm and leg extended
- Headstands
- Handstands
- Spinning and standing on one leg
- Walking along a solid line (i.e., a brick wall—a series of posts, etc.)
- Slacklining (cool with the kids, I hear—thanks, Adrienne!)
#12. WAY OF THE DRAGON
Sometimes the best way to renew our training is to search for a different vibe. We might be doing similar stuff to what we were doing before, but if the package feels different—we won’t get bored. It’s a win-win.
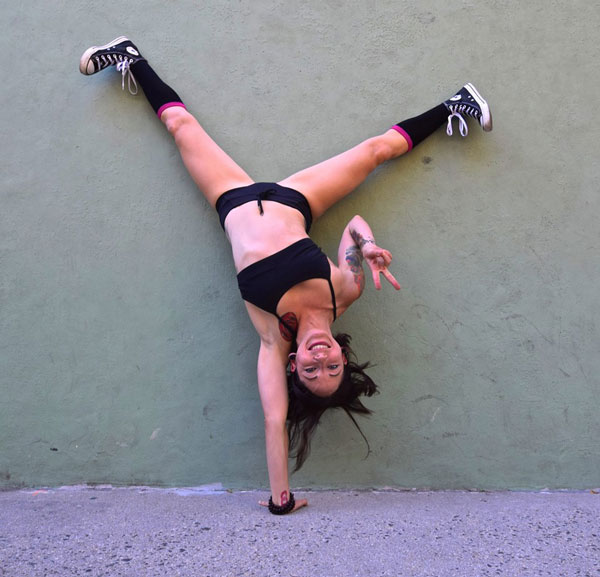
A great way to insert some glamour into your bodyweight training to explore the way martial artists approach the subject. Practitioners of the oriental fighting systems—kung fu, karate, tae kwon do—these guys have centuries of thought and practice behind what they do, and they are inevitably crazy about bodyweight. Just check out tapes of modern Shaolin training to see how seriously these monks take calisthenics.
If the western, scientific, linear, American double-progression-style of bodyweight training is losing some of it’s meaning for you, think about exploring the way bodyweight is performed in traditional martial arts. These arts involve tons of training in ten areas:
- Katas (movement forms): body control, coordination, conditioning, power striking, etc.
- Pushes and pulls: various pushups, pullups, etc.
- Leg exercises: horse stance, low stepping forms
- Sensitivity drills: chi sau, striking/blocking drills
- Animal drills: eagle claw, monkey, tiger, etc.
- Agility: rolls, flips, tricks, tumbling
- Extreme mobility work: “teacup” training, joint work, box splits, etc.
- Balance techniques: plum blossom poles, asymmetrical tai chi movements, etc.
- Breathing exercises: chi gung, iron shirt work, etc.
- Meditation
All of this is bodyweight work. All of it is useful, and it might just suit you. One of my favorite martial arts bodyweight manuals is the old classic Dynamic Strength by Harry Wong. Check it if you can!
#13. ROPE-A-DOPE
Another super old-school bodyweight tool! Rope training is vouched for by everyone from the military to sixties Batman. I’m not talking about those piss poor ropes in modern gyms—you know, the ones they lay across the floor so you can play ribbon with ‘em. I’m taking about ropes you actually CLIMB, bitch!
Get a thick length of climbing rope (it has to be thick as you can get, for grip—narrow rope is no good) and secure it to a high girder or branch (20 foot is about perfect). Then climb that sucker. Ropes build incredible pulling strength and arm size, but they also work the torso and midsection more than most people realize. One of my personal heroes in calisthenics, Harvey Day, said that rope climbing was THE toughest abdominal exercise. He was right.
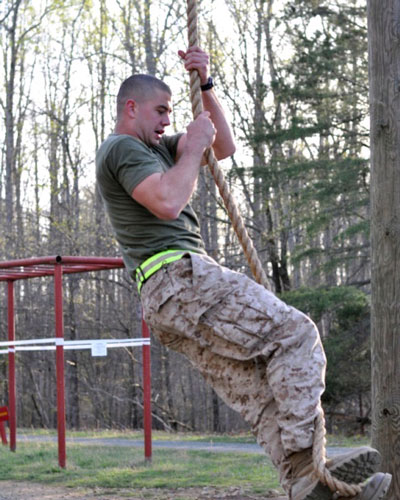
Be ready for a challenge, and—as ever—you can make this shit progressive.
-Climb up and down with legs and both arms
-Climb up with legs and both arms/climb down using only arms
-Climb up and down using only arms
-Climb up with the legs in a L-hold
Experts begin their climbs seated on the floor—in an L-hold! This means the legs cannot help with the climb at all. By the time you can do this, your biceps will look like goddamn steel softballs. There are other progressions from there—mostly built around speed (time yourself for distance or reps) and volume (how many climbs can you make?).
#14. SURVIVE THE CENTURY
I said earlier that a challenge is as good as a rest when it comes to keeping your ass training. Now, if you’re REALLY looking for a challenge, why not try the coolest calisthenics gauntlet in the whole damn world: The Century.
I know the vast majority of you reading this will be aware of The Century. For those who aren’t, it’s a bodyweight strength test over four different exercises performed back-to-back for a hundred-rep total (hence the name). Check it:
| Men | Women |
| 40 Squats | 40 Squats |
| 30 Push-ups | 30 Knee Push-ups |
| 20 Hanging Knee Raises | 20 Hanging Knee Raises |
| 10 Pull-ups | 10 Australian Pull-ups |
Want to see what a perfect Century looks like? Check these videos from Al Kavadlo and Adrienne Harvey.
Working towards The Century isn’t just a motivating challenge: it’s a killer program in itself. The entire body is worked; form on the basics is tightened up; and because the exercises are performed with no rest, you wind up with a killer cardio workout, too.
The Century is designed as the final PCC test, to be performed after three grueling days of bodyweight training. If you’re headed to a PCC—now that’s a challenge to motivate ya!—check out this awesome article on The Century by Adrienne Harvey.
#15. I DON’T WANT NO DISSENSION! JUST…DYNAMIC TENSION
About twenty years ago if you’d talked to anyone in fitness about building up your body with calisthenics, they woulda immediately shot back with one name—Charles Atlas.
Atlas—real name Angelo Siciliano—was a legend in the physique world for developing the bodyweight-only system known as Dynamic Tension. Anyone my age who bought a comic book EVER remembers the ads vividly—the scrawny dude getting sand kicked in his face (in front of his gal! Not cool!) only to go into hiding and use Atlas’ secret techniques. A little while later, he would return to the beach, jacked up, find the bully, and rip off his head and s*** down his neck. Then he f***ed the bully’s mom, while she was still grieving. Probably at the funeral. Actually, yeah. At the funeral. That’s how I remember the ads, anyway.
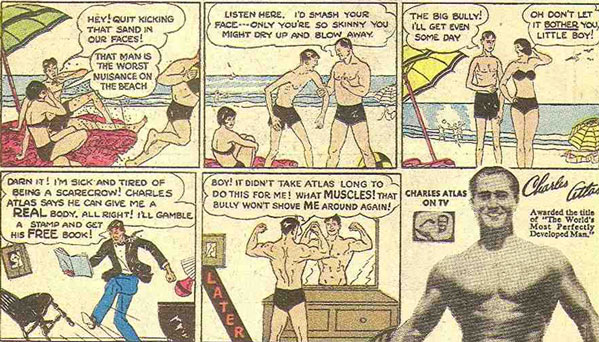
Atlas fused basic calisthenics training drills with isometric tension techniques to create his system—a system which, all in has, has to be one of the most successful training programs the world has ever seen, any way you want to slice it. If you’re devoted to bodyweight—maybe working through Convict Conditioning or a similar system—and you’re looking to explore something a bit different for a while, why not go old school and give it a try?
I know a lot of folks have attacked Atlas’s methods over the years. So what? Here’s the reality: no training system is perfect, and virtually no athlete goes their entire career using just one system, anyway. So if you give Dynamic Tension a try and find out it’s not for you, that’s cool. I’m betting you’ll learn a thing or two along the way. And that’s what it’s all about.
One proviso though. If I see you at the beach, please don’t kick sand in my face. I bruise real easy.
#16. PAIN WEEK
Here’s a fun little number to shake yourself out of a funk. When a body part needs specialization, the sensible way to train that area is to up the intensity and volume a little, allowing plenty of time for rest and recovery.
Feel like screwing with “sensible”? Try “pain week”, which was a common bodybuilding tactic in gyms in the seventies and eighties. (You don’t hear about it much now, which is why I thought you might want to know this stuff.) When your training is getting tedious, pick a body part that’s lagging for you—let’s say, chest, for example. Now, instead of slightly increasing frequency and volume, we are gonna jack them up massively, by working this area every day, for five days straight.
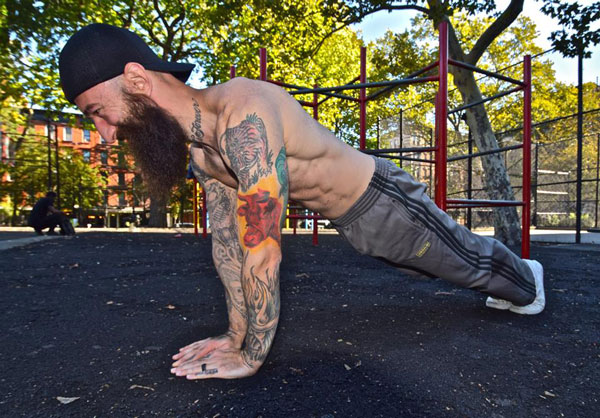
Utilizing pain week is simple. Pick five exercises, and perform five DAMN HARD sets of each exercise, each on a different day. That’s all you do—nothing else that week. Take the weekend off as a well-deserved rest, and go back to your regular workouts on Monday. (Trust me, you’ll be grateful about it.)
For chest, Pain Week might look like this:
MON: Pushups between chairs: 5 x max
TUE: Parallel bar dips: 5 x max
WED: Clap pushups: 5 x max
THU: Muscle-ups: 5 x max
FRI: One-arm tripod pushups: 5 x max
SAT: OFF
SUN: OFF
Monday’s workout should be tough, but otherwise fine. On Tuesday you should be a little sore, which will make things extra tough. Wednesday, your pectorals will feel deep-fried and scream during every rep of every set. Strangely, by the time Friday rolls around, your pecs will feel as if they’re starting to adapt—but you’ll still be glad to put the madness behind you.
The best part of Pain Week is that it actually seems to work. Using this method, you actually CAN noticeably improve a lagging body part in a real short span of time. Don’t believe me? Try it.
#17. THE “PERFECT 10”
I can’t take credit for this one. This is from a buddy of mine and former tactical firearms officer Mike Barnard. When he read about my “Big 6” exercises—squats, pushups, pullups, leg raises, bridges and inversions—Mike wrote me and told me about his list: the “Perfect 10”.
Mike’s theory was that a perfect athlete—with control, strength, stamina—would be able to achieve these ten bodyweight feats:
- Pistol squat: 25 reps per leg. Hip, knee and ankle strength, mobility and endurance.
- Pushup: 100 reps. Vertical pressing strength and stamina.
- Pull-up: 50 reps. Pulling strength and stamina.
- Muscle-up: 10 reps. Horizontal bar dominance; explosive pulling and pushing strength.
- Elbow lever: 1 minute hold. Balance-strength-stamina.
- Human Flag: 5 seconds. Huge lateral chain power.
- Front lever: 10 seconds. Total-body strength plus anterior chain.
- Back lever: 10 seconds. Total-body strength plus posterior chain.
- L-hold: 20 seconds. Contractile hip and abdominal power.
- Free handstand: 30 seconds: Shoulder and arm strength, plus ultimate inverse balance.
So—how do you stack up on this “perfect” list?
Mike was in the process of working towards all these feat when we last spoke—and he already had a WARNING: this list is only for athletes who are already real badasses, or those with big, BIG ambitions to get there.
But maybe you fit that category? If not you, then who?
#18. MUSCLE CONTROL
This one also comes under the “something different” category.
Back in the day—let’s call it a century, or roundabout—one of the popular disciples of strength was muscle control. Like a hybrid between yoga and Dynamic Tension (which hadn’t been invented), muscle control was the art of maximally contracting and relaxing all the muscles of the body, rhythmically and separately.
Before you think: what’s so hard about that shit? Stop and consider it for a second. Yep, maybe—inspired by Arnold—you can tense your pecs in time to the beat. But can you really control each row of your abs separately? Can you pull one shoulder-blade up while the other one goes down?
For a really great example of this art, google British athlete Tony Holland.
Most of you older guys will be nodding your heads; you will have heard all about muscle control. Before you younger guys laugh too hard, remember that Bruce Lee was influenced by muscle control methods; you can see it in his warm-up sequences. That shoulder mobility comes from Western muscle control training, not kung fu. In fact, muscle control not only increases coordination, neural recruitment, circulation and mobility, it also helps ease joint pain. It’s a helluva workout.
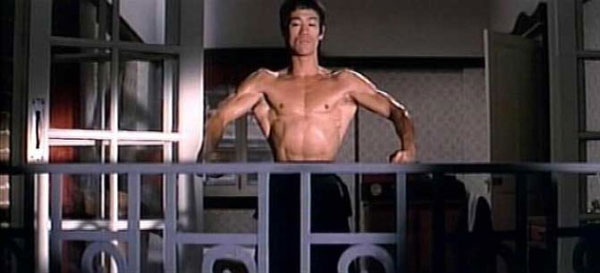
Muscle control theory was pioneered by a strongman who went by the stage name “Maxick” (changed from the more vomit-y “Max Sick”). In fact, for many years, muscle control was called Maxalding. Maxick used his training methods on himself. The legendary Eugen Sandow said that Maxick had achieved a level of physical conditioning that, in his opinion, could never ever be bettered.
Sick wrote in depth about his ideas and techniques, and he had a huge number of followers during his lifetime. Luckily his works are all now public domain and you can enjoy them for free. The full library can be found here.
#19. TRY PARKOUR
If the semi-static pushes and pulls of bodyweight bodybuilding or strength training are getting you down, you need to get in touch with what your body was made for in the first place. Move!
I’ve been aware of the ideas behind parkour since before most of you were born. (Yeah—I’m THAT ancient.) But it’s nothing new. What is?
One of the biggest thrills (and surprises) I’ve had over the last decade or so is seeing this new wave of Hérbertisme training, parkour, become mainstream. You see kids getting off their asses and Xboxes and doing it in the park, in the street—everywhere. You don’t need to buy anything to get into it, and your imagination and effort is what unlocks your ability; not any drugs, money, equipment. God, it’s cool—it’s just the kind of thing the world of physical culture needs. And the talent some of these young athletes possess blows me away time after time.
I wish this stuff had been better known when I was a kid: I woulda eaten it up with a spoon. I have actually built some parkour drills into my explosives training, over the past few years, and loved it. I’ll never be great, but I continue to surprise folks with my agility.
So don’t think you are too old for this stuff. If you want to start, begin slow and master the basic drills. Over time, you’ll be able to link some moves and freestyle.
#20. BAR-ONLY TRAINING
Here’s a tip to shake up your training straight from Joe Hartigen. I recall one occasion when someone I knew a little bit who worked out pretty hard asked Joe how to improve his upper-body mass and strength with a quick turnaround. I think he was expecting a sets and reps answer, but he didn’t get one. Joe was real concise. He said something along the lines of: only use the bar when you train. Nothing else. That was it.
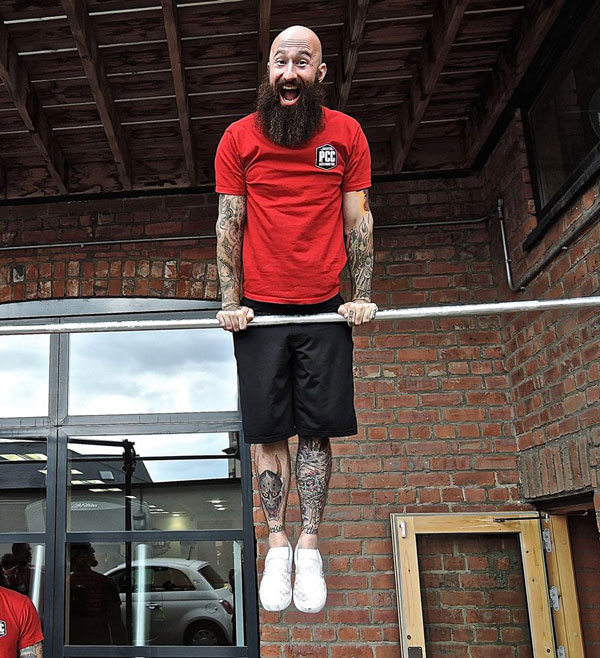
In fact, if you are looking for upper-body gains, this weird advice is actually gold. If you’re only working on the bar, all your exercises are hanging. That’s a grip and core workout every damn rep; not to mention circulation, as your blood is pumping hard the whole time. You’ll be doing plenty of pullups for your lats and biceps. Goodbye floor work for your trunk—hello leg raises and front and back levers which work the torso like nothing else. Pretty good for the whole body, actually. Standard pushups are fairly easy—if you want to press using the bar, you’ll need horizontal bar dips and muscle-ups, which are Nth-Level pec and triceps builders.
Joe gave no rules, but if you’re serious about this I’d think about doing nothing but a bar workout, every other day for no more than twelve weeks. I’d alternate between pulling days and pushing/levers/abs (although there’s gonna be a ton of carry-over).
If you’re interested in this idea and want some more technical instruction, the finest manual of bar calisthenics is by my pal Al Kavadlo. Check out Raising the Bar.
If this works for you—hey, remember Coach taught you this great tip right? If it’s a total failure, remember—this old crap wasn’t my goddamn idea.
——–
There you go—straight from me to you, twenty training ideas to keep you interested, invested, and in the calisthenics game for the rest of the year. At least! In Part Two of this article we’ll look at programming tips and tricks to help you even further out of any slump you might find yourself in. Big thanks go out to Al, Danny and Grace for letting me use their awesome photos, and more thanks too to the lovely Adrienne for all her help with this post.
Now, I don’t get on the net much—yes, that statement dates me for the elderly bastard I am, but so be it. I’m just not that type of guy. The biggest pleasure I get from posting here is that it gives me the chance to speak to all you cool bodyweight athletes and soon-to-be athletes from all over the world. So please, please—I’m gonna be checking this page for the next two weeks. I would LOVE to hear from all of ya: old friends and new friends alike. If you have any questions, I would really get a kick out of trying to help you, and I answer all comments. I don’t care if you’re completely new, or a “lurker”: don’t be shy. There are no stupid questions. So shoot me a line, studs and studettes!
***
Paul “Coach” Wade is the author of Convict Conditioning, Convict Conditioning Volume 2, the Convict Conditioning Ultimate Bodyweight Training Log, and five Convict Conditioning DVD and manual programs. Click here for more information about the Convict Conditioning DVDs and books available for purchase from Dragon Door Publications.
