• Skip to main content
  • Skip to primary sidebar
  • Home
  • Contributors
  • Resources
    • Q&A with Paul “Coach” Wade
  • Workshops
  • Products
  • Forums
  • Articles
  • Blogs
    • RKC Blog
    • Strong Medicine Blog
  • Archives

PCC Blog

Progressive Calisthenics - The Official Blog for the PCC Community

bodyweight exercise

Neck Bridges, Squats and the Changing Nature of Ambition

August 18, 2015 By Dan Earthquake 31 Comments

Dan Earthquake Wrestler's Bridge

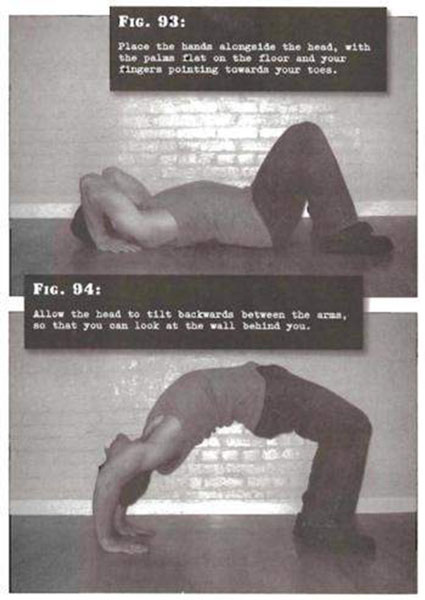
At three years old I wanted to be a wrestler. The local judo club was the focus of my ambition until I was seven and could join the class. The instructor–Ted Spacey–was a large jovial man. Among the calisthenics that he imposed upon us were neck bridges. I complained once to him that they hurt the top of my head. “Then you’re not doing enough of them,” was his reply.

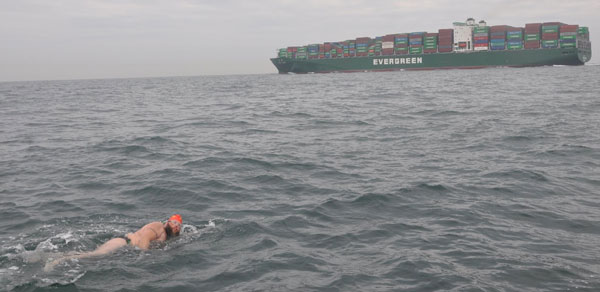
Family legend puts me in the sea with my Granddad at 5 months old and I’ve always swam, mostly for leisure. Vanity lifting caused a few injuries which directed me into doing more swimming and as I found I could go further, my ambitions became more aquatic. Eventually I swam the English Channel at 39 years old. On the way to France I had a lot of time to quietly reflect upon what I wanted to do next.

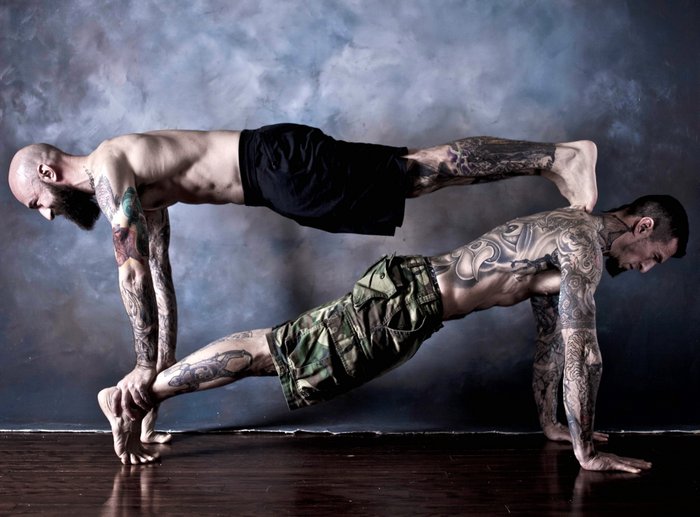
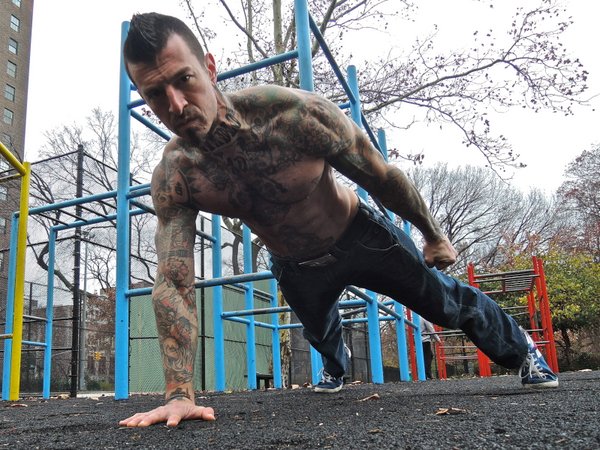
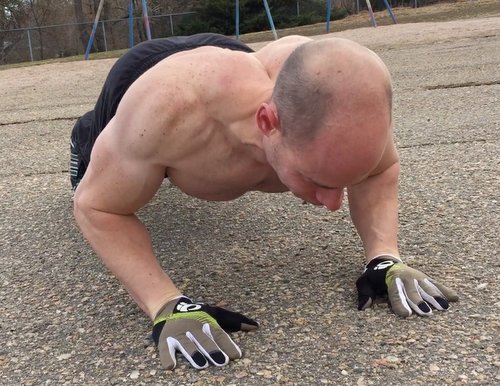
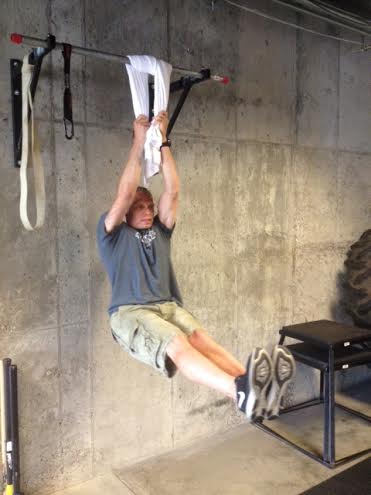
A little unfinished business with a 40-mile hike was concluded nineteen months later by which time I had started watching pro wrestling again online. My wonder at the spectacle now increased by knowing what injuries feel like and having some idea what strength it takes to lift people overhead. The conditioning aspect of the sport still intrigues me. The volume of calisthenics that many of the wrestlers do is impressive. Throughout all my other activities I’ve continued to do neck bridges, and since the age of sixteen have enjoyed doing pull-ups and dips. Lately I added push-ups, leg raises and bodyweight squats (which I had largely ignored for most of my life).

Pro wrestling legend Ric Flair has spoke of doing 500 bodyweight squats and 200-250 push ups and leg raises daily for about ten years during his busiest period as NWA World Champion. Admiring his longevity & ability to take bumps into his early 60’s, I decided to see if I could get near those numbers. It hasn’t been easy.

Dan Earthquake Backyard Workout

Slow sets of five repetitions are my preference and have been my habit for nearly twenty years. I used to do these in an intense manner so as to struggle to get the fourth and fail on the fifth. This was a once a week program which fit in with an otherwise physical job and active lifestyle.

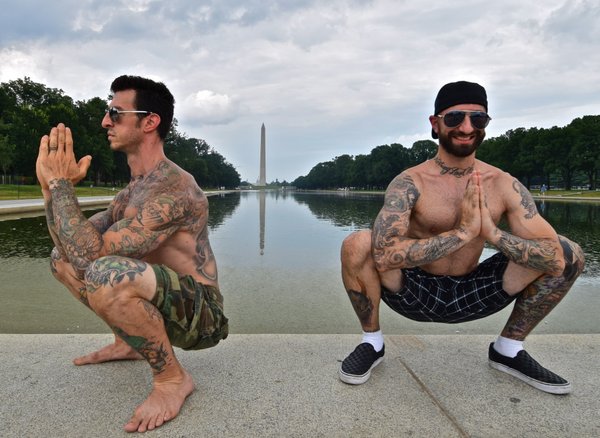
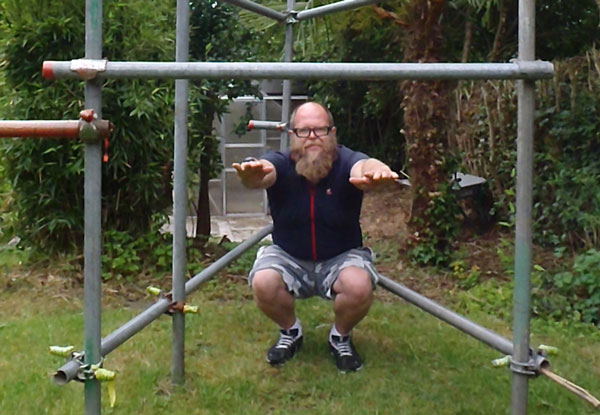
Last October I bought a copy of C-MASS, which inspired me to look at different strategies. I love that book! I decided to start as if I were a novice, using some basic strength sets multiple times a day, then do a few months of muscle building in the 15 rep range. Coach Wade posted his “Diesel 20” article in January which inspired me further to go for the 500 squats in one day.

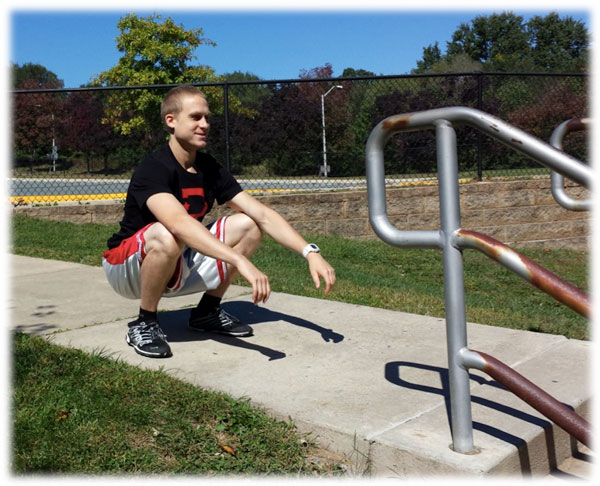
Initially a few sets of 15 were as much as I could manage. I’d given up on my training diaries a few years ago but it was Coach Wade saying “Do it for old coach” that made me restart. I’m glad I did.  I started out by putting a set of 15 squats between other exercises and I found I could do a hundred and fifty during a session. Soon it was twenty five reps, then thirty and so on. As the reps got bigger, the sets reduced.  Some days I do five sets of a hundred. That’s not everyday–I’m not Ric Flair!

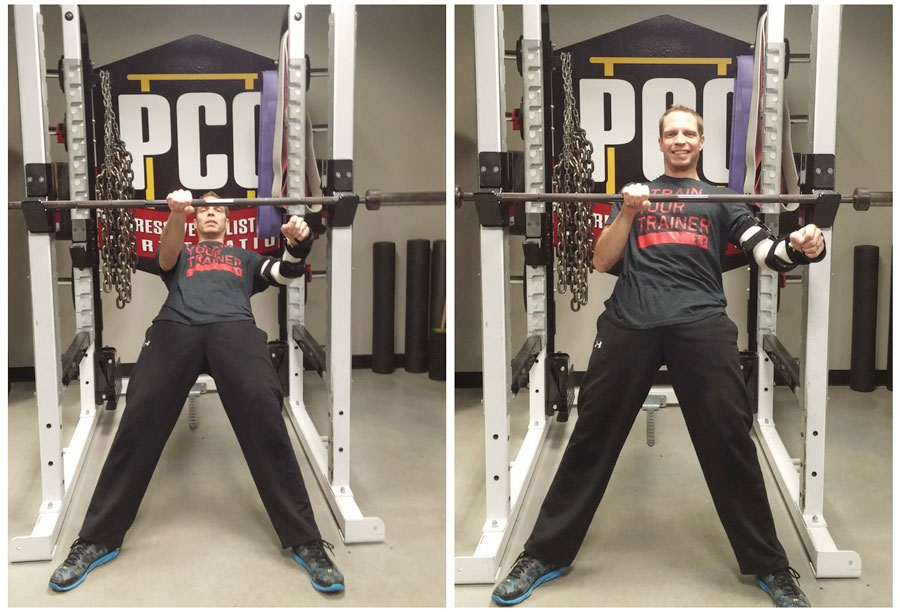
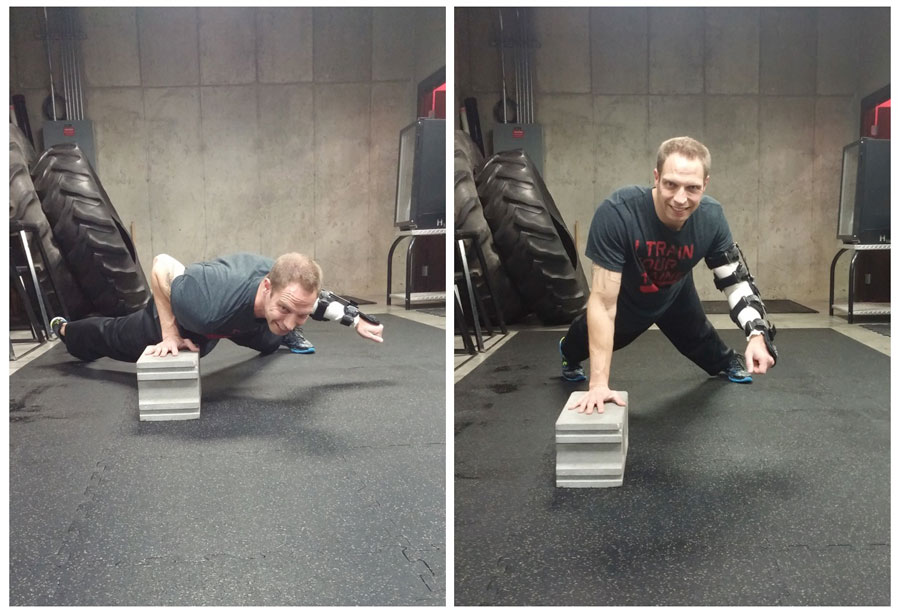
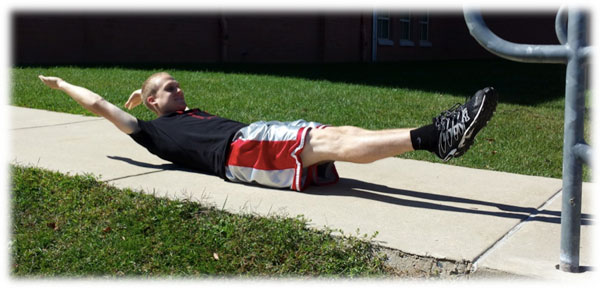
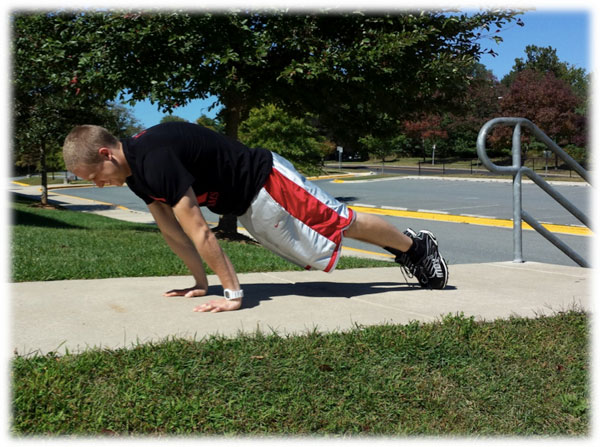
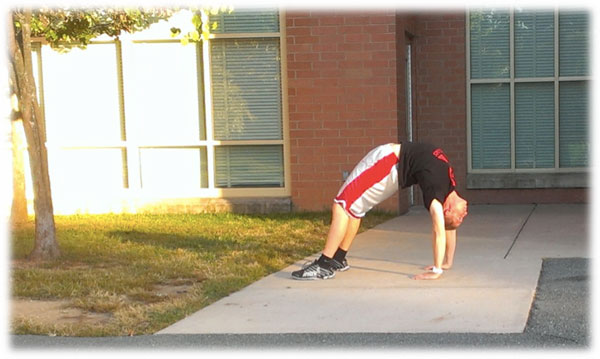
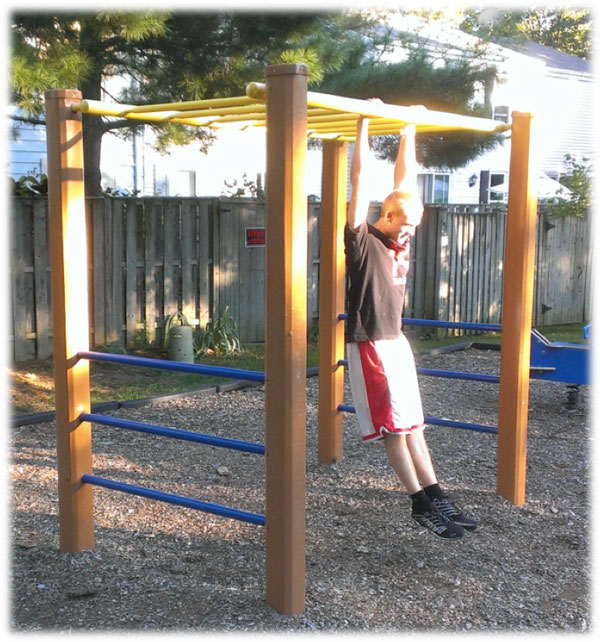
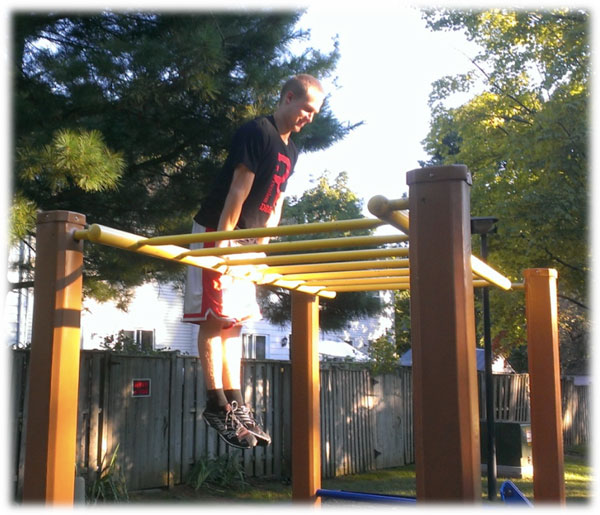
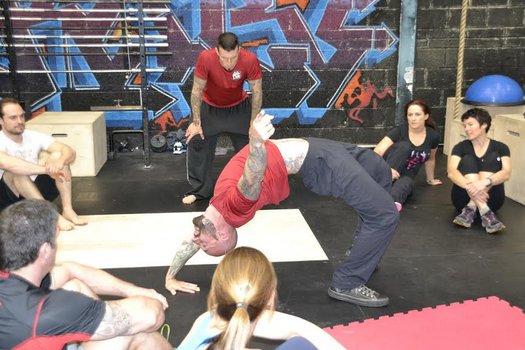
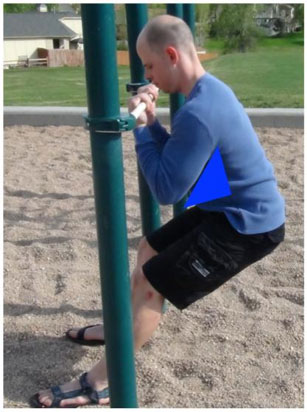
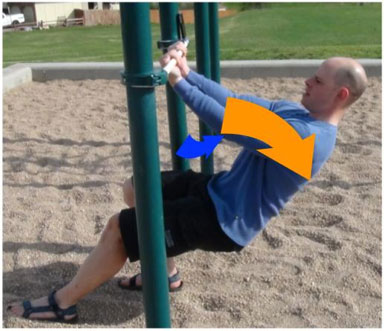
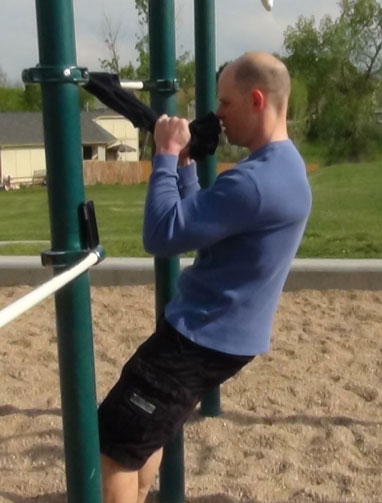
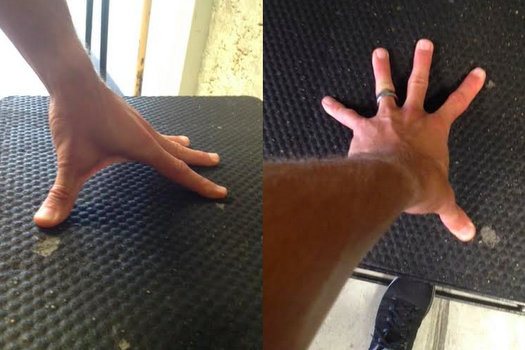
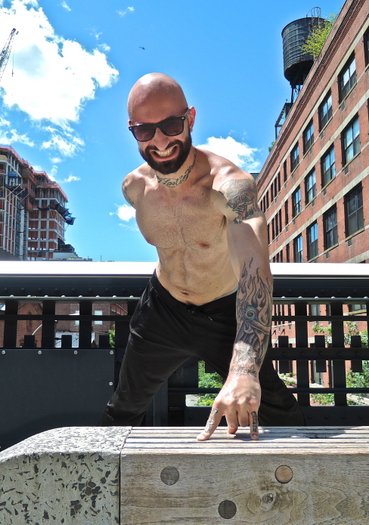
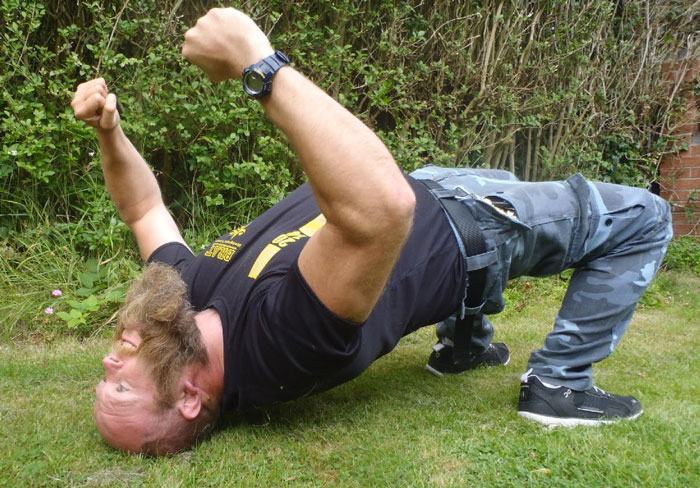
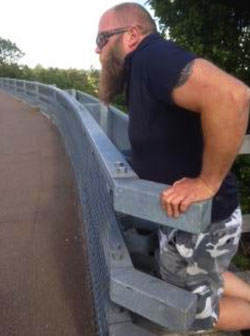
Sometimes I combine other movements using bars or benches and squat down whilst pulling on the lats as I descend. At the top I change grip and move forwards into a slow incline push up. This feels like an ideal movement to do in between sets of my favorite exercises: dips, pull-ups and push-ups.

Dan Earthquake Bodyweight Dips

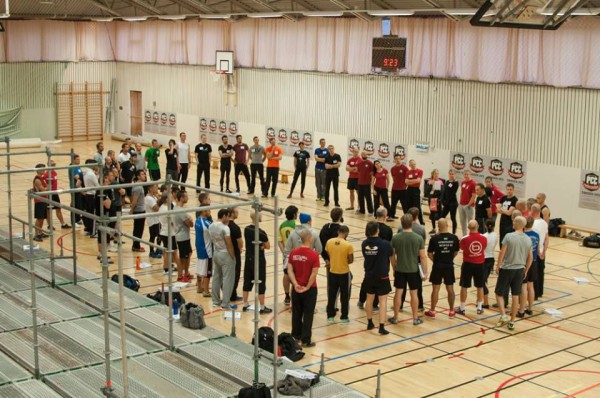
Following the PCC blog is very encouraging. Recent articles of regression, simplicity, focus on the basics and the Replek concept have stimulated my imagination. Danny Kavadlo’s assertion that calisthenics is a creative discipline had me smiling and nodding in agreement.

I didn’t always realize the importance of calisthenics and in hindsight should have favored them more over the lifting in my early days. Big ambitions can distract a person from doing the right thing in many aspects of life. I’ve worked myself into a lot of dead ends. Most importantly I’ve never stopped, always finding something productive to do.

I never became a pro wrestler but I had a taste. Judo, drug-free powerlifting competitions and heats of the UK Strongest Man were as close as I ever got. I wasn’t very good at any of those things. I’m not very advanced in my calisthenics either. Rather than worry about that, however, I enjoy the experience and savor struggle.

Sometimes the small ambitions are the ones that endure to provide the most value. Impressing the judo instructor was once an ambition. I often think of Ted Spacey when I do wrestlers bridges and it always makes me smile. Two years ago I realized that my head had stopped hurting. I guess I’m finally doing enough of them now.

Dan Earthquake English Channel Swim

****

Dan Earthquake is involved in event safety and hosts winter swimming training camps for Channel Swimmers. In 2013 the Channel Swimming Association awarded him the trophy for “Greatest Feat of Endurance” for his 21hr 25 minute crossing of the English Channel.

Filed Under: Motivation and Goals, Progressive Calisthenics Tagged With: bodyweight exercise, C-Mass, calisthenics, Dan Earthquake, extremely high rep training, motivation, push-ups, squats, training

The Dragon Pistol Squat

July 28, 2015 By Al Kavadlo 25 Comments

Al Kavadlo Dragon Pistol Lead

The first time I ever tried to do a one-legged pistol squat, I failed miserably. Even though I thought I had strong legs from years of weight training, my initial attempt at this calisthenics staple resulted in me falling on my behind. After several weeks of dedicated practice, however, I was able to nail the pistol squat and eventually build up to performing it for reps.

Later on, I discovered an exercise known as the shrimp squat, which finds the non-squatting leg held behind the body, rather than in front, as it is with the pistol. Once again, my first attempt at this new one-legged squat variation was unsuccessful. This time, however, I was able to get the hang of my newfound lower-body calisthenics challenge within a few training sessions. The strength and stability I’d built from pistols had a good amount of carryover to learning this new skill.

As I got more comfortable with the shrimp squat, I began finding new ways to make single leg squats more challenging. By holding both hands behind my back, I discovered I could change the leverage and add a significant amount of resistance without relying on external weights. I was also starting to practice a technique that would later go on to be dubbed the “jumbo shrimp”, which involves increasing the range of motion of a standard shrimp squat by standing on an elevated surface so that the back leg can drop down lower than when standing on the ground.

Raised Shrimp Squat "Jumbo Shrimp" at Encinitas PCC workshop

Legs Get To Work
One of the most common misconceptions about bodyweight strength training is that it can only be progressed so far. After a certain point, many people would argue that the only way to increase the difficulty of an exercise is to add weight. This is especially true when it comes to leg training. Even folks who have come around to the idea that a muscular and highly functional upper-body can be built with calisthenics alone often have a hard time conceiving that the same is true for their lower half.

Though different people define strength differently, there are plenty of bodyweight squat variations to keep your workouts fun and challenging for a lifetime. If standard pistol squats and shrimp squats are no longer difficult for you, don’t start thinking you need to join a gym. Instead, consider giving the dragon pistol squat a shot.

Dragon Pistol Squat ? #ProgressiveCalisthenics #Legs #Calisthenics #Legday #PistolSquat #BeardPower #NinjaTraining #NowYouTry

A video posted by Al Kavadlo (@al_kavadlo) on Jul 23, 2015 at 11:42am PDT

Enter The Dragon Pistol
Like the traditional pistol squat, the dragon pistol requires serious strength, balance and mobility – and in a very unique way. The dragon pistol can be surprisingly taxing on your inner thighs as well as your deep glute and hip muscles. And of course, all the other muscles that you work in a standard pistol will get hit as well.

As we each have our unique strengths and weakness, some people may find this move a lot harder than a normal pistol, while others may not experience a huge disparity. Regardless, I suggest building a solid foundation in standard pistol squats before beginning to work on this variation.

Convict Conditioning Vol 2 Twist

Other than that, I recommend you spend some time working on your hip mobility by practicing twist holds, which you may recall seeing in Coach Wade’s Convict Conditioning Vol 2. Once you’re able to do a standard pistol and a full twist hold, you shouldn’t be too far from the dragon pistol.


Elevation Training
Though standing on a bench or other elevated surface when performing a shrimp squat can increase the difficulty of the exercise by increasing the range of motion, practicing the dragon pistol while elevated can actually be a very helpful regression. By allowing your non-squatting leg to drop below the bench, you can decrease the amount of mobility required to perform the exercise. (This same technique of standing on an elevated surface can be very useful when someone is learning to do a standard pistol squat as well.)

Dragon Pistol Raised Regression

Toe the Line
If you’ve spent some time working on pistol squats, you’ve probably at some point experienced a cramp in your non-squatting leg as you fought to keep it in the air. This is common when learning the dragon pistol, too, only the cramping may take place in your hip and/or inner thigh instead of your quads. To minimize this issue, many people find holding the toe of their squatting leg to be helpful, particularly in the bottom position.

The dragon pistol also has quite a bit in common with the shrimp squat, as both moves begin with the non-squatting leg behind the body, rather than in front. As such, you may find that holding your toe behind your back at the top of a dragon pistol (similar to how you would in a shrimp squat) will allow you to control your leg as you gradually extend it into the bottom position (which more closely resembles a pistol squat, only with the extended leg threaded behind the squatting leg). Note that your hand will reach across to the opposite toe for this variation, whereas in a shrimp squat it is more common to hold the toe on the same side. So if you’re going for a dragon pistol on your left leg, you would hold your right toe with your left hand.

Al Kavadlo Dragon Pistol How To

When practicing these progressions, I recommend keeping your training volume low. Warm up with a few easier moves (basic squats, split squats, maybe a few pistols and shrimps) then get into practicing your dragon pistol progressions (elevated, holding your toe, etc). When starting out, stick to just one or two reps at a time – a total of 10 reps per side in one training session is probably plenty. If you go slowly and focus on staying in complete control of your movement, you won’t need to do a whole lot of volume.

I’ve only recently begun experimenting with this move, so don’t take my guidance as the final word. I’m sure I will learn a lot more as I go. Feel free to share your experience with the dragon pistol squat in the comments below.

***

Al Kavadlo is the lead instructor for Dragon Door’s Progressive Calisthenics Certification. Recognized worldwide for his amazing bodyweight feats of strength as well as his unique coaching style, Al is the author of five books, including Raising The Bar: The Definitive Guide to Pull-up Bar Calisthenics and Pushing The Limits! Total Body Strength With No Equipment. Read more about Al on his website:www.AlKavadlo.com.

Filed Under: Progressive Calisthenics, Tutorial Tagged With: Al Kavadlo, bodyweight exercise, calisthenics, Dragon Pistol, flexibility, how to, leg training, mobility, tutorial

5 Unique Push-Up Variations to Help You Increase Strength & Size

July 14, 2015 By Todd Kuslikis 14 Comments

5 Push-Up Variations

It could be argued that the push-up is the most popular exercise ever invented. Before we had chrome plated dumbbells and Olympic sized barbells people had to rely on their own body weight for building strength.

Yet is the push-up outdated? Should it be used only as a simple conditioning exercise or as a “finisher” after the “real” weight-based exercises are completed?

Of course not.

There is still tremendous value to the push-up. It is the Godfather of all exercises so we must pay it due respect. Yet, descendants of this exercise have sprung up around the world to help bodyweight enthusiasts continue to improve their strength and build more muscle.

Today, I’d like to share with you my five favorite unique push-up variations to help you increase strength and size.

These exercises are super effective for three main reasons…

1. Challenge Different Muscle Groups

The typical push-up targets mostly the middle portion of the chest, front deltoids and triceps. In order to get stronger, you have to challenge your muscles from different angles and in unique ways. Some of these exercises you might have never heard of before, but after you try each of them, you’ll feel muscles you never knew you had.

2. Build Whole Body Strength

True bodyweight enthusiasts know that one of the greatest benefits to calisthenics exercises is that they build whole body strength. Isolation exercises can cause weak links in your armor that may eventually lead to an injury.

The exercises below surpass most other forms of exercise because they strengthen the entire chain (whole body) as a functional unit.

3. They Are Fun To Do!

Let’s be honest, haven’t you gotten tired of cranking out rep after rep of basic push-ups? When you add unique exercises to your normal routine it becomes fresh and exciting again. Which makes you WANT to do it!

That’s one of the most important aspects of fitness. Sure, getting a nice physique and becoming healthier is great, but we only get one life to live – why grudge through your normal routine? Have fun with it!

Changing up your exercises and adopting new and unique styles will help you do this.

Ok, now on to the exercises…

Variation 1: Barbwire Push-Up

The Barbwire Push-Up (also known as the Diver Bomber Push-Up) is great for developing strength through a large range of motion. You’ll work the upper, middle and lower portions of the chest along with the front, middle and rear delts.

One of the greatest benefits is that with each rep, you are improving spinal mobility. The spine is so important for keeping up your strength. As soon as your spine starts to stiffen you lose functionality which leads to poor performance.

How To Do The Barbwire Push-Up

Start off in a “Downward Dog Position”. Lower yourself down toward the floor as if you were sliding under barbwire. The more arc you can get in your spine the better. As you “slip under the barbwire” arch up while pressing down against the floor. At this point you should have a full arch in your back. Make sure to look up, too, which will extend the arch into your cervical spine.

Begin to arc back down “under the barbwire” while curving your spine the entire time. Press back to starting position.

Coaching Tips

1. The key to this exercise is getting a full range of motion. Make sure you that you are arching as much as you can.

2. To make the exercise easier you can do any number of modifications:

  • Perform the exercise on your knees (you won’t get much range of motion but it will still help you build strength).
  • Decrease the range of motion in your spine (i.e. don’t go down as far or arch up as high).
  • Do the first part of the movement normally but instead of arching back “under the barbwire” come straight to the starting position, which is also known as a Hindu Push-Up.

Variation 2: X Push-Up

The X Push-Up is one of the greatest exercises to develop whole body strength. Normally, with any exercise, you’ll have some muscles that are working much harder than others because the exercise targets a particular muscle group.

With the X Push-Up it seems that it targets ALL of your major muscle groups. In order to perform this exercise your chest, back, core, shoulders, and glutes will be firing on all cylinders.

How To Do The X Push-Up

From a normal push-up position, separate your legs so that your feet are 1.5x shoulder width. Then separate your hands 1.5x shoulder width and bring them up so they are NOT in line with your head. Your body will look like a big “X”. The further you separate your hands and the higher you bring them, the harder the exercise will be.

Lower yourself down until your nose gently touches the ground. Push back up.

Coaching Tips

1. It is important to maintain proper alignment when performing this exercise. One tip that will help you is to keep your glutes and core tight throughout every rep.

2. If the full X Push-Up is too difficult, bring your hands and legs in to 1.2x shoulder width. This will create less demand on your muscles and allow you to progress up to 1.5x shoulder width or even more.

Variation 3: Diamond Kiss Push-Up

The Diamond Kiss Push-Up is a go-to calisthenics exercise for developing strong triceps. It also helps to target the inner portion of the chest muscle and lats. You have probably heard that form is very important when performing any exercise. Well, when performing the Diamond Kiss Push-Up, it is especially important because you are putting tremendous demand on your shoulders. If you can not perform the exercise without your spine being perfectly in-line, then switch to an easier progression.

How To Do The Diamond Kiss Push-Up

Start off in a normal push-up position. Place your thumb and pointer finger together creating a diamond in-between. The diamond should be in line with your head. While keeping your spine perfectly straight lower yourself down until your nose touches the ground in between the diamond. Then press back up.

Coaching Tips

1. As mentioned before it is very important to keep your spine straight.

2. Elbow positioning is also important. While performing this exercise the more you flare your elbows out to the side, the greater likelihood of injury. Try to keep your elbows tucked close to your body as much as possible.

3. Easier Variations: If you can’t complete 5-6 reps of this variation I recommend separating the fingers so that there is more space between your hands. This will decrease the emphasis on your triceps and rely more upon your chest muscles. As your triceps get stronger you’ll be able to bring your hands in close.

Variation 4: Spider Push-Up

The Spider Push-Up is an exercise that incorporates abdominal specific training into the normal push-up. If you have a strong upper body this is a great exercise to incorporate into your training because it will help tighten not only your abs but also your obliques.

How To Do The Spider Push-Up

Start off in a normal push-up position. Lower yourself down like normal while simultaneously bringing your left knee up toward your left elbow. This may take some flexibility but eventually you’ll get it. After you reach the “down” position, press up to starting position while simultaneously bringing your left leg back. Repeat on the other side.

Coaching Tips

1. Maintain proper spinal alignment while performing this movement. You may find yourself arching up to get enough space to get your leg up. Don’t do this. If you don’t have enough flexibility to get your leg up high than just bring your leg up as high as you can (while maintaining form).

2. While performing the movement, consciously contract the abs. This will help you engage more muscle fibers and get more out of the movement.

Variation 5: Dolphin Push-Up

This is one of my favorite conditioning and strength movements. Is it the hardest progression? No. But it targets muscles you don’t normally work, which makes it challenging (especially when you get into high reps) and is very fun to do. Also, I’ll teach you a variation to make the exercise even harder.

How To Do The Dolphin Push-Up

Start off in the plank position, resting on your forearms and elbows. Lower yourself down a bit further (you won’t get a ton of range of motion but the little bit that you get will help to engage the middle rhomboid muscles in your back), then press your butt up into the air. Go as high as you can. You’ll feel muscles in your shoulders that aren’t normally targeted, which is great for developing a healthier shoulders.

Coaching Tips

1. Just like the Barbwire Push-Up, this exercise is focused on spinal mobility as well as developing strength. You don’t need to perform this exercise quickly. Keep a strong, steady pace and try to get as much range of motion as you can.

2. How To Make It Harder: Instead of resting on your forearms, start off on your hands. This is the “Horse Push-Up” variation and is harder than the Dolphin Push-Up. You’ll perform a normal push-up but instead of maintaining a straight spine up to starting position, you’ll lead with your butt and come up all the way to a downward dog position. This will increase range of motion in your spine and shoulders as well as put greater demands on your chest.

The traditional push-up is the Mac Daddy of all calisthenics, yet performing endless reps of the same exercise will eventually lead to diminishing returns. You must challenge your body in unique ways in order to get it to grow. You must apply the principles of Progressive Calisthenics so that it adapts and gets stronger. All of the above exercises are unique variations to the normal push-up. They’ll not only challenge you in new ways but also add more enjoyment to your routine.

****

Todd Kuslikis is the founder of a bodyweight exercise blog called AShotofAdrenaline.net. He teaches men how to build muscle using only calisthenics. You can download his free 3 month bodyweight training program by clicking here. 

Filed Under: Progressive Calisthenics, Tutorial Tagged With: advanced push-ups, advanced variations, bodyweight exercise, increase muscle size, muscle mass, push-up variations, push-ups, Todd Kuslikis, tutorial, video

Calisthenics, Injuries and Life

February 10, 2015 By Corey Howard 72 Comments

Corey Howard One Arm Aussie Pull-Up

On June 8 of 2014, I turned 40.  The following day I had surgery to repair a ruptured triceps in my right arm.  In late August, just 3 months later I was able to pass all of the skill elements for my RKC recertification using ONLY calisthenics for training.  But what happened in between those dates is where the magic of calisthenics lies.

Fitness gives me life.  It helps me stay in shape so I can help out my wife around the house and keep crossing things off the seemingly never ending to-do list.  Being in shape gives me the ability to play basketball with my son in the driveway, or throw soft toss to him in the batting cage.  In late May when I ruptured my triceps I was no stranger to working around injuries, but it still gave me a few new opportunities.  First, I was able to focus entirely on my lower body and write what turned out to be a fairly successful blog post about calisthenics leg training.  Second, it forced me to start my upper body training from ground zero and really dig deeper into the Convict Conditioning progressions.

How does an advanced lifter re-teach himself one arm push-ups?  I will admit, despite limited range of motion in my elbow and absolutely zero pushing strength in my right arm; I had retained most of my pulling strength.  After regaining complete active full range of motion in the joint I was able to start push-ups at an incline as well as horizontal pull-ups. Pairing the pushing and pulling together gave me a chance to work on regaining my tricep strength as well as the range of motion from the pulling movements.

Despite my youthful desire to challenge myself and rush to the next progression I made sure I was able to hit 20 quality reps with each movement before moving on to the next harder step.  I think this also helped strengthen the tendon as well as create movement proficiency.  Eventually I was able to do 20 quality narrow push-ups on the floor and 20 wide grip pull-ups with my ankles elevated on a support bar.

Corey Howard One Arm Raised Push-Up

The transition to a dead hang pull-up was surprisingly quick and easy, but moving to the one arm push-up proved to be a bit more challenging.  To accommodate the added weight and strain on the elbow joint I had to move to incline one-arm push-ups and follow a similar rep progression back to the ground.  I think it really helped practicing single arm push-ups at various heights and immediately following it with tight narrow push-ups on the floor.

I learned a couple things along the way.  First, patience is everything.  Don’t rush to get to the next progression until you’ve mastered the step you’re on.  As Paul Wade says in Convict Conditioning, earn the right to advance to the next step.  This pays dividends when you attempt the next step and find that you can actually control a few reps with quality technique instead of surviving and gutting out two or three sloppy injury risking reps.  Second, most of us are not professional athletes.  Yes, a lot of us think part of our identity comes from what we can do in the gym.  Our true identity is created by how we are as a husband and father.  My injury sucked.  It took away my ability to train upper body and I lost some of my hard earned muscle mass, but that paled in comparison to not being able to play catch with my son, or help my wife carry in the groceries.

On Friday January 9th, I ruptured my bicep in the other arm.  On Monday the 19th I had surgery to repair that. Click here for a photo during the repair process. Warning: Graphic medical photo.  Two major injuries in six months.  This time around I’m not worried about the lost training time, I’m upset that I won’t be able to go sledding with my son, or do everything my wife needs me to do.  I’ll admit I’m having a hard time dealing with this one. Three months from now I know I’ll look back and see countless blessings from this, including a deeper appreciation for the pull-up progressions, but right now I’m in the storm and it’s tough to see the shore over the tall waves.

Corey Howard Recovers From Surgery

I know there are tons of people dealing with worse situations than mine; those of us in the fitness world sometimes stake too much of our identity on our physical capabilities. Twenty years from now the only thing people will remember is how you treated your family and those around you. It’s easy to forget that we work out to be healthy and so we can have a good quality of life. I may have temporarily lost the use of my arm, but I’m not going to let myself lose sight of the big picture.

***

About Corey Howard, PCC, RKC, CK-FMS: Corey Howard strives to constantly become stronger, and to help others to achieve their fitness goals. He is the owner of Results Personal Training, and can be reached at fithubby.com, resultsptonline.com or coreyhoward.com.

Filed Under: Motivation and Goals, Progressive Calisthenics Tagged With: bodyweight exercise, calisthenics, Corey Howard, Injury, push-ups, recovery from injury, surgery

The “Diesel 20”: Add Twenty Pounds of Muscle in One Year —Using Only Bodyweight

January 6, 2015 By Paul "Coach" Wade 255 Comments

Danny Kavadlo 1 Arm Push Up

Okay. It’s the New Year. It’s 2015—that means another year just slipped by you.

Another ****ing year.

That vague image you had of your ideal self: of jacking up to a dangerous, bone-shattering level of strength, and bulking up some serious muscle…you got there yet? Huh? Or are you still running around on a low setting, chasing your own ass?

Big changes need to be made, stud. And big changes require big personal challenges. A rich dude I knew back in the Bay once told me that it was EASIER to set—and meet—the goal of making a million dollars, than setting and meeting a goal of making a hundred thousand dollars. Why? Cuz the bigger goal is more inspiring. It unleashes more psychic energy; causes you to truly marshal ALL your forces to meet the challenge. The same principle that holds true for money holds true for your body. A big, inspiring, challenging goal is more likely to be met than a small, flimsy, pathetic one. So here’s a goal for ya:

I want to help you put on 20 pounds of muscle in a single year: using only bodyweight training.

Matt Schifferle Muscle
PCC Instructor, Matt Schifferle is a calisthenics master who exclusively uses bodyweight…does it look like he has a problem adding slabs of muscle? Check out the loaded guns!

Now, if you love training and that ain’t a goal to jack you up—you’re probably dead already. Twenty pounds of dense, solid muscle is an awe-inspiring amount of beef, and would totally revolutionize your body. Forget what you mighta seen on bodybuilding sites or magazines, where guys talk about putting on ridiculous amounts like fifty pounds in a year. That’s real rare, and when it does happen it is purely the result of huge amounts of steroids and other chemical poisons: it is mostly water, and what isn’t water is fake, artificial tissue that’ll disappear (taking extra with it) when the drugs are discontinued. That’s madness to me: if you want to look big using dumbass tricks, just stuff some goddam Kleenex in your sleeves. (In fact, modern bodybuilders are actually doing the equivalent of this. Google “synthol abuse” if you feel like laughing at the mentally challenged.)

What will twenty pounds of REAL muscle look like on you? Imagine a big, juicy quarter pounder burger patty. Now, remember that a quarter pounder burger is its raw weight: and that patty is at least a third bigger before cooked up. Now imagine four of these big, raw patties squashed together. That big, meaty lump is pretty much what a pound of muscle looks like. So imagine twenty of those lumps (that’s eighty large raw burgers).

It’s quite an amount, no? If you could plaster your torso, arms and legs with all that meat, you’d appear much, much bigger and more intimidating. (Remember, if you count bones, organs, skin and the rest, the average guy only has about forty pounds of lean muscle on his body anyway.)

And as for strength? Damn, son—if you really want to level up your raw power, getting diesel is a real good way to do it. Yep, there are some real pansy huge bodybuilders out there, and there are some tiny guys who can lift like Superman. But as a general rule, there is a direct correlation between muscle and strength. That’s why powerlifters and Olympic lifters move up through weight classes throughout their careers: as they gain strength, they gain lean muscle tissue. Plus, you’re not gonna be pumping out reps on silly machines, right? You are gonna be using the ultimate functional training tool: your body. You WILL become alpha-strong as a consequence of training for this goal.

How to really do it: six keys to success

You are probably expecting a routine here, right?

In truth, it’s very, very tough to work hard on just one routine for a year. Most athletes will get stale and bored, and quit. Thinking “programs” is not enough. Putting on the “Diesel 20” is a big ask—it’s kinda like going to war. Exercises and routines are your weapons and equipment. In war, the tactics you use are way more important than your weapons. We’ll talk programs a little later—let’s absorb the tactics first. Here are SIX Alpha-Building tactics to keep you on the straight and narrow:

  1. Joints first

If you are going into a year of hard training, you gotta be conditioned to it first. The job of a beginner—no matter what age they are—is to learn the correct calisthenics movement patterns, build basic strength, and condition their joints. If beginners launch into tough regimes designed to build maximum muscle, they will only end up hurt and frustrated. If you are a beginner and want a great starter routine for the New Year, I wrote one here just for you.

  1. Work the basics.

Despite what you might believe, tons of muscle is NOT built by working with dozens of exercises, working with isolation-type moves, or by working each muscle head “from every angle”. This might (or might not) be a method for putting the finishing touches on a physique that already carries plenty of beef—for actually building mass, its worse than useless. A better tactic is to structure your training around a handful of basic, compound movement-types, used progressively. I favor the “Big Six”: pullups, bodyweight squats, handstand pushups, bridges, leg raises, and pushups. (Some folks might choose to include dips as part of the pushup family.)

Al Kavadlo Bar Dips
I’m a pushup man myself, but I gotta say it:
dips can be an excellent upper-body builder.

Note that “structuring your training around” these six does NOT mean you are limited to six exercises. The Big Six are families of exercises: so when you are doing “pullups”, you might actually want to do two types of vertical pull plus a horizontal pull to work all your back muscles: three exercises, but they all come under the “pullup” banner. As long as you stick to the basics and work progressively, this is a good way to work everything to the max.

You can add other bodyweight work, certainly for the lower body: explosive jumps and plyo work goes well with squats, as does sprinting training. (Hill or stair sprints build more muscle on the legs than you might imagine: many UFC fighters actually favor this kind of work over barbell squats.)

Beyond this, if you want to throw in some different stuff into your sessions—maybe isolation movements or static exercises—sure you can. But use these things sparingly, as add-ons, rather than the backbone of your program.

  1. Mix low AND high reps.

High reps or low reps for maximum muscle gain? If you read my article, The Ten Commandments of Calisthenics Mass (Commandment X), then you know that you need BOTH. For upper-body, it’s a great idea to begin your sessions by using very hard pulling and pushing exercises which limit you to low reps. If you want, you can use more sets than usual. One useful method is to shoot for 10-15 reps over as many sets as it takes.

It doesn’t matter what exercise you use—dips, pullups, pushups, levers, handstand pushups, whatever—just use low reps for your primary push and pull movement, and constantly try to move up to harder and harder techniques. For the rest of the pulling/pushing exercises of your workout, you should shoot for higher reps, attempting to really drain the muscles. In the old days, this used to be called the “heavy/light” system. There are alternative equivalent methods, but this combination works very well over the long term.

You can use this approach for legs, too, but since the lower body has adapted to carrying you around all day, you can usually grow well using just higher reps.

  1. Sets and reps?

As I said above, if you are working with very hard exercises, where you can only get low (1-5) reps, you can use more sets to reach your rep goals. (If you can only do four strict pullups, for example, you might set a workout rep goal of ten reps, and do a set of four, a set of three, and three singles—or whatever you can manage.)

If you are pushing hard on muscle-building, higher rep sets (8-20) stick to one or two sets and just give it your all. (Extending your set—by changing grip, style, range-on-motion, speed or position—doesn’t count as a new set. It’s all one set, baby!) That’s miles better than just plugging away. Sure, for legs you can get away with adding more sets than this, but always emphasize quality over quantity.

  1. Hit it hard or go home.

If you want to transform yourself this year, work ****ing hard when you train. How hard? Hard enough to improve—it ALL comes down to this. “Improving” doesn’t mean “jumping to stuff that’s too difficult”. It means finding a baseline you find manageable but tough, and consistently improving form, adding a rep here or there, or making minor technical progressions. These all add up over the year to huge changes.

I’m not a generally huge fan of training to “failure” for most workouts. But the reality is that the harder you push yourself, the better your body adapts, to cope with the perceived effort. Eight reps is better than six reps. Fourteen reps is better than ten reps. If you are fired up and committed to gaining a LOT of muscle in the near future, you need to push yourself more than you might in regular strength training sessions.

  1. Stay away from the weights.

To those of you versed in modern fitness “culture”, this sounds nuts. Sacrilege, even. You gotta hit that bench, those heavy squats, or you can’t grow, bro! Sure. That’s why gymnasts are some of the most muscular natural athletes on the planet.

Yes—bodyweight training WILL jack you up.

In the REAL world, using weights makes training TOO EASY. That’s why most gym-trained folks never change. Any fat weakling can do bench presses or machine curls. But strict dips? One-leg squats? Hanging levers? One-arm pushups? Only for REAL athletes.

Bodyweight also keeps you honest. It’s simple to bulk up 20 pounds of fat and go do some deadlifts and convince yourself it’s “all muscle”. But when you are struggling to add reps to your pullups, you know the truth from the lies pretty damn quick.

Programs, Paulie?

Okay—that’s the tactics. What about the program?

Well, I can’t give you a program. That changes over a year. (For sure, the exercises you use MUST change, as you grow in power and mass.) There are plenty of programs you can apply these tactics to in Convict Conditioning, Raising the Bar and C-MASS.

Like I said, your program should ideally be based around six basic components (which are distilled into the Big Six). Pullup variations, bodyweight squats and leg work, bridges, handstand work, leg raises/midsection and pushups. They key is to work these six families hard. What does “hard” look like? Here’s a sample intermediate routine, containing just two workouts, cycled with a day off between each. The exercises may change if you are not this strong, but the flavor is there:

WORKOUT 1: Pullups, Squats, Bridges

Pullups

Everyone loves pullups! You warm up with two sets of five regular two-arm pullups and some hanging stretches, just to get everything loose. After that’s it’s archer pullups—an exercise you find pretty tough. You want to get ten cumulative reps in today: it doesn’t matter how many sets it takes. You begin with your weakest side, and manage to grind out four good reps. You repeat that on your stronger side, then get three reps on both sides. You finish with another set of two (both sides) and a single (both sides), making ten reps (4, 3, 2, 1). Not quite failure, but tough, stimulating work—you’re going for eleven reps next time, champ!

Not done yet, though. After some shoulder circling, you head back to the bar to finish off with regular, two-arm pullups. Your lats and biceps are so shot that strict, deep reps are out of the question now: so you only go ¾ of the way down, and swing yourself up. One set of nine of these, and there’s no point in doing any more vertical work: your lats are flash fried.

Al Kavadlo Shredded Back Pull Up
ACHIEVEMENT UNLOCKED: Shredded upper-back!

Your upper-back and traps could use some more training, right? So it’s back to everybody’s favorite, horizontal pulls. You set yourself under a low bar and pull yourself up until your chest touches, forcing your shoulder-blade muscles to contract almost painfully, even from rep one. A strict set of eight, followed by a set of seven leaves your upper-back tissues pumped and burning as hell.

By now, your entire upper-back has had a great workout—front-to-back, side-to-side. You are a Spartan though, and want to finish off with a little treat for your grip—hanging grip holds. To help work the entire hand, you throw a couple towels over the bar, turning a tough exercise into a real bastard. Your forearms are pretty thrashed already, so you can barely last a few seconds each hold—three sets and yer hands are cramping, with your forearms feeling so hot, you want to plunge them into ice water. Great work. You are doing something right! Thankfully, your arms can take a break now. Legs are up next.

Squats

After a warm-up of jogging on the spot and jackknife squats, it’s time for the perfect neural primer if you want big legs: explosive jumps. Three sets following the rules and progressions I set out in Convict Conditioning 3 (released soon!) and BANG—it’s suddenly time for squats.

Perfect one-leg squats are a little tough for the rep range you’re shooting for, so you start with a version of assisted squats, using a doorframe to help pull yourself up. You go tough on yourself, though—each rep is slow, strict, momentum-free, and with as little help as possible. Ten strict reps per leg, for three sets, leave your quadriceps feeling like they’ve been surgically removed, dipped in battery acid, then sewn back in.

But you need more squats—for motor patterning and conditioning. (Don’t worry, those big leg muscles can take it.) So you work with deep, strict, perfect two leg squats—two sets of fifty reps leave those legs pumped and blitzed beyond belief. Not done yet though—you head outside for some sprints. (I’m betting you have a stretch of road. Somewhere.) You set a point around a hundred meters away, and hit it. At first it feels like you’re running through Jell-o, but you grit your teeth and somehow adapt. Five rounds of sprints with a minute in-between leaves those legs shot and shaky. You ever seen a sprinter’s legs, kid?

Allan Wells Sprinter Quads
Allan Wells is just one example of a champion sprinter with great legs who never touched a weight: he stuck to plyometrics and bodyweight circuits, and in the eighties his contemporaries said that when he flexed, his quads looked “like a road map”.

Bridges

Back indoors and though you yearn to crash on the couch, you still have another exercise to go: bridges. Everything is warm now, so you head straight to bridge pushups: fifteen reps seem easy, so you stretch out and switch to gecko bridge pushups—one arm, one leg. Only for champions, this. You are shaking and trembling, but manage four reps apiece. It doesn’t feel like enough, so you go back to regular bridge pushups, and bang out a set of twelve: each rep with a three second pause, tensing at the top. Just to bulk up those back-legs, you finish with two sets of straight bridges—twenty-five and eighteen reps leave your hamstrings (and triceps) aflame.

Convict Conditioning Bridges
Classic bridge pushups. Not sure what the book is called.

By now, it’s time to call it a day. But there’s a nagging feeling in the back of your mind: you suspect that you worked your legs so damn hard—all the squats, jumps and running—that you couldn’t give your spinal muscles all they deserved during the bridges. Your legs gave out first. Sure, you gave them a good workout, but “good” won’t build the Diesel 20, right? So you rock up to the overhead bar again, jump up and spin round into a back lever. Yeah, it’d be ideal to lever up and down, but your body is so brutalized now, just holding the lever is an achievement. You hold it ramrod stiff for three seconds—spinal muscles like steel pythons…five seconds…body shaking…eight seconds, and down. You give yourself a goal of thirty seconds total, holding the back lever: it takes seven ruthless, cumulative sets to manage it. By the end of it, you are sweating and exhausted, and your spinal muscles are thrashed to hell.

Do you do any more for your legs and back? Any squats, deadlifts, leg curls, hacks, adductor band moves? NO! Not because you don’t want to, because you can’t. Your muscles are worked to the max!

Forget what the fools tell you that you can’t build muscle with calisthenics. If you can train like this once or twice a week for a year, you will revolutionize yourself. This stuff would add mass to a pencil! Go have a steak and a good night’s sleep—you earned it.

WORKOUT 2: Handstand pushups, leg raises, pushups

It’s 48 hours, ten hours sleep and several quality meals since your last workout: but your legs are still a little stiff. Must be time to hit it again with workout 2! We did pullups, squats and bridges last time: this time it’s handstand work, midsection and pushups. Mostly upper-body. Your legs shouldn’t have to work too hard.

Handstand pushups

A good warm-up is always a great idea before shoulder work. So you start with shoulder rolling, active stretches, plus a few handstands against the wall. That gets some blood in there. Time to hit handstand pushups: for your first set, you bust out a strict set of six—not too shabby. Two minutes rest and you’re back on it—five reps. Maybe you could have got six, but it’s not wise to push too hard when your skull is hovering above the ground, right? You still want more, so you add sets rather than doing lots of reps all at once. Another set of 3, then a final perfect single rep, and you call it a day (that’s 15 reps: 6, 5, 3, 1). On that final single rep you hold your arms locked out for a total of about twelve seconds—seems like forever. You don’t quite crumple to the floor after this, but you ain’t far off.

Arnold Handstand Push-Up
Yep. Even Arnold himself used handstand pushups from time to time—
the legendary Frank Zane spots him.

You can feel the deep stimulation in the deltoids and triceps as you wander around, shaking out your wrists and arms. How can your shoulders and arms NOT grow after a beating like this? Hell, your whole damn upper-body feels like it’s had a workout!

Leg raises

Need to stretch out those compressed torso and shoulder muscles—after a break and a sip of water, you head off to the horizontal bar.

Your body is already warm, so after a couple sets of light, stretchy, knee raises, it’s time for the real stuff: strict hanging leg raises. With your legs as stiff as ramrods and using zero momentum, you bust out a set of eighteen. On the next set you only get six reps before you need to start swinging and cheating, but fight your way to eleven anyway. Two sets and your abs, waist and hips are toast.

Al Kavadlo Six Pack
Al’s six-pack was built with bodyweight training and nutritional discipline. No machines, drugs or supplements are necessary for a stripped steel stomach like this.

You drop down and walk to the other side of the room, to give your grip a bit of a rest, then you’re back—this time for hanging knee raises. These should seem easy after the straight-leg stuff, but your abs are tired: you can manage one really, really tough, messy set of twenty-one. Your hanging strength is spent now, so you head to the floor. You get on your back, not for a rest, but to work on some lying leg raises. One set of twelve strict, wheezing reps and you are nearly done. There’s a little gas left in those abs, so you quickly hook your feet under the couch and move to fast sit-ups. Just ten reps in, your abs are ready for suicide. By fifteen, “fast” is out the window, and you are gulping breaths on the floor between reps. You shoot for thirty, but twenty three is your absolute limit today—not because you quit, but because your stomach muscles do. How do you know you’re done? You can’t even get up for a full minute—your abs won’t respond. So you lie down and get your breath until you can face the next movement.

Pushups

You take a few minutes to walk off the pain in your belly, stretching a little to let the blood and waste products in your tight abs dissipate, then it’s back to your true love: the floor. A couple of easy warm up sets of pushups, then you’re into the real stuff. Let’s work the arms and shoulders with close pushups—one strict, slow set of twelve leaves your pushing muscles hot, and your triceps swollen like balloons. So we repeat the feat! Or try—you manage an agonizing-but-strict ten reps. You could not do more close pushups if you tried. So you place your hands a few inches apart, and the shift allows you another three pushups. Then you move a few inches apart again—two more. By now your upper-body is screaming in pain, and you are huffing like the Little Engine That Could. But you are a warrior, and there is more in you. So you switch to regular pushups, and manage to grind out five okay reps—with a little body English. This last set has lasted twenty reps—but WHAT a set it was. For sanity’s sake, you take a ten second breather, shaking out your arms and shoulders. Still not done, you get back into the pushup position and pump out some partials—nine half reps, six quarter reps, and finally about a dozen “pulse” reps: just bumping up and down, to squeeze the last bit of juice from your muscles. If the floor was a 500lbs barbell, it wouldn’t be any easier to push!

By now, the triceps and shoulders are blown to bits. But the pecs—after a three minute rest they got a little bit left in the tank. You set up two chairs a little way apart, and place your palms of the seats for stretch pushups, setting your feet up on a box at hip height to make things even tougher. Ten reps and your chest muscles are in agony. You manage eleven. But instead of crashing down, you pop your feet down on the floor to improve your leverage and continue. You manage another four reps only, your chest screaming at you the whole way. You’re toast.

Clint Walker Stretch Pushups
In the fifties and sixties, actor Clint Walker had the best pecs in Hollywood. The stretch pushups didn’t hurt none, huh? (You’re right. He shoulda played Superman.)

It takes you five minutes of rest before you feel ready to hit the shower. Another killer workout in the bank—but look on the bright side. You got another 48 hours to rest before going back to workout 1 and kicking yourself in the ass again.

Got the idea?

Gentlemen, it’s training like this that builds SERIOUS MUSCLE. It’s not easy. It’s not really fun. But if you can train like this for a year you will look like all those guys you always dreamed of looking like. I’m not saying you should do this workout—you can use any workouts you like—I’m just trying to give you a taste of the kind of hard-ass, focused training that will ramp up your muscle mass quickly.

Another point is that you need to—always—vary the exercises you are using to reflect your strength and ability. For most people, the exercises in the above workouts, with those rep levels, would be too tough. For some hard cases, these exercises would be too easy. The exercises you use will change as you get stronger, fairly quickly: the athlete performing these exercises would “outgrow” them fairly soon, as he moves to harder and harder stuff over the year. (How do you “move to harder and harder stuff”? You meet rep goals on the exercises you are doing, then find ways to make ‘em a little harder. You got this thing, right?)

Fit Rebel Push-Up

Just Do It

If you are really up for this challenge—Beta to Alpha in twelve short months—one final piece of advice. Keep it secret. I don’t believe this modern bullshit that you should shout your goals to as many folks as possible. There is magic in secrecy, in knowing something nobody else does. Social media is one reason so few folks get in shape these days—they expend all their mental energy talking about their goals, and leave none for the goals themselves.

Shoot me a comment with questions or ideas—but don’t promise me you are gonna do it. Promise yourself. If you really want to go for this, get weighed, take a photo of your physique, and come back in one year to show me how awesome you got. I WILL publish it, and you WILL get famous.

I believe in you, kid.

A million thanks to the greatest calisthenics trainers on earth, Al and Danny Kavadlo, for providing most of the photos. Find Al at AlKavadlo.com and Danny at DannyTheTrainer.com. It was also an honor to be able to use shots of the Fit Rebel himself, Matt Schifferle. This guy is a master bodyweight bodybuilder, and really understands the science like nobody else in the world. Please check out his site, RedDeltaProject.com.

***

Paul “Coach” Wade is the author of Convict Conditioning, Convict Conditioning Volume 2, the Convict Conditioning Ultimate Bodyweight Training Log, and five Convict Conditioning DVD and manual programs. Click here for more information about the Convict Conditioning DVDs and books available for purchase from Dragon Door Publications.

Filed Under: Motivation and Goals, Progressive Calisthenics Tagged With: Al Kavadlo, Big Six, bodyweight exercise, C-Mass, calisthenics, Convict Conditioning, Danny Kavadlo, goals, how to gain muscle with calisthenics, Matt Schifferle, muscle building, Paul "Coach" Wade, Paul Wade, progressive calisthenics

Back to Basics: 6 Moves to Master Before Moving Forward

November 4, 2014 By Eric Buratty 35 Comments

Kavadlo Brothers Squat

Everybody wants to go straight to the advanced moves, but ain’t nobody want to make time for getting better at the basics!

Here at PCC, we get it. Your mind was just blown away from someone’s Facebook picture or YouTube video performing some sexy, ninja-like move that you want to try, too. This simply means you’ve been inspired to either try a calisthenics move (which is cool), or convert your training efforts exclusively toward calisthenics all together (even cooler).

But, like everything else people are good at in life, such graceful displays of strength, control and power require a considerable amount of time and practice to master. Not to mention the patience involved will humble anyone who might already have a strong fitness background from other disciplines (e.g., weight training, dancing and yoga).

That said, before moving on to some of the more advanced variations of calisthenics moves, EVERYONE needs to become proficient in the following basic positions.

1. Full-Depth Squat

Eric Buratty Squat

Also known as an “ass-to-grass” squat, this is a basic human resting position that involves maximal bending of your hips and knees. NO ONE has any business loading this movement pattern until they can achieve full range-of-motion with their own bodyweight, and still remain upright from a postural perspective.

Calisthenics Transition: Foundation for Progressing the Squat Chain (i.e., working up towards pistol and shrimp squat variations)
Recommended Practice: Sit in this position for 5-10 minutes daily. The more favorable times to do so are upon waking for the day, before bed, whenever on a rest day and before or after a tough workout. Feel free to shake up social conformity any time you have the opportunity to squat—especially when waiting in line or shopping out in public.

2. Supine Hollow Body

Eric Buratty Supine Hollow Position

The hollow body is the ultimate educator on the principle of whole body tension. A challenging core workout on its own, this position teaches you the principles of progression in all of calisthenics. More specifically, it allows you to feel the effect of lengthening or shortening the body as a lever for resistance, so you can adapt your training on a given day accordingly. Without understanding the principles of progression in calisthenics, you will only be setting yourself up for failure—and even injury.

Calisthenics Transition: Foundation for Precision and Control Required in Handstand, Front/Side/Back Levers
Recommended Practice: Maintain this position for a total of 2 minutes on training days involving handstands, front/back levers and human flags. Use as part of a warm-up, or superset with the aforementioned moves as active recovery during a workout (e.g., 8 sets of 15 seconds, 6 sets of 20 seconds, 4 sets of 30 seconds).

3. Hollow Body Leaning Push-Up Plank

EricBuratty Hollow Leaning Plank PushUp

By “leaning” into a standard push-up position, you’ll reach a higher level of total body tension that forces you to have greater balance and control over your body. The ability to achieve this position also serves as an excellent confidence booster for when you start experimenting with moves that involve less point(s)-of-contact with the ground.

Calisthenics Transition: Foundation for Progressing Midsection Floor Holds (e.g., N/L/V-Sits, Side Planks, Planche, Manna), Inversions and Elbow Levers
Recommended Practice: Use as part of a warm-up on workout days involving midsection floor holds, as a “finisher” on workout days involving push-ups or as active recovery on workout days involving vertical and horizontal pull-ups. Work up to holding this position for a solid 2 minutes without form breakdown.

4. Hollow Body Backbend

Eric Buratty Hollow Body Backbend

When it comes to improving overall mobility, look no further than backwards bending (AKA “bridging”). Insert “do you even backbend?” parody for “do you even lift?” here. Known for its extremely therapeutic benefits on the muscles and tendons of the entire body, you can further enhance the quality of this position by putting the lower body into as much extension as possible and concentrating on pushing the shoulders past the hands. What you’re left with is a more “hollowed” version in the basic family of bridging that opens new doors for achieving stronger three-limb holds, geckos, stand-to-stands, walkovers and eventually, arched “Mexican” handstands.

Calisthenics Transition: Foundation for Progressing Handstands
Recommended Practice: Work up to holding this position for at least a solid minute after every workout you do. Given the powerful stretch that occurs in common problem areas for Americans from performing this movement (i.e., spine, shoulders and hips), you might even want to start devoting an entire training session to bridging throughout the week.

5. Hollow Body Dead Bar Hang

Eric Buratty Dead Hang Hollow

Similar to the full-depth squat mentioned above, passive hanging is another type of human resting position. When you take the passive hang one step further and connect the scapular muscles with the rest of the body, you’re left with this active hang that’s visually appealing and graceful. This happens to be one of the best positions for activating the core, as it decompresses the entire spine and puts the shoulders into a healthy stretched position with straight arms. With consistent practice of this deceptively challenging hang, you might “accidentally” become stronger at pull-ups AND start revealing your Diamond-Cut Abs.

Calisthenics Transition: Foundation for Progressing Pull-Up Chain & Leg Raise Chain
Recommended Practice: Hang from any straight bar (or any freestanding object for that matter) that allows you to put your body into a fully extended, hollow position, and maintain the position for a total of 1-2 minutes daily. This can either be done before or after a workout to facilitate warm-ups and cool downs—or as a nice complement to an active recovery day away from your regular training.

6. Hollow Body Bar Support

Eric Buratty Hollow Bar Support

As with the other “hollow” positions above, you’re pretty much forced into a state of total body tension with the bar support—which will lead to stronger reps on any related movement you’re preparing to train. In this instance, the ability to support yourself over a bar in a straight arms, locked out, elbows forward position is definitely a good indicator that you’re ready to reach the top of the dipping chain and beyond. Who ELSE is ready to work towards their first straight-bar muscle-up?!

Calisthenics Transition: Foundation for Progressing Straight Bar Dips & Top of Dipping Chain (i.e., Muscle-Up)
Recommended Practice: Use as part of a warm-up on workout days involving the dipping chain—or as active recovery on workout days involving vertical and horizontal pull-ups. Work up to holding this position for a solid minute at a time without form breakdown.

In no particular order, there you have six positions to master before you get slammed in the face with a serious slice of humble pie.

Why do we want to emphasize these isometric positions before worrying about reps and transitions anyway?

Simply put, it’s so we know where our body is in free space and when its position changes. That way, when we reflect on those workout days where our bodies felt ginormously heavier, we might be able to identify which positions felt strong and which ones felt stronger, so we know where to improve on next time.

I’ll end with one of my favorite training-related quotes which comes from Gymnastics Coach Christopher Sommer: “Save the nonsense. Bad form simply means bad attitude. Plain and simple. It means that you did not care enough to do it right.”

To acknowledge this quote from a PCC standpoint, always focus on becoming stronger than yesterday but not as strong as tomorrow! 😉

***
Eric Buratty brings five years of experience to the DC Metro Area as a Certified Personal Trainer, Progressive Calisthenics Instructor, Nutrition Consultant and Sports Injury Specialist.
For more information about Eric, check out his website, EricBurattyFitness.com.

Filed Under: Progressive Calisthenics, Tutorial Tagged With: bodyweight exercise, bridge, calisthenics basics, calisthenics positions, Eric Buratty, foundation calisthenics, hanging hollow position, hollow position, skills training, squats, tutorial

The First Rule of PCC

August 19, 2014 By Danny Kavadlo 45 Comments

Danny Kavadlo fight club tribute photo

People are always asking me if I know Coach Wade. “Is it true?” they ask. “Can he really do one-arm handstand push-ups? What does he look like? Is there a Progressive Calisthenics Certification coming to my city?”

“Yes there is!” I tell them. Tell everyone you know! The first rule of PCC is you DO talk about PCC.

The second rule of PCC is you DO talk about PCC. The next event is October 10-12 in Haarlem, Holland! This particular workshop really looks like something special. My brother and PCC Lead Instructor, Al Kavadlo, have personally met and trained with Martijn Bos, owner of Trainingscentrum Helena, Holland’s #1 Calisthenics and MMA studio, where we will hold the country’s first ever Progressive Calisthenics Certification. We are looking forward to meeting a lot of new friends there!

Danny Kavadlo Coaching Hanging Knee Raise
Danny Kavadlo coaches Martijn Bos at PCC Germany.

No wait. Back up. Let me start over.

For months, I couldn’t sleep. My brother Al and I were literally the top Personal Trainer and Fitness Manager in a company that employed thousands. Our job was to train everybody generically regardless of individual situations. Which company did we work for, you ask? A major one. In fact it is one of the biggest chain gyms in New York City. But we wanted something more.

Tired with the standard conventions of the industry, we chose to walk off the beaten path. Commercial fitness teaches trainers to believe that with isolation machines and protein powders, we will grow to be athletic, strong and functional. That if we buy this product or that pill, all our problems will be solved. But they won’t.

We’re a generation of men and women raised on gimmicks and machines. Advertising has us chasing treadmills and Shake-weights. Thigh-masters. Bowflex. We were wondering if another piece of equipment was really the answer we needed.

Al Kavadlo bridge

Many do what they’re told. Pull a lever, push a button. At PCC, we do Push-Ups instead of pushing buttons. We don’t pull a lever; we become the lever. It was right in everyone’s face. We just made it visible. It was on the tip of everyone’s tongue. We just gave it a name.

Danny Kavadlo Human Flag
Welcome to PCC

Every time we arrive in a new city, we meet people we’ve never trained with before, yet we have an instant kinship as fellow bodyweight warriors. We’re all part of the same family. Déjà vu all over again.

Al and Danny Kavadlo at Munich Airport
You wake up in Munich

To date, we’ve had nine Progressive Calisthenics Certifications in seven different cities, spanning three continents. Bodyweight training, the oldest and noblest form of strength training, is gaining a resurgence. Progressive Calisthenics is becoming this incredible, global community. PCC is the first and best bodyweight certification.

PCC Workshop in Sweden

“What’s next?” everybody wants to know. “Is it true? Is Coach Wade building an army?”

DO talk about PCC! Tell everyone you know!

The posse’s gettin’ bigger!

-DK

***

Danny Kavadlo is one of the world’s most established and respected personal trainers. He is a Master Instructor of Progressive Calisthenics and the author of Everybody Needs Training: Proven Success Secrets for the Professional Fitness Trainer. A true in-person experience, Danny is known globally as a motivator and leader in the body-weight community. Learn more about Danny at: www.DannyTheTrainer.com.

Filed Under: Motivation and Goals, Workshop Experiences Tagged With: bodyweight certification, bodyweight exercise, calisthenics community, Danny Kavadlo, functional training, PCC, Progressive Calisthenics Certification Workshops, Upcoming Workshops

The Bodyweight Arm Training Revolution

July 29, 2014 By Matt Schifferle 29 Comments

Al and Danny Kavadlo bare their calisthenics arms
PCC Lead Instructors Al and Danny Kavadlo showing off their calisthenics arms.

“Matt I thought we were friends. How could you do this to me?!”

My buddy Tony is standing in front of me, all 295 pounds of him. He’s a powerlifter who considers benching 315 a warm up.

“My biceps feel like they are going to explode. I can hardly get my triceps to relax they are so pumped up. How could you do this to me?” He says with a smile on his face.

Tony’s just gotten a taste of two of my favorite arm blasting exercises. They are simple, efficient and they don’t require a single ounce of iron. They are also somewhat backwards to classical strength training for the biceps and triceps. So when Tony said it was his arm day and wanted something different, I didn’t pull any punches.

The classic approach to weight lifting work involves holding a weight or cable attachment in the hand. Good technique is classically done with a body that doesn’t move much and a neutralized elbow.

Classic Arm Training Diagram

The bodyweight approach works the opposite way. The objective is to lock the hand in place, neutralize the body and move the elbow as much as possible.

Bodyweight Arm Training Diagram

This New Approach Has Some Big Advantages:

Less stress on joints.

The joints of the body typically become more stable and less likely to move into stressful positions when the extremities are against an unmoving object and the body itself moves through space.

More energy on target muscles.

Since there is less energy spent trying to prevent the body from moving (you actually want it moving around) you can spend more effort towards actually performing the movement and working the muscles in the arms.

More functional carry over to pull ups and pressing movements.

The curling exercise is still very much a pull up style movement. The triceps extension is also a style of push up. Just like with pull ups and push ups, you keep your hands in place and move your body using the action of the elbow joint. This is neurologically similar to push ups, dips, rows and pull ups. This means that you’ll program your nervous system to engage your biceps and triceps more during all pushing and pulling exercises. So you won’t just be hitting your arm muscles during these two moves, but you’ll also place more emphasis on those muscles with almost every upper body bodyweight movement in your calisthenics arsenal.

Carry over to Olympic lifting.

Some of my clients who practice Olympic lifting report a carry over to exercises such as cleans. I believe this is due to the fact that both of these moves train you to become more conscious of using your elbow as opposed to just trying to move the hands into an ideal position.

It’s easy to adjust resistance mid-set or even mid-rep.

Both moves have a variety of ways you can adjust the resistance on the fly. You can dial-in the perfect level of resistance and make adjustments as necessary even during those last few reps.

The bottom line is this–by reversing the classical weightlifting arm strategies with calisthenics, you open the door for unbelievable levels of tension applied directly to your biceps and triceps with more comfort and safety. How’s that for a formula for success?

The first exercise is the triceps move known as the Tiger Bend. You can do this move on any elevated platform or edge of a counter. Park benches and sturdy table tops work particularly well.

Place both hands about shoulder width, palms-down with a thumb-less grip. If you’re using a narrow surface, your hands may need to be placed next to each other, which will be fine.

Bend your elbows downward and forward without letting them flare out to the side. The key is to keep your elbows pointing down to the ground, creating a gap between your arm and torso as indicated with the blue triangle in the picture. Tense up your triceps and shoulders as hard as possible, and tense your lats to stabilize your back.

Low Bar Setup Position ArmTraining

Apply resistance by stepping your feet back so some of your weight goes directly to your hands. Once your feet are firmly planted, push directly down with your hands and push your elbows up and away from the surface your hands are pressing down on. (See blue arrow below.) This should cause your body to lift up and back as indicated by the orange arrow. Once your arms are fully straight begin coming back down by bending your elbows down and forwards.

Low Bar Arm Training Top of Movement

Regressions and Progressions:

I love this exercise because it’s so easy to progress and regress it. Moving your feet back will place more weight on your hands and increase the resistance. Moving them closer will do the opposite, making the move easier.

You can also change the resistance by putting your face in a different place in relation to your hands. Bringing your chin between your hands will be easier, while bringing your nose or forehead between your hands will be respectively more difficult. You can also make this move much easier or harder by selecting hand placements at different heights. Just like the push up progressions, the more your body tilts towards the floor, the harder the move will become. Placing the hands on a higher surface will stand your body up more and take away some of the resistance. If you want some additional assistance, you can simply place one foot in front of the other to help lift you into position on those last few reps. Lastly, you can also bend your body in half a little at the hips. Again, this will bring more of your body weight to your feet to make the exercise a little easier. Straightening out your body into one straight line will make the movement more difficult.

The biceps exercise is very similar, only now you face the other way. Since this is technically a pull up style exercise, so bars or handles you would usually use for moves like Australian pull ups will be ideal.

Place your hands on the back side of the bar with your fingers on top of the bar. Once again, a thumb-less grip may be ideal, but I’ve also used a thumb grip without much trouble.

Tense up your biceps and push your elbows away from your rib cage with your hands right next to your chin. It’s still ideal to keep your elbows in front of your torso as you can see from the blue triangle below. This position will ensure maximum tension on your biceps.

Chin Up Position Flexed Bodyweight Arm Training

I recommend using a slight kink in the hips rather than keeping your body straight. This will allow a bit more flexibility in your motion and lend itself to a more natural motion.

Chin Up Position Bodyweight Arm Training

Lower yourself down and back by bringing your elbows out and upward (blue arrow) which will cause your body weight to fall away from under the bar(orange arrow). Return to the starting position by bending your elbows down and forward to maintain that elbow position in front of the ribs.

Performance Tips:

-It’s a good idea to keep tension on your target muscles at all times. It’s tempting to relax at the bottom or top of each rep, but maintaining tension on the muscle is key in maximizing your progress.

– A little goes a long way. If you need to adjust your resistance, just moving your body an inch or two can make all of the difference in the world. Sometimes even moving your feet a couple of inches or slightly straightening your knees can be more than enough.

– Towels are a great addition to these moves. They can provide a neutral grip which many people find more comfortable. Plus they are great for building up that grip. Nothing complements your bis and tris like a pair of beefy forearms.

Bodyweight Arm Training Towel Variation

– Once you’re more comfortable with the motion of the exercises, work on tensing other muscles in your body as much as possible. Adding more tension to your back, shoulders, hips, hamstrings and even your chest can bring these moves to a whole new level and your results will follow.

– Be patient and use light resistance for the first few weeks. These moves can take some practice to get everything dialed-in just right. Making the movement of the elbows the focus of the exercise can feel a little strange at first, especially if you’re used to the classic method of curls and extensions. Keep tweaking the position and movement of the elbow, and it will feel natural before too long.

– Listen to your joints. both of these moves can place a massive amount of tension through your biceps and triceps. Sometimes people find their joints need some time to become accustomed to the high degree of tension running through the muscles. It’s always okay to use a shorter range of motion and a lower level of resistance at first to allow the tendons around the elbow to strengthen up. Take your time easing into the exercise over a few weeks. Once they are accustomed to the exercise, feel free to use a big range of motion. By then your elbows will be bulletproof!

Good luck with these two movements. If you have any questions please don’t hesitate to ask in the comments down below.

****

Matt Schifferle a.k.a. The Fit Rebel made a switch to calisthenics training 5 years ago in an effort to rehab his weight lifting injuries. Since then he’s been on a personal quest to discover and teach the immense benefits of advanced body weight training. You can find some of his unique bodyweight training methods at RedDeltaProject.com.

Filed Under: Tutorial Tagged With: arm training, biceps, bodyweight exercise, calisthenics, Matt Schifferle, no gym necessary, outdoor training, strength, triceps

Calisthenics Grip Training

July 22, 2014 By Corey Howard 31 Comments

Handshake

I’ll never forget Gary. It’s not that Gary was such an amazing person, in fact he was quite bland. Imagine shaking hands with someone’s limp lifeless, overcooked soggy noodle hand. That was what made him disappointingly unforgettable. We’ve all met someone like that, and it creeps most people out. Shake my hand like you mean it!

On the other side of the spectrum is Rich. Rich has been crowned the World Arm Wrestling Champ many times. After introducing him to my father, my dad said, “that was like sticking your hand into a bunch of bananas! I wasn’t sure I was getting my arm back!” Your handshake says a lot about you. Grip strength says even more.

Al Kavadlo Human Flag
Grip strength is an essential part of many advanced calisthenics exercises, such as the infamous human flag, demonstrated here by PCC Lead Instructor Al Kavadlo.

How can a strong grip help?  First, your grip is the linkage between your body and whatever it is you’re trying to control.  If you’re trying to put heavy objects overhead, a crushing grip can actually tighten the linkage in your shoulder and give you a safer press.  If you’re a calisthenic ninja, killer grip can keep you on the bar for more pull-ups or help your handstands as you grip the ground and drive upward.  But how on earth can you develop card tearing grip strength using only calisthenics?  According to Paul Wade in Convict Conditioning II, finger tip push-ups and towel hangs are all you need.  From my own experience, he’s right!

Finger tip push-ups are simple; just do a push-up on your finger tips!  Well, there’s a bit more to it than that.  This one killer exercise strengthens the entire hand from the fingers up through the forearms.  It’s easy to let your ego get in front of you with this one, so be sure to progress slowly and cautiously. I recommend starting these as incline push-ups.  This enables you to keep your technique spot-on and stay injury free.

Fingertip Setup Hand Position
Make sure you set your hand up with your fingers locked and spread.

It’s important to make sure you set your hand up with your fingers locked and spread.  Try and create a tall wide support structure with your fingers.  Ideally you want your fingers to look like they are flowing right up into your arm, there should be no odd bends or strains.

As you make progress with these just keep moving closer to the floor, and once you’re able to do 8-10 quality fingertip push-ups, try one arm push-ups, or 3 finger push-ups.

AlKavadlo Three Finger Incline Pushup
PCC Lead Instructor Al Kavadlo demonstrates a 3-finger incline one arm push-up, unofficially known as the “Heavy Metal” push-up.

Towel hangs can start out easy, then progress to a battle of will between your body and your mind.  These work amazingly well for developing grip endurance as well as thick muscled forearms.

Again I strongly suggest starting out with a grip training drill you can do fairly well and slowly progress to the harder stuff like one arm hangs, thicker towel hangs, longer hangs, or even pull-ups or leg raises with a towel.  I would also encourage you to pull the shoulders down away from your ears while you hang.  This tightens up the shoulder complex and creates more stability.  Once you can hang for about a minute I’d suggest you bump it up a bit.  Remember, everything can be made more challenging with simple calisthenics tweaks.

Corey Howard Towel Hangs for Grip Strength
I love to use towel hangs for developing my grip!

I caution you about pushing too hard and trying to progress too fast.  Sometimes you can overwork these smaller muscles and not even know it until you have a painful case of tennis elbow.  Remember for most people, grip is the smallest link in the chain.  The last thing you want to do is allow your brain and larger muscles to overpower your grip work and cause an injury.

Grip training can be tricky but the rewards are huge! I can tell you from my own experience, Paul Wade’s combo rocks!  After doing these two movements fairly consistently I’ve had to add a link in my watch, and can no longer slip my wedding ring off for any pull-up work.  My forearms, wrists and fingers have thickened up a bit.  If you increase the size of the motor, most of the time you increase the output as well…. More grip strength!  More pull-ups!  Fire it up!!

***

About Corey Howard, PCC, RKC, CK-FMS: Corey Howard strives to constantly become stronger, and to help others to achieve their fitness goals. He is the owner of Results Personal Training, and can be reached at www.resultsptonline.com or www.coreyhoward.com.

Filed Under: Progressive Calisthenics, Tutorial Tagged With: bodyweight exercise, Convict Conditioning, Convict Conditioning Vol 2, Corey Howard, grip strength, grip training

The Bodyweight Revolution

April 15, 2014 By Paul "Coach" Wade 146 Comments

Al and Danny Kavadlo
The Kavadlo brothers are the face of
the Dragon Door bodyweight revolution!

If you have been keeping track of the fitness world over the last five years, you have definitely heard the term bodyweight revolution used by writers and teachers.

Lots of folks have used this term, but few—if any—have defined it.

To me, if there is a common theme behind the modern bodyweight strength revolution, it’s this:

Cutting edge athletes and coaches are starting to break down the distinction between bodyweight training and externally-weighted methods for adding strength and muscle mass.

What does that mean?

Well, up till fairly recently, the fitness “status quo” treated bodyweight training and, say, weight-training very differently. Weight-training was done to get ya big and strong as possible. To achieve this, you were supposed to follow three basic rules:

  1. Train hard for strength and mass. (A given. No pain, no gain, bitches!)
  2. Be progressive. (The goal is always: add weight to the bar!)
  3. Focus on load, not reps. (Folks will ask: how much can you bench? Not; how many reps?)

Fairly simple, huh?

And it worked, too. For the last fifty or so years, barbells and dumbbells have been the “go-to” method for bodybuilders and strength trainers alike. Some coaches and exercise ideologists have gotten so wrapped up in the romance of the iron, that they have told us that these tools are the only way to maximize muscle and power. (This is horseshit, but you know that already, right?)

Compare this model with bodyweight training. Over the last forty-plus years, personal trainers, writers and fitness coaches have been force-feeding the world with a philosophy of bodyweight training which is built on the following three principles:

  1. Train moderately for skill or conditioning. (e.g., soccer drills, circuit training)
  2. You can’t be progressive with load. (Sure, you can add weight to pullups, but then you are weight-training, right?)
  3. Build to high reps. (How many pushups can you do?)

Notice something? The bodyweight training principles are pretty much the diametric opposite of the weight-training principles! Why? Because it was figured that there was no point in treating calisthenics like a PROPER strength and muscle discipline, coz there was no way to make the load progressive. For this reason, bodyweight training ceased to be viewed as a power and strength method. It became relegated to a “fitness” method, or for a warm-up, prior to the weights. Worse still, it was viewed as a means for “light toning”. (Puke now, ye who have the buckets readied.)

Recent conditioning icons have shattered this illusion, and are actually bringing intelligent athletes round to the notion that you can break any bodyweight exercise into progressive chunks—all the way from easy rehab work, up to the hardest strength exercises know to mankind. I’m talking about revolutionary books like Al Kavadlo’s Pushing the Limits! and Raising the Bar; Brooks Kubik’s wonderful Dinosaur Bodyweight Training; and Pavel’s breakthrough Naked Warrior.

Bodyweight can’t build total-body strength? Give me a break!
Bodyweight can’t build total-body strength?
Give me a break!

This is the idea at the very heart of the modern bodyweight revolution. If you can use external weights progressively—in hard sessions designed to build load over time—why can’t you do the same using your body’s own weight? The answer is, of course, you can. You don’t need to treat bodyweight as a gymnastics or sports skill, or as a warm-up, or as a simple endurance discipline. You can do it progressively, just like weight-training. All you need is a solid understanding of the science of bodyweight progressions. And this is why the Progressive Calisthenics Certification (PCC) organization was born, to catalog and disseminate this traditional knowledge to anyone in the fitness world who wants it.

A lot of athletes—specially those already in the bodybuilding or powerlifting world—have taken this breakdown in the barriers between regular lifting and bodyweight training approach real literally. Hell, why not apply regular lifting templates to bodyweight training? This is what many have tried to do; and in this article I’ll discuss some ways of doing it. I’ll also show you a good alternative used by my own teacher, Joe Hartigen.

The CC-Style Template

When it comes to sets and reps, I generally prefer a real simple, old school, American-style double progression. You warm up with some fairly easy exercises, then hit your major technique hard for two-to-three sets. When you hit your rep goal, you move to a tougher exercise. Don’t go to failure—always leave a little energy left in your limbs to complete an exercise safely, or in case you need to defend yourself. That’s the Convict Conditioning approach—and trust me, it works just as well for weight-training as it does for calisthenics. Many old school bodybuilders and strength athletes have used this kind of program with great success—it’s not a million miles away from the sort of training performed by old school strength marvels like Doug Hepburn, or modern-day bodybuilding champions like Dorian Yates.

Dorian Hepburn
Hepburn—like all the ultra-strong old-timers—used bodyweight training alongside his lifting. He also trained infrequently, going all-out with low sets. Sound familiar?

Popular Strength/Mass Templates

Of course, there are other rep/set formats than the CC approach. Dozens. Here’s a roll-call of a few well-known ones:

  • The 5×5 system
  • Pyramid training
  • Ladders
  • Heavy singles

All of these popular weight-training approaches can be used with bodyweight—in fact, they are being used right now. But no method is perfect, and there are problems when applying these methods.

Using singles is a good example. A heavy singles workout might consist of, say 10 sets of 1 rep, using 85% of your max. This is pretty easy to accomplish if you are working with your bench press; but it’s a lot tougher to translate it to your bodyweight pushups. For a start, how do you define “85%” of effort accurately? Which pushup progression do you select? With the bench press, you can add a tiny increment, maybe 2lbs to the bar every so often. How do you add such microscopic increments to your pushup form? How do you maintain this system, long-term with such fuzzy variables? You are kinda pissing in the wind here.

A bigger problem with most training systems is that they waste the athlete’s precious energy. A really great rule of thumb in muscle and strength work is that the degree to which your body adapts is proportionate to the stress you put it through. But what athletes constantly forget is that the muscle-building and strength stimulus is based on your best set, it’s not spread over your other sets! As I’ve said elsewhere:

Paul_Blog4To put that shit simply, if you want to get diesel, you need to do a lot of work in a single, relatively brief set. Your peak set! Trouble is, a lot of athletes are in the habit of exhausting themselves before they reach that peak set.

Bodybuilding is possibly to blame for this. Back in the seventies and eighties, it was all about “pyramiding”; you would typically warm up with 15, 12, 10 and 8 reps before knocking out a few peak sets of 6-8—then you would reverse the process. (You go up in weight, then down, hence the term “pyramid”.) The problem with this was that by the time you had done the first four sets you were too shot to do very much in your peak sets! Then you would repeat all those lighter, higher-rep sets again, just adding more volume to eat into an already overloaded recovery system.

The same problem is true of the popular “ladders” method of training. With ladders, you start with one rep—say, a pullup—then take a short break, and do two pullups. Break, then three. All the way up to your peak set, of, say, five reps. Then you take a short breather, do four reps, then break, then three, and so on down to one rep. See the problem with this? If your peak/best set here is the five rep set, you will have already done TEN reps of that exercise before you reach it! If the five reps really represent your best, then doing ten reps of the same beforehand is definitely going to adversely affect your performance in the five. In essence, ladders are a good way of doing a lot of work, but a pretty imperfect way of doing high quality sets.

5×5 is a more traditional method—it was used by Arnold’s hero, Reg Park, back in the fifties.

Big Reg Park
Bodyweight back work: Big Reg Park
rocking some behind-the-neck pullups.

Park’s method was to use two warm-up sets of five, then three sets of five with the heaviest weight you can handle for a particular exercise. Once you can hit the 3×5, you go up in weight.

It’s a simple (and pretty effective) idea. The problem—in terms of hitting one great, “peak” set—is that it makes you hold yourself back. You are inevitably (even if only subconsciously) holding yourself back from giving your all on the first hard set, in order to get the five reps on the final two sets. You need to do this, because if you really gave your all grinding out five reps on the first heavy set, you would be pretty unlikely to be able to repeat that twice. So with 5×5 you never have the motivation to really give your all and hit that one peak set.

Enter the Mentor: Joe Hartigen

One template which doesn’t contain any of these problems was taught to me in the 1980’s by my mentor, Joe Hartigen. Joe was a bona-fide calisthenics master, and although he was in his seventies when I met him, he was much more powerful than me, and remained incredibly strong in pulling movements right up to the final year of his life. Joe had forgotten more about training methods and the history of physical culture than I will ever know, and I learned virtually all the progressions in Convict Conditioning from him.

Despite the fact that Joe was an icon to me—and several others in San Quentin—we didn’t train in exactly the same way. We had different backgrounds, for one thing. I came from a “new school” calisthenics approach, one based on building up high reps in squats, sit-ups, pullups and (especially) pushups. In fact I would often return to these high-rep workouts—often ultra-endurance bodyweight work—throughout my time inside, particularly in Angola. (Think “thousand pushup days” and you got the idea.)

Joe was very much a man who favored lower, more intense, higher quality reps. He typically shook his head when he looked at my training journals, and—likewise—I must admit that when I was younger and dumber, I possibly looked down on his methods as a bit old-fashioned. Like a cool photograph, but colored in sepia. In later years, I realized he was right on the money, and although I modified my own training to better match his thinking, our workout styles were never quite the same.

The Hartigen Method

When it came to sets and reps, Joe had a pretty fixed method for working out. I’ve never heard a name for this scheme, so I’m gonna call it The Hartigen Method (although there’s no way he was the first to use it). This approach is simple to apply, allows for the use of real hard exercises, and is progressive—so I thought I’d put it out there for any ex-lifters or strength athletes looking for a new way to work with bodyweight exercises.

Here’s how it works:

1. Pick the hardest exercise you can do for 5 reps in good form.

2. Warm up, and perform a 5 rep set.

3. Rest approximately 1 minute. Shake your muscles loose as you rest.

4. Perform 4 reps of the same exercise.

5. Rest approximately 1 minute. Shake your muscles loose as you rest.

6. Perform 3 reps of the same exercise.

7. Repeat this procedure until you have performed a single rep.

That’s it! In essence, Joe picked an exercise he could do five good, strict reps with, and did 5, 4, 3, 2, 1.

It’s that simple. Joe’s theory was that if you could bust out five reps of an exercise you were working on, then after a minute’s rest, you should be able to do four reps. After another minute, you should be able to do three, and so on. Joe felt this rep scheme offered low reps for strength and muscle, but also enough reps—fifteen total—to give an athlete plenty of hard practice on an exercise, but without burning out.

Plus, using this method you can hit an exercise hard in under ten minutes. Even if you were working with four exercises in a workout (two or three would be better!) you could be done in half an hour. Joe’s method works great with weights, too—kettlebell presses and rows would be a wonderful superset, if you’re that way inclined. (5 presses, a minute’s rest, 5 rows, a minute’s rest, 4 presses, etc.) You could superset pushup and pullup exercises the same way.

Making progress
Progression couldn’t be simpler with this method. When you can do all 15 reps—that is, 5, 4, 3, 2, 1—for three workouts in a row, you move to a slightly harder version of the exercise. As with all bodyweight strength, having an extensive toolbox of progressions is key to moving forward; it’s also why the PCC Instructors’ Manual includes hundreds of progressive exercises.

There will be times you don’t get 5, 4, 3, 2, 1. You may only get 5, 3, 2, 1, 1. That’s fine, and to be embraced. When you don’t get the full 15, use these principles to move forward:

Try to add a rep (or two) next time; shoot for 5, 4, 2, 1, 1, then 5, 4, 3, 1, 1, and so on.

Whatever you get, always push yourself hard on the first set—that’s your peak set.

Adding reps on the earlier sets is more valuable than adding reps on the final sets.

Never do more reps than you are aiming for; stick with 5, 4, 3, 2, 1.

Aim to perform ALL five sets, even if those sets are very low rep; e.g., 3, 2, 1, 1, 1.

Exercises, post-set work and warm-ups

Joe often performed more exercises than I stuck to. Most people today would probably call his routine imbalanced. In particular, he loved hanging exercises, and would do all kinds of weird variations of pullups, leg raises, levers, holds and hangs. Strangely, despite being such an aficionado of hanging work, he would typically do only three exercises for the rest of his body—one-leg squats, flat one-arm pushups, and some kind of inversion; handstands, but often headstands (I rarely saw him do inverse pressing, these were typically static). I have watched Joe do bridges, and do them easily, but like the man himself, these were an exception rather than a rule.

Whatever his last exercise of the session was, Joe would often make his very final set harder by completing a ten second dynamic-tension isometric at the top position of that very last rep. He’d follow this with a slow negative of about ten seconds. He claimed that this little “trick” for finishing his workout told his body that the session was over, and increased his hormonal profile. I’m not sure that’s true, but if Joe’s physique—at over seven decades—was testament, then he knew what he was talking about.

Al Kavadlo Push-Up
No matter what exercise you finish with,
you can squeeze it at the top for an isometric benefit.

What about a warm-up? Interestingly—like Reg Park—Joe never went over five reps on his warm-up sets. He would typically do two or three warm-up sets of five reps, and he always applied Charles Atlas-style dynamic tension during his warm-ups. If he was doing an exercise like one-arm pullups, he would perform an exercise about half as tough on his warm-ups—two-arm pullups. Always five reps. Why not more? Joe felt that you should always train to meet your goals. His peak sets were always five reps, so he thought if he did more in his warm-ups, his body would get confused and start adapting to higher reps instead! I’m not certain I agree with that, but it gives you some food for thought, eh?

I often advocate using progressive exercises when warming up—maybe start with a real easy exercise for high reps, then follow with a slightly harder exercise for less reps. But Joe only ever used one exercise technique in his warm-ups, no matter how many warm-up sets he did. I used to wonder why, for example, he’d perform two sets of regular pullups before his one-arm work; why not one set of regular two-arms, then something harder, like assisted pullups? I asked him once. Because I can make the two-arms as hard as assisted pullups, dumbass! he replied. And it was true. His capacity to tense his muscles during training—dynamic tension—was so profound, he could make seemingly easy exercises as seem as hard as advanced ones. He was able to adjust the intensity of any exercise by 100% or 1%, just using the power of his mind.

That was how profound his body wisdom was. Not many athletes could aspire to this level, although it’s possible with time and patience. I still admire the man to this day!

Lights Out!

Well, that’s it from me. Thanks again for reading—it means a lot to this dopey fella that you guys and gals still take the time to read my weathered musings. I hope this article has given you a new idea to play with. Looking for a lower-rep strength and mass routine that fits well with bodyweight? Give The Hartigen Method a try…tonight!

Oh, and if you liked hearing about Joe’s attitude to training, check this article out. I wrote it for my good buddy Neil Bednar.

You could do a lot worse than modeling your training around old Joe’s philosophy. That brother was something else!

***

Paul “Coach” Wade is the author of five Convict Conditioning DVD/manual programs. Click here for more information about Paul Wade, and here for more information on Convict Conditioning DVD’s and books available for purchase from the publisher.

Filed Under: Progressive Calisthenics Tagged With: Al Kavadlo, bodyweight exercise, calisthenics, Danny Kavadlo, Kavadlo brothers, Paul Wade, PCC, PCC Workshop, Progressive Calisthenics Certification Workshop, pull-ups, push-ups, Raising the Bar, squats, strength training

  • « Go to Previous Page
  • Page 1
  • Page 2
  • Page 3
  • Page 4
  • Go to Next Page »

Primary Sidebar

Featured Products

previous arrow
GetStrongBookCover
ConvictConditioningBookCover
StreetWorkoutBookCover
ExplosiveCalisthenicsBookCover
StrengthRulesBookCover
next arrow

Categories

Progressive Calisthenics Certification Logo
Click here for more information or to register for the PCC workshop

Get Strong Workouts TriadXP App
Get Strong Workouts App

Recent Posts

  • Top 5 Reasons Why an In-Person Workshop is the Best Way to Supercharge Your Training
  • HYBRID STRENGTH TRAINING IS HERE!
  • My Calisthenics Journey to the PCC
  • The Handstand Press: Complete Control Through the Handstand
  • The Get Strong App is Here!

Dragon Door Publications

Dragon Door Publications

Recent Comments

  • bross dandon on The Case for Curved Handstands
  • Johnny Flewellen Jr. on Strength for Life
  • Dan Earthquake on The Pursuit of the Daily Minimum
  • Johnny Flewellen Jr. on The Pursuit of the Daily Minimum
  • Johnny Flewellen Jr. on Yoga, Calisthenics and the Journey of a Lifetime
FOLLOW US ON TWITTER!

Copyright © 2025

Dragon Door Publications / The author(s) and publisher of this material are not responsible in any manner whatsoever for any injury that may occur through following the instructions or opinions contained in this material. The activities, physical and otherwise, described herein for informational purposes only, may be too strenuous or dangerous for some people, and the reader(s) should consult a physician before engaging in them.