• Skip to main content
  • Skip to primary sidebar
  • Home
  • Contributors
  • Resources
    • Q&A with Paul “Coach” Wade
  • Workshops
  • Products
  • Forums
  • Articles
  • Blogs
    • RKC Blog
    • Strong Medicine Blog
  • Archives

PCC Blog

Progressive Calisthenics - The Official Blog for the PCC Community

bodyweight training

Isometrics, Prison Training and Bodyweight: A Match Made in Valhalla

October 24, 2019 By Paul "Coach" Wade Leave a Comment

Hey, you guys!

It’s been a long time. I missed ya! How’s the wife? I always thought she was a honey…a real catch!

…Wait, what? She did what with the mailman? She took the kids, too? Damn.

I never liked her anyway bro. …Uh…some training talk might take your mind off it, huh?

I’ve sure been thinking about training a lot these days. One type of training in particular—isometrics. I’ve also been working isometrics—hard—for the last couple years or so, and feeling stronger and tougher than ever as a result. Let’s chit-chat about ‘em; tumble some thoughts around in the brain-laundry, and see what colors run, eh?

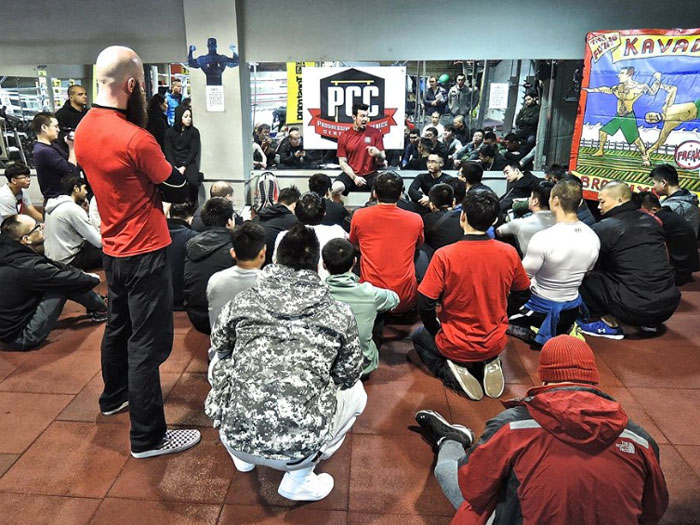
“Isometrics” is a word virtually everyone who trains knows pretty well. We’ve all heard about isometrics; static training; “isos”. We’ve all read an article about their benefits, thought about seriously applying them, then put the ideas back in a dusty mental drawer and continued with our usual old training. Since Dragon Door is about to release the ISOCHAIN—a project I’ve been heavily involved in, from the get-go—I thought I’d talk a bit about bodyweight and isos to my PCC brethren. (And sistren.)

I’ve used isos in some manner for decades; since the earliest days of my training, in fact. In Convict Conditioning I wrote about how I used to pull on prison bars for an iso workout. I didn’t invent this; inmates have been doing it for hundreds of years to get strong. It’s amazing how varied and productive bar pulling can be. I had a little, dog-eared notebook full of different techniques, bad pencil sketches of different angles and holds to work different muscles. I even included a handful of examples in Convict Conditioning.

Something I talk about a lot in all my books are the old-time strongmen and their methods. All the old timers used isometric holds, particularly as feats of strength: I’m thinking of the human bridge, various back lifts, crucifix holds, ridiculously heavy support holds, restraining wild horses—all this must have put thousands of pounds of force through the human body! But those guys thrived on it, and many of them were performing well into old age.

The Mighty Maxick (1882-1961): one of the great pioneers of isometrics.

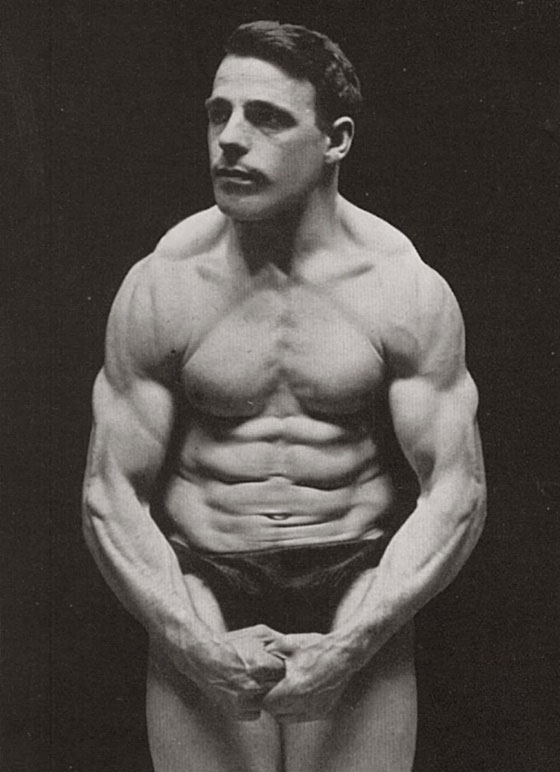
Maxick stands out as a guy who build his entire system around loadless isometrics: pitting one muscle against another. He built an amazing physique on it, too, and his “muscle control” exhibitions were famous throughout the world. Angelo Siciliano—a.k.a. “Charles Atlas”—was another former strongman who took isometric tension seriously, and his Dynamic Tension system pretty much started the modern bodybuilding craze. Nobody wanted sand kicked in their face, did they? (Apologies if you’re into that kinda thing.)

It’s an interesting but little-known fact that the history of the old-time strongmen, isometrics, and prison training are all intertwined. Nobody personifies this more than the great Russian strongman, Alexander Zass—The Amazing Samson. Zass always used isometrics, even from a young age. His first workouts involved pushing and pulling against trees in the local forest. Before he could fulfill his dream of becoming a famous strongman, World War I rolled around, and Zass was nearly killed by the Austrians, then made a prisoner of war. Despite unbelievably poor training conditions—and food that would make a billy goat puke—Zass never lost his passion to become strong, while injured and locked away. He began grimly pushing and pulling against his cell bars, on a daily basis. When he was put in shackles, he would pull against the chains, over and over, from different angles. Zass was using whatever he could to train. This is the tradition that continues in jails to this day. I’ve seen inmates use towels, walls, even each other to generate some brutal isometric workouts.

Zass was training with chains a century before powerlifters thought of it.

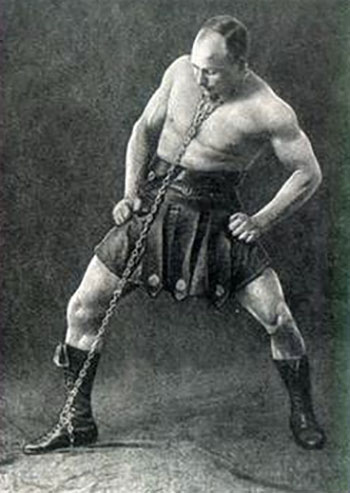
Did these isometric workouts produce results? Unbelievably, Zass became so powerful from this training that he could split chains and bend bars. He was made a prisoner of war four times: he escaped prison, four times. It seems he was just too damn strong for the early twentieth century military jails. And yeah, that’s not hyperbole. Zass was inhumanly powerful. (You may have seen the famous photo of him taking a horse for a walk: with the colt on his shoulders.) It was Zass who began the bar bending and chain breaking that became synonymous with the old-school strongmen.

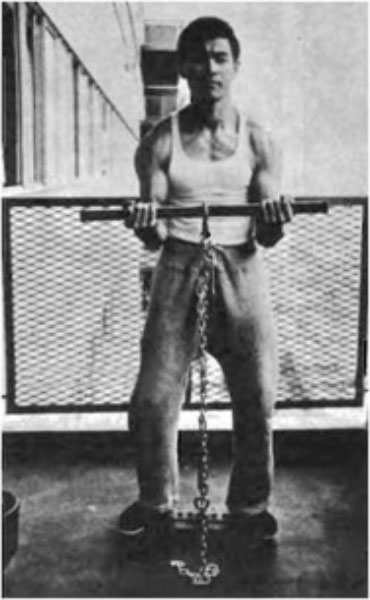
Numerous athletes took Zass’s chain-pulling system to heart, and built enormous strength from it. But by the time the fifties had rolled around, strongman training was out in Europe and America, and Olympic weightlifting was in. Chain isometrics were still used, but some bright spark—history seems to disagree exactly who it was—attached a bar to the chain, to better replicate the barbell lifts. This simple—but very powerful—chain-and-bar unit was found in elite gyms throughout Europe and America, but it was stolen by other athletes who craved power, too. You might have seen the famous images of Bruce Lee using one. Lee swore by isometrics as a training method, claiming it increased his strength and speed.

Bruce Lee Training With Homemade Isometric Device

Although isos have largely gone by the wayside these days—our loss—some well-read athletes still use these cool old hardcore devices. Ross Enamait is one famous strength and conditioning coach who still promotes isometrics. (A few years back he wrote a great article teaching athletes how to build their own chain-and-bar unit. Check it out, here.)

I’m old (read: decrepit) enough to remember actually seeing the first generation of these chain-and-bar devices being used, in strength magazines and whatnot. They always intrigued me at the time. I didn’t ever get round to trying to construct one though. The lack of measurement was the only thing that bothered me: how do you know how much force you are generating? You don’t. At least with bodyweight training you know you are getting stronger because you move from progression to progression. With conventional weight-training, you move from heavier to heavier bars. But with traditional isometrics without weights? Sure, you feel stronger—but you just don’t know how much, or what’s working.

This has been the major stumbling block for most isometrics. I think it’s the one issue—in today’s era of measuring everything—that has turned the modern generation off isos. We know, thanks to anecdotal and scientific evidence, that isos get you very strong—rapidly. But how strong? How do you know what’s working? How do you motivate yourself to hit a new PR?

This is what first intrigued me so much about the ISOCHAIN. It has a digital force meter that measures the “weight” you are lifting with pinpoint accuracy: on curls, presses, squats, deadlifts, etc.

I know from experience, also—particularly as I get older—that isometric work is good for building muscle while being amazing for the joints. I have been very critical of lifting “external” weights in the past; one reason is the potential damage heavy weight training can do to the joints. With chain-and-bar devices, your joints are under heavy load, but not moving: this results in almost zero friction inside the joints. Imagine pushing coarse sandpaper against a wall, then rubbing. Does a lot of damage, right? Now imagine pushing down on the sandpaper just as hard, but keeping still. Virtually no damage. This is the difference on your joints between loaded isometrics and loaded dynamic lifting.

One of the reasons I’m reaching out to you guys here is that I’d like you to start thinking about incorporating some isos into your program. Isometrics are one of those training topics everybody has an opinion about—but never actually tries, seriously. That’s a damn shame. Isometrics has a ton of proven benefits—from amplified strength and muscle gain to increased speed, reduced joint pain, fat-loss, lower blood pressure, improved heart health, and so on. (Check here for an in-depth article on the science, egghead.)

Truth is—three steps behind, as old Paul always is—I’m probably preaching to the choir right here. If you are seriously into bodyweight training, chances are you already perform isometrics in some form. Isometrics, in its purest sense, just means holding a position to build strength. Damn, it’s hard to do bodyweight training in any form without doing isos:

  • Holding a handstand (or even a headstand): isometric.
  • The plank (RKC plank, anyone?): isometric.
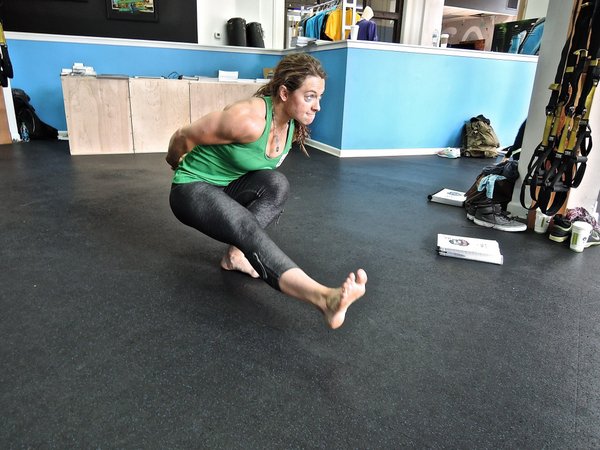
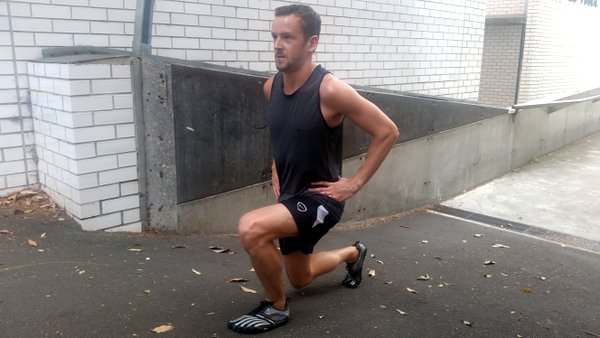
  • Wall squats: isometric:
  • Bridges: isometric.
  • Hollow body holds:
  • Elbow lever variations: isometric.
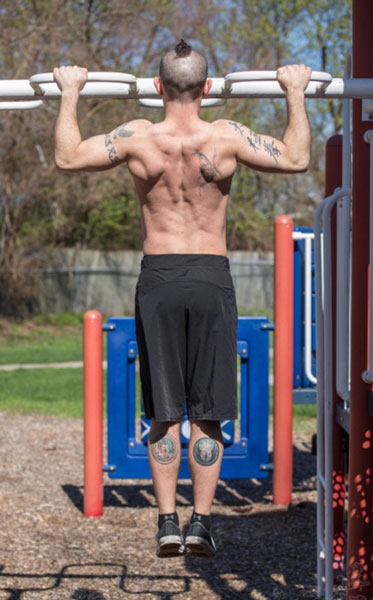
  • Grip hangs:
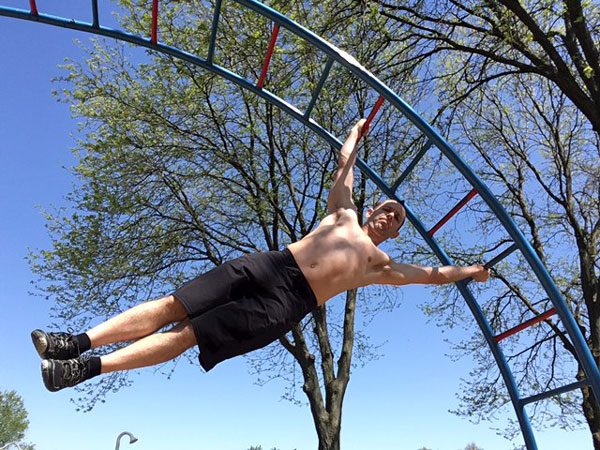
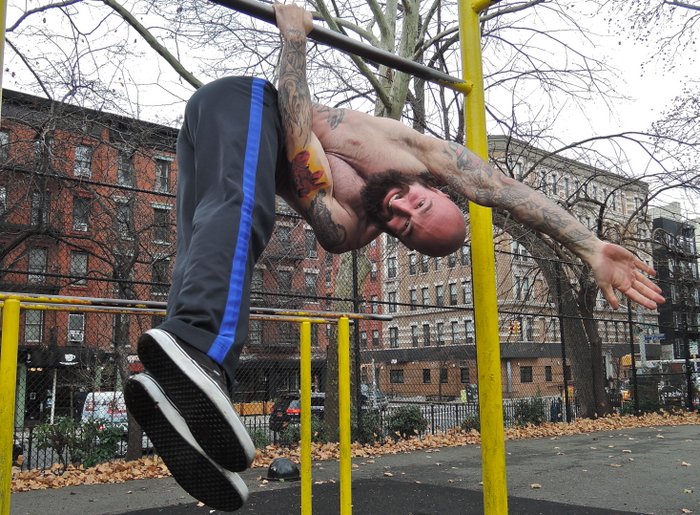
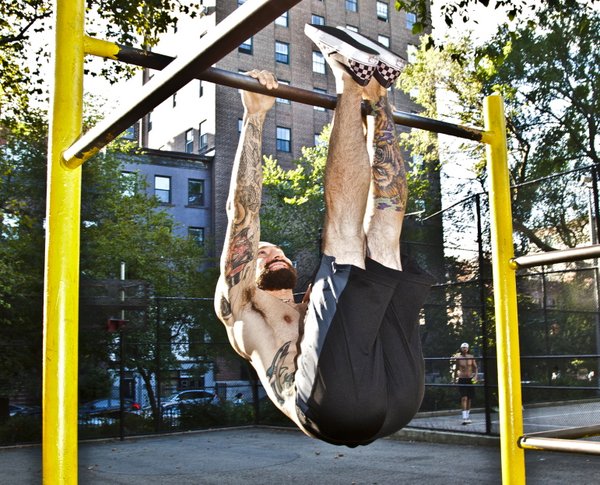
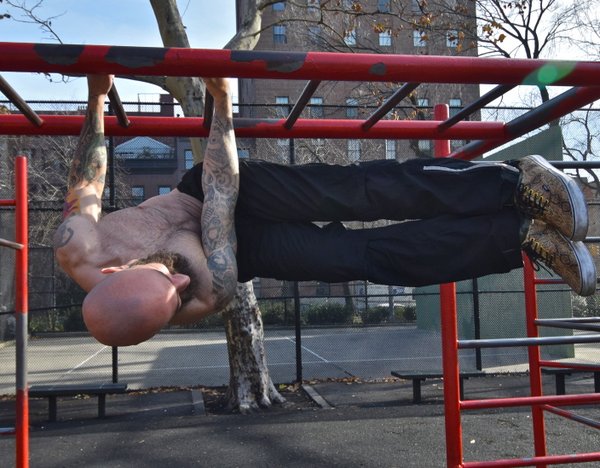
  • Front and rear hanging levers: isometric.
  • L-holds and V-holds for abs: isometric.
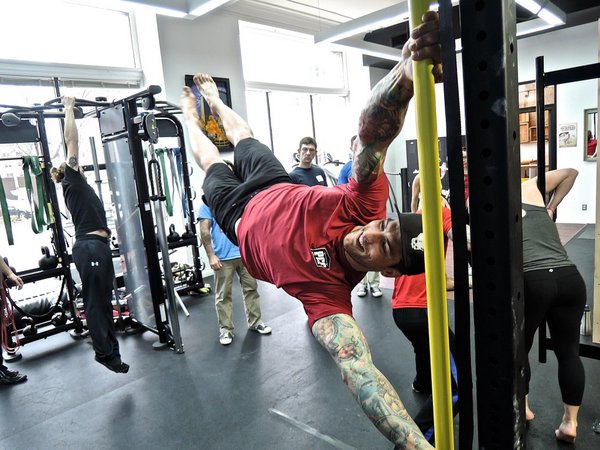
  • The human flag and the clutch flag: isometric.

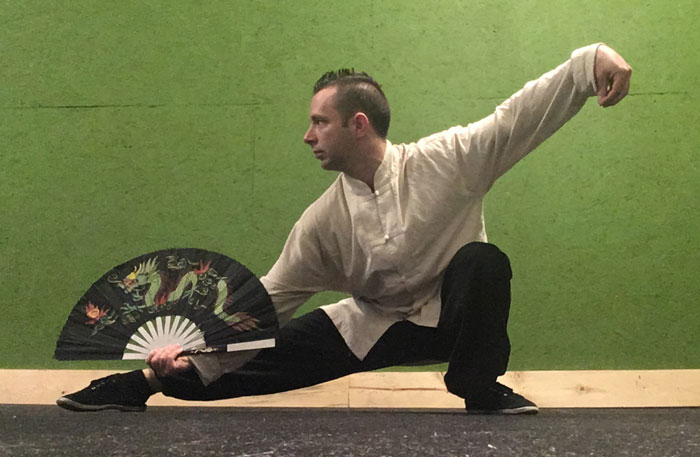
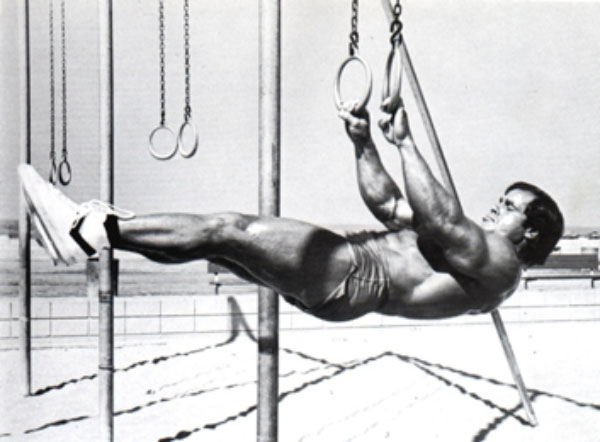
…And so it goes on. The most impressive gymnastic strength feats that exist—the Iron Cross, the planche, the inverted cross, the Maltese Cross, and so on—are all isometric holds. Hell, even holding a classical yoga position is isometrics! So us bodyweight guys and gals are probably already well ahead of the curve when it comes to isos.

Classic bodybuilders weren’t averse to getting some isometric action: Mr Olympia, the late Franco Colombu, rocks a front lever.

I’d also like to ask you guys a favor. The ISOCHAIN has been tested in prototypes, but to get the project off the ground—to fund the tooling, the best materials, the programming exactly as we want it—we need pre-orders. If we don’t get them, this project won’t succeed, and that would be a damn shame. I would love for this old-school piece of gear to come back, better than ever, for modern athletes to benefit from. Please, go take a look at the device—it’s amazing. Even if you don’t want one, please send the link to a friend. Or an enemy. Hell, someone you are ambivalent about. Spread the word. Please.

Read about the ISOCHAIN design, here.

Pre-order your own ISOCHAIN, here.

I know what you’re thinking. But it’s a gadget! Some of my hardcore bodyweight bros are probably about ready to track me down and give me the old baseball bat massage, eh? Uncle Paul, you always told us we don’t NEED gadgets or equipment to get in peak shape!

I did say that—and it’s TRUE. It’s as true today as it was yesterday, and it will always be true. I stand behind the ISOCHAIN because I believe, hand on heart, that it will help a lot of athletes, young and old, reach their full potential. It’s the most important piece of training equipment to be released in my lifetime. I hope people who read this know me well enough to know that I would never put my name behind something I didn’t believe in, 100%. Fact.

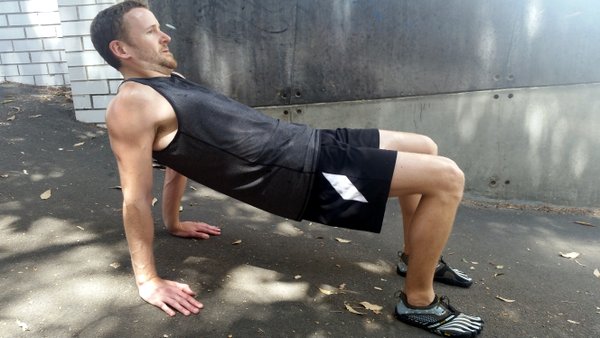
That said—you don’t need an ISOCHAIN to perform isometrics and gain the benefits. One of the bonuses of isometrics is that it can be performed anywhere. You can do loadless isometrics—muscle-vs-muscle training, so beloved by Maxick. You can do low-to-zero tech isos using a chain, a rope, a towel. You can perform static-state isos, using a doorway, a wall, or so on. And—saving the best for last—you can do bodyweight isometric progressions, like levers, flags, L-holds, grip work, and so on.

So what do you guys think? Do you want to see isos make a big return? Please hit me up in the comments below. Let me know if you’ve used isos, and benefited from them; let me know if you want some more articles here on loadless or zero–tech isos. Shoot me a comment if you have any questions, and I’ll answer them if I can.

Heck, please leave a comment just to say hi. I’d love to hear from all of ya!

Paul

Filed Under: Announcement Tagged With: bodyweight training, ISOCHAIN, isometric device, Isometric training, Isometrics, isos, Paul "Coach" Wade, Paul Wade

Internal Martial Arts and Calisthenics

May 30, 2017 By Ray Shonk 6 Comments

Ray Shonk Flag Lead Photo

A long time ago, before I became a trainer (and after a long hiatus in my own fitness and martial art training), I decided to get back on the scene. I began training a martial art called Taijiquan, also known as Tai Chi. To be perfectly honest, I chose this after watching late night Kung Fu movies. Inspiration comes from many places!

Without much research on it, I jumped in. The first few classes were exceptionally frustrating. I was super uncoordinated and it felt like I was doing “the robot.” I was unprepared for the fluidity of many of the moves, as well as for the full body unity that is required. However, after about a year, things eventually started smoothing out, and I finally got into the martial side of Taijiquan.

Ray Shonk Tai Chi

I started working on “pushing hands” or chi sau, and once again the frustration kicked in. As I had previously experienced, I felt clunky in many of my movements.

I decided to get into weight training in hopes of improving my performance. Like many folks from my generation, weight training seemed like the most viable way to get better physically equipped. And while it’s true that my weight training at this time incorporated a few push-ups and assisted pull-ups, the primary focus was still on external resistance.

Speed ahead years later and I got a bit stronger and leaner. I won my first gold medal for Taijiquan. I even left my corporate job to become a trainer. But something was still missing in my own development. I needed to try something different…

At this time, a good friend of mine introduced me to the Kavadlo Brothers by showing me a YouTube video. Like many, my first thought was, “How can you possibly get stronger using no weights?” But I kept an open mind and gave it a shot. I started my training with the basic, fundamental movements of bodyweight strength training: push-ups, squats, lunges, dips and, of course, pull-ups!

Ray Shonk Pull-Up

After several months of training in both calisthenics and Taijiquan, I noticed that I was not only getting faster, stronger and leaner, but all my movements flowed more freely. I had found what I was missing! The movements in all aspects of Taijiquan required control of multiple muscles at the same time and calisthenics promotes multiple muscle recruitment in each exercise. I mean, lets look at it. A bench press uses the pectorals, triceps and deltoids, but a push-up hits all those muscles, as well as just about everything else. A strong man may be able to control others, but a truly powerful man can control himself.

It’s been five years since I put the weights down for good. Now that I’ve established a solid foundation in the basics, I’ve incorporated more advanced bodyweight exercises like the pistol squat, muscle-up and human flag. I have since attended the SCC in New York with Danny Kavadlo, and the PCC in Boston with Al & Danny Kavadlo. I’m finding that I’m stronger, faster and more agile in my late 30’s than I ever was in my 20’s. A huge part of that has been training my body with my body, an art that extends as far back as man. My Tai Chi practice and all aspects of my life are better with calisthenics!

Ray Shonk Jungle Gym MuscleUp

****

Ray Shonk, PCC, SCC is a personal trainer in Grand Rapids Michigan, a adjunct professor at GVSU and owner of Quest Fitness. He currently specializes in Calisthenics, Sports Performance and Martial Arts training. When he is not training he spends time brewing beer, and spending time with friends and family. Learn more at www.questfitnessgym.com.

Filed Under: Progressive Calisthenics Tagged With: bodyweight training, PCC, progressive calisthenics, Ray Shonk, Tai Chi, taijiquan

One Rep Away To Undo Laziness

January 26, 2016 By Eric Buratty 18 Comments

LeadPhotoOneRepBuratty

Laziness is a cornerstone of the many excuses people give for not staying active.

In an effort to reduce laziness, we commonly experiment with several workout strategies that offer us an exciting challenge and minimize boredom.

When we think about it, though, many proven strength training programs are boring cookie-cutter routines. These same workout templates have been around forever—as recycled/revamped set-rep schemes that are also available online for free.

If they work so damn well, what’s the issue?

Well, for starters, they’re hard to stick to.

This is because the physiological benefits from a strength training program over the short run aren’t always consistent with our psychological experience over the long run.

In other words, we all enjoy getting stronger by following those cookie-cutter programs until their linear progressions stop working.

Then we no longer experience the same level of happiness from our workouts.

Then anxiety, frustration and boredom settle in.

Then we lose interest and get lazy.

Then we find ourselves hopping around programs like a bunny that lost its energizer batteries.

EricBurattyChart

As we can see, it’s a hellacious cycle of unrewarding time and effort invested. This is what happens when our original goals become more important than our journey.

So . . .

HOW do we adapt our goal-oriented mindset to fit in with our process-oriented reality?

HOW do we embrace the method to our madness without letting our strength program become just another boring cookie-cutter routine?

HOW do we find balance between the physiological and psychological aspects of exercise without losing sight of what we originally set out to accomplish?

. . . We focus on performance.

Even on the most sluggish of days, the way we perform our reps still dictates the type of gains (or lack of gains) we receive. So, once we become more aware of our stronger and weaker days (over the course of weeks, months and years of experience), the key to boosting performance is then through executing variety in repetition.

Let’s go over how to apply some popular rep styles that further maximize performance and minimize laziness.

Please note that, to get the point across in the most objective manner possible, we’ll assume a total body workout emphasis with demonstrations of each rep style coming from the handstand push-up chain of progressions (i.e. pike push up – to target upper body) and the shrimp squat chain of progressions (i.e. foot elevated/Bulgarian split squat – to target the lower body).

ExerciseCollageKavadlos

FASTER “SNAPPY” Reps

This rep style is characterized by a maximum application of force on the acceleration phase of a range-of-motion. Imagine trying to launch off like a rocket or catapult when transitioning from the eccentric/lowering phase to the concentric/lifting phase–especially when our bodyweight resistance makes a movement (initially) feel lighter (until fatigue sets in, of course).

This rep style can be further divided into two subcategories: explosive/ballistic and plyometric reps. The key difference between these two subcategories is that explosive/ballistic reps are performed without “catching any air,” while plyometric reps involve a short but powerful time period off the ground.  From a physics perspective, explosive/ballistic reps demonstrate why force equals mass times acceleration (i.e. F = ma), whereas plyometric reps take things a step further to show why power equals force times velocity (i.e. P = fv).

FASTER Upper Body Demo 1 (explosive-ballistic)

FASTER Upper Body Demo 2 (plyometric)

FASTER Lower Body Demo 1 (explosive-ballistic)

FASTER Lower Body Demo 2 (plyometric)

Pros: Improves speed, explosiveness and fast-twitch motor recruitment—which means greater carryover to athletic skills that require considerable force and power production; Permits the use of momentum to support a smoother eccentric to concentric transition—which allows for a higher number of reps to be performed cleanly.

Cons: Decreases total body awareness—which can lead to injury when an individual hasn’t fully mastered a movement or progressed it appropriately; Does not simulate the amount of speed and muscle tension for setting PRs.

When to Use: Ideal for all fitness levels training in the 6-12 rep range (i.e. working with the lower level progressions of “the big six” from Convict Conditioning) – wherein the emphasis is on speed & power output first, muscle-building & size second, and strength third.

Beyond Calisthenics: For those who wish to supplement their calisthenics training with weighted movements, this rep tempo would be most appropriate for exercises like kettlebell swings and snatches, one-arm rows with dumbbells/kettlebells/barbells, as well as barbell push-presses and hang power snatches.

SLOWER “Grinding” Reps

This rep style is characterized by a deliberate application of constant muscle tension throughout the entire range-of-motion.  Imagine trying to flex the target muscles for an exercise as hard as possible—as if we’re doing a photo shoot for a fitness magazine cover—while executing a single rep for an exercise.

SLOWER Upper Body Demo

SLOWER Lower Body Demo

Pros: Increases total body awareness—which has implications for injury prevention—even if the rest of mainstream health & fitness media deems a particular exercise as being “unsafe;” Simulates the amount of speed and muscle tension required for setting PRs.

Cons: Decreases speed, explosiveness and fast-twitch motor recruitment—which means less carryover to athletic skills that require considerable force and power production; Does not permit the use of momentum to support a smoother eccentric to concentric transition—which will not allow a higher number of reps to be performed cleanly.

When to Use: Ideal for intermediate and advanced-level individuals training in the 1-5 rep range (i.e. working with the higher level progressions of “the big six” from Convict Conditioning) – wherein the emphasis is mostly on strength and precision in power output.

Beyond Calisthenics: For those who wish to supplement their calisthenics training with weighted movements, this rep tempo would be most appropriate for exercises like Turkish get-ups with kettlebells/dumbbells, heavy deadlifts and front squats with a barbell, goblet style shrimp squats (AKA airborne lunges) or Cossack squats (AKA side-to-side squats) with a kettlebell/dumbbell.

MODERATE “Recovery” Reps

This rep style is characterized by a fluid contraction/stretching of the muscles that may also target strength/stability at a specific point throughout a range-of-motion. Imagine the body as an oscillating wave of potential energy—such as a slinky going down a flight of stairs, a child riding a swing back and forth or Wile E. Coyote jumping off the Burj Khalifa building in Dubai with a bungee cord in an attempt to catch The Road Runner.

From a fitness perspective, we’ll have to fire a large number of rapid muscle contractions every second in order for our joints, tendons and muscles to remain stable under oscillating conditions. The more of these contractions we initiate per second while remaining in a stable equilibrium position, the greater our capacity is to recruit the muscles we need to stimulate contraction/growth or stretching/recovery.

There are a few different ways this can be applied:

Isometric Reps

Upper Body Demo

Lower Body Demo

Dead Stop Reps

Upper Body Demo

Lower Body Demo

Pulsed Reps

Upper Body Demo

Lower Body Demo

Normal Reps

Upper Body Demo

Lower Body Demo

Pros: Reinforces a graceful mastering of the positions and transitions throughout a range-of-motion—which can be helpful in overcoming sticking points and plateaus; Encourages healthy circulation and blood flow to muscles, as well as tendons and joints; Ultimately helps make PRs look AND feel easy; Minimizes the amount of muscle fatigue from eccentric stress—which allows the individual to perform more quality work

Cons: Not as energy-expensive as slow or fast rep styles—so they may not be the best starting point for individuals who are simply interested in taking off a few pounds

When to Use: Ideal for anyone interested in progressing high-tension movements like the family of backbends, forward bends, handstands/inversions, front/back/side levers and mid-section holds, as well as one arm or one leg variations for any of these movements—all while facilitating an individual’s original strength training goals

Beyond Calisthenics: For those who wish to supplement their calisthenics training with weighted movements, this rep tempo would be most appropriate for exercises like paused snatches or clean & jerks (i.e. Olympic lifts from floor or blocks), squats with a barbell on the front side or back side, kettlebell or barbell thrusters, cable bicep curls and close grip barbell bench press, as well as farmer’s walks with heavy weight(s) carried above the head, at the “rack position” or beside the torso.

Wrap-Up

At the end of the day, understand that going faster isn’t always better.

And neither is going slower.

We must get stronger and perform better in all rep ranges with their appropriate tempo to balance the physiological and psychological aspects of any workout program.

Since performance is both mental and physical, expect fluctuations to occur depending on sleep and nutrition quality. Learn to respect body along the way to keep those fluctuations to a minimum.

When energy levels are lower, take the intensity down a few notches, and just have some fun without any formal workout structure.

When energy levels are higher, kick the intensity up a few notches, and add in some structured work sets to earn that breakfast, that holiday meal or that dinner out with family & friends over the weekend.

When in doubt, do a little of both!

After all, a wise person once said, “for every action, there’s an equal and opposite amount of laziness we kill.” 😉

Have any favorite rep styles? Or how about a movement flow that combines one or more rep styles?

Share them in the comments below!

****

Eric Buratty is the health & fitness coordinator at MMA & Sport in the suburbs of Montgomery County. When he’s not fine-tuning his superhero core powers, he helps self-starters move their bodies with more integrity in both one-on-one and group workout settings, writes actionable health content and seeks out further education to help others prevent health problems instead of cure them.

Get to know Eric better and stay updated on his content by connecting with him on Facebook.

Filed Under: Progressive Calisthenics, Tutorial Tagged With: bodyweight training, Eric Buratty, rep speed, reps, tutorial, video, workout strategies

The Meathook

March 31, 2015 By Al Kavadlo 32 Comments

Al Kavadlo Meathook
PCC Lead Instructor Al Kavadlo demonstrates the meathook.

Using all of the body’s musculature together as one cohesive unit is among my favorite aspects of bodyweight training. Iso-lateral calisthenics moves like the “one arm push-up” are misleadingly named, as they require strength throughout the entire body—not just one of its appendages. Few iso-lateral moves demonstrate this full body harmony better than the little known (and perhaps more aptly named) “meathook” exercise.

Hooked on Calisthenics
Though a full body movement, the meathook still emphasizes certain areas. It requires tremendous grip strength as well as monstrous shoulders and lats, plus a powerful core. If you don’t have those attributes yet, practicing toward this move can help you build those areas along the way.

Before you are even ready to begin working toward the meathook, however, the first step is to be sure that you have a solid foundation in push-ups, pull-ups and hanging knee raises. I recommend getting to at least 30 push-ups, 20 hanging knee raises and 10 pull-ups before you even consider attempting the meathook. (Those numbers may look familiar.) I also suggest you get comfortable with full range-of-motion, straight hanging leg raises before working toward a meathook. You should to be able to get your shins all the way to the bar before you move on to the next step.

Al Kavadlo Hanging Leg Raise
Get comfortable with full range-of-motion, straight hanging leg raises before working toward a meathook.

Wipe Out!
The windshield wiper is a very challenging exercise in its own right, but it is also a crucial lead-up step toward the meathook. Once you’ve met those initial requisites, your next step is to start working on windshield wipers. Begin by hanging from an overhead apparatus, then raise your shins to the bar and begin rotating your legs and hips toward one side. Aim to get your legs parallel to the ground before reversing direction and lowering them to the opposite side.

Once you get comfortable performing several windshield wipers in a row, you’re almost ready to attempt the meathook, which you can think of like a static windshield wiper held on just one arm. Naturally, before you’re ready for all that, you’ll need to get comfortable performing a basic hang on one arm. These can be surprisingly tough when you are starting out. I advise you to use the progressions in Convict Conditioning 2 to build toward a one arm hang if you aren’t there yet.

Al and Danny Kavadlo Windshield Wipers
The windshield wiper is a crucial lead-up step toward the meathook.

Hook It Up
Though grip strength is an important prerequisite, remember that the meathook involves a lot more than just the ability to hang on to the bar. Your lats and shoulders need to be very strong and stable to hold the meathook, plus you will need powerful abdominals and obliques. Do not attempt this move until you’ve built up to a solid one arm hang and can do several consecutive windshield wipers.

Once you’ve satisfied those requirements, you are ready to rock and roll! Begin by grasping the bar tightly, then perform a windshield wiper toward your dominant arm. When your legs are all the way over to the side, lift your hips toward your elbow, folding your body around your arm. It may take some trial and error to get a feel for finding the “sweet spot” but at a certain point, you will feel your balance shift.

Al Kavaldo Windshield Wipers
The elbow of your primary arm should wind up down by your hip.

Once your hips are in position, begin to loosen the grip on your secondary hand, gradually transferring all of your weight to the other arm. When you feel confident enough to completely release your secondary hand from the bar, do so carefully.

You’re now holding a meathook – Congratulations! Stay here for a few seconds, then slowly reverse the movement and try it on the other side.

If you are unable to take your other hand away, try removing a finger or two instead. Over time you can work toward relying on your secondary arm less and less as you progressively build the strength to perform the full meathook.

Once you’ve gotten the “hang” of getting into a meathook this way, you can start building up to longer holds and experimenting with different methods of getting in and out of position. The meathook can also be useful for bridging the gap toward one arm pull-ups and the rarely seen one arm back lever.

There are many uses and applications for this move; feel free to experiment and get creative!

***

About Al Kavadlo: Al Kavadlo is the lead instructor for Dragon Door’s Progressive Calisthenics Certification. Recognized worldwide for his amazing bodyweight feats of strength as well as his unique coaching style, Al is the author of five books, including Raising The Bar: The Definitive Guide to Pull-up Bar Calisthenics and Pushing The Limits! Total Body Strength With No Equipment. Read more about Al on his website:www.AlKavadlo.com.


Filed Under: Progressive Calisthenics, Tutorial Tagged With: Al Kavadlo, bodyweight training, meathook, meathook progressions, progressive calisthenics, tutorial

The Hand Truck Workout

March 24, 2015 By George Corso 20 Comments

George Corso Handtruck Workout

My clients count on me to be an innovative trainer. In fact, I’ve always enjoyed finding new and effective ways to work with people way before the trend of ‘being different just to be different’ became popular. So it wasn’t much of a surprise when my client Lorraine came in for her training session at my studio carrying a dolly that she grabbed from her dumpster at work. Her dad had made it but decided to get rid of it so she brought it with her and said “I have a very bad feeling that you can make good use of this”. Immediately my wheels started turning with all the fun ways I could use this thing. I took my time and experimented. I found movements that were safe and distinctly purposeful for my clients.

After a lot of thought and even more practice I came up with 24 useful ways to train with the dolly. Most of them stem from the prone position but each one remains unique with different neuromuscular firing patterns. Like all bodyweight training regimes, every exercise is a progression to more advanced movements. These movements are all accomplished with a “slow is smooth, smooth is fast approach. (Thank you Phil Dunphy.) They all not only require stability, but also an understanding of how the muscles of the body have to behave as one cohesive unit.

Here are the exercises in order from beginner to advanced.

THE PLANK WALK. I believe that the plank walk is the most important exercise of the 24 exercises I have listed. This one movement will set you up for all of the rest. It is excellent for developing control and discipline and it teaches a client how to become patient when learning and performing a new exercise. The plank walk is performed by keeping the body rigid while the forearms are resting on the dolly. The only parts of the body that are moving are the feet and ankles while you SLOWLY move towards your destination. It is imperative that this be mastered before moving on.

The next 4 videos demonstrate the plank walk:

  1. Plank Walk
  2. Injured Bear Crawl
  3. Wheel Barrow
  4. Reverse Wheel Barrow

Series 1 Hand Truck Workout

Be sure to continue to move slowly during the next progression.

THE TRAVELING PUSHUP. Now we will be adding additional movements. In the introductory phase we kept the body rigid while traveling with the dolly. Next we will be moving the body in different planes of motion while emphasizing control. Bodyweight practitioners discipline themselves to move with utmost precision in order to reap the greatest rewards. This is important to convey to the newcomers to this kind of conditioning.

The next 4 videos demonstrate the traveling pushup variations:

  1. Traveling Pushups
  2. Travel Bus Driver Pushups
  3. Single Leg Wheel Barrow
  4. Rotational Wheel Barrow

Series 2 Hand Truck Workout

THE TRAVELING V WALK. During the next series of exercises there is more emphasis on the transfer of weight onto the shoulders. This series is ideal for the client who wants to progress to walking on their hands in an inverted position. These selected exercises will definitely help them attain that goal. The traveling v walk will specifically strengthen the wrists. It also aids in teaching the client the proper forward lean that is needed while also adding flexibility to the wrists.

The next 4 videos demonstrate the traveling v walk and the variations:

  1. Traveling V Walk
  2. Traveling Inch Worm
  3. Tuck Walk
  4. Swimmers


Series 3 Hand Truck Workout

THE 360. The next series is called the 360 because there is a shift from developing strength towards developing stability.   These exercises require control and concentration from the client. There is an emphasis on 100 percent body compression as well.

The next 4 videos demonstrate the 360 and its variations:

  1. 360
  2. Side Walk
  3. Bus Drivers
  4. Single Arm Walk

Series 4 Hand Truck Workout

THE LEG SEQUENCE. This series emphasizes balance and leg strength. I was trained as a track sprinter and have come to the conclusion that it is important to isolate the hamstrings and fire up those fibers first by performing some bridges before moving on to squatting and lunging techniques.

The next 4 videos demonstrate the leg sequence:

  1. Hip Bridges and Leg Curl
  2. Straight Leg Bridge
  3. Injured Animal Run
  4. Pistol Sweeps


Series 5 Hand Truck Workout

PRESSING. These last 4 exercises will require that clients move while pressing. Your clients will need adequate shoulder stability and full body awareness before moving on to this advanced series. If your client has stalled in a particular calisthenic movement, these applications may help him or her to achieve a goal that at one time seemed impossible, or your client may just feel like these are achievements on their own! Either way, whatever your level, proceed slowly and own the move!

The next 4 videos will demonstrate the press sequence

  1. Hop off the Press
  2. Rotational Hop Press
  3. Sweeping One Arm Press
  4. Press and Slide

Series 6 Hand Truck Workout

You can pick up a dolly at the local hardware store and easily incorporate it into your training. Use your imagination and come up with variations specific to your clients’ needs. I use this piece of equipment in group training, with one on one, and during my own training. My clients love to tell me how much they have come to hate the dolly but always admit in the end that they love the results they are seeing!!!!


***

George Corso, CSCS, NSCA-CPT, PCC, RKC, I360, WKC, is the co-owner and founder of CORSO. Over the last 15 years, George has been a successful varsity track and field coach, working with athletes to reach district and state championships. He actively trains in the art of Jeet Kune Do (JKD) as a level 3 student. George can be contacted at george@corsofit.com.

Filed Under: Progressive Calisthenics, Tutorial Tagged With: bodyweight training, creative workout, George Corso, hand truck workout, plank progressions, progressions, progressive calisthenics

The Top Ten PCC Blog Posts of 2014

December 30, 2014 By Al Kavadlo 12 Comments

PCC Workshop with Al and Danny Kavaldo

As the year comes to an end, it’s fun to take a look back and reflect. 2014 was a big year for the Progressive Calisthenics Certification!

The PCC community continues to grow and many of you may have only discovered us recently. With a new post running every week, it’s all too common for great content to get lost in the shuffle. I’m proud of each and every post we shared this year, so it was tough to pick my favorites!

With that said, let’s take a look back at my top ten PCC blog posts of 2014 (in no particular order):

–With nearly 300 comments, Coach Wade’s primer on his forthcoming masterpiece, Explosive Calisthenics, was clearly you guys’ favorite post of the year!

–Global Bodyweight Training creator Mike Fitch explained why handstands make you better at everything.

–Senior PCC Adrienne Harvey shared this fantastic tutorial on progressions for the dragon flag.

–The “Fit Rebel” Matt Schifferle told us why so many folks have their arm training backwards.

–A lot if people think the Kavadlo Brothers never wear shirts. This might be why.

Al and Danny Kavadlo Seldom Wear Shirts...
–Grace Menendez showed us how learning to do an elbow lever made her feel like a superhero!

–Dave Mace detailed his ongoing journey toward the one arm pull-up.

–Thanks to your support, I’ve been starting to feel like PCC is taking over the world!

–Corey Howard explains how breaking his arm wound up giving him the chance to make calisthenics leg training his top priority – and get the quads he always wanted!

–In another twist of fate, PCC attendee Marcus Santer failed the Century test but gained an important lesson along the way.

Thanks to all of you who read this blog and support the PCC movement. I can’t wait to see what next year has in store for the PCC and the entire bodyweight strength training community. Let me know what your favorite posts were from this year in the comments below.

We’re Working Out!

Al

***

About Al Kavadlo: Al Kavadlo is the lead instructor for Dragon Door’s Progressive Calisthenics Certification. Recognized worldwide for his amazing bodyweight feats of strength as well as his unique coaching style, Al is the author of four books, including Raising The Bar: The Definitive Guide to Pull-up Bar Calisthenics and Pushing The Limits! Total Body Strength With No Equipment. Read more about Al on his website:www.AlKavadlo.com.

Filed Under: Progressive Calisthenics Tagged With: 2014 recap, Al Kavadlo, bodyweight training, calisthenics tutorials, progressive calisthenics, top ten of 2014

Meditative Movements

December 2, 2014 By Nick Lynch 10 Comments

Al Kavadlo: showcasing the calmest, kip free muscle up I’ve ever seen!

“The body is the subconscious mind.” Dr. Joe Dispenza

At the recent Milwaukee PCC workshop, Danny and Al Kavadlo talked a lot about the importance of the mind and body being one for the success of movement. Danny talked about his belief that the mind and body are not separate, but rather one kickass force of energy. After all, how can you pop up into a flagpole when you’re thinking about filing taxes?

After the Milwaukee PCC, I asked Al if he meditates (no need to ask Danny, he’s got a tattoo of Buddha on his belly!). Al replied, “Calisthenics movements are meditative.” He’s right. If you’re going to achieve a complex calisthenics move, you need to be that move. Calisthenics is profound because you become those movements: you become a human flagpole, a pull-up or a pistol squat. There are no weights, belts or rules to hide behind. The movements are so simple yet extremely advanced and the results are invigorating.

Nick Lynch: focused on not falling and cracking my chin. Better stay up!

The beauty here is that you have to dedicate all of your focus and intention on each movement. To balance on one hand or perform a single arm pull-up hold, you’ll need to trigger all the smallest, most tedious muscles you never knew you had. The mental requirements of calisthenics are profound. Your brain waves become organized and simple: you quickly slip into Alpha brain waves or ‘The Zone’, as we call it in the world of sports.

Most of us live in sustained, high Beta brain waves; we’re over-trained. This comes from too much caffeine, too much stimulation and too much work while we simultaneously neglect our nourishment and recovery time. Calisthenics will require your brain to slip into Alpha waves. The same waves one rides during deep meditation. When we surf the Alpha waves we tend to function better under stress. We allow the subconscious mind to take over and since the subconscious mind is the body, we allow our body to perform with total freedom!

Katie Petersen: focused while performing one of the most difficult variations of a pistol squat

What?! Total freedom of movement! When was the last time you truly experienced that? If you’ve attended the PCC or practice single limb exercises, you’ve been there even if only for a brief moment. If you’ve played sports you’ve been there, if you’re intently reading this article you’ve been there. Even if you’ve never attended a PCC, practiced single limb movements or played sports…you’ve been there! You’re human and at one point or other you’ve been an infant, toddler and child. Kids live without conscious thinking for the first few months of their lives. They’re fearless and free with movement. Adults teach them safety and other laws of society essential for surviving. Unfortunately, we don’t always pay much attention to the upkeep of our freedom to move as we age.

The good news? You’ve already surfed the Alpha waves so you can surf them again. To begin, I recommend picking up Paul Wade’s Convict Conditioning. Follow the simple progressions and don’t rush. Enjoy the slow but steady progress you’ll make following the simple movements, which will add up! Also, practice some meditative movements. This can be a simple task of washing the dishes slowly and quietly, walking around the house without stomping, and closing a door without letting it slam. These meditative movements will easily transfer to smooth calisthenics and strength training.

Adam Von Rothfelder: you can be a big guy and perform the flagpole with a smile on your face.

***

PCC Instructor and RKC Team Leader Nick Lynch is a Strength and Conditioning Coach at Milwaukee School of Engineering University (MSOE). He owns Superb Health Milwaukee, a kettlebell studio in Milwaukee, WI. He has 13 years of full-time training and coaching experience and a lifetime of wellness education. Nick lives in Milwaukee, WI with his wife Natalie and son Weston.

Filed Under: Motivation and Goals, Workshop Experiences Tagged With: bodyweight training, calisthenics, Meditative movements, mental training, Milwaukee Workshop, Nick Lynch, PCC Workshop

Hill Training

November 25, 2014 By David Mace 19 Comments

Al Kavadlo On A Hill

There is a common misconception that you require heavy weights to strengthen your legs effectively. The counter-argument to this is the mighty pistol squat, but leg training shouldn’t end there. There are many great exercises that require no equipment, and are not possible to perform in a gym.
All you need is a steep hill!

The Workout

I perform this workout once a week. The exercises are split into three different sets, and between sets I train a selection of mid-section / core exercises, such as leg raises, bridges and planks.

Below is a short demonstration video of this workout, along with my training partner Yury. You’ll get the impression that we were knackered afterwards!

Important note – before attempting any of these exercises you should ensure that you can perform them on a level surface.

Sprints

Sprinting is probably the first exercise that many will think of when I mention hill training; it is a great explosive exercise for building strength as well as cardiovascular fitness.

To progress/regress simply adjust your speed or use a hill with a different incline. Backwards sprinting is a good variation that will put more emphasis on the hamstrings.

Lunge Walk

From a standing position, step one leg forward as far as you can. Squat down until the back knee is just above the ground, from here step the back foot up to the front foot. Repeat with the other leg.

For an increased challenge, take your back foot straight through into the next lunge. Leaning forward will place more emphasis on the glutes.

David Mace Lunge

Broad Jumps, Hops, Frog Jumps

Time for some explosive exercises!

Start off with simple broad jumps. Placing your feet shoulder width apart, squat down and jump as far forward as you can. Ensure to land on the ball of your foot and squat as you land to cushion the impact; use your arms to gain extra momentum. It’s important that the knee tracks along the line of the toes as you land. Repeat until you reach the chosen distance.

David Mace Jump

Next, hop up the hill with one leg to get a unilateral workout. Start with your weaker leg, repeat the same distance with your stronger leg; this way you are working both legs equally.

Frog jumps are one of my favorite exercises. Don’t try this exercise until you have a strong deep squat. Go into your squat, balance on the balls of your feet, from here bounce up the hill. The key with this exercise is to bounce low but long, so as not to waste energy.

David Mace Frog Jump

Start out easy with this one, with a handful of jumps. Gradually increase the distance over the following sessions.

Crawls

Crawling is one of our most natural movements. Performing this up-hill turns it into an extremely challenging exercise. This will work your entire Anterior Chain, which are the muscles at the front of your body.

When crawling, your leading arm should be opposite to your leading leg. Try to keep your hips as low as possible, and for increased difficulty keep your knees off the ground.

I could go on and on about the benefits of crawling, but that’s a post for another day.

David Mace Crawling

Crab Walks

We’ve worked the Anterior Chain, let’s get into the Posterior Chain!

With the front of your body facing upwards, balance on your hands and feet with your knees at a 90 degree angle.

This exercise is easier to go backwards as you’ll be driving with your legs then rather than your arms. For an extra glute challenge, try to keep your hips up high. This is harder than it sounds.

David Mace Crab Walk

Taking it Further

All of these exercises can be performed backwards or even sideways to alter the muscles worked, but first ensure you get the basics right.

I plan to progress to more challenging exercises in the future. There are lots of advanced crawling patterns that could be attempted, such as bear crawls, Spiderman crawls and commando crawls. Furthermore, I intend to try partner exercises like wheelbarrows, piggy-backs and fireman’s lifts. So stay tuned.


***
Dave Mace is a full time programmer and a part time calisthenics enthusiast, who loves to teach PCC to friends and co-workers. Success for him is measured in helping others (and himself) to achieve their maximum potential and doing things that you once thought were impossible. He can be contacted through his website, Maximum Potential Calisthenics, or at his Google+ and Facebook pages.

Filed Under: Conditioning, Tutorial Tagged With: bodyweight conditioning, bodyweight training, calisthenics, conditioning, hill training, pistols

Primary Sidebar

Featured Products

previous arrow
GetStrongBookCover
ConvictConditioningBookCover
StreetWorkoutBookCover
ExplosiveCalisthenicsBookCover
StrengthRulesBookCover
next arrow

Categories

Progressive Calisthenics Certification Logo
Click here for more information or to register for the PCC workshop

Get Strong Workouts TriadXP App
Get Strong Workouts App

Recent Posts

  • Top 5 Reasons Why an In-Person Workshop is the Best Way to Supercharge Your Training
  • HYBRID STRENGTH TRAINING IS HERE!
  • My Calisthenics Journey to the PCC
  • The Handstand Press: Complete Control Through the Handstand
  • The Get Strong App is Here!

Dragon Door Publications

Dragon Door Publications

Recent Comments

  • bross dandon on The Case for Curved Handstands
  • Johnny Flewellen Jr. on Strength for Life
  • Dan Earthquake on The Pursuit of the Daily Minimum
  • Johnny Flewellen Jr. on The Pursuit of the Daily Minimum
  • Johnny Flewellen Jr. on Yoga, Calisthenics and the Journey of a Lifetime
FOLLOW US ON TWITTER!

Copyright © 2025

Dragon Door Publications / The author(s) and publisher of this material are not responsible in any manner whatsoever for any injury that may occur through following the instructions or opinions contained in this material. The activities, physical and otherwise, described herein for informational purposes only, may be too strenuous or dangerous for some people, and the reader(s) should consult a physician before engaging in them.