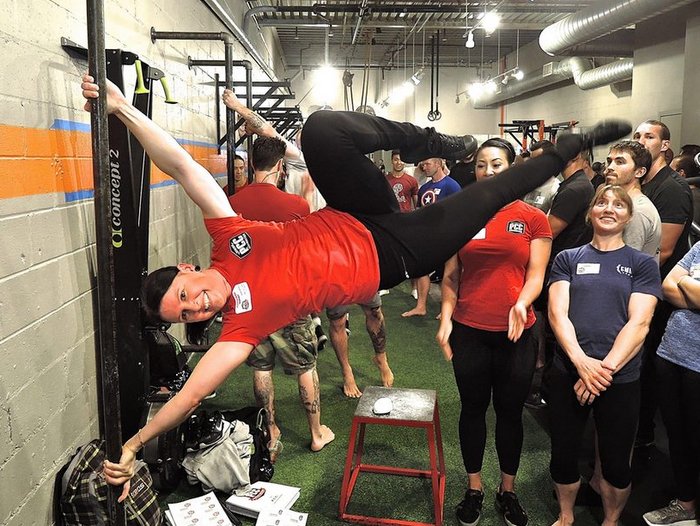
Years ago, well before the PCC, and just after Convict Conditioning began to get extremely popular, I heard Andrea Du Cane say that we shouldn’t live in the posture of our sport. In many cases, we should also not live in the posture of our work.
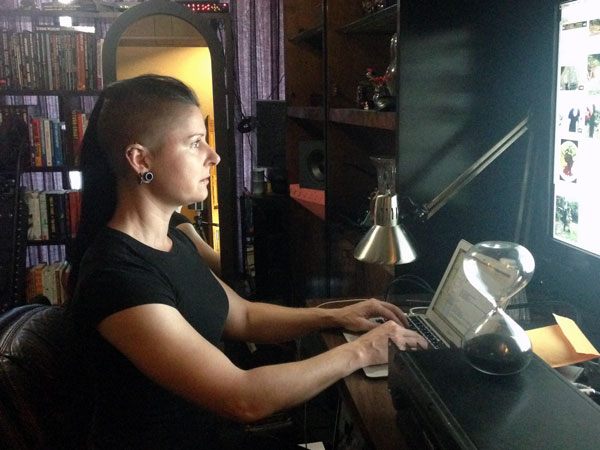
It seems as though many of our clients (and in some cases ourselves) spend the majority of their working hours seated at a desk looking at a screen, then spend hours staring at a small screen. So, let’s take a moment to work with some do-anywhere calisthenics exercises to help build healthy habits while undoing some of the desk-damage so we can continue to help our students, clients, and ourselves safely build strength.
In 6th grade, a brilliant friend (math genius and fellow computer nerd) and I would get to school early to boot up a lab of dinosaur-era computers. Already at that young age, my friend had the dreaded forward leaning head, hunched shoulders, and rounded upper back from hours and hours of programming. Thankfully, I was still spending a reasonable amount of time playing in the backyard on the monkey bars—while getting regular reminders from Mom to stand up straight and keep my shoulders back—which saved me from the same situation.
But, pulling long hours at work, then tapping at tiny screens has left almost everyone pretty susceptible to bad habits and weaknesses that can hold us back in our calisthenics training—and in our everyday enjoyment of life.
First, for those of us who are instructors, it’s important to remember our scope of practice. If a student or client is in pain or has a medical issue—or even if you’re just unsure about the situation—always refer them to an appropriate medical professional.
As much as it would be great to think that a standing desk would solve all the sitting related problems of the world, some of us have noticed that intense cognitive tasks requiring full concentration and extreme focus just don’t seem to go as well when working at a standing desk. That has definitely been my experience, as my typing speed and overall productivity seem to suffer if I try to do highly mental tasks at a standing desk. So, under the assumption that we or our students/clients will need to work at a desk for a significant period of time most workdays, let’s discuss how we can help.
We already know that it’s important to take breaks from seated work. I’m a huge fan of the Pomodoro technique—it can also boost productivity at the same time. Basically, set a timer for 25 minutes of work, then take a 5 minute break to walk around, do a few movement exercises, then repeat the 25min, 5min cycle four times before taking a longer break.
Poor posture habits while standing and sitting often stem from a lack of core or (as Paul “Coach” Wade would say) midsection strength. It’s also pretty common for people with weak midsections to have or develop back issues. Think of the midsection as a cylinder, if the “front half” isn’t doing its fair share, then the back half will be carrying an extra burden. If the abs aren’t able to hold us upright while standing or seated, then the back has to compensate that much more—often leading to discomfort or worse.
The great news is that instead of doing endless questionable crunches, the PCC and Convict Conditioning methodology emphasize training the midsection specifically, and instruct us to engage it when performing most (if not all) of the other calisthenics exercises. For example, It’s hard to even imagine performing a pistol squat without abdominal involvement—the same is true with any advanced push-up (it’s critical for Neuro-Grip push-ups)—and just about every other exercise in the PCC and Convict Conditioning curriculum.
While many different schools of training have their own approaches to counteracting the very modern problem of too much sitting, in this post I’ll mainly focus on calisthenics strength, and very basic mobility. Nothing too fancy is necessary for most of our general population clients to work on counteracting the dreaded desk body. But, if you are inclined to work more on mobility and flexibility alongside your calisthenics strength, definitely check out Al Kavadlo’s Stretching Your Boundaries.
I think of “un-desking” as having the following components:
- Unlocking the hips and hip flexors
- Abdominal/midsection strengthening
- Stretching and strengthening the shoulders and upper back
Unlocking the Hips and Hip Flexors
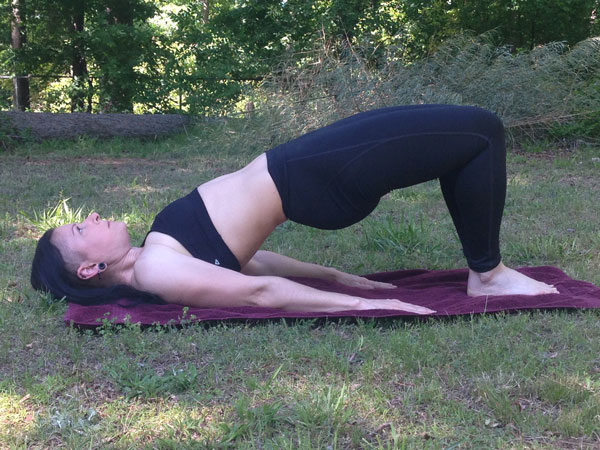
The short bridge (also sometimes called the hip bridge or shoulder bridge) is a regular part of my mobility warm-ups and those I teach to others. It’s accessible for nearly anyone. When practicing the short bridge, the beginner is comfortable and in control as they work towards bringing the hips higher while engaging their glutes.
Start on the ground with your hands at your sides. Push down hard through your heels and strongly activate your glutes to get your hips as high as possible. This is nearly the opposite of slumping over at a desk. It’s sometimes helpful to think of pushing the hips up and over towards your head (but only THINK this, your feet need to stay on the ground).
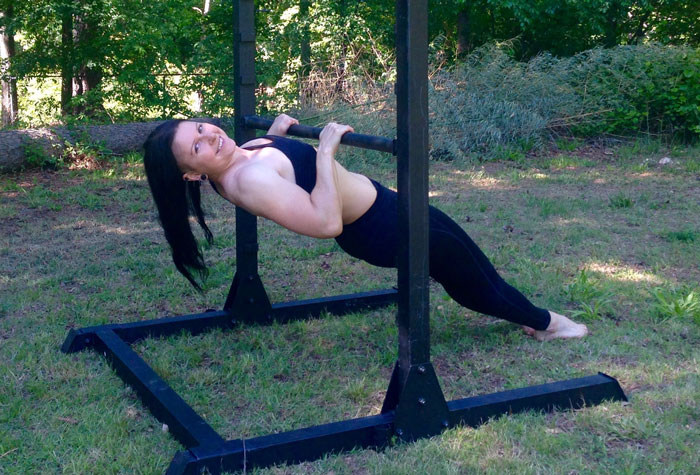
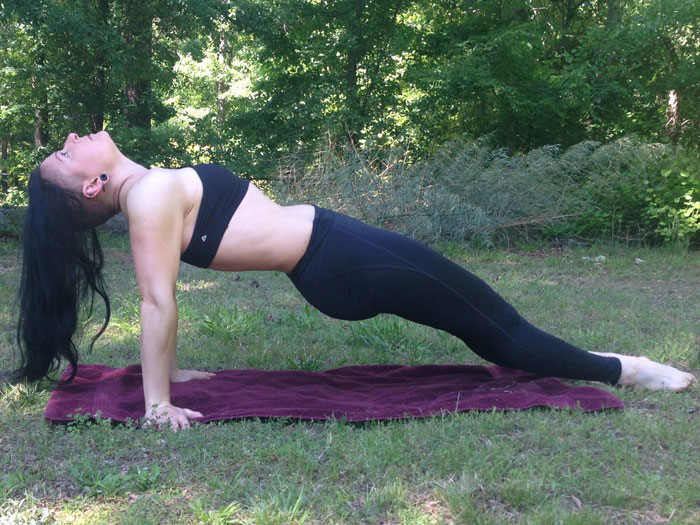
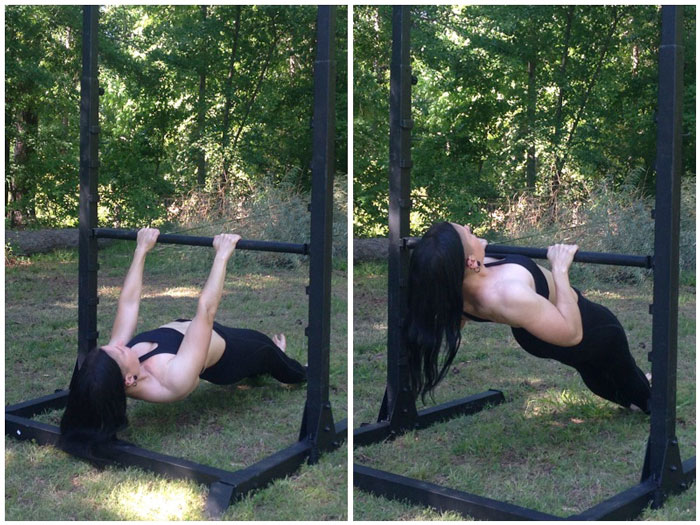
The straight bridge is another extremely valuable early step toward a full bridge in Convict Conditioning that is very useful long after achieving a full bridge. Like the short bridge, you may also know it by other names. Those of use who spend a lot of time typing—and who are also pull-up enthusiasts can greatly benefit from this move. I love it and love to hate it. At the top of this bridge variation, be sure that the shoulders feel rotated back and down. Experiment with different hand positions (fingers facing forward, to the side, backwards) while working to bring your chest and body high off of the ground in a reverse plank position.
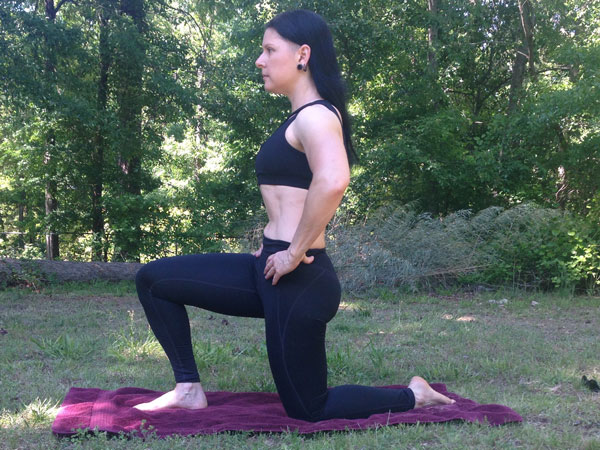
A favorite bodyweight stretch from the RKC curriculum also has great value for calisthenics practitioners. It’s no secret that I love kettlebells as much as I love calisthenics, and I’ve found that including this RKC hip flexor stretch in bodyweight only workout warm-ups can do wonders for bridging. If you find your hip flexors are tight and have never tried this drill before, give it a go! It’s a lifesaver after long car rides, or marathon writing sessions at the computer.
On a padded surface, get in a half-kneeling position. Without pushing forward in any kind of extreme lunge, simply think of tucking your tailbone while strongly activating your glutes. The front of your hip and thigh on the leg with the knee on the mat should feel a strong stretch. Take time with this powerful move and be sure to try it on both sides.
Abdominal/Midsection Strengthening
As mentioned earlier in this post, most if not all of the calisthenics exercises in the PCC curriculum and Convict Conditioning involve the abdominals. But if you or your students are having desk-related issues, focused abdominal strengthening can really help. The leg raise series beginning on the ground all the way up to the most exotic lever strongly impact the abs. Since the midsection recovers quickly, it can be trained much more often than most muscle groups—some may opt to train the midsection daily.
Stretching and Strengthening the Shoulders and Upper Back
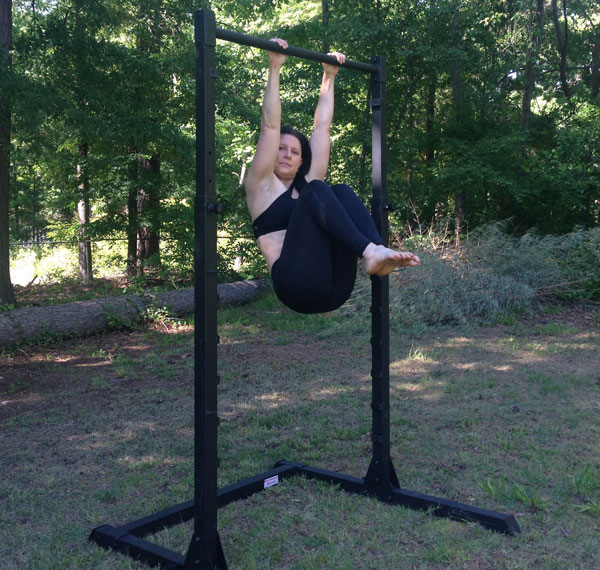
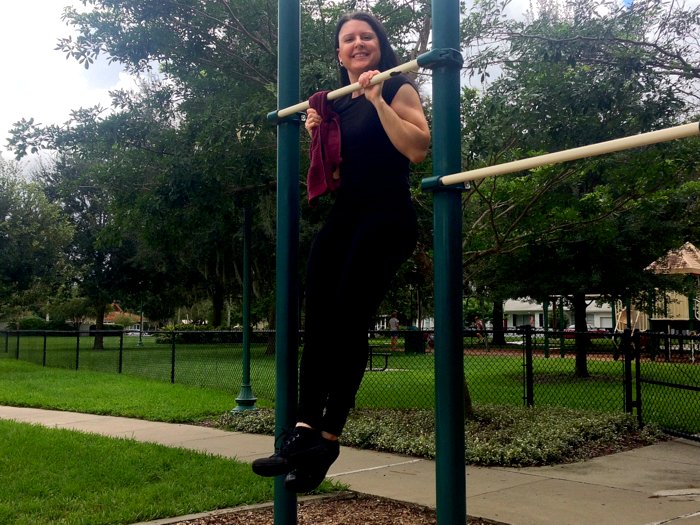
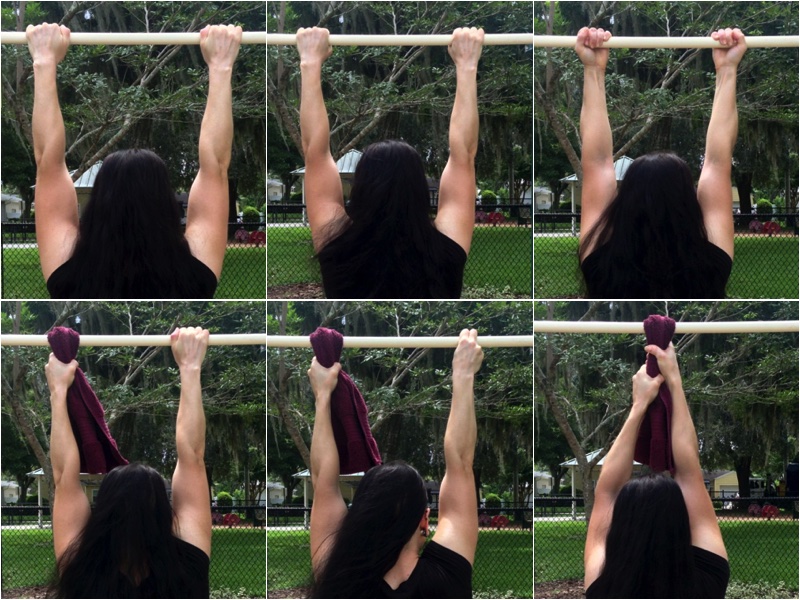
Weak upper backs and weak shoulders tend to round forward during desk work—but so do the shoulders of active people—especially boxers and pull-up addicts! Spending time hanging from a pull-up bar can not only greatly increase grip strength, but it’s an opportunity to relax and activate the back with dead and active hangs—done for reps, this move is sometimes called a “scap-up” referring to the movement of the scapula. (In a past PCC blog post I outlined several different bar hang grips but in this case, even the most basic bar hang grip will fit the bill.)
Pay particular attention to how your shoulders and upper back are feeling, and if you’re a beginner, take it easy.
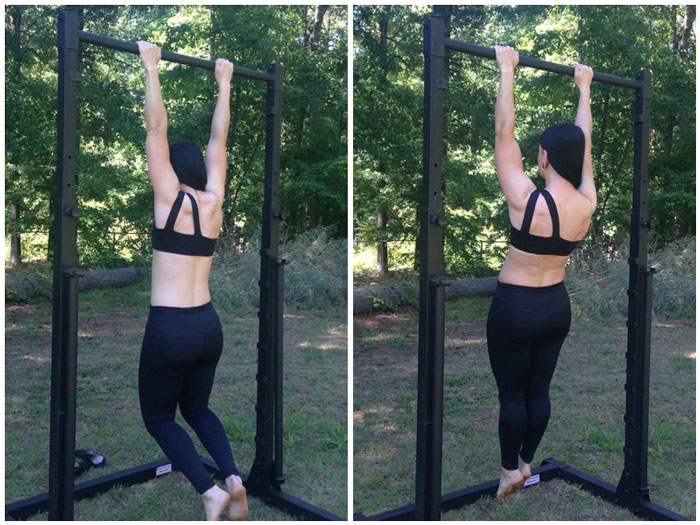
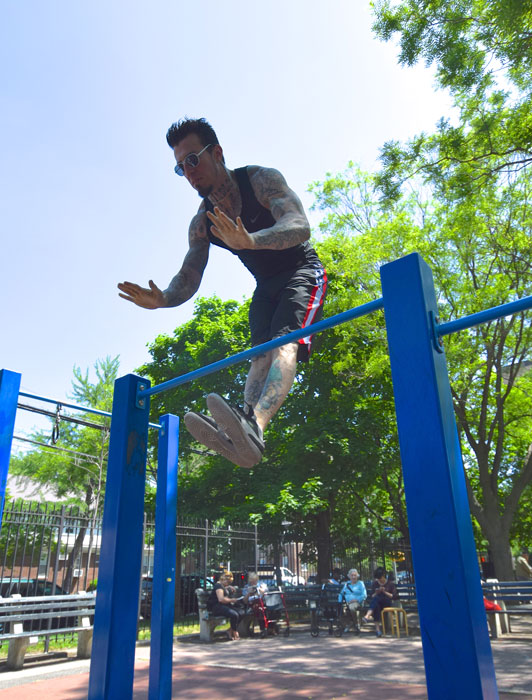
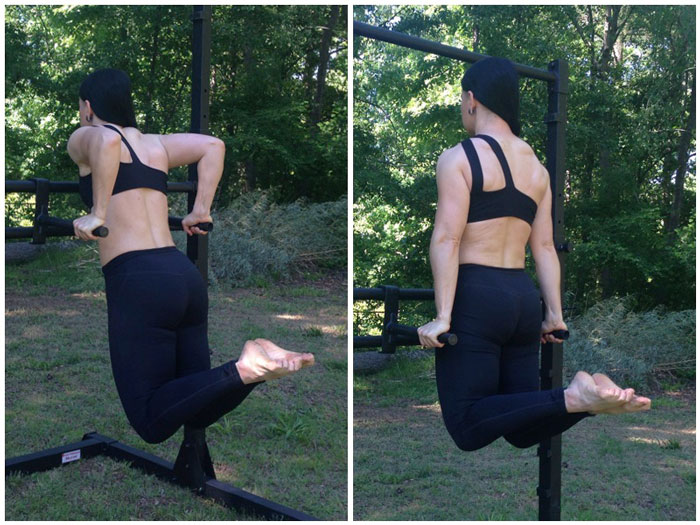
Last but certainly not least, the Aussie pull-up, especially performed to the chest can help remind our shoulders to stay back where they belong. Far from being just a step on the way to the pull-up, the Aussie pull-up (aka bodyweight row) performed slowly with a nearly isometric hold at the top can help posture, upper back strength and lead to better lockouts at the top of standard pull-ups. Be sure to experiment with lower bars of various heights. The Aussie can be further regressed for beginners or deconditioned students by bending the knees. This shortens the lever of the body and places some of the body’s weight on the feet.
One of the great and occasionally frustrating things about progressive calisthenics is that there are so many options and there’s never time to talk about or do them all! I’ll just briefly mention dips here for intermediate folks, since the delightful chest stretch at the bottom of the dip (don’t dip so low as to risk impingement) is great after a day at the desk. Likewise a strong active hold at the top awakens many of the upper body muscles that suffer when we sit and slouch.
Example Un-Desk Warm-Up Sequence (repeat for a few rounds if you have time):
Optimally begin by taking a short walk.
- Short bridges: 5 reps, pausing for height and max tension at the top
- RKC hip flexor stretch 1-2 per side
- Dips and/or straight arm holds above dip bars
- Bar hang alternating between dead hang and active hang (scap-ups) + a few pull-ups if they’re not maximum effort for you. This is not PR time.
- Aussie pull-ups (aka bodyweight rows) 5 slow reps with max tension at top of each rep.
- Short Bridge a few test reps to note improvement.
While it would be ideal for all workplace settings to have space for—and the social acceptance of—spontaneous exercise sessions, coming up with minimalist sequences for the work day can at least alleviate some of the issues until you can destroy the stress of the day at the gym or at home.
Bonus Slouch Slayer:
If you’re not sure if/when you’re slipping into a slouch at the desk, Place a mirror to the right or left of where you’re seated. While you work, take a second to catch a glimpse of your profile. Catching myself slouching a couple times was enough to build great upright posture habits at the desk. The moment you catch yourself in a really hunched slouch in that mirror, you’ll be motivated to sit up straighter, check your shoulders, abs, etc. At that point I’d also encourage you to stand up, and try a few of the calisthenics “un-desk” moves.
****
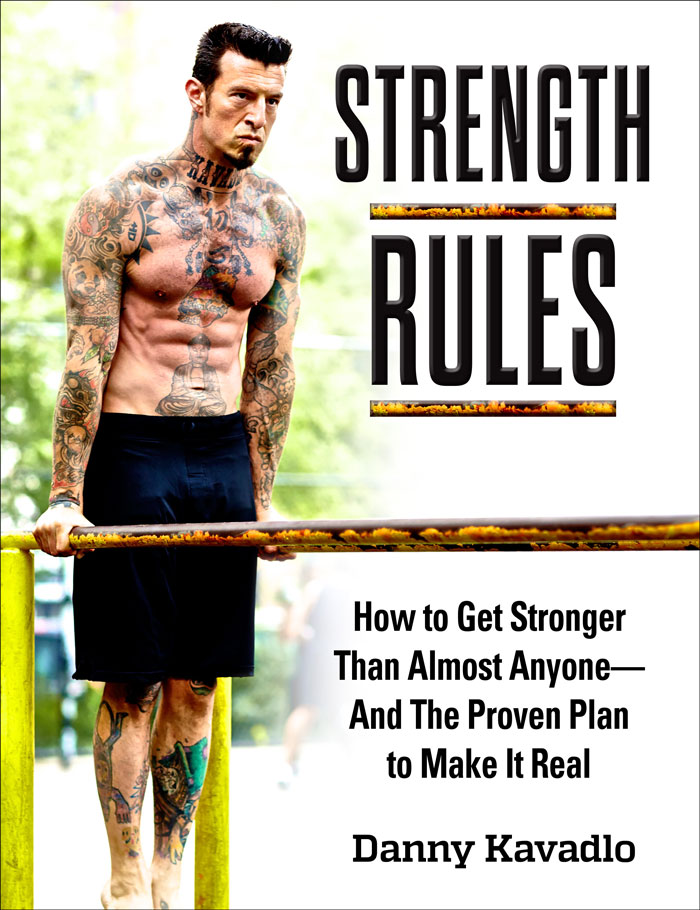
Adrienne Harvey, Senior PCC Instructor, RKC-II, CK-FMS, has been RKC Certified since 2010, and RKC Level 2 certified since 2011. Kettlebell and bodyweight training have been crucial in Adrienne’s personal quest for fitness. A core member of the PCC team, Adrienne loves sharing her knowledge with small groups and individuals. She also loves to develop recipes and workout programs to further support performance, body composition, and of course—FUN. Go to http://www.giryagirl.com for more information about Adrienne.
 Your Grip = Your Health?
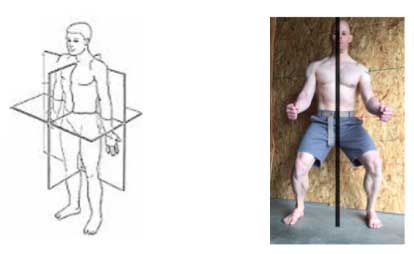
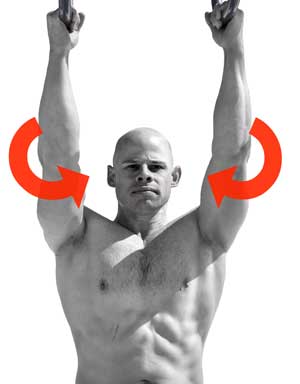
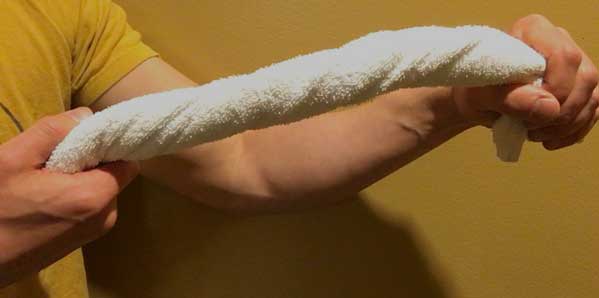
 The image to the right shows how the muscles are arranged to direct muscle tension inwards towards the centerline. Almost every muscle has at least a few muscle fibers that direct force inwards towards the spine. This is yet another reason to practice
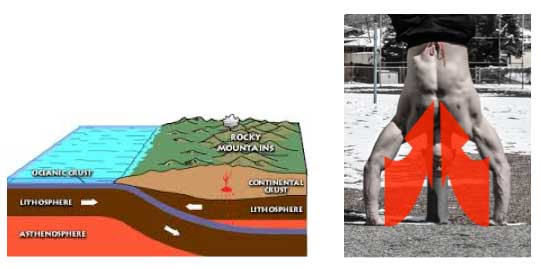
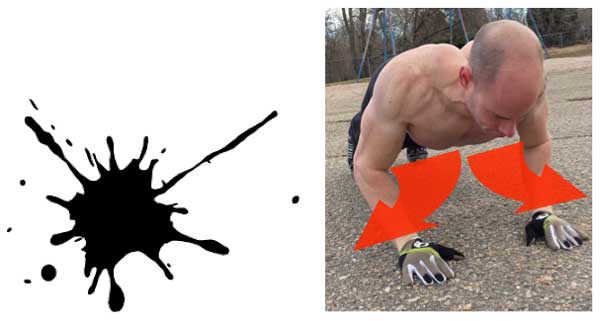
 Lesson #3: “Screw” your limbs inwards
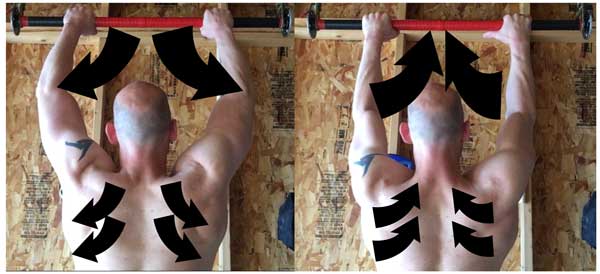
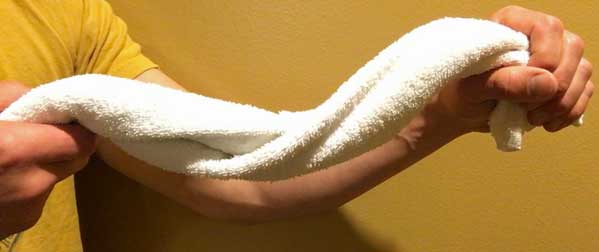
 Lock it up! Applying torque on your legs or arms will make them more stable.