• Skip to main content
  • Skip to primary sidebar
  • Home
  • Contributors
  • Resources
    • Q&A with Paul “Coach” Wade
  • Workshops
  • Products
  • Forums
  • Articles
  • Blogs
    • RKC Blog
    • Strong Medicine Blog
  • Archives

PCC Blog

Progressive Calisthenics - The Official Blog for the PCC Community

calisthenics

Meditative Movements

December 2, 2014 By Nick Lynch 10 Comments

Al Kavadlo: showcasing the calmest, kip free muscle up I’ve ever seen!

“The body is the subconscious mind.” Dr. Joe Dispenza

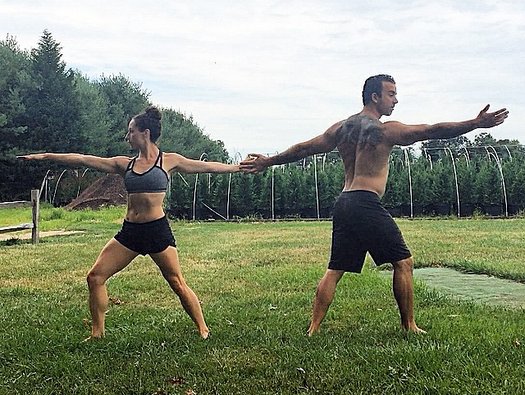
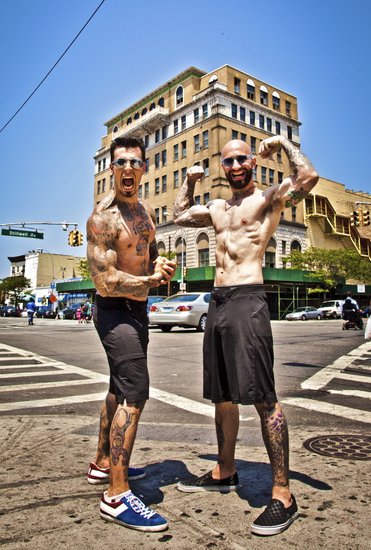
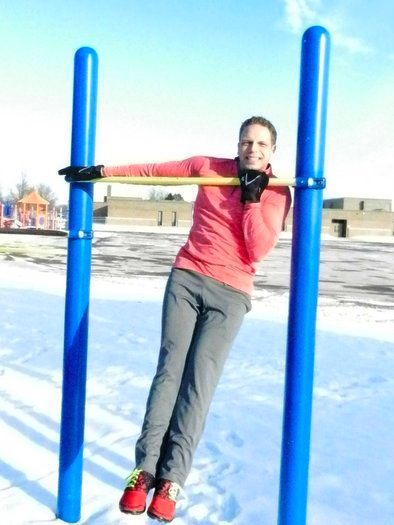
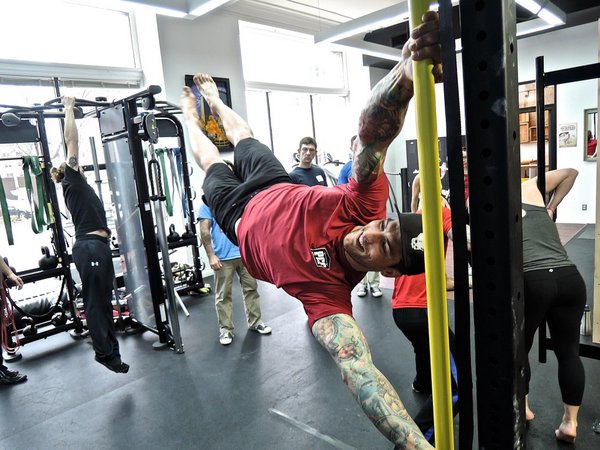
At the recent Milwaukee PCC workshop, Danny and Al Kavadlo talked a lot about the importance of the mind and body being one for the success of movement. Danny talked about his belief that the mind and body are not separate, but rather one kickass force of energy. After all, how can you pop up into a flagpole when you’re thinking about filing taxes?

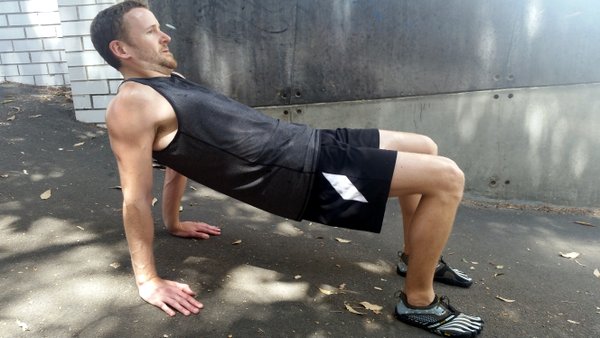
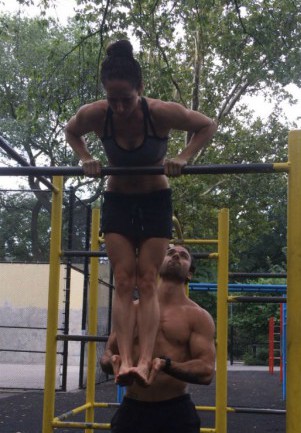
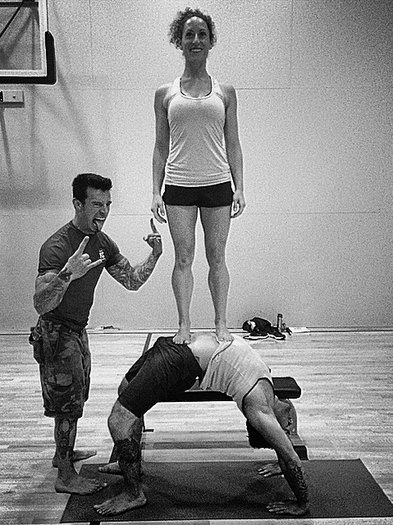
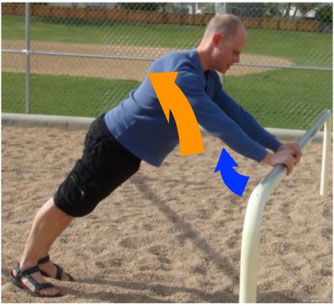
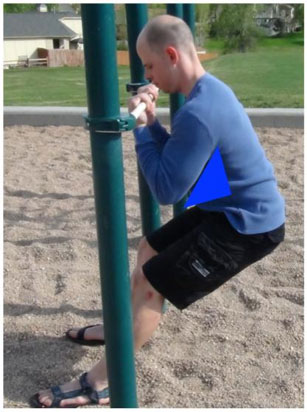
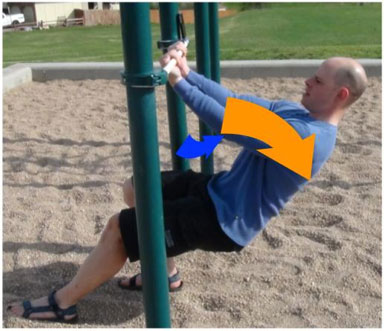
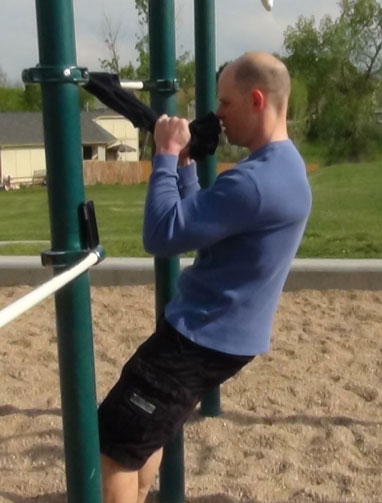
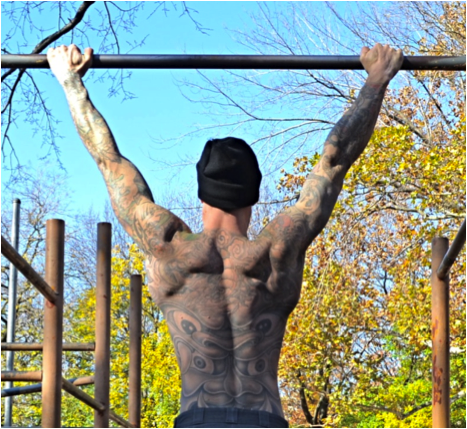
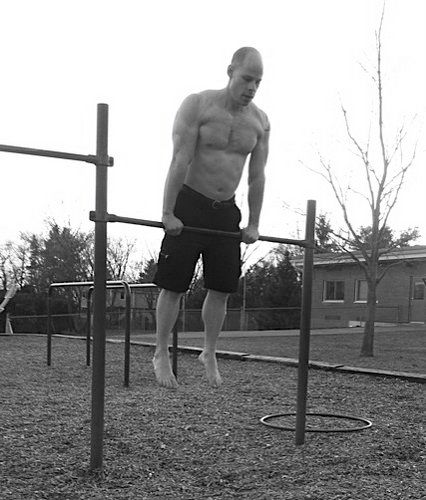
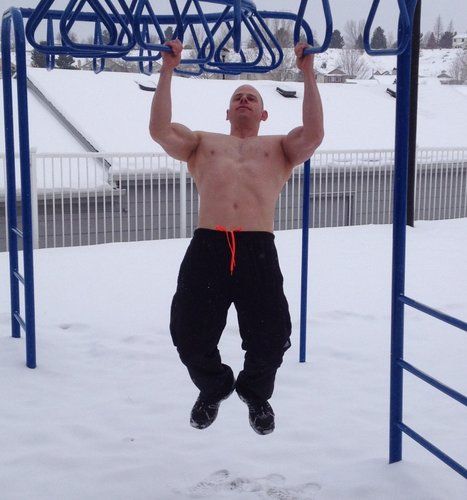
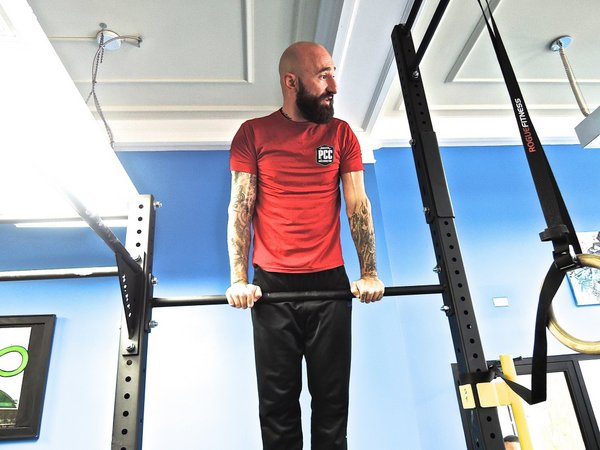
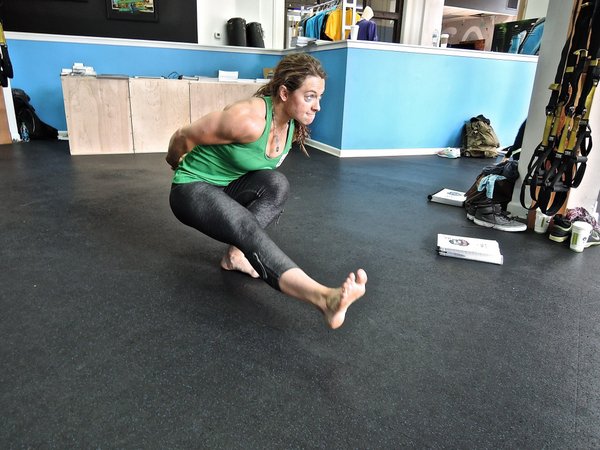
After the Milwaukee PCC, I asked Al if he meditates (no need to ask Danny, he’s got a tattoo of Buddha on his belly!). Al replied, “Calisthenics movements are meditative.” He’s right. If you’re going to achieve a complex calisthenics move, you need to be that move. Calisthenics is profound because you become those movements: you become a human flagpole, a pull-up or a pistol squat. There are no weights, belts or rules to hide behind. The movements are so simple yet extremely advanced and the results are invigorating.

Nick Lynch: focused on not falling and cracking my chin. Better stay up!

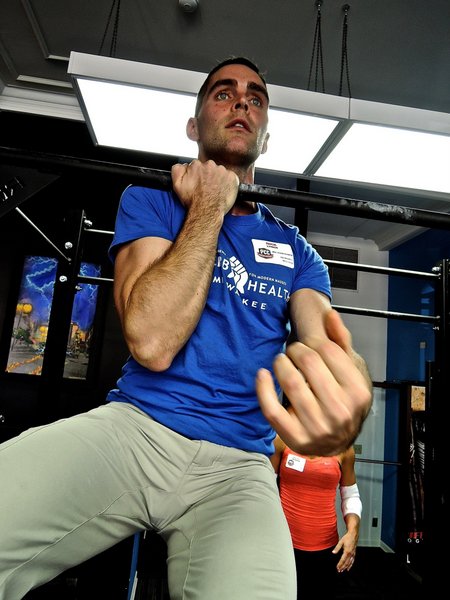
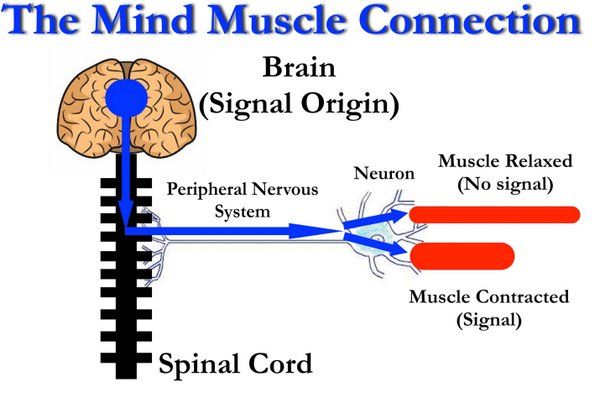
The beauty here is that you have to dedicate all of your focus and intention on each movement. To balance on one hand or perform a single arm pull-up hold, you’ll need to trigger all the smallest, most tedious muscles you never knew you had. The mental requirements of calisthenics are profound. Your brain waves become organized and simple: you quickly slip into Alpha brain waves or ‘The Zone’, as we call it in the world of sports.

Most of us live in sustained, high Beta brain waves; we’re over-trained. This comes from too much caffeine, too much stimulation and too much work while we simultaneously neglect our nourishment and recovery time. Calisthenics will require your brain to slip into Alpha waves. The same waves one rides during deep meditation. When we surf the Alpha waves we tend to function better under stress. We allow the subconscious mind to take over and since the subconscious mind is the body, we allow our body to perform with total freedom!

Katie Petersen: focused while performing one of the most difficult variations of a pistol squat

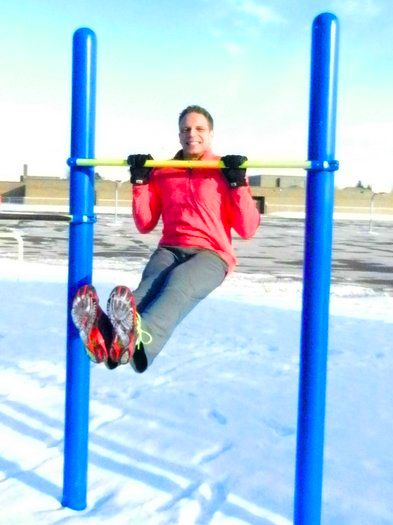
What?! Total freedom of movement! When was the last time you truly experienced that? If you’ve attended the PCC or practice single limb exercises, you’ve been there even if only for a brief moment. If you’ve played sports you’ve been there, if you’re intently reading this article you’ve been there. Even if you’ve never attended a PCC, practiced single limb movements or played sports…you’ve been there! You’re human and at one point or other you’ve been an infant, toddler and child. Kids live without conscious thinking for the first few months of their lives. They’re fearless and free with movement. Adults teach them safety and other laws of society essential for surviving. Unfortunately, we don’t always pay much attention to the upkeep of our freedom to move as we age.

The good news? You’ve already surfed the Alpha waves so you can surf them again. To begin, I recommend picking up Paul Wade’s Convict Conditioning. Follow the simple progressions and don’t rush. Enjoy the slow but steady progress you’ll make following the simple movements, which will add up! Also, practice some meditative movements. This can be a simple task of washing the dishes slowly and quietly, walking around the house without stomping, and closing a door without letting it slam. These meditative movements will easily transfer to smooth calisthenics and strength training.

Adam Von Rothfelder: you can be a big guy and perform the flagpole with a smile on your face.

***

PCC Instructor and RKC Team Leader Nick Lynch is a Strength and Conditioning Coach at Milwaukee School of Engineering University (MSOE). He owns Superb Health Milwaukee, a kettlebell studio in Milwaukee, WI. He has 13 years of full-time training and coaching experience and a lifetime of wellness education. Nick lives in Milwaukee, WI with his wife Natalie and son Weston.

Filed Under: Motivation and Goals, Workshop Experiences Tagged With: bodyweight training, calisthenics, Meditative movements, mental training, Milwaukee Workshop, Nick Lynch, PCC Workshop

Hill Training

November 25, 2014 By David Mace 19 Comments

Al Kavadlo On A Hill

There is a common misconception that you require heavy weights to strengthen your legs effectively. The counter-argument to this is the mighty pistol squat, but leg training shouldn’t end there. There are many great exercises that require no equipment, and are not possible to perform in a gym.
All you need is a steep hill!

The Workout

I perform this workout once a week. The exercises are split into three different sets, and between sets I train a selection of mid-section / core exercises, such as leg raises, bridges and planks.

Below is a short demonstration video of this workout, along with my training partner Yury. You’ll get the impression that we were knackered afterwards!

Important note – before attempting any of these exercises you should ensure that you can perform them on a level surface.

Sprints

Sprinting is probably the first exercise that many will think of when I mention hill training; it is a great explosive exercise for building strength as well as cardiovascular fitness.

To progress/regress simply adjust your speed or use a hill with a different incline. Backwards sprinting is a good variation that will put more emphasis on the hamstrings.

Lunge Walk

From a standing position, step one leg forward as far as you can. Squat down until the back knee is just above the ground, from here step the back foot up to the front foot. Repeat with the other leg.

For an increased challenge, take your back foot straight through into the next lunge. Leaning forward will place more emphasis on the glutes.

David Mace Lunge

Broad Jumps, Hops, Frog Jumps

Time for some explosive exercises!

Start off with simple broad jumps. Placing your feet shoulder width apart, squat down and jump as far forward as you can. Ensure to land on the ball of your foot and squat as you land to cushion the impact; use your arms to gain extra momentum. It’s important that the knee tracks along the line of the toes as you land. Repeat until you reach the chosen distance.

David Mace Jump

Next, hop up the hill with one leg to get a unilateral workout. Start with your weaker leg, repeat the same distance with your stronger leg; this way you are working both legs equally.

Frog jumps are one of my favorite exercises. Don’t try this exercise until you have a strong deep squat. Go into your squat, balance on the balls of your feet, from here bounce up the hill. The key with this exercise is to bounce low but long, so as not to waste energy.

David Mace Frog Jump

Start out easy with this one, with a handful of jumps. Gradually increase the distance over the following sessions.

Crawls

Crawling is one of our most natural movements. Performing this up-hill turns it into an extremely challenging exercise. This will work your entire Anterior Chain, which are the muscles at the front of your body.

When crawling, your leading arm should be opposite to your leading leg. Try to keep your hips as low as possible, and for increased difficulty keep your knees off the ground.

I could go on and on about the benefits of crawling, but that’s a post for another day.

David Mace Crawling

Crab Walks

We’ve worked the Anterior Chain, let’s get into the Posterior Chain!

With the front of your body facing upwards, balance on your hands and feet with your knees at a 90 degree angle.

This exercise is easier to go backwards as you’ll be driving with your legs then rather than your arms. For an extra glute challenge, try to keep your hips up high. This is harder than it sounds.

David Mace Crab Walk

Taking it Further

All of these exercises can be performed backwards or even sideways to alter the muscles worked, but first ensure you get the basics right.

I plan to progress to more challenging exercises in the future. There are lots of advanced crawling patterns that could be attempted, such as bear crawls, Spiderman crawls and commando crawls. Furthermore, I intend to try partner exercises like wheelbarrows, piggy-backs and fireman’s lifts. So stay tuned.


***
Dave Mace is a full time programmer and a part time calisthenics enthusiast, who loves to teach PCC to friends and co-workers. Success for him is measured in helping others (and himself) to achieve their maximum potential and doing things that you once thought were impossible. He can be contacted through his website, Maximum Potential Calisthenics, or at his Google+ and Facebook pages.

Filed Under: Conditioning, Tutorial Tagged With: bodyweight conditioning, bodyweight training, calisthenics, conditioning, hill training, pistols

The Power of Partner Training

August 26, 2014 By Rosalia Chann and Angelo Grinceri 16 Comments

Rosalia and Angelo train together outdoors

Do you remember the feeling of your first pull-up, first push-up, or even your first plank?

Those accomplishments are unforgettable milestones in your fitness journey, but it can be easy to take them for granted once you’ve moved on to new challenges.

Did you ever help someone else accomplish a new feat of strength? Becoming a part of that person’s accomplishment can be just as uplifting and rewarding.

image

We created Couples Calisthenics to help show people how much fun it is to share fitness with your significant other (or a friend). It’s all about enjoying the process of building an understanding of your own body in relation to your partner, as well as creating non-verbal communication and expression through natural movement. This allows you and your partner to feel, listen, and accommodate one another’s strengths and weaknesses. We encourage each training session to take on an organic flow of its own, escaping from daily thoughts of work and life to create a special connection between you and your partner.

Our journey of calisthenics evolved from spotting and assisting one another in the park on basics like push-ups, pull-ups, dips, and squats. Eventually we began working on more difficult exercises such as muscle-ups and handstands, and even creating exercises only possible while working with a partner.

Angelo spotting Rosalia on her handstand at PCC Virginia
Angelo spotting Rosalia on her handstand at the recent PCC Workshop in Virginia

Movement is one of life’s sweetest gifts that we all take for granted in our daily lives. We move through our lives completely unaware of how to utilize and connect with our own bodies, effecting many aspects of our lives that are meant to naturally thrive.

‘Working out’ should be looked at as a constant practice and an enjoyable experience. Learning how to listen and utilize your own body with your partner will result in more than just achieving aesthetic results. Enjoy a workout that can strengthen the neuromuscular connection within your mind and body, enhance your relationships by building trust, reduce stress and pain with frequent fun movement, learn how to react to your partners moving body, provide motivation and encouragement for one another, and cultivate joy back into everyday life. These natural movements can be performed in any stress free healthy environment. We are all capable of much more than we think. Set a purpose together, maintain movement authenticity, build your strength intrinsically, and enjoy an active lifestyle together. More than just your aesthetic results will thrive!

Partner Weighted Bridge Angelo and Rosalia with Danny Kavadlo

***
Rosalia Chann, PCC, RKC, is a personal trainer and group exercise instructor at ModelFit in New York City. Angelo Grinceri, PCC, is an independent personal trainer in New York City and the creator of Intrinsic Strength. Together they run www.CouplesCalisthenics.com

Filed Under: Motivation and Goals Tagged With: calisthenics, couples calisthenics, friendship, motivation, partner training, teamwork, training partner

The Bodyweight Arm Training Revolution

July 29, 2014 By Matt Schifferle 29 Comments

Al and Danny Kavadlo bare their calisthenics arms
PCC Lead Instructors Al and Danny Kavadlo showing off their calisthenics arms.

“Matt I thought we were friends. How could you do this to me?!”

My buddy Tony is standing in front of me, all 295 pounds of him. He’s a powerlifter who considers benching 315 a warm up.

“My biceps feel like they are going to explode. I can hardly get my triceps to relax they are so pumped up. How could you do this to me?” He says with a smile on his face.

Tony’s just gotten a taste of two of my favorite arm blasting exercises. They are simple, efficient and they don’t require a single ounce of iron. They are also somewhat backwards to classical strength training for the biceps and triceps. So when Tony said it was his arm day and wanted something different, I didn’t pull any punches.

The classic approach to weight lifting work involves holding a weight or cable attachment in the hand. Good technique is classically done with a body that doesn’t move much and a neutralized elbow.

Classic Arm Training Diagram

The bodyweight approach works the opposite way. The objective is to lock the hand in place, neutralize the body and move the elbow as much as possible.

Bodyweight Arm Training Diagram

This New Approach Has Some Big Advantages:

Less stress on joints.

The joints of the body typically become more stable and less likely to move into stressful positions when the extremities are against an unmoving object and the body itself moves through space.

More energy on target muscles.

Since there is less energy spent trying to prevent the body from moving (you actually want it moving around) you can spend more effort towards actually performing the movement and working the muscles in the arms.

More functional carry over to pull ups and pressing movements.

The curling exercise is still very much a pull up style movement. The triceps extension is also a style of push up. Just like with pull ups and push ups, you keep your hands in place and move your body using the action of the elbow joint. This is neurologically similar to push ups, dips, rows and pull ups. This means that you’ll program your nervous system to engage your biceps and triceps more during all pushing and pulling exercises. So you won’t just be hitting your arm muscles during these two moves, but you’ll also place more emphasis on those muscles with almost every upper body bodyweight movement in your calisthenics arsenal.

Carry over to Olympic lifting.

Some of my clients who practice Olympic lifting report a carry over to exercises such as cleans. I believe this is due to the fact that both of these moves train you to become more conscious of using your elbow as opposed to just trying to move the hands into an ideal position.

It’s easy to adjust resistance mid-set or even mid-rep.

Both moves have a variety of ways you can adjust the resistance on the fly. You can dial-in the perfect level of resistance and make adjustments as necessary even during those last few reps.

The bottom line is this–by reversing the classical weightlifting arm strategies with calisthenics, you open the door for unbelievable levels of tension applied directly to your biceps and triceps with more comfort and safety. How’s that for a formula for success?

The first exercise is the triceps move known as the Tiger Bend. You can do this move on any elevated platform or edge of a counter. Park benches and sturdy table tops work particularly well.

Place both hands about shoulder width, palms-down with a thumb-less grip. If you’re using a narrow surface, your hands may need to be placed next to each other, which will be fine.

Bend your elbows downward and forward without letting them flare out to the side. The key is to keep your elbows pointing down to the ground, creating a gap between your arm and torso as indicated with the blue triangle in the picture. Tense up your triceps and shoulders as hard as possible, and tense your lats to stabilize your back.

Low Bar Setup Position ArmTraining

Apply resistance by stepping your feet back so some of your weight goes directly to your hands. Once your feet are firmly planted, push directly down with your hands and push your elbows up and away from the surface your hands are pressing down on. (See blue arrow below.) This should cause your body to lift up and back as indicated by the orange arrow. Once your arms are fully straight begin coming back down by bending your elbows down and forwards.

Low Bar Arm Training Top of Movement

Regressions and Progressions:

I love this exercise because it’s so easy to progress and regress it. Moving your feet back will place more weight on your hands and increase the resistance. Moving them closer will do the opposite, making the move easier.

You can also change the resistance by putting your face in a different place in relation to your hands. Bringing your chin between your hands will be easier, while bringing your nose or forehead between your hands will be respectively more difficult. You can also make this move much easier or harder by selecting hand placements at different heights. Just like the push up progressions, the more your body tilts towards the floor, the harder the move will become. Placing the hands on a higher surface will stand your body up more and take away some of the resistance. If you want some additional assistance, you can simply place one foot in front of the other to help lift you into position on those last few reps. Lastly, you can also bend your body in half a little at the hips. Again, this will bring more of your body weight to your feet to make the exercise a little easier. Straightening out your body into one straight line will make the movement more difficult.

The biceps exercise is very similar, only now you face the other way. Since this is technically a pull up style exercise, so bars or handles you would usually use for moves like Australian pull ups will be ideal.

Place your hands on the back side of the bar with your fingers on top of the bar. Once again, a thumb-less grip may be ideal, but I’ve also used a thumb grip without much trouble.

Tense up your biceps and push your elbows away from your rib cage with your hands right next to your chin. It’s still ideal to keep your elbows in front of your torso as you can see from the blue triangle below. This position will ensure maximum tension on your biceps.

Chin Up Position Flexed Bodyweight Arm Training

I recommend using a slight kink in the hips rather than keeping your body straight. This will allow a bit more flexibility in your motion and lend itself to a more natural motion.

Chin Up Position Bodyweight Arm Training

Lower yourself down and back by bringing your elbows out and upward (blue arrow) which will cause your body weight to fall away from under the bar(orange arrow). Return to the starting position by bending your elbows down and forward to maintain that elbow position in front of the ribs.

Performance Tips:

-It’s a good idea to keep tension on your target muscles at all times. It’s tempting to relax at the bottom or top of each rep, but maintaining tension on the muscle is key in maximizing your progress.

– A little goes a long way. If you need to adjust your resistance, just moving your body an inch or two can make all of the difference in the world. Sometimes even moving your feet a couple of inches or slightly straightening your knees can be more than enough.

– Towels are a great addition to these moves. They can provide a neutral grip which many people find more comfortable. Plus they are great for building up that grip. Nothing complements your bis and tris like a pair of beefy forearms.

Bodyweight Arm Training Towel Variation

– Once you’re more comfortable with the motion of the exercises, work on tensing other muscles in your body as much as possible. Adding more tension to your back, shoulders, hips, hamstrings and even your chest can bring these moves to a whole new level and your results will follow.

– Be patient and use light resistance for the first few weeks. These moves can take some practice to get everything dialed-in just right. Making the movement of the elbows the focus of the exercise can feel a little strange at first, especially if you’re used to the classic method of curls and extensions. Keep tweaking the position and movement of the elbow, and it will feel natural before too long.

– Listen to your joints. both of these moves can place a massive amount of tension through your biceps and triceps. Sometimes people find their joints need some time to become accustomed to the high degree of tension running through the muscles. It’s always okay to use a shorter range of motion and a lower level of resistance at first to allow the tendons around the elbow to strengthen up. Take your time easing into the exercise over a few weeks. Once they are accustomed to the exercise, feel free to use a big range of motion. By then your elbows will be bulletproof!

Good luck with these two movements. If you have any questions please don’t hesitate to ask in the comments down below.

****

Matt Schifferle a.k.a. The Fit Rebel made a switch to calisthenics training 5 years ago in an effort to rehab his weight lifting injuries. Since then he’s been on a personal quest to discover and teach the immense benefits of advanced body weight training. You can find some of his unique bodyweight training methods at RedDeltaProject.com.

Filed Under: Tutorial Tagged With: arm training, biceps, bodyweight exercise, calisthenics, Matt Schifferle, no gym necessary, outdoor training, strength, triceps

The Bodyweight Revolution

April 15, 2014 By Paul "Coach" Wade 146 Comments

Al and Danny Kavadlo
The Kavadlo brothers are the face of
the Dragon Door bodyweight revolution!

If you have been keeping track of the fitness world over the last five years, you have definitely heard the term bodyweight revolution used by writers and teachers.

Lots of folks have used this term, but few—if any—have defined it.

To me, if there is a common theme behind the modern bodyweight strength revolution, it’s this:

Cutting edge athletes and coaches are starting to break down the distinction between bodyweight training and externally-weighted methods for adding strength and muscle mass.

What does that mean?

Well, up till fairly recently, the fitness “status quo” treated bodyweight training and, say, weight-training very differently. Weight-training was done to get ya big and strong as possible. To achieve this, you were supposed to follow three basic rules:

  1. Train hard for strength and mass. (A given. No pain, no gain, bitches!)
  2. Be progressive. (The goal is always: add weight to the bar!)
  3. Focus on load, not reps. (Folks will ask: how much can you bench? Not; how many reps?)

Fairly simple, huh?

And it worked, too. For the last fifty or so years, barbells and dumbbells have been the “go-to” method for bodybuilders and strength trainers alike. Some coaches and exercise ideologists have gotten so wrapped up in the romance of the iron, that they have told us that these tools are the only way to maximize muscle and power. (This is horseshit, but you know that already, right?)

Compare this model with bodyweight training. Over the last forty-plus years, personal trainers, writers and fitness coaches have been force-feeding the world with a philosophy of bodyweight training which is built on the following three principles:

  1. Train moderately for skill or conditioning. (e.g., soccer drills, circuit training)
  2. You can’t be progressive with load. (Sure, you can add weight to pullups, but then you are weight-training, right?)
  3. Build to high reps. (How many pushups can you do?)

Notice something? The bodyweight training principles are pretty much the diametric opposite of the weight-training principles! Why? Because it was figured that there was no point in treating calisthenics like a PROPER strength and muscle discipline, coz there was no way to make the load progressive. For this reason, bodyweight training ceased to be viewed as a power and strength method. It became relegated to a “fitness” method, or for a warm-up, prior to the weights. Worse still, it was viewed as a means for “light toning”. (Puke now, ye who have the buckets readied.)

Recent conditioning icons have shattered this illusion, and are actually bringing intelligent athletes round to the notion that you can break any bodyweight exercise into progressive chunks—all the way from easy rehab work, up to the hardest strength exercises know to mankind. I’m talking about revolutionary books like Al Kavadlo’s Pushing the Limits! and Raising the Bar; Brooks Kubik’s wonderful Dinosaur Bodyweight Training; and Pavel’s breakthrough Naked Warrior.

Bodyweight can’t build total-body strength? Give me a break!
Bodyweight can’t build total-body strength?
Give me a break!

This is the idea at the very heart of the modern bodyweight revolution. If you can use external weights progressively—in hard sessions designed to build load over time—why can’t you do the same using your body’s own weight? The answer is, of course, you can. You don’t need to treat bodyweight as a gymnastics or sports skill, or as a warm-up, or as a simple endurance discipline. You can do it progressively, just like weight-training. All you need is a solid understanding of the science of bodyweight progressions. And this is why the Progressive Calisthenics Certification (PCC) organization was born, to catalog and disseminate this traditional knowledge to anyone in the fitness world who wants it.

A lot of athletes—specially those already in the bodybuilding or powerlifting world—have taken this breakdown in the barriers between regular lifting and bodyweight training approach real literally. Hell, why not apply regular lifting templates to bodyweight training? This is what many have tried to do; and in this article I’ll discuss some ways of doing it. I’ll also show you a good alternative used by my own teacher, Joe Hartigen.

The CC-Style Template

When it comes to sets and reps, I generally prefer a real simple, old school, American-style double progression. You warm up with some fairly easy exercises, then hit your major technique hard for two-to-three sets. When you hit your rep goal, you move to a tougher exercise. Don’t go to failure—always leave a little energy left in your limbs to complete an exercise safely, or in case you need to defend yourself. That’s the Convict Conditioning approach—and trust me, it works just as well for weight-training as it does for calisthenics. Many old school bodybuilders and strength athletes have used this kind of program with great success—it’s not a million miles away from the sort of training performed by old school strength marvels like Doug Hepburn, or modern-day bodybuilding champions like Dorian Yates.

Dorian Hepburn
Hepburn—like all the ultra-strong old-timers—used bodyweight training alongside his lifting. He also trained infrequently, going all-out with low sets. Sound familiar?

Popular Strength/Mass Templates

Of course, there are other rep/set formats than the CC approach. Dozens. Here’s a roll-call of a few well-known ones:

  • The 5×5 system
  • Pyramid training
  • Ladders
  • Heavy singles

All of these popular weight-training approaches can be used with bodyweight—in fact, they are being used right now. But no method is perfect, and there are problems when applying these methods.

Using singles is a good example. A heavy singles workout might consist of, say 10 sets of 1 rep, using 85% of your max. This is pretty easy to accomplish if you are working with your bench press; but it’s a lot tougher to translate it to your bodyweight pushups. For a start, how do you define “85%” of effort accurately? Which pushup progression do you select? With the bench press, you can add a tiny increment, maybe 2lbs to the bar every so often. How do you add such microscopic increments to your pushup form? How do you maintain this system, long-term with such fuzzy variables? You are kinda pissing in the wind here.

A bigger problem with most training systems is that they waste the athlete’s precious energy. A really great rule of thumb in muscle and strength work is that the degree to which your body adapts is proportionate to the stress you put it through. But what athletes constantly forget is that the muscle-building and strength stimulus is based on your best set, it’s not spread over your other sets! As I’ve said elsewhere:

Paul_Blog4To put that shit simply, if you want to get diesel, you need to do a lot of work in a single, relatively brief set. Your peak set! Trouble is, a lot of athletes are in the habit of exhausting themselves before they reach that peak set.

Bodybuilding is possibly to blame for this. Back in the seventies and eighties, it was all about “pyramiding”; you would typically warm up with 15, 12, 10 and 8 reps before knocking out a few peak sets of 6-8—then you would reverse the process. (You go up in weight, then down, hence the term “pyramid”.) The problem with this was that by the time you had done the first four sets you were too shot to do very much in your peak sets! Then you would repeat all those lighter, higher-rep sets again, just adding more volume to eat into an already overloaded recovery system.

The same problem is true of the popular “ladders” method of training. With ladders, you start with one rep—say, a pullup—then take a short break, and do two pullups. Break, then three. All the way up to your peak set, of, say, five reps. Then you take a short breather, do four reps, then break, then three, and so on down to one rep. See the problem with this? If your peak/best set here is the five rep set, you will have already done TEN reps of that exercise before you reach it! If the five reps really represent your best, then doing ten reps of the same beforehand is definitely going to adversely affect your performance in the five. In essence, ladders are a good way of doing a lot of work, but a pretty imperfect way of doing high quality sets.

5×5 is a more traditional method—it was used by Arnold’s hero, Reg Park, back in the fifties.

Big Reg Park
Bodyweight back work: Big Reg Park
rocking some behind-the-neck pullups.

Park’s method was to use two warm-up sets of five, then three sets of five with the heaviest weight you can handle for a particular exercise. Once you can hit the 3×5, you go up in weight.

It’s a simple (and pretty effective) idea. The problem—in terms of hitting one great, “peak” set—is that it makes you hold yourself back. You are inevitably (even if only subconsciously) holding yourself back from giving your all on the first hard set, in order to get the five reps on the final two sets. You need to do this, because if you really gave your all grinding out five reps on the first heavy set, you would be pretty unlikely to be able to repeat that twice. So with 5×5 you never have the motivation to really give your all and hit that one peak set.

Enter the Mentor: Joe Hartigen

One template which doesn’t contain any of these problems was taught to me in the 1980’s by my mentor, Joe Hartigen. Joe was a bona-fide calisthenics master, and although he was in his seventies when I met him, he was much more powerful than me, and remained incredibly strong in pulling movements right up to the final year of his life. Joe had forgotten more about training methods and the history of physical culture than I will ever know, and I learned virtually all the progressions in Convict Conditioning from him.

Despite the fact that Joe was an icon to me—and several others in San Quentin—we didn’t train in exactly the same way. We had different backgrounds, for one thing. I came from a “new school” calisthenics approach, one based on building up high reps in squats, sit-ups, pullups and (especially) pushups. In fact I would often return to these high-rep workouts—often ultra-endurance bodyweight work—throughout my time inside, particularly in Angola. (Think “thousand pushup days” and you got the idea.)

Joe was very much a man who favored lower, more intense, higher quality reps. He typically shook his head when he looked at my training journals, and—likewise—I must admit that when I was younger and dumber, I possibly looked down on his methods as a bit old-fashioned. Like a cool photograph, but colored in sepia. In later years, I realized he was right on the money, and although I modified my own training to better match his thinking, our workout styles were never quite the same.

The Hartigen Method

When it came to sets and reps, Joe had a pretty fixed method for working out. I’ve never heard a name for this scheme, so I’m gonna call it The Hartigen Method (although there’s no way he was the first to use it). This approach is simple to apply, allows for the use of real hard exercises, and is progressive—so I thought I’d put it out there for any ex-lifters or strength athletes looking for a new way to work with bodyweight exercises.

Here’s how it works:

1. Pick the hardest exercise you can do for 5 reps in good form.

2. Warm up, and perform a 5 rep set.

3. Rest approximately 1 minute. Shake your muscles loose as you rest.

4. Perform 4 reps of the same exercise.

5. Rest approximately 1 minute. Shake your muscles loose as you rest.

6. Perform 3 reps of the same exercise.

7. Repeat this procedure until you have performed a single rep.

That’s it! In essence, Joe picked an exercise he could do five good, strict reps with, and did 5, 4, 3, 2, 1.

It’s that simple. Joe’s theory was that if you could bust out five reps of an exercise you were working on, then after a minute’s rest, you should be able to do four reps. After another minute, you should be able to do three, and so on. Joe felt this rep scheme offered low reps for strength and muscle, but also enough reps—fifteen total—to give an athlete plenty of hard practice on an exercise, but without burning out.

Plus, using this method you can hit an exercise hard in under ten minutes. Even if you were working with four exercises in a workout (two or three would be better!) you could be done in half an hour. Joe’s method works great with weights, too—kettlebell presses and rows would be a wonderful superset, if you’re that way inclined. (5 presses, a minute’s rest, 5 rows, a minute’s rest, 4 presses, etc.) You could superset pushup and pullup exercises the same way.

Making progress
Progression couldn’t be simpler with this method. When you can do all 15 reps—that is, 5, 4, 3, 2, 1—for three workouts in a row, you move to a slightly harder version of the exercise. As with all bodyweight strength, having an extensive toolbox of progressions is key to moving forward; it’s also why the PCC Instructors’ Manual includes hundreds of progressive exercises.

There will be times you don’t get 5, 4, 3, 2, 1. You may only get 5, 3, 2, 1, 1. That’s fine, and to be embraced. When you don’t get the full 15, use these principles to move forward:

Try to add a rep (or two) next time; shoot for 5, 4, 2, 1, 1, then 5, 4, 3, 1, 1, and so on.

Whatever you get, always push yourself hard on the first set—that’s your peak set.

Adding reps on the earlier sets is more valuable than adding reps on the final sets.

Never do more reps than you are aiming for; stick with 5, 4, 3, 2, 1.

Aim to perform ALL five sets, even if those sets are very low rep; e.g., 3, 2, 1, 1, 1.

Exercises, post-set work and warm-ups

Joe often performed more exercises than I stuck to. Most people today would probably call his routine imbalanced. In particular, he loved hanging exercises, and would do all kinds of weird variations of pullups, leg raises, levers, holds and hangs. Strangely, despite being such an aficionado of hanging work, he would typically do only three exercises for the rest of his body—one-leg squats, flat one-arm pushups, and some kind of inversion; handstands, but often headstands (I rarely saw him do inverse pressing, these were typically static). I have watched Joe do bridges, and do them easily, but like the man himself, these were an exception rather than a rule.

Whatever his last exercise of the session was, Joe would often make his very final set harder by completing a ten second dynamic-tension isometric at the top position of that very last rep. He’d follow this with a slow negative of about ten seconds. He claimed that this little “trick” for finishing his workout told his body that the session was over, and increased his hormonal profile. I’m not sure that’s true, but if Joe’s physique—at over seven decades—was testament, then he knew what he was talking about.

Al Kavadlo Push-Up
No matter what exercise you finish with,
you can squeeze it at the top for an isometric benefit.

What about a warm-up? Interestingly—like Reg Park—Joe never went over five reps on his warm-up sets. He would typically do two or three warm-up sets of five reps, and he always applied Charles Atlas-style dynamic tension during his warm-ups. If he was doing an exercise like one-arm pullups, he would perform an exercise about half as tough on his warm-ups—two-arm pullups. Always five reps. Why not more? Joe felt that you should always train to meet your goals. His peak sets were always five reps, so he thought if he did more in his warm-ups, his body would get confused and start adapting to higher reps instead! I’m not certain I agree with that, but it gives you some food for thought, eh?

I often advocate using progressive exercises when warming up—maybe start with a real easy exercise for high reps, then follow with a slightly harder exercise for less reps. But Joe only ever used one exercise technique in his warm-ups, no matter how many warm-up sets he did. I used to wonder why, for example, he’d perform two sets of regular pullups before his one-arm work; why not one set of regular two-arms, then something harder, like assisted pullups? I asked him once. Because I can make the two-arms as hard as assisted pullups, dumbass! he replied. And it was true. His capacity to tense his muscles during training—dynamic tension—was so profound, he could make seemingly easy exercises as seem as hard as advanced ones. He was able to adjust the intensity of any exercise by 100% or 1%, just using the power of his mind.

That was how profound his body wisdom was. Not many athletes could aspire to this level, although it’s possible with time and patience. I still admire the man to this day!

Lights Out!

Well, that’s it from me. Thanks again for reading—it means a lot to this dopey fella that you guys and gals still take the time to read my weathered musings. I hope this article has given you a new idea to play with. Looking for a lower-rep strength and mass routine that fits well with bodyweight? Give The Hartigen Method a try…tonight!

Oh, and if you liked hearing about Joe’s attitude to training, check this article out. I wrote it for my good buddy Neil Bednar.

You could do a lot worse than modeling your training around old Joe’s philosophy. That brother was something else!

***

Paul “Coach” Wade is the author of five Convict Conditioning DVD/manual programs. Click here for more information about Paul Wade, and here for more information on Convict Conditioning DVD’s and books available for purchase from the publisher.

Filed Under: Progressive Calisthenics Tagged With: Al Kavadlo, bodyweight exercise, calisthenics, Danny Kavadlo, Kavadlo brothers, Paul Wade, PCC, PCC Workshop, Progressive Calisthenics Certification Workshop, pull-ups, push-ups, Raising the Bar, squats, strength training

PCC Australia – The Experience of The Century

March 25, 2014 By Darren Manser 26 Comments

Darren_ManserWhen I signed up for the first ever PCC Australia, I knew I had my work cut out for me. I didn’t find out about the event until fairly late,  so I only had 3 weeks to get ready for The Century.

The first time I attempted the test, I completed the 100 reps in 8 minutes and 50 seconds. Not bad. I’ll be able to shave those 50 seconds off in the next three weeks, I thought. I decided to send Andrew Read from Dragon Door Australia an email to make sure I was doing it right. Andrew responded to my email very quickly.

“100 repetitions need to be completed within 8 minutes.  Once you start the exercise you cannot stop until the desired reps are completed.  You must complete ALL ten chin ups in a row.”

Crap, Crap, Crap. I thought I was able to stop throughout the set.

Three weeks out my max rep chin ups was a whopping eight reps. And that was fresh, with no hanging knee raises before.  How the hell am I going to do 10 chin ups AFTER holding onto the bar to do 20 hanging knee raises–especially at the end of three days of attempting all sorts of new and interesting techniques?

I then stumbled across Coach Wade’s article about kicking ass in the Convict Conditioning certification. Ideally you need to do 50% more for each activity prior to the weekend.

How the hell was I going to do that? I decided I was just going to keep doing the Century. I’d stop all other training and simply practice the test.

In the beginning I did the century morning and night for two days straight.  What a stupid idea!  As a result of me being 105kg (231lbs), I’m way too heavy to jump into that much volume.  I was now way too sore and the PCC was getting way too close.

After a couple of days with no training, it was time to rethink the strategy and start again.

My new strategy was to do as much work as I possibly could whilst staying as fresh as I could so I decided to do ladder super-sets.  I combined the squats and the push-ups and then the hanging knee raises and the chin ups.  I based the ratios on what was coming up in the PCC.  It looked something like this:

Squat:      4, 8, 12, 16, 20

Push up:  3, 6,   9, 12, 15

Squat:      4, 8, 12, 16, 20

Push up:  3, 6,   9, 12, 15

Squat:      4, 8, 12, 16

Push up:  3, 6,   9, 12

Squat:      4, 8, 12

Push up:  3, 6,   9

This adds up to a total of 184 squats and 138 push ups.  All done with excellent form (at the time I thought I was doing a brilliant job, that was of course until I did the PCC and realized how you can polish every little technique to get more out of it).

The ladders for the hanging knee raises and the chin ups looked like this.

Knee Raises: 2, 4, 6, 8

Chin ups:       1, 2, 3, 4

Knee Raises: 2, 4, 6, 8

Chin ups:       1, 2, 3, 4

Knee Raises: 2, 4, 6

Chin ups:       1, 2, 3

Knee Raises: 2, 4

Chin ups:       1, 2

Knee Raises: 2

Chin ups:       1

Total hanging knee raises: 60 reps

Total chin ups: 30 reps

Ideally I would rest for a couple of minutes in between ladders, although sometimes the morning permitted this and sometimes it didn’t.  Oh yeah, I forgot to mention that I have 6 children and I also run my own Natural therapies business, as a Naturopath, Acupuncturist and Kinesiologist.  So between my sets I would lift up my 3 youngest children (Bodhi 4, Tyson 3 and Ruby 15 months) up onto the chin up bar, so they could hang.  Or I would hold their feet and they would do a handstand.

I would do the routine three or four mornings in a row and then have a rest day. I made a deal with myself that I wouldn’t test myself again with the chin ups before the weekend. I simply didn’t have enough time to recover from a training session like that.  I was however, hoping and praying that the adrenaline from the event and the other attendees cheering would help raise me over the bar.

Finally, it was off to Melbourne for me.

The Course was AMAZING.  On the first morning, the first thing we did was the hollow position.  We drilled this again and again.  Then we applied that position to almost everything that we did.  WOW!! It is totally amazing how much better a push up feels whilst doing this. I even feel my poor little abdominals now whilst push-upping.

Then onto the next exercise, then the next exercise.  Every single section we did across the weekend, I had a first.  There was not one activity that I didn’t improve on.

The weekend flew.  The generosity of both Al and Danny was definitely one of the highlights of both the course and my life.  The support from the other attendees was amazing.

Sunday afternoon we arrived at the Century test.  There were a lot of fine looking specimens in the room.  My heart rate was jacked.  My palms were sweaty.  How on earth was I going to hang onto the bar–let alone do the test?  I had a massive feeling of letting down Al and Danny if I couldn’t do it.  I also thought I was letting down my kids, particularly my boys.  (I want to be a good role model for them).

As I watched the other people do the Century I was inspired.  Some people were amazing.  Some people were only just getting through.  A couple of others were not making it.  Then for some reason I thought, “The best thing I can do is the best that I can do.”  If I hadn’t prepared enough then that’s my fault.

Finally it was my turn to test.  I decided to take it nice and easy.  I started with getting to 30 squats and decided to have a rest in the top position.  (Once you start the set you can’t move your feet with the squats, shift your hand and lift your bum in the push ups or let go of the bar with the hanging knee raises and the chin ups.  Although you are allowed to let go of the bar in between the hanging leg raises and the chin ups).  Then I did another 10 squats until Andrew, my counter, says, “You’re done with the squats.” This caught me off guard – for some reason I thought I had to do 50. No complaints here!

On to the push ups! I waited maybe 30 seconds to allow my heart rate to fall slightly and then started my set.  I moved to 15 reps.  I stopped in the top of the push up position, took  a few breaths, then did 5 more repetitions to make 20.  Then 10 singles from 20 to 30.  YES!!!! The push ups were now done.

From the push ups I moved straight across to the hanging knee raises.  I wanted to get them done as quickly as possible so that I could have a long recovery before the pull-ups. I’d been practicing hanging knee raises a lot in the last three weeks and I actually got through them easier than I expected. All that was left was the pull-ups!

I had a lot of time left on the clock, so I took full advantage of it. I shook out the tension in the arms as much as I possibly could. I caught my breath and let my heart rate slow down. Before I knew it I was down to one minute and it was time to start the pull-ups.

I positioned my hands on the bar and started my first few repetitions. When I made it to 6 repetitions, I remember thinking, “I can’t believe it, only four to go!”  I pulled really hard  again – now only three repetitions left.  Pulled hard again for number eight.  Two to go!!! By this time the other two people who were testing at the same time I was had already finished.  All the people were now cheering for me.  Pulled hard once more, and I only had one repetition to go.

An image of my 4 year old son pops in my head.  I decide that I’m going to do the last rep for him.  I yell out a massive “Come on” to psych myself up.  The crowd is cheering so loudly, Danny and Al both walk over and are standing in front of me, willing me to complete the last repetition.  Andrew, my counter, was cheering too.  I pulled as hard as I possibly could whilst only thinking about my son.  I must do it for him.  Somehow, some way I get over the bar.  Everyone cheers.  Al and Danny are both jumping up and down.  They come over to me and high-five me and give me a big hug.  I have tears in my eyes.  What the hell just happened?  How the hell did that happen?  What an amazing feeling.  I was then presented with my official instructor shirt and my certificates.  Then went outside and cried.  I did it!

So what did I learn from this process?

Ideally I should have been 15kg (30lbs) lighter.  This would have made all of the movements and the test a great deal easier.  More practice before the event would have been good, too.  Now that the course is over I am so motivated to incorporate this into my lifestyle, not just as a work out. I am really looking forward to what is possible.

The whole PCC course was amazing.  The presenters, Al Kavadlo and Danny Kavadlo were AMAZING with their knowledge and their time.  All in all this was THE best course I have ever done.  I would thoroughly recommend anyone to do this course.

I would like to say a massive thank you to John Du Cane, Paul Wade, Al Kavadlo, Danny Kavadlo and Andrew Read.  You have all changed my life in one way or another.  I love you all.

PCCAustraliaOfficial

Filed Under: Workshop Experiences Tagged With: Al Kavadlo, Andrew Read, Australia, bodyweight, calisthenics, Century Test, certification, Darren Manser, Dragon Door Australia, PCC, progressive calisthenics, Progressive Calisthenics Certification Workshop, workshop experience

Who Needs Weighted Pull-Ups?

March 11, 2014 By Corey Howard 13 Comments

DannyKavadloHang

Back in late October I started experiencing pain in my right shoulder. Like most of us that place a large priority on our fitness, I ignored it. Dumb move!

As the next few weeks progressed, the pain expanded to my right trap, lat, pec, entire shoulder complex, bicep, plus numbness in my fingers. I’m not sure about the rest of you, but when I’m experiencing pain throughout that much real estate I get concerned and the workouts become kind of nonexistent.

After many doctor appointments over the last couple of months, I’m disappointed to report they still don’t have any idea what’s going on. However, after sitting around hurting, feeling sorry for myself, and not moving, I knew something had to change. My life is fitness. I tell people all the time how important it is to move. When something hurts, there are always ways to keep moving forward. And move forward I have, except this time it’s been exclusively with calisthenics.

As I returned to the gym after a 2 week layoff, I was forced to deepen my calisthenics knowledge. The basic movements were thankfully still easy for me, but I could no longer do weighted pull-ups, which had previously been a big part of my routine. I needed to find a way to keep getting stronger in pull-ups without hanging any weight off my body.

One of the first modifications I used was the “L-Sit Pull-Up”. This movement shifts the body’s balance just enough to make a regular pull-up harder. Not to mention it’s awesome for teaching ab tension throughout the motion!

The L-Sit Pull-Up is done by holding the top of a hanging leg raise, then doing your pull-ups while maintaining the L-sit position the entire time. I must warn you there are a few things you need to keep in mind while performing these. It’s imperative you begin by pulling your shoulders tight into the sockets to create the necessary stability so you don’t swing on your leg raise. Second, keep your legs straight and raise them up under control so you don’t create any upward momentum when you begin your pull. Remember Coach Wade likes slow controlled movements. Third, as you pull yourself up; pull your elbows in toward the midline so your arms aren’t flaired out. This does a couple of things; first, it mirrors the handstand push-up groove and second, it engages the pecs with the lats and creates a solid stable shoulder complex. I’ve seen many clients go from 20 dead hang pull-ups to only 5 on this one. Fire it up!

Corey Howard Performs an L-Sit Pull Up

The next change I made was to toss in some Archer Pull-Ups. We’ve all seen Al Kavadlo do these on his YouTube channel. The Archer Pull-Up is where you pull yourself up to one side then the other. Besides, we all are trying to achieve the one arm pull-up, and this is an amazing progression towards that!

When starting with these I strongly suggest alternating your grip. Turn your palm towards your face on the side you will be pulling towards and your palm away from you on the arm you plan on keeping straight. Next as you begin your pull, think about pulling your elbow to your opposite hip. This is where that L-Sit Pull-Up foundation will come in handy. In other words, if you’re pulling yourself to the right side, pull your right elbow to your left hip. Try and use your straight arm as a guide to keep you moving sideways. I’ve found a false grip or muscle-up hand position works best. Once you can comfortably knock out 7 quality reps or more per side without resting then you’re ready for the final pull-up challenge.

Corey Howard, PCC and RKC Instructor Performs an Archer Pull Up

The last tweak I used to make pull-ups evil is by modifying the grip heights. Paul Wade suggested you use a towel in the Convict Conditioning book, but I like to grab the pull-up bar with one hand and the vertical support structure of the pull-up rig with the other hand. This is similar to an Archer Pull-Up except with a lower non-dominant hand position. You have a few options here to make it harder as you progress. You can either move your hand lower on the pull-up rig, or… If you think this is just simply too easy for you, feel free to hang a stretchy band from the pull-up bar and grab that with your non-dominant hand! The stretchy band will refuse to provide you much for assistance and will scoff as you pull harder against it seeking help. Once you master these I promise you will have the upper body pulling strength of Samson!

Corey Howard, PCC and RKC Instructor Performs a Pull Up with Varying Grip Heights

There you have it. The 3 pull-up variations I switched over to so I could keep building pulling strength. The best part–not a single one of these pull-ups seem to aggravate my shoulder or arm. I’m just like you, and really at the end of the day we all like to get stronger. Grabbing a pull-up bar and pulling your body up with two arms is unfortunately something that many people still can’t do. However there are a few of us crazy dreamers out there that want to defy “normal.” We need to push the envelope and make pull-ups look insanely easy and maybe even knock out a few one arm pull-ups if possible. So go fire up some L-Sit, Archer, or Mixed Grip Pull-Ups. I guarantee you’ll get stronger, and you won’t have to hang weights off your body while doing it!

***

About Corey Howard, PCC, RKC, CK-FMS: Corey Howard strives to constantly become stronger, and to help others to achieve their fitness goals. He is the owner of Results Personal Training, and can be reached at www.resultsptonline.com or www.coreyhoward.com.

Filed Under: Progressive Calisthenics Tagged With: advanced, Al Kavadlo, archer pull-ups, calisthenics, Convict Conditioning, Corey Howard, Injury, progression, pull-up progressions, pull-ups, Raising the Bar, strength training

Turning Up the Mind-Muscle Connection

March 4, 2014 By Matt Schifferle 27 Comments

Matt Schifferle PCC

“You must be crazy! How can I possibly have weak glutes and hamstrings?!”

I’m at the chiropractor and I’m finally throwing in the towel on my lower back pain. I’m not a model patient.

“Do you know how much I deadlift and use kettlebells? Those things are like glute and hamstring blasters.” Then he told me something that changed everything about how I used exercise for the next 10 years; “Matt, exercises don’t work your muscles, only your brain can do that.”

I thought he was nuts but then he hit me with the science of what he was talking about.
“It’s simple; the signal instructing certain muscles to contract and how they work doesn’t come from a weight or a special exercise. Your brain creates a signal, it travels through the nervous system and eventually reaches the muscle fibers as your mind instructed. Everything about how the muscle behaves comes from your brain.”

Mind Muscle Connection Chart
Everything about how the muscle behaves comes from your brain. Diagram © Matt Schifferle 2014

It was a simple lesson, but over the years it has completely enveloped my entire approach to all aspects of my training. From calisthenics to bike racing and even walking has taken on new meaning due to this mind-muscle connection.

Here are some of the biggest lessons I’ve learned in how the mind-muscle connection has changed my calisthenics training:

#1- Distraction dilutes the mind-muscle signal

Anything that pulls your thoughts away from the exercise literally dilutes the signal you’re sending to your muscles. TV, talking, smart phones, even some types of music are now training enemy #1.

No TV, no smart phones, just a horizontal base and a truckload of focus.

#2- Mind-muscle signals become habitual

Habit is simply repeating the same mental signals over time. This repetition causes those signals to become easier to create and more powerful in their application. Of course habit can be both a great benefit and a massive detriment to your training. If your usual signal is to use your lats while doing pull ups you’ll use them in other activities as well. However, if you’re not in the habit of using them, they won’t turn on no matter how many pull ups you do.

#3- The signal can change at various points during the range of motion

It’s not uncommon for a signal and thus a muscle contraction to change during an exercise. At some points during the range of motion, it may be stronger and other points it may be weaker. Some common examples can include triceps relaxing at the bottom of a push up but contracting very powerfully at the top and glutes to shut off at the bottom of a squat while they may kick in halfway up towards standing.

Working to maintain the signal throughout the full range of motion makes a huge difference in the strength of the muscle as well as the integrity of the joints.

#4- It takes practice to get the muscle to do just what you want it to do

It’s common to not really feel a muscle turning on the first few times you try to use it more during an exercise. Sometimes it takes some time for the signal to develop and beat a neurological path to the muscle. I found this to be the case with my abdominals during the leg raise progressions. At first it felt like my abs were hardly doing anything, but the more I focused on turning them on, the more they eventually got into the game. Now hanging leg raises result in a deep abdominal burn and more powerful contractions even though the actual workout hasn’t changed much. Don’t be discouraged if nothing feels different at first. Keep concentrating and things will change very soon.

#5- Small and stubborn muscles may be due to a weak mind-muscle connection

My shoulders have always been a weakness for me. It didn’t matter how many shoulder exercises I did, they just wouldn’t grow and really develop. Once I started working on the mind muscle connection with my shoulders I was surprised to find how weak the signal was. Once the signal became stronger my shoulders grew like crazy. This was also the case with my hamstrings as I mentioned before.

It’s hard to believe that Matt ever had small shoulders!

#6- Exercises, and tools are simply templates for developing the mind-muscle signal

One of the biggest lessons about the mind-muscle connection was that there’s nothing in there about supplements, gadgets or fitness dogma. The root cause of all things muscle comes from the brain, not a product you can buy in a store.

As for a particular exercise, each movement places a certain demand upon a set group of muscles, but it’s a rough template for where the tension needs to go and how hard the various muscle contract. It’s up to your own focus and skillful concentration to refine the tension and direct it to the target muscles.

The million dollar question is: how can you develop and refine the mind muscle connection?

There are many techniques, but the common element is simply trying to build and control the tension in a select number of muscles through your own focus and concentration.

When I’m trying to really dial in my mind muscle connection I use what I call the P.T.R (Peter) method. Here’s how it would work with a classic push up.

Step 1- Set your Position

The first thing is to take your time setting up your position for the exercise you wish to do. This should be a pretty relaxed thing to do. In the case of push ups, I like to start my push ups laying on the floor so all of the muscles are relaxed. I then take my time placing all of my limbs and joints in the most perfect position I can. I check the position of my hands, elbows, shoulders, spine, hips, neck, even the placement of my fingers is something I really focus on getting just right.

Step 2- Set your Tension

Once I’m in position, I fire off the mind-muscle signal by tensing the muscles I want to involve during the exercise. I’m still laying on the floor, all of the tension is entirely proactive. I’m just flexing the muscles I want to engage as hard as possible. This can include my chest, shoulders, hands, lats, abs, triceps, quads and forearms. Lately I’ve been focused on getting my triceps more involved with my push ups, so I’ve been focusing more on tensing up the triceps.

Step 3- Apply Resistance

Once the tension is set just the way I like then I slightly lift myself off the floor and begin my set. Once the resistance is applied, the tension in the muscle grows much more, only now it’s flowing along the channels already established in step 2. So if I’m working to get my triceps more involved they now carry more of the resistance of the exercise.

The P.T.R method conditions you to really dial in the tension of any exercise you choose. It builds your ability to direct and alter the tension in your muscles at will so you can modify that tension however you wish.

P.T.R. works with any technique. Matt builds his lats with pull-ups.

Contrast this with simply dropping down and firing off push ups as fast as possible. The position and tension your body uses is going to be much more reactive rather than proactive. If you’re used to using your shoulders more than your triceps during the push up then that same pattern of signal will be generated. It’s not a bad thing, it’s just that it’s much more difficult to focus and change the mind-muscle connection and thus how your mind is asking your muscles to perform. Your old movement habits will take over both good and bad.

In closing I want to leave you with a couple of mantras I’ve used with my clients to reinforce the awareness of the mind-muscle connection:

– Muscle follows mind.

– Exercise doesn’t work muscle; your focus and concentration works the muscle.

– Nothing different happens in your training until you chose to make it different.

– Exercise technique is more than just keeping your back straight or toes pointing forward. Technique is about refining the mind-muscle signal. Thus technique isn’t everything, it’s the only thing.

– Effecting training isn’t just about blood sweat and tears. It’s about learning how to engage and use your body in a more effective way.

Yours in strength,

-Matt Schifflerle

****

Matt Schifferle a.k.a. The Fit Rebel made a switch to calisthenics training 5 years ago in an effort to rehab his weight lifting injuries. Since then he’s been on a personal quest to discover and teach the immense benefits of advanced body weight training. You can find some of his unique bodyweight training methods at www.RedDeltaProject.com.

Filed Under: Progressive Calisthenics Tagged With: brain training, calisthenics, Matt Schifferle, mental training, mind-muscle connection, technique, training strategy

Goals, Goals, Goals

January 28, 2014 By Steven Low 12 Comments

Goal.Almost everyone I’ve talked to knows the importance of incorporating training goals to improve your performance. Basically, training goals allow you to build a routine around them that is specific to them.

For example, if you’re training for the planche, then you typically want to be working on planche isometrics as well as some other type of pushup motion – such as one arm pushups, pseudo planche pushups, or another similar motion such as dips to supplement your strength gains. You would make sure that your sets have at least 2-3 minutes rest between them (if not a bit more) to ensure muscle recovery. You would also ensure that you would have 3 or more sets of an exercise to ensure sufficient volume for building strength.  Finally, you would attempt to progress on exercises as much as possible each week to make sure that you’re not stagnating.

Likewise, if you were working on gaining pure hypertrophy you’d want to have a mix of repetition ranges between about 5 and 12. You’d want to have about 30 seconds to about 2.5 minutes rest between sets. You’d want to make sure you’re mixing compound exercises and isolation exercises together in some sort of bodyweight and weights hybrid routine.

Each of these types of routines have specific goals, and from the goals – if you know what the literature says on training information – you can accurately build a routine towards your goals. That was the main thrust of my book Overcoming Gravity. To help trainees learn to build routines towards their goals in the area of bodyweight training.

Now, I didn’t talk as much about goals for other physical activities, which is the purpose of this article. From what I have observed most people do not understand that they even need to do this, much less have the information they need to know on HOW to do it.  So let’s talk about some examples.

If you sprain your ankle or hurt your back lifting something, what would the common layperson do?

What would a doctor tell you to do?

If you guessed RICE – rest, ice, compression, and elevation – for the ankle, and muscle relaxers and rest for the back you’d be correct. However, these methods actually prolong your recovery from injury. This is what most people don’t understand, but it makes sense to them when you explain it.

For instance, if you went to a physical therapist after spraining your ankle or injuring your back would you choose to not do anything they told you to? Of course not. A physical therapist would typically work on the injured area to figure out if there are any potential imbalances or other issues that need to be rehabilitated. They would give you non-painful range of motion exercises with concurrent stability exercises, and they may use modalities for pain. They would also give you a home exercise program that you would be doing all of the other 5-6 days with exercises that you would need to do at least 1-2 times a day (if not more) when you’re not in therapy.

This happens across the board with any type of injury – even catastrophic injuries such as knee replacements, rotator cuff surgeries, or ligament repairs, or any other type of major surgery. Early mobilization, muscle activation, and stabilization exercises are the key to better outcomes.

So if you get injured, the best thing to do is never  pure rest. There is always something you can be doing to rehabilitate it. In a lot of these cases, a common layperson or even an experienced trainee may need to see a professional to get specific injury advice. This is what I would recommend if an injury has not significantly healed within about 1-2 weeks with non-painful mobility, stability work, and other types of early rehabilitation.

No one wants to be injured for 1-2+ months and have no clue on how to make it better. Don’t do this to yourself if you’re injured!  The goal behind an injured part of the body is to restore the stability and range of motion, manage the pain well, then move into more specific rehabilitation. This goal underlies all of the recommendations above.

Now, this information is good, but let me get into some of the more applicable information for everyone else.

For example, let’s take someone with a tight back from a previous back injury – from say, 6 months ago. Or even a tight back from just having one come on from hard training. Or how about a tight shoulder or elbow tendonitis that comes on after training hard?

What is the typical recommendation for these types of situations that aren’t exactly injuries but require some amount of prehabilitation?

The common thread with these types (that is echoed across Facebook, other social media, common training articles, forums including Reddit, CrossFit, Performance Menu, American Parkour, and other various forums I visit) is that you need to do soft tissue work. Most of this includes some sort of massage, foal roller, lacrosse ball, or other implement that helps to loosen the area.

I’m going to suggest to you that this is incomplete information. Why is this information incomplete?

The body has nociceptors in place to tell you if you are putting an area at risk of injury which will signify pain to your brain. Likewise, it has mechanoreceptors and other sensory feedback that will tell the body if an area is unstable or potentially at risk for injury.

What does a body do when there’s pain or instability? It tightens up the muscles in an attempt to protect the area from further damage. This is why all of the muscles around an injured ankle get stiff and tight.

What does it do if there’s potentially an overuse injury developing?  It tights up the muscles again to protect the area, and signals to the brain a nagging type of pain or discomfort.

You see, many people use soft tissue work to loosen up the tight muscles that comes with previously injured areas or areas that are starting to develop overuse injuries, but they don’t do anything afterward to follow it up. This is why foam rolling without any follow-up is incomplete.

Most people’s goals are to get back to training, usually for optimal performance. Foam rolling in this case is definitely incomplete and does not get you back to the goal. Why? Because people have to continue foam rolling week after week if the back does not get less tight or improve measurably.

This is where you see your progress stagnating. If you’re beating your head against the wall not making progress then you need to change something up. As Einstein said, the definition of insanity is…

Let me give you an example of what someone would do if they have a tight lower back, especially from a previous injury.

So if you went into physical therapy, the physical therapist would likely work on your back to loosen up the tight muscles because they are not conducive to good movement. However, this soft tissue work would be followed up with muscle activation exercises, especially if there was a lot of previous pain.

Typically, these would include exercises specific for the tranverseus abdominus muscle because when there’s pain, the timing of the body’s activation of the muscle for core stability is thrown off. Then this training would be followed up with specific isolation exercises which would develop into compound exercises. This approach works for the majority of back related injuries.

So if you have a tight back, foam rolling is generally OK as long as there is no pain and it loosens up the area. But if that’s all you do for it then it’s incomplete. You will likely have to foam roll it indefinitely before and after every training session.

If you do foam roll or use other soft tissue work you should be following it up with exercises for prehabilitation. TVA activation is pretty specific, but a lot of the pilates and yoga poses emphasize keeping the core tight while doing leg lifts, bird dogs, hip bridges, and other exercises that work pretty well. Following this up with one of the best exercises for trunk stability, the reverse hyperextension, is typically right on the money. Performing reverse hyperextensions in a slow and controlled manner works most of the back muscles in an eccentric pattern which helps them to fire and turn on in the correct pattern again.

In conclusion, if you take nothing else away from this article, take these:

  • Everything you do for training should have a goal.
  • If you are doing prehabilitation work, it should be with the expectation that the area you’re working on is improving either in performance or getting better. If it’s not, then there’s something you’re missing.
  • Likewise, your warm up should have a specific goal. Your flexibility training should have a specific goal. Your skill training should have a specific goal. Your sleep you should have a specific goal. Even your nutrition should have a specific goal.

You should be looking to optimize and improve all facets of your training. And to do that you need goals. And you need to modify aspects of your training or your life to align with your goals.

Don’t keep beating your head against the wall with no results.

***

About Steve: Steven Low, Senior PCC and author of Overcoming Gravity: A Systematic Approach to Gymnastics and Bodyweight Strength, is a former competitive gymnast who, in recent years, has been heavily involved in the gymnastics performance troupe, Gymkana.  With his degree from the University of Maryland College Park in Biochemistry, Steven has spent thousands of hours independently researching the scientific foundations of health, fitness and nutrition.  Currently Steven is pursuing a doctorate of Physical Therapy from the University of Maryland Baltimore which provides him with insights into practical care for common injuries.  His training is varied and intense with a focus on gymnastics, parkour, rock climbing, and sprinting.  He currently resides in his home state of Maryland. His website is http://eatmoveimprove.com.

Filed Under: Motivation and Goals Tagged With: bodyweight, calisthenics, goal-setting, goals, healing, injuries, isolation exercises, Overcoming Gravity, pain, Steven Low, training

Yoga, Calisthenics and the Journey of a Lifetime

January 23, 2014 By John Du Cane, CEO and founder, Dragon Door 30 Comments

John, the Yogi who came in from the cold.

As a teenager in the sixties UK, I was highly athletic. I played wing in Rugby, had a mean long jump and high jump and could sprint like the wind. Two of my track buddies at high school went on to great fame: the iconic musician Nick Drake and Mark Phillips, who went on to marry Princess Anne.

I also loved weight lifting and was drawn to pumping iron. Unfortunately the strength coach/trainer at my school was pretty darn clueless and I would lift away without much direction at all—either from him or any literature on the subject.

What I also discovered, in 1966, was the just-published Light on Yoga by B.K.S. Iyengar—which changed my life. I used this seminal and highly inspirational book to teach myself Yoga. Scary, perhaps, but finding a teacher in those days was challenging to say the least. By age nineteen, I could pull off a headstand while in a full lotus, had an eye-popping ability to rotate my abs, as a ridged column, through 360 degrees, with the method known as Uddiyana Bandha, plus a whole lot of other impressive looking stuff.

Uddiyana Bandha
Uddiyana Bandha
Iyenga, “the Michelangelo of Yoga
Iyenga, “the Michelangelo of Yoga”

I enjoyed looking cool, feeling cool and being proud of what I could do physically. If that doesn’t motivate you to practice physical culture, I don’t know what to say…

At the age of twenty-five I finally traveled to India to study Yoga and meditation. Ironically, there in India, I switched my allegiance to Qigong and Tai Chi as my principal discipline for physical cultivation. The Hatha Yoga I had studied had had a transformative impact on me, but it did involve almost solely holding static postures. Qigong and Tai Chi opened up a different world that was motion-based and much more satisfying for me personally.

However, those crucial dozen years where I dove deep into Yoga gave me immense flexibility benefits that have extended to my current age of 64. For instance, without having rigorously practiced the headstand since my mid-twenties, I can still move effortlessly into a full headstand. Same for the full lotus and many other cool poses.

Naturally forty years of martial arts, kettlebells and other bodyweight exercise have helped me stay in nice shape into my sixties. However, I do believe that my years as Yogi John gave me a crucial foundation that I am eternally grateful to have laid for myself.

So, when Al Kavadlo presented his latest masterpiece, Stretching Your Boundaries to me, I was thrilled and immediately impressed by the spectacular way Al tied together Yogic stretching and flexibility methods with calisthenics. Along with Paul Wade, Al has been leading the inspirational charge in a new appreciation for the healing and athletic benefits of bodyweight exercise.

BOOk_StretchingYourBoundaries

What I also love about Al’s work—and never more true than for Stretching Your Boundaries—is the aesthetic and the philosophy of physical culture he brings to the table. “Calisthenics” means “beautiful strength.” Strong, flexible, healthy, graceful body—with a mind and spirit to match. Al perfectly embodies that “beautiful strength-beautiful spirit” ideal, in my opinion. He brings a Zen lightness and equanimity to his practice. But he also brings the kind of sharp-mindedness and rigor to his physical cultivation that is another hallmark of Zen. We had Zen and the Art of Archery. Now we have the Zen Art of Stretching Your Boundaries.

I love, also, Al’s emphasis on the importance of joint health, circulation and breath work. The older you get, the more you need to move and breathe well. And nothing needs more movement for health and well being than the joints.

Just as Iyengar inspired me and millions of others to take up Yoga, Al is inspiring a new generation to improve their mobility, strength and health by integrating yoga and calisthenics in dramatic new style.

Let’s remember: we have the one body only to work with, a precious treasure that can be abused and trashed—or burnished, refined and transformed into an ongoing piece of living artwork. In Stretching Your Boundaries, Al hands you a priceless set of methods to refine your physical being. I urge you to take full advantage.

Yours in Strength,

John Du Cane

Filed Under: Flexibility Tagged With: Al Kavadlo, beautiful strength, calisthenics, John Du Cane, Paul Wade, PCC, Stretching Your Boundaries, Tai Chi, yoga, Zen

  • « Go to Previous Page
  • Page 1
  • Interim pages omitted …
  • Page 4
  • Page 5
  • Page 6
  • Page 7
  • Page 8
  • Page 9
  • Go to Next Page »

Primary Sidebar

Featured Products

previous arrow
GetStrongBookCover
ConvictConditioningBookCover
StreetWorkoutBookCover
ExplosiveCalisthenicsBookCover
StrengthRulesBookCover
next arrow

Categories

Progressive Calisthenics Certification Logo
Click here for more information or to register for the PCC workshop

Get Strong Workouts TriadXP App
Get Strong Workouts App

Recent Posts

  • Top 5 Reasons Why an In-Person Workshop is the Best Way to Supercharge Your Training
  • HYBRID STRENGTH TRAINING IS HERE!
  • My Calisthenics Journey to the PCC
  • The Handstand Press: Complete Control Through the Handstand
  • The Get Strong App is Here!

Dragon Door Publications

Dragon Door Publications

Recent Comments

  • bross dandon on The Case for Curved Handstands
  • Johnny Flewellen Jr. on Strength for Life
  • Dan Earthquake on The Pursuit of the Daily Minimum
  • Johnny Flewellen Jr. on The Pursuit of the Daily Minimum
  • Johnny Flewellen Jr. on Yoga, Calisthenics and the Journey of a Lifetime
FOLLOW US ON TWITTER!

Copyright © 2025

Dragon Door Publications / The author(s) and publisher of this material are not responsible in any manner whatsoever for any injury that may occur through following the instructions or opinions contained in this material. The activities, physical and otherwise, described herein for informational purposes only, may be too strenuous or dangerous for some people, and the reader(s) should consult a physician before engaging in them.