• Skip to main content
  • Skip to primary sidebar
  • Home
  • Contributors
  • Resources
    • Q&A with Paul “Coach” Wade
  • Workshops
  • Products
  • Forums
  • Articles
  • Blogs
    • RKC Blog
    • Strong Medicine Blog
  • Archives

PCC Blog

Progressive Calisthenics - The Official Blog for the PCC Community

handstand tutorial

Getting Started with the Freestanding Handstand

October 31, 2017 By Krista Stryker 3 Comments

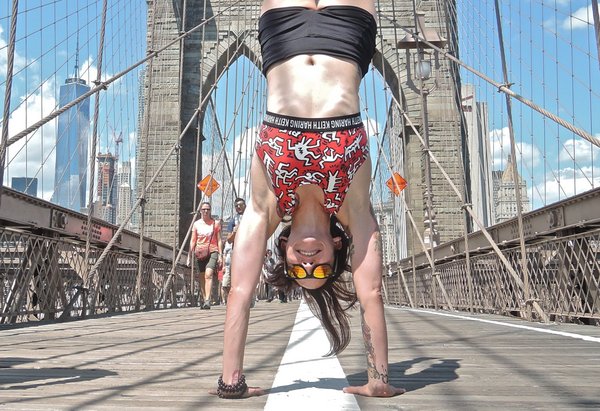
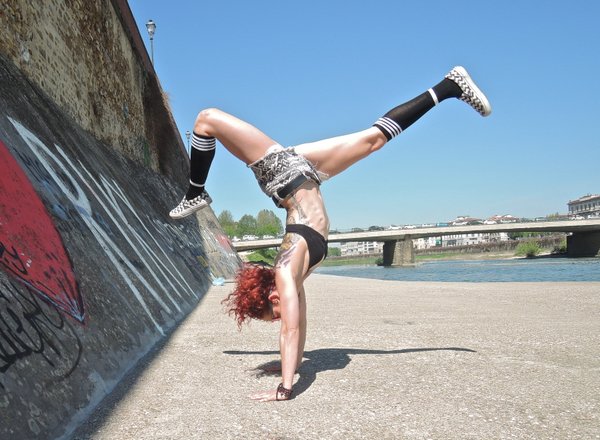
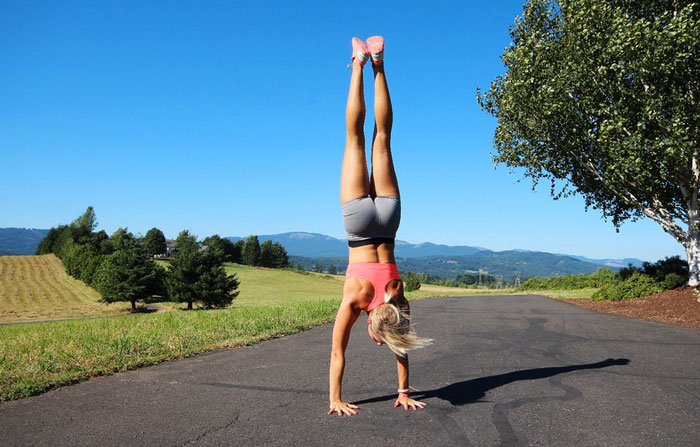
Krista Stryker Handstand

I didn’t grow up as a gymnast.

As a kid, I played basketball and soccer, but was fairly uncoordinated and had very little body awareness. In fact, handstands didn’t even come on the radar for me until my mid 20’s, and at that time I had just barely built up the strength to do proper push-ups and my first pull-up. Handstands seemed like something only superheroes could do.

Fast forward to today, and I’m happy to say I’ve built a pretty solid handstand. It’s one of the things I get asked about most when I’m training (I also get asked a lot if I’m a gymnast, which always makes me laugh because at 5’9” with fairly long limbs I don’t exactly have the ideal gymnast build).

But it hasn’t been easy. It’s taken me around three years of extremely consistent training to get where I am today, and while I probably could have progressed faster if I knew what I know now from the start, I’ve actually really enjoyed the ups and downs of the journey. It’s been frustrating and yet incredibly satisfying at the same time—and the constant challenge has meant that I’ve never been bored or lost interest in practicing.

If your goal is to learn to handstand, here are my best tips on making progress, whether you’re just starting out or you’ve been struggling to make progress for a while now.

No One is Too Good for the Wall

I train outside a lot, and out of everything I’m doing the main thing people like to stop and ask me about is my handstand and how they, too can work up to a freestanding handstand one day.

Without a doubt, my biggest piece of advice is to use the wall.

When I first started seriously working on handstands, I spent around six months practicing solely on the wall, and it made the absolute biggest difference in my handstand progression.

Now, I totally get that some of you will want to bypass the wall. After all, for a strong, athletic person, relying on the wall may seem like an unnecessary step. But working on the wall has countless benefits, including helping you to build endurance, establish a straight, solid handstand line, teaching you the beginnings of balancing in a handstand, and much more.

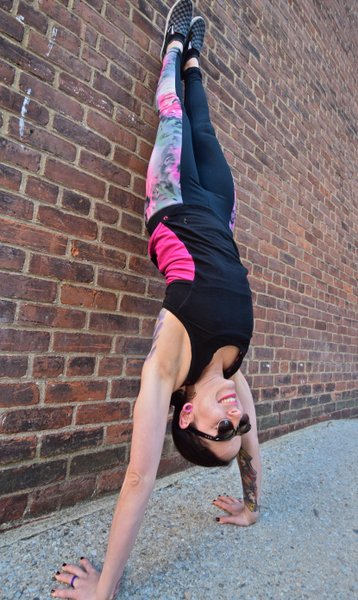
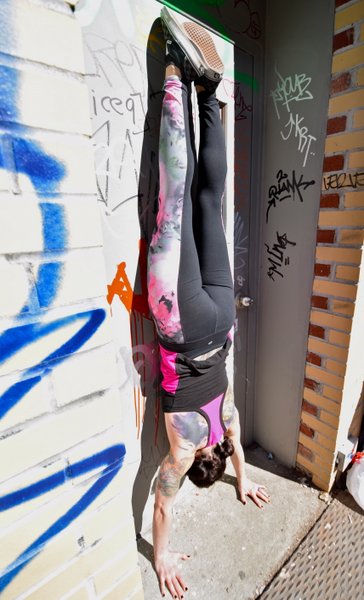
When getting started with wall handstands, most people will practice with their back to the wall. However, I’ve personally found that practicing with my chest facing the wall has been even more helpful.

Start in a plank with your feet touching the wall, then walk your feet up the wall until your body is completely vertical and your hands are only a couple of inches away from the wall (if it’s too scary to get that close at first, don’t worry, just work up to it). Once you’re there, push up through your shoulders as much as you can, tighten your core and glutes, and hold for time. This is going to help you build endurance upside down which is absolutely necessary to hold a longer freestanding handstand down the road.
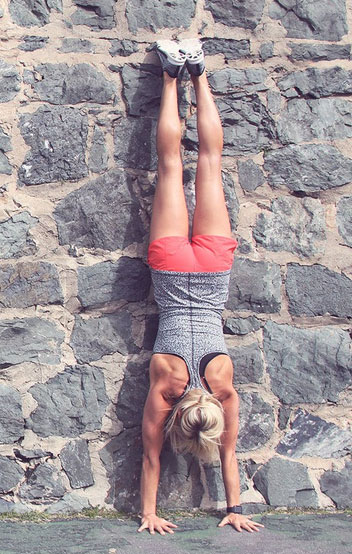
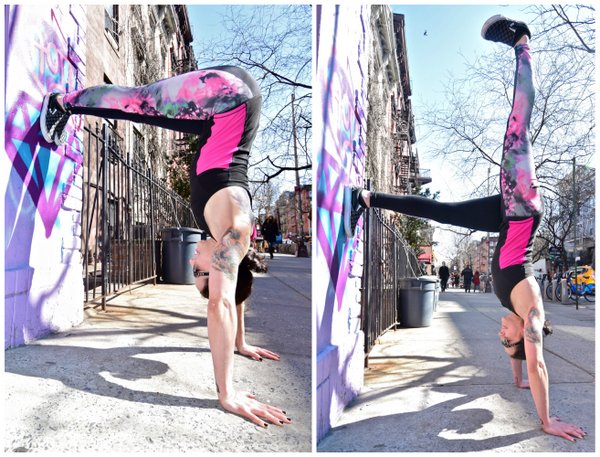
Wall Handstand Balancing Drill

Once you’re able to hold a handstand for at least 30-45 seconds against the wall, you can start working on figuring out the balance portion of the handstand.

Here’s one of my favorite drills for balance:

  1. Start by walking up the wall as described above.
  2. Walk your hands away from the wall so that they’re about a foot away
  3. Slowly remove one foot from the wall and balance it overhead so that your shoulders and hips remain in a straight line. It’s okay if your leg goes slightly past your hips, just focus on your hips being directly over your shoulders.
  4. Even more slowly, remove the other foot from the wall and try your best to hold your handstand briefly. If you fall backward, just put your feet back on the wall. If you fall forward, simply cartwheel out.
  5. Split your legs back and forth, working to feel the balance in your fingertips and the alignment in your shoulders and hips.

You can practice this drill for time to build even more endurance. Just be patient with it and go slowly—this type of training can’t be rushed.

It also really helps to film yourself doing the exercise so that you can see whether you’re actually as aligned as you think you are. Videos don’t lie!

Working Away From the Wall

Once you start to feel the balance against the wall, it’s time to start working on getting away from the wall.

There are countless ways to get into a handstand, but most people will start with the basic kick up. This can be frustrating at first, and you’ll have to work on figuring out how hard to kick up to hit that sweet spot. If you don’t kick hard enough, you won’t make it to vertical—if you kick too hard, you’ll fall or cartwheel over. It just takes time and practice.

Even when you start working away from the wall, don’t give up your wall training all together. While working your freestanding handstand is a necessary step in handstand training, you should still work on the wall to keep building up endurance and working on your balance and alignment in a handstand.

A good recommendation is to spend about half of your time practicing on the wall and half of your time working on kicking up into a freestanding handstand until you get really consistent with your freestanding handstand—then you can spend most (if not all) of your practice away from the wall.

Consistency is Key

If you’re serious about being able to rock a handstand, the number one thing to keep in mind is that you have to be consistent with your training. Since handstands are more of a skill than a strength exercise (although don’t get me wrong, they can definitely tire you out!), you can practice handstands nearly every single day.

And you should—even spending 5-15 minutes a day working on your endurance and balance holding a handstand will make a huge difference towards your progress.

Ultimately, though, you have to really want a handstand and be patient with the process. It can take a great deal of time before you feel consistent and comfortable in a handstand, but take it from me, the process is absolutely worth it.

And of course, it you want to learn more about handstands, come to the PCC!
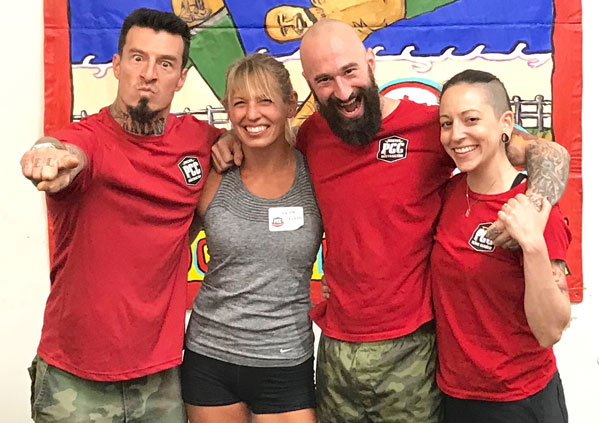
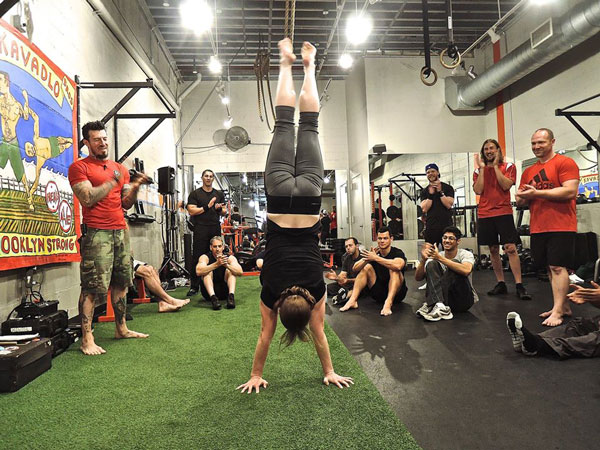
Krista Stryker With Kavadlos at PCC

***

Krista Stryker, PCC is an NSCA certified personal trainer and the founder of 12 Minute Athlete, a popular website and app helping thousands of people get fit in as little time as possible. Krista has been featured in The Washington Post, SHAPE Magazine, Muscle & Fitness Hers and MindBodyGreen. Find out more about Krista on her blog and connect on social media @12minuteathlete.
Filed Under: Progressive Calisthenics, Tutorial Tagged With: freestanding handstand, handstand, handstand drill, handstand tutorial, Krista Stryker, progressive calisthenics

Five Ways to Fast Track Your Freestanding Handstand

November 22, 2016 By Matt Beecroft 18 Comments

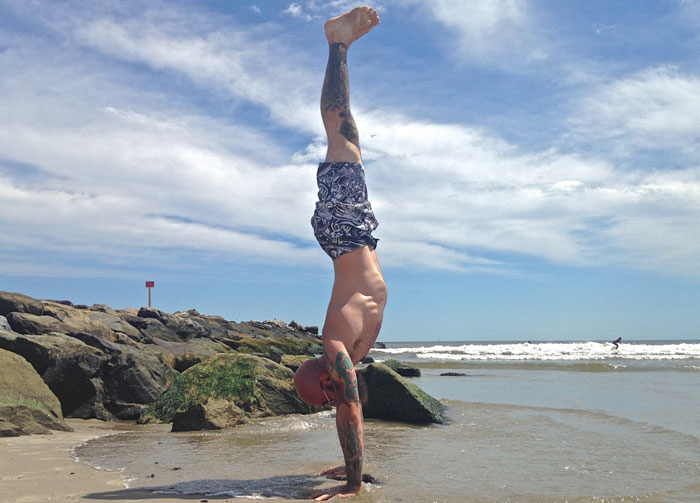
Al Kavadlo handstand beach

As an adult you’ve decided to embark on an inversion and hand balancing journey. Seriously, are you crazy?

If you think about it, children with amazing mobility, breathing, reflexive stability and perfect natural movement still can take 18 months to learn how to stand on their feet. And you have decided that you want to balance on your hands!  Are you out of your mind?

Read ahead, because I am too.

At 40 something years of age, 6 foot 3 inches and 90 kilograms (hardly genetically blessed to do anything in the calisthenics or gymnastics arena), I decided to do the same thing. Yep, I looked at what someone else was doing, and said to myself, “that looks like fun, if they can do it, I can.” That was on my first Progressive Calisthenics Certification or PCC in the US back in 2013 with the infectious spirit and great vibes of Al and Danny Kavadlo. I was hooked.

But little did I know of the journey I had decided to undertake.

Unlike a lot of other adults who embark on achieving the freestanding handstand, I wasn’t exposed to gymnastics as a kid, nor did I have friends into gymnastics. I also wasn’t a kid that spent time cartwheeling with my mates in the park. So let’s just say inversions and hand balancing were completely foreign to me until I started playing around with my first crow pose at the PCC in 2013.

Zip, zero, nothing, nada.

What do I love about the handstand?  Everything gets better from learning how to handstand.

Whilst nailing your freestanding handstand may be the long term goal (and it’s so sweet when you finally get there!), the journey is where the real gold is. Improved strength and mobility in the hands, wrists, shoulders and thoracic spine, as well as improved proprioception are just some of the physical attributes developed.

The mental aspects however, were more surprising to me. Overcoming my fears of falling, being upside down or simply self-preservation were surprising, considering my background as an Expert Level 2 Krav Maga instructor and Muay Thai coach. I think I was more comfortable being punched in the head rather than landing on it. It also taught me how impatient I was, and a lot about perseverance and persistence. Some days you will feel great and find your balance without much trouble. Other days, it just won’t be there. The handstand can be an elusive beast.  The handstand was a reminder to me about attitude, and how just turning up and doing the work is where it’s at.

Though I could write further about my journey, what’s more important is that I have been successful in helping others, some in their forties as well, achieve their first handstands in a relatively short time. Repeatable, expedited results with others as a coach, is what I endeavor to achieve

So here are 5 tips that will help you fast track your way to your first freestanding handstand.

1. Volume: Do the work

It maybe not what you want to read, but you have to do the work. Regardless of the discipline – calisthenics, circus, yoga or gymnastics, the best hand balancers do it most days of the week. Hand balancing is a very specialized skill. Regardless of my time spent with the Kavadlos on my handstand journey or engrossing myself in material from other experts in the field, they all advocate the same thing: volume. Many serious advocates will say to practice 5 days a week, though I’ve found that following a structured program just 3 days per week for an hour had a few of my students hitting their freestanding handstands in just 6 months with no prior experience. Repetition is your teacher. Even if it’s just cranking out a crow pose on the office floor for a few minutes, or the kitchen bench a couple of times per day, you need to spend more time, you know, balancing on your hands if you want to get good at balancing on your hands.

Grace Kavadlo Handstand variant

2. The Wrists, Hands and Fingers

While it would seem really obvious as you are putting your entire body weight through, and making fine adjustments with your hands, wrists and fingers, I am still surprised at the number of people who don’t spend enough time looking after these areas. Adequate time must be spent mobilizing and strengthening these areas properly. The most common complaint when working any handbalancing is soreness of the wrists, and though it will certainly take time for your joints, muscles, tendons and ligaments to adjust to the load, you still need to spend time looking after those areas every session.

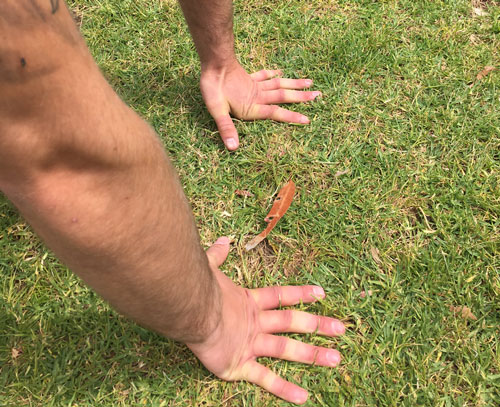
For me personally, the “first knuckle push-up” is one of the most important drills in my warm up.  Having the fingers spread, index fingers pointing straight ahead, shoulders above the wrists and in a kneeling or push-up position, raise the heel of the palm while keeping the knuckles and fingers on the ground, with a 4 second lowering eccentric on each rep for 3 sets of 10-20 reps. And if you have a problem getting good ROM because your knuckles are all banged up from hitting stuff, it can be assisted by using your other hand to anchor or press your fingers and knuckles down whilst you raise the heel of the palm off the floor.

handstandhandplacement3

3. Face the Wall

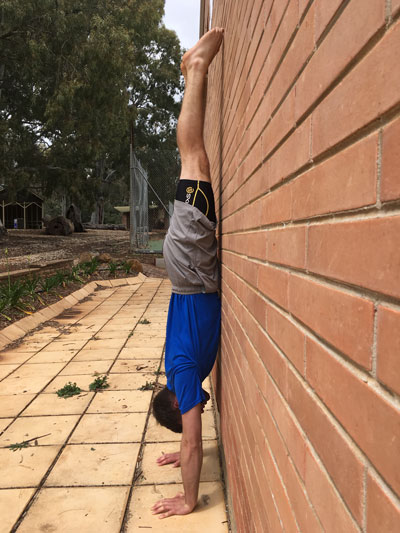
Facing the wall handstands are an absolute necessity if you want to achieve a great handstand. While facing away from the wall also has its advantages, facing the wall helps to achieve a straighter looking handstand and a nicer “line” or shape. About 50 years ago circus performers and strongmen performed mainly “banana back” or arched back handstands, but with the advent of modern gymnastics aesthetics, artistry and scoring criteria, it’s meant that the straight line handstand with the toes pointed is often the preferred method. Try working up to 5 sets of 45s-60s holds thinking about your “shape” or “line”. That usually means hands a few inches from the wall, shoulders open, the rib cage pulled down to a posteriorly rotated pelvis with the chest and hips against the wall.

Patrick Madigan handstand towards wall

4. Don’t Face the Wall

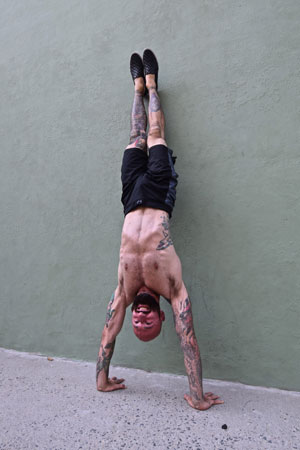
I am totally going to contradict myself both with this point and the next, but hear me out. One of the few drills that will really help you start to build the strength and motor control required in the hands is the heel pull. This is done facing away from the wall with your hands roughly a foot away. Gently kick up to rest against the wall, then using only your fingers, hands and forearms, pull your entire body off the wall, without using your feet at all. This is the most important point – do not use your feet to push off. Besides getting an amazing pump through the hands and forearms, it will also show you where you are leaking force through your body, and require you to tighten everything up into a straight line.

When done correctly, your entire body will float away from the wall as one unit, and pull you into your handstand. This is a crucial exercise as it teaches you that you cannot use your feet to push against anything when you kick up into a freestanding handstand. The only things that can balance and stabilize you are your fingers, wrists and forearms. It is also exciting as many will feel what it is like to achieve their first handstand and it is crucial for building confidence. Work up to 15-20 sets holding your handstand for as long as possible each time. Once you hit a few handstands like this, you should feel ready to do a freestanding one!

al kavadlo handstandwall5

5. Get Off the Wall

Yes, it’s another contradiction, but the wall and its security are also going to be your crux or vice if you don’t get away from it. Right from the beginning, you need to play around with just kicking up into a freestanding handstand. Children usually just play and catch on pretty quick. I know what you are going to say, you aren’t a spring chicken any more. I get it. There is the fear of falling on your head, which is why learning to cartwheel and bail out is really going to help here. The problem with the wall is that it’s there. When people practice against the wall, they usually kick up haphazardly and without any control. The issue with this is that it teaches you the complete opposite of what you need to do when finally kicking up into a freestanding one. When you kick up into a freestanding handstand, it needs to be done softly, gradually, and under control. The problem with a lot of the facing away from the wall handstand work is it teaches the total opposite of this. The wall also becomes a security blanket that people struggle to wean themselves away from. You need to get away from the wall if you ever want to hit your freestanding handstand.

Kirsty Grosart PCC handstand

****

Matthew Beecroft is a PCC Team Leader, Senior RKC, and CK-FMS certified instructor. He is also a GFM and Animal Flow instructor and Expert Level 2 instructor with Krav Maga Global and a Muay Thai coach who has trained amateur and professional Muay Thai champions. He can be contacted through his website www.realitysdc.com.au or his Facebook page facebook.com/MeetLifeHeadOn

Filed Under: Progressive Calisthenics, Tutorial Tagged With: handbalancing, handstand technique, handstand tutorial, handstands, Matt Beecroft, progressive calisthenics

Training Handstands For Strength

March 1, 2016 By Grace Kavadlo 26 Comments

Grace Kavadlo Handstands 1

When many people think of the handstand, they think of a bodyweight skill. In other words, if your goal isn’t to hold a freestanding handstand, somehow it’s not a worthwhile exercise. While learning to balance on your hands is certainly a noble pursuit, a lot can be gained from approaching the handstand from a pure strength training perspective by using a wall for support. In calisthenics, we encourage all types of isometric holds from elbow levers to L-sits. You can think of the wall handstand as just being the inverted variety.

Wall handstands take the balance element out of the exercise and are excellent for building overhead pressing strength. Practicing wall handstand holds is also a great way of building shoulder stability and increasing static strength. Handstands strengthen your triceps, delts, rhomboids, traps, and the extensor muscles of your forearms which can help build strong, healthy wrists. When you tense your entire body in a wall handstand, similar to how you would in a plank, you can also target your quads, glutes, and even your abs.

Below are 3 different wall handstand variations that you can try. Aim to hold each pose for as long as you can, ideally working up to one full minute. It’s not uncommon to feel dizzy or slightly disoriented after performing long holds, so ease in slowly and rest as needed between efforts.

Back-to-the-Wall Handstand
This is a great place to start if you are new to handstands. Begin by facing a wall with both hands on the ground, your front knee bent and the other leg extended behind you. Hop off your bent leg and reach your extended leg towards the wall. It may take a few hops before you finally hit the wall. Make sure your arms are straight with your elbows fully extended. A common mistake beginners tend to make is to bend their elbows as they kick up which makes them fall on their head and never want to attempt a handstand again. Remember “when the elbows bend, the power ends.”

Once you’re up, allow your head to relax between your shoulders as you actively press into the ground. It is normal to have a slight arch in your back when you are practicing this exercise, but aim to minimize this pressure on your low back by actively squeezing your glutes, engaging your abs and pushing your head and chest through your arms. When you’re ready to come down, release one leg at a time back to the ground, doing your best to land gently.

Grace Kavadlo Handstands

L-to-the-Wall Handstand
Begin in a push-up position with your heels touching the wall behind you. Slowly begin to crawl your feet up the wall as you fold at the waist, walking your hands in closer until your hips are aligned above your shoulders. Your body will wind up in an inverted capital letter L-shape. It may help to have a pair of eyes on you to let you know when you are in position, as it can be hard to tell at first.

In addition to upper body strength, there’s a lot of flexibility needed in your hamstrings to fully extend your legs. If you don’t have the mobility to achieve a full lockout, you can practice with a slight bend in your knees and/or allow your heels to come off the wall slightly. This is also a really intense exercise for your shoulders. It can help to alternate extending one leg upwards at a time in order to take some of the pressure off your shoulders if it starts to get too intense.

Grace Kavadlo Handstands

Face-the-Wall Handstand
Similar to the L-to-the-wall, begin in a push-up position with your heels against the wall, then start crawling your feet up and walking your hands in. This time, the idea is to get the entire front of your body pressed flat against the wall. When you reach the wall, tuck your chin to your chest, tense your glutes, squeeze your quads, point your toes and engage your abs. Think about lengthening your body as much as possible by actively shrugging your shoulders, pressing into the ground and reaching your legs upward.

You can ease into this variation by walking in as close to the wall as you feel comfortable and then walking back out. Gradually you will build the strength and confidence to bring your hands all the way the wall.

Grace Kavadlo Handstands

Upside Down and Inside Out
From an overall health perspective, inversions have a lot more to offer than strength or skill alone. Due to the effect gravity has on the body, practicing inversion holds can be beneficial for the circulatory, lymphatic, and nervous systems. Your body has many valves and veins all transporting lymph fluid, nutrients, and blood constantly. By inverting yourself, you are in essence helping these natural processes by encouraging venous return from the lower extremities back to your heart, brain, lungs, and lymph nodes. As such, there are many folks in the yoga community who consider handstands to be the fountain of youth, so don’t neglect them!

See you on the flip-side, ninjas!

Grace Kavadlo Handstands

****

Grace Kavadlo is a PCC Team Leader, personal trainer and group exercise instructor located in New York City. She is a columnist for Bodybuilding.com and can be seen in several Dragon Door books, including Coach Wade’s Explosive Calisthenics. For more information about Grace, check out her website, www.DieselGrace.com

Filed Under: Progressive Calisthenics, Tutorial Tagged With: calisthenics, Grace Kavadlo, handstand, handstand tutorial, handstands, how to, wall handstand variations, wall handstands

Primary Sidebar

Featured Products

previous arrow
GetStrongBookCover
ConvictConditioningBookCover
StreetWorkoutBookCover
ExplosiveCalisthenicsBookCover
StrengthRulesBookCover
next arrow

Categories

Progressive Calisthenics Certification Logo
Click here for more information or to register for the PCC workshop

Get Strong Workouts TriadXP App
Get Strong Workouts App

Recent Posts

  • Top 5 Reasons Why an In-Person Workshop is the Best Way to Supercharge Your Training
  • HYBRID STRENGTH TRAINING IS HERE!
  • My Calisthenics Journey to the PCC
  • The Handstand Press: Complete Control Through the Handstand
  • The Get Strong App is Here!

Dragon Door Publications

Dragon Door Publications

Recent Comments

  • bross dandon on The Case for Curved Handstands
  • Johnny Flewellen Jr. on Strength for Life
  • Dan Earthquake on The Pursuit of the Daily Minimum
  • Johnny Flewellen Jr. on The Pursuit of the Daily Minimum
  • Johnny Flewellen Jr. on Yoga, Calisthenics and the Journey of a Lifetime
FOLLOW US ON TWITTER!

Copyright © 2025

Dragon Door Publications / The author(s) and publisher of this material are not responsible in any manner whatsoever for any injury that may occur through following the instructions or opinions contained in this material. The activities, physical and otherwise, described herein for informational purposes only, may be too strenuous or dangerous for some people, and the reader(s) should consult a physician before engaging in them.