• Skip to main content
  • Skip to primary sidebar
  • Home
  • Contributors
  • Resources
    • Q&A with Paul “Coach” Wade
  • Workshops
  • Products
  • Forums
  • Articles
  • Blogs
    • RKC Blog
    • Strong Medicine Blog
  • Archives

PCC Blog

Progressive Calisthenics - The Official Blog for the PCC Community

handstands

Five Ways to Fast Track Your Freestanding Handstand

November 22, 2016 By Matt Beecroft 18 Comments

Al Kavadlo handstand beach

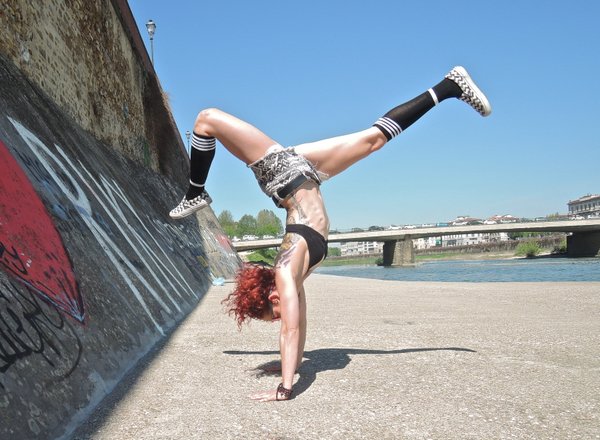
As an adult you’ve decided to embark on an inversion and hand balancing journey. Seriously, are you crazy?

If you think about it, children with amazing mobility, breathing, reflexive stability and perfect natural movement still can take 18 months to learn how to stand on their feet. And you have decided that you want to balance on your hands!  Are you out of your mind?

Read ahead, because I am too.

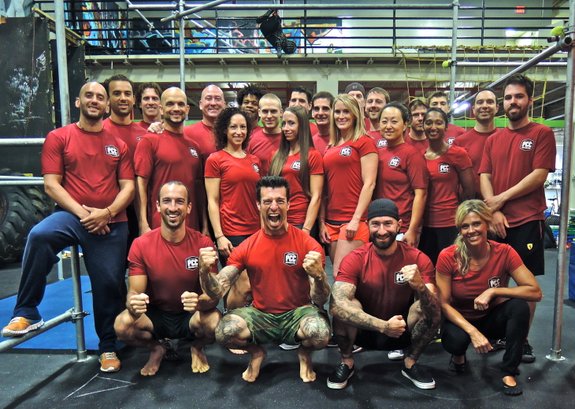
At 40 something years of age, 6 foot 3 inches and 90 kilograms (hardly genetically blessed to do anything in the calisthenics or gymnastics arena), I decided to do the same thing. Yep, I looked at what someone else was doing, and said to myself, “that looks like fun, if they can do it, I can.” That was on my first Progressive Calisthenics Certification or PCC in the US back in 2013 with the infectious spirit and great vibes of Al and Danny Kavadlo. I was hooked.

But little did I know of the journey I had decided to undertake.

Unlike a lot of other adults who embark on achieving the freestanding handstand, I wasn’t exposed to gymnastics as a kid, nor did I have friends into gymnastics. I also wasn’t a kid that spent time cartwheeling with my mates in the park. So let’s just say inversions and hand balancing were completely foreign to me until I started playing around with my first crow pose at the PCC in 2013.

Zip, zero, nothing, nada.

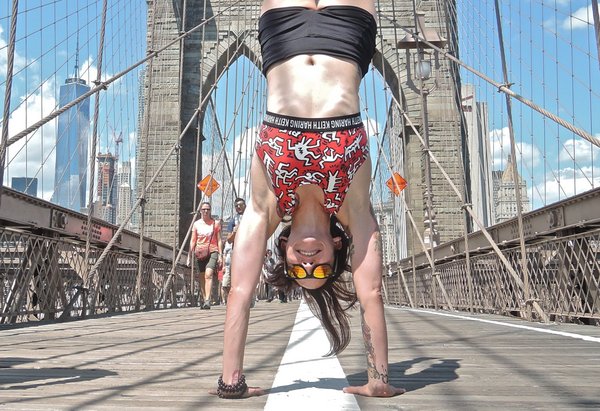
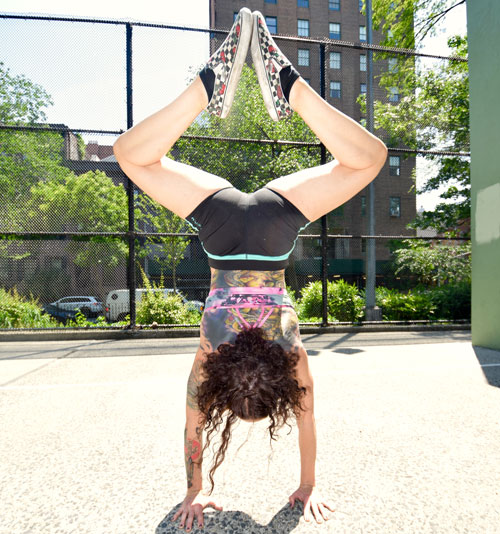
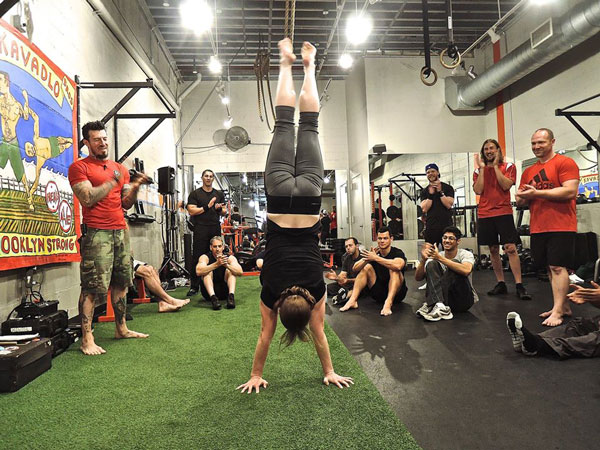
What do I love about the handstand?  Everything gets better from learning how to handstand.

Whilst nailing your freestanding handstand may be the long term goal (and it’s so sweet when you finally get there!), the journey is where the real gold is. Improved strength and mobility in the hands, wrists, shoulders and thoracic spine, as well as improved proprioception are just some of the physical attributes developed.

The mental aspects however, were more surprising to me. Overcoming my fears of falling, being upside down or simply self-preservation were surprising, considering my background as an Expert Level 2 Krav Maga instructor and Muay Thai coach. I think I was more comfortable being punched in the head rather than landing on it. It also taught me how impatient I was, and a lot about perseverance and persistence. Some days you will feel great and find your balance without much trouble. Other days, it just won’t be there. The handstand can be an elusive beast.  The handstand was a reminder to me about attitude, and how just turning up and doing the work is where it’s at.

Though I could write further about my journey, what’s more important is that I have been successful in helping others, some in their forties as well, achieve their first handstands in a relatively short time. Repeatable, expedited results with others as a coach, is what I endeavor to achieve

So here are 5 tips that will help you fast track your way to your first freestanding handstand.

1. Volume: Do the work

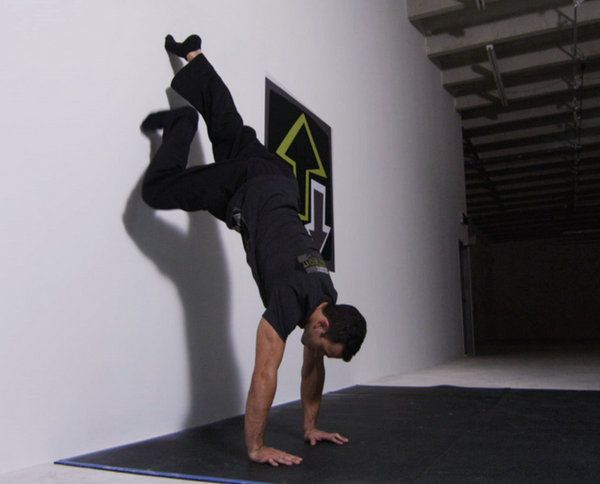
It maybe not what you want to read, but you have to do the work. Regardless of the discipline – calisthenics, circus, yoga or gymnastics, the best hand balancers do it most days of the week. Hand balancing is a very specialized skill. Regardless of my time spent with the Kavadlos on my handstand journey or engrossing myself in material from other experts in the field, they all advocate the same thing: volume. Many serious advocates will say to practice 5 days a week, though I’ve found that following a structured program just 3 days per week for an hour had a few of my students hitting their freestanding handstands in just 6 months with no prior experience. Repetition is your teacher. Even if it’s just cranking out a crow pose on the office floor for a few minutes, or the kitchen bench a couple of times per day, you need to spend more time, you know, balancing on your hands if you want to get good at balancing on your hands.

Grace Kavadlo Handstand variant

2. The Wrists, Hands and Fingers

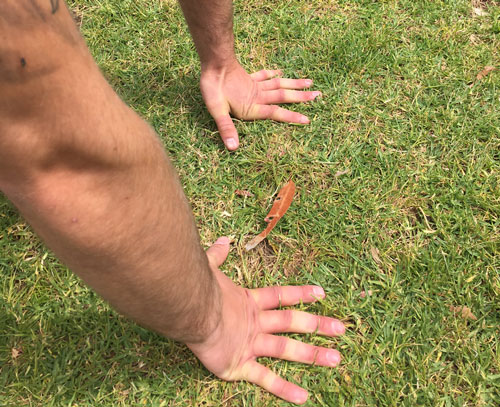
While it would seem really obvious as you are putting your entire body weight through, and making fine adjustments with your hands, wrists and fingers, I am still surprised at the number of people who don’t spend enough time looking after these areas. Adequate time must be spent mobilizing and strengthening these areas properly. The most common complaint when working any handbalancing is soreness of the wrists, and though it will certainly take time for your joints, muscles, tendons and ligaments to adjust to the load, you still need to spend time looking after those areas every session.

For me personally, the “first knuckle push-up” is one of the most important drills in my warm up.  Having the fingers spread, index fingers pointing straight ahead, shoulders above the wrists and in a kneeling or push-up position, raise the heel of the palm while keeping the knuckles and fingers on the ground, with a 4 second lowering eccentric on each rep for 3 sets of 10-20 reps. And if you have a problem getting good ROM because your knuckles are all banged up from hitting stuff, it can be assisted by using your other hand to anchor or press your fingers and knuckles down whilst you raise the heel of the palm off the floor.
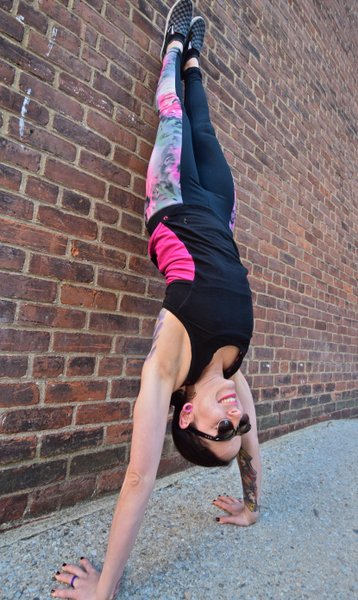
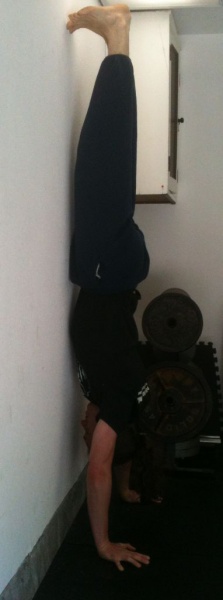
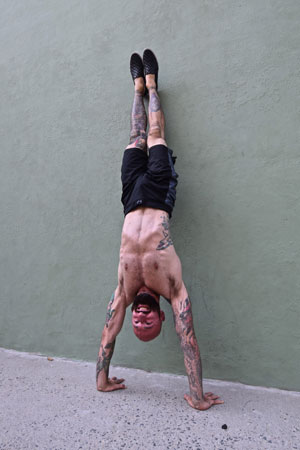
handstandhandplacement3

3. Face the Wall

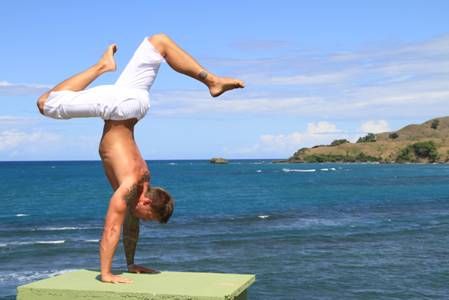
Facing the wall handstands are an absolute necessity if you want to achieve a great handstand. While facing away from the wall also has its advantages, facing the wall helps to achieve a straighter looking handstand and a nicer “line” or shape. About 50 years ago circus performers and strongmen performed mainly “banana back” or arched back handstands, but with the advent of modern gymnastics aesthetics, artistry and scoring criteria, it’s meant that the straight line handstand with the toes pointed is often the preferred method. Try working up to 5 sets of 45s-60s holds thinking about your “shape” or “line”. That usually means hands a few inches from the wall, shoulders open, the rib cage pulled down to a posteriorly rotated pelvis with the chest and hips against the wall.

Patrick Madigan handstand towards wall

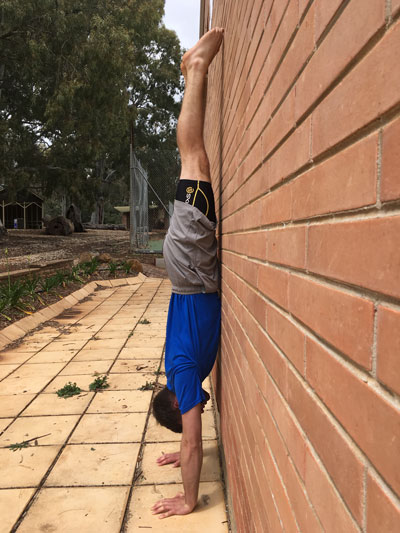
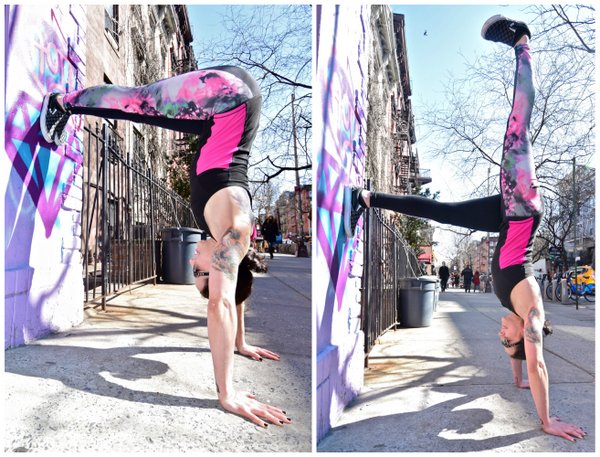
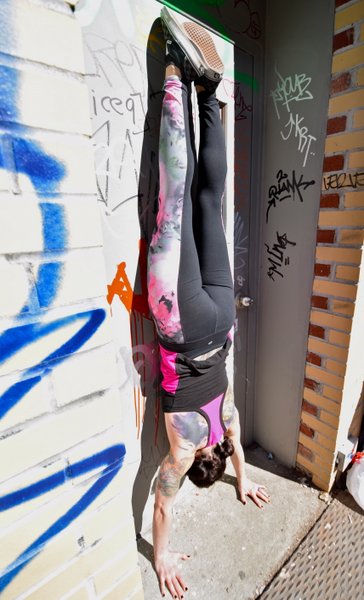
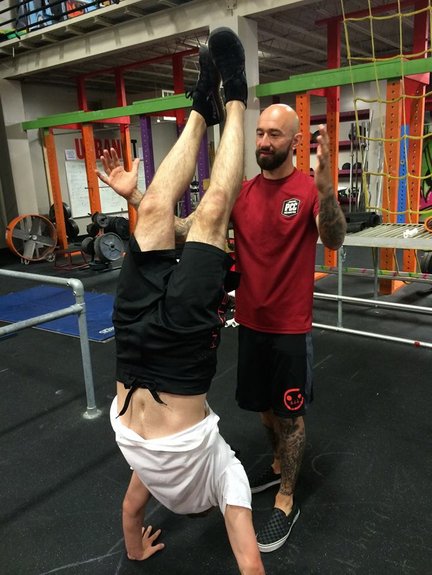
4. Don’t Face the Wall

I am totally going to contradict myself both with this point and the next, but hear me out. One of the few drills that will really help you start to build the strength and motor control required in the hands is the heel pull. This is done facing away from the wall with your hands roughly a foot away. Gently kick up to rest against the wall, then using only your fingers, hands and forearms, pull your entire body off the wall, without using your feet at all. This is the most important point – do not use your feet to push off. Besides getting an amazing pump through the hands and forearms, it will also show you where you are leaking force through your body, and require you to tighten everything up into a straight line.

When done correctly, your entire body will float away from the wall as one unit, and pull you into your handstand. This is a crucial exercise as it teaches you that you cannot use your feet to push against anything when you kick up into a freestanding handstand. The only things that can balance and stabilize you are your fingers, wrists and forearms. It is also exciting as many will feel what it is like to achieve their first handstand and it is crucial for building confidence. Work up to 15-20 sets holding your handstand for as long as possible each time. Once you hit a few handstands like this, you should feel ready to do a freestanding one!
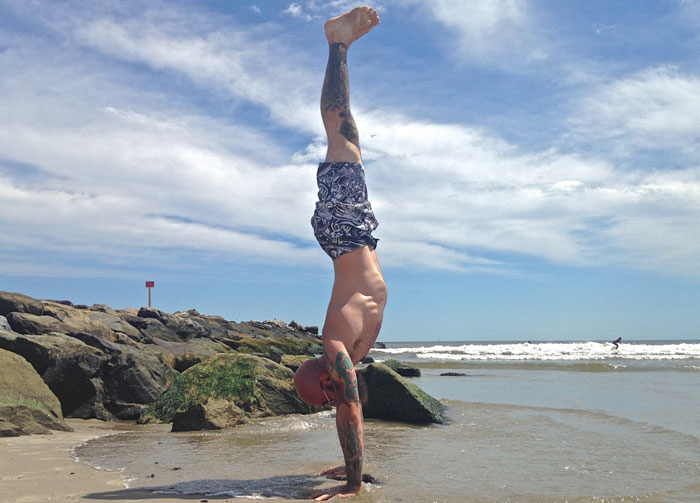
al kavadlo handstandwall5

5. Get Off the Wall

Yes, it’s another contradiction, but the wall and its security are also going to be your crux or vice if you don’t get away from it. Right from the beginning, you need to play around with just kicking up into a freestanding handstand. Children usually just play and catch on pretty quick. I know what you are going to say, you aren’t a spring chicken any more. I get it. There is the fear of falling on your head, which is why learning to cartwheel and bail out is really going to help here. The problem with the wall is that it’s there. When people practice against the wall, they usually kick up haphazardly and without any control. The issue with this is that it teaches you the complete opposite of what you need to do when finally kicking up into a freestanding one. When you kick up into a freestanding handstand, it needs to be done softly, gradually, and under control. The problem with a lot of the facing away from the wall handstand work is it teaches the total opposite of this. The wall also becomes a security blanket that people struggle to wean themselves away from. You need to get away from the wall if you ever want to hit your freestanding handstand.

Kirsty Grosart PCC handstand

****

Matthew Beecroft is a PCC Team Leader, Senior RKC, and CK-FMS certified instructor. He is also a GFM and Animal Flow instructor and Expert Level 2 instructor with Krav Maga Global and a Muay Thai coach who has trained amateur and professional Muay Thai champions. He can be contacted through his website www.realitysdc.com.au or his Facebook page facebook.com/MeetLifeHeadOn

Filed Under: Progressive Calisthenics, Tutorial Tagged With: handbalancing, handstand technique, handstand tutorial, handstands, Matt Beecroft, progressive calisthenics

Training Handstands For Strength

March 1, 2016 By Grace Kavadlo 26 Comments

Grace Kavadlo Handstands 1

When many people think of the handstand, they think of a bodyweight skill. In other words, if your goal isn’t to hold a freestanding handstand, somehow it’s not a worthwhile exercise. While learning to balance on your hands is certainly a noble pursuit, a lot can be gained from approaching the handstand from a pure strength training perspective by using a wall for support. In calisthenics, we encourage all types of isometric holds from elbow levers to L-sits. You can think of the wall handstand as just being the inverted variety.

Wall handstands take the balance element out of the exercise and are excellent for building overhead pressing strength. Practicing wall handstand holds is also a great way of building shoulder stability and increasing static strength. Handstands strengthen your triceps, delts, rhomboids, traps, and the extensor muscles of your forearms which can help build strong, healthy wrists. When you tense your entire body in a wall handstand, similar to how you would in a plank, you can also target your quads, glutes, and even your abs.

Below are 3 different wall handstand variations that you can try. Aim to hold each pose for as long as you can, ideally working up to one full minute. It’s not uncommon to feel dizzy or slightly disoriented after performing long holds, so ease in slowly and rest as needed between efforts.

Back-to-the-Wall Handstand
This is a great place to start if you are new to handstands. Begin by facing a wall with both hands on the ground, your front knee bent and the other leg extended behind you. Hop off your bent leg and reach your extended leg towards the wall. It may take a few hops before you finally hit the wall. Make sure your arms are straight with your elbows fully extended. A common mistake beginners tend to make is to bend their elbows as they kick up which makes them fall on their head and never want to attempt a handstand again. Remember “when the elbows bend, the power ends.”

Once you’re up, allow your head to relax between your shoulders as you actively press into the ground. It is normal to have a slight arch in your back when you are practicing this exercise, but aim to minimize this pressure on your low back by actively squeezing your glutes, engaging your abs and pushing your head and chest through your arms. When you’re ready to come down, release one leg at a time back to the ground, doing your best to land gently.

Grace Kavadlo Handstands

L-to-the-Wall Handstand
Begin in a push-up position with your heels touching the wall behind you. Slowly begin to crawl your feet up the wall as you fold at the waist, walking your hands in closer until your hips are aligned above your shoulders. Your body will wind up in an inverted capital letter L-shape. It may help to have a pair of eyes on you to let you know when you are in position, as it can be hard to tell at first.

In addition to upper body strength, there’s a lot of flexibility needed in your hamstrings to fully extend your legs. If you don’t have the mobility to achieve a full lockout, you can practice with a slight bend in your knees and/or allow your heels to come off the wall slightly. This is also a really intense exercise for your shoulders. It can help to alternate extending one leg upwards at a time in order to take some of the pressure off your shoulders if it starts to get too intense.

Grace Kavadlo Handstands

Face-the-Wall Handstand
Similar to the L-to-the-wall, begin in a push-up position with your heels against the wall, then start crawling your feet up and walking your hands in. This time, the idea is to get the entire front of your body pressed flat against the wall. When you reach the wall, tuck your chin to your chest, tense your glutes, squeeze your quads, point your toes and engage your abs. Think about lengthening your body as much as possible by actively shrugging your shoulders, pressing into the ground and reaching your legs upward.

You can ease into this variation by walking in as close to the wall as you feel comfortable and then walking back out. Gradually you will build the strength and confidence to bring your hands all the way the wall.

Grace Kavadlo Handstands

Upside Down and Inside Out
From an overall health perspective, inversions have a lot more to offer than strength or skill alone. Due to the effect gravity has on the body, practicing inversion holds can be beneficial for the circulatory, lymphatic, and nervous systems. Your body has many valves and veins all transporting lymph fluid, nutrients, and blood constantly. By inverting yourself, you are in essence helping these natural processes by encouraging venous return from the lower extremities back to your heart, brain, lungs, and lymph nodes. As such, there are many folks in the yoga community who consider handstands to be the fountain of youth, so don’t neglect them!

See you on the flip-side, ninjas!

Grace Kavadlo Handstands

****

Grace Kavadlo is a PCC Team Leader, personal trainer and group exercise instructor located in New York City. She is a columnist for Bodybuilding.com and can be seen in several Dragon Door books, including Coach Wade’s Explosive Calisthenics. For more information about Grace, check out her website, www.DieselGrace.com

Filed Under: Progressive Calisthenics, Tutorial Tagged With: calisthenics, Grace Kavadlo, handstand, handstand tutorial, handstands, how to, wall handstand variations, wall handstands

PCC DC – A Historic Occasion

July 15, 2014 By Al Kavadlo 33 Comments

Al Kavadlo and Danny Kavadlo at the Washington Monument

Last weekend my brother Danny and I visited our nation’s capital en route to our latest PCC event in Alexandria, Virginia. Between touring sights like the Washington Monument and witnessing so many historic PCC firsts, it was a weekend I will never forget!

As is always the case with the PCC, calisthenics enthusiasts from various backgrounds and disciplines gathered together to hone their bodyweight skills, draw inspiration from one another and push their limits to set new personal achievements.

Every time we do a Progressive Calisthenics Certification, it’s a whirlwind of a weekend and I can’t believe how quickly it’s all over. But like the old saying goes, time flies when you’re having fun!

Time was not the only thing flying at last weekend's PCC!
Time was not the only thing flying at last weekend’s PCC!

The caliber of athletes attending the PCC continues to impress and amaze me. We had so many incredibly strong individuals gathered together in one room that the collective energy was off the charts! The number of firsts that took place was truly awe inspiring.

A First Muscle-up at the DC PCC
There’s no better feeling than the satisfaction of getting your first muscle-up!

For the first time in Progressive Calisthenics Certification history, each and every PCC candidate who took on the Century test met the challenge and earned their ranking to become an official PCC instructor. The collective energy amongst this group was so intense, once the Century momentum got going, it was unstoppable!

In addition to the unprecedented passing rate, we also saw lots of first muscle-ups, first back levers, first handstands and other groundbreaking achievements. Many a plateau was destroyed. It really felt like there was magic in the air!

Al Kavadlo Spotting a Handstand at the DC PCC
Calisthenics magic!

In fact, I even achieved a personal best myself! I did what I’d consider my cleanest, slowest muscle-up I’ve ever done. Or at least the best one I’ve gotten on video!

Notice that I am rolling my hand slowly over the bar rather than beginning with a false grip, which adds an extra challenge. Thankfully the bar is relatively thin!

Congratulations to all the newly certified PCC instructors! Knowing that this group will be out there spreading the word about calisthenics and changing lives in the process is a wonderful feeling.

There are currently PCC events planned in 9 different cities over the next several months. I hope to see YOU in the next group photo!

We’re Working Out!

-Al

Group Photo at the July PCC in Washington DC

***
Al Kavadlo is the lead instructor for Dragon Door’s Progressive Calisthenics Certification. Recognized worldwide for his amazing bodyweight feats of strength as well as his unique coaching style, Al is the author of four books, including Stretching Your Boundaries, Raising The Bar: The Definitive Guide to Pull-up Bar Calisthenics and Pushing The Limits! Total Body Strength With No Equipment. Read more about Al on his website: www.AlKavadlo.com.

Filed Under: Workshop Experiences Tagged With: Al Kavadlo, Century Test, handstands, muscle-up video, muscle-ups, PR, Washington DC PCC Workshop

Handstands Will Make You Better at Everything

February 4, 2014 By Mike Fitch 28 Comments

Mike Fitch Handstand

Yeah, it’s a bold statement, but hear me out. The mechanics of successfully performing a handstand will amp up all of your other exercise endeavors, making you stronger, more stable, and better coordinated, while the discipline required to master the move will make you a better human being overall. It will force you to take a long, hard look at the time you are willing to invest in reaching a specific goal.  It will also allow you to win money in a bar bet, steal the spotlight at any wedding and of course get the girl (or guy). Results may vary on the last three.

For thousands of years, athleticism has been demonstrated through feats of bodyweight strength and skill, with fit individuals judged not just by their bodies’ tone, but by how skillfully they could use their bodies.  Even in the golden age of bodybuilding, Arnie and the boys were known to challenge each other post workout with hand balancing and bodyweight strength contests.  We then saw a lull in these activities, with the popularization of the fixed-axis weight-lifting machine and single-plane isolation “robot training,”  but luckily for you and me (and the human race), the idea of skills practice and self-mastery is making its way back into fitness.

My favorite field, progressive bodyweight training, includes a multitude of exercises that are always sure to elicit an envious “I’ve always wanted to do that!”  Pistol squats, muscle-ups, human flags, HAND BALANCING – these moves are sure to catch the eye of any fitness enthusiast.  And the great thing is that any of these feats are possible to learn with the proper progression training, time commitment, and, most importantly, consistency.

Just as it takes a baby about 12 months of daily conditioning and practice to eventually stand on their own, it can take an adult months or years of repeated practice to build the neural grooves associated with a perfect handstand.  Are you willing to invest that kind of time?  I can guarantee that it will be one of the most humbling and gratifying journeys that you’ll experience.

While performing a great handstand is certainly a worthy goal unto itself, you’ll find that the skills you build in the process will transfer over into your other training, making you a better athlete and enhancing your quest toward a better body. Here are some examples of the tremendous carry-over you’ll see:

The Kinetic Chain

Let’s start with a simplified definition of the very complex concept of the kinetic chain: everything in our body is connected to everything else.   A handstand is a prime example of the connectivity of the kinetic chain, with each position, alignment, and movement requiring constant communication and neuromuscular efficiency in order to maintain that perfect balance. If just one thing changes during our hand balance, such as flexing our toes instead of extending them, then our body must immediately adjust to this new shift. 

Hand balancing is, obviously, performed on your hands, so that’s a great place to start thinking about how everything is connected.  Your fingers are some of the densest areas of nerve endings on the body, and have the best tactile feedback and positioning capability. Kicking up into your handstand initiates a sort of neuromuscular “super highway,” with all of those little finger receptors sending and receiving information throughout the body.  Your body’s communication must be perfectly orchestrated to keep you in balance, like a super effective emergency dispatcher taking calls, sending reinforcements, and keeping you safe (aka preventing you from crashing onto your head.)

The body has to adjust to the hand placement in relation to the shoulders; to the elbows being over the wrists but under the shoulders; and the hips, where are the hips in relation to the shoulders?; and it goes on.   So if we do this efficiently, and amp up our body’s abilities to communicate and make minute adjustments in a flash, you may already see how handstand training can benefit other athletic goals. But, I promised that handstands will make you better at everything, so let’s keep on going. 

Al Kavadlo Performs a Handstand

 Internal Tension

A tense body is a strong body.  Why is it so easy to balance a ruler or a bat vertically on your hand? Because the object is rigid, with no bends or “leaks.” Whether you are lifting your own body or grinding out a 1000 pound deadlift, the concept is the same – you need to create a rigid structure from which you can pull, push, lift or balance.  In Progressive Calisthenics, there is no room for any part of your body to lose connection or leak tension, and you learn very quickly about any leaks in your chain.  Mastering total body tension will not only accelerate your handstand training, but will be directly applicable to most of your other training as well.

 Grip Strength

In addition to “tense the whole body,” you’ll hear a lot of HB coaches tell you to “grip the ground.”   In our foot we have the luxury of a heel which plays a clever game of leverage to make walking and standing fairly easy tasks. Unfortunately, we don’t have the same advantage in our hands. So, the fingers must DIG into the ground, countering the body’s tendency to over balance (topple over), or let up to counter an underbalance.  It’s this constant battle between the finger extensors and flexors trading off between the rolls of agonist and antagonist that keeps us upright.   And along the way you’ll be conditioning for some brutal forearm strength.

Shoulder Stability

Few exercises can compare to a handstand for building shoulder stability. And let’s face it, nobody is going to be staring in amazement while you’re performing more band internal/external shoulder rotations.

 The shoulder – so incredible, so complex, and so commonly abused – can be an important source of power, but also a source of hidden weakness impacting your training in ways you don’t even realize.  Over repetition syndrome, poor form, and especially faulty postures can create imbalances that lead to injury or instability. But even if you don’t feel pain, if your body senses a weakness in the shoulder, it will automatically restrict the amount of power passing through that joint, and can actually dial down the surrounding muscle excitation.  I’m going to assume that everyone would rather be tapping into all of their strength for their efforts. As the saying goes, “you can’t shoot a cannon from a canoe.”

In Hand Balancing, the shoulder is the first line receiving all of that information from the sensors in the hands and forearm musculature, reacting to the head and hands below and the rest of the body above.  The muscles at the shoulder joint have to fire up like a synchronized light show to adjust to the constantly changing center of gravity over such a limited base of support, from the deeper muscles like Supraspinatus, Infraspinatus, Teres Minor, and Subscapularis (rotator cuff), to the bigger and more powerful Lats, Pecs, and Delts.  Even with the elbow completely locked, the heads of the Bicep and Triceps that cross the shoulder joint play a role in stabilizing the shoulder.  And that’s not even mentioning the other muscles that keep your Scapula strapped to your back.

 Simply put, handstands will make you stronger through increased activation and stabilization.

Free Standing Handstand

Spinal Stabilization

Handstands require not just spinal, or core, stabilization, but true multi-planar stabilization involving inversion of the body.

 Now, I realize there are many views on spinal stabilization and some debate over its efficacy and “functional” carryover to life or sport  (“You have to draw in to activate TVA!”  “No, bracing is the only way!”  “Let’s fight!”).  But we can probably all agree that the surrounding musculature of the spine (ie the core) needs to be able to properly stabilize to protect the spinal cord, and that the spine needs to be able to fight gravity’s constant pull, distributing the load while generating force and, more importantly, accepting external forces (whether that’s gravity, or a linebacker). It flexes, extends, rotates, laterally flexes and in the case of the handstand, stays perfectly still, and STABLE. 

When we are upright, we know that the core musculature should be firing to allow for gait pattern as in walking or running, or bending over to snatch up a kettlebell. But get inverted and everything changes.  The anchor or base is now the shoulder girdle, sitting on top of those mechanically disadvantaged hands. So now the spinal stabilizers have to figure out how to balance the pelvis over the shoulders, with the big legs riding on top.  This is true multi-planar stabilization! In a hand balance, all of the spine’s muscular units have to play their part to keep the spine in perfect alignment – i.e. spinal stabilization.

GETTING STARTED: TUTORIAL

I am constantly asked, “What’s the key to learning handstands?”  And there is a clear answer:  “To get good at handstands, you practice handstands.”   There is no other weighted exercise that will make you better at handstands – you just need to put in the time to practice the handstand-specific progressions and conditioning exercises. It IS skill specific training.

So here’s the part where you get to see what you’re made of.  Are you willing to put the time in to taking this challenge on? Are you ready to approach it with discipline, practicing often, even daily if necessary? You are no longer trying to merely increase your reps;  now you are working to improve yourself, master difficult skills, and achieve long-term goals.

I can tell you from my own experience that the handstand can be an allusive opponent.  I first learned an arch-back style handstand, which is common for most beginners, before I was challenged by a gymnast friend to learn the flat back style.  That process of re-educating took months! It was probably a year before I could easily switch between the two, along with other body positions, and stay up for multiple minutes. I learn more about Hand Balancing every single day and am humbled by it constantly.  I’m certainly a lot better now than I was a few years ago, and I definitely have more goals yet to reach.  It’s clear to me that it’s a life-long practice.  There’s no turning back now.

 Intro to Handstand Conditioning: The Wall-Assisted Handstand

Begin your handstand training with the simple Wall Assisted Handstand.  It may seem like the most basic conditioning exercise, but remember, a baby has to crawl before he could stand. The exercise itself is as simple as it sounds, but I have some tips to help make it wildly successful for you:

  1. First of all, you should have your front, not your back, facing the wall.  Otherwise you’re automatically training in an arch back handstand.  While the arch back is a legitimate handstand in itself, the mechanics are different and you may not get the same benefits I mentioned earlier.

  2. Follow these steps to get yourself safely into place:   Start by facing away from the wall. Bend forward and place your hands on the ground at roughly shoulder width.  Place your feet on the wall and walk them up until the body is elongated.  Walk your hands towards the wall until they are about 6 inches or so away from the wall (this may vary – just find a distance that feels comfortable psychologically).  The toes should be pointed with the top of the foot flat on the wall.

  3. Once in position, SET the body:  Grip the ground with your fingertips.  Lock the elbows completely, driving down into ground, creating as much space as possible between your toes and the ground.  When you successfully fire the traps, the space between your ears and shoulders will close.  Squeeze the glutes and quads, and draw in or brace the abdominal wall. Make sure not to hinge at the hips.

  4. Don’t forget to breathe!

  5. Time yourself to see how long you can hold this perfectly tensed handstand.  Your goal is to first work up to one minute, then two. Once you can hold for two minutes, begin bringing your hands closer and closer to the wall.

  6. And here’s an important Bonus Tip:   If you’re not used to twisting or summersaulting out of a handstand, be sure to leave enough strength to get back DOWN the wall!

Wall Walking Handstand

Expect to be humbled by this isometric conditioning.  But keep up with your handstand practice, and it will absolutely fast track your way to being better at EVERYTHING!

For more information on Hand Balancing, check out our new 5-part video series, Hand Balancing for the Bodyweight Athlete, available as downloads or on DVD.

Mike Fitch is the Founder/President of Global Bodyweight Training, a fitness company providing training, education, and promotion of bodyweight training disciplines, as well as creator of the popular Animal Flow program. Mike’s current interests lie in exploring how bodyweight training disciplines can be integrated with skills-based practices, and multi-planar, fluid movement. He’s been featured in Men’s Health, Shape, and Fitness Magazine, as well as on The Doctor’s, Good Morning America, and LIVE with Kelly and Michael.

Filed Under: Progressive Calisthenics Tagged With: carryover, coordination, hand balancing, handstands, Mike Fitch, progressive calisthenics, skill training, strength training

The Case for Curved Handstands

December 3, 2013 By Logan Christopher 24 Comments

sig-klein-handstandAsk any gymnast or circus performer about doing handstands and they’re likely to tell you that a straight handstand is the only way to do it. It’s the perfect form, and anything else is wrong.

I disagree! Let me tell you why.

Recently on this site was an article all about the straight handstand and the benefits of doing them in that manner. I don’t disagree with those points, but wanted to give a different opinion on why the curved handstand is a viable option as well.

Are Curved Handstands Dangerous?

First off, let’s talk about the claim that doing a curved handstand is going to hurt your back. Just like anything else, it can happen, but if you’re smart about it, they’re completely safe.

I think this myth is simply a result of people doing straight handstands for other reasons, and then not knowing why that is the case.  To think that bending your spine is going to hurt you is ridiculous.

Push too far with bridging exercises and you can tweak your back, but doing them right you’ll develop more flexibility and strength.

When doing a handstand if you let gravity just pull your legs over without maintaining any core tightness, it can take you into a position that you’re not ready for. Doing too much of can certainly cause you to strain your back.

Instead maintain tightness, and build up what you do over time. Just like any other exercise.

Art2 - OHBalAre Straight Handstands Necessary for Higher Level Skills?

The straight handstand can help you do harder skills but it is not necessary.

I have heard people say that you need perfectly straight alignment to hold a one arm handstand. Tell that to Professor Paulinetti, the man who basically invented the one arm handstand.

You see, old school hand balancers, did all their handstands with curves in their backs. All of them! And they pulled of amazing skills.

They treated the straight handstand as an advanced variation of the handstand. This harder skill was something to practice later on after you could stand on your hands.

Over time, hand balancers transitioned away from the curve to the straight position you see commonly today. Part of this was for aesthetic reasons. It’s more pleasing to the eye, and for things like gymnastic competitions, you’re judged on this.

Another part is that a straight handstand does help you to achieve more difficult skills. By beginning with it you can build those habits from the beginning. This is a smart thing to do if you plan on taking your hand balancing skills far.

To prove this point, in the future, I’d like to build up to the one hand handstand in a curved position like the old timers did.

What About The Beginner or Recreational Athlete?

Don’t plan to be paid to do hand balancing professionally? Not a gymnast? Would you just like to be able to hold a freestanding handstand? If that’s the case I don’t think going for the straight handstand is necessarily for you.

If you ask anyone to hold a handstand that has never done it before, what will you see? When they kick up, before they fall down almost instantly, they’ll be in a curved position.

The curved handstand is a more natural position. It takes a lot of effort to get a perfect line in your handstand because it is unnatural. To tighten the muscles as needed to form a straight line is significantly more difficult, and not to mention, it takes additional shoulder flexibility, that many people don’t have.

If you choose, you can practice the curved handstand. You’re likely to gain the skill faster than someone going after a straight handstand. You’ll be freestanding in a shorter amount of time, which is of course dependent on how much you practice. Then from there you can practice other hand balancing skills and work on straightening out later if you choose.

Or you can practice a straight handstand from the beginning. It will take longer with more practice time. But once you have it you’ll be good to go onto other more advanced skills.

It is a choice you can make.

Sure, a straight handstand is better, in that it is more advanced. Just like a 315 lb. snatch is better than a 225 lb. one. But that doesn’t make the curved handstand wrong.

Reverse Handstand SideHow to Learn the  Straight or Curved Handstand

If you’re going to do handstands the starting place is against the wall. But depending on which of these two you want to go for you’re going to do them differently.

If you choose to go with the curved handstand then when doing wall handstands your back can face the wall. Kick-up into position then hold for time.

If you choose to go with a straight handstand you’ll want to face the other way. The reason for this is that this orientation forces you into a straighter position, especially as you inch your hands closer and closer to the wall.

In either style you build endurance by holding for time and maintaining your position. Then when it comes to freestanding handstands this skill set should be built in as you learn to balance out in the open.

So let’s take a poll. Do you do curved or straight handstands? Even if its just against the wall, what are you going for? Answer in the comments below.

***

About Logan Christopher: Logan Christopher has been called a physical culture renaissance man as he is accomplished in a wide range of strength skills from kettlebell juggling, performing strongman stunts, and bodyweight exercises. He is the author of numerous books including Secrets of the Handstand and The Master Keys to Strength & Fitness. In addition, he’s spent the last several years going deep into mental training to find out what it takes to really excel and tactics that can help people instantly improve their exercises. You can find out more about all this at http://www.legendarystrength.com/.

Filed Under: Progressive Calisthenics, Tutorial Tagged With: curved handstands, handstands, Logan Christopher, opposite handstands, straight handstands, tutorial

Primary Sidebar

Featured Products

previous arrow
GetStrongBookCover
ConvictConditioningBookCover
StreetWorkoutBookCover
ExplosiveCalisthenicsBookCover
StrengthRulesBookCover
next arrow

Categories

Progressive Calisthenics Certification Logo
Click here for more information or to register for the PCC workshop

Get Strong Workouts TriadXP App
Get Strong Workouts App

Recent Posts

  • Top 5 Reasons Why an In-Person Workshop is the Best Way to Supercharge Your Training
  • HYBRID STRENGTH TRAINING IS HERE!
  • My Calisthenics Journey to the PCC
  • The Handstand Press: Complete Control Through the Handstand
  • The Get Strong App is Here!

Dragon Door Publications

Dragon Door Publications

Recent Comments

  • bross dandon on The Case for Curved Handstands
  • Johnny Flewellen Jr. on Strength for Life
  • Dan Earthquake on The Pursuit of the Daily Minimum
  • Johnny Flewellen Jr. on The Pursuit of the Daily Minimum
  • Johnny Flewellen Jr. on Yoga, Calisthenics and the Journey of a Lifetime
FOLLOW US ON TWITTER!

Copyright © 2025

Dragon Door Publications / The author(s) and publisher of this material are not responsible in any manner whatsoever for any injury that may occur through following the instructions or opinions contained in this material. The activities, physical and otherwise, described herein for informational purposes only, may be too strenuous or dangerous for some people, and the reader(s) should consult a physician before engaging in them.