• Skip to main content
  • Skip to primary sidebar
  • Home
  • Contributors
  • Resources
    • Q&A with Paul “Coach” Wade
  • Workshops
  • Products
  • Forums
  • Articles
  • Blogs
    • RKC Blog
    • Strong Medicine Blog
  • Archives

PCC Blog

Progressive Calisthenics - The Official Blog for the PCC Community

stretching

Never Stop Learning: My Top 3 Training Tips

August 11, 2015 By Corey Howard 21 Comments

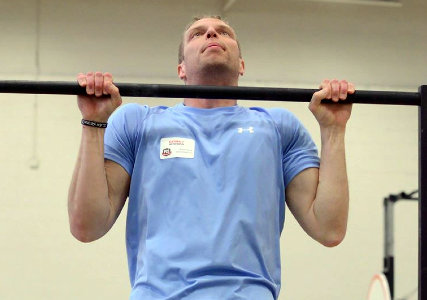
Corey Howard Pull Ups

At the age of 41, I can honestly say I’m still learning something new all the time.  There is no straight path to success; it is a crooked and curvy line.  I’ve learned some lessons the hard way in my training, but each setback yields another opportunity to refine my craft.

Here are 3 of the most valuable lessons I’ve learned (and relearned) throughout my time as a trainer and fitness enthusiast:

1. Work Your Legs and Glutes

If you were to look through my training log over the past year, you would see most of my workouts are focused on my lower body.  Unfortunately, this is due to having ruptured my triceps and biceps in the last year, but honestly it’s been the best thing ever.  Even when my upper body has been healthy, I still make my lower half 60-70% of my focus… EACH time I train! Most people would hate this because it’s so physically taxing but focusing on your lower half improves your testosterone levels, builds lower body muscle which helps burn more fat, improves stability in your midsection, improves mobility and helps create more explosive power for sprints and jumps. You just can’t ignore pistol squats, shrimp squats, bridges, lunges, hyperextensions or anything else that puts a beating on your lower half.

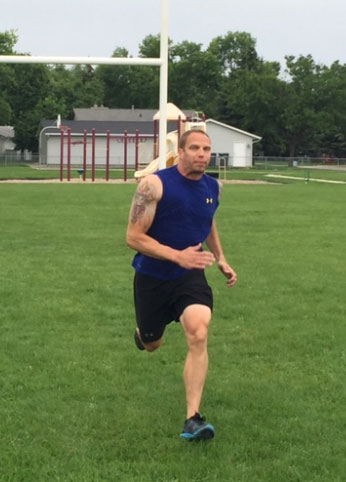
Sprinting is also a fantastic way to work your legs with only your bodyweight.  If you truly want to feel the benefit of sprints, don’t sprint on a treadmill! The treadmill takes away from you actively creating force.  Get outside and make your legs plant and propel you forward. Training outside is awesome, and running as fast as you can for a short period is even better. Again, the research on sprint work is off the charts (Coach Wade talks about it as a finisher in his book C-Mass). Sprints will thoroughly cook your lower half quickly and effectively, plus they help build size and burn fat at the same time.  So get out and sprint 20, 30, 40 or 50 yards, in a field, through a parking lot, or up a steep hill. No matter where you do it, make your body move as fast and explosively as you can once or twice a week.
Corey Howard Running

2. Refine The Basics Using Regressions

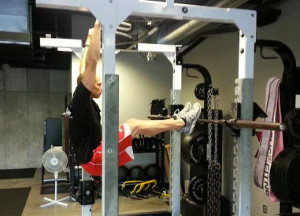
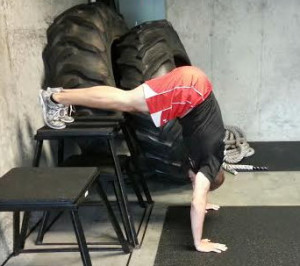
Two of my favorite exercises are jackknife pull-ups and pike push-ups.  These two are simply amazing for adding size in the lats and shoulders, plus they give you a chance to perfect your pulling and pressing groove. The jackknife pull-up has really helped me re-learn pull-ups.  It’s given me a chance to work on my height at the top as well as given me an opportunity to work various grips without completely loading my freshly repaired elbows. The pike push-up has done the same thing; given me a chance to work on various pressing widths as well as practice my groove.  Don’t scoff at either of these; pairing these two for 5 alternating sets each will leave your lats, shoulders, and triceps feeling it the next day.

Corey Howard Jacknife Pull-Ups
Corey Howard Pike Push Ups

3. Stretch!

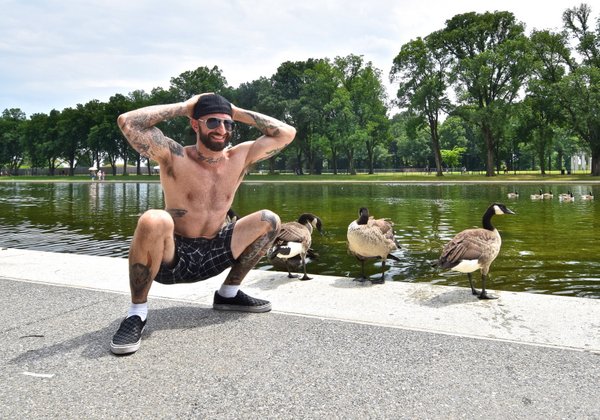
When I was younger, I mistakenly thought that stretching was a waste of time. Now that I’m older, if I don’t stretch out I’m practically crippled the next day. If you stretch the working muscle group in between sets it not only speeds up recovery but some studies have shown it helps with hypertrophy too.  A healthy person should be able to comfortably squat below parallel with their hands behind their head.  If you can’t physically do this, you need to spend some time working on your movement quality.  I don’t know everyone’s personal movement issues or pains but if I could suggest a few areas to spend some time stretching out: the ankles, hips, shoulder complex and neck.

I’m not going to tell you to spend an hour on this every day, but 10 minutes before and after your workout is a great start.  For the ankles, find a step and stretch out your Achilles.  If your ankles can move appropriately then chances are your knees will move and feel better.  For the hip complex, I’d strongly suggest the pigeon for your glutes and the half kneeling hip flexor stretch.  Healthy hip mobility will allow the body to stabilize itself and let your hamstrings and low back relax.  As for the shoulder complex, I like to use a stretchy band hanging from a pull-up bar.  Hinge yourself forward and let the band pull your arm forward stretching through the lats, then turn around and let it pull your arm back to open up the chest.  Healthy shoulder movement will also help the body stabilize and improve your posture.  Finally some simple head nods and slow rolls will go a long way to ease tension.  Again, this is very elementary but just making time for this will be a great start. For more information, I recommend Al Kavadlo’s Stretching Your Boundaries.
Al Kavadlo Overhead Squat

Tony Robbins once said, “The secret to success is learning how to use pain and pleasure instead of having pain and pleasure use you.  If you do that, you’re in control of your life.  If you don’t, life controls you.”  I have chosen to use my pain as speed bumps or opportunities to improve.  I can’t stress it enough: train your lower body three times each week, get outside and run like you’re fleeing the scene, don’t be afraid to take a step back to refine the easier progressions, and stretch out!  It will pay huge dividends on the harder stuff.  Fire it up!


***

About Corey Howard, PCC, RKC, CK-FMS: Corey Howard strives to constantly become stronger, and to help others to achieve their fitness goals. He is the owner of Results Personal Training, and can be reached at fithubby.com, resultsptonline.com or coreyhoward.com.
Filed Under: Progressive Calisthenics, Tutorial Tagged With: Corey Howard, glute training, leg training, regressions, stretching

Simplicity and the Pragmatic Practice of Calisthenics

June 16, 2015 By Silvio Bauer 19 Comments

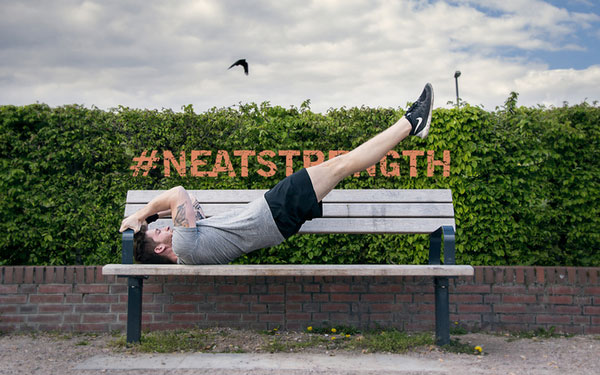
Silvio Bauer Dragon Flag

It is 6 o’clock in the evening. I’ve just come home from work. I slip out of my shoes and take off my backpack. I quickly get into the kitchen, pour myself a glass of water and drink it.

I head to my bedroom to change into a pair of comfortable shorts and a simple t-shirt. On a piece of paper, I briefly note four words: Muscle-ups, dragon flags, shrimp squats and handstands. I get my keys as well as the piece of paper and a pen.

Outside of the house, I start running at a steady pace. At this point, I’m already shaking off the worries of my day. I feel totally liberated, because for the next hour, all I need to focus on is the movement of my own body. Nothing can distract me. As I’m running, I’m getting further and further away from my phone, my digital leash. I soak in the environment.

In about 5 minutes, I stand before two pull-up bars. One of them I can only reach with a slight jump. My heart rate is already elevated from the run. The movements I’m about to practice will work pretty much every major muscle group, so I prepare for it accordingly.

First, I do some joint rotations for shoulders, hips, knees, ankles. I combine this with dynamic stretches like toy soldiers, arm circles and leg swings to prime my muscles.

The exercises I previously scribbled on the piece of paper are the exercises I will put my focus on today. I split them into two groups, muscle-ups + shrimp squats, then dragon flags + handstands.

For the first “super-set”, I get down into a deep squat and simultaneously do wrist circles. I do some push-ups, get up, do side lunges and then I jump up to the bar for some pull-ups. These “easier” exercises get my blood rushing through the muscles I’m going to need for my focus exercises. I never max out on these because I want to retain my strength.

After two rounds I’m warmed up and ready to rock. After a round of muscle-ups and shrimp squats, I shake out my legs and arms. I do a warrior pose to stretch my quads and hip flexors in order to improve my mobility for the next set of shrimp squats, then some shoulder mobility to help my muscle-ups. I count 5 deep breaths. Rinse and repeat.

While I am practicing these two movements, one at a time, my goal is to maximize the precision – not the effort – of each of them. When I feel I lose control over my form, I simply stop. On my piece of paper, I jot down my reps, not to impress anybody, only as a means to record my progress and to recalibrate my focus.

After 5 rounds I go to the nearest park bench. I am more than warmed up from the first two exercises, so I immediately get on the bench and do my dragon flags. After each set, I do a few kick-ups into a handstand, count 5 breaths and repeat.

After 3 sets of dragon flags, I shift my focus solely on debugging my handstand. After 15 more minutes, I call it a day.

To cool down from my practice, I get into a back bridge and counter that stretch with a forward bend. I do this once more and then I take a leisurely walk home.

As I walk, I contemplate over the quality of my workout and what I achieved. Some moves worked well today, with some I struggled a bit more than usual. But I know that this is part of the process. With consistency, I know I will get better over time.

When I approach the front door to our house, my mind gets filled with a rush of anticipation: I am going to enjoy a delicious and nutritious home-cooked meal.

-The End

The Moral of the Tale

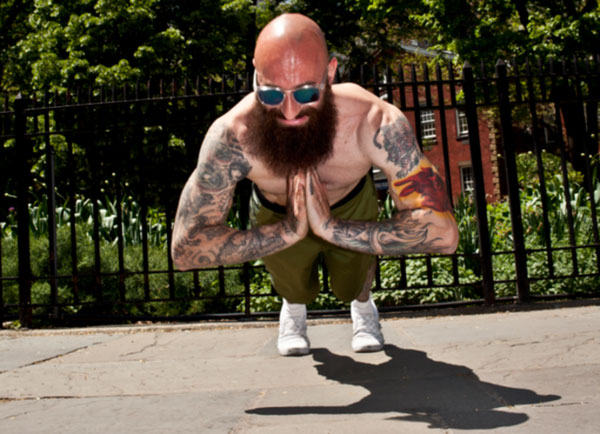
Al Kavadlo prayer pushup

This story is not to brag about how Zen my workouts are, but rather to illustrate the key concept of calisthenics: simplicity.

In Convict Conditioning, Paul “Coach” Wade explained how he used advanced bodyweight exercises out of necessity while serving time. There was just no other way to get strong and survive but with his own body.

In our superfluous world with an abundance of options, practicing calisthenics can also enhance our “inner freedom”. By limiting options (not using machines, weights, apps or other equipment), we can liberate our training from being drawn in every direction.

But in order to make progress over time, we have to consistently apply this pragmatic approach to our training. With all the excellent information available about advanced bar calisthenics or bodyweight strength built with nothing but the floor, the variety of calisthenics exercises can be quite seductive to us enthusiasts.

Only by focusing on a few movement patterns at a time, we can ensure sufficient attention to each of these moves.

There is also no need to over-complicate the process of one’s training. Warm-ups are only needed for the specific body parts that come into play in a workout. If you follow an upper/lower body split routine, there is no need to warm up your legs on your upper body day.

The same principle applies to cool-downs. Static stretches are most effectively applied to the muscle groups that were used to generate mechanical tension. Flexibility does not need to be practiced for its own sake. It serves a purpose: making it possible for you to move the way you want to move. If you want to do pistol squats, insufficient ankle mobility will limit your ability to do so. However, if pistols don’t interest you, the necessity of ankle mobility drills is questionable.

The story above most probably differs from your own. It’s not necessarily better or worse than yours, it’s simply the template I found works best for me. It is merely an example of an application of the underlying pragmatic principles that calisthenics have to offer.

Everybody has a different story. What’s yours?

Move freely.

-Silvio

****

Silvio is a full time medical engineer who loves to practise and teach calisthenics in his free time. He enjoys creating workout plans for his friends and spreads the word about PCC over at his blog, neatstrength.com. You can follow him on facebook.com/neatstrength, twitter.com/neatstrength or on instagram.com/neatstrength/.

Filed Under: Progressive Calisthenics, Tutorial Tagged With: calisthenics, calisthenics workout, flexibility, outdoor workout, Silvio Bauer, simple workout, stretching, tutorial

3 Steps to Getting “In the Zone” for EVERY Workout

February 17, 2015 By Eric Buratty 36 Comments

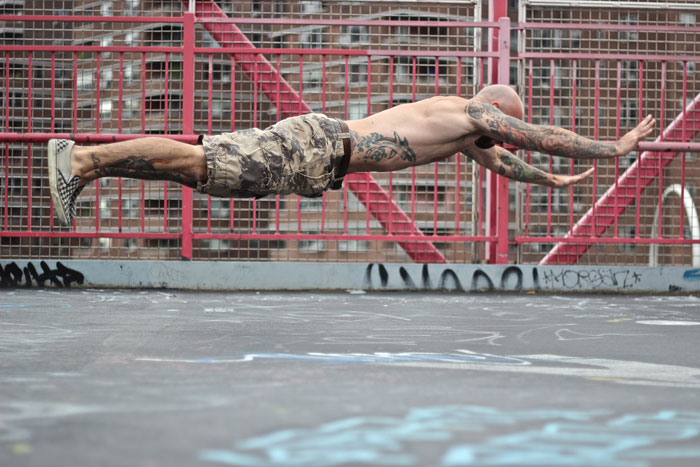
Al Kavadlo superman push-up

Want to know what it feels like to explode?

No, I’m not referring to those whack pre-workout supplements.

I’m referring to what it feels like to get “in the zone,” which naturally occurs during your superhero-like workouts. These are the moments when you look and feel deceptively stronger to the naked eye. These are the moments that ultimately allow you to push your limits.

Since we’ve all experienced those days where we feel like crap and less motivated to train, it’s time to put a cap on that mental and physical stress once and for all. Here are three steps for a stronger workout and improved recovery rate, EVERY time.

Step I: First Things First – Eliminate Distractions!

  1. Turn off your computers, mobile devices, and yes, even “high energy” music.

Responding to emails, text messages and social media notifications during the time you’ve set aside for working out is a good way to kill your training progress all together—due to their emotionally distracting capabilities. Playing “high energy” music may also upset the balance you want to achieve between feeling overly excited and feeling too calm.

  1. Turn away from all timers, stopwatches and clocks.

Reaching the highest level of performance possible during a given workout requires an attentive mind and body. Therefore, it would be silly to try and gauge your performance in the moment right in front of you if you’re too focused on beating the clock. While in a utopian-like society we would make linear progress, the mind and body simply do not work like that. So, in reality, we must respect our body’s dynamic progress capabilities without training on the nerve from elapsed time.

  1. Ditch the mirrors.

Mirrors create the illusion of space—which can sometimes be helpful in the short run for teaching body awareness. However, in the long run, too much reliance on mirrors can slow down your reaction time, affect your force and power development and interfere with your body’s natural balance and stability. These are the EXACT qualities you need to be mindful of when successfully getting in the zone

Step II: Select Your Secret Weapon – Choose a Movement for the Type of Workout You’re About to Do.

  1. Choose a Jump Variation for workouts involving more lower body volume AND for total body workouts.

Here’s a video I put together that features some fun options for you to try.

  1. Choose a plyometric Pushing Variation for workouts involving more upper body pushing volume.

This guy knows what I’m talking about.

  1. Choose a plyometric Pulling Variation for workouts involving more upper body pulling volume.

Unless you’re proficient with chest to bar pull-ups or kipping muscle ups, stick to the horizontal axis for some explosive Australian pull-ups.

Step III: Get in the Zone – Activate Your Nervous System.

  1. Regardless of what your current fitness levels are like, when you last worked out or what time limitations you may currently have, it’s imperative that you hit a warm-up that’s specific to the workout you’re about to perform. This is because the way you spend your first 5-10 minutes is the best indicator of how the rest of your workout will go. So we’re all on the same page, a solid warm-up will typically involve any of the following elements.

a) Active Stretch

Danny Kavadlo Toy Soldier
Danny Kavadlo demonstrates the “toy soldier”

b) Isometric or Dynamic Core Move (examples: plank or leg raise)

c) Lower Level Big Six Movement from Convict Conditioning for higher reps

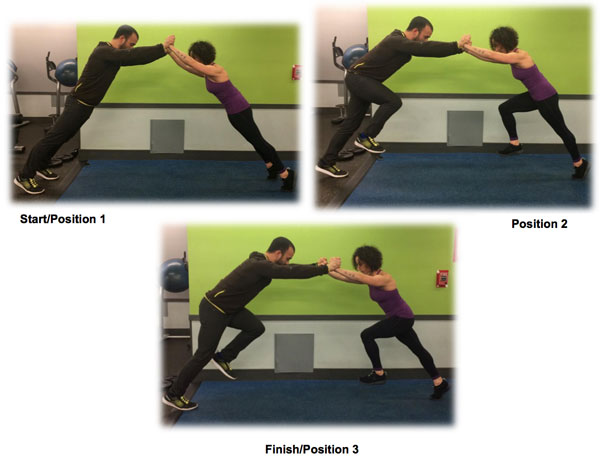
d) Lower Intensity Cardio Exercise of your choice (light jog, jumping jacks, wall or some moderately paced mountain climbers with a training partner if you have one (see below))

Angelo Grinceri & Rosalia Chann of Couples Calisthenics

If you have a training partner, some moderately paced mountain climbers for as little as 15 seconds at a time will surely warm-up your core, and get some blood flowing through your entire body. Talk about killing two birds with one stone!

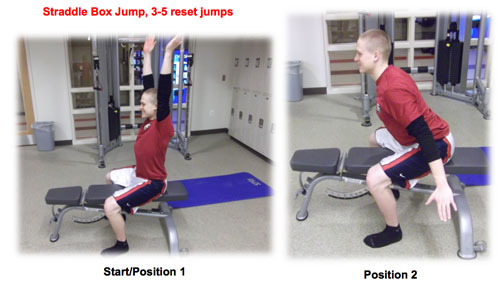
  1.  We’ll now kick up this baseline warm-up a few notches with that plyometric move you selected in Step II above. This is because, the more athletic your warm-up is, the better your chances are of putting yourself into the zone. Perform a superset between that plyometric movement and your warm-up movement(s).
  1. In order to make the plyometric movement look and feel as graceful and explosive as possible, you’ll perform 3-5 reps ONLY at various points throughout your warm-up. Ideally you’ll want to get away from counting with such few reps as this habit encourages you to train on the nerve. But that’s the approximate range for those of you who need quantitative satisfaction in the beginning.

Not sure where to start?

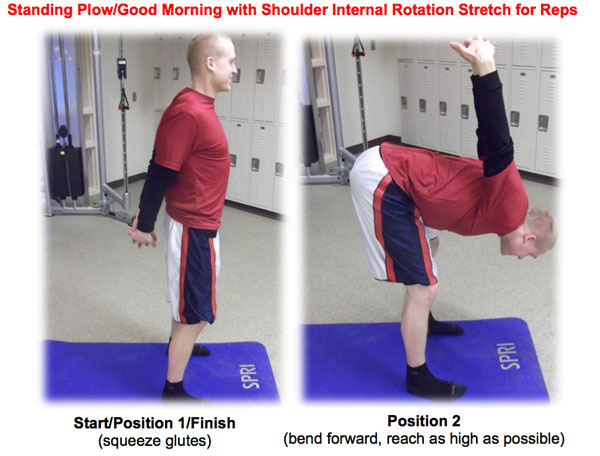
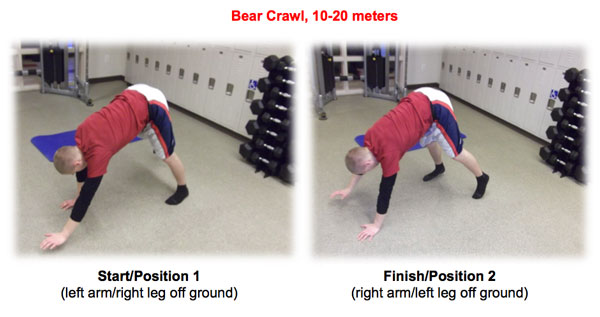
I recently performed a total body workout that consisted of pike push-ups, hanging V-leg raises, reverse lunges and straight leg bridges for reps. So, to give you an idea of how to apply this info, here’s the specific warm-up sequence/circuit I used prior to that workout.

Burraty Pike To Pancake

Burraty Standing Plow Good Morning

Burraty Bear Crawl

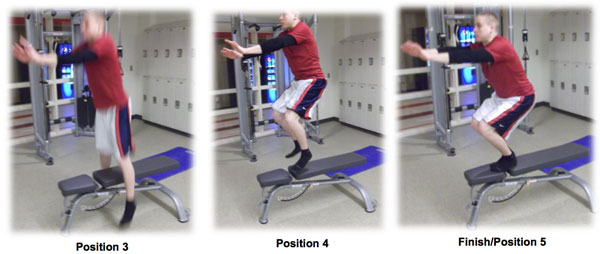
Burraty Staddle Box Jumps 1

Burraty Staddle Box Jumps 2

You’ll learn to feel this, but your performance WILL increase with each successive set/rep of your plyometric movement if you’re completely engaged in the moment right in front of you. It should also go without saying that this info can be applied toward workouts with weights for those of you who choose to supplement your calisthenics training.

By the end of your warm-up, you should feel ready to do more—with noticeable improvements in performance—but should NOT at any time feel excessive metabolic fatigue, out of breath or as though you’re doing the Valsalva Maneuver.

In sum, here are some key benefits you’ll experience from getting in the zone for EVERY workout.

  • Mood-uplifting, “neural-charge” effect—wherein eustress exceeds distress from an exercise standpoint
  • Greater body awareness through free space—remind upper and lower extremities of each other for total body synergy
  • More control over body momentum—reinforce a strong carryover between “loading” and “landing” positions (i.e., eccentric and concentric phases in a range-of-motion)
  • Make exercise fun, playful and less routine-like.

Do YOU have any favorite strategies that help you get in the zone for your workouts? If so, I’m sure we would love to hear about them. Just drop your tips in the comments below!


***
Eric Buratty brings five years of experience to the DC Metro Area as a Certified Personal Trainer, Progressive Calisthenics Instructor, Nutrition Consultant and Sports Injury Specialist.
For more information about Eric, check out his website, EricBurattyFitness.com.

Filed Under: Progressive Calisthenics, Tutorial Tagged With: Eric Buratty, explosive calisthenics, fitness training, focus, mental training, plyometrics, stretching, tutorial, warm up, warmup, workout strategy

Get Stronger by Improving Your Back Flexibility

March 18, 2014 By Keira Newton and Jarlo Ilano 19 Comments

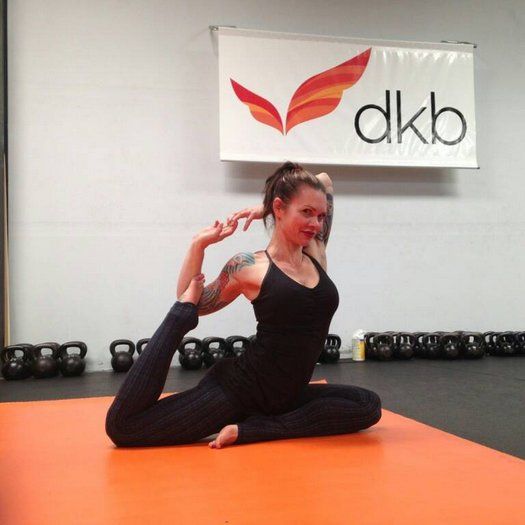
Master RKC Keira Newton Spinal Flexibility

We get frustrated when flexibility work is just an afterthought in an athlete’s program, something done for only a few minutes after the main workout without a lot of thought or effort. The truth is that proper and focused flexibility training especially for your spinal flexibility, can help you get stronger!

Getting stronger from stretching sounds great, doesn’t it?

How is that? One of the ways flexibility work can make you stronger is immediately apparent in terms of form and technique. If you are so bound up in your upper back that you can’t pull your shoulders back in a proper line, your pressing is not going to be as strong, whether it’s pressing a kettlebell or your bodyweight in a handstand.

For instance, Keira remembers when she first started working seriously on her flexibility, that although her shoulders were pretty mobile, her upper back wasn’t. By working on that specifically, she was able to improve her shoulder positioning, and found her pressing strength immediately improved, as well as her hand balancing. Being able to extend correctly at the upper back placed her shoulders in a much better mechanical advantage and she was able to use her strength from a better foundation.

She also recalls one of her teaching sessions with an experienced RKC who was having trouble with her pull-ups. Keira gave her some corrective thoracic mobility exercises and she went from barely doing one, to doing sets of multiple reps. The flexibility work put her in a better position for her pull and she broke out of that plateau. She was working hard and putting a lot of effort in her pulls, but her mobility was holding her back. Once that was freed up, she was able to gain so much more from her efforts.

High tension techniques for strength and power are great. There’s no denying that those techniques work for getting people as strong as possible, but you have to balance out that tension with proper mobility to get the most out of your body. It’s not the act of stretching that will give you strength, but it’s the new options your body will have to get in the best positions to utilize the power and strength that you already have.

A Flexible Spine is a Powerful Spine

There’s a reason the word “backbone” is associated with strength and courage. A strong and flexible back is the foundation for power in the upper body, just as the hips are for the lower body. Thoracic spine (mid-back) mobility affects how well you can use your shoulder girdle and arms, by placing them either in resting positions of weakness or strength.

A kyphotic (flexed) thoracic spine puts your shoulders well forward of the vertical midline of your body and away from your power posture. It’s like trying to push from an unstable platform. You won’t be able to use your strength properly no matter how powerful your muscles.

Most of our full body rotation comes from the thoracic spine, so when you think of rotational work, that involves a great deal of thoracic function. Stiffness here reduces not just your mobility but your ability to apply the proper leveraging and angles for a lot of different strength skills.

Below we will show you comprehensive routines for improving your spinal mobility for forward bending, rotations, and backbending. You’ll probably find that some of the moves here will be easier for you while others will jump out and kick you in the butt! (Guess which ones you should work on more…)

We advise you to go through all of these movements and discover for yourself what you need to improve the most.

Forward Bending Sequence

Forward bending involves spinal joint and hip flexion, and the associated flexibility of the muscles and other soft tissues of the posterior chain. It can be difficult to isolate one specific cause as the key issue if you have tightness. While it’s very easy to say you have tight hamstrings, the fact is that the sensation of tightness in the hamstrings may very well come from an issue in your low back.

This sequence is a demonstration of “covering all the bases,” with a comprehensive approach that can be pared down as you practice and figure out what you need to work on for yourself. A quick run-through of the sequence can give you a baseline as well, and act as a measure for progress.

We begin with a full spinal flexion movement, from your neck all the way to your pelvis. You want to round out as much as possible, then move into full extension (back bending). Though the emphasis is on the forward bend, you’ll want to move into extension as a break in between. It takes the spine through a full range of motion and is a good warmup for the sequence.

In the squat, point your toes out at around 45 degrees. This positioning assists in helping you round out your lower back and go into a posterior pelvic tilt (the pelvis tucking under you). Get your chest between your knees and tuck your chin down, as well as letting your tailbone sink down. Play with rocking back and forth between your toes and your heels. Then sit back and drop down even further. Next, jump into a push-up position. Then drop your hips down to the floor and lift your chest up and out, locking your elbows out if possible. Remember to look up as well, for extension throughout the entire spine.

Do ten repetitions, or more if you feel up to it.

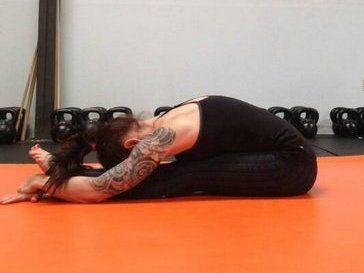
Master RKC Keira Newton Forward Bend SeatedNext is a standing forward bend, where you bring your hands to one side and keep them on the ground as you stand up. This is a combined forward bend and rotation. Another variant is to sit back into the opposite hip. So if your hands are to the right of your body, you’ll sit back to the left. Spend a couple minutes going between one side and the other.

The last move in the forward bending sequence is the seated forward bend. With this move, you’ll add a rotation to the forward bend, just as you did in the standing forward bend. With your legs locked out straight in front of you, pick a side and fold forward at a diagonal on that side. Move in and out of the stretch at least ten times on each side, as well as straight forward, and hold the stretch on one side for upwards of a minute.

Back Bend Preparation

Backbending (spinal extension) can be a very uncomfortable and difficult motion for many people. When you add up all the hours we sit, drive, and are parked in front of the computer, you’ll see how rarely we get into backbending positions during our normal daily activities. So it’s no surprise that a full backbend like the bridge posture can be so daunting.

With this in mind, it helps to go through a thorough preparation before going to the limits of your spinal extension range of motion.

The first emphasis is on the thoracic spine (your midback), and improving extension and rotation in this region. Improving mobility in this part of the spine prevents undue strain on the lower back by distributing the motion throughout the spine rather than all on the lower back. In the first exercise in this video, you’ll see that Keira has to emphasize the motion, not straight down but also forward, as her shoulders are so flexible that she isn’t moving at the spine. When she improves her direction of force, you can see that the stretch is now where it needs to be. Work on this for three sets of one minute each.

Next is thoracic rotation, which is essentially extension at the side of the spine you are rotating towards. This in combination with sidebending takes you to the end-range of the extension motion. So you’ll be working on all the structures that need to be pliable for a good backbend.

Keira is demonstrating two movement variations: the first is up on forearms and knees with the back starting in a neutral position, and the second is more on the back of the upper arm and shoulder with the torso bending to the side. When you try these out, you’ll notice that the second variation places you in a sort of pre-stretched position, so you won’t be moving as far. You may skip the first variation if you are already flexible, but even then, the first one is a good warm-up to do. Play with shifting your weight more onto your knees or your arms to find the best angle for you. Start with three sets of 30 seconds on each side.

Last in this video is a more direct back bend preparation and is adapted from a sequence taught by Jarlo’s Ashtanga yoga teacher, Cathy Louise Broda at http://www.purpleyoga.com. It starts with a kneeling back bend, then works on the hip flexors, quadriceps, and shoulder bridges, to fully warm up and prepare the body for more intense spinal extension postures.

In the kneeling backbend, it is key to elongate and lift the spine as you lean back. Pushing your hips forward and lifting your chest up and back will create this “open” spine, and will prevent a jammed up feeling in the low back. Relaxing your hips and buttocks will be difficult at first, but that is another key to a good backbend. 10 – 12 slow repetitions here will do you well.

Next up are lunge stretches with rotation to the side of the front knee. Adding rotation to this position adds depth to the stretch and is a great concept to employ in almost any exercise. You don’t have to do this in full splits like Keira is showing, just go into as deep a lunge as you are comfortable. The effect is still the same. Do three sets of 30 seconds on each side.

The camel pose in yoga is a backbend with arm support, and can allow you to improve your backbending technique with relatively little strain. With the support of your arms you can stay in the position a bit longer than you could just bending back. Remember the details of pushing your hips and chest away from each other to open up your spine. Work up to three sets of 30 seconds on this posture, as that’s a good amount of time to experience this position.

Following the camel is the kneeling quadriceps stretch. If your knees bother you in this position, you can sit on a small stool or a few cushions to take some pressure off. If this doesn’t help, don’t force it and try a standing or side lying quad stretch instead. You’ll be able to do this later, but don’t hurt your knees and put yourself out of commission. The key point here is to avoid a low back arch. Keep your back flat, so the forces of the stretch will be on the upper thighs and not on your back. Take your time and gradually lean back further when you can do so without pain. Three sets of 30 seconds to a minute will work well here.

Lastly, shoulder bridge practice starts you on a more active backbend and is a great way to get a lot of repetitions in with good technique. You’ll pull all of what you’ve practiced so far in the sequence and work on a smooth spinal curve, relaxed hips, and good mobility and strength in the quads. Choose the shoulder bridge variation that works best for you, and perform a couple sets of 10 repetitions to improve your bridge.

Full Bridge

In the full bridge, or “wheel pose” in yoga, you’ll need good flexibility in your shoulders, hips, and the entire back. But you’ll also need proper technique. Important details here are to create that smooth curve and arch, like an archway in a building that can support weight evenly, and simply looks good. You can tell when a person does a bridge and there is a sharp angle in one part of the spine – in that case, there will be more of a strain rather than a curve that distributes forces evenly.

Master RKC Keira Newton Back BendFor a proper bridge, your arms and legs are the support structures and your hips and back should be relaxed and open. Your chest should be projected up and back, toward the top corner of the wall behind you, and your hips should be lifted up and forward, toward the top corner of the wall in front of you. This aiming in opposite directions creates that “openness” in the spine. Breathing should be steady and even, and you should hold the position for 5 to 10 breaths. Again, don’t force things. Take your time and improve steadily.
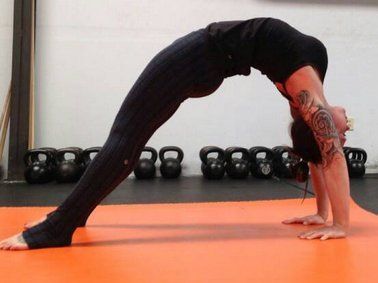
Master RKC Keira Newton Back Bend 2As you improve you can play with shifting your weight more toward your feet or toward your hands. You’ll find which way is more difficult, and that’d be what you need to work on! It will also lead you back to which of the preparation exercises to focus on. It may be the thoracic extension, or your hip flexors and quads if they are holding you back.

Invest in Your Flexibility

What we’ve shared above will improve your back flexibility and consequently improve your body positioning for every exercise and skill you practice.

It does take time and patience to increase your flexibility, especially if it’s been long neglected. But the payoff is well worth the effort. Set aside some time in your routine to make flexibility a priority and you will be more than happy with the benefits in your strength and power.

***

Keira Newton is an accomplished trainer with many certifications including that of Master RKC, Feldenkrais, FMS, and Z Health. Her combined knowledge of strength training along with flexibility and mobility work has helped hundreds of her clients at dkb Fitness and seminar students to help them achieve their maximum potential.

Jarlo Ilano,PT, MPT, OCS has been a Physical Therapist since 1998 and is a Board Certified Orthopedic Clinical Specialist. He has special interests in the neck and back, shoulder, and flexibility work, combining his clinical expertise with his own training in martial arts and yoga to provide practical and cutting edge knowledge for GMB Fitness.

Filed Under: Flexibility Tagged With: back flexibility, bridge, flexibility, Jarlo Ilano, Keira Newton, strength, stretching, thoracic spine, thoracic spine mobility, yoga

Primary Sidebar

Featured Products

previous arrow
GetStrongBookCover
ConvictConditioningBookCover
StreetWorkoutBookCover
ExplosiveCalisthenicsBookCover
StrengthRulesBookCover
next arrow

Categories

Progressive Calisthenics Certification Logo
Click here for more information or to register for the PCC workshop

Get Strong Workouts TriadXP App
Get Strong Workouts App

Recent Posts

  • Top 5 Reasons Why an In-Person Workshop is the Best Way to Supercharge Your Training
  • HYBRID STRENGTH TRAINING IS HERE!
  • My Calisthenics Journey to the PCC
  • The Handstand Press: Complete Control Through the Handstand
  • The Get Strong App is Here!

Dragon Door Publications

Dragon Door Publications

Recent Comments

  • bross dandon on The Case for Curved Handstands
  • Johnny Flewellen Jr. on Strength for Life
  • Dan Earthquake on The Pursuit of the Daily Minimum
  • Johnny Flewellen Jr. on The Pursuit of the Daily Minimum
  • Johnny Flewellen Jr. on Yoga, Calisthenics and the Journey of a Lifetime
FOLLOW US ON TWITTER!

Copyright © 2025

Dragon Door Publications / The author(s) and publisher of this material are not responsible in any manner whatsoever for any injury that may occur through following the instructions or opinions contained in this material. The activities, physical and otherwise, described herein for informational purposes only, may be too strenuous or dangerous for some people, and the reader(s) should consult a physician before engaging in them.