• Skip to main content
  • Skip to primary sidebar
  • Home
  • Contributors
  • Resources
    • Q&A with Paul “Coach” Wade
  • Workshops
  • Products
  • Forums
  • Articles
  • Blogs
    • RKC Blog
    • Strong Medicine Blog
  • Archives

PCC Blog

Progressive Calisthenics - The Official Blog for the PCC Community

technique

Coaching and Using Powerful Push-up Elbow Positions

May 17, 2016 By Adrienne Harvey 29 Comments

Adrienne Harvey One-Arm Push-Up

I’m pretty sure there hasn’t been a PCC or SCC workshop where the following question hasn’t come up:

“Where do I put my elbows during the push-up?”

Or if it isn’t asked, there’s always more than a handful of people who need some coaching on elbow placement with the push-up.

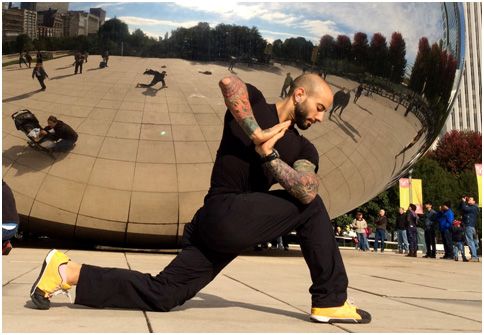
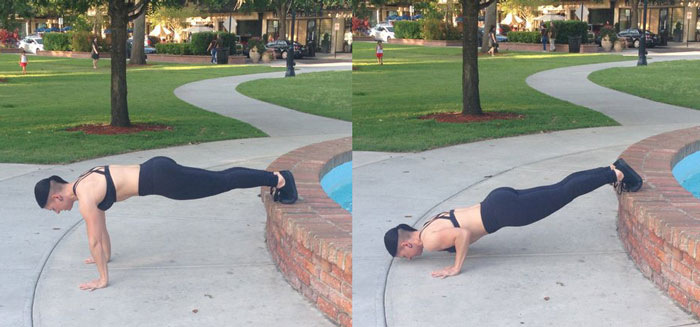
Al’s answer is a real winner, and we can all benefit from hearing and reviewing it. Basically, you want to make sure your elbows stay below your shoulders. Keeping them way out at a 90 degree angle to your torso is not ideal, but they don’t have to be right next to the body either. For most people, the ideal arm position will create somewhere between a 0-60 degree angle between the upper arm and the torso.

Push-Up Elbow Range 0-60 degrees

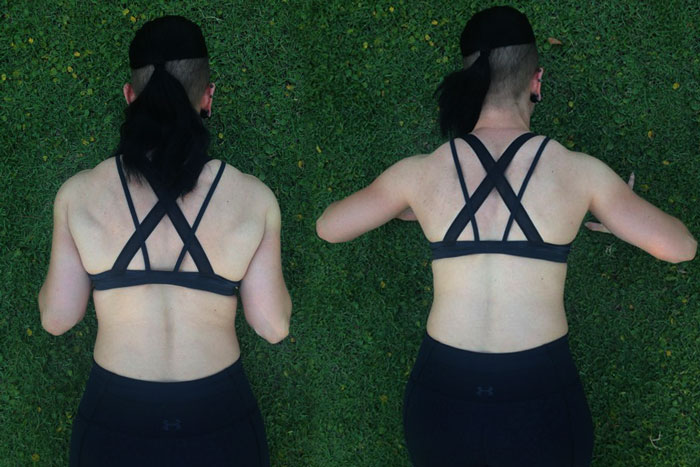
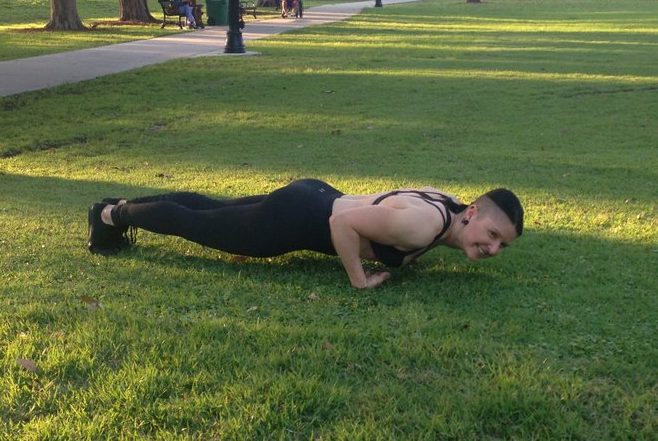
The good news is the range of 0-60 degrees allows each of us to find a strong and comfortable place, but by intentionally varying the angle in our sessions we can recruit different muscle groups more intensely. Generally speaking within this safe range, when the elbows are close to the sides as on the left photo above, there’s more emphasis on the triceps and front delts. When the degree is greater, we can experience a little more recruitment of the pectorals.

There’s several reasons that the elbow issue keeps coming up, and will probably continue to be up for discussion with trainers and enthusiasts alike. Here are three of the bigger reasons:

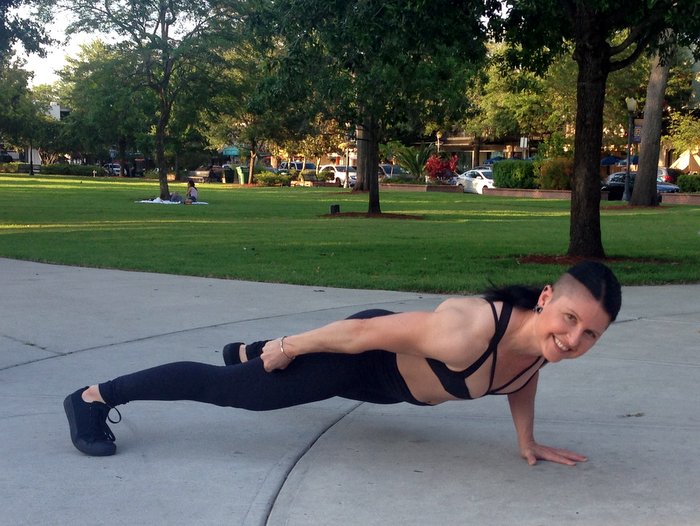
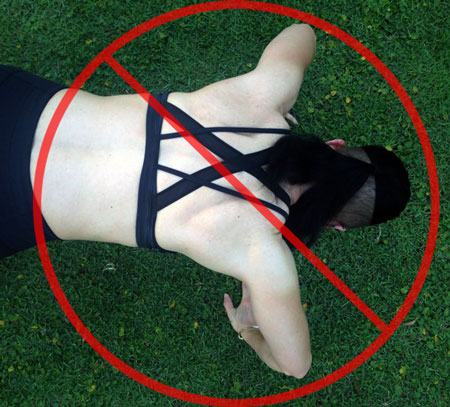
  1. There are a LOT of heavily used stock photos of people doing push-ups with their arms way out at big 90-degree angles. This is actually a huge pet peeve of mine because you’ll see these photos in well known, famous magazines and advertisements for everything from workout wear to every supplement you can imagine. The most extreme example I’ve seen was a (at least we were told) highly converting photo chosen to promote my friend’s boot camp. The woman in the stock photo had her elbows cranked out to such a degree that doing a push-up from that picture-posed position looked physically impossible!I could continue with more examples, but you get the idea—we’re all surrounded by tons of strange visual examples of something as simple as a push-up. It’s easy for even experienced exercisers to start thinking that this super-wide elbow angle is a preferred position, considering how often we see it in supposedly authoritative mainstream books, magazines, ads, etc. for men and women!
Elbows up too high can put shearing force on the shoulder joints, etc. I hated even taking this picture. OUCH!
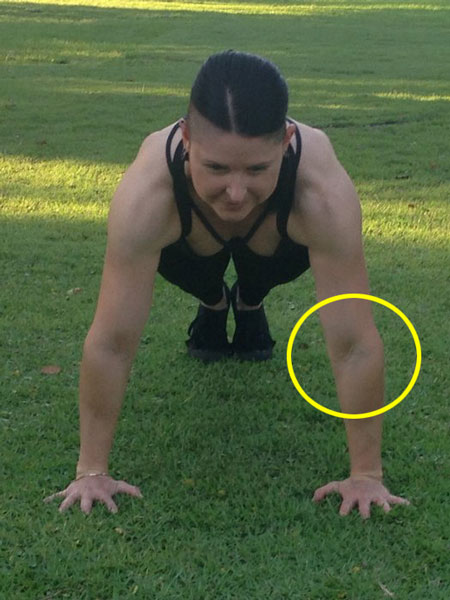
  1. The elbows can sneak out and up when someone has moved ahead to a more difficult variation too quickly. I’ve also seen many people start out with a great elbow position, then as they fatigue, the elbows start coming forward as compensation. At the same time, you’ll see their head jut forward to the ground as another, often simultaneous compensation. Beginners can sometimes be so focused on hitting a particular rep goal, that they won’t even feel these compensations happening.That’s where you, as a great instructor can help out.

    If you are training on your own, check in from time to time by shooting a short video (just for you) on your phone and checking your form. Whenever I feel like something is “off” with any given exercise, I get out the camera, it’s a great tool. When you’re coaching a client and they’re doing well, you can also shoot short videos of them on their own phones—they will now have that as a reference (they’ll also probably proudly show it to their friends and end up sending you referrals). It takes everyone some time to build the body awareness to know when the form is breaking down. This is part of why it’s so important NOT to rush through the beginning steps of any calisthenics exercise.

  1. I’m sad that we need to bring up this third reason. As with the “squat depth” debate there still are still plenty of dogmatic trainers out there who are insisting that “there can only be one” (true for the Highlander, but not for elbow position) correct elbow position for everyone all the time. So, feel free to break free from the “right and wrong” dogma and find your effective elbow placements within that generous 0-60% angle area. Experiment, have fun, and don’t do anything that hurts!

The important thing to remember (and which is stressed at both the SCC and PCC) is that the exact elbow position will vary with each person. It can even be fun to challenge yourself within this range after you’re comfortable with your own ideal elbow position. Always remember to think of pointing your “elbow pits” forward at the top of the push-up, and the points of your elbows aimed at your feet or toes. This will help maintain your position and keep the reps nice and productive for building strength and habits.

Point the elbow pits forward at the top of your push ups

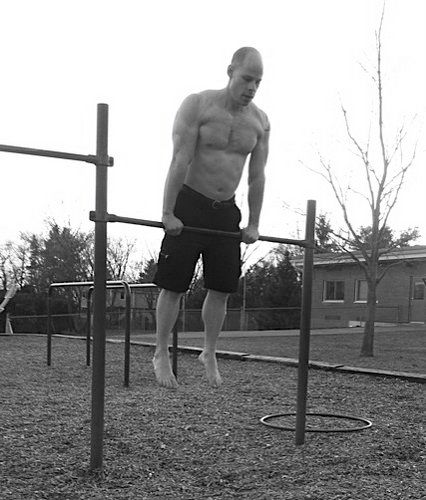
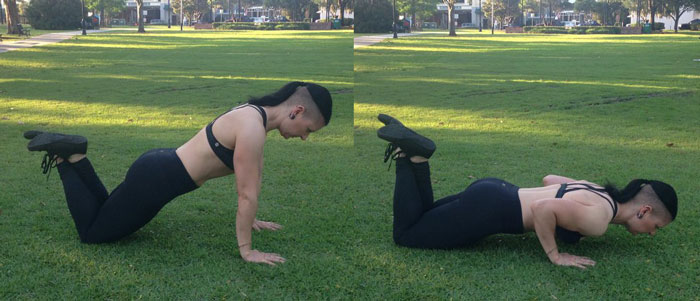
What if someone can’t perform a push-up without putting the elbows way up high with their shoulders crushing their ears? This simply means they’ll need to work on an earlier step in the progression until they have enough strength. Push-ups on railings are great for teaching the elbow position while building the requisite strength. Be extra sure that the hands are placed in line with and below the shoulders, no matter what surface is used. Knee pushups performed with absolute precision are also very useful for gaining the strength and habit of a healthy elbow/shoulder position.

The same idea applies for the often-maligned, but still very effective knee push up…
It also applies to the raised push-up step…

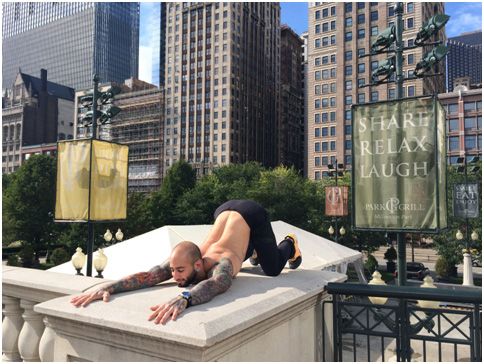
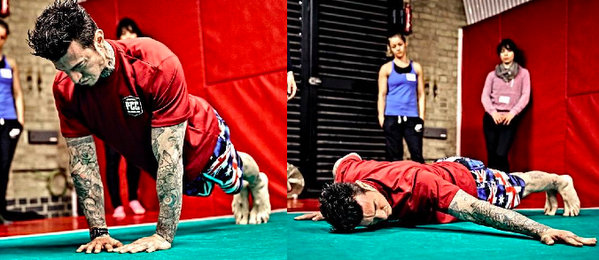
Let’s start with the “smallest” angle. This is with the arms right next to the body—even touching. Yoga enthusiasts may recognize this position as similar to when they perform the chaturanga series of movements. The hands are almost automatically placed right under the shoulders with this position too. It’s a very stable feeling for most people. If I’m going for high reps, or am helping a student activate and use the whole of their torso (lats, serratus), then this is a great go-to position.

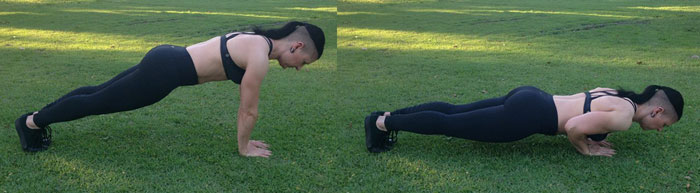
People with large lats from serious pull-up habits, as well as those who may have a few pounds to lose will naturally need to take their arms a little further away from the body. They will of course need to still be sure to engage the lats, keep the shoulders away from the ears and maintain a plank position and tension throughout the body.

Paying attention to elbow placement VERY much applies for the more advanced variations like this feet raised push up. A good elbow angle will ensure that you don’t face plant when you first progress to this variation.

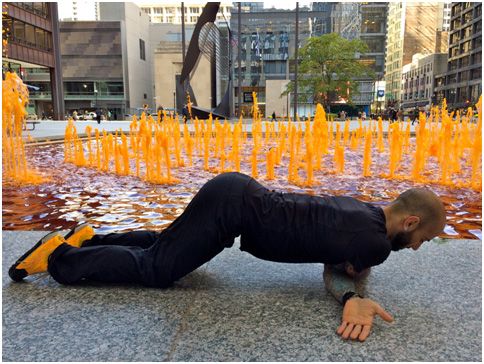
Taking the elbows out to a 45 degree or larger angle will usually be a choice of personal preference given physiology, or a choice made to make the exercise different or a little more difficult. We know that taking the hands out wider past the shoulders will be more challenging for most as well. When you’re ready, explore different hand positions, and then prepare to progress to a really fun intermediate/advanced push-up, the archer push-up.

Danny Kavadlo performing a precision demonstration of the archer push-up at a recent PCC workshop.

No matter what elbow angle is best for you, a real power-booster with the push up is the idea of having a spiraling feeling throughout the arm, and especially with the hands through the ground. A useful cue for this is to have your fingers pointing forwards, but at the top of the push-up, your “elbow pits” (see earlier phoot) will also be pointing forward. In a pinch—like those last few crucial reps of the Century Test—this spiraling feeling can make the difference between pass and fail.

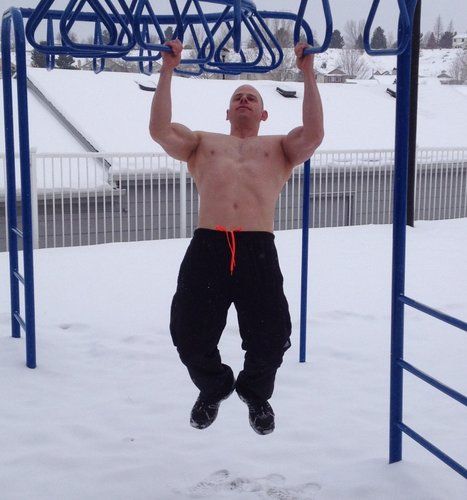
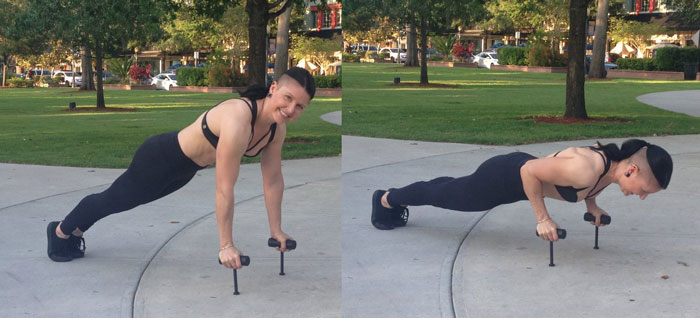
Figuring out your optimal elbow angle can also lead to great success with the intermediate/advanced variations below, and of course your path to the one-arm push-up:

Close push-ups are safer and more effective when the elbow placement is right for you.
Neuro-Grip Push-Ups are nearly impossible without good elbow placement.
Neuro-Grip push-ups are nearly impossible without good elbow placement.
And the scary-looking back of the wrist push-ups (work up to these gently and only if appropriate for you) simply DEMAND proper form…or else!

Hopefully these ideas will help you and your clients/students continue to get strong and progress with the eternally useful, do-anywhere push-up. Please share your experiences in the comments below.

Train STRONG!
Adrienne

****

Adrienne Harvey, Senior PCC Instructor, RKC-II, CK-FMS, has been RKC Certified since 2010, and RKC Level 2 certified since 2011. Kettlebell and bodyweight training have been crucial in Adrienne’s personal quest for fitness.  A core member of the PCC team, Adrienne loves sharing her knowledge with small groups and individuals. She also loves to develop recipes and workout programs to further support performance, body composition, and of course—FUN.

Adrienne will be leading a one-day SCC (Strength Calisthenics Certification) Workshop in Gaithersburg, MD next month, and joining the Kavadlos at the PCC in New York next month as well. There are still a few spots available for each workshop, sign up today.

Filed Under: Progressive Calisthenics, Tutorial Tagged With: Adrienne Harvey, calisthenics, elbow placement, PCC, progressive calisthenics, push-up, push-ups, SCC, technique

Turning Up the Mind-Muscle Connection

March 4, 2014 By Matt Schifferle 27 Comments

Matt Schifferle PCC

“You must be crazy! How can I possibly have weak glutes and hamstrings?!”

I’m at the chiropractor and I’m finally throwing in the towel on my lower back pain. I’m not a model patient.

“Do you know how much I deadlift and use kettlebells? Those things are like glute and hamstring blasters.” Then he told me something that changed everything about how I used exercise for the next 10 years; “Matt, exercises don’t work your muscles, only your brain can do that.”

I thought he was nuts but then he hit me with the science of what he was talking about.
“It’s simple; the signal instructing certain muscles to contract and how they work doesn’t come from a weight or a special exercise. Your brain creates a signal, it travels through the nervous system and eventually reaches the muscle fibers as your mind instructed. Everything about how the muscle behaves comes from your brain.”

Mind Muscle Connection Chart
Everything about how the muscle behaves comes from your brain. Diagram © Matt Schifferle 2014

It was a simple lesson, but over the years it has completely enveloped my entire approach to all aspects of my training. From calisthenics to bike racing and even walking has taken on new meaning due to this mind-muscle connection.

Here are some of the biggest lessons I’ve learned in how the mind-muscle connection has changed my calisthenics training:

#1- Distraction dilutes the mind-muscle signal

Anything that pulls your thoughts away from the exercise literally dilutes the signal you’re sending to your muscles. TV, talking, smart phones, even some types of music are now training enemy #1.

No TV, no smart phones, just a horizontal base and a truckload of focus.

#2- Mind-muscle signals become habitual

Habit is simply repeating the same mental signals over time. This repetition causes those signals to become easier to create and more powerful in their application. Of course habit can be both a great benefit and a massive detriment to your training. If your usual signal is to use your lats while doing pull ups you’ll use them in other activities as well. However, if you’re not in the habit of using them, they won’t turn on no matter how many pull ups you do.

#3- The signal can change at various points during the range of motion

It’s not uncommon for a signal and thus a muscle contraction to change during an exercise. At some points during the range of motion, it may be stronger and other points it may be weaker. Some common examples can include triceps relaxing at the bottom of a push up but contracting very powerfully at the top and glutes to shut off at the bottom of a squat while they may kick in halfway up towards standing.

Working to maintain the signal throughout the full range of motion makes a huge difference in the strength of the muscle as well as the integrity of the joints.

#4- It takes practice to get the muscle to do just what you want it to do

It’s common to not really feel a muscle turning on the first few times you try to use it more during an exercise. Sometimes it takes some time for the signal to develop and beat a neurological path to the muscle. I found this to be the case with my abdominals during the leg raise progressions. At first it felt like my abs were hardly doing anything, but the more I focused on turning them on, the more they eventually got into the game. Now hanging leg raises result in a deep abdominal burn and more powerful contractions even though the actual workout hasn’t changed much. Don’t be discouraged if nothing feels different at first. Keep concentrating and things will change very soon.

#5- Small and stubborn muscles may be due to a weak mind-muscle connection

My shoulders have always been a weakness for me. It didn’t matter how many shoulder exercises I did, they just wouldn’t grow and really develop. Once I started working on the mind muscle connection with my shoulders I was surprised to find how weak the signal was. Once the signal became stronger my shoulders grew like crazy. This was also the case with my hamstrings as I mentioned before.

It’s hard to believe that Matt ever had small shoulders!

#6- Exercises, and tools are simply templates for developing the mind-muscle signal

One of the biggest lessons about the mind-muscle connection was that there’s nothing in there about supplements, gadgets or fitness dogma. The root cause of all things muscle comes from the brain, not a product you can buy in a store.

As for a particular exercise, each movement places a certain demand upon a set group of muscles, but it’s a rough template for where the tension needs to go and how hard the various muscle contract. It’s up to your own focus and skillful concentration to refine the tension and direct it to the target muscles.

The million dollar question is: how can you develop and refine the mind muscle connection?

There are many techniques, but the common element is simply trying to build and control the tension in a select number of muscles through your own focus and concentration.

When I’m trying to really dial in my mind muscle connection I use what I call the P.T.R (Peter) method. Here’s how it would work with a classic push up.

Step 1- Set your Position

The first thing is to take your time setting up your position for the exercise you wish to do. This should be a pretty relaxed thing to do. In the case of push ups, I like to start my push ups laying on the floor so all of the muscles are relaxed. I then take my time placing all of my limbs and joints in the most perfect position I can. I check the position of my hands, elbows, shoulders, spine, hips, neck, even the placement of my fingers is something I really focus on getting just right.

Step 2- Set your Tension

Once I’m in position, I fire off the mind-muscle signal by tensing the muscles I want to involve during the exercise. I’m still laying on the floor, all of the tension is entirely proactive. I’m just flexing the muscles I want to engage as hard as possible. This can include my chest, shoulders, hands, lats, abs, triceps, quads and forearms. Lately I’ve been focused on getting my triceps more involved with my push ups, so I’ve been focusing more on tensing up the triceps.

Step 3- Apply Resistance

Once the tension is set just the way I like then I slightly lift myself off the floor and begin my set. Once the resistance is applied, the tension in the muscle grows much more, only now it’s flowing along the channels already established in step 2. So if I’m working to get my triceps more involved they now carry more of the resistance of the exercise.

The P.T.R method conditions you to really dial in the tension of any exercise you choose. It builds your ability to direct and alter the tension in your muscles at will so you can modify that tension however you wish.

P.T.R. works with any technique. Matt builds his lats with pull-ups.

Contrast this with simply dropping down and firing off push ups as fast as possible. The position and tension your body uses is going to be much more reactive rather than proactive. If you’re used to using your shoulders more than your triceps during the push up then that same pattern of signal will be generated. It’s not a bad thing, it’s just that it’s much more difficult to focus and change the mind-muscle connection and thus how your mind is asking your muscles to perform. Your old movement habits will take over both good and bad.

In closing I want to leave you with a couple of mantras I’ve used with my clients to reinforce the awareness of the mind-muscle connection:

– Muscle follows mind.

– Exercise doesn’t work muscle; your focus and concentration works the muscle.

– Nothing different happens in your training until you chose to make it different.

– Exercise technique is more than just keeping your back straight or toes pointing forward. Technique is about refining the mind-muscle signal. Thus technique isn’t everything, it’s the only thing.

– Effecting training isn’t just about blood sweat and tears. It’s about learning how to engage and use your body in a more effective way.

Yours in strength,

-Matt Schifflerle

****

Matt Schifferle a.k.a. The Fit Rebel made a switch to calisthenics training 5 years ago in an effort to rehab his weight lifting injuries. Since then he’s been on a personal quest to discover and teach the immense benefits of advanced body weight training. You can find some of his unique bodyweight training methods at www.RedDeltaProject.com.

Filed Under: Progressive Calisthenics Tagged With: brain training, calisthenics, Matt Schifferle, mental training, mind-muscle connection, technique, training strategy

Structuring a PCC Recovery Day

November 5, 2013 By Angelo Gala 5 Comments

angelo1Hey there! How is your training going? Are you making lots of progress on your pistol, handstand push-up and bridge progressions? That’s awesome! How is your body feeling? It’s about time we address the purple and pink striped elephant in the room. Do you take the time to work on skill/technique development and regressions rather than just focusing on cultivating specific strength? How often do you take a day off? Do you include some active recovery or are you inclined to just take it easy and catch up on some youtube or boobtube? Yep, lots of questions coming your way, I know. I’m not trying to poke or point fingers at what you may be or may not be doing. Lets talk recovery and building a happy body that wants nothing more than to rebuild and be better than ever!

I personally LOVE the PCC minimalist approach, especially when it comes to recovery days. But what exactly is a recovery day? Following a simplistic approach to fitness, to me a rest and recovery day incorporates more of what you typically do less of.

Try making a point to emphasize eating and sleeping. Food provides the nutrients and building blocks that support the demands we place on our bodies. When we sleep, are body’s little worker bees put on their hard hats and rebuild our foundation to be bigger and better, allowing our muscles to grow stronger and longer. Catching up with friends and family reminds us of what is important in our lives providing a necessary distraction from the mental grind of vigorous exercise. Light cardiovascular activity is a must. Yes, I said it. I know that High Intensity Interval Training is all the craze right now with plenty of scientific research to back it up but please don’t forget that we need to be easy on our bodies from time to time. 20+ minutes of easy-moderate steady state exercise is a very heart healthy activity to include. Lastly restoring range of motion to our body’s joints and increasing our flexibility will keep our physical body in balance.

If you are wondering where to fit this in, take a step back to look at your weekly training block. How many days in a row are you pushing your body? The acclimated body can go hard for up to three days in a row before it will be asking for a de-loading day. If you are a little more advanced in your age, or have less than 3-5 years of consistent vigorous exercise under your belt, your body may require a break every third day. At a minimum one should back off at least one day a week with a preference of two (maybe three) days depending on your training history. Again, this does not require a total day of nothing on the agenda, just enough of a change of pace to allow the battery to recharge.

Structuring a Recovery Day:

It can be next to impossible to recommend a routine for everyone who reads this article, but I can at least provide some guidelines to help structure a recovery day based on the demands these workouts place on the body.

Recovery can actually to be very intuitive. Many of us are goal oriented and have been working on obtaining certain skills like a back lever or freestanding handstand push-up. Along the journey to these benchmarks we stumble across tight backs, sore shoulders and wrists or maybe even creaky knees. These are all signs from our body telling us that it may require a little extra love and dedicated time where you give back to your self.

Looking specifically at the movements found in the PCC curriculum, we ask a lot out of our shoulders, chest, triceps, forearms and core musculature as we work to support our entire body weight practicing all the push-up, handstand and arm lever variations. Though the single leg squat progressions do not place a significant demand on the lower body compared to a 2x body weight barbell squat, we may find that limits in our mobility hinder our ability to achieve full range of motion in the pistol squat, or at least challenge our confidence in the movement’s execution. If the bottom position of the pistol is easy to obtain, compare it to the shrimp squat, or even the double shrimp? Most likely we will find some difficulty along that journey.

I always structure a recovery workout for my athletes to begin with 20-30 minutes of a steady cardiovascular activity. A few suggestions may be an easy 5k run on a mostly flat to rolling course, a bike ride on the smallest chain ring of your crankset, a steady swim or up to a 5k row focusing on mechanics, cadence and breathe work. The steady cardio is programmed first in our recovery for a few reasons. Most importantly it will generate body heat and prep your soft tissue for manipulation and stretching. Steady cardio creates a calming / meditative effect on the body and mind. It also promotes an environment of self-exploration where you may develop the intuition of what areas of your body may need a little extra attention when it is time to stretch.

After the heat-building phase of the cardio warm-up is complete, it’s time to address some binding in the soft tissue with self-myofascial release techniques (self-massage). For this you can purchase all sorts of tools to address every area of the body such as foam rollers, PVC piping, rumble rollers, tennis balls, a tiger tail and so on. I suggest picking up a lacrosse ball, as it is the most universal tool, you can easily take it anywhere and it can generally apply enough pressure on your trigger points to promote change.

Using the lacrosse ball or roller is theoretically very simple. Pick a muscle group to work on and lay your bodyweight over the tool. Initially you will scan around your soft tissue on the tool looking for any tender spots or pain spots. Once something jumps out at you, stop moving and isolate the discomfort. Try your hardest to not move off the spot, then apply a contract and relax activation with the muscle group you are rolling over. You can do this by either squeezing the muscles you are resting on or moving the stimulated joint through its natural range of motion over and over. This will most definitely cause a bit more discomfort but let me be upfront and completely honest with you. When it comes to restoring / improving mobility or flexibility, its going to be uncomfortable. The more discomfort you can tolerate (aside from sharp pain, which is always bad) the more change you will make. If its not uncomfortable, then you wont be making much if any progress. Your only other option to break up the binding is to get a deep tissue sports massage on a weekly or biweekly schedule. If your budget isn’t big enough to afford regular body work, then get comfortable with being uncomfortable on a lax ball 😛

Personally, I beat my body up enough that I can spend all day doing soft tissue work, so in order to keep ourselves within a reasonable time cap, pick an area on the front side and back side of the shoulders as well as an area both on the front side and back side of the hips. Spend about 5 minutes on each or at least until you feel a bit of the discomfort begin to subside.

Now that we have successfully built requisite body heat and prepped our soft tissues to make change, its time to focus on increasing our flexibility since many exercises in the PCC curriculum require a fair level of specific flexibility. To do this we will work from the ground up.

-Single leg squats require a significant amount of ankle mobility so here we can utilize a standard Standing Calf Stretch focusing on dorsi-flexing our ankle as much as possible. Don’t forget to practice this stretch with the knee straight as well as bent.

angelo2

-To get the outer hips, a Standing Figure 4 Stretch is achieved by crossing one ankle over the opposing knee. From this position, sit back as if you were sitting in a chair while simultaneously reaching your rib cage over the top shin. Do your best to keep your hips as neutral as possible rather than shifting them to help counter balance the posture.

angelo3

-Inner thighs are most accessibly stretched in the Bound Angle Pose. Here push your lower back up against a wall and pull your heels together as close to your inner thighs as possible. For the remainder of the stretch, place your hands on your knees with fingers pointed toward your midline and gradually apply pressure down into your legs as if you could press your knees all the way to the floor.

angelo4

-Stretch the backside of your legs with the traditional Head-to-Knee Pose. From a seated position, extend one leg forward and align the sole of your opposite foot against the inner thigh of your extended leg. From here, square the center of your chest with the knee of your extended leg and lean forward in an attempt to rest your bottom rib on your upper thigh bringing your nose-to-knee.

angelo5

-Half Kneeling Hip Flexor Stretch with a side bend will open the front of the hips as well as prep the spine to bend and twist. Set up in a lunge position with the back knee on the floor. Bind your fingers and stretch both arms over head. From here slide your hips forward until you feel a significant stretch in the hip flexor muscle of the down knee then begin to side bend over the front leg focusing on a long stretch sensation from the top of the hip all the way to the bottom of your armpit.

angelo6

-You are only as young as the mobility of your spine so to improve this, hang tight in the half kneeling position while you twist your opposite elbow over the front knee. Place your hands in a prayer position with fingertips facing forward then press your hands together to engage and deepen the twist.

angelo7

-Heart Opener’s Pose is a great stretch for the mid to lower back, it improves your overhead position and acts as a great prep for bridging. Find your way into this posture by setting up in a quadruped position (kneeling on all fours). Prioritize the stretch in your middle back first by pressing your belly button down towards the floor, arching your spine. Finally, to stretch your shoulders and deepen the back bend, keep your hips stacked on top of your knees while you walk your hands forward until you can rest your forehead or even your chin on the ground.

angelo8

-Address your shoulders with a Butterfly Shoulder Stretch. Again starting in a quadruped position, cross your elbows in front of your shoulders with the tops of your hands pressed against the ground. Stretch your arms away from each other, shrug your shoulders down away from your ears then slowly begin to rock forward until your chest aligns in front of your elbows and you feel a stretch on the outside of the shoulder that is stacked in front.

angelo9

Following this blueprint may not cure all or any of your ailments, but it will certainly aid in your weekly workout recovery. It is easy to get consumed by the exercises that build strength and conditioning while losing sight of benefits gained by slightly backing off the intensity. Try adding this to your program at least once a week and let me know how it affects your progress.

***

About Angelo Gala, RKC / PCC Team Leader: Angelo Gala has been a fitness professional in the Boston area for greater than 11 years. He is a Certified Strength and Conditioning Specialist through the NCSA, and has studied the Pranavayu system of yoga under David Magone.  He is a Dharma friend at the Sakya Center of Buddhist Studies in Cambridge, MA where he completed a 1 year intensive study of Mangalam Yantra Yoga under the guidance of Lama Migmar Tseten. Go to http://www.dragondoor.com/angelo-gala/ for more info.

Filed Under: Flexibility, Progressive Calisthenics Tagged With: active recovery, calisthenics, meditation, PCC, recovery, skill training, strength, stretches, technique, yoga

Primary Sidebar

Featured Products

previous arrow
GetStrongBookCover
ConvictConditioningBookCover
StreetWorkoutBookCover
ExplosiveCalisthenicsBookCover
StrengthRulesBookCover
next arrow

Categories

Progressive Calisthenics Certification Logo
Click here for more information or to register for the PCC workshop

Get Strong Workouts TriadXP App
Get Strong Workouts App

Recent Posts

  • Top 5 Reasons Why an In-Person Workshop is the Best Way to Supercharge Your Training
  • HYBRID STRENGTH TRAINING IS HERE!
  • My Calisthenics Journey to the PCC
  • The Handstand Press: Complete Control Through the Handstand
  • The Get Strong App is Here!

Dragon Door Publications

Dragon Door Publications

Recent Comments

  • bross dandon on The Case for Curved Handstands
  • Johnny Flewellen Jr. on Strength for Life
  • Dan Earthquake on The Pursuit of the Daily Minimum
  • Johnny Flewellen Jr. on The Pursuit of the Daily Minimum
  • Johnny Flewellen Jr. on Yoga, Calisthenics and the Journey of a Lifetime
FOLLOW US ON TWITTER!

Copyright © 2025

Dragon Door Publications / The author(s) and publisher of this material are not responsible in any manner whatsoever for any injury that may occur through following the instructions or opinions contained in this material. The activities, physical and otherwise, described herein for informational purposes only, may be too strenuous or dangerous for some people, and the reader(s) should consult a physician before engaging in them.