• Skip to main content
  • Skip to primary sidebar
  • Home
  • Contributors
  • Resources
    • Q&A with Paul “Coach” Wade
  • Workshops
  • Products
  • Forums
  • Articles
  • Blogs
    • RKC Blog
    • Strong Medicine Blog
  • Archives

PCC Blog

Progressive Calisthenics - The Official Blog for the PCC Community

tension

Time Under Tension

November 27, 2018 By Ray Shonk Leave a Comment

Ray Shonk Pistol Squat

Progressing in your calisthenics quest doesn’t always mean that you master the next big movement or duplicate a zany stunt. Another way of scaling the difficulty of just about any particular exercise is to simply employ time. No, I don’t mean making your workouts longer—in fact this method could make your workouts shorter—what I am referring to is time under tension.

The phrase “time under tension” refers to how long a muscle (or group of muscles) is under stress for a given rep or set. This can be achieved by lengthening the concentric, eccentric or pausing phase of an exercise.

I used this technique back in my weight lifting days. In fact, most methods of progressive resistance in calisthenics can apply to the weight room as well. When I was focused on lifting (and training people to do the same), there were times I would use less weight, instead choosing to focus on a slow tempo. Oftentimes, my clients would question my method, as they were only thinking in terms of lifting as much weight as possible. But to their surprise, when I had them do a 3 second eccentric and concentric (3 seconds down and 3 seconds up) movement for each rep, they would burn out sooner and get more out of the exercise—even at less external resistance.

Of course, you are also not limited to a 3 second tempo, you can also slow it down more so, such as a 5 second tempo. You could even add pause at the bottom of your movement. All of these are effective ways of increasing your muscles’ time under tension.

The concept of time under tension is arguably even more important when applied to bodyweight training. Because of our minimalist approach (and equipment set-ups), we are constantly using methods of increasing resistance without adding external weight. In fact, calisthenics newbies often wonder how it’s done. Well, again, time under tension is one of the least complicated ways!

Slowing an exercise down—or pausing at the bottom—are both ways to employ time over tension. This is one of the least complicated methods of progressing an exercise without adding external resistance.

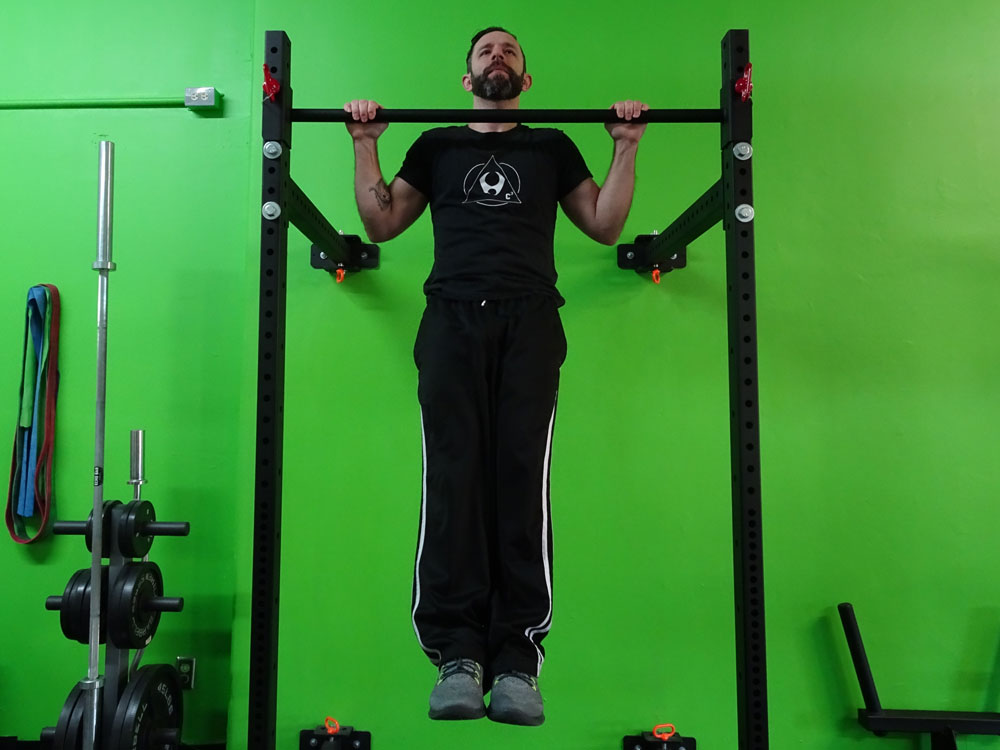
In fact, for me personally, when I put the weights away and became completely calisthenics focused, I was able to achieve very high rep counts in my basic 3 exercises: push-ups, pull-ups and squats. For a while, I thought progressions were the only way to go from there, so that is what I did.

Over the course of time, and after many steps, classic push-ups became feet-elevated push-ups, two-legged squats became pistol squats, and pull-ups became muscle-ups.

Eventually, my numbers started to pick up again. So I thought back and remembered the slow tempo workouts I use to do. I decided to give it a shot and they were more challenging than I expected. You see, not only does the slow tempo maintain the tension on the muscles for longer, it also requires you to be more attentive to form, thus giving a greater yield from every single repetition.

Ray Shonk Feet Raised Push-up variation
It’s true that elevating your feet or using your knuckles are ways of progressing the push-up, but did you know that simply slowing it down is a progression in it’s own right?

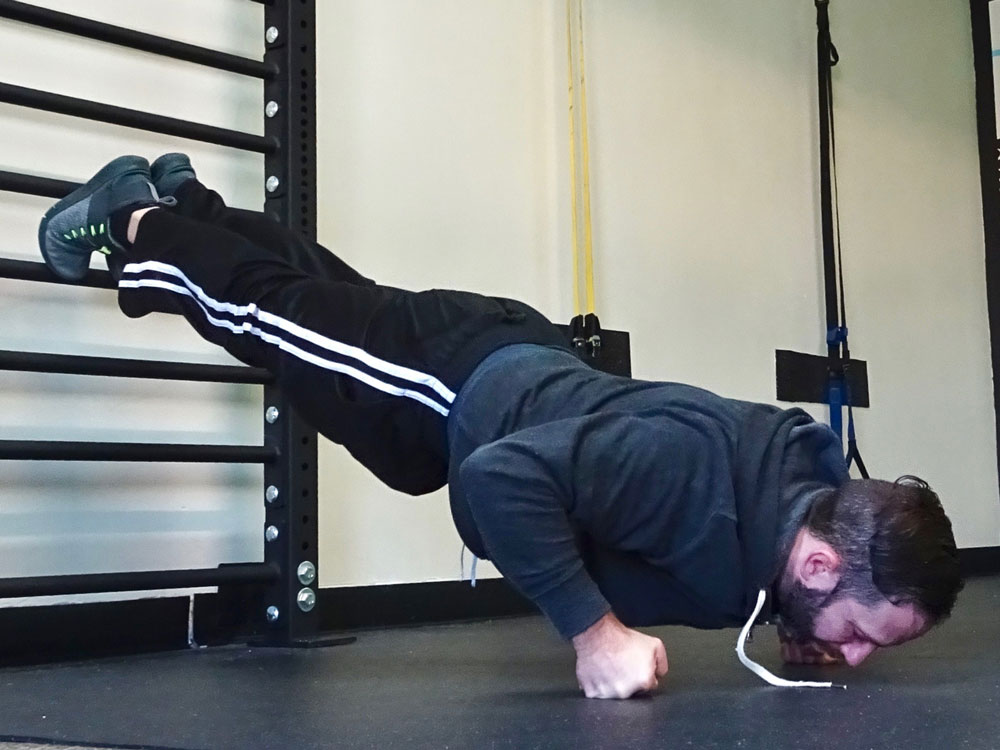
Feel free to experiment. I’ve found that pausing at various points throughout the range of motion (as opposed to just the top or bottom position) can help overcome sticking points. Think about a pull-up, for example, where you pause for 2 seconds at the top, then again with your elbows at 90 degrees, then 120 degrees, with a final pause at the dead hang—ouch!) Furthermore, you can even experiment with super-slow reps, such a “the one minute push-up” which is 30 seconds on the way up and 30 seconds on the way down! Just make sure to take your time on the eccentric phase for max results!

Remember, fitness isn’t just being able to knock out 100 push-ups, or bench press double bodyweight: it is more about embracing the process, living in the present, and ranking quality over quantity when it comes to movements. Take it slow, build real strength, and focus on your form: you will see quality changes!

***

Ray Shonk, PCC is a personal trainer in Grand Rapids, Michigan, an adjunct professor at GVSU and the owner of Quest Fitness. In 2017, he authored his first book, appropriately titled, The Calisthenics Quest. Ray specializes in Calisthenics, Sports Performance and Martial Arts training. When he is not training, Ray spends time brewing beer, and enjoying time with friends and family. Learn more at www.questfitnessgym.com

Filed Under: Progressive Calisthenics, Tutorial Tagged With: calisthenics, tempo, tension, time under tension, TUT

Developing Powerful Abs with the Dragon Flag

April 22, 2014 By Adrienne Harvey 32 Comments

PCC Team Leader Adrienne Harvey Dragon Flag in Sweden

Anyone who’s familiar with extreme calisthenics already knows the infamous human flag exercise; the dragon flag variant, however, is an equally awesome move that fewer people are aware of. It looks cool, it’s commonly associated with Bruce Lee, and there’s so much that can be learned by working up to and practicing it. The other great thing about the dragon flag is that learning to do one means learning how to create an incredible amount of tension throughout your whole body—an essential skill for all advanced calisthenics. While there are many different paths to the dragon flag, the multi-faceted one shared below has worked well for a few clients and myself. Some of these drills led me to the dragon flag before I was ever really trying for it. Oddly enough, even though they require very maximal effort, I’ll usually leave dragon flags for the end of the workout, or focus on them at a separate time of day from my main workout. Regardless, it’s also a good idea to be warmed up. The Trifecta from Convict Conditioning 2 using the bridge, L-sit, and twist is a great sequence to practice before and after your calisthenics work, especially high tension moves like the dragon flag!

It seems like all forms of the flag require an extreme level of tension. Whenever I catch myself not properly respecting that fact on any flag progression, I remember watching Danny Kavadlo psych himself up for one of his human flag demonstrations—that fierce-looking (and sounding) process is nearly as impressive as the feat itself! But the good news is that since most serious bodyweight enthusiasts will naturally already have some of the requisite abdominal strength, the dragon flag may be a little bit “easier” to achieve than a full human flag. It certainly requires a little less skill since it’s usually performed on a solid bench, or from the ground with a low bar, instead of self-suspended in the air while gripping a pole!

Al Kavadlo performs a Dragon Flag on a pole
Al Kavadlo performs a dragon flag on a pole

The dragon flag can also be performed on a pole, but it requires a bit of pain tolerance (pick which trap you want to jam the side of the pole into) and extra time practicing the correct grip—plus you’ll also have to fight the rotation from that off-centered pole! For comfort and simplicity—especially at the beginning—using a bench, a well-secured very low bar, or similar set up is best for learning the dragon flag. Certain types of very simple ab stations on fit trails (look for a flat platform with a low bar attached at one end) can also be appropriate for flags, though I would recommend padding the surface under your shoulders.

Fit Trail ab bench

For safely make sure that whatever you are using, grabbing, and pushing against is sturdy and can support your entire body weight or more.

Alternately, on a flat bench, you can choose to place your hands on the sides of the bench (usually near the ears, but everyone’s placement will be slightly different) or behind your head as shown below:

Hand position choices for dragon flags on a bench

Since the dragon flag requires a lot of tension, proprioception and skill, I’ve used multiple steps and strategies to progress towards it. Many of these moves are good for warming up when you’re able to do the full flag too.

1. The “Hardstyle” plank: The ability to really own the full body tension in this intense version of the plank is crucial. To me the dragon flag feels like an extra serious, less unsupported Hardstyle plank. (Think of doing a plank on just your arms.) The Hardstyle plank differs from the regular variety because the whole body is tensed, the elbows are pulling towards the toes really engaging the abs, and the heels are pushing outwards as well. Similarly, the glutes are engaged too—as they are in the dragon flag!

Hardstyle Plank

2. Lying leg raises from the floor—while these are a LOT easier than a dragon flag, remaining tense with your legs just a few inches off the ground while fully engaging your abdominals will really help you towards the goal of the dragon flag.

Flat Leg Raises Demonstration

3. A yoga-like shoulder stand—learning to balance up on your shoulders and NOT your neck will help you get into the right position at the midpoint of the dragon flag, or the starting point of the negative version. Familiarity with the feeling at this position can help insure that you’re keeping the body in a straight line as you descend, and eventually ascend too. The more balanced you can be at this midpoint, the more chance you have for a little “rest” between the grueling ascent and descent of the full dragon flag.

Shoulder stand demonstration

4. Tuck-flags or roll-ups (I’m sure someone has a better name for this drill). As we know from many other bodyweight exercises (L-sits, front and back bar levers) if we shorten the length of our legs, then the more favorable leverage makes the move much easier. While in a tuck position, use your abs to slowly pull your tucked body up off the floor onto your shoulders while firmly gripping the bench or very low bar, slowly lower back down until your abs are almost screaming! This move is not to be done quickly, and is surprisingly difficult if performed correctly—especially for reps! Gradually straighten the legs more and more to increase difficulty.

Tuck raises demonstration

5. Negative dragon flags. Grasp the bench or very low bar and begin from the shoulder-stand-like top position. After making sure you’re resting on your shoulders, not your neck, tense the whole body (torso, glutes, legs, etc.) and try to lower yourself slowly, and under control without bending at the hips. You may feel like you’re supporting most of your body through your arms at first, but try to mitigate that feeling by really keeping the body tight during every second of your descent. This takes an amazing amount of tension. The closer your legs get to the ground, the more difficult the move becomes. Try to maintain the straight body position and the tension as long as you can without just dropping your legs at the bottom of the movement. The abs, glutes, legs and everything in between are strongly engaged (I’ve even managed to cramp up one or both feet while practicing these!)

Negative dragon flags

6. Full dragon flags up from the ground, towards the shoulder-stand-like position, then descending. It’s very easy to accidentally cheat these on the way up, as your hips will want to fold to help you out. Instead, think of maintaining a slightly flatter version of a hollow position while focusing on keeping the body as one solid plank. I think the most difficult part of this move is initiating the movement from the ground. The first few seconds feel nearly impossible on some days!

Steps 1-4 can be practiced together, but practicing the negative flags and full flags is incredibly taxing. I typically won’t do more than 1-2 per set for negatives, and only 1 full dragon flag per set, for a session total of 3-5 sets. That’s ten reps total for the day at most. You may be able to work up to more over time, but this move takes practice, patience, and long term dedication, so best to ease in gradually.

While some may dismiss moves like the dragon flag and human flag as “party tricks,” these very cool looking moves are rewarding to conquer as they challenge our patience along with building strength, skill, and control. Thankfully, these hard-won concepts will carry over directly and indirectly to many other bodyweight drills, skills and feats of strength.

 ***

About Adrienne Harvey, PCC Team Leader, RKCII, CK-FMS, Primal Move Nat’l Instructor: Originally RKC Certified in 2010, and RKC Level 2 certified in 2011, kettlebell and bodyweight training have been crucial in Adrienne’s personal quest for fitness. A core member of the PCC team, Adrienne loves sharing her knowledge with small groups and individuals. She also loves to develop recipes and workout programs to further support performance, body composition, and of course—FUN.  Go to http://www.giryagirl.com for more information about Adrienne!

Filed Under: Progressive Calisthenics, Tutorial Tagged With: abdominal training, abs, Adrienne Harvey, dragon flag, full body tension, human flag, tension, tutorial

Tight is Right

June 18, 2013 By Mike Gillette 3 Comments

blue Oz

Photo courtesy of Mike Gillette

Control… Tension… Control-able Tension… These are the success-essentials for bodyweight mastery. If you (or your clients) lack the ability to “tighten that which needs to be tightened,” then the structural integrity of your exercise-specific postures will be soft, saggy and sad. What you (or your clients) need is the ability to generate head-to-toe tension at will.

If you’ve been training for any length of time, particularly those of you who wield kettlebells, then you have already been teaching yourself how to generate tension. Bracing the body while under dynamic or asymmetric loads is a very effective self-teaching tool when the subject at hand is tension-generation.

But what about your clients? Particularly your new clients? Is there a way to expedite the development of intentional body control so they too can reap the benefits of bodyweight strength-development?

Absolutely.

The following Body-Control Drill sequence is perfect for beginners and simple to administer in a group exercise setting. Once all participants are in the starting position, you will provide a series of instructions. You will be leading your trainee(s) through a process of tightening and relaxing different parts of the body. In addition to the benefit of learning how to generate tension on demand, you are also teaching your clients to respond to your cues. This will make you more effective at teaching them advanced movements down the road. Here’s how you run the drill…

TO BEGIN: Have your trainee(s) stand in a neutral position with feet shoulder-width apart, hips over heels and head over hips. The arms should be resting comfortably at the sides. Shoulders are back and the head is level with eyes cast “on the horizon”.

Points-of-Performance:

  • Do not exceed 5 seconds of tension at a time. Two contractions per isolated body part are sufficient.
  • Trainees must be cued to “breathe through” the contractions. They are NOT to hold their breath.
  • Coaches must be careful not to “burn out” clients in the performance of this drill. Done with intention, this drill can be grueling.
  • As the coach you are in charge of quality-control. If there is a slacker in your group, then poke, prod or do whatever you need to in order to get them to tighten up to your satisfaction. In general you will be able to assess your athletes visually, but there will be times when you have to go “hands-on”. (Note: When I work with females, I make a fist and gently bump the area in question. This prevents the appearance of hand contact which looks or feels like I am squeezing/grabbing them. If it’s a male athlete I do the same thing, I just don’t bump as gently).
  • This is just a drill. Use it where and when it makes sense, but stay focused on the bigger picture.

Step 1: “Grab the floor with your feet and hold” ….. “Now release”

Step 2: “Tighten your lower legs and hold” ….. “Now release”

Step 3: “Tighten your upper legs and hold” ….. “Now release”

Step 4: “Tighten up from your feet through your upper legs and hold” ….. “Now release”

Step 5: “Tighten your glutes and hold” ….. “Now release”

Step 6: “Tighten your midsection and hold” ….. “Now release”

Step 7: “Tighten up your glutes and midsection and hold” …. “Now release”

Step 8: “Tighten your shoulders and chest and hold” ….. “Now release”

Step 9: “Tighten your arms and hold” ….. “Now release”

Step 10: “From head to toe, tighten your entire body and hold”… “Now release”

That’s it. It’s an easy drill for you to administer and easy for your clients to understand. And using this drill as a basic framework, you can apply variations. Your clients could perform it seated, while holding a broomstick or a length of rope, they could even perform it supine at the end of a workout.

***

About Mike Gillette: Former SWAT Commander and Executive Bodyguard, Mike Gillette is a relentless student of the human factors which allow people to succeed despite overwhelming odds. His research and experiences have taken him through many different worlds and disciplines. They have ultimately produced a body of knowledge which has been put to use by clients ranging from high-risk professionals operating in extraordinary circumstances, to ordinary people who want to make extraordinary changes in their lives…

Find him on Facebook!


Filed Under: Progressive Calisthenics, Tutorial Tagged With: body control, bodyweight exercise, full body tension, Mike Gillette, tension, tutorial

Primary Sidebar

Featured Products

previous arrow
GetStrongBookCover
ConvictConditioningBookCover
StreetWorkoutBookCover
ExplosiveCalisthenicsBookCover
StrengthRulesBookCover
next arrow

Categories

Progressive Calisthenics Certification Logo
Click here for more information or to register for the PCC workshop

Get Strong Workouts TriadXP App
Get Strong Workouts App

Recent Posts

  • Top 5 Reasons Why an In-Person Workshop is the Best Way to Supercharge Your Training
  • HYBRID STRENGTH TRAINING IS HERE!
  • My Calisthenics Journey to the PCC
  • The Handstand Press: Complete Control Through the Handstand
  • The Get Strong App is Here!

Dragon Door Publications

Dragon Door Publications

Recent Comments

  • bross dandon on The Case for Curved Handstands
  • Johnny Flewellen Jr. on Strength for Life
  • Dan Earthquake on The Pursuit of the Daily Minimum
  • Johnny Flewellen Jr. on The Pursuit of the Daily Minimum
  • Johnny Flewellen Jr. on Yoga, Calisthenics and the Journey of a Lifetime
FOLLOW US ON TWITTER!

Copyright © 2025

Dragon Door Publications / The author(s) and publisher of this material are not responsible in any manner whatsoever for any injury that may occur through following the instructions or opinions contained in this material. The activities, physical and otherwise, described herein for informational purposes only, may be too strenuous or dangerous for some people, and the reader(s) should consult a physician before engaging in them.