• Skip to main content
  • Skip to primary sidebar
  • Home
  • Contributors
  • Resources
    • Q&A with Paul “Coach” Wade
  • Workshops
  • Products
  • Forums
  • Articles
  • Blogs
    • RKC Blog
    • Strong Medicine Blog
  • Archives

PCC Blog

Progressive Calisthenics - The Official Blog for the PCC Community

Archives for November 2014

Hill Training

November 25, 2014 By David Mace 19 Comments

Al Kavadlo On A Hill

There is a common misconception that you require heavy weights to strengthen your legs effectively. The counter-argument to this is the mighty pistol squat, but leg training shouldn’t end there. There are many great exercises that require no equipment, and are not possible to perform in a gym.
All you need is a steep hill!

The Workout

I perform this workout once a week. The exercises are split into three different sets, and between sets I train a selection of mid-section / core exercises, such as leg raises, bridges and planks.

Below is a short demonstration video of this workout, along with my training partner Yury. You’ll get the impression that we were knackered afterwards!

Important note – before attempting any of these exercises you should ensure that you can perform them on a level surface.
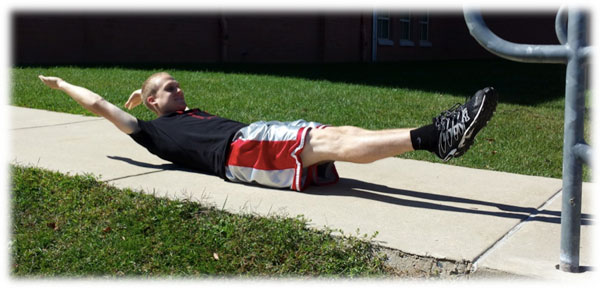
Sprints

Sprinting is probably the first exercise that many will think of when I mention hill training; it is a great explosive exercise for building strength as well as cardiovascular fitness.

To progress/regress simply adjust your speed or use a hill with a different incline. Backwards sprinting is a good variation that will put more emphasis on the hamstrings.
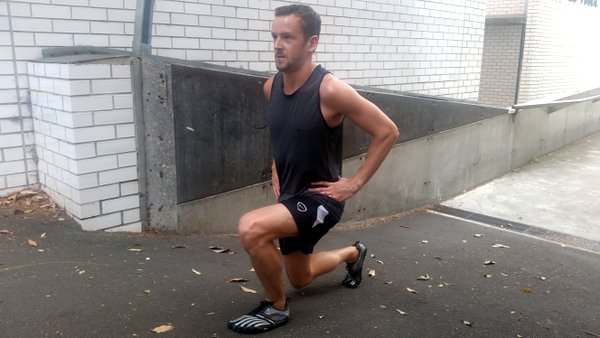
Lunge Walk

From a standing position, step one leg forward as far as you can. Squat down until the back knee is just above the ground, from here step the back foot up to the front foot. Repeat with the other leg.

For an increased challenge, take your back foot straight through into the next lunge. Leaning forward will place more emphasis on the glutes.

David Mace Lunge

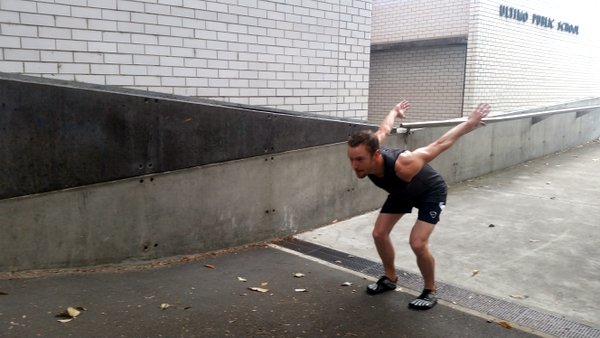
Broad Jumps, Hops, Frog Jumps

Time for some explosive exercises!

Start off with simple broad jumps. Placing your feet shoulder width apart, squat down and jump as far forward as you can. Ensure to land on the ball of your foot and squat as you land to cushion the impact; use your arms to gain extra momentum. It’s important that the knee tracks along the line of the toes as you land. Repeat until you reach the chosen distance.

David Mace Jump

Next, hop up the hill with one leg to get a unilateral workout. Start with your weaker leg, repeat the same distance with your stronger leg; this way you are working both legs equally.

Frog jumps are one of my favorite exercises. Don’t try this exercise until you have a strong deep squat. Go into your squat, balance on the balls of your feet, from here bounce up the hill. The key with this exercise is to bounce low but long, so as not to waste energy.

David Mace Frog Jump

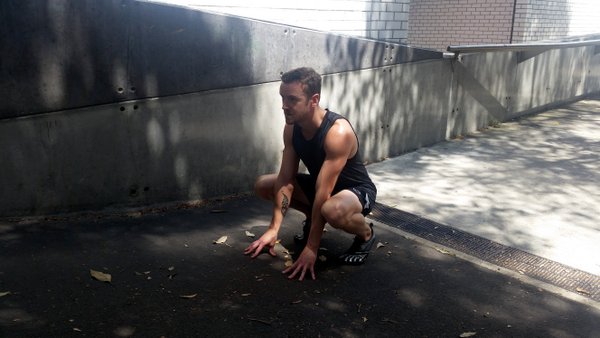
Start out easy with this one, with a handful of jumps. Gradually increase the distance over the following sessions.
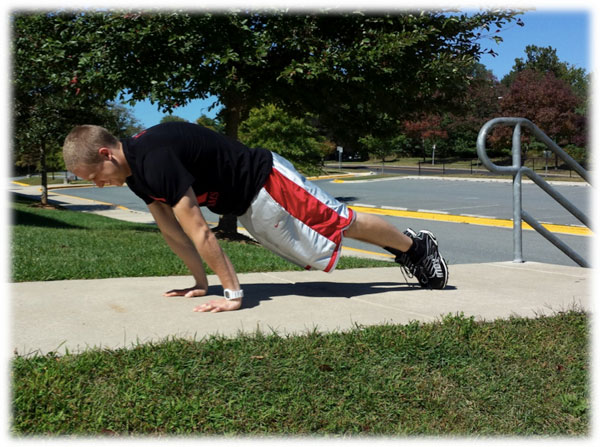
Crawls

Crawling is one of our most natural movements. Performing this up-hill turns it into an extremely challenging exercise. This will work your entire Anterior Chain, which are the muscles at the front of your body.

When crawling, your leading arm should be opposite to your leading leg. Try to keep your hips as low as possible, and for increased difficulty keep your knees off the ground.

I could go on and on about the benefits of crawling, but that’s a post for another day.
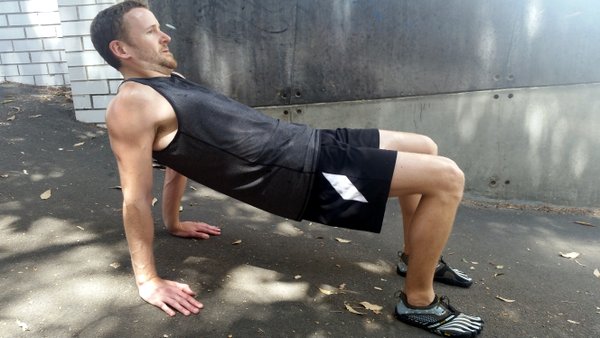
David Mace Crawling

Crab Walks

We’ve worked the Anterior Chain, let’s get into the Posterior Chain!

With the front of your body facing upwards, balance on your hands and feet with your knees at a 90 degree angle.

This exercise is easier to go backwards as you’ll be driving with your legs then rather than your arms. For an extra glute challenge, try to keep your hips up high. This is harder than it sounds.

David Mace Crab Walk

Taking it Further

All of these exercises can be performed backwards or even sideways to alter the muscles worked, but first ensure you get the basics right.

I plan to progress to more challenging exercises in the future. There are lots of advanced crawling patterns that could be attempted, such as bear crawls, Spiderman crawls and commando crawls. Furthermore, I intend to try partner exercises like wheelbarrows, piggy-backs and fireman’s lifts. So stay tuned.


***
Dave Mace is a full time programmer and a part time calisthenics enthusiast, who loves to teach PCC to friends and co-workers. Success for him is measured in helping others (and himself) to achieve their maximum potential and doing things that you once thought were impossible. He can be contacted through his website, Maximum Potential Calisthenics, or at his Google+ and Facebook pages.

Filed Under: Conditioning, Tutorial Tagged With: bodyweight conditioning, bodyweight training, calisthenics, conditioning, hill training, pistols

Conquering the Century Test

November 18, 2014 By Adrienne Harvey 51 Comments

Adrienne Testing Pushups At Sweden PCC
Adrienne closely observes push ups during the Century Test at a PCC Workshop

The Century Test is the climax of every Progressive Calisthenics Certification event. After three days of intense training, the Century is the only opportunity for prospective candidates to prove their mettle and earn the title of PCC Instructor.

While helping Al and Danny teach at several PCC workshops, I’ve noticed the same common issues continually come up during the Century Test. Before you think these don’t apply to you, remember I’ve actually seen many accomplished and highly athletic people make these very mistakes! Of course we make sure to point out the complete rules and standards at each workshop, but why not work to avoid these hidden perils from the beginning?

First, let’s talk about speed—you will have a total of EIGHT minutes to complete your Century Test. Somewhere along the line, a terrible rumor started about doing the test “as fast as you can.” Unfortunately, this is the opposite of how the test should be approached; the Century is not a race!

While we don’t want you to fall asleep mid-test or run out of time, we do require you to use a moderate pace that allows you to complete each rep with your best form, crisply and cleanly. We also need to be able to evaluate and count your reps in real time. If someone gets into speed demon mode, it’s very difficult to evaluate AND count each rep while making sure they are up to our standards. We shouldn’t be seeing “motion blur” around you!

Once you begin a set, you can’t stop until you have completed the required amount of reps (which will be counted by whoever is testing you—Al, Danny, or an assisting PCC instructor). For example, the first set is 40 bodyweight squats. Once that set begins, there’s no stopping until you complete all 40 reps. After a set is completed, you can take as much time (within that total of eight minutes) as you need to rest between sets—more on that later!

For many PCC attendees, an odd issue happens with the squats, but it is easily corrected. Sometimes people focus SO much on the “down” portion of the squat that they don’t always fully complete the “up” portion! Make sure you stand ALL the way UP at the end of each squat rep. Again, if this can happen to some of the most athletic and accomplished people then it can happen to anyone. If you have a training partner, ask them to keep a close eye on your full squat movement (or record a short video of yourself).

Testing Squats at the PCC

As for the lowering phase, the top of your thighs must come below parallel with the ground without any bouncing at the bottom. Some people have had issues here as well, so make sure you go all the down before you come all the way up!

Next up are push-ups, 30 reps. Men will do these from the feet, and the ladies will be doing them from the knees. (Feet must be together for men; knees together for women.) Again, be sure to come all the way up to a full lockout at the top – much like the squats, it’s easy to become preoccupied with the bottom portion of the exercise, the required depth, etc. while shortchanging the completion of the rep. Use a comfortable, moderate pace so we can see that all your reps are up to our standards.

Al Kavadlo Testing Pushups at a PCC Workshop

Many of the women who come to the PCC are super fit and have not done push-ups from the knees in a while—these same women often tend to have some very fashionable workout wear. This can be perilous when these high performance fabrics make our knees slide during the push-up. Suddenly our hands and knees are very far apart, and it’s against the rules to re-adjust them during the set. Make sure you have a non-slip mat below you, and/or hike up those shiny capris past your knees so they do not move on that mat!

Another issue that even very fit women will have with the knee push-up (especially if we’re used to doing push-ups from the feet) is the idea of keeping the body in a perfectly straight line from the knees to the shoulders, without bending at the hips. Have a training partner observe you, or shoot a video to watch and make sure for yourself. One cue I have used successfully with clients is to have them practice by starting in a “straight arm plank” position, then while keeping the trunk straight, drop down to the knees to find the proper alignment to begin a knee push-up.

Danny Testing Hanging Knee Raises

Hanging knee raises are a real equalizer! Like squats, they’re tested the same for men and women. You must not swing or use momentum to make these reps, and you must hang onto the bar for the entire duration of the set. Make sure to grip the bar tightly while squeezing your shoulders down and back (basically, don’t hang like a limp noodle!) Imagine trying to bend the bar in half to intensify this feeling. Make sure to practice this at home!

Don’t underestimate a set of 20 knee raises. Bringing your knees above your waist takes a surprising amount of abdominal strength when you don’t use any momentum. When your feet come back down (also under control), I’ve found that aiming to put them just below (or even slightly in front of) your body is a great way to prevent momentum. People have found themselves in big momentum-trouble when they’ve extended their feet behind them on the “down” portion of the knee raises, because they start swinging back and picking up momentum. It almost becomes a mini-kip. Control is the name of the game with knee raises!

Finally we have the pull-ups, which are often the most challenging (and potentially heartbreaking) part of Century Test. Sometimes someone with plenty of time to spare just wants to get the test done and he or she does not give themselves adequate rest between the hanging knee raises and the pull-ups. I’ve seen very strong (but reasonably fatigued from 3 days of fun and intensive PCC work) people fail the test at the workshop because they couldn’t finish those last 1-3 pull-ups. An extra 30 seconds to 1 minute rest time between sets could have meant the difference between passing at the PCC or having to go home, regroup, train and submit a test video. It’s moments like these that we all wish for an “undo” or “rewind” button on life! Don’t underestimate the adrenaline rush of “test time”! Remember, it is not a race; you have 8 full minutes, so use it!

For the pull-ups, men will be doing 10 dead hang pull ups from a pull up bar with their choice of underhand or overhand grip. (If the bar is too high, and/or your hands are somehow shredded because you were inspired to overdo it a bit on the previous days, do not hesitate to ask us for a step stool!) Women will be performing 10 “Aussie” pull-ups (down under the bar—also known as bodyweight rows) from a waist-height bar. Again, I can’t encourage the ladies enough to experiment with these bodyweight rows. When practicing for the PCC, find a bar that’s the right height for you, and make sure that your body is positioned in such a way that you’re able to pull yourself up to the bar without having your feet slide—experiment with a mat, or a good shoe choice, etc. Pull yourself up close to the bar at the top of each rep, stay engaged (think plank) without having your body bow up or slump down.

Adrienne Demonstrates Aussie Pull-Up

Men, make sure that you are doing full pull-up reps, as half reps won’t count and can be costly in terms of fatigue! A SLIGHT kink in the elbows at the bottom of the rep is technically allowed, but make sure to have someone check you and video yourself to make sure that you aren’t slipping into doing half-reps. And, no kipping or momentum allowed!

I hope that these details have been helpful, and please feel free to ask questions here and always at the workshop. We really do want everyone to pass if they are truly ready and able to represent the PCC as a certified instructor, while helping their students/clients improve their fitness and quality of life.

Hope to see you at a future PCC Workshop!
Adrienne

Adrienne at the PCC Workshop with Adam

***

About Adrienne Harvey, Senior PCC Instructor, RKC-II, CK-FMS, Primal Move Nat’l Instructor: Originally RKC Certified in 2010, and RKC Level 2 certified in 2011, kettlebell and bodyweight training have been crucial in Adrienne’s personal quest for fitness. A core member of the PCC team, Adrienne loves sharing her knowledge with small groups and individuals. She also loves to develop recipes and workout programs to further support performance, body composition, and of course—FUN. Go to http://www.giryagirl.com for more information about Adrienne!

Filed Under: Motivation and Goals, Progressive Calisthenics Tagged With: Adrienne Harvey, attending PCC, Aussie Pull Ups, bodyweight row, Century Test, Century Test details, Hanging knee raises, how to pass the Century Test, Knee Push ups, Passing the PCC, PCC Testing, PCC Workshop, Progressive Calisthenics Certification Workshop, pull-ups, push-ups, squats

Happy Days At PCC Milwaukee

November 11, 2014 By Danny Kavadlo 25 Comments

Al and Danny Kavadlo in Milwaukee, WI

It’s no secret that since its inception just over one year ago, the Progressive Calisthenics Certification has grown and grown, gaining strength, momentum and community as the days go by. After all, the first rule of PCC is you DO talk about PCC; it’s good to see we’re all doing our jobs!

For our twelfth certification, we headed up North to Drench fitness in Milwaukee, Wisconsin, prepared to have a great workshop in a great city on a Great Lake. And that’s exactly what we did!

Alex Cordero Archer Pull up
You see ‘dem Packers? I mean, packed shoulders?

As is the case when so many bodyweight gladiators get together, something incredible happens. Anyone who’s ever partaken in a push-up contest or a pull-up jam knows exactly what I’m talking about. You see, when you put so much fire and passion together in one place, the room itself ignites in a celebration of energy, inspiration and motivation. It’s an incredible thing to behold.

The calisthenics killers of the Badger State proved their epic power, as personal bests were achieved by just about everybody. There’s nothing like the feeling of earning a one arm pushup, stand-to-stand bridge or human flag when you’ve never done it before. Like they say, you never forget your first!

Katie Petersen One-Arm Pushup
Pushing the limits at PCC

It’s with a heavy heart that we leave America’s heartland. It’s amazing how such a life-changing weekend can go by so quickly, but the friends we’ve made and the experiences we shared will transcend time. These days are ours. PCC is forever.

Congratulations to the new wave of freshly appointed Progressive Calisthenics Instructors. We are proud to have you represent!

Milwaukee_PCC_Group_Photo

The posse’s getting bigger,
-DK

***

Danny Kavadlo is one of the world’s foremost authorities on calisthenics, nutrition and personal training. He is the author of the Dragon Door titles Diamond-Cut Abs and Everybody Needs Training. Danny is known for his minimalist philosophy, simple approach and motivational talents.

A true in-person experience, Danny is a Master Instructor for Dragon Door’s Progressive Calisthenics Certification. He has been featured in the NY Times, TRAIN, Men’s Fitness and is a regular contributor to Bodybuilding.com. Learn more about Danny at www.DannyTheTrainer.com

Filed Under: Progressive Calisthenics, Workshop Experiences Tagged With: Danny Kavadlo, Milwaukee PCC Workshop, motivation, PCC, PCC Workshop, progressive calisthenics, workshop experience, Workshop recap

Back to Basics: 6 Moves to Master Before Moving Forward

November 4, 2014 By Eric Buratty 35 Comments

Kavadlo Brothers Squat

Everybody wants to go straight to the advanced moves, but ain’t nobody want to make time for getting better at the basics!

Here at PCC, we get it. Your mind was just blown away from someone’s Facebook picture or YouTube video performing some sexy, ninja-like move that you want to try, too. This simply means you’ve been inspired to either try a calisthenics move (which is cool), or convert your training efforts exclusively toward calisthenics all together (even cooler).

But, like everything else people are good at in life, such graceful displays of strength, control and power require a considerable amount of time and practice to master. Not to mention the patience involved will humble anyone who might already have a strong fitness background from other disciplines (e.g., weight training, dancing and yoga).

That said, before moving on to some of the more advanced variations of calisthenics moves, EVERYONE needs to become proficient in the following basic positions.

1. Full-Depth Squat

Eric Buratty Squat

Also known as an “ass-to-grass” squat, this is a basic human resting position that involves maximal bending of your hips and knees. NO ONE has any business loading this movement pattern until they can achieve full range-of-motion with their own bodyweight, and still remain upright from a postural perspective.

Calisthenics Transition: Foundation for Progressing the Squat Chain (i.e., working up towards pistol and shrimp squat variations)
Recommended Practice: Sit in this position for 5-10 minutes daily. The more favorable times to do so are upon waking for the day, before bed, whenever on a rest day and before or after a tough workout. Feel free to shake up social conformity any time you have the opportunity to squat—especially when waiting in line or shopping out in public.

2. Supine Hollow Body

Eric Buratty Supine Hollow Position

The hollow body is the ultimate educator on the principle of whole body tension. A challenging core workout on its own, this position teaches you the principles of progression in all of calisthenics. More specifically, it allows you to feel the effect of lengthening or shortening the body as a lever for resistance, so you can adapt your training on a given day accordingly. Without understanding the principles of progression in calisthenics, you will only be setting yourself up for failure—and even injury.

Calisthenics Transition: Foundation for Precision and Control Required in Handstand, Front/Side/Back Levers
Recommended Practice: Maintain this position for a total of 2 minutes on training days involving handstands, front/back levers and human flags. Use as part of a warm-up, or superset with the aforementioned moves as active recovery during a workout (e.g., 8 sets of 15 seconds, 6 sets of 20 seconds, 4 sets of 30 seconds).

3. Hollow Body Leaning Push-Up Plank

EricBuratty Hollow Leaning Plank PushUp

By “leaning” into a standard push-up position, you’ll reach a higher level of total body tension that forces you to have greater balance and control over your body. The ability to achieve this position also serves as an excellent confidence booster for when you start experimenting with moves that involve less point(s)-of-contact with the ground.

Calisthenics Transition: Foundation for Progressing Midsection Floor Holds (e.g., N/L/V-Sits, Side Planks, Planche, Manna), Inversions and Elbow Levers
Recommended Practice: Use as part of a warm-up on workout days involving midsection floor holds, as a “finisher” on workout days involving push-ups or as active recovery on workout days involving vertical and horizontal pull-ups. Work up to holding this position for a solid 2 minutes without form breakdown.

4. Hollow Body Backbend

Eric Buratty Hollow Body Backbend

When it comes to improving overall mobility, look no further than backwards bending (AKA “bridging”). Insert “do you even backbend?” parody for “do you even lift?” here. Known for its extremely therapeutic benefits on the muscles and tendons of the entire body, you can further enhance the quality of this position by putting the lower body into as much extension as possible and concentrating on pushing the shoulders past the hands. What you’re left with is a more “hollowed” version in the basic family of bridging that opens new doors for achieving stronger three-limb holds, geckos, stand-to-stands, walkovers and eventually, arched “Mexican” handstands.

Calisthenics Transition: Foundation for Progressing Handstands
Recommended Practice: Work up to holding this position for at least a solid minute after every workout you do. Given the powerful stretch that occurs in common problem areas for Americans from performing this movement (i.e., spine, shoulders and hips), you might even want to start devoting an entire training session to bridging throughout the week.

5. Hollow Body Dead Bar Hang

Eric Buratty Dead Hang Hollow

Similar to the full-depth squat mentioned above, passive hanging is another type of human resting position. When you take the passive hang one step further and connect the scapular muscles with the rest of the body, you’re left with this active hang that’s visually appealing and graceful. This happens to be one of the best positions for activating the core, as it decompresses the entire spine and puts the shoulders into a healthy stretched position with straight arms. With consistent practice of this deceptively challenging hang, you might “accidentally” become stronger at pull-ups AND start revealing your Diamond-Cut Abs.

Calisthenics Transition: Foundation for Progressing Pull-Up Chain & Leg Raise Chain
Recommended Practice: Hang from any straight bar (or any freestanding object for that matter) that allows you to put your body into a fully extended, hollow position, and maintain the position for a total of 1-2 minutes daily. This can either be done before or after a workout to facilitate warm-ups and cool downs—or as a nice complement to an active recovery day away from your regular training.

6. Hollow Body Bar Support

Eric Buratty Hollow Bar Support

As with the other “hollow” positions above, you’re pretty much forced into a state of total body tension with the bar support—which will lead to stronger reps on any related movement you’re preparing to train. In this instance, the ability to support yourself over a bar in a straight arms, locked out, elbows forward position is definitely a good indicator that you’re ready to reach the top of the dipping chain and beyond. Who ELSE is ready to work towards their first straight-bar muscle-up?!

Calisthenics Transition: Foundation for Progressing Straight Bar Dips & Top of Dipping Chain (i.e., Muscle-Up)
Recommended Practice: Use as part of a warm-up on workout days involving the dipping chain—or as active recovery on workout days involving vertical and horizontal pull-ups. Work up to holding this position for a solid minute at a time without form breakdown.

In no particular order, there you have six positions to master before you get slammed in the face with a serious slice of humble pie.

Why do we want to emphasize these isometric positions before worrying about reps and transitions anyway?

Simply put, it’s so we know where our body is in free space and when its position changes. That way, when we reflect on those workout days where our bodies felt ginormously heavier, we might be able to identify which positions felt strong and which ones felt stronger, so we know where to improve on next time.

I’ll end with one of my favorite training-related quotes which comes from Gymnastics Coach Christopher Sommer: “Save the nonsense. Bad form simply means bad attitude. Plain and simple. It means that you did not care enough to do it right.”

To acknowledge this quote from a PCC standpoint, always focus on becoming stronger than yesterday but not as strong as tomorrow! 😉

***
Eric Buratty brings five years of experience to the DC Metro Area as a Certified Personal Trainer, Progressive Calisthenics Instructor, Nutrition Consultant and Sports Injury Specialist.
For more information about Eric, check out his website, EricBurattyFitness.com.

Filed Under: Progressive Calisthenics, Tutorial Tagged With: bodyweight exercise, bridge, calisthenics basics, calisthenics positions, Eric Buratty, foundation calisthenics, hanging hollow position, hollow position, skills training, squats, tutorial

Primary Sidebar

Featured Products

previous arrow
GetStrongBookCover
ConvictConditioningBookCover
StreetWorkoutBookCover
ExplosiveCalisthenicsBookCover
StrengthRulesBookCover
next arrow

Categories

Progressive Calisthenics Certification Logo
Click here for more information or to register for the PCC workshop

Get Strong Workouts TriadXP App
Get Strong Workouts App

Recent Posts

  • Top 5 Reasons Why an In-Person Workshop is the Best Way to Supercharge Your Training
  • HYBRID STRENGTH TRAINING IS HERE!
  • My Calisthenics Journey to the PCC
  • The Handstand Press: Complete Control Through the Handstand
  • The Get Strong App is Here!

Dragon Door Publications

Dragon Door Publications

Recent Comments

  • bross dandon on The Case for Curved Handstands
  • Johnny Flewellen Jr. on Strength for Life
  • Dan Earthquake on The Pursuit of the Daily Minimum
  • Johnny Flewellen Jr. on The Pursuit of the Daily Minimum
  • Johnny Flewellen Jr. on Yoga, Calisthenics and the Journey of a Lifetime
FOLLOW US ON TWITTER!

Copyright © 2025

Dragon Door Publications / The author(s) and publisher of this material are not responsible in any manner whatsoever for any injury that may occur through following the instructions or opinions contained in this material. The activities, physical and otherwise, described herein for informational purposes only, may be too strenuous or dangerous for some people, and the reader(s) should consult a physician before engaging in them.