• Skip to main content
  • Skip to primary sidebar
  • Home
  • Contributors
  • Resources
    • Q&A with Paul “Coach” Wade
  • Workshops
  • Products
  • Forums
  • Articles
  • Blogs
    • RKC Blog
    • Strong Medicine Blog
  • Archives

PCC Blog

Progressive Calisthenics - The Official Blog for the PCC Community

Progressive Calisthenics

Kids and Calisthenics

May 27, 2014 By Peter D'Epiro 6 Comments

Playground Workout child performs clutch flag

When my son began organized sports my main reason for coaching was fairly simple: spend time with my boy. Besides, who better to coach the team than someone who has experience as both a coach and former athlete, understands we are not playing for a college scholarship from the ages of 5-12, and is more than happy to explain that point to overzealous parents?

I was excited to spend quality time with my son, but over time I learned that coaching provides opportunities beyond teaching kids the skills of various sports and trying to foster an environment that would leave them wanting to sign up again the next year.

KidsSportsTeam

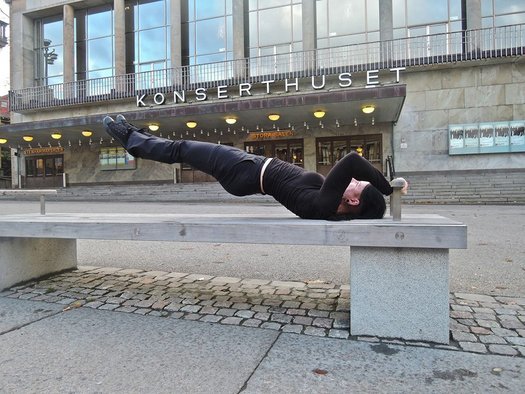
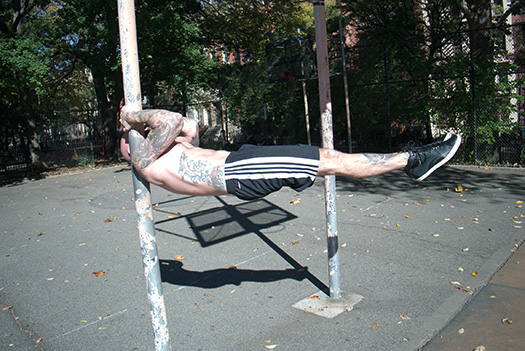
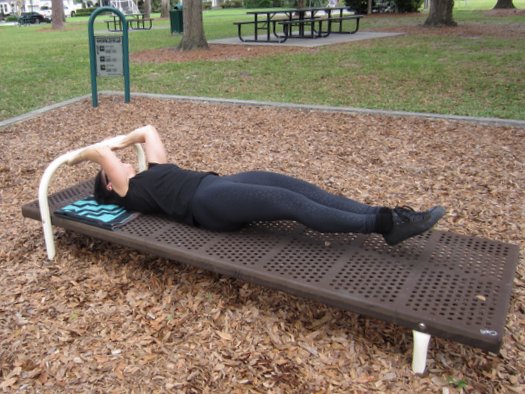
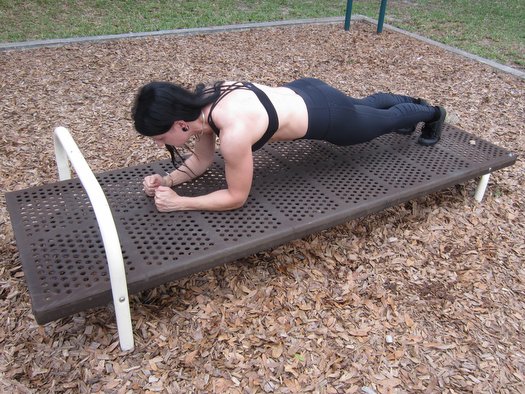
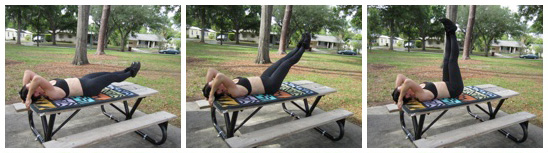
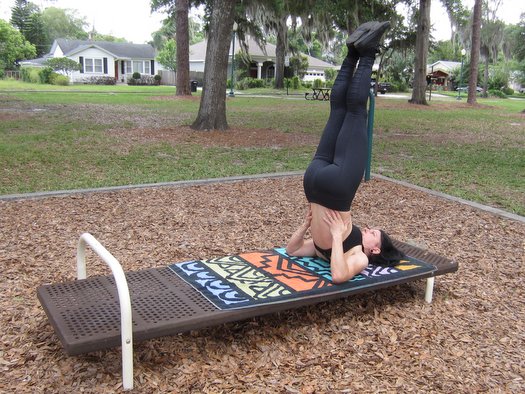
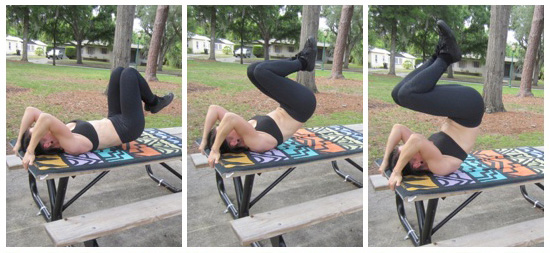
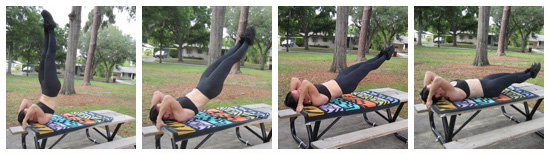
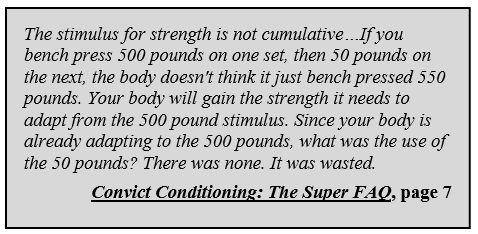
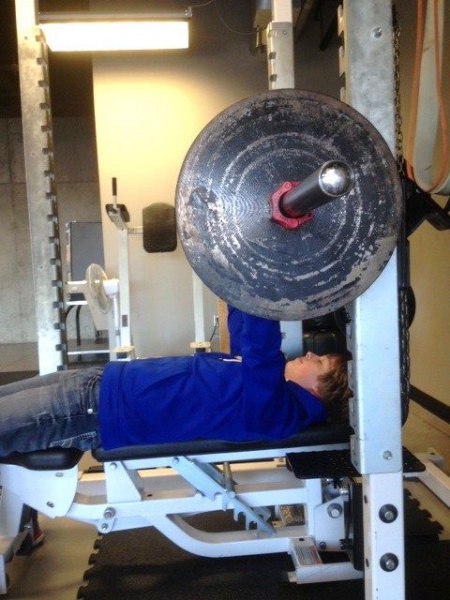
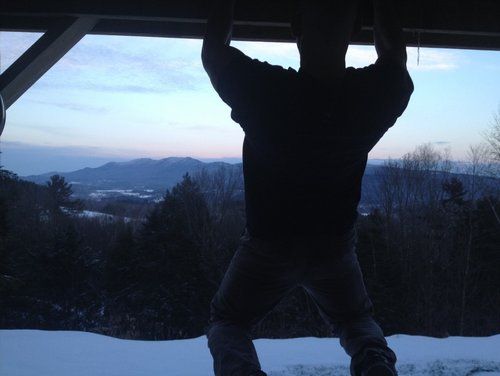
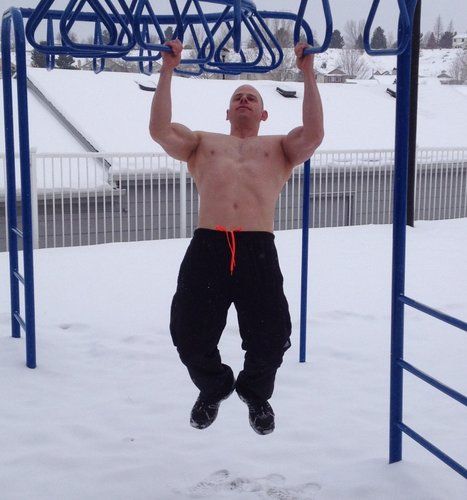
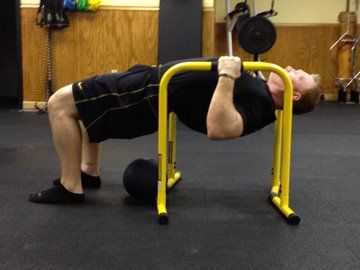
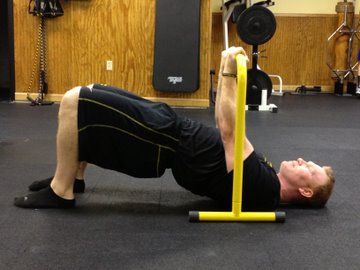
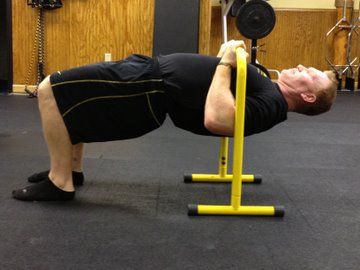
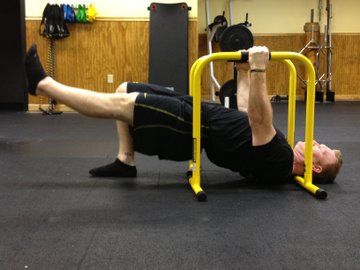
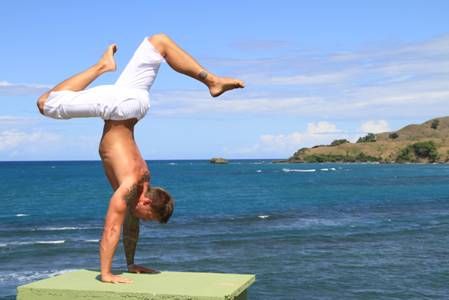
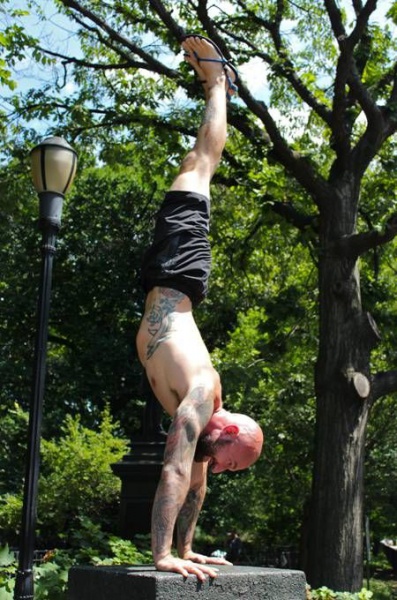
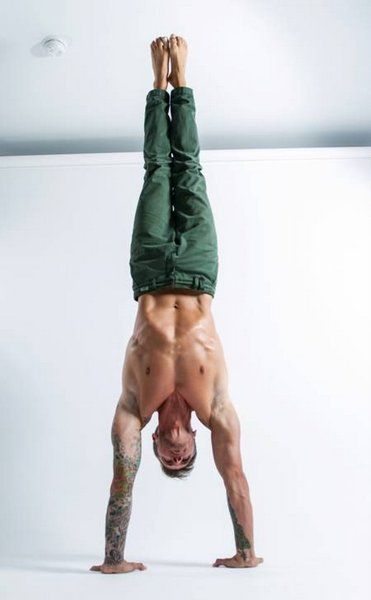
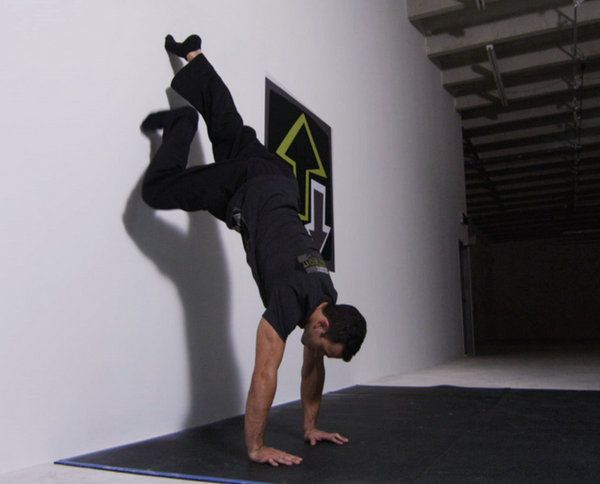
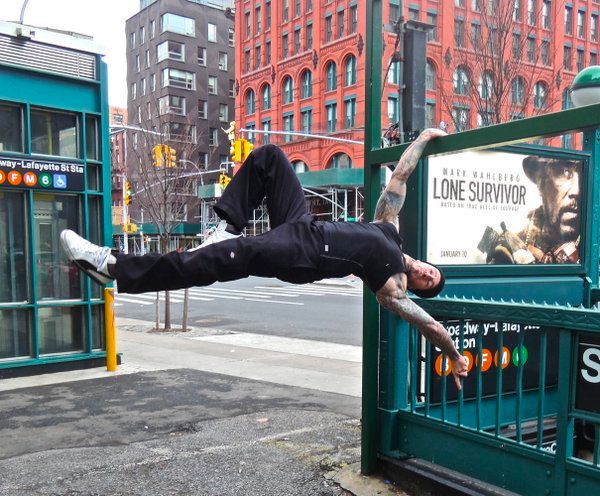
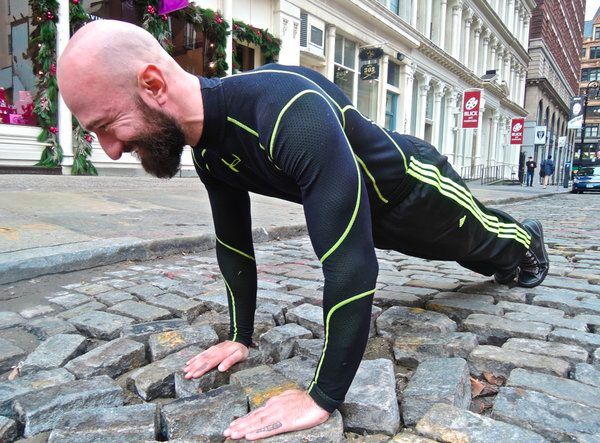
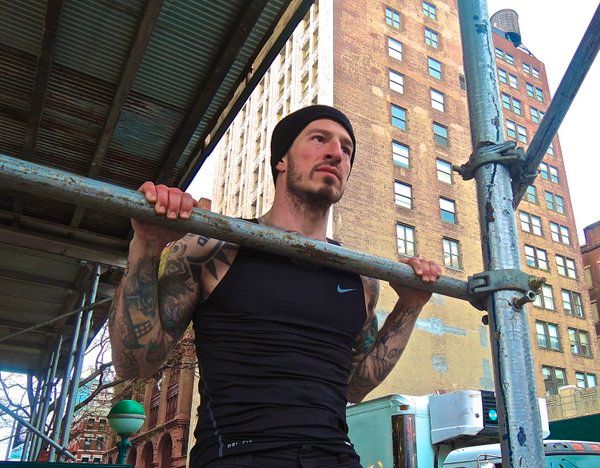
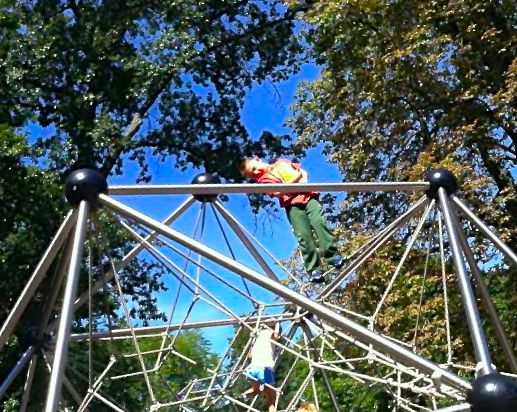
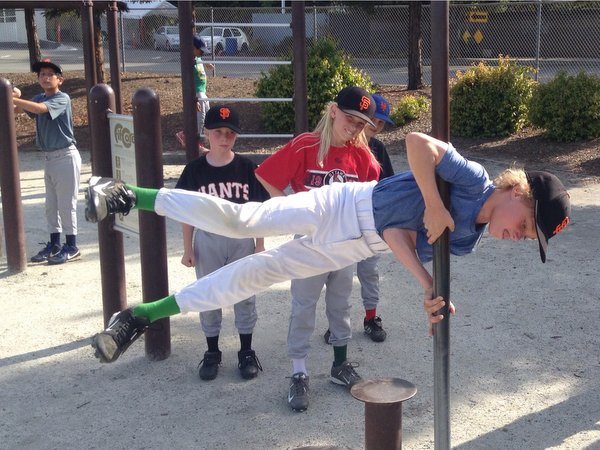
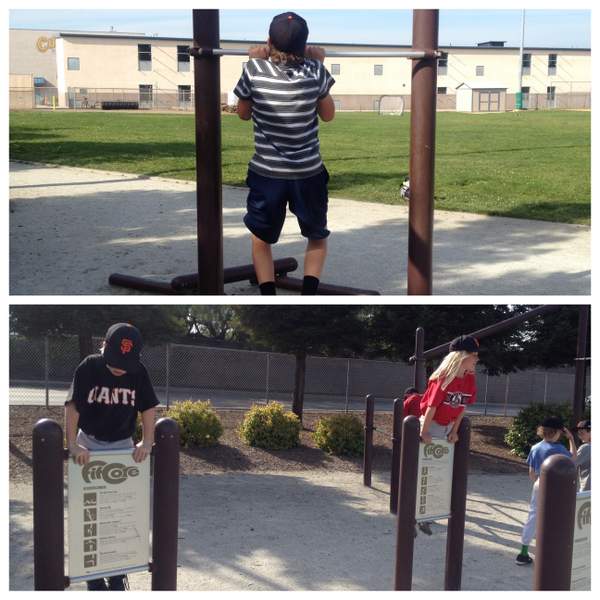
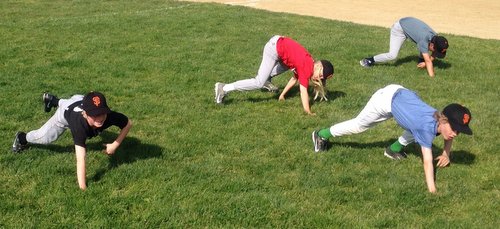
I can’t imagine a much better resource for developing motor skills, strength and athleticism in today’s youth than calisthenics. As a result, you will find our teams opening practice with a number of standard athletic drills (skips, cariocas, etc.) and animal movements to work on total body strength, stability and coordination. If we’re lucky, as we often are during our current baseball season, we will practice at a park or school that has playground equipment nearby, and the kids can all head over for a couple rounds of a fun calisthenics circuit. When we have practice at this particular school, our players show up, start playing catch to get ready for practice, and inevitably a chorus of inquiries starts, asking if they can go do their “obstacle course” to start practice. You can’t beat building genuine strength and movement skill, while all the while the kids feel like they are having a great time “playing.”

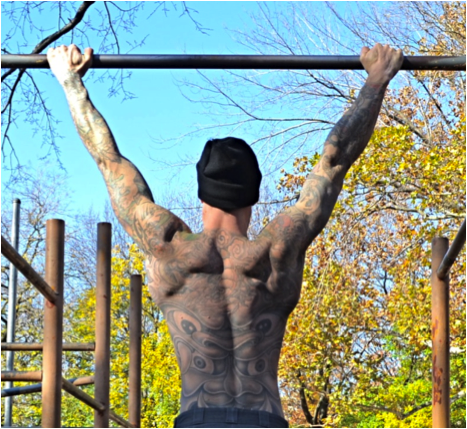
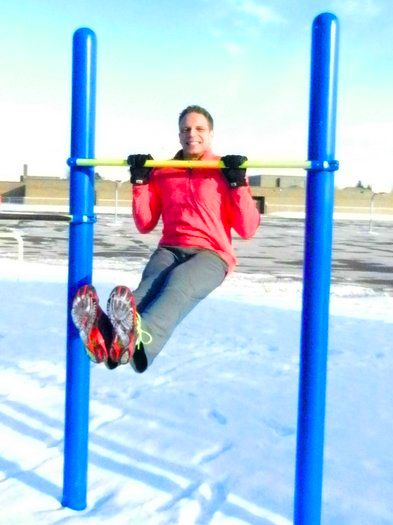
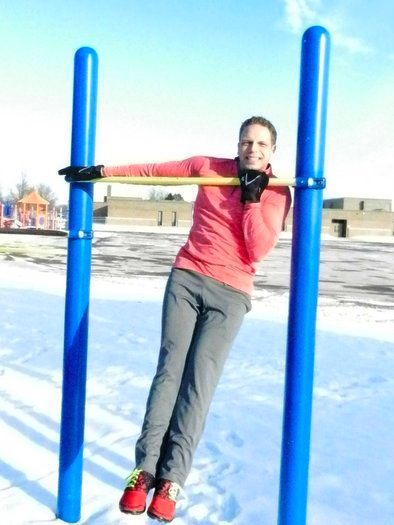
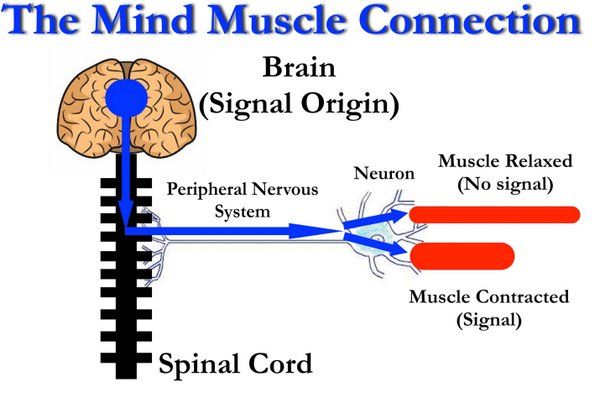
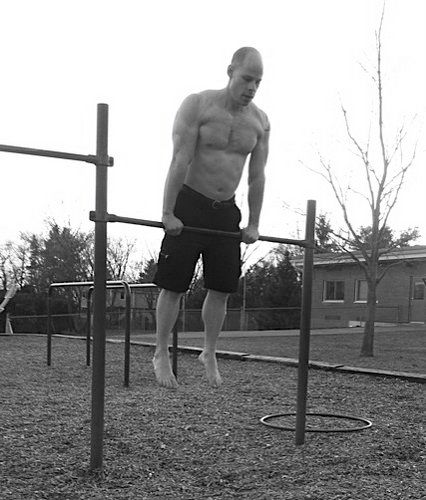
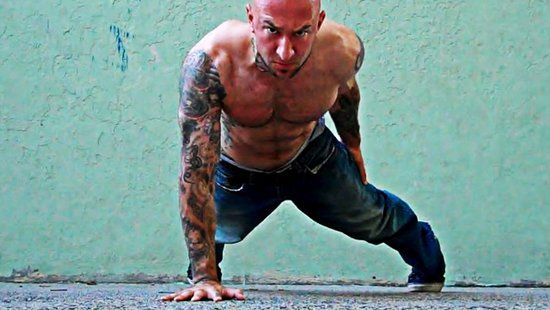
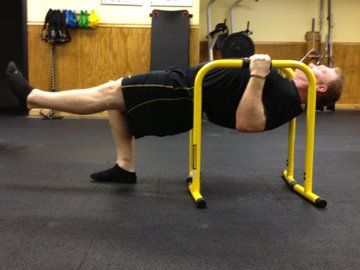
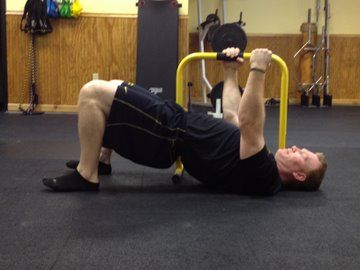
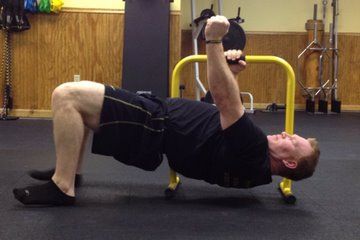
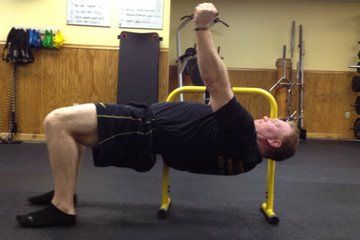
Think about some of the principles and skills required for calisthenics movements: learning to generate total body tension, learning to link the kinetic chain rather than isolating joints and muscles. Let a young athlete practice push ups, pull ups and other bar exercises and more than likely, even without being cognizant of it, they will figure out how to generate more tension throughout their kinetic chain, creating a more stable base from which to produce strength and perform the movement.

Kids Calisthenics Obstacle Course

What does an athlete need to hit a baseball as far as possible, kick a soccer ball as far as possible, throw a baseball as hard as possible? They need linkage through the entire system, total body tension at just the right moments, integration of the nervous system and kinetic chain.

KidsCalisthenics1My family lives in California, a state known for great weather year-round. Despite this environment, physical education in school is down to 1 or 2 days per week as a result of state budget cuts and shifting priorities in school curriculum. Academic excellence is so prioritized that time to play outside of school also suffers. Combine this atmosphere, contemporary technological advances that have reduced our activity in general, and the realization that today’s youth are being raised with these advances completely integrated into their lives, and the bottom line is there is just not as much physical activity occurring for our youth today compared to past generations. That’s why it’s so important for parents to make sure their kids get out and move.

The relationship between calisthenics, youth and young athlete development seems perfectly synergistic, building strength and improving motor development in under-active children, and providing the injury prevention and general athletic development (needed to safeguard young athletes from the risks of early sport specialization). If you are a parent, consider taking advantage of the great resource that calisthenics offers to develop your child’s movement skills, athleticism and strength. And if you coach youth sports, considering doing your athletes a huge favor by making time for movement training beyond the skills of your sport.

Kids Calisthenics Crawling

***

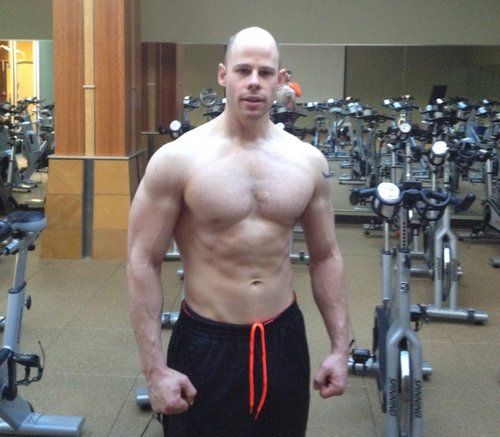
About Pete D’Epiro: A fitness & performance coach in the San Francisco Bay Area for 20 years, Pete specializes in training the unique population that is the Silicon Valley executive/entrepreneur as well as junior athletes ranging from middle school to Division I scholarship athletes.  Pete also volunteers his time to Stew Smith’s non-profit Heroes of Tomorrow, providing free training to candidates preparing for careers in military special operations, law enforcement, & fire.  Most days of the year Pete can be found at the world-class training facility, Evolution Trainers (www.evolutiontrainers.com), in Mountain View, California.

Filed Under: Progressive Calisthenics Tagged With: athletic training, calisthenics play, movement skills, Peter D'Epiro, physical education, pull-ups, young athletes

Developing Powerful Abs with the Dragon Flag

April 22, 2014 By Adrienne Harvey 32 Comments

PCC Team Leader Adrienne Harvey Dragon Flag in Sweden

Anyone who’s familiar with extreme calisthenics already knows the infamous human flag exercise; the dragon flag variant, however, is an equally awesome move that fewer people are aware of. It looks cool, it’s commonly associated with Bruce Lee, and there’s so much that can be learned by working up to and practicing it. The other great thing about the dragon flag is that learning to do one means learning how to create an incredible amount of tension throughout your whole body—an essential skill for all advanced calisthenics. While there are many different paths to the dragon flag, the multi-faceted one shared below has worked well for a few clients and myself. Some of these drills led me to the dragon flag before I was ever really trying for it. Oddly enough, even though they require very maximal effort, I’ll usually leave dragon flags for the end of the workout, or focus on them at a separate time of day from my main workout. Regardless, it’s also a good idea to be warmed up. The Trifecta from Convict Conditioning 2 using the bridge, L-sit, and twist is a great sequence to practice before and after your calisthenics work, especially high tension moves like the dragon flag!

It seems like all forms of the flag require an extreme level of tension. Whenever I catch myself not properly respecting that fact on any flag progression, I remember watching Danny Kavadlo psych himself up for one of his human flag demonstrations—that fierce-looking (and sounding) process is nearly as impressive as the feat itself! But the good news is that since most serious bodyweight enthusiasts will naturally already have some of the requisite abdominal strength, the dragon flag may be a little bit “easier” to achieve than a full human flag. It certainly requires a little less skill since it’s usually performed on a solid bench, or from the ground with a low bar, instead of self-suspended in the air while gripping a pole!

Al Kavadlo performs a Dragon Flag on a pole
Al Kavadlo performs a dragon flag on a pole

The dragon flag can also be performed on a pole, but it requires a bit of pain tolerance (pick which trap you want to jam the side of the pole into) and extra time practicing the correct grip—plus you’ll also have to fight the rotation from that off-centered pole! For comfort and simplicity—especially at the beginning—using a bench, a well-secured very low bar, or similar set up is best for learning the dragon flag. Certain types of very simple ab stations on fit trails (look for a flat platform with a low bar attached at one end) can also be appropriate for flags, though I would recommend padding the surface under your shoulders.

Fit Trail ab bench

For safely make sure that whatever you are using, grabbing, and pushing against is sturdy and can support your entire body weight or more.

Alternately, on a flat bench, you can choose to place your hands on the sides of the bench (usually near the ears, but everyone’s placement will be slightly different) or behind your head as shown below:

Hand position choices for dragon flags on a bench

Since the dragon flag requires a lot of tension, proprioception and skill, I’ve used multiple steps and strategies to progress towards it. Many of these moves are good for warming up when you’re able to do the full flag too.

1. The “Hardstyle” plank: The ability to really own the full body tension in this intense version of the plank is crucial. To me the dragon flag feels like an extra serious, less unsupported Hardstyle plank. (Think of doing a plank on just your arms.) The Hardstyle plank differs from the regular variety because the whole body is tensed, the elbows are pulling towards the toes really engaging the abs, and the heels are pushing outwards as well. Similarly, the glutes are engaged too—as they are in the dragon flag!

Hardstyle Plank

2. Lying leg raises from the floor—while these are a LOT easier than a dragon flag, remaining tense with your legs just a few inches off the ground while fully engaging your abdominals will really help you towards the goal of the dragon flag.

Flat Leg Raises Demonstration

3. A yoga-like shoulder stand—learning to balance up on your shoulders and NOT your neck will help you get into the right position at the midpoint of the dragon flag, or the starting point of the negative version. Familiarity with the feeling at this position can help insure that you’re keeping the body in a straight line as you descend, and eventually ascend too. The more balanced you can be at this midpoint, the more chance you have for a little “rest” between the grueling ascent and descent of the full dragon flag.

Shoulder stand demonstration

4. Tuck-flags or roll-ups (I’m sure someone has a better name for this drill). As we know from many other bodyweight exercises (L-sits, front and back bar levers) if we shorten the length of our legs, then the more favorable leverage makes the move much easier. While in a tuck position, use your abs to slowly pull your tucked body up off the floor onto your shoulders while firmly gripping the bench or very low bar, slowly lower back down until your abs are almost screaming! This move is not to be done quickly, and is surprisingly difficult if performed correctly—especially for reps! Gradually straighten the legs more and more to increase difficulty.

Tuck raises demonstration

5. Negative dragon flags. Grasp the bench or very low bar and begin from the shoulder-stand-like top position. After making sure you’re resting on your shoulders, not your neck, tense the whole body (torso, glutes, legs, etc.) and try to lower yourself slowly, and under control without bending at the hips. You may feel like you’re supporting most of your body through your arms at first, but try to mitigate that feeling by really keeping the body tight during every second of your descent. This takes an amazing amount of tension. The closer your legs get to the ground, the more difficult the move becomes. Try to maintain the straight body position and the tension as long as you can without just dropping your legs at the bottom of the movement. The abs, glutes, legs and everything in between are strongly engaged (I’ve even managed to cramp up one or both feet while practicing these!)

Negative dragon flags

6. Full dragon flags up from the ground, towards the shoulder-stand-like position, then descending. It’s very easy to accidentally cheat these on the way up, as your hips will want to fold to help you out. Instead, think of maintaining a slightly flatter version of a hollow position while focusing on keeping the body as one solid plank. I think the most difficult part of this move is initiating the movement from the ground. The first few seconds feel nearly impossible on some days!

Steps 1-4 can be practiced together, but practicing the negative flags and full flags is incredibly taxing. I typically won’t do more than 1-2 per set for negatives, and only 1 full dragon flag per set, for a session total of 3-5 sets. That’s ten reps total for the day at most. You may be able to work up to more over time, but this move takes practice, patience, and long term dedication, so best to ease in gradually.

While some may dismiss moves like the dragon flag and human flag as “party tricks,” these very cool looking moves are rewarding to conquer as they challenge our patience along with building strength, skill, and control. Thankfully, these hard-won concepts will carry over directly and indirectly to many other bodyweight drills, skills and feats of strength.

 ***

About Adrienne Harvey, PCC Team Leader, RKCII, CK-FMS, Primal Move Nat’l Instructor: Originally RKC Certified in 2010, and RKC Level 2 certified in 2011, kettlebell and bodyweight training have been crucial in Adrienne’s personal quest for fitness. A core member of the PCC team, Adrienne loves sharing her knowledge with small groups and individuals. She also loves to develop recipes and workout programs to further support performance, body composition, and of course—FUN.  Go to http://www.giryagirl.com for more information about Adrienne!

Filed Under: Progressive Calisthenics, Tutorial Tagged With: abdominal training, abs, Adrienne Harvey, dragon flag, full body tension, human flag, tension, tutorial

The Bodyweight Revolution

April 15, 2014 By Paul "Coach" Wade 146 Comments

Al and Danny Kavadlo
The Kavadlo brothers are the face of
the Dragon Door bodyweight revolution!

If you have been keeping track of the fitness world over the last five years, you have definitely heard the term bodyweight revolution used by writers and teachers.

Lots of folks have used this term, but few—if any—have defined it.

To me, if there is a common theme behind the modern bodyweight strength revolution, it’s this:

Cutting edge athletes and coaches are starting to break down the distinction between bodyweight training and externally-weighted methods for adding strength and muscle mass.

What does that mean?

Well, up till fairly recently, the fitness “status quo” treated bodyweight training and, say, weight-training very differently. Weight-training was done to get ya big and strong as possible. To achieve this, you were supposed to follow three basic rules:

  1. Train hard for strength and mass. (A given. No pain, no gain, bitches!)
  2. Be progressive. (The goal is always: add weight to the bar!)
  3. Focus on load, not reps. (Folks will ask: how much can you bench? Not; how many reps?)

Fairly simple, huh?

And it worked, too. For the last fifty or so years, barbells and dumbbells have been the “go-to” method for bodybuilders and strength trainers alike. Some coaches and exercise ideologists have gotten so wrapped up in the romance of the iron, that they have told us that these tools are the only way to maximize muscle and power. (This is horseshit, but you know that already, right?)

Compare this model with bodyweight training. Over the last forty-plus years, personal trainers, writers and fitness coaches have been force-feeding the world with a philosophy of bodyweight training which is built on the following three principles:

  1. Train moderately for skill or conditioning. (e.g., soccer drills, circuit training)
  2. You can’t be progressive with load. (Sure, you can add weight to pullups, but then you are weight-training, right?)
  3. Build to high reps. (How many pushups can you do?)

Notice something? The bodyweight training principles are pretty much the diametric opposite of the weight-training principles! Why? Because it was figured that there was no point in treating calisthenics like a PROPER strength and muscle discipline, coz there was no way to make the load progressive. For this reason, bodyweight training ceased to be viewed as a power and strength method. It became relegated to a “fitness” method, or for a warm-up, prior to the weights. Worse still, it was viewed as a means for “light toning”. (Puke now, ye who have the buckets readied.)

Recent conditioning icons have shattered this illusion, and are actually bringing intelligent athletes round to the notion that you can break any bodyweight exercise into progressive chunks—all the way from easy rehab work, up to the hardest strength exercises know to mankind. I’m talking about revolutionary books like Al Kavadlo’s Pushing the Limits! and Raising the Bar; Brooks Kubik’s wonderful Dinosaur Bodyweight Training; and Pavel’s breakthrough Naked Warrior.

Bodyweight can’t build total-body strength? Give me a break!
Bodyweight can’t build total-body strength?
Give me a break!

This is the idea at the very heart of the modern bodyweight revolution. If you can use external weights progressively—in hard sessions designed to build load over time—why can’t you do the same using your body’s own weight? The answer is, of course, you can. You don’t need to treat bodyweight as a gymnastics or sports skill, or as a warm-up, or as a simple endurance discipline. You can do it progressively, just like weight-training. All you need is a solid understanding of the science of bodyweight progressions. And this is why the Progressive Calisthenics Certification (PCC) organization was born, to catalog and disseminate this traditional knowledge to anyone in the fitness world who wants it.

A lot of athletes—specially those already in the bodybuilding or powerlifting world—have taken this breakdown in the barriers between regular lifting and bodyweight training approach real literally. Hell, why not apply regular lifting templates to bodyweight training? This is what many have tried to do; and in this article I’ll discuss some ways of doing it. I’ll also show you a good alternative used by my own teacher, Joe Hartigen.

The CC-Style Template

When it comes to sets and reps, I generally prefer a real simple, old school, American-style double progression. You warm up with some fairly easy exercises, then hit your major technique hard for two-to-three sets. When you hit your rep goal, you move to a tougher exercise. Don’t go to failure—always leave a little energy left in your limbs to complete an exercise safely, or in case you need to defend yourself. That’s the Convict Conditioning approach—and trust me, it works just as well for weight-training as it does for calisthenics. Many old school bodybuilders and strength athletes have used this kind of program with great success—it’s not a million miles away from the sort of training performed by old school strength marvels like Doug Hepburn, or modern-day bodybuilding champions like Dorian Yates.

Dorian Hepburn
Hepburn—like all the ultra-strong old-timers—used bodyweight training alongside his lifting. He also trained infrequently, going all-out with low sets. Sound familiar?

Popular Strength/Mass Templates

Of course, there are other rep/set formats than the CC approach. Dozens. Here’s a roll-call of a few well-known ones:

  • The 5×5 system
  • Pyramid training
  • Ladders
  • Heavy singles

All of these popular weight-training approaches can be used with bodyweight—in fact, they are being used right now. But no method is perfect, and there are problems when applying these methods.

Using singles is a good example. A heavy singles workout might consist of, say 10 sets of 1 rep, using 85% of your max. This is pretty easy to accomplish if you are working with your bench press; but it’s a lot tougher to translate it to your bodyweight pushups. For a start, how do you define “85%” of effort accurately? Which pushup progression do you select? With the bench press, you can add a tiny increment, maybe 2lbs to the bar every so often. How do you add such microscopic increments to your pushup form? How do you maintain this system, long-term with such fuzzy variables? You are kinda pissing in the wind here.

A bigger problem with most training systems is that they waste the athlete’s precious energy. A really great rule of thumb in muscle and strength work is that the degree to which your body adapts is proportionate to the stress you put it through. But what athletes constantly forget is that the muscle-building and strength stimulus is based on your best set, it’s not spread over your other sets! As I’ve said elsewhere:

Paul_Blog4To put that shit simply, if you want to get diesel, you need to do a lot of work in a single, relatively brief set. Your peak set! Trouble is, a lot of athletes are in the habit of exhausting themselves before they reach that peak set.

Bodybuilding is possibly to blame for this. Back in the seventies and eighties, it was all about “pyramiding”; you would typically warm up with 15, 12, 10 and 8 reps before knocking out a few peak sets of 6-8—then you would reverse the process. (You go up in weight, then down, hence the term “pyramid”.) The problem with this was that by the time you had done the first four sets you were too shot to do very much in your peak sets! Then you would repeat all those lighter, higher-rep sets again, just adding more volume to eat into an already overloaded recovery system.

The same problem is true of the popular “ladders” method of training. With ladders, you start with one rep—say, a pullup—then take a short break, and do two pullups. Break, then three. All the way up to your peak set, of, say, five reps. Then you take a short breather, do four reps, then break, then three, and so on down to one rep. See the problem with this? If your peak/best set here is the five rep set, you will have already done TEN reps of that exercise before you reach it! If the five reps really represent your best, then doing ten reps of the same beforehand is definitely going to adversely affect your performance in the five. In essence, ladders are a good way of doing a lot of work, but a pretty imperfect way of doing high quality sets.

5×5 is a more traditional method—it was used by Arnold’s hero, Reg Park, back in the fifties.

Big Reg Park
Bodyweight back work: Big Reg Park
rocking some behind-the-neck pullups.

Park’s method was to use two warm-up sets of five, then three sets of five with the heaviest weight you can handle for a particular exercise. Once you can hit the 3×5, you go up in weight.

It’s a simple (and pretty effective) idea. The problem—in terms of hitting one great, “peak” set—is that it makes you hold yourself back. You are inevitably (even if only subconsciously) holding yourself back from giving your all on the first hard set, in order to get the five reps on the final two sets. You need to do this, because if you really gave your all grinding out five reps on the first heavy set, you would be pretty unlikely to be able to repeat that twice. So with 5×5 you never have the motivation to really give your all and hit that one peak set.

Enter the Mentor: Joe Hartigen

One template which doesn’t contain any of these problems was taught to me in the 1980’s by my mentor, Joe Hartigen. Joe was a bona-fide calisthenics master, and although he was in his seventies when I met him, he was much more powerful than me, and remained incredibly strong in pulling movements right up to the final year of his life. Joe had forgotten more about training methods and the history of physical culture than I will ever know, and I learned virtually all the progressions in Convict Conditioning from him.

Despite the fact that Joe was an icon to me—and several others in San Quentin—we didn’t train in exactly the same way. We had different backgrounds, for one thing. I came from a “new school” calisthenics approach, one based on building up high reps in squats, sit-ups, pullups and (especially) pushups. In fact I would often return to these high-rep workouts—often ultra-endurance bodyweight work—throughout my time inside, particularly in Angola. (Think “thousand pushup days” and you got the idea.)

Joe was very much a man who favored lower, more intense, higher quality reps. He typically shook his head when he looked at my training journals, and—likewise—I must admit that when I was younger and dumber, I possibly looked down on his methods as a bit old-fashioned. Like a cool photograph, but colored in sepia. In later years, I realized he was right on the money, and although I modified my own training to better match his thinking, our workout styles were never quite the same.

The Hartigen Method

When it came to sets and reps, Joe had a pretty fixed method for working out. I’ve never heard a name for this scheme, so I’m gonna call it The Hartigen Method (although there’s no way he was the first to use it). This approach is simple to apply, allows for the use of real hard exercises, and is progressive—so I thought I’d put it out there for any ex-lifters or strength athletes looking for a new way to work with bodyweight exercises.

Here’s how it works:

1. Pick the hardest exercise you can do for 5 reps in good form.

2. Warm up, and perform a 5 rep set.

3. Rest approximately 1 minute. Shake your muscles loose as you rest.

4. Perform 4 reps of the same exercise.

5. Rest approximately 1 minute. Shake your muscles loose as you rest.

6. Perform 3 reps of the same exercise.

7. Repeat this procedure until you have performed a single rep.

That’s it! In essence, Joe picked an exercise he could do five good, strict reps with, and did 5, 4, 3, 2, 1.

It’s that simple. Joe’s theory was that if you could bust out five reps of an exercise you were working on, then after a minute’s rest, you should be able to do four reps. After another minute, you should be able to do three, and so on. Joe felt this rep scheme offered low reps for strength and muscle, but also enough reps—fifteen total—to give an athlete plenty of hard practice on an exercise, but without burning out.

Plus, using this method you can hit an exercise hard in under ten minutes. Even if you were working with four exercises in a workout (two or three would be better!) you could be done in half an hour. Joe’s method works great with weights, too—kettlebell presses and rows would be a wonderful superset, if you’re that way inclined. (5 presses, a minute’s rest, 5 rows, a minute’s rest, 4 presses, etc.) You could superset pushup and pullup exercises the same way.

Making progress
Progression couldn’t be simpler with this method. When you can do all 15 reps—that is, 5, 4, 3, 2, 1—for three workouts in a row, you move to a slightly harder version of the exercise. As with all bodyweight strength, having an extensive toolbox of progressions is key to moving forward; it’s also why the PCC Instructors’ Manual includes hundreds of progressive exercises.

There will be times you don’t get 5, 4, 3, 2, 1. You may only get 5, 3, 2, 1, 1. That’s fine, and to be embraced. When you don’t get the full 15, use these principles to move forward:

Try to add a rep (or two) next time; shoot for 5, 4, 2, 1, 1, then 5, 4, 3, 1, 1, and so on.

Whatever you get, always push yourself hard on the first set—that’s your peak set.

Adding reps on the earlier sets is more valuable than adding reps on the final sets.

Never do more reps than you are aiming for; stick with 5, 4, 3, 2, 1.

Aim to perform ALL five sets, even if those sets are very low rep; e.g., 3, 2, 1, 1, 1.

Exercises, post-set work and warm-ups

Joe often performed more exercises than I stuck to. Most people today would probably call his routine imbalanced. In particular, he loved hanging exercises, and would do all kinds of weird variations of pullups, leg raises, levers, holds and hangs. Strangely, despite being such an aficionado of hanging work, he would typically do only three exercises for the rest of his body—one-leg squats, flat one-arm pushups, and some kind of inversion; handstands, but often headstands (I rarely saw him do inverse pressing, these were typically static). I have watched Joe do bridges, and do them easily, but like the man himself, these were an exception rather than a rule.

Whatever his last exercise of the session was, Joe would often make his very final set harder by completing a ten second dynamic-tension isometric at the top position of that very last rep. He’d follow this with a slow negative of about ten seconds. He claimed that this little “trick” for finishing his workout told his body that the session was over, and increased his hormonal profile. I’m not sure that’s true, but if Joe’s physique—at over seven decades—was testament, then he knew what he was talking about.

Al Kavadlo Push-Up
No matter what exercise you finish with,
you can squeeze it at the top for an isometric benefit.

What about a warm-up? Interestingly—like Reg Park—Joe never went over five reps on his warm-up sets. He would typically do two or three warm-up sets of five reps, and he always applied Charles Atlas-style dynamic tension during his warm-ups. If he was doing an exercise like one-arm pullups, he would perform an exercise about half as tough on his warm-ups—two-arm pullups. Always five reps. Why not more? Joe felt that you should always train to meet your goals. His peak sets were always five reps, so he thought if he did more in his warm-ups, his body would get confused and start adapting to higher reps instead! I’m not certain I agree with that, but it gives you some food for thought, eh?

I often advocate using progressive exercises when warming up—maybe start with a real easy exercise for high reps, then follow with a slightly harder exercise for less reps. But Joe only ever used one exercise technique in his warm-ups, no matter how many warm-up sets he did. I used to wonder why, for example, he’d perform two sets of regular pullups before his one-arm work; why not one set of regular two-arms, then something harder, like assisted pullups? I asked him once. Because I can make the two-arms as hard as assisted pullups, dumbass! he replied. And it was true. His capacity to tense his muscles during training—dynamic tension—was so profound, he could make seemingly easy exercises as seem as hard as advanced ones. He was able to adjust the intensity of any exercise by 100% or 1%, just using the power of his mind.

That was how profound his body wisdom was. Not many athletes could aspire to this level, although it’s possible with time and patience. I still admire the man to this day!

Lights Out!

Well, that’s it from me. Thanks again for reading—it means a lot to this dopey fella that you guys and gals still take the time to read my weathered musings. I hope this article has given you a new idea to play with. Looking for a lower-rep strength and mass routine that fits well with bodyweight? Give The Hartigen Method a try…tonight!

Oh, and if you liked hearing about Joe’s attitude to training, check this article out. I wrote it for my good buddy Neil Bednar.

You could do a lot worse than modeling your training around old Joe’s philosophy. That brother was something else!

***

Paul “Coach” Wade is the author of five Convict Conditioning DVD/manual programs. Click here for more information about Paul Wade, and here for more information on Convict Conditioning DVD’s and books available for purchase from the publisher.

Filed Under: Progressive Calisthenics Tagged With: Al Kavadlo, bodyweight exercise, calisthenics, Danny Kavadlo, Kavadlo brothers, Paul Wade, PCC, PCC Workshop, Progressive Calisthenics Certification Workshop, pull-ups, push-ups, Raising the Bar, squats, strength training

Push-ups for a Better Bench Press

April 8, 2014 By Corey Howard 9 Comments

Al Kavadlo Push-upAs someone who loves a challenge, I get excited when someone tells me it’s impossible to get strong using only calisthenics. Though at first I was skeptical, too, I’ve learned firsthand how effective bodyweight training can be.

Most coaches tell us that to get stronger you need to keep adding weight to whatever lift you want to improve on. If you want to bench press more, they say to use some sort of pyramid training and ramp up the weight each session. With the exception of Stanford, that’s what’s taught at most collegiate and high school strength programs. Imagine the frustration on a 16 year old kid when I tell him I won’t let him bench press until he can perform 20 quality push-ups off the floor!

As I was talking with a student of mine named Caden during his first session at my facility, the topic of bench pressing inevitably came up. We discussed my background in competitive powerlifting and, as you would expect, he wanted to know how much I could bench. After telling him my best competition lift he responded with a story about how some other kid at his school can supposedly press more than me. So of course I had to know what his own best effort was on the bench.

day_3_100_2“One hundred thirty-five pounds… once,” he stated. For those of you that have trained young teenage athletes, you know they need proof before they believe anything you say. So I decided to challenge him a bit. I told him I could help him improve on that 135×1 in only 4 weeks without even putting him on the bench. In fact we would be using a steady diet of push-ups. Caden scoffed at me. Why wouldn’t he? Remember the old school thinking at most high schools?

“Alright, but it’ll never happen,” he promised.

Let’s stop for a second and quickly compare a textbook push-up to a text book bench press. In a push-up, the hands are under your shoulders while the body is elevated and tight (abs, lats, glutes and thighs) to prevent any sagging or arching. As you descend it should feel like you are screwing your hands into the floor, the lats get tighter, and the elbows stay close to the body. Everything is tracking straight and tight. Then once your nose or chest touches the floor you reverse the motion as slow or fast as you want. Speed will build explosive strength and slow will teach you to grind out a heavy rep for strength.

Compare that to a textbook bench press; before you lower the bar to your chest, the shoulder blades should be retracted, glutes are tight and feet are driving into the ground. As the descent begins it should again feel like you are screwing your back into the bench, tightening the lats, and keeping the elbows near the body. Then after the bar touches the chest you can drive the meaty part of your thumbs into the bar almost as if you were rotating your elbows in and driving yourself away from the load to lock it out over head.

Notice any similarities?

CadenPush-upNow let’s take those same principles and apply them to Caden. On day one he could not do any of this. Once he was on the floor it kind of looked like a saggy banana getting tazed. We needed to tap into the Convict Conditioning principles and start teaching push-up technique against a wall. As he grew more proficient, his push-up got closer to the floor. It’s important to note that although we always had a specific number of reps in mind for each day, once technique failed, his set was over. Many times he wanted to crawl under the bar and “just try” the bench press again, I happily refused to allow that. Remember sometimes young teenage clients need proof or an “A-ha moment” before they buy into you or your system.

Caden’s “A-ha moment” came 4 weeks later. After dialing in the pushup similarities to the bench press in his warm ups, we loaded the bar with 135. He gave me a solid 5 rep effort. If you use one of those 1-rep max calculators, that’s roughly a 20lb increase in max effort strength in 4 weeks using nothing but pushups. For those of you that are wondering what other “assistance work” I had him do? It was all calisthenics- bridge progressions, bodyweight squat progressions, lying leg raises, and horizontal pull-ups. Caden never touched a weight his first 4 weeks in my facility.

Calisthenics work! Fire it up!!

Caden1 ***

About Corey Howard, PCC, RKC, CK-FMS: Corey Howard strives to constantly become stronger, and to help others to achieve their fitness goals. He is the owner of Results Personal Training, and can be reached at www.resultsptonline.com or www.coreyhoward.com.

Filed Under: Progressive Calisthenics Tagged With: bench press, carryover, Corey Howard, push-ups, strength training

Who Needs Weighted Pull-Ups?

March 11, 2014 By Corey Howard 13 Comments

DannyKavadloHang

Back in late October I started experiencing pain in my right shoulder. Like most of us that place a large priority on our fitness, I ignored it. Dumb move!

As the next few weeks progressed, the pain expanded to my right trap, lat, pec, entire shoulder complex, bicep, plus numbness in my fingers. I’m not sure about the rest of you, but when I’m experiencing pain throughout that much real estate I get concerned and the workouts become kind of nonexistent.

After many doctor appointments over the last couple of months, I’m disappointed to report they still don’t have any idea what’s going on. However, after sitting around hurting, feeling sorry for myself, and not moving, I knew something had to change. My life is fitness. I tell people all the time how important it is to move. When something hurts, there are always ways to keep moving forward. And move forward I have, except this time it’s been exclusively with calisthenics.

As I returned to the gym after a 2 week layoff, I was forced to deepen my calisthenics knowledge. The basic movements were thankfully still easy for me, but I could no longer do weighted pull-ups, which had previously been a big part of my routine. I needed to find a way to keep getting stronger in pull-ups without hanging any weight off my body.

One of the first modifications I used was the “L-Sit Pull-Up”. This movement shifts the body’s balance just enough to make a regular pull-up harder. Not to mention it’s awesome for teaching ab tension throughout the motion!

The L-Sit Pull-Up is done by holding the top of a hanging leg raise, then doing your pull-ups while maintaining the L-sit position the entire time. I must warn you there are a few things you need to keep in mind while performing these. It’s imperative you begin by pulling your shoulders tight into the sockets to create the necessary stability so you don’t swing on your leg raise. Second, keep your legs straight and raise them up under control so you don’t create any upward momentum when you begin your pull. Remember Coach Wade likes slow controlled movements. Third, as you pull yourself up; pull your elbows in toward the midline so your arms aren’t flaired out. This does a couple of things; first, it mirrors the handstand push-up groove and second, it engages the pecs with the lats and creates a solid stable shoulder complex. I’ve seen many clients go from 20 dead hang pull-ups to only 5 on this one. Fire it up!

Corey Howard Performs an L-Sit Pull Up

The next change I made was to toss in some Archer Pull-Ups. We’ve all seen Al Kavadlo do these on his YouTube channel. The Archer Pull-Up is where you pull yourself up to one side then the other. Besides, we all are trying to achieve the one arm pull-up, and this is an amazing progression towards that!

When starting with these I strongly suggest alternating your grip. Turn your palm towards your face on the side you will be pulling towards and your palm away from you on the arm you plan on keeping straight. Next as you begin your pull, think about pulling your elbow to your opposite hip. This is where that L-Sit Pull-Up foundation will come in handy. In other words, if you’re pulling yourself to the right side, pull your right elbow to your left hip. Try and use your straight arm as a guide to keep you moving sideways. I’ve found a false grip or muscle-up hand position works best. Once you can comfortably knock out 7 quality reps or more per side without resting then you’re ready for the final pull-up challenge.

Corey Howard, PCC and RKC Instructor Performs an Archer Pull Up

The last tweak I used to make pull-ups evil is by modifying the grip heights. Paul Wade suggested you use a towel in the Convict Conditioning book, but I like to grab the pull-up bar with one hand and the vertical support structure of the pull-up rig with the other hand. This is similar to an Archer Pull-Up except with a lower non-dominant hand position. You have a few options here to make it harder as you progress. You can either move your hand lower on the pull-up rig, or… If you think this is just simply too easy for you, feel free to hang a stretchy band from the pull-up bar and grab that with your non-dominant hand! The stretchy band will refuse to provide you much for assistance and will scoff as you pull harder against it seeking help. Once you master these I promise you will have the upper body pulling strength of Samson!

Corey Howard, PCC and RKC Instructor Performs a Pull Up with Varying Grip Heights

There you have it. The 3 pull-up variations I switched over to so I could keep building pulling strength. The best part–not a single one of these pull-ups seem to aggravate my shoulder or arm. I’m just like you, and really at the end of the day we all like to get stronger. Grabbing a pull-up bar and pulling your body up with two arms is unfortunately something that many people still can’t do. However there are a few of us crazy dreamers out there that want to defy “normal.” We need to push the envelope and make pull-ups look insanely easy and maybe even knock out a few one arm pull-ups if possible. So go fire up some L-Sit, Archer, or Mixed Grip Pull-Ups. I guarantee you’ll get stronger, and you won’t have to hang weights off your body while doing it!

***

About Corey Howard, PCC, RKC, CK-FMS: Corey Howard strives to constantly become stronger, and to help others to achieve their fitness goals. He is the owner of Results Personal Training, and can be reached at www.resultsptonline.com or www.coreyhoward.com.

Filed Under: Progressive Calisthenics Tagged With: advanced, Al Kavadlo, archer pull-ups, calisthenics, Convict Conditioning, Corey Howard, Injury, progression, pull-up progressions, pull-ups, Raising the Bar, strength training

Turning Up the Mind-Muscle Connection

March 4, 2014 By Matt Schifferle 27 Comments

Matt Schifferle PCC

“You must be crazy! How can I possibly have weak glutes and hamstrings?!”

I’m at the chiropractor and I’m finally throwing in the towel on my lower back pain. I’m not a model patient.

“Do you know how much I deadlift and use kettlebells? Those things are like glute and hamstring blasters.” Then he told me something that changed everything about how I used exercise for the next 10 years; “Matt, exercises don’t work your muscles, only your brain can do that.”

I thought he was nuts but then he hit me with the science of what he was talking about.
“It’s simple; the signal instructing certain muscles to contract and how they work doesn’t come from a weight or a special exercise. Your brain creates a signal, it travels through the nervous system and eventually reaches the muscle fibers as your mind instructed. Everything about how the muscle behaves comes from your brain.”

Mind Muscle Connection Chart
Everything about how the muscle behaves comes from your brain. Diagram © Matt Schifferle 2014

It was a simple lesson, but over the years it has completely enveloped my entire approach to all aspects of my training. From calisthenics to bike racing and even walking has taken on new meaning due to this mind-muscle connection.

Here are some of the biggest lessons I’ve learned in how the mind-muscle connection has changed my calisthenics training:

#1- Distraction dilutes the mind-muscle signal

Anything that pulls your thoughts away from the exercise literally dilutes the signal you’re sending to your muscles. TV, talking, smart phones, even some types of music are now training enemy #1.

No TV, no smart phones, just a horizontal base and a truckload of focus.

#2- Mind-muscle signals become habitual

Habit is simply repeating the same mental signals over time. This repetition causes those signals to become easier to create and more powerful in their application. Of course habit can be both a great benefit and a massive detriment to your training. If your usual signal is to use your lats while doing pull ups you’ll use them in other activities as well. However, if you’re not in the habit of using them, they won’t turn on no matter how many pull ups you do.

#3- The signal can change at various points during the range of motion

It’s not uncommon for a signal and thus a muscle contraction to change during an exercise. At some points during the range of motion, it may be stronger and other points it may be weaker. Some common examples can include triceps relaxing at the bottom of a push up but contracting very powerfully at the top and glutes to shut off at the bottom of a squat while they may kick in halfway up towards standing.

Working to maintain the signal throughout the full range of motion makes a huge difference in the strength of the muscle as well as the integrity of the joints.

#4- It takes practice to get the muscle to do just what you want it to do

It’s common to not really feel a muscle turning on the first few times you try to use it more during an exercise. Sometimes it takes some time for the signal to develop and beat a neurological path to the muscle. I found this to be the case with my abdominals during the leg raise progressions. At first it felt like my abs were hardly doing anything, but the more I focused on turning them on, the more they eventually got into the game. Now hanging leg raises result in a deep abdominal burn and more powerful contractions even though the actual workout hasn’t changed much. Don’t be discouraged if nothing feels different at first. Keep concentrating and things will change very soon.

#5- Small and stubborn muscles may be due to a weak mind-muscle connection

My shoulders have always been a weakness for me. It didn’t matter how many shoulder exercises I did, they just wouldn’t grow and really develop. Once I started working on the mind muscle connection with my shoulders I was surprised to find how weak the signal was. Once the signal became stronger my shoulders grew like crazy. This was also the case with my hamstrings as I mentioned before.

It’s hard to believe that Matt ever had small shoulders!

#6- Exercises, and tools are simply templates for developing the mind-muscle signal

One of the biggest lessons about the mind-muscle connection was that there’s nothing in there about supplements, gadgets or fitness dogma. The root cause of all things muscle comes from the brain, not a product you can buy in a store.

As for a particular exercise, each movement places a certain demand upon a set group of muscles, but it’s a rough template for where the tension needs to go and how hard the various muscle contract. It’s up to your own focus and skillful concentration to refine the tension and direct it to the target muscles.

The million dollar question is: how can you develop and refine the mind muscle connection?

There are many techniques, but the common element is simply trying to build and control the tension in a select number of muscles through your own focus and concentration.

When I’m trying to really dial in my mind muscle connection I use what I call the P.T.R (Peter) method. Here’s how it would work with a classic push up.

Step 1- Set your Position

The first thing is to take your time setting up your position for the exercise you wish to do. This should be a pretty relaxed thing to do. In the case of push ups, I like to start my push ups laying on the floor so all of the muscles are relaxed. I then take my time placing all of my limbs and joints in the most perfect position I can. I check the position of my hands, elbows, shoulders, spine, hips, neck, even the placement of my fingers is something I really focus on getting just right.

Step 2- Set your Tension

Once I’m in position, I fire off the mind-muscle signal by tensing the muscles I want to involve during the exercise. I’m still laying on the floor, all of the tension is entirely proactive. I’m just flexing the muscles I want to engage as hard as possible. This can include my chest, shoulders, hands, lats, abs, triceps, quads and forearms. Lately I’ve been focused on getting my triceps more involved with my push ups, so I’ve been focusing more on tensing up the triceps.

Step 3- Apply Resistance

Once the tension is set just the way I like then I slightly lift myself off the floor and begin my set. Once the resistance is applied, the tension in the muscle grows much more, only now it’s flowing along the channels already established in step 2. So if I’m working to get my triceps more involved they now carry more of the resistance of the exercise.

The P.T.R method conditions you to really dial in the tension of any exercise you choose. It builds your ability to direct and alter the tension in your muscles at will so you can modify that tension however you wish.

P.T.R. works with any technique. Matt builds his lats with pull-ups.

Contrast this with simply dropping down and firing off push ups as fast as possible. The position and tension your body uses is going to be much more reactive rather than proactive. If you’re used to using your shoulders more than your triceps during the push up then that same pattern of signal will be generated. It’s not a bad thing, it’s just that it’s much more difficult to focus and change the mind-muscle connection and thus how your mind is asking your muscles to perform. Your old movement habits will take over both good and bad.

In closing I want to leave you with a couple of mantras I’ve used with my clients to reinforce the awareness of the mind-muscle connection:

– Muscle follows mind.

– Exercise doesn’t work muscle; your focus and concentration works the muscle.

– Nothing different happens in your training until you chose to make it different.

– Exercise technique is more than just keeping your back straight or toes pointing forward. Technique is about refining the mind-muscle signal. Thus technique isn’t everything, it’s the only thing.

– Effecting training isn’t just about blood sweat and tears. It’s about learning how to engage and use your body in a more effective way.

Yours in strength,

-Matt Schifflerle

****

Matt Schifferle a.k.a. The Fit Rebel made a switch to calisthenics training 5 years ago in an effort to rehab his weight lifting injuries. Since then he’s been on a personal quest to discover and teach the immense benefits of advanced body weight training. You can find some of his unique bodyweight training methods at www.RedDeltaProject.com.

Filed Under: Progressive Calisthenics Tagged With: brain training, calisthenics, Matt Schifferle, mental training, mind-muscle connection, technique, training strategy

The Missing Link to the One-Arm Push Up

February 18, 2014 By Todd Cambio 21 Comments

Al Kavadlo One Arm Push Ups

I love body weight exercises.  I think they should be the basis of any training program.  Body weight movements can be used for warming up, for cooling down, for flexibility and mobility.  Then, once you learn these movement patterns, they can be progressed to truly test one’s individual strength.  Things like pistol squats, pull-ups, handstand push-ups and one-arm push-ups are incredible exercises, which is one of the reasons I gravitated towards Convict Conditioning.   This book has been instrumental in bringing my skill set to the next level.  I use it to train myself as well as my clients.  It has helped me clearly structure a periodized workout plan for my clients with clear goals and progressions.

When I design my training programs, I train opposing muscles groups or movement patterns.  For every action – there is an equal and opposite reaction.  For example, we all know that the push up is a fantastic upper body strength exercise – but when overused, it can cause some issues.  The big muscle groups like the upper pectorals; shoulder and the internal rotators of the arm and shoulder can become shorter and tighter than the external rotators and scapula retractors.  This tightness can possibly cause a forward rounding posture and possible neck and shoulder injuries.  So to make sure I don’t cause these possible issues, I always have an opposite movement paired with the exercise, in this case, the body row.  This is my push/pull relationship method of training.

The body row is the sister exercise to the push up, however, it is much less utilized.  It also incorporates almost all the same muscle groups as the push up.  The exception is that the prime movers are the back of the body (posterior chain) as opposed to the front (anterior chain) of the body.  Most of the attention goes to the Pull Up as the ultimate body weight back exercise, which is of course an awesome exercise, but until my clients are strong enough to do them correctly, the Body Row rules the roost!

So, what is that missing link you may ask?  It’s the Body Row.  Actually, since we are talking about the One-Arm Push Up, it’s the One-Arm Body Row!

In fact, as I progress up the ten steps in Convict Conditioning Push Up Series, I progress up my own steps to a one-arm body row.

In Convict Conditioning, the horizontal pull is what I call a body row.  I use the Lebert Equalizers for my horizontal pulls because I can add some great variety to the pulls as well as bring them with me to where ever I want to train, inside or outside.  Always having a place to do a pull up is sometimes an issue.  So, if I am outside and want to add in some pulls, I can.

The Body Row is similar to Convict Conditioning’s Pull Up Series Step Two, but with a different tool.  Here is the point where I branch off from the Pull Up Series and add a few alternative steps with the Equalizers that translate to a better one-arm push up.

I will not go into great detail about each body row movement because I am sure if you are following Convict Conditioning, you get the main points on proper form.  I will point out the basics though, which are pretty straightforward.  When you get into your starting position with the Equalizers (EQ), dig your heels into the ground and fire your glutes to keep your hips locked and aligned.  Grab the black grips with a firm hold to fire the forearms.  Keep a neutral spine as you pull yourself off the ground.   When you progress to the single arm body rows, it is much like a single arm kettle bell swing in that your body will want to rotate on you.  Do your best to keep your shoulders parallel to the floor.  Your core will get quite a workout here too!

Convict Conditioning Push Up Steps with correlating Body Row Movements:

Step 4 – Half Body Row – Mirrors the Half Push Up (the ball under the glutes is to help cue you to keep your hips up)

Todd Cambio Half Body Row Todd Cambio Half Body Row

Step 5 – Full Body Row – Mirrors Full Push Up

Todd Cambio Half Body Row Todd Cambio Half Body Row

Step 6 –Single EQ Chin up – Mirrors Close Push Ups

Todd Cambio Half Body Row Todd Cambio Half Body Row

Step 7 –Single Leg EQ Body Row – Mirrors the Uneven Push Up

Todd Cambio Half Body Row Todd Cambio Half Body Row

Step 8 – One Arm Half EQ Body Row – Mirrors the One Arm Half Push Up

Todd Cambio Half Body Row Todd Cambio Half Body Row

Step 9 – One Arm EQ Body Row – Mirrors the One Arm Push Up

Todd Cambio Half Body Row Todd Cambio Half Body Row

So there you have it, a push/pull relationship that not only enhances your one-arm push up but also increase your overall body weight strength.

Todd M. Cambio, CSCS, HKC is the owner of Precision Fitness in Westerly, RI. He is a strength and conditioning coach that specializes in sports performance and obstacle course race training. Todd is a Certified Strength and Conditioning Specialist, a Spartan Group X Obstacle Course Coach, a published author and Master Body Weight Trainer & Presenter for Lebert Fitness. See what Todd is up to by visiting www.ToddCambio.com.

Filed Under: Progressive Calisthenics Tagged With: bodyweight row, Convict Conditioning, core strength, one-arm push-ups, progressive calisthenics, push-pull, Todd Cambio

Handstands Will Make You Better at Everything

February 4, 2014 By Mike Fitch 28 Comments

Mike Fitch Handstand

Yeah, it’s a bold statement, but hear me out. The mechanics of successfully performing a handstand will amp up all of your other exercise endeavors, making you stronger, more stable, and better coordinated, while the discipline required to master the move will make you a better human being overall. It will force you to take a long, hard look at the time you are willing to invest in reaching a specific goal.  It will also allow you to win money in a bar bet, steal the spotlight at any wedding and of course get the girl (or guy). Results may vary on the last three.

For thousands of years, athleticism has been demonstrated through feats of bodyweight strength and skill, with fit individuals judged not just by their bodies’ tone, but by how skillfully they could use their bodies.  Even in the golden age of bodybuilding, Arnie and the boys were known to challenge each other post workout with hand balancing and bodyweight strength contests.  We then saw a lull in these activities, with the popularization of the fixed-axis weight-lifting machine and single-plane isolation “robot training,”  but luckily for you and me (and the human race), the idea of skills practice and self-mastery is making its way back into fitness.

My favorite field, progressive bodyweight training, includes a multitude of exercises that are always sure to elicit an envious “I’ve always wanted to do that!”  Pistol squats, muscle-ups, human flags, HAND BALANCING – these moves are sure to catch the eye of any fitness enthusiast.  And the great thing is that any of these feats are possible to learn with the proper progression training, time commitment, and, most importantly, consistency.

Just as it takes a baby about 12 months of daily conditioning and practice to eventually stand on their own, it can take an adult months or years of repeated practice to build the neural grooves associated with a perfect handstand.  Are you willing to invest that kind of time?  I can guarantee that it will be one of the most humbling and gratifying journeys that you’ll experience.

While performing a great handstand is certainly a worthy goal unto itself, you’ll find that the skills you build in the process will transfer over into your other training, making you a better athlete and enhancing your quest toward a better body. Here are some examples of the tremendous carry-over you’ll see:

The Kinetic Chain

Let’s start with a simplified definition of the very complex concept of the kinetic chain: everything in our body is connected to everything else.   A handstand is a prime example of the connectivity of the kinetic chain, with each position, alignment, and movement requiring constant communication and neuromuscular efficiency in order to maintain that perfect balance. If just one thing changes during our hand balance, such as flexing our toes instead of extending them, then our body must immediately adjust to this new shift. 

Hand balancing is, obviously, performed on your hands, so that’s a great place to start thinking about how everything is connected.  Your fingers are some of the densest areas of nerve endings on the body, and have the best tactile feedback and positioning capability. Kicking up into your handstand initiates a sort of neuromuscular “super highway,” with all of those little finger receptors sending and receiving information throughout the body.  Your body’s communication must be perfectly orchestrated to keep you in balance, like a super effective emergency dispatcher taking calls, sending reinforcements, and keeping you safe (aka preventing you from crashing onto your head.)

The body has to adjust to the hand placement in relation to the shoulders; to the elbows being over the wrists but under the shoulders; and the hips, where are the hips in relation to the shoulders?; and it goes on.   So if we do this efficiently, and amp up our body’s abilities to communicate and make minute adjustments in a flash, you may already see how handstand training can benefit other athletic goals. But, I promised that handstands will make you better at everything, so let’s keep on going. 

Al Kavadlo Performs a Handstand

 Internal Tension

A tense body is a strong body.  Why is it so easy to balance a ruler or a bat vertically on your hand? Because the object is rigid, with no bends or “leaks.” Whether you are lifting your own body or grinding out a 1000 pound deadlift, the concept is the same – you need to create a rigid structure from which you can pull, push, lift or balance.  In Progressive Calisthenics, there is no room for any part of your body to lose connection or leak tension, and you learn very quickly about any leaks in your chain.  Mastering total body tension will not only accelerate your handstand training, but will be directly applicable to most of your other training as well.

 Grip Strength

In addition to “tense the whole body,” you’ll hear a lot of HB coaches tell you to “grip the ground.”   In our foot we have the luxury of a heel which plays a clever game of leverage to make walking and standing fairly easy tasks. Unfortunately, we don’t have the same advantage in our hands. So, the fingers must DIG into the ground, countering the body’s tendency to over balance (topple over), or let up to counter an underbalance.  It’s this constant battle between the finger extensors and flexors trading off between the rolls of agonist and antagonist that keeps us upright.   And along the way you’ll be conditioning for some brutal forearm strength.

Shoulder Stability

Few exercises can compare to a handstand for building shoulder stability. And let’s face it, nobody is going to be staring in amazement while you’re performing more band internal/external shoulder rotations.

 The shoulder – so incredible, so complex, and so commonly abused – can be an important source of power, but also a source of hidden weakness impacting your training in ways you don’t even realize.  Over repetition syndrome, poor form, and especially faulty postures can create imbalances that lead to injury or instability. But even if you don’t feel pain, if your body senses a weakness in the shoulder, it will automatically restrict the amount of power passing through that joint, and can actually dial down the surrounding muscle excitation.  I’m going to assume that everyone would rather be tapping into all of their strength for their efforts. As the saying goes, “you can’t shoot a cannon from a canoe.”

In Hand Balancing, the shoulder is the first line receiving all of that information from the sensors in the hands and forearm musculature, reacting to the head and hands below and the rest of the body above.  The muscles at the shoulder joint have to fire up like a synchronized light show to adjust to the constantly changing center of gravity over such a limited base of support, from the deeper muscles like Supraspinatus, Infraspinatus, Teres Minor, and Subscapularis (rotator cuff), to the bigger and more powerful Lats, Pecs, and Delts.  Even with the elbow completely locked, the heads of the Bicep and Triceps that cross the shoulder joint play a role in stabilizing the shoulder.  And that’s not even mentioning the other muscles that keep your Scapula strapped to your back.

 Simply put, handstands will make you stronger through increased activation and stabilization.

Free Standing Handstand

Spinal Stabilization

Handstands require not just spinal, or core, stabilization, but true multi-planar stabilization involving inversion of the body.

 Now, I realize there are many views on spinal stabilization and some debate over its efficacy and “functional” carryover to life or sport  (“You have to draw in to activate TVA!”  “No, bracing is the only way!”  “Let’s fight!”).  But we can probably all agree that the surrounding musculature of the spine (ie the core) needs to be able to properly stabilize to protect the spinal cord, and that the spine needs to be able to fight gravity’s constant pull, distributing the load while generating force and, more importantly, accepting external forces (whether that’s gravity, or a linebacker). It flexes, extends, rotates, laterally flexes and in the case of the handstand, stays perfectly still, and STABLE. 

When we are upright, we know that the core musculature should be firing to allow for gait pattern as in walking or running, or bending over to snatch up a kettlebell. But get inverted and everything changes.  The anchor or base is now the shoulder girdle, sitting on top of those mechanically disadvantaged hands. So now the spinal stabilizers have to figure out how to balance the pelvis over the shoulders, with the big legs riding on top.  This is true multi-planar stabilization! In a hand balance, all of the spine’s muscular units have to play their part to keep the spine in perfect alignment – i.e. spinal stabilization.

GETTING STARTED: TUTORIAL

I am constantly asked, “What’s the key to learning handstands?”  And there is a clear answer:  “To get good at handstands, you practice handstands.”   There is no other weighted exercise that will make you better at handstands – you just need to put in the time to practice the handstand-specific progressions and conditioning exercises. It IS skill specific training.

So here’s the part where you get to see what you’re made of.  Are you willing to put the time in to taking this challenge on? Are you ready to approach it with discipline, practicing often, even daily if necessary? You are no longer trying to merely increase your reps;  now you are working to improve yourself, master difficult skills, and achieve long-term goals.

I can tell you from my own experience that the handstand can be an allusive opponent.  I first learned an arch-back style handstand, which is common for most beginners, before I was challenged by a gymnast friend to learn the flat back style.  That process of re-educating took months! It was probably a year before I could easily switch between the two, along with other body positions, and stay up for multiple minutes. I learn more about Hand Balancing every single day and am humbled by it constantly.  I’m certainly a lot better now than I was a few years ago, and I definitely have more goals yet to reach.  It’s clear to me that it’s a life-long practice.  There’s no turning back now.

 Intro to Handstand Conditioning: The Wall-Assisted Handstand

Begin your handstand training with the simple Wall Assisted Handstand.  It may seem like the most basic conditioning exercise, but remember, a baby has to crawl before he could stand. The exercise itself is as simple as it sounds, but I have some tips to help make it wildly successful for you:

  1. First of all, you should have your front, not your back, facing the wall.  Otherwise you’re automatically training in an arch back handstand.  While the arch back is a legitimate handstand in itself, the mechanics are different and you may not get the same benefits I mentioned earlier.

  2. Follow these steps to get yourself safely into place:   Start by facing away from the wall. Bend forward and place your hands on the ground at roughly shoulder width.  Place your feet on the wall and walk them up until the body is elongated.  Walk your hands towards the wall until they are about 6 inches or so away from the wall (this may vary – just find a distance that feels comfortable psychologically).  The toes should be pointed with the top of the foot flat on the wall.

  3. Once in position, SET the body:  Grip the ground with your fingertips.  Lock the elbows completely, driving down into ground, creating as much space as possible between your toes and the ground.  When you successfully fire the traps, the space between your ears and shoulders will close.  Squeeze the glutes and quads, and draw in or brace the abdominal wall. Make sure not to hinge at the hips.

  4. Don’t forget to breathe!

  5. Time yourself to see how long you can hold this perfectly tensed handstand.  Your goal is to first work up to one minute, then two. Once you can hold for two minutes, begin bringing your hands closer and closer to the wall.

  6. And here’s an important Bonus Tip:   If you’re not used to twisting or summersaulting out of a handstand, be sure to leave enough strength to get back DOWN the wall!

Wall Walking Handstand

Expect to be humbled by this isometric conditioning.  But keep up with your handstand practice, and it will absolutely fast track your way to being better at EVERYTHING!

For more information on Hand Balancing, check out our new 5-part video series, Hand Balancing for the Bodyweight Athlete, available as downloads or on DVD.

Mike Fitch is the Founder/President of Global Bodyweight Training, a fitness company providing training, education, and promotion of bodyweight training disciplines, as well as creator of the popular Animal Flow program. Mike’s current interests lie in exploring how bodyweight training disciplines can be integrated with skills-based practices, and multi-planar, fluid movement. He’s been featured in Men’s Health, Shape, and Fitness Magazine, as well as on The Doctor’s, Good Morning America, and LIVE with Kelly and Michael.

Filed Under: Progressive Calisthenics Tagged With: carryover, coordination, hand balancing, handstands, Mike Fitch, progressive calisthenics, skill training, strength training

On Street Workout

January 14, 2014 By Danny Kavadlo 21 Comments

Danny Kavadlo Performs a Human Flag in the streets of New York City

There is no denying it: The phenomenon known as Street Workout has built a mighty following over the years, a following that grows exponentially every single day.

What started with minimalist calisthenics crews in New York has spread across these great States, and all over the planet. While not exactly the same, Progressive Calisthenics and Street Workout do have a lot in common. Just look at the wild success of PCC Sweden (where participants trained on actual urban scaffolding!) and next month’s sold-out PCC Australia, not to mention upcoming events in Germany, Holland and Ireland. Clearly, the principles of Street Workout have become an international sensation. A movement, if you will.

And we are not slowing down. You can’t ignore us. Street Workout is just so damn fun and good for you! It sometimes seems like the fitness world is nothing more than a bloated bastion of isolated movements and impractical applications. Street Workout is a breath of fresh air.

A variety of exercises demonstrated simultaneously by participants and PCC Instructors at the 2013 PCC in Sweden

Do It Anywhere
To begin, it encourages us to tap into the creative, even artistic, part of our cerebrums. Whereas commercial gym members use multiple thousand-pound machines to train one muscle at a time, we can look at a pole, fence or street sign and come up with a dozen exercises on the spot. The ability to observe and use your surroundings is a human trait that’s dying these days. Free your mind. Further, unlike a gym, there’s no fee for this club. We welcome all comers.

I used to know a guy who would drive 40 minutes each way to a gym to train for 45. He could have ran flights of stairs, done dips on a bench and pull-ups off a ledge in a fraction of the time. Hell, he could have done push-ups right there on the street—that’s what I’m talkin’ about!

Al Kavadlo Performs a Push Up on Cobblestones

Real Strength
Street Workout is more than just efficient and visually impressive—it also makes you really freakin’ strong! By encouraging harmonious full body movements over isolation and non-cohesion, this style of training builds real world power! Modern classics like high-altitude pistol squats and scaffolding pull-ups employ more muscle groups and promote greater overall strength than traditional gym exercises like leg extensions or biceps curls. I’m a lot more impressed by someone who can confidently pull his or her body up and over a real object, than somebody who moves a weight straight up and down a machine!

Danny Kavadlo Performs a Pull Up on New York City Scaffolding

It’s Fun
We are born with a primal urge to be outside. We’re animals, not built to sit under florescent lights in climate controlled, window-less rooms all day. It’s bad enough that so many good people have to do this at their jobs. Why do it during your workout?

Have some fun. Breathe the air. Feel the sun. Outdoor training makes you feel like a kid again.

Wilson on the playground

Community
This is the best part of all. Whenever and wherever there is a gathering of Street Workout enthusiasts, it’s like reuniting with old family, even if you’ve never met. The passion and energy are that intense. I can’t explain it, but there is a special kinship in our world, just as there is in the calisthenics community overall. I treasure being a part of it.

In his groundbreaking book, Raising the Bar, my brother and PCC Lead Instructor Al Kavadlo refers to it as “The Bar Brotherhood”.

The Kavadlo Brothers

When all is said and done, working out, like life, should be full of challenges, fun and adventure. No training style embodies these elements quite like Street Workout does. So what are you waiting for? Let’s hit the pavement and train!


***

Danny Kavadlo is one of the world’s most established and respected personal trainers. He is a Master Instructor of Progressive Calisthenics and the author of Everybody Needs Training: Proven Success Secrets for the Professional Fitness Trainer. A true in-person experience, Danny is known globally as a motivator and leader in the body-weight community. Learn more about Danny at: www.DannyTheTrainer.com.

Filed Under: Progressive Calisthenics Tagged With: Al Kavadlo, calisthenics, Danny Kavadlo, fitness, New York City, no gym necessary, PCC, Raising the Bar, street workout, strength training, workout

The Top Ten PCC Blog Posts of 2013

December 31, 2013 By Al Kavadlo 8 Comments

Al_deep_squat

The Progressive Calisthenics Certification made its mark on the fitness world in 2013 and I am very excited to have been a part of it. It’s almost hard to believe that this blog has been up and running for an entire year, yet on the other hand, it’s amazing to think that in such a small amount of time, the PCC has already grown into an international phenomenon. Next year, we will be holding PCC workshops in a half dozen different countries!

I am proud of every one of the nearly 50 posts we shared this year on the PCC blog, so it was hard to assemble this list. With that in mind, let’s take a look back at my top ten PCC blog posts of 2013 (in no particular order):

We’ll start with the most popular post this blog has ever seen, Paul Wade’s Ten Commandments of Calisthenics Mass.

And let’s not forget my counterpoint to that piece: Building Strength Without Mass.

My brother and fellow PCC Master Instructor Danny Kavadlo shared his personal experiences with Bodyweight Training.

PCC Team Leader Adrienne Harvey gave us her unique perspective on PCC Sweden.

A fantastic motivational piece from Dragon Door Founder and CEO John Du Cane on How to Be Successful at Anything.

Another classic post from Coach Wade, this time discussing the Tao of PCC.

PCC Team Leader Logan Christopher made a case for Curved Handstands.

PCC Senior Instructor Steven Low gave us this great piece on the Marriage of Bodyweight Methods.

PCC Team Leader Angelo Gala shared his Journey to the Back Lever.

And last but not least, this touching father and son calisthenics story from Peter D’Epiro.

Thanks to all of you who read this blog and support the PCC movement! I can’t wait to see what next year has in store for the PCC and the entire bodyweight strength training community.

We’re Working Out!

Al

Al_one_hand

***

About Al Kavadlo: Al Kavadlo is the lead instructor for Dragon Door’s Progressive Calisthenics Certification. Recognized worldwide for his amazing bodyweight feats of strength as well as his unique coaching style, Al is the author of three books, including Raising The Bar: The Definitive Guide to Pull-up Bar Calisthenics and Pushing The Limits! Total Body Strength With No Equipment. Read more about Al on his website: www.AlKavadlo.com.


Filed Under: Progressive Calisthenics Tagged With: Adrienne Harvey, Al Kavadlo, Danny Kavadlo, John Du Cane, Logan Christopher, Paul Wade, PCC, Peter D'Epiro, progressive calisthenics, Steven Low, top ten of 2013

  • « Go to Previous Page
  • Page 1
  • Interim pages omitted …
  • Page 13
  • Page 14
  • Page 15
  • Page 16
  • Page 17
  • Interim pages omitted …
  • Page 19
  • Go to Next Page »

Primary Sidebar

Featured Products

previous arrow
GetStrongBookCover
ConvictConditioningBookCover
StreetWorkoutBookCover
ExplosiveCalisthenicsBookCover
StrengthRulesBookCover
next arrow

Categories

Progressive Calisthenics Certification Logo
Click here for more information or to register for the PCC workshop

Get Strong Workouts TriadXP App
Get Strong Workouts App

Recent Posts

  • Top 5 Reasons Why an In-Person Workshop is the Best Way to Supercharge Your Training
  • HYBRID STRENGTH TRAINING IS HERE!
  • My Calisthenics Journey to the PCC
  • The Handstand Press: Complete Control Through the Handstand
  • The Get Strong App is Here!

Dragon Door Publications

Dragon Door Publications

Recent Comments

  • bross dandon on The Case for Curved Handstands
  • Johnny Flewellen Jr. on Strength for Life
  • Dan Earthquake on The Pursuit of the Daily Minimum
  • Johnny Flewellen Jr. on The Pursuit of the Daily Minimum
  • Johnny Flewellen Jr. on Yoga, Calisthenics and the Journey of a Lifetime
FOLLOW US ON TWITTER!

Copyright © 2025

Dragon Door Publications / The author(s) and publisher of this material are not responsible in any manner whatsoever for any injury that may occur through following the instructions or opinions contained in this material. The activities, physical and otherwise, described herein for informational purposes only, may be too strenuous or dangerous for some people, and the reader(s) should consult a physician before engaging in them.