• Skip to main content
  • Skip to primary sidebar
  • Home
  • Contributors
  • Resources
    • Q&A with Paul “Coach” Wade
  • Workshops
  • Products
  • Forums
  • Articles
  • Blogs
    • RKC Blog
    • Strong Medicine Blog
  • Archives

PCC Blog

Progressive Calisthenics - The Official Blog for the PCC Community

Tutorial

Perfecting The Hanging Knee Raise

March 22, 2016 By Al Kavadlo 21 Comments

Al Kavadlo Hanging Knee RaiseI get a lot of questions from potential PCC candidates about our Century Test. It’s understandable that folks want to be prepared for the testing that comes at the end of the PCC weekend, and it’s often the same questions that come up:

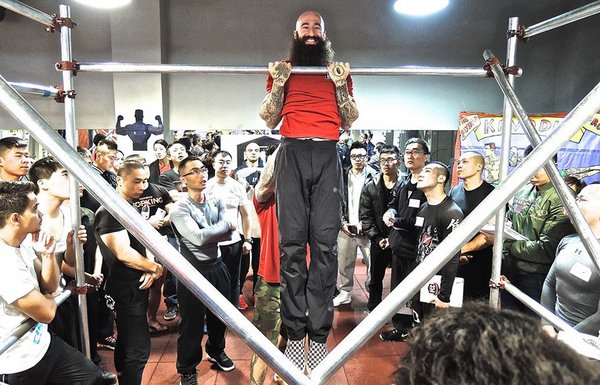
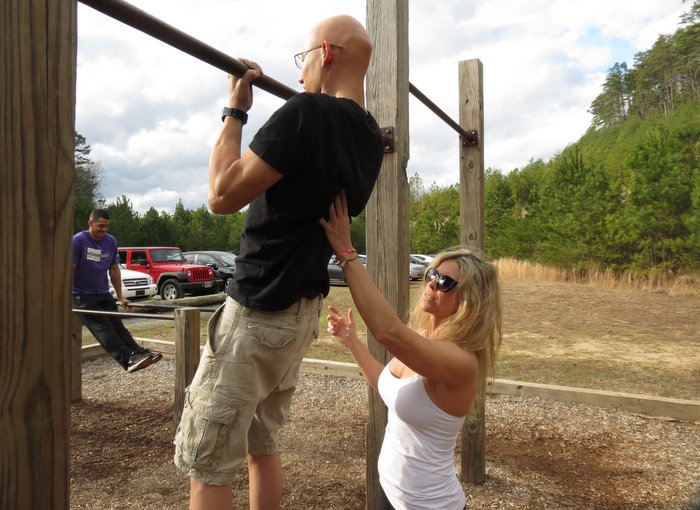
Am I allowed to come off the bar during the pull-ups?

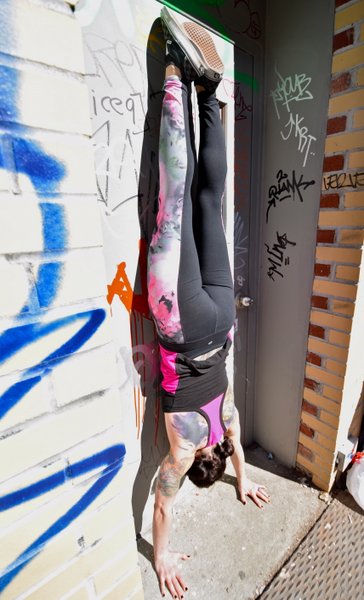
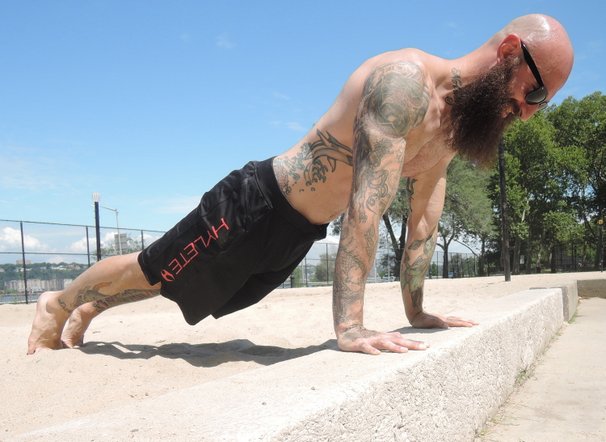
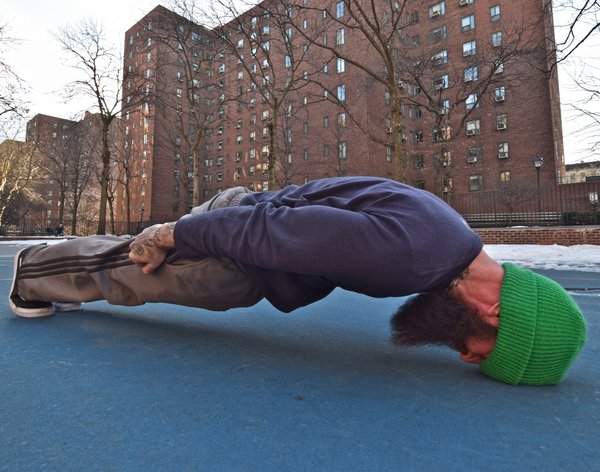
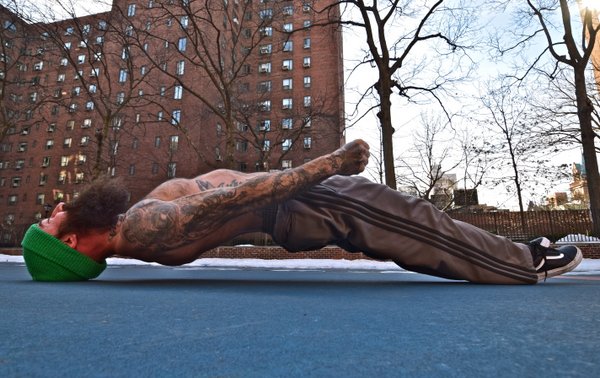
Am I allowed to rest in a “down dog” position during the push-ups?

Can I bribe the instructors in order to pass?

Do I really have to go all the way down on all 40 squats?!?

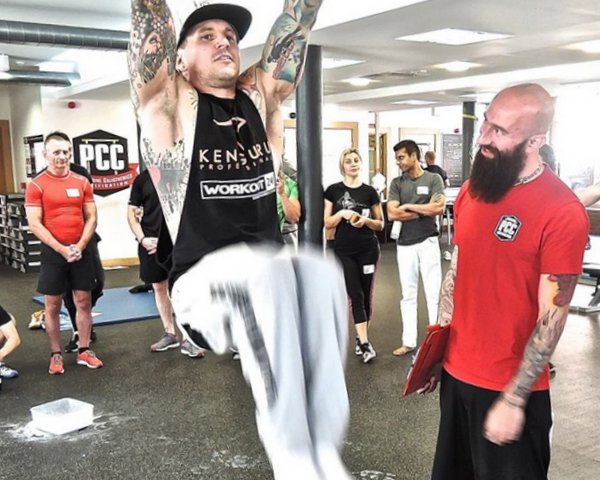
Hardly anyone asks about the hanging knee raises. And this is precisely the problem. (For the record, the answers to the other 4 questions are NO, NO, NO and YES.)

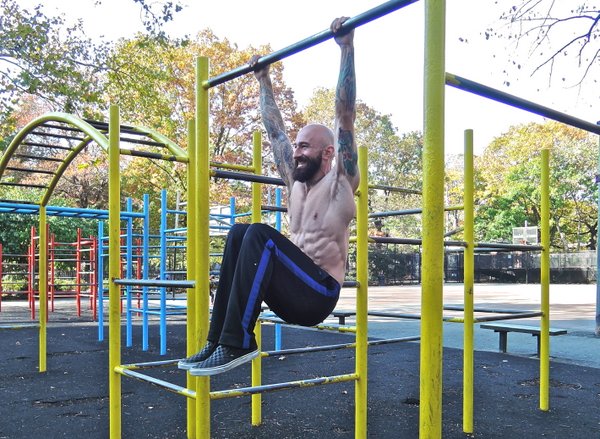
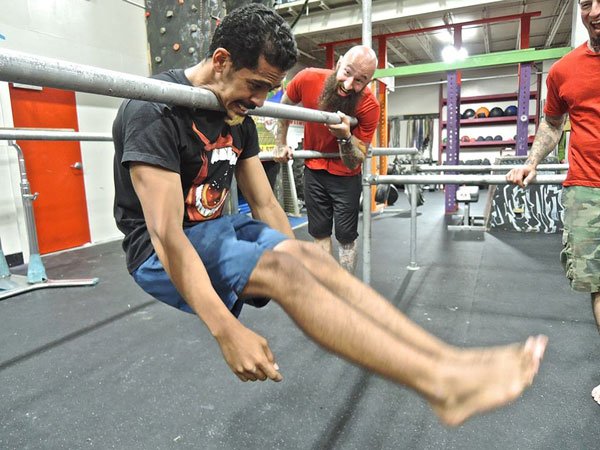
Though far more people have failed the Century during the pull-ups than during the hanging knee raises, I believe that many of those who couldn’t complete their pull-ups had trouble at least in part due to the knee raises having taken more effort than they anticipated. If you’re struggling by your tenth hanging knee raise, it does not bode well for the rest of the test, even if you manage to hang on long enough to finish the 20 required reps. This is why perfecting your hanging knee raise is a key part of training for the Century. It’s a great strategy to make sure you have gas left in the tank to complete the test, and the extra time spent hanging from the bar can only help your pull-up game in the long run.

PCC_UK-Stephen-Hughes-Landers-HangingKneeRaise2The first few times I taught the PCC workshop I was surprised by how many people could not perform a proper hanging knee raise upon entering. At this point, it no longer surprises me, but it still sometimes amazes me when otherwise solid candidates struggle with this exercise. It’s not the hardest move in the world, but it does take some practice. Particularly in the context of the Century, performing 20 clean reps in a row is a more difficult task than many expect it to be, yet it seems like lots of folks show up for the PCC having never even attempted more than a single rep. People either underestimate the hanging knee raise, or they’re too focused on all the pull-ups to even notice this relatively modest exercise.

As such, many PCC candidates end up getting “no-repped” on a lot of their hanging knee raises due to poor technique, which wastes both time and energy. If you wind up getting no-repped 6 or 7 times during the hanging knee raises, not only does that leave less time to rest before your pull-ups, it can also zap your strength and vitality.

If you want all of your reps to count, the biggest thing to watch out for is excessive swinging. This is especially true during the lowering phase of the movement. Though a slight degree of wavering may be unavoidable, anything more than that is unacceptable.

In order to facilitate a controlled descent, think about pointing your toes and reaching your feet slightly forward in the bottom position, almost like a gymnastic “hollow body” hold. This will help you avoid picking up excessive momentum. Also make sure to maintain tension in your abs, and don’t let your legs swing behind your body at the bottom of the rep.

Al Kavadlo Hanging Knee Raise
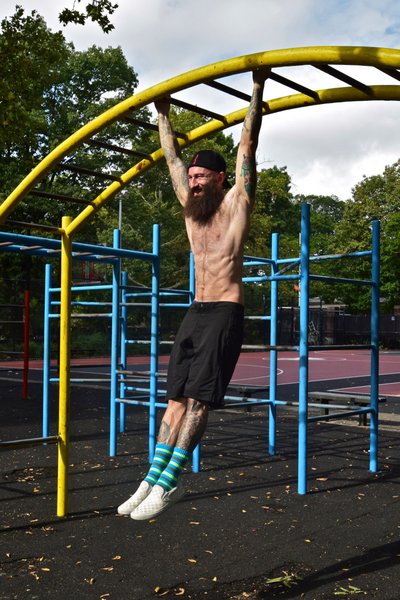
Focus on raising your knees with control as well. Avoid moving too quickly and aim to pause briefly at the top of each repetition to make sure that you remain steady.

Furthermore, it’s crucial to make sure you have a solid grip. Squeeze the bar tightly, keep your elbows locked, and actively pull your shoulder blades down and back to minimize any swinging.

Though range of motion is less often a concern on this exercise than the others that comprise the Century test, it is essential that your knees are raised above hip height for a rep to count. Focus on tilting your hips and pelvis forward at the top of each rep in order to fully engage your abs and ensure that your knees come up high enough.

It’s great to understand all of those concepts theoretically, but it’s another thing to actually put in the time to get a feel for the exercise physically. The key to perfecting your hanging knee raise is very simple: lots of practice. Do them before your pull-ups to warm up or do them afterwards to burn out. Just make sure you do them before you come to PCC.

***

Al Kavadlo is the lead instructor for Dragon Door’s Progressive Calisthenics Certification. Recognized worldwide for his amazing bodyweight feats of strength as well as his unique coaching style, Al is the author of five books, including Raising The Bar: The Definitive Guide to Pull-up Bar Calisthenics and Pushing The Limits! Total Body Strength With No Equipment. Read more about Al on his website:www.AlKavadlo.com.

Filed Under: Progressive Calisthenics, Tutorial Tagged With: abdominal training, abs, Al Kavadlo, Century Test, Hanging knee raises, hanging leg raises, HKR, HLR, PCC, PCC Workshop, progressive calisthenics, The Century Test

Training Handstands For Strength

March 1, 2016 By Grace Kavadlo 26 Comments

Grace Kavadlo Handstands 1

When many people think of the handstand, they think of a bodyweight skill. In other words, if your goal isn’t to hold a freestanding handstand, somehow it’s not a worthwhile exercise. While learning to balance on your hands is certainly a noble pursuit, a lot can be gained from approaching the handstand from a pure strength training perspective by using a wall for support. In calisthenics, we encourage all types of isometric holds from elbow levers to L-sits. You can think of the wall handstand as just being the inverted variety.

Wall handstands take the balance element out of the exercise and are excellent for building overhead pressing strength. Practicing wall handstand holds is also a great way of building shoulder stability and increasing static strength. Handstands strengthen your triceps, delts, rhomboids, traps, and the extensor muscles of your forearms which can help build strong, healthy wrists. When you tense your entire body in a wall handstand, similar to how you would in a plank, you can also target your quads, glutes, and even your abs.

Below are 3 different wall handstand variations that you can try. Aim to hold each pose for as long as you can, ideally working up to one full minute. It’s not uncommon to feel dizzy or slightly disoriented after performing long holds, so ease in slowly and rest as needed between efforts.

Back-to-the-Wall Handstand
This is a great place to start if you are new to handstands. Begin by facing a wall with both hands on the ground, your front knee bent and the other leg extended behind you. Hop off your bent leg and reach your extended leg towards the wall. It may take a few hops before you finally hit the wall. Make sure your arms are straight with your elbows fully extended. A common mistake beginners tend to make is to bend their elbows as they kick up which makes them fall on their head and never want to attempt a handstand again. Remember “when the elbows bend, the power ends.”

Once you’re up, allow your head to relax between your shoulders as you actively press into the ground. It is normal to have a slight arch in your back when you are practicing this exercise, but aim to minimize this pressure on your low back by actively squeezing your glutes, engaging your abs and pushing your head and chest through your arms. When you’re ready to come down, release one leg at a time back to the ground, doing your best to land gently.

Grace Kavadlo Handstands

L-to-the-Wall Handstand
Begin in a push-up position with your heels touching the wall behind you. Slowly begin to crawl your feet up the wall as you fold at the waist, walking your hands in closer until your hips are aligned above your shoulders. Your body will wind up in an inverted capital letter L-shape. It may help to have a pair of eyes on you to let you know when you are in position, as it can be hard to tell at first.

In addition to upper body strength, there’s a lot of flexibility needed in your hamstrings to fully extend your legs. If you don’t have the mobility to achieve a full lockout, you can practice with a slight bend in your knees and/or allow your heels to come off the wall slightly. This is also a really intense exercise for your shoulders. It can help to alternate extending one leg upwards at a time in order to take some of the pressure off your shoulders if it starts to get too intense.

Grace Kavadlo Handstands

Face-the-Wall Handstand
Similar to the L-to-the-wall, begin in a push-up position with your heels against the wall, then start crawling your feet up and walking your hands in. This time, the idea is to get the entire front of your body pressed flat against the wall. When you reach the wall, tuck your chin to your chest, tense your glutes, squeeze your quads, point your toes and engage your abs. Think about lengthening your body as much as possible by actively shrugging your shoulders, pressing into the ground and reaching your legs upward.

You can ease into this variation by walking in as close to the wall as you feel comfortable and then walking back out. Gradually you will build the strength and confidence to bring your hands all the way the wall.

Grace Kavadlo Handstands

Upside Down and Inside Out
From an overall health perspective, inversions have a lot more to offer than strength or skill alone. Due to the effect gravity has on the body, practicing inversion holds can be beneficial for the circulatory, lymphatic, and nervous systems. Your body has many valves and veins all transporting lymph fluid, nutrients, and blood constantly. By inverting yourself, you are in essence helping these natural processes by encouraging venous return from the lower extremities back to your heart, brain, lungs, and lymph nodes. As such, there are many folks in the yoga community who consider handstands to be the fountain of youth, so don’t neglect them!

See you on the flip-side, ninjas!

Grace Kavadlo Handstands

****

Grace Kavadlo is a PCC Team Leader, personal trainer and group exercise instructor located in New York City. She is a columnist for Bodybuilding.com and can be seen in several Dragon Door books, including Coach Wade’s Explosive Calisthenics. For more information about Grace, check out her website, www.DieselGrace.com

Filed Under: Progressive Calisthenics, Tutorial Tagged With: calisthenics, Grace Kavadlo, handstand, handstand tutorial, handstands, how to, wall handstand variations, wall handstands

If You Build Your Pull-up…It Will Come

February 23, 2016 By Beth Andrews 28 Comments

Pull-Up Build Lead Pic

Have you ever heard a voice inside you that says, “I’d like to do a pull up, but I don’t know where to start?”

In the movie Field of Dreams, Ray Kinsella (played by Kevin Costner) was a farmer who heard a voice whisper from his corn field, “If you build it, he will come.” The message was that there would be a reward if he listened and followed through by turning his farm land into a baseball field.

If you’ve seen the movie, you know that Ray took a chance and followed the voice. As a result, he got to fulfill his dream of playing baseball alongside some of the all-time greats as well as reuniting with his father.

If you have been hesitant and unsure of where to start building toward the pull up, then here’s your sign, and here is my whisper:

“If you build your pull-up, it will come.”

Just as Ray was hesitant and unsure, yet through different signs and signals, he took a risk and built his playing field, you can achieve a pull-up if you really want it badly enough.

But first, like Ray, you must do the work. You must plow your corn. Let’s start by working the top and bottom of the pull up.

First, get comfortable hanging on the bar. This can actually be a bit scary for first timers, especially if the bar is high. I have worked with clients that fear they are going to fall because they don’t trust their grip strength. If this is you, then have a friend assist you or make sure that you have a platform to step down on for security.

https://www.youtube.com/watch?v=vDftEVZtd04

Focus on actively hanging using both hands for as long as you can stay engaged. That may only be 10 seconds to start or it could be much longer. Either way, do this a couple of days per week, progressively working to longer times, and don’t forget to rest enough between sets so you can give a strong effort on the bar each time. Aim to progressively work your way towards one full minute. You can never hang too long on the bar!

When you have reached a minute on your standard bar hang, you are ready to try a flexed-arm hang. Get someone to assist you up or stand on a platform to get your chin over the bar. Use an underhand grip when starting out. Twice a week should be enough at first, as this type of hang can fry your nervous system when you are new to it and take longer to recover. At first you may only manage a few seconds. This is fine. Aim to gradually build toward a 30 second hold.

I also recommend the Aussie pull-up (aka bodyweight row) as an assisting exercise to help build pulling strength toward a full pull-up. Though the movement pattern is a little different than in an overhead pull-up, the Aussie pull-up can be helpful in bridging the top and bottom of the pull up together. Feel free to use either an overhand or underhand grip. Start with sets of 5 reps at a time, eventually progressing to 3 sets of 10reps. Aim to practice your Aussies 2-3 times a week, while continuing to work your flexed-arm hang concurrently.

Beth Andrews Aussie Pull Ups

Now that the corn is plowed, let’s build your pull-up!

When you can hang on the bar for a full minute, exceed thirty seconds on a flexed-arm hang and do three sets of ten reps of Aussie pull-ups, you have built a good foundation to attempt a chin-up (a pull-up with an underhand grip). Chin-ups are a little easier to begin with for most people. Grab your bar with your hands shoulder width apart and give it a shot! If you are still unable to pull your chin above the bar, here are a few more suggestions:

1- Get a spotter to help you through the full range of motion. The spotter should only assist through the hardest points of the movement. Don’t allow your spotter to do too much of the work for you!

Beth Andrews Pull-Up Spotting

2- Practice negative pull-ups. Simply get into a flex-arm hang, lock in for a few seconds, then slowly lower yourself down with control.

3 – Keep doing the three steps mentioned above, along with with these two additional steps. Once you’ve conquered the chin up, aim to build up to five consecutive reps. Now you’re ready to change over to the overhand grip. Once you can get an overhand pull up, aim to build up to five sets of one rep. Then progress up to five sets of five reps.

If you get stuck or struggle, go back and plow some more corn. Because… “If you build it, he will come.”

****

Beth Andrews is a PCC Team Leader, Senior RKC, Primal Move Instructor, and CK-FMS. She is the owner of Maximum Body Training and has over 20 years of training experience. She also runs a successful online training business. For online training or to host a certification, email Beth at: sba1@bellsouth.net    

Filed Under: Progressive Calisthenics, Tutorial Tagged With: assisted pull-ups, Aussie Pull Ups, Beth Andrews, how to do a pull-up, pull-up, pull-ups

Super Slow Reps for Superhuman Strength

February 16, 2016 By Benji Williford 19 Comments

Lead Photo Benji Williford

A lot of my personal training clients start out thinking that training faster means training better. But working out like The Flash won’t make you superhuman if you are bobbing your head for apples with your elbows flared out over your shoulders instead of actually doing push-ups. Poor form at a super-fast pace is not only allowing momentum to carry you through part of the range of motion, but it’s also potentially causing unnecessary strain on tendons and ligaments, as the muscles that should be doing the work aren’t activated properly.

My first rule for my clients is to focus on proper form. I created the phrase “AF3” which stands for Absolute Form Fit Function. The intention is to master the form, which improves fitness and ultimately, overall function. One antidote toward improper form is slowing down the rep speed. Let’s continue to look at the push-up as an example.

As you probably know, the push-up is essentially a traveling plank. It is a total body exercise and not just for building big pecs. Now do me a favor and go try an extremely slow push-up with full range of motion. Start in a plank with fully extended arms and lower down very gradually, touching your chest to the floor, then push back to fully extended arms.

You might have had some form breaks or even lacked strength to complete the rep. You should have definitely experienced the feeling of total body activation needed to maintain the straight body alignment in the absence of momentum. If you couldn’t do the full range-of-motion, consider modifying the exercise. For example, try placing your knees on the floor. This will shorten your body length (lever) so you will have to push less percentage of your bodyweight. Yes, the regression of an exercise can be an important part of progressing. It’s important to not let your ego deter you from modifications. You can often foster quicker progressions by perfecting “easier” versions of an exercise.

There are numerous ways you can manipulate your rep speed in order to develop better body control. The following is one example of a set of 7 push-ups stretched out over 2 minutes and 40 seconds.

Rep 1- 10 second rep (5 seconds down/negative and 5 seconds up/positive)
Rep 2- 20 second rep (10 seconds down/negative and 10 seconds up/ positive)
Rep 3- 30 second rep (15 seconds down/negative and 15 seconds up/positive)
Rep 4- 40 second rep (20 seconds down/negative and 20 seconds up /positive)
Rep 5- 30 second rep (15 seconds down/negative and 15 seconds up/positive)
Rep 6- 20 second rep (10 seconds down/negative and 10 seconds up positive)
Rep 7- 10 second rep (5 seconds down/negative and 5 seconds up/positive)

Notice how the set starts by climbing up the ladder in 10 second increments for each push-up from rep 1 (10 second rep) through rep 4 (40 second rep).  Then at rep 5, it goes back down the ladder by decreasing the time in 10 second increments until you reach rep number 7 (10 second rep).  The times listed aren’t absolute, so feel free to experiment with them. The important thing is to move evenly and controlled throughout the range-of-motion.  Avoid fast jerky movements or hitting and holding positions.

To keep a solid pace, I recommend either using a stopwatch or a metronome (a device that musicians use to keep a specific tempo). Personally, I prefer the sound of the metronome. There are now free metronome apps available that you can download to your smartphone. Be sure to set the beats per minute to 60 (that equals one beat per second). It takes some concentration when counting to avoid rushing where you should be within a specific rep, which adds another layer and takes this challenge to the next level. It is mind over matter.

Though we’ve been using the push-up as our main example, remember that you can use this method with just about any exercise: pull-ups, squats (even pistols!), skin the cats…the list goes on.

Benji Williford PCC Pullup

Of course, you will move slowly if you only train slowly. So yes, performing fast reps is important. The point is to move fast well.  In order to incorporate faster reps, you could use this structure by using the same 60 beats per minute with one set of 7 push-ups and adjusting the times as follows:

Rep 1- 2 second rep (1 seconds down/negative and 1 seconds up/positive)
Rep 2- 4 second rep (2 seconds down/negative and 2 seconds up positive)
Rep 3- 8 second rep (4 seconds down/negative and 4 seconds up/positive)
Rep 4- 16 second rep (8 seconds down/negative and 8 seconds up /positive)
Rep 5- 8 second rep (4 seconds down/negative and 4 seconds up/positive)
Rep 6- 4 second rep (2 seconds down/negative and 2 seconds up positive)
Rep 7- 2 second rep (1 seconds down/negative and 1 seconds up/positive)

Since the first rep and seventh rep are quick, you can even consider making them plyometric to build explosive power. Notice that shorter rep times will inherently eliminate some exercises. For example, it might not be the best idea to do a two second skin the cat.

Experiment with your rep speed but don’t let your ego get in the way. If you need to regress an exercise in order to maintain good quality of movement, then do so. Soon enough, you’ll gain the strength you desire to control any rep at any speed through it’s entire range-of-motion.

****

Benji Williford, PCC, RYT, CF-L1 is a Personal Fitness Trainer located out of Eau Claire, WI. Benji believes that, “A successful fitness program is based on positive dialogue between the mind and body.” He can be reached through his website: http://www.benjiwilliford.com, or by email: Benji@ChainReaction-Fitness.com.

Filed Under: Progressive Calisthenics, Tutorial Tagged With: Benji Williford, bodyweight strength training, progressive calisthenics, push-up, strength training, tutorial

Building the Foundation for Spectacular Progress, Programming with the SCC

February 9, 2016 By Adrienne Harvey 22 Comments

Raised Push-up Adrienne Harvey

After reading an online article last week, I had a brief flashback from my early days of strength training—or what I thought was strength training. In the 80s, bodybuilding came into the popular consciousness (along with aerobics and some of the most regrettable workout wear ever) and took its seat as the basis for mainstream strength training. For decades, the general public (which included me in the late 1990s, early 2000s) didn’t know that we were trying to use the ideas of this physique-based sport-specific training to build strength and general health. Most of us thought that doing these moves would help us to get stronger, more in shape, and improve our health—and they did to a point. But like many others, I was often confused because my real-world strength had only mildly increased along with my improved body composition and heavier machine-based lifting.

Also unfortunately, being short meant that many of these “standard” machines just barely fit me. Come to think of it, I remember seeing people of all shapes and sizes fidgeting with the machines in vain attempts to make them “fit”. The other even more frustrating effect was that I felt clumsy, both in and outside the gym. I’d trip over my own feet and just generally felt disconnected… and didn’t know what to do about it. Maybe I just wasn’t a coordinated person?

Fortunately, I eventually learned that I just needed to change the way I was training.  And soon after, I noticed my pull-up numbers began to increase as I learned to use my whole body for the lift, not just my arms and upper body as I’d learned to with the bodybuilding approach. And while it was still good that I could even do pull-ups that way, I’d been stuck on the same 3-4 satisfactory reps for a very long time.

When Convict Conditioning was first published, I balked at the early steps, thinking I was somehow magically beyond them. I couldn’t have been more wrong! I needed to start from the beginning and fill in the missing pieces of my training. It was necessary to “get over myself” to realize the extreme value of those beginning steps—especially when building the strength foundation necessary for advanced moves down the line. There are no “hacks” or “shortcuts” that can take the place of a solid foundation.

With all of that being said, it is still difficult for people to know how and where to start with bodyweight training, even if they are experienced with weight training or even if they’ve been training with kettlebells. In Convict Conditioning as well as Al Kavadlo and Danny Kavadlo’s books there are suggested workouts, examples, and instructions on how to customize your own programs. Yet somehow many of us still struggle to know where to start, or how to program a lot of this almost too-simple-to-be-true training for our clients or groups.

In Convict, we’re told to simply work through the progressions, only moving ahead when the reps are comfortably met… not barely met. Over time, we learn not to cheat ourselves when rushing through the progressions. It’s the beginner’s mind concept… and it works! But how do we teach it to others in the context of a session?

The other so-called “problem” with bodyweight training often comes from the lack of restrictions and the fact that it really can be done anywhere. With so few “rules” it can be easy to feel lost instead of liberated at first. This is one of the many reasons I’m thrilled with the new one-day Strength Calisthenics Certification workshops. They teach precisely what you need from the beginning… and more importantly, how to teach it to others. At the first ever SCC in New York, even experienced trainers and exercise enthusiasts found themselves “filling in the gaps” of their training with these powerful basics and the philosophy behind them. We never really outgrow the “classics”.

Aussie Pullups How To

Many of us (and our clients) may first come to basic bodyweight exercises with some baggage and the feeling that we “already know what we’re doing.” We often find that our ideas might actually be stuck back in high school PE class, or from following along with an old exercise video! What a client may remember from PE might be fuzzy at best, and you may find out that they have a bad attitude towards the exercises because sub-standard form has been causing pain! As a trainer (even if you’re training yourself), you need to understand and communicate the value of starting back at the beginning.

The SCC has all the basic building blocks for your own training, and for training others. The 400+ page manual also includes a programming guide for all levels and for multiple goals (including of all things, bodybuilding!) The SCC guide will help you get the coordination-boosting, real-world-strength-boosting, foundation–building benefits for yourself and your client/students. While your creativity will still need to be applied, these ideas will help you create workouts with skill building and movement pattern improvement—along with strength and conditioning.

Below is an example of a workout heavily inspired by the SCC materials and which could be adapted for a variety of beginner-to-intermediate situations.

Start with a warm up. At the PCC and SCC, we teach to warm up with the earlier, and often earliest progressions for the various movements we’ll be training in a given session, I also like to apply this to the Trifecta movements from Convict Conditioning Vol2 (when you go to the SCC, you’ll notice that the bridge and midsection hold moves also appear in the SCC manual), and scale it in much the same way. Some people have been confused with the Trifecta and have tried to jump right in with the later steps, even if they have not yet worked up to them in their regular sessions. Short bridges, beginner seated twists and bent-leg raised holds are great “warm-up” versions of the bridge, twist, and l-sit specified in Paul Wade’s Trifecta… even if you’re advanced or working with advanced students, revisiting those early steps for the first few reps is a great warm-up and “check in” with the body on a given day. Remember, these are active movements requiring active tension for full benefits. The other function of this focused warm up is to get our minds ready to work. Even a loosely structured warm-up can focus our attention on the task at hand, while breaking us away from our minds chattering away about the experiences of the day. In my own training, I think I do warm-ups as much for my mind as for my body!

Shoulder Bridge

Trifecta “Warm-Up” Example:

  • Short bridge and 5-second holds for three reps
  • Raised or knuckle-based N-hold (5-10 second holds) for three reps
  • Straight leg hold or easy twist hold (5-10 second holds) for three reps

Repeat (with the same versions of the exercises, or if you have progressed in your training, you have the option to move up a step or two)*

The SCC-Inspired “Beginner” workout example below uses a blend of the approaches given in the programming guide, but the core of the ideas below were from the section for deconditioned exercisers. The original form of this workout was designed for a deconditioned client with a fair amount of retained strength. I’ve adapted it for a more general purpose, but please tailor it to your own situations.

Senior PCC Adrienne Harvey Self-Assisted Squat

Review the movement patterns of each exercise for a few reps before starting, this will allow you to take extra time to make any changes before starting the real work sets. You’ll soon know whether there will be an opportunity to move forward in this session or the need to revisit an earlier step. For this workout, we did just a few reps of the assisted squat (with vertical pole or partner), horizontal pulls (Aussie pull-ups, bodyweight rows), incline (hands raised) push-ups, leg raises from the floor. While this can be progressed to any more advanced level, the original intention of this 3x week workout was to build up a reasonably deconditioned person—it can also be a nice way to come back to working out after illness.

Here are the work sets (do two rounds):

  • Self-assisted squats, 10 reps
  • Aussie pull-ups, 10 reps
  • Incline push-ups, 10 reps
  • Leg raises from the floor, 10 reps

Following this section, some may wish to follow up with some basic conditioning exercises such as jumping rope for time, or a brisk walk home from the park.

Finally, I find that “cooling down” with the version of the Trifecta I described above can be not only a useful way to end the workout, but a way to assess how you feel about the work sets, and to note any improvements as well. It’s subtle, but this “cool down” can really be a big motivator to stay the course!

This is just one example adapted from the SCC programming section, and while most people who train others will agree that most of our clients will be deconditioned, general population people, the SCC programming can also ramp up to spectacular levels of difficulty and challenge.

I hope to see you at a future SCC or PCC workshop!

*Trifecta progression examples for the second round: wrestler’s bridge or full bridges, L-sit from the floor, full twist hold… but remember there’s no reason to rush forward.


****

Adrienne Harvey, Senior PCC Instructor, RKC-II, CK-FMS, has been RKC Certified since 2010, and RKC Level 2 certified since 2011. Kettlebell and bodyweight training have been crucial in Adrienne’s personal quest for fitness.  A core member of the PCC team, Adrienne loves sharing her knowledge with small groups and individuals. She also loves to develop recipes and workout programs to further support performance, body composition, and of course—FUN. Go to http://www.giryagirl.com for more information about Adrienne.

Filed Under: Progressive Calisthenics, Tutorial Tagged With: Adrienne Harvey, beginner workout, bodyweight exercise, calisthenics, how to write workout programs, PCC, program for beginner, program for deconditioned, progressive calisthenics, SCC, Strength Calisthenics Certification, Why SCC, workout

Calisthenics Neck Training

February 2, 2016 By Robby Taylor 29 Comments

Calisthenics Neck Training Danny Kavadlo

There are a few body parts that often seem limited in training options when working with nothing but your own bodyweight. Neck strength is one of those areas. Sure, you can get a reasonably strong neck from doing wrestler’s bridges and headstands, but these quickly become exercises of endurance, requiring sets of a minute or longer to continue seeing improvement.

Though some coaches would have you believe there are limitations to what can be accomplished with bodyweight training alone, the truth is you can get an extreme workout for every muscle in your body without anything more than a pull-up bar. You just need to be creative!

As practitioners of Progressive Calisthenics know, when you’re able to hold a basic plank for an extended time, you can start to train more advanced skills like the L-sit and the back lever in order to increase the intensity and decrease the time needed to build strength. Wrestler’s bridges and headstands are to neck strength what the plank is to core strength: just the beginning.

Calisthenics Neck Training Headstands2
Headstands are just the beginning!

Advanced Neck Strength
Essentially, you can break down advanced neck exercises into two categories: planking and hanging. The easier of the two is planking, which consists of 3 main variations. (I say easier, but keep in mind that all of these exercises are very difficult, so be careful and ease in slowly.)

It’s also worth noting that while these are first and foremost neck exercises, you will likely be surprised by how much work you experience with the rest of your body. The good news is that you can scale any of these exercises by placing a hand (or two) on the ground (or bar) for an assist.

Neck Planks
When practicing any of these variants, make sure to use a soft surface and/or wear a hat with some cushioning. The first variation is the front neck plank. Start by performing the negative portion of a push up. At the bottom, touch your forehead to the ground, brace your entire body, especially your neck, and push into the floor through your forehead. Then if you feel you are ready to, remove your hands so the only contact points you have with the ground will be your forehead and your toes. Try to maintain contact with your forehead as much as possible, minimizing any “rolling” that would result in more of the top of your head making contact with the ground.

Calisthenics Neck Training 3

The second planking exercise is a modification of the standard wrestler’s bridge; you could call it a back neck plank. From a wrestler’s bridge, move your head such that the back of your skull is in contact with the ground and your eyes are pointed upward. Forcefully push the back of your head into the floor. The only contact points will be your feet and the back of your head. Once you are comfortable with this, you can work on holding the position with your legs fully extended, such that the only contact points are the backs of your feet and the back of your head.

Calisthenics Neck Training 4

The final planking exercise is a modification of the side plank. Find a low surface upon which to rest your head at about the same level as when doing a side plank. Set your body up in a side plank position with the side of your head resting on the object. Brace your entire body, especially your neck, pushing the side of your head down into the object. When you’re ready, remove your arm, so that the only contact points are the side of your head on the object and the side of your foot on the floor.

Calisthenics Neck Training 5

Neck Hangs
Now on to the hanging exercises! The easier of the two is the back neck hang. Get yourself in the top position of a behind-the-neck pull up. From there, curl the back of your neck around the bar as much as you reasonably can, leaning your head back so that you are looking up. Find a good spot on the back of your head and use it like a hook to suspend your weight from the bar. I find it helpful for counterbalancing to arch your body, so your feet wind up reaching back behind you. With time and patience, you may eventually be able to remove one or both hands.

Calisthenics Neck Training 6

The harder of the two hanging neck exercises is the front neck hang. This one’s a real doozy! From the top of a pull up, with your jaw on top of the bar, curl your head down, driving your chin towards your chest, curling your body around the bar with your neck strength. If you can, remove your hands and hold for time. It will be helpful to hold your legs/arms out in front of you to counterbalance.

Calisthenics Neck Training 7

Although this is likely the hardest variation in the article, it may be the easiest to scale. With your jaw on top of the bar and one or both hands on the bar, you can perform curls essentially by nodding – cycle between the neck position of the front neck hang and an extended position, where you let the angle between your jaw and your neck open, bringing your chin up.

Get Neck-ed
Any or all of these exercises can be used to increase your neck strength far beyond what you would attain through basic neck bridges and headstands, without the need for silly head harnesses or other such gadgetry. Start working these progressions and get ready to say goodbye to that pencil neck. One day you might even find yourself doing a human flag on the top of your head like my friend Danny Kavadlo.

****

Robby Taylo rDanny Kavadlo 8Robby Taylor, PCC, is a calisthenics enthusiast and personal trainer located in Denton, Texas. Connect with him on Facebook to find out more.

Filed Under: Progressive Calisthenics, Tutorial Tagged With: bodyweight neck exercises, neck calisthenics, neck planks, neck strengthening, neck training, neck training tutorial, Robby Taylor

One Rep Away To Undo Laziness

January 26, 2016 By Eric Buratty 18 Comments

LeadPhotoOneRepBuratty

Laziness is a cornerstone of the many excuses people give for not staying active.

In an effort to reduce laziness, we commonly experiment with several workout strategies that offer us an exciting challenge and minimize boredom.

When we think about it, though, many proven strength training programs are boring cookie-cutter routines. These same workout templates have been around forever—as recycled/revamped set-rep schemes that are also available online for free.

If they work so damn well, what’s the issue?

Well, for starters, they’re hard to stick to.

This is because the physiological benefits from a strength training program over the short run aren’t always consistent with our psychological experience over the long run.

In other words, we all enjoy getting stronger by following those cookie-cutter programs until their linear progressions stop working.

Then we no longer experience the same level of happiness from our workouts.

Then anxiety, frustration and boredom settle in.

Then we lose interest and get lazy.

Then we find ourselves hopping around programs like a bunny that lost its energizer batteries.

EricBurattyChart

As we can see, it’s a hellacious cycle of unrewarding time and effort invested. This is what happens when our original goals become more important than our journey.

So . . .

HOW do we adapt our goal-oriented mindset to fit in with our process-oriented reality?

HOW do we embrace the method to our madness without letting our strength program become just another boring cookie-cutter routine?

HOW do we find balance between the physiological and psychological aspects of exercise without losing sight of what we originally set out to accomplish?

. . . We focus on performance.

Even on the most sluggish of days, the way we perform our reps still dictates the type of gains (or lack of gains) we receive. So, once we become more aware of our stronger and weaker days (over the course of weeks, months and years of experience), the key to boosting performance is then through executing variety in repetition.

Let’s go over how to apply some popular rep styles that further maximize performance and minimize laziness.

Please note that, to get the point across in the most objective manner possible, we’ll assume a total body workout emphasis with demonstrations of each rep style coming from the handstand push-up chain of progressions (i.e. pike push up – to target upper body) and the shrimp squat chain of progressions (i.e. foot elevated/Bulgarian split squat – to target the lower body).

ExerciseCollageKavadlos

FASTER “SNAPPY” Reps

This rep style is characterized by a maximum application of force on the acceleration phase of a range-of-motion. Imagine trying to launch off like a rocket or catapult when transitioning from the eccentric/lowering phase to the concentric/lifting phase–especially when our bodyweight resistance makes a movement (initially) feel lighter (until fatigue sets in, of course).

This rep style can be further divided into two subcategories: explosive/ballistic and plyometric reps. The key difference between these two subcategories is that explosive/ballistic reps are performed without “catching any air,” while plyometric reps involve a short but powerful time period off the ground.  From a physics perspective, explosive/ballistic reps demonstrate why force equals mass times acceleration (i.e. F = ma), whereas plyometric reps take things a step further to show why power equals force times velocity (i.e. P = fv).

FASTER Upper Body Demo 1 (explosive-ballistic)

FASTER Upper Body Demo 2 (plyometric)

FASTER Lower Body Demo 1 (explosive-ballistic)

FASTER Lower Body Demo 2 (plyometric)

Pros: Improves speed, explosiveness and fast-twitch motor recruitment—which means greater carryover to athletic skills that require considerable force and power production; Permits the use of momentum to support a smoother eccentric to concentric transition—which allows for a higher number of reps to be performed cleanly.

Cons: Decreases total body awareness—which can lead to injury when an individual hasn’t fully mastered a movement or progressed it appropriately; Does not simulate the amount of speed and muscle tension for setting PRs.

When to Use: Ideal for all fitness levels training in the 6-12 rep range (i.e. working with the lower level progressions of “the big six” from Convict Conditioning) – wherein the emphasis is on speed & power output first, muscle-building & size second, and strength third.

Beyond Calisthenics: For those who wish to supplement their calisthenics training with weighted movements, this rep tempo would be most appropriate for exercises like kettlebell swings and snatches, one-arm rows with dumbbells/kettlebells/barbells, as well as barbell push-presses and hang power snatches.

SLOWER “Grinding” Reps

This rep style is characterized by a deliberate application of constant muscle tension throughout the entire range-of-motion.  Imagine trying to flex the target muscles for an exercise as hard as possible—as if we’re doing a photo shoot for a fitness magazine cover—while executing a single rep for an exercise.

SLOWER Upper Body Demo

SLOWER Lower Body Demo

Pros: Increases total body awareness—which has implications for injury prevention—even if the rest of mainstream health & fitness media deems a particular exercise as being “unsafe;” Simulates the amount of speed and muscle tension required for setting PRs.

Cons: Decreases speed, explosiveness and fast-twitch motor recruitment—which means less carryover to athletic skills that require considerable force and power production; Does not permit the use of momentum to support a smoother eccentric to concentric transition—which will not allow a higher number of reps to be performed cleanly.

When to Use: Ideal for intermediate and advanced-level individuals training in the 1-5 rep range (i.e. working with the higher level progressions of “the big six” from Convict Conditioning) – wherein the emphasis is mostly on strength and precision in power output.

Beyond Calisthenics: For those who wish to supplement their calisthenics training with weighted movements, this rep tempo would be most appropriate for exercises like Turkish get-ups with kettlebells/dumbbells, heavy deadlifts and front squats with a barbell, goblet style shrimp squats (AKA airborne lunges) or Cossack squats (AKA side-to-side squats) with a kettlebell/dumbbell.

MODERATE “Recovery” Reps

This rep style is characterized by a fluid contraction/stretching of the muscles that may also target strength/stability at a specific point throughout a range-of-motion. Imagine the body as an oscillating wave of potential energy—such as a slinky going down a flight of stairs, a child riding a swing back and forth or Wile E. Coyote jumping off the Burj Khalifa building in Dubai with a bungee cord in an attempt to catch The Road Runner.

From a fitness perspective, we’ll have to fire a large number of rapid muscle contractions every second in order for our joints, tendons and muscles to remain stable under oscillating conditions. The more of these contractions we initiate per second while remaining in a stable equilibrium position, the greater our capacity is to recruit the muscles we need to stimulate contraction/growth or stretching/recovery.

There are a few different ways this can be applied:

Isometric Reps

Upper Body Demo

Lower Body Demo

Dead Stop Reps

Upper Body Demo

Lower Body Demo

Pulsed Reps

Upper Body Demo

Lower Body Demo

Normal Reps

Upper Body Demo

Lower Body Demo

Pros: Reinforces a graceful mastering of the positions and transitions throughout a range-of-motion—which can be helpful in overcoming sticking points and plateaus; Encourages healthy circulation and blood flow to muscles, as well as tendons and joints; Ultimately helps make PRs look AND feel easy; Minimizes the amount of muscle fatigue from eccentric stress—which allows the individual to perform more quality work

Cons: Not as energy-expensive as slow or fast rep styles—so they may not be the best starting point for individuals who are simply interested in taking off a few pounds

When to Use: Ideal for anyone interested in progressing high-tension movements like the family of backbends, forward bends, handstands/inversions, front/back/side levers and mid-section holds, as well as one arm or one leg variations for any of these movements—all while facilitating an individual’s original strength training goals

Beyond Calisthenics: For those who wish to supplement their calisthenics training with weighted movements, this rep tempo would be most appropriate for exercises like paused snatches or clean & jerks (i.e. Olympic lifts from floor or blocks), squats with a barbell on the front side or back side, kettlebell or barbell thrusters, cable bicep curls and close grip barbell bench press, as well as farmer’s walks with heavy weight(s) carried above the head, at the “rack position” or beside the torso.

Wrap-Up

At the end of the day, understand that going faster isn’t always better.

And neither is going slower.

We must get stronger and perform better in all rep ranges with their appropriate tempo to balance the physiological and psychological aspects of any workout program.

Since performance is both mental and physical, expect fluctuations to occur depending on sleep and nutrition quality. Learn to respect body along the way to keep those fluctuations to a minimum.

When energy levels are lower, take the intensity down a few notches, and just have some fun without any formal workout structure.

When energy levels are higher, kick the intensity up a few notches, and add in some structured work sets to earn that breakfast, that holiday meal or that dinner out with family & friends over the weekend.

When in doubt, do a little of both!

After all, a wise person once said, “for every action, there’s an equal and opposite amount of laziness we kill.” 😉

Have any favorite rep styles? Or how about a movement flow that combines one or more rep styles?

Share them in the comments below!

****

Eric Buratty is the health & fitness coordinator at MMA & Sport in the suburbs of Montgomery County. When he’s not fine-tuning his superhero core powers, he helps self-starters move their bodies with more integrity in both one-on-one and group workout settings, writes actionable health content and seeks out further education to help others prevent health problems instead of cure them.

Get to know Eric better and stay updated on his content by connecting with him on Facebook.

Filed Under: Progressive Calisthenics, Tutorial Tagged With: bodyweight training, Eric Buratty, rep speed, reps, tutorial, video, workout strategies

Three Easy Stretches to Improve Your Calisthenics Practice

December 22, 2015 By Al Kavadlo 14 Comments

Wonder Wheel Bridge Al Kavaldo

Anyone who’s practiced calisthenics long enough knows firsthand that mobility is a crucial component of bodyweight exercise. Calisthenics staples like L-sits, back bridges and pistol squats all demand a high degree of flexibility, but even less obvious exercises like pull-ups and handstands require mobility as well.

While practicing those moves in and of themselves can help you improve your range of motion, supplemental stretching can elevate your calisthenics game to the next level.

Here are three simple stretches that you can practice daily to improve your overall mobility. Just try to hold each pose a few times a day while you take several deep, slow breaths. There’s no need to set a timer or be too dogmatic about it.

Speaking of dogs…

Updog

What’s up, dog?

For starters, it’s a great way to prep your spine for bridge work. It also opens your hip flexors, warms up your triceps and provides a good stretch for your abdomen.

Begin in a push-up position, then drop your hips toward the ground, lift your chest and look up. Be careful not to let your shoulders shrug up by your ears. Think about pulling down and back through your shoulder blades like you would during a pull-up. Press your hands into the ground, lock your elbows and gently contract your quads to prevent your legs from dragging on the ground.

Al Kavadlo Up Dog

Downward Dog

Downward Dog is a helpful stretch for building flexibility in the entire posterior chain as well as opening the shoulders. It will loosen your hamstrings for L-sits and pistol squats, plus it can improve your handstand as well.

Begin on your hands and knees with your toes curled under your heels, then slowly lift your hips into the air while pressing your chest toward your thighs. Try to keep your back as flat as possible while pressing your hands into the ground and reaching your hips into the air. Do your best to maintain straight arms and legs, though it’s okay to allow your knees to bend and/or let your heels come off the floor. In time, work toward fully extending your legs and pressing your feet flat. People with tight calves may find it helpful to bend one knee while straightening the other, alternating sides.

Al Kavadlo downward dog

Seated Twist

A powerful stretch for the hips and spine, the seated twist is also one of Coach Wade’s three favorite stretches, as noted in Convict Conditioning 2. The full expression of the exercise, which involves binding the hands, is also a great stretch for the shoulders. Seated twists are helpful for any calisthenics move that requires rotation, such as the side crow or dragon pistol squat.

Sit on the ground with both legs extended straight in front of you. Now bend your right leg and cross it over the left, placing your right foot flat on the floor. Twist your trunk and reach your left arm out in front of your right knee. Your right hand should be placed palm down on the floor a few inches behind your back as you twist and look over your right shoulder. From here you can bend your left leg as well, tucking the foot beneath your opposite hip. For an added stretch, reach your right hand behind your back while threading your left hand through the opening beneath your right knee, bringing your hands into a bind (or gripping a cloth between the hands if a bind is not yet attainable). Make sure to repeat the stretch on both sides.

Seated Twists

I encourage you to use these stretches to warm up at the start of your calisthenics practice and/or to cool down at the end. The more time you spend in each pose, the better they should start to feel. Also feel free to practice throughout the day any time you feel stiff.

To find out more about stretching to improve your calisthenics practice, check out my book Stretching Your Boundaries – Flexibility Training for Extreme Calisthenic Strength.

Pic5StretchingYourBoundariesBookCover

****

Al Kavadlo is the lead instructor for Dragon Door’s Progressive Calisthenics Certification. Recognized worldwide for his amazing bodyweight feats of strength as well as his unique coaching style, Al is the author of five books, including Raising The Bar: The Definitive Guide to Pull-up Bar Calisthenics and Pushing The Limits! Total Body Strength With No Equipment. Read more about Al on his website:www.AlKavadlo.com.

Filed Under: Flexibility, Tutorial Tagged With: Al Kavadlo, breathing, calisthenics, downward dog, flexibility, mobility, PCC, progressive calisthenics, seated twist, Stretching Your Boundaries, twist, updog, yoga

The Push-Up Lever

November 17, 2015 By Matt Schifferle 36 Comments

Push Up Lever Lead

Give me a lever, and a place to lay, and I shall make crazy gains.
– Archimedes (probably)

There are a million reasons why I love calisthenics. Aside from the obvious, calisthenics has allowed me to unleash my inner mad scientist and build a variety of “devices.” It’s amazing what you can create with a little imagination and a few trips to the hardware store.

Most of my designs are home made versions of commercially available products such as suspension straps and calf blocks, but one of my favorites is a unique way to load extra resistance onto a standard push-up that I call the Push-up Lever.

PushUpLever
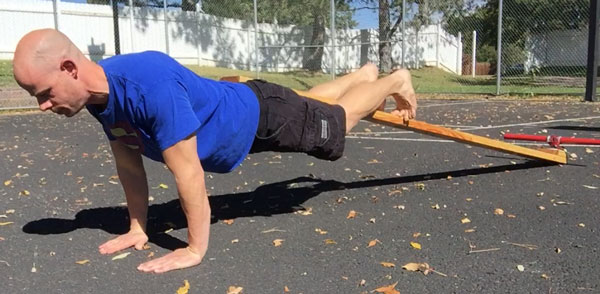
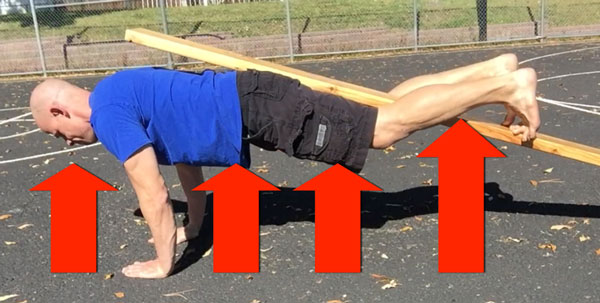
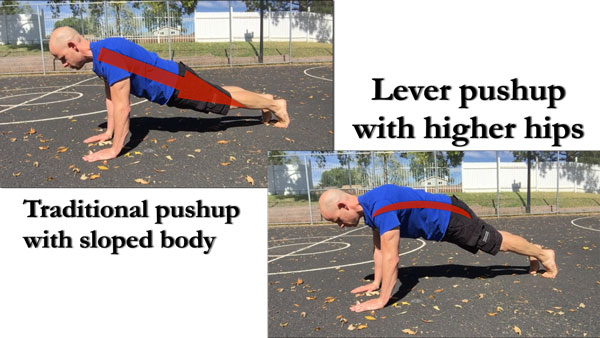
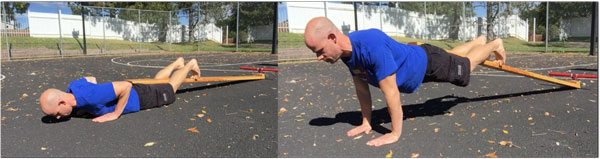
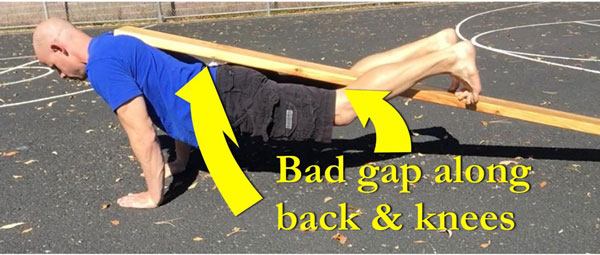
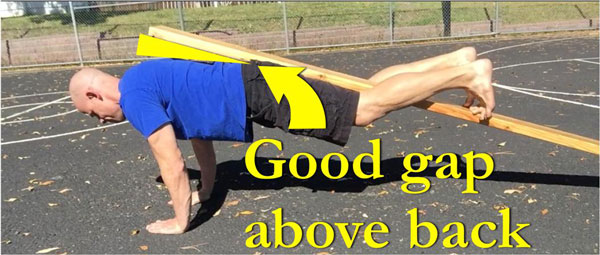
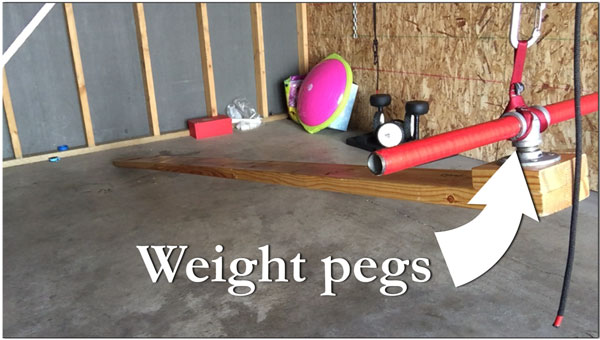
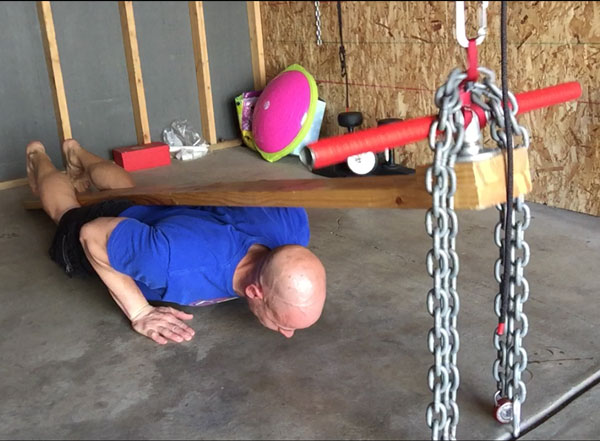
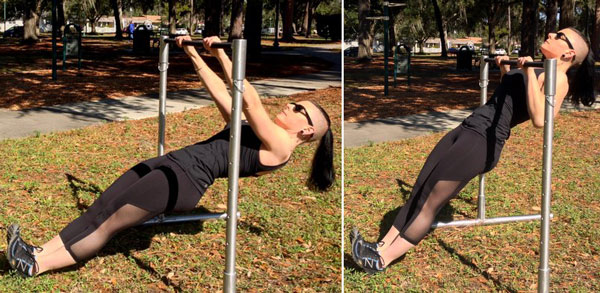
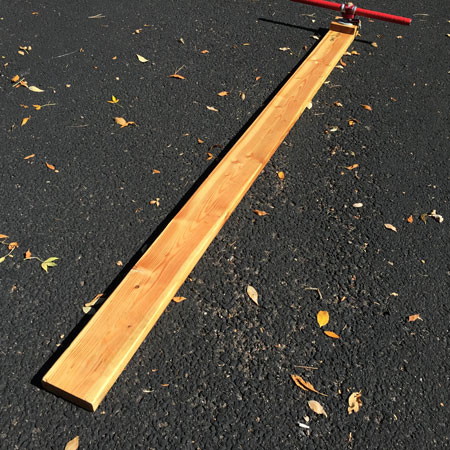
The struggle to load the push-up…

She may not look like much, but that simple plank of wood solves many issues that have plagued anyone who’s tried to add resistance to a standard push-up.

In the time of 10-15 B.C. (Before Calisthenics) I used to do a lot of weighted bodyweight exercises. Most moves were pretty simple, like using a dip belt to load pull-ups, but push-ups were always a struggle for me. I’ve used weight vests, weighted backpacks, stretch bands and stacking weight plates on my back. While all of these methods did produce more resistance, that hard work came at a steep price. Loading the back or neck produced a lot of stress on the spine which felt unnatural and awkward. In some cases, like with sandbags or plates, the weight was difficult to load on my back, plus the load was always prone to shift forcing me to compromise my technique. Using items like bands or chains caused loading on sensitive pressure points like the neck or lower back.

Weight vests seemed to be an ideal solution, but they were expensive and hard to adjust. Even adjustable weight vests required opening numerous pockets and removing small weights. It just wasn’t worth the hassle so I seldom adjusted the load. Despite my effort, I always felt most methods didn’t work very well. I wanted some serious resistance and a plate on the back or a chain around the neck only brought marginal difficulty.

I figured there had to be a better way, so I started to meditate on the ways progressive calisthenics makes push-ups harder. One of the classic methods is to do push-ups on the knees and then make the lever of the body longer by doing them on the toes. So I asked myself, is it possible to further extend the lever of the body out beyond the toes?

That question was the inspiration the Push-up Lever.

What is a Push-up Lever?

The Push-up Lever is the world’s first complete push-up amplification device. Unlike methods that simply load more resistance on pushing muscles, the push-up lever amplifies all of the technical requirements of the push-up. This includes not only the muscles in the arms and chest, but also improving the strength in the core, hips, and legs. It also requires greater scapular control and even more tension in the feet. Many people claim they are sore in their abs and hips the next day after trying it for the first time.

The beauty of the lever is it doesn’t place any excess weight or pressure on your spine, but instead places it on your hips, which can handle the load in a much safer way and with far more control. It’s also something you can easily adjust by sliding where your hips are on the lever. The more you extend the lever out beyond your toe,s the more difficult it makes your push-up.

The further you slide the board up your hips the easier the move becomes!

Not only is the lever easier to use and adjust, but it can challenge even the strongest athletes. This is because it makes the traditional push-up more difficult in 2 ways. It makes the lever of your body longer so you have to work against more resistance. It also makes your whole body lift against gravity. So not only are you working with a mechanical disadvantage but you’re also lifting more of your own body weight.

The Lever forces you to lift your entire body directly against gravity, not just your upper torso.

You can use any long slender object as a push-up lever. Pipes, barbells and even small trees can suffice, but I much prefer a 2 x 4 or a 2×6 plank of wood. Make sure any board you use is straight and not warped. Also look out for splinters. You may wish to sand it down and varnish it for a nice finished look.

How do you use a push-up lever?

Using the push-up lever requires a slightly different technique than a standard push-=up. Since the board rests on your hips, you need to slightly elevate your hips so they are the same height as your shoulders throughout the full range of motion. It can take a little bit of practice to use this type of push-up, however I find it to be natural and very useful.

Push Up Comparison

Also, be sure you have the strength to do your push-ups from the floor up. If you struggle to maintain control of your push up while “kissing the baby” with your chest to the floor, you may want to work on the lower range of your push-up for a few weeks before giving the push-up lever a try.

To use a push-up lever, simply lay down as you would in a push-up position and place the board against your hips at the appropriate length. Wrap your feet around the board so you’re “hugging” it with your thighs and the back of your knees. Some people prefer to use a flat foot against the board but I’ve always found more control through dorsi-flexing my feet and pressing my toes straight into the board.

Push-Up Lever Up and Down

Place your hands in the position you would normally do a push-up with and make your entire body tight, especially your quads, hips, and core. From there, simply do a push-up while pressing your hips up against the board and holding it tight with your legs. The first few times you do this you might feel like you’re sticking your butt up in the air, but I promise you’ll quickly become used to the new position.

Beware of the pressure from the lever pushing your hips down causing your back to sag.

If you’re using the lever at the half point of the board you should have a gap between your upper back and the lever as you push upwards. If the board is touching against your upper back you’ll need to lift your hips up even more to prevent the pressure of the lever going to your spine.

Notice the end of the board against my upper back and the gap between the board and my hips and knees. This places the pressure against my shoulders and causes pressure along the spine.
Here the gap between the board and the upper back is seen while my hips and legs are locked into the lever.

As you lower yourself down to the floor you want to “lead with your chest” so your hips stay at the same height of your shoulders through the full range of motion. Ideally, both your chest and hips should arrive at the ground at the same time and then lift up at the same rate of speed.

Once you have the technique down you can use the push-up lever for any push-up variation you normally use. Wide push-ups, close push-ups, alternating push-ups, medicine ball push-ups, etc.

Want even more resistance?

The classic push-up lever will offer a substantial amount of resistance and challenge to your classic push-ups. If you’re of the masochistic type and want even more resistance you can use the lever to safely add actual weight through the power of leverage.

This is done through adding weight pegs on one end of the lever with a small carabiner to suspend it off of a set of suspension straps or gymnastics rings.

PushUpLeverWeightPegs

In this position, you’ll use the lever backwards as the weight is suspended above and forward of your body. You’ll use the pivot point very close to your feet but still keep the load of the lever on your hips.

Be aware that it won’t take much weight to significantly load your push-ups. Most of the guys I’ve introduced this set up two will use no more than 10 to 15 pounds of weight. I’ve had powerlifters max out through as little as 40 pounds!

These chains only weigh about 12 pounds but they feel like a 225# bench press!

Using the lever in this way is the same as before where you will place yourself underneath and tighten your legs around the lever and push yourself up off the floor while driving your hips into the board.

While the push-up lever can be a great addition to your push-up program, it’s in no way a substitute for good old fashioned progressive calisthenics. When I first discovered it I made the mistake of using the lever for most of my workouts while neglecting the progressive steps towards the one arm push-up. Even though the lever helped me grow much stronger, I still had to fight to rebuild some of the muscle control and coordination I had lost from neglecting the advanced push-up techniques. Ultimately, the push-up lever is just one more tool for your toolbox. It can help you get stronger, but you still have to do the work.

***

Matt Schifferle a.k.a. The Fit Rebel made a switch to calisthenics training 5 years ago in an effort to rehab his weight lifting injuries. Since then he’s been on a personal quest to discover and teach the immense benefits of advanced body weight training. You can find some of his unique bodyweight training methods at RedDeltaProject.com and on his YouTube channel: RedDeltaProject.

Filed Under: Progressive Calisthenics, Tutorial Tagged With: homemade fitness equipment, Matt Schifferle, progressive calisthenics, push-up, Push-Up Lever, pushup, simple gym equipment

Side Crow and Crooks Pose

November 3, 2015 By Grace Kavadlo 19 Comments

GraceYogaLead-Pic

The world of hand balancing encompasses much more than just the traditional handstand. Moves like the side crow and crooks pose are excellent additions to your Progressive Calisthenics routine. These hand balancing skills cultivate synergy in the body between the upper and lower extremities and help foster improved body awareness. Although they may seem like just a party trick, they are actually a great way to build strength throughout your entire body, especially in areas like our hands, wrists and fingers, which are often overlooked in strength training. They can also be a great way to work on mobility.

Beyond the physical benefits, adding hand balancing to your regimen can be a wonderful way to hone your powers of concentration. We live in a culture where people drown out the sounds of their own breathing during training with iPods and other distractions. Learning the crooks pose requires you to be completely present and focused. This practice of mindfulness and attention can really extend into every aspect of our lives and allow us to learn to live fully in every moment.

Is this dude even working out?

The side crow and crooks pose are eye-catching exercises that will challenge your mental fortitude, physical strength and flexibility. These moves are a beautiful expression of what it means to be mobile, strong, and healthy! Before you attempt either of one, however, you should have a solid grasp on the basic crow pose. If you need to work on getting into your crow, check out my tutorial here.

Once you have gotten comfortable in the crow pose, we can continue using the system of progressive calisthenics to systematically break down these more advanced variations and help you along the journey.

GraceYoga3

Let’s Get Twisted
Since both the side crow and crooks pose involve intense trunk rotation, we will start off with a stretch to prep the lateral sides of your body. Sit on the ground with your left leg extended and cross your right leg over. Begin to twist your entire torso to the right side, placing your right hand on the ground behind you to help extend your spine upwards. Place your left elbow outside your right knee to actively push your body deeper into the twist. You should feel this stretch around your lower back, sides and midsection. Repeat on both sides.

Al Kavadlo Side Crow

The Side Crow
For many people, the side crow will be a helpful lead-up step before attempting crooks pose. Start in a squat position, then twist to one side and place your arms on the outside of one leg with your hands on the ground. Similar to crow pose, your elbows should bend back toward your legs, except this time making contact with only one leg and at two points: near your knee and the other by your hip. Lift your hips up and shift all your weight onto your hands, with your knees stacked together.

If you do not have the mobility to do the above variation, you will start by placing your hands further apart and only use one elbow as a contact point. Try to line up your elbow mid-thigh, before lifting your hips and shifting your weight onto your hand. Make sure to practice the balance on both sides!

Bow & Arrow Stretch
After you’ve conquered the side crow, you are ready for the crooks pose. Once again, we will start off with a preparatory stretch. Begin in a seated position with both legs extended. With your right hand reach for the toes of your right foot and pull your leg back, bending your knee. Wrap your leg around your shoulder and resist the urge to round your spine forward by propping yourself up with your left hand. Breathe easy and hold the position for 30 seconds before repeating on the opposite side.

GraceYoga5

Floating Bow & Arrow
This move is similar to an L-Sit in that it requires monster wrist, triceps and core strength to perform. Begin by getting into your bow and arrow stretch, but place both hands on the ground at your sides. Tense your abs and lock out your elbows to lift your butt off the ground. Actively point your toes and lean slightly forward in order to stay afloat.

Crooks Pose
Now it’s time to put it all together! From the floating bow and arrow, cross your ankles, bend your elbows and lean forward. Extend your legs to the side where you threaded your leg through and squeeze your knees together to create tension throughout the entire body.

AlYoga6

Often our own minds create a blockage as a way to shield us from the unknown. Practicing hand balancing gives you the opportunity to move past some of these self-imposed limitations. As Bruce Lee once said: “If you always put limits on everything you do, physical or anything else. It will spread into your work and into your life. There are no limits. There are only plateaus, and you must not stay there, you must go beyond them.”

Thanks for joining me on this journey into hand-balancing. Til next time, peace, love and ninja kicks!

***

Grace Kavadlo, PCC, HKC is a personal trainer and group exercise instructor located in New York City. She is a columnist for Bodybuilding.com and can be seen in several Dragon Door books, including Coach Wade’s Explosive Calisthenics. For more information about Grace, check out her website, www.DieselGrace.com

Filed Under: Tutorial Tagged With: crooks pose, Grace Kavadlo, hand balancing, side crow, yoga

  • « Go to Previous Page
  • Page 1
  • Page 2
  • Page 3
  • Page 4
  • Page 5
  • Interim pages omitted …
  • Page 7
  • Go to Next Page »

Primary Sidebar

Featured Products

previous arrow
GetStrongBookCover
ConvictConditioningBookCover
StreetWorkoutBookCover
ExplosiveCalisthenicsBookCover
StrengthRulesBookCover
next arrow

Categories

Progressive Calisthenics Certification Logo
Click here for more information or to register for the PCC workshop

Get Strong Workouts TriadXP App
Get Strong Workouts App

Recent Posts

  • Top 5 Reasons Why an In-Person Workshop is the Best Way to Supercharge Your Training
  • HYBRID STRENGTH TRAINING IS HERE!
  • My Calisthenics Journey to the PCC
  • The Handstand Press: Complete Control Through the Handstand
  • The Get Strong App is Here!

Dragon Door Publications

Dragon Door Publications

Recent Comments

  • bross dandon on The Case for Curved Handstands
  • Johnny Flewellen Jr. on Strength for Life
  • Dan Earthquake on The Pursuit of the Daily Minimum
  • Johnny Flewellen Jr. on The Pursuit of the Daily Minimum
  • Johnny Flewellen Jr. on Yoga, Calisthenics and the Journey of a Lifetime
FOLLOW US ON TWITTER!

Copyright © 2025

Dragon Door Publications / The author(s) and publisher of this material are not responsible in any manner whatsoever for any injury that may occur through following the instructions or opinions contained in this material. The activities, physical and otherwise, described herein for informational purposes only, may be too strenuous or dangerous for some people, and the reader(s) should consult a physician before engaging in them.