• Skip to main content
  • Skip to primary sidebar
  • Home
  • Contributors
  • Resources
    • Q&A with Paul “Coach” Wade
  • Workshops
  • Products
  • Forums
  • Articles
  • Blogs
    • RKC Blog
    • Strong Medicine Blog
  • Archives

PCC Blog

Progressive Calisthenics - The Official Blog for the PCC Community

Tutorial

99 Reps

October 27, 2015 By Eric Bergmann 12 Comments

John Du Cane Speaking At PCC

“There’s an epidemic.  99 reps…”

Dragon Door founder John Du Cane uttered this ominous phrase during the PCC workshop I attended.

In order to pass the PCC, you must complete the Century Test, which requires 100 reps. Yet there is a 99 rep curse.  One rep shy of the goal. There were multiple such instances when I got my PCC, and I feel they could have been avoided.

If you’re looking to get your PCC or are simply looking for some techniques to help you squeeze out extra reps in your training, this article is for you.

We’ll go through the four movements of the test one-by-one, but first a comment on form: great form will be more efficient and preserve energy throughout the test.  Before you worry about increasing reps, be sure your form is approaching perfect.
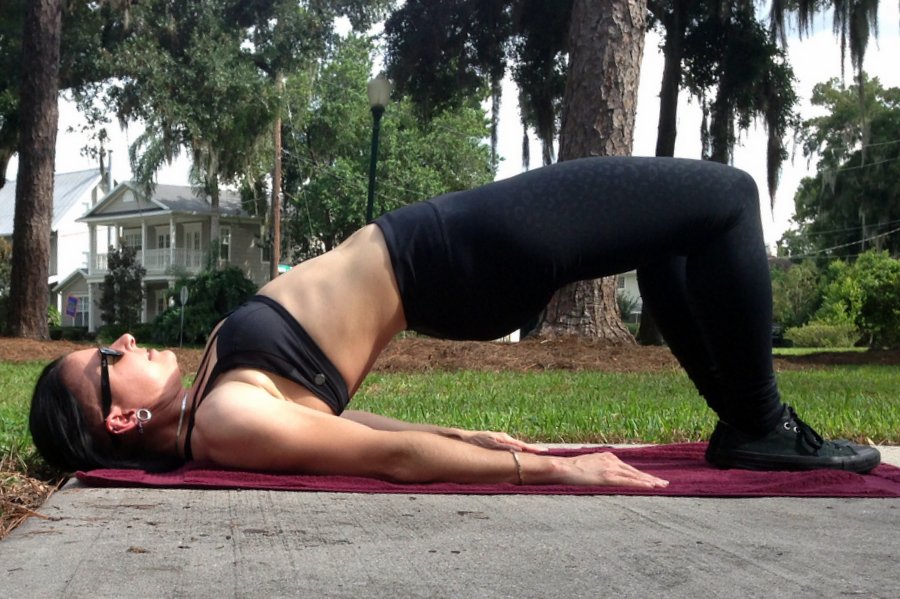
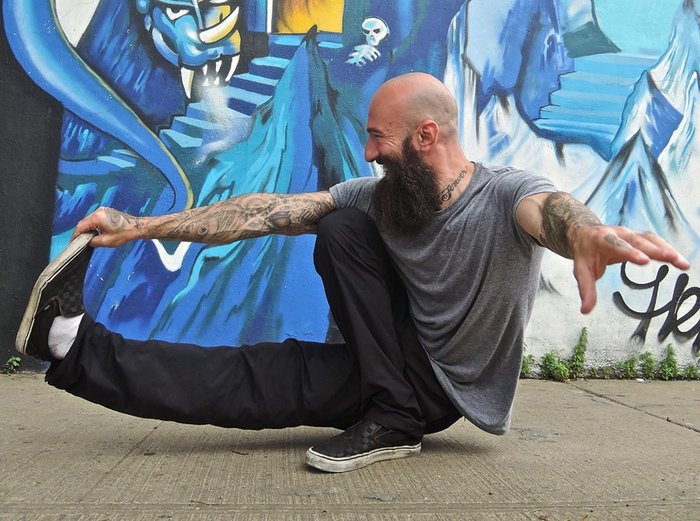
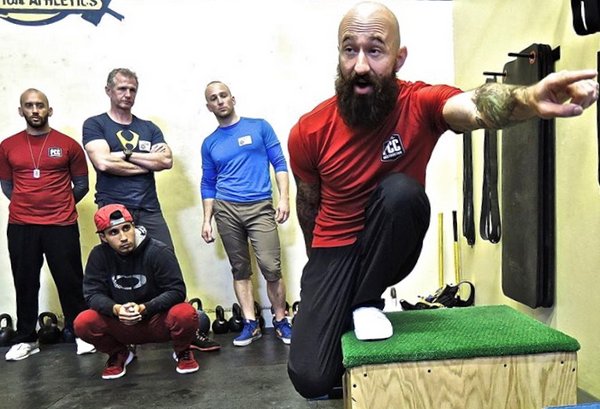
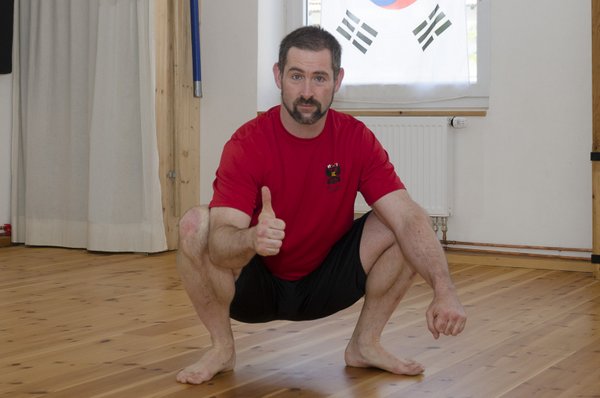
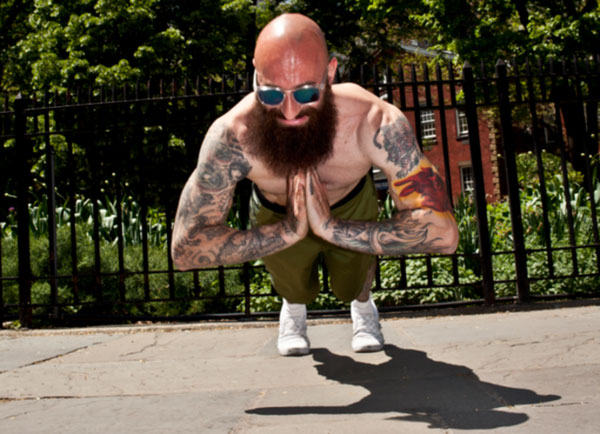
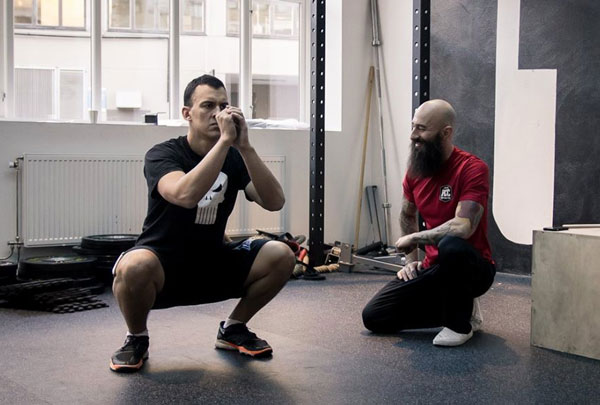
The Squat

PCC Century Test SquatsPosition check:

How is your foot position?  Do you have contact with the ground through your big toe, little toe, and the center of your heel?

Play with the width and rotation of your feet. Find a position that allows you to feel like you are sitting between your legs while keeping your feet flat on the floor, knees inline with your toes, with a neutral spine.

1) Lower down slowly and with control. On the way up, begin pushing not just down through the floor, but also to the sides, like you’re standing on a towel and are trying to rip it in half using your feet (your feet, including the big toe joint, must remain flat on the ground).

2) As you’re ascending out of the hole, bear down on your abs—think low and deep, like you’re about to get punched below the navel.

3) On the hardest rep(s), try using the Valsalva maneuver: breathe in on your way down, but don’t breathe out on your way up.  Hold the air in to keep your intra-abdominal pressure high until you hit the sticking point (the hardest portion of the rep).  At that point begin to slowly let the air hiss out as you complete the rep.  You should sound like a tire losing air.

4) At the top of each rep get tall and relaxed.  Now is a good time to take an extra breath before beginning your next rep.  You have 8 minutes.  The clock is not your enemy, fatigue is.
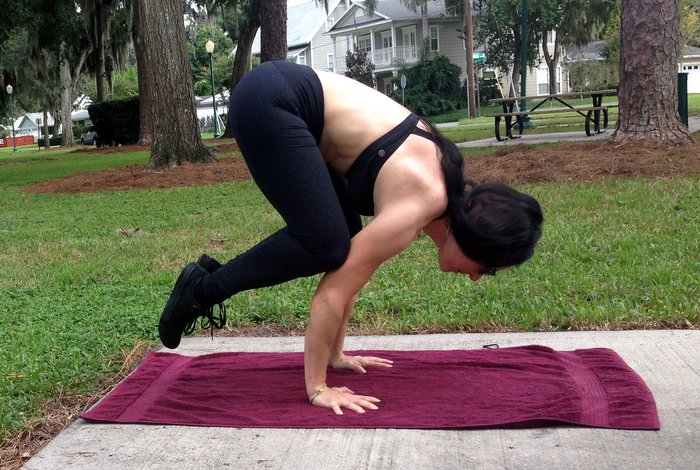
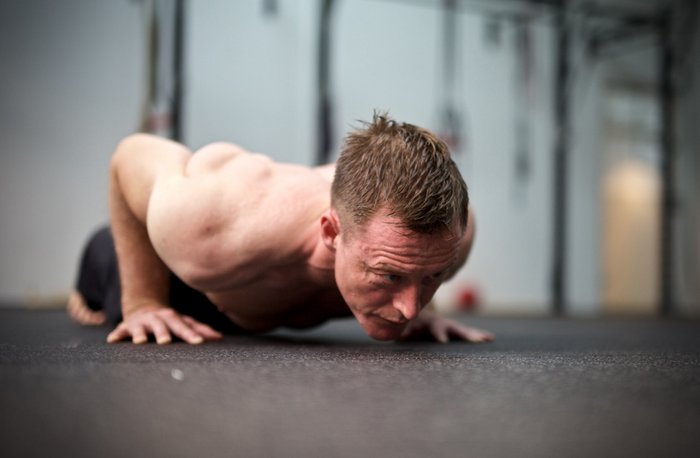
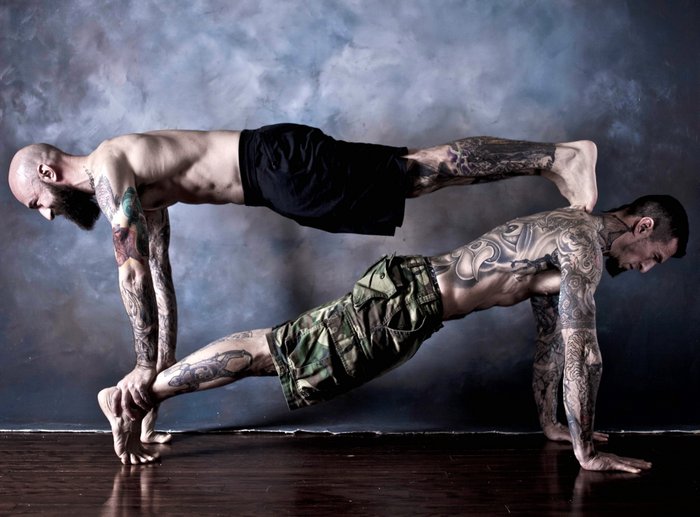
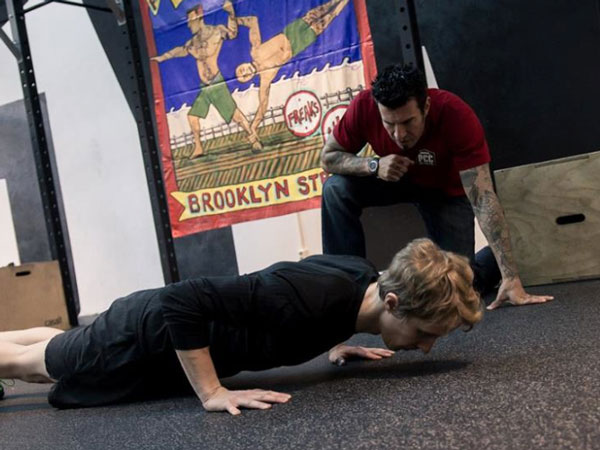
The Push-Up

PCC Century Test Push UpsPosition Check:

Are your forearms approximately perpendicular to the ground throughout the movement?

Are your upper-arms approximately 45 degrees from your body at the bottom of each rep, so that you look like an arrow when viewed from above?

Have you found a hand position of appropriate width for your upper-arm length and that accommodates your shoulder girdle? Play with hand placement and rotation to find your best position.

Is your body in a straight line from shoulder to heel?

1) Pretend you have a big dial in each hand. When you hit the bottom of the rep, grip the dials hard and turn them as you push into the floor—the left one goes counterclockwise, the right one goes clockwise.  Your hand and elbow positions shouldn’t change, but you’re gripping and turning those dials anyway. The harder the rep, the harder you turn those dials and push.

2) Just before the sticking point, bear down on the abs (low and deep, like you are going to get punched in the gut again). Keep that tension until you finish the rep.

3) Lockout at the top of the rep and relax, but don’t linger. Remember: you’re still holding a plank. Don’t sag when you relax—your next rep will be terrible if you start in a weak position.

4) Remember the pressurized breathing from squat tactic #3?  Use that again.

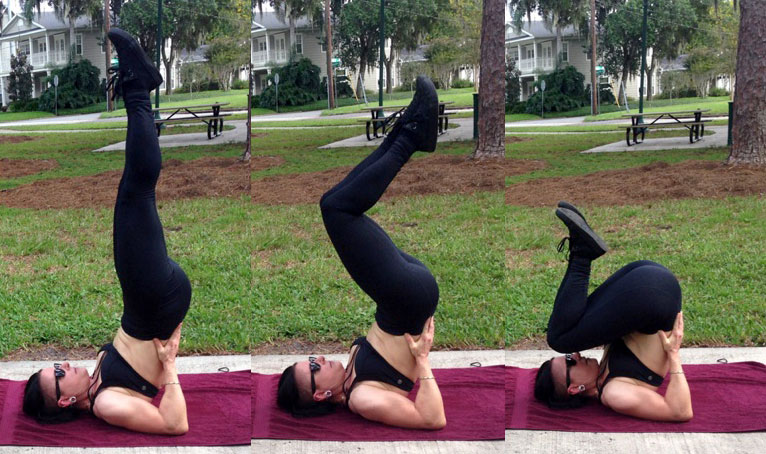
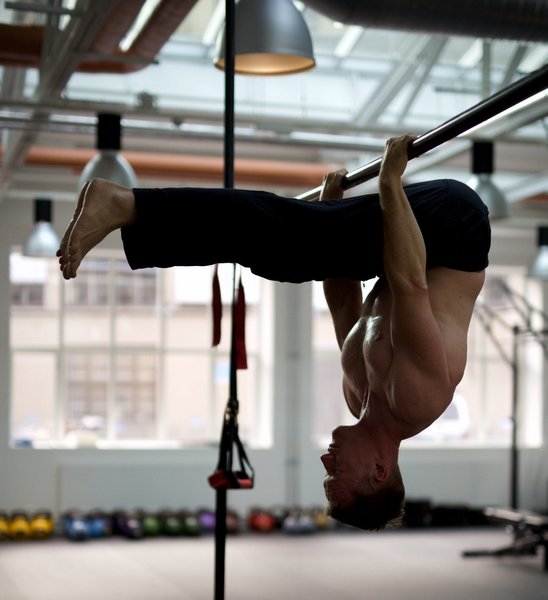
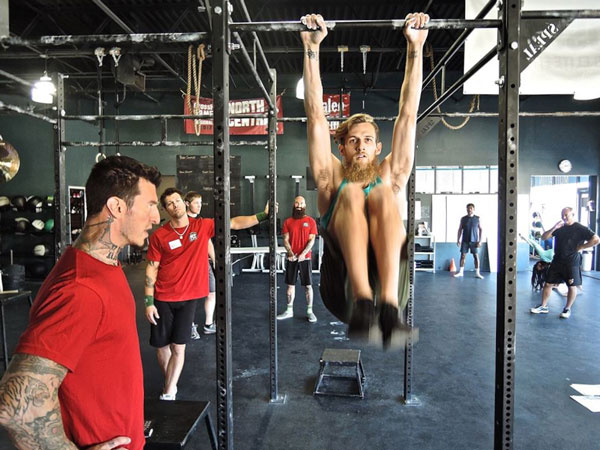
The Hanging Knee Raise

PCC Hanging Knee RaisesPosition Check:

Is the bar deep in your hands, not near the fingertips?  Do you have a strong grip on the bar?

Are you shoulders packed down so that you’re not dangling off the structures of your shoulder?

Are your knees and feet together?

Check again.  Failure to get into the right position will reduce your body’s willingness to fire the abs and to flex the hips.  Don’t believe me?  Grab a bar with your fingertips, hang from your shoulder sockets, leave your legs flailing around and let me know how you did versus being in a strong position.

These tactics will be about limiting body-sway, which is typically what wrecks candidates on the hanging knee raise.

1) Lower the legs slowly after each rep.  The shorter and lighter your legs, the faster you can go. The more you’re built like me, the more you’ll need to control the eccentric portion of the movement.

2) Do not relax at the end of a rep.  You risk losing position and incurring sway.

3) When the reps begin to get hard increase your grip on the bar, your depression/packing of the shoulder-blades, and the pressure you’re applying between your knees and feet—double-down on your starting position.
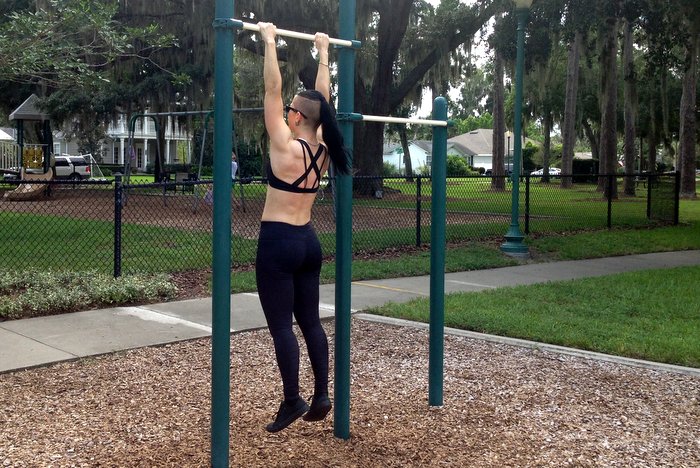
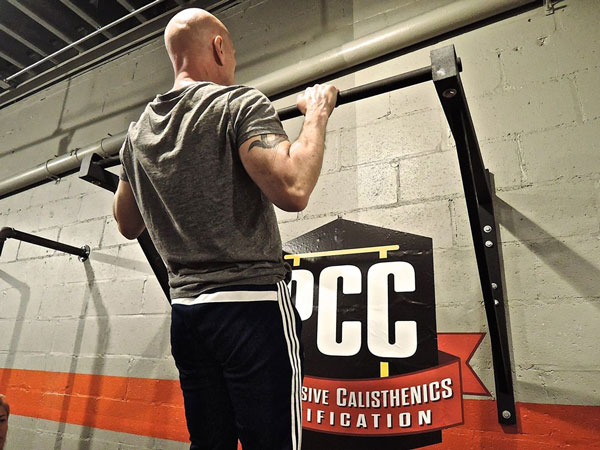
The Pull-Up

PCC Century Test Pull UpsPosition Check:

Do you have a deep grip on the bar—i.e., not near your fingertips?

Are your feet slightly in front of your body?

This is it. The moment when people complete 9 1/2 reps and wonder what just happened. Here’s how to avoid that:

1) Crush the bar.  When the reps get hard your grip gets harder.  You’re about to go for rep 100?  Crush that bar like it’s covered in butter and you’re dangling over the Grand Canyon.

2) Right before the sticking point, bear down on the abs and glutes.  Deep and low for the abs, hard for the glutes.  This won’t help unless you’re already crushing the bar.  You are crushing the bar, right? Good.  Crush harder.  They should have to pry your hands off the bar after your 100th rep.  Want a high-five when you pass?  Too bad.  Your hands won’t open for the next several minutes.

3) Remember the pressurized breathing?  Now’s your time to shine.  Get air in at the bottom position.  Start hissing out air at the sticking point.  Keep hissing until you complete the rep.

4) Savagely rip that bar off the supports.  Think about driving your shoulders and elbows toward the Earth, rather than pulling your head over the bar. Refuse to fail.

These techniques, properly utilized, should get you about a 20% increase in reps. Practice them and watch your numbers go up.

See you at 100 reps.

Al Kavadlo, Eric and Beth Bergmanns6

***

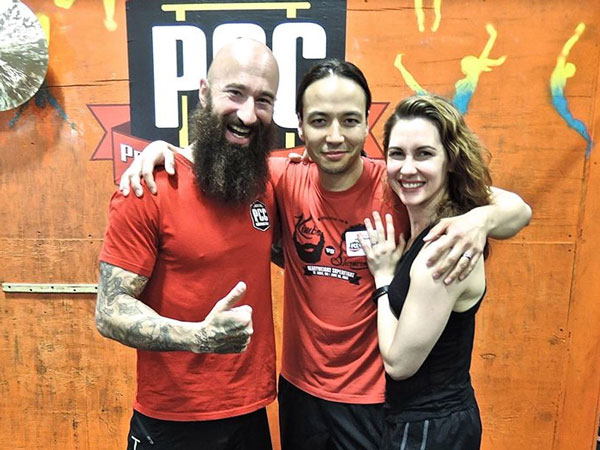
Eric Bergmann is a New York City based strength coach, movement specialist, and proud member of the PCC family. He co-owns Bergmann Fitness—a boutique training and nutrition service—with his wife, Beth. You can find out more about them at bergmannfitness.com

Filed Under: Progressive Calisthenics, Tutorial Tagged With: Century Test, Eric Bergmann, how to pass the Century Test, PCC, PCC Workshop, progressive calisthenics

The Smith Machine and Push-Ups: The Calisthenics Odd Couple

October 13, 2015 By Derek Spoden 9 Comments

Smith Machine Push-Ups Lead

There are very few objects that come to mind when thinking about “calisthenics equipment” other than the floor, a bar, and maybe some chalk. Bodyweight culture prides itself on minimal equipment, unrestricted movement, and the ability to exercise anywhere. The Smith Machine represents absolutely none of that.

When most bodyweight enthusiasts think of a piece of equipment like the dreaded globo-gym behemoth that is the Smith Machine, few would see an incredibly effective tool for learning and perfecting your push-up form. While the Smith Machine may evoke visions of flared elbows and terrible pressing technique form below the bar, I suggest getting above this piece of pop-gym equipment for perfecting your horizontal pushing pattern with incline push-ups!

Smith Machine Push-Up Setup
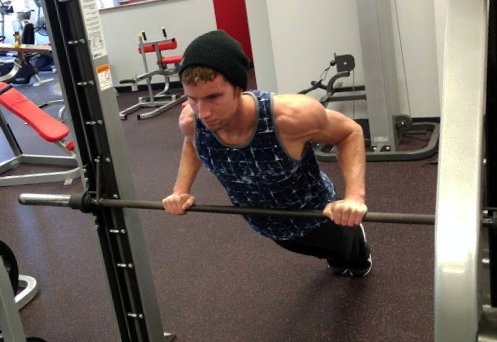
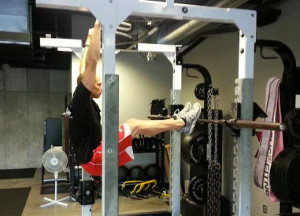
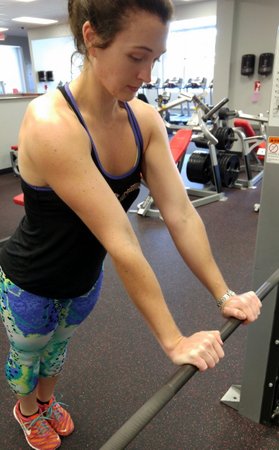
The Smith Machine is basically just an adjustable straight bar, so it really is a bodyweight athlete’s best friend in disguise when it comes to learning push-ups, both the basic and one-arm versions. Strict form push-ups are an absolute foundation of calisthenics, but they can be difficult for beginners, or those with shoulder injuries, to initially learn and perform safely. Earlier progressions like wall push-ups and knee push-ups are fairly fixed positions, but incline push-ups can perfectly fill the rather large gap between the vertical wall and the flat floor. While we can’t adjust the wall or the floor, the adjustable bar of the Smith Machine provides an effective way to perform an incredible range of push-ups at various inclines without having to sacrifice form.

The most common piece of equipment for incline push-ups is often a bench, a plyo box, a chair, maybe even your kitchen counter, but these items often vary from location to location and don’t really offer specific and strategic height modification. Not all of us go to gyms and not all gyms even have Smith Machine stations, so any squat rack with adjustable side safety bars or bar catches can be used with this article’s tips in a similar fashion—however, do exercise caution and always use a slow tempo when using an unsecured barbell.

Hand Close-up
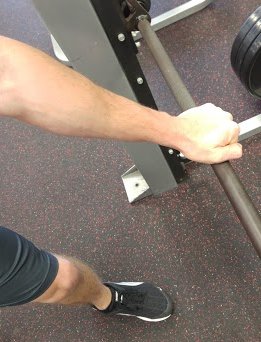
To begin working on Smith Machine incline push-ups, start with the bar set to about chest-height and set up your stance and grip as you would any other incline push-up, except you will be gripping the bar rather than placing an open-hand on the floor. This slight difference can cause the elbows to naturally want to flare out to the sides, so keep your grip close to shoulder width and be mindful of your form. I do recommend using a “thumbs over the bar” grip rather than wrapping them underneath, as this allows the wrists to turn out slightly and keep the elbows pointed inwards. After performing a good 10 reps to get a feel for the angle, assess your performance and fatigue.

Did you hit 10? How intense was it? How many sets could you complete? Ask yourself these questions while you rest and adjust the intensity accordingly. If you didn’t make all the reps, raise the bar a notch or two, then try again at this higher level. If you made all the reps and everything felt good and easy, then lower the bar a notch or two and repeat this process until you find a level that allows you to perform more than 5, but less than 10 repetitions for consecutive sets with good form—mark and remember that level as your base training level. Depending on your fitness goals, once you can perform 4-5 sets of 10 incline push-ups on a given bar level with <2 minutes rest each set, it’s time to progress.

These incline push-ups can also be easily modified based on specific training goals by raising or lowering the bar to alter movement intensity. Lower the bar until you can only perform 3-5 reps to emphasize strength. Move up and down to amass numerous sets within the 8-15 rep range for building size. Or try raising the bar to test your stamina and stability with higher reps (30+). The height of the bar can be adjusted to change the movement’s intensity based on your body angle across a wide difficulty range depending on the equipment’s adjustment design. Bar height/intensity can also be changed from set to set and rep to rep, allowing for seamless Pyramid Sets, Drop Sets, or even Interval Sets.

At this point, you can also modify your foot position from wide to narrow as mini-progressions between bar heights, making the same level push-ups more difficult as your stance gets closer to centered or easier as your stance and base of support widens. Using a straddled stance will give a much wider base of support and make the movement a bit more stable. As the stance narrows towards shoulder width and then tight together, the balance shifts more towards the upper body.  From there, you can even begin to stack your feet or perform push-ups with one leg raised, placing more weight and much more balance demand on your arms.

One-Arm Raised Push-UpWith these same methods of adjusting movement intensity via bar height and foot placement, one can also begin to safely explore the more advanced one-arm push-up progressions. Although most of the preceding article has been geared towards beginner calisthenics practitioners who are attempting to learn basic push-ups, all of the stance strategies and varied intensity tactics discussed above can be used by more intermediate and advanced bodyweight athletes attempting to learn or perfect their one-arm form. No matter your level, using an adjustable bar is a simple and effective way to track and ensure your progress.

****

Derek Spoden, PCC, M.S., is a personal trainer and health caretaker from Minnesota who enjoys teaching calisthenics to clients from ages 8-80. Bodyweight exercise and mindful exploration are at the heart of his training.
Check out Facebook.com/derekspoden to learn more about Derek!

Filed Under: Progressive Calisthenics, Tutorial Tagged With: beginner drills, calisthenics equipment, Derek Spoden, incline push ups, push-ups, regressions and progressions, Smith Machine

The Hidden Powers of Short Bridges and Shoulder Stand Squats

September 29, 2015 By Adrienne Harvey 35 Comments

Shoulder Bridge

Over the past few weeks, I’ve been conducting a little experiment. Due to an intense work schedule, combined with not getting enough sleep, I found myself in a condition that was not optimal for intense workouts. So, I decided to revisit a few of the early steps of Coach Wade’s “Big Six.”

In Convict Conditioning, as well as at the PCC, the warm up for the work sets of our training can come from practicing earlier steps of the movements. For example, if our work sets consist of knocking out reps of full bridges, we would warm up for them with a few meaningful sets of short bridges or straight bridges (the first and second steps of the progression in Convict Conditioning).

The first step of the Convict Conditioning squat sequence is the shoulder stand squat. This step is outlined in the original Convict Conditioning book, but explained in a little more detail in the Convict Conditioning Ultimate Bodyweight Squat Course DVD and Manual. This move is controversial because for many beginners (especially those who are overweight), getting down on the floor, and essentially getting upside down, will present a big obstacle right away. Then, if they’ve managed to get into the shoulder stand, it can be difficult for some larger people to get into the end position simply because they may be in their own way. This can be a major obstacle and it really doesn’t take that much extra weight to cause either of these issues. So at the PCC, we teach some other beginner drills which are more easily applicable to people of all shapes, sizes, ages, and fitness levels.

However, I’d recently managed to mildly annoy—but not injure—my left knee. In general, I tend to err on the side of caution and will make no apologies for stopping an exercise or movement if I feel a certain type of discomfort. Over the years I think this attitude this has helped me remain uninjured even while doing a fair amount of intense training and advanced drills. Exercise should make us stronger, not screw us up!

Shoulder Stand Squat Sequence

Though accidents happen, avoiding injury during training should be a top priority. While we are all continually encouraged to “get outside our comfort zone,” part of our own individual fitness journeys should include learning to carefully monitor our physical selves. This of course will be different for everyone, and will change as we age. I’m not saying that we should be afraid of what we’re doing in the gym or in life, only that it’s a good idea to start paying attention to, and learning to understand the subtle signals from our bodies.

So I wondered what kind of benefits my annoyed left knee could gain from the shoulder stand squat—and if the unweighted movement might give me the chance to analyze what might have happened in the first place, or at the least identify some trouble spots. I also started to consider what some of the other beginner steps could bring to my other challenges and goals.

The following is what I did, at a reasonably slow speed, which took a lot of control:

Two rounds:

  • Short bridges – 25 reps
  • Shoulder stand squats – 25 reps
  • Bar Hang – 1 minute
  • Full bridge
  • Plow stretch

The rep range in my example above was chosen since those were the Convict Conditioning “intermediate standards” for the short bridges and shoulder stand squats. This wasn’t meant to be an especially taxing workout, but I did find parts of it surprisingly challenging, in a way that indicated I might be working with my nervous system as much as my muscles. The above rep ranges are not necessarily appropriate for everyone, and will take some experimentation. When in doubt, do less on the first round to figure out where you stand (and where you stand on that particular day).

Adrienne Timed Bar Hangs

Intrigued by the CNS response of the above example, on a day following a very challenging kettlebell workout in the same week, I decided to make a different version but with the same general ideas:

First round :

  • Short bridges – 25 reps
  • Shoulder stand squats – 25 reps
  • Crow stand – 1 minute
  • Full bridge
  • Plow stretch

Adrienne Crow Stand

Second round:

  • Short bridges – 25 reps
  • Shoulder stand squats – 25 reps
  • Wall handstand – 1 minute
  • Full bridge
  • Plow stretch

I ended with Coach Wade’s “Trifecta” and some deep squats. Everything felt easier and better executed.

Going back to the more advanced drills the next day, I had a new confidence, and could tell that progress was made that week, just from the two small sessions with the earlier steps. Since then, I’ve made it a point to have more sessions like these during a typical week.

I encourage you to revisit earlier steps you have learned from Convict Conditioning and/or the PCC Workshop. Even if you feel like you’ve long-since outgrown them, they still hold their own challenges and can teach you a lot (especially if you go purposefully slow). For those of us who are instructors, they also help us stay sharp and empathize with our clients when explaining and working through those beginning progressions. Never underestimate the power of those early steps!

***

Adrienne Harvey, Senior PCC Instructor, RKC-II, CK-FMS, has been RKC Certified since 2010, and RKC Level 2 certified since 2011. Kettlebell and bodyweight training have been crucial in Adrienne’s personal quest for fitness.  A core member of the PCC team, Adrienne loves sharing her knowledge with small groups and individuals. She also loves to develop recipes and workout programs to further support performance, body composition, and of course—FUN. Go to http://www.giryagirl.com for more information about Adrienne.

Filed Under: Progressive Calisthenics, Tutorial Tagged With: Adrienne Harvey, Bridges, Convict Conditioning, PCC, progressive calisthenics, Shoulder Stand Squats

Cut to the Core

September 1, 2015 By Eric Buratty 14 Comments

Al Kavadlo Front Lever

It’s tempting to use the terms “core” and “abdominal” muscles interchangeably.

After all, having visible abs and sub-seven percent body fat gives us an automatic pass to forget training our core, right?

Not exactly.

You see, the truth is that the abdominal muscles are just a part of our core.

Why?

Because BROscience. And because I said so.

All joking aside, our entire core includes our upper back muscles, our lower back muscles, our psoas muscle and then our abdominal muscles.

That last area becomes especially important for earning our “beach body” card.

However, without a strong core, our “beach body” muscles are just there for show.

The good news is that Progressive Calisthenics happens to be the perfect way to wake these muscles up—even when they’re hidden beneath layers of fat.

What about abs being made in the kitchen (not the gym)? Yeah, yeah . . . we’ve all heard that one before.

We could just as easily counter that question with: What foods STRENGTHEN the core musculature?

So, instead of wasting time on semantics and dogmatic fitness debates, let’s cut to the core with more important matters.

Like WHEN and HOW to train the core for best results.

Who’s with me?

Al Kavadlo Beach Back Lever

WHEN to Train the Core

Ideally, we’ll train the core first thing during our workouts whenever we are:

  1. Making a comeback from a sports injury
  2. Combating some form of lagging or acute inflammation around a joint/tendon so that it doesn’t turn into chronic inflammation (i.e., performing an active recovery workout in place of a regular workout)
  3. Not feeling a solid muscle contraction where we need to on a given movement—which could lead to acute and/or chronic inflammation

Whenever we are feeling closer to 100 percent and beyond, we’ll train our core after emphasizing our lower body muscles.
This is because, when we target our largest muscles first, we elicit a favorable hormonal response that translates into greater energy expenditure from our core musculature.

What if we’re emphasizing our upper body muscles during our main workout?

Well, it’s still recommended to superset some lower body plyometrics and core moves during our warm-up to help get us get in the zone.

We could also consider throwing in some core moves as bonus work if we accomplish our desired training effect earlier than expected for a given workout day.

Just ‘cause, you know, that playing around stuff is good for us every so often.

HOW to Activate the Core

Now that we’re all on the same page with when we should train our core, I’m sure you’re dying to know how you can start applying this info . . . like yesterday.

Kavadlo Brothers Two Flags

In this capacity, here are some drills to help you feel what it’s like to activate the entire core musculature.
These are ordered from least to most challenging and should be practiced as such.

  1. Hollow Rock (Floor)
  2. Hollow/Reverse Hollow Sideways Roll (Floor)
  3. Reverse Hollow (Superman) Rock (Floor)
  4. Hollow/Reverse Hollow Swing (Start/Stop – Hanging)
  5. Sideways Hollow Swing (Start/Stop – Hanging)

Here’s what these moves look like in action in case you’re unfamiliar with the naming system I’ve used for them.

https://youtu.be/OjccrGGndGk

While it’s not necessary to structure your practice too much with these moves, it is recommended to just pick one or two at a time, and really focus on accentuating total body tension with them.

Implication or Application – You Decide!

As you’ll see and feel over time, a stronger core allows you to progress toward more advanced skills without fear of injury.

In particular, the similarities between the positions and transitions of these moves and those of front levers, kipping muscle-ups, and human (press) flags should be fairly noticeable.

Defying gravity rules!

Adrienne progression towards the human flag
Senior PCC, Adrienne Harvey working towards the full press flag with Step #6 Split Press Flag from Convict Conditioning Vol. 2

Now that you have further knowledge and tools to help you cut to the core, hopefully you will either imply other intelligent questions from this info, or apply greater integrity when using these muscles, moving forward.

In other words, knowledge is power, and the choice is yours in how you use it!

****

Eric Buratty brings six years of experience to the DC Metro Area as a Certified Personal Trainer, Progressive Calisthenics Instructor, Nutrition Consultant and Sports Injury Specialist. For more information about Eric check out his website, EricBurattyFitness.com.

Filed Under: Progressive Calisthenics, Tutorial Tagged With: abdominal training, abs, body control, calisthenics, core, core strength, core training, core training drills, Eric Buratty

Never Stop Learning: My Top 3 Training Tips

August 11, 2015 By Corey Howard 21 Comments

Corey Howard Pull Ups

At the age of 41, I can honestly say I’m still learning something new all the time.  There is no straight path to success; it is a crooked and curvy line.  I’ve learned some lessons the hard way in my training, but each setback yields another opportunity to refine my craft.

Here are 3 of the most valuable lessons I’ve learned (and relearned) throughout my time as a trainer and fitness enthusiast:

1. Work Your Legs and Glutes

If you were to look through my training log over the past year, you would see most of my workouts are focused on my lower body.  Unfortunately, this is due to having ruptured my triceps and biceps in the last year, but honestly it’s been the best thing ever.  Even when my upper body has been healthy, I still make my lower half 60-70% of my focus… EACH time I train! Most people would hate this because it’s so physically taxing but focusing on your lower half improves your testosterone levels, builds lower body muscle which helps burn more fat, improves stability in your midsection, improves mobility and helps create more explosive power for sprints and jumps. You just can’t ignore pistol squats, shrimp squats, bridges, lunges, hyperextensions or anything else that puts a beating on your lower half.

Sprinting is also a fantastic way to work your legs with only your bodyweight.  If you truly want to feel the benefit of sprints, don’t sprint on a treadmill! The treadmill takes away from you actively creating force.  Get outside and make your legs plant and propel you forward. Training outside is awesome, and running as fast as you can for a short period is even better. Again, the research on sprint work is off the charts (Coach Wade talks about it as a finisher in his book C-Mass). Sprints will thoroughly cook your lower half quickly and effectively, plus they help build size and burn fat at the same time.  So get out and sprint 20, 30, 40 or 50 yards, in a field, through a parking lot, or up a steep hill. No matter where you do it, make your body move as fast and explosively as you can once or twice a week.

Corey Howard Running

2. Refine The Basics Using Regressions

Two of my favorite exercises are jackknife pull-ups and pike push-ups.  These two are simply amazing for adding size in the lats and shoulders, plus they give you a chance to perfect your pulling and pressing groove. The jackknife pull-up has really helped me re-learn pull-ups.  It’s given me a chance to work on my height at the top as well as given me an opportunity to work various grips without completely loading my freshly repaired elbows. The pike push-up has done the same thing; given me a chance to work on various pressing widths as well as practice my groove.  Don’t scoff at either of these; pairing these two for 5 alternating sets each will leave your lats, shoulders, and triceps feeling it the next day.

Corey Howard Jacknife Pull-Ups
Corey Howard Pike Push Ups

3. Stretch!

When I was younger, I mistakenly thought that stretching was a waste of time. Now that I’m older, if I don’t stretch out I’m practically crippled the next day. If you stretch the working muscle group in between sets it not only speeds up recovery but some studies have shown it helps with hypertrophy too.  A healthy person should be able to comfortably squat below parallel with their hands behind their head.  If you can’t physically do this, you need to spend some time working on your movement quality.  I don’t know everyone’s personal movement issues or pains but if I could suggest a few areas to spend some time stretching out: the ankles, hips, shoulder complex and neck.

I’m not going to tell you to spend an hour on this every day, but 10 minutes before and after your workout is a great start.  For the ankles, find a step and stretch out your Achilles.  If your ankles can move appropriately then chances are your knees will move and feel better.  For the hip complex, I’d strongly suggest the pigeon for your glutes and the half kneeling hip flexor stretch.  Healthy hip mobility will allow the body to stabilize itself and let your hamstrings and low back relax.  As for the shoulder complex, I like to use a stretchy band hanging from a pull-up bar.  Hinge yourself forward and let the band pull your arm forward stretching through the lats, then turn around and let it pull your arm back to open up the chest.  Healthy shoulder movement will also help the body stabilize and improve your posture.  Finally some simple head nods and slow rolls will go a long way to ease tension.  Again, this is very elementary but just making time for this will be a great start. For more information, I recommend Al Kavadlo’s Stretching Your Boundaries.

Al Kavadlo Overhead Squat

Tony Robbins once said, “The secret to success is learning how to use pain and pleasure instead of having pain and pleasure use you.  If you do that, you’re in control of your life.  If you don’t, life controls you.”  I have chosen to use my pain as speed bumps or opportunities to improve.  I can’t stress it enough: train your lower body three times each week, get outside and run like you’re fleeing the scene, don’t be afraid to take a step back to refine the easier progressions, and stretch out!  It will pay huge dividends on the harder stuff.  Fire it up!


***

About Corey Howard, PCC, RKC, CK-FMS: Corey Howard strives to constantly become stronger, and to help others to achieve their fitness goals. He is the owner of Results Personal Training, and can be reached at fithubby.com, resultsptonline.com or coreyhoward.com.

Filed Under: Progressive Calisthenics, Tutorial Tagged With: Corey Howard, glute training, leg training, regressions, stretching

The Dragon Pistol Squat

July 28, 2015 By Al Kavadlo 25 Comments

Al Kavadlo Dragon Pistol Lead

The first time I ever tried to do a one-legged pistol squat, I failed miserably. Even though I thought I had strong legs from years of weight training, my initial attempt at this calisthenics staple resulted in me falling on my behind. After several weeks of dedicated practice, however, I was able to nail the pistol squat and eventually build up to performing it for reps.

Later on, I discovered an exercise known as the shrimp squat, which finds the non-squatting leg held behind the body, rather than in front, as it is with the pistol. Once again, my first attempt at this new one-legged squat variation was unsuccessful. This time, however, I was able to get the hang of my newfound lower-body calisthenics challenge within a few training sessions. The strength and stability I’d built from pistols had a good amount of carryover to learning this new skill.

As I got more comfortable with the shrimp squat, I began finding new ways to make single leg squats more challenging. By holding both hands behind my back, I discovered I could change the leverage and add a significant amount of resistance without relying on external weights. I was also starting to practice a technique that would later go on to be dubbed the “jumbo shrimp”, which involves increasing the range of motion of a standard shrimp squat by standing on an elevated surface so that the back leg can drop down lower than when standing on the ground.

Raised Shrimp Squat "Jumbo Shrimp" at Encinitas PCC workshop

Legs Get To Work
One of the most common misconceptions about bodyweight strength training is that it can only be progressed so far. After a certain point, many people would argue that the only way to increase the difficulty of an exercise is to add weight. This is especially true when it comes to leg training. Even folks who have come around to the idea that a muscular and highly functional upper-body can be built with calisthenics alone often have a hard time conceiving that the same is true for their lower half.

Though different people define strength differently, there are plenty of bodyweight squat variations to keep your workouts fun and challenging for a lifetime. If standard pistol squats and shrimp squats are no longer difficult for you, don’t start thinking you need to join a gym. Instead, consider giving the dragon pistol squat a shot.

Dragon Pistol Squat ? #ProgressiveCalisthenics #Legs #Calisthenics #Legday #PistolSquat #BeardPower #NinjaTraining #NowYouTry

A video posted by Al Kavadlo (@al_kavadlo) on Jul 23, 2015 at 11:42am PDT

Enter The Dragon Pistol
Like the traditional pistol squat, the dragon pistol requires serious strength, balance and mobility – and in a very unique way. The dragon pistol can be surprisingly taxing on your inner thighs as well as your deep glute and hip muscles. And of course, all the other muscles that you work in a standard pistol will get hit as well.

As we each have our unique strengths and weakness, some people may find this move a lot harder than a normal pistol, while others may not experience a huge disparity. Regardless, I suggest building a solid foundation in standard pistol squats before beginning to work on this variation.

Convict Conditioning Vol 2 Twist

Other than that, I recommend you spend some time working on your hip mobility by practicing twist holds, which you may recall seeing in Coach Wade’s Convict Conditioning Vol 2. Once you’re able to do a standard pistol and a full twist hold, you shouldn’t be too far from the dragon pistol.


Elevation Training
Though standing on a bench or other elevated surface when performing a shrimp squat can increase the difficulty of the exercise by increasing the range of motion, practicing the dragon pistol while elevated can actually be a very helpful regression. By allowing your non-squatting leg to drop below the bench, you can decrease the amount of mobility required to perform the exercise. (This same technique of standing on an elevated surface can be very useful when someone is learning to do a standard pistol squat as well.)

Dragon Pistol Raised Regression

Toe the Line
If you’ve spent some time working on pistol squats, you’ve probably at some point experienced a cramp in your non-squatting leg as you fought to keep it in the air. This is common when learning the dragon pistol, too, only the cramping may take place in your hip and/or inner thigh instead of your quads. To minimize this issue, many people find holding the toe of their squatting leg to be helpful, particularly in the bottom position.

The dragon pistol also has quite a bit in common with the shrimp squat, as both moves begin with the non-squatting leg behind the body, rather than in front. As such, you may find that holding your toe behind your back at the top of a dragon pistol (similar to how you would in a shrimp squat) will allow you to control your leg as you gradually extend it into the bottom position (which more closely resembles a pistol squat, only with the extended leg threaded behind the squatting leg). Note that your hand will reach across to the opposite toe for this variation, whereas in a shrimp squat it is more common to hold the toe on the same side. So if you’re going for a dragon pistol on your left leg, you would hold your right toe with your left hand.

Al Kavadlo Dragon Pistol How To

When practicing these progressions, I recommend keeping your training volume low. Warm up with a few easier moves (basic squats, split squats, maybe a few pistols and shrimps) then get into practicing your dragon pistol progressions (elevated, holding your toe, etc). When starting out, stick to just one or two reps at a time – a total of 10 reps per side in one training session is probably plenty. If you go slowly and focus on staying in complete control of your movement, you won’t need to do a whole lot of volume.

I’ve only recently begun experimenting with this move, so don’t take my guidance as the final word. I’m sure I will learn a lot more as I go. Feel free to share your experience with the dragon pistol squat in the comments below.

***

Al Kavadlo is the lead instructor for Dragon Door’s Progressive Calisthenics Certification. Recognized worldwide for his amazing bodyweight feats of strength as well as his unique coaching style, Al is the author of five books, including Raising The Bar: The Definitive Guide to Pull-up Bar Calisthenics and Pushing The Limits! Total Body Strength With No Equipment. Read more about Al on his website:www.AlKavadlo.com.

Filed Under: Progressive Calisthenics, Tutorial Tagged With: Al Kavadlo, bodyweight exercise, calisthenics, Dragon Pistol, flexibility, how to, leg training, mobility, tutorial

“Replek” Training for the PCC

July 21, 2015 By Karl Indreeide 24 Comments

Karl Indreeide Replek Training

As I prepared to attend the recent PCC Workshop in New York City, I began using a system inspired by the Swedish running technique known as “Fartlek Training”, a form of interval training where you let the terrain and your mood direct the speed and intensity of your running.

The name “Fartlek” translates to “Speed Play” in English and “play” is a very accurate word to describe it, as it’s close to the way a kid moves just for enjoyment or exploration.  It is running by feel, running by inspiration.

I decided to name my system “Replek” as it is a similar method to Fartlek, except instead of playing with your speed, you play with your reps.

The plan is well suited to the PCC Century Test as well as getting the most out of the workshop weekend. In addition to positioning you to pass the Century, it also adapts your body to handle a high volume of calisthenics over several days.

Replek is nice and forgiving. It takes your daily stresses, aches and pains into consideration. Like a sly lover, this plan lets you believe that the initiative and follow through are all yours, that there is no plan, really, no string-pulling, no forcing. It’s all about you and what you feel like doing.

You stay within your comfort-zone, don’t do anything you don’t feel like doing, and yet results appear and motivation grows. Your comfort zone will expand from the inside out, and what seemed like too much work a while ago just isn’t anymore. You didn’t break any barriers. The barriers just moved.

There is a time for working through adversity, facing your demons, finishing unbearable workouts and so on. To be able to fight through discomfort is invaluable. But so is getting results without suffering, and learning how to productively back off at the right moment.

Replek for PCC is done this way: You pick exercises or chains that you want to work on (pull-ups, push-ups, squats, leg raises, bridges, etc.), then you start playing a game with yourself.

Karl Indreeide Replek Training

Here are the rules of the game:

Wherever, Whenever
It is up to you if you want to do all your reps in a condensed workout, spread them throughout the day or do some combination of the two. I recommend that you mix all these modes. After a while, you won’t care, because you’ll have grasped the essence of the program, which is sneaking the reps in whenever possible.

Never to Failure
That means you must always stop at least one rep before your failed rep. Most sets should stay way clear of that. The only exception to this is when you on occasion, do some version of the Century Test.

Avoid Punishment
As this program is based on positive reinforcement, it is your job and responsibility to stay away from the punishment of injury, failure, getting overly exhausted or negative self talk  (or negative self talk about you giving yourself negative self talk). Stay away from the drama. Stay away from the heroism and struggle. Observe your form, do your reps, log your sets, stay fresh.

Keep a Log
You always want to capture exactly which exercise/variation you do, your number of reps and sets and the daily total of any given exercise. The log is the most important tool of this method. The log is also crucial in keeping your motivational fire burning (pun not intended, but gratefully received). In the beginning you might actually have to force yourself to log. In a short while, however, you will have a deep desire to do so.

Just write the date and the reps for each exercise. You don’t need to bother with noting rest periods and so on, but can feel free to keep additional notes if you find it helpful. But we don’t want to punish you for training by forcing you to write an essay, do we?

This was my log entry for the 16th of May, this year:
BW squat: 50
Push-ups: 20/22/6/20/24/21/21/20/22/23/15 – 224
Shoulders feeling much better than yesterday
Wheel roll-out: 10/10/4 – 24
Pull-up: 9/6/9/7/10/ 10 (chin up)/5/7 – 63
Pistol:
R: 4/3 – 7
L: 2/2/2 – 6
Push-ups – one hand on basketball
V: 4/6
H: 4/6
Bottom position of pistol: 50 sec/50 sec
Short bridge:  1 min
Crow (sec): 10/20/20
Squat bottom pos: 5 min
Couch stretch: 4 min

Another day looks like this:
Pull up: 1/5/7/13 – 26
That was all the training I did that day. Still, getting the 13th rep in was very nice! It is not my historical best in that department, but the best I had done for a long time.

Personal Records
One of the great features of this program is that you can experience personal records on a daily basis. Your goal is to increase the number of reps during a set as well as the total number of reps of any given exercise during a day. Say your first day you do four sets of push ups: 5/10/15/7 = 37. The next day you do 4/7/16/10/ 3 = 40. Boom! You double-PR’d on the push up! Whenever you PR underline the number or write in bold as I did here, so it is always easy to track the history of PRs, and check your current status.  By the way, the PRs we are talking about are the ones within this program. Forget about past glory and previous heights of achievement. Focus on the present.

Less Structure
Some days you’ll have the time or inspiration to collect your reps within the frame of a more conventional workout. Structure those sessions however you like, and feel free to change trajectory mid-flight. Concentrate on one exercise at a time, or do super-sets, tri-sets or circuits. You are guaranteed to stumble upon combos or sequences that work really well for you, and that belong in your arsenal of go-to-workouts. You will also experience that there is drive in open-endedness, especially given that you have your previous PRs to relate to.

Test the Waters
Always be extra careful with the first few sets. Hone in on the perfect rhythm, and at the same time actively search for any discomfort or pain. Go slow. Think of these reps as screening. Maintain tension in all the right places. Does this feel like a good day for squats / push ups / L-sits? If so, go for it! If not, it may be best to back off and try something else. Other times an exercise will feel much better a couple of sets in, so don’t be to quick to abort, but also keep the “ live to fight another day” mentality at heart. If it is not a great day for squats, it might be an excellent day for pull-ups.

Stay Modest
Sometimes you will feel like a star. You become the exercise, you feel power running effortlessly through your whole body as you perform perfect reps. This is when you can astonish yourself with a crushing PR. Most of the time, though, stick to modest ones. Many small PRs are preferable to a few big ones. Try to not get more than one PR per exercise each day, and don’t PR on the same exercise two days in a row.  Remember that the PR is the reward that will keep you going. Spread them out. The smaller the increments, the more PRs you can enjoy. You are setting yourself up for a very productive schedule of reinforcement, and are safeguarding against overuse.

Whenever you PR – back off, and then see what you feel like the next day. The next day you might do a very low total number of reps in that exercise, just to recover, or maybe stay away from it completely. If you feel like too much time has passed since your last PR, then do a volume PR – these are always accessible. You can always get in one more rep during a day. Just make sure you don’t sacrifice your form just to get an extra rep. This is why you can rest as long as you need between sets.

Maintain High Standards
The aforementioned point taken into consideration, a standard to reach for might still be a good idea, as long as you don’t rush to get there. If you are preparing for the PCC, then passing the Century Test is an obvious goal. 40 squats, 30 push ups, 20 knee raises and 10 pull ups should feel very comfortable on their own, meaning you should be able to do 60 squats, 45 push ups, 30 knee raises and closer to 15 pull ups.

Prioritize
The last pull-up is where many Century hopefuls fail. Make the pull-up and pull-up related work the centerpiece of your efforts.  The push up is also a natural focal point – follow the progressions in Convict Conditioning or Pushing The Limits!

That’s it! Now all you have to do is start somewhere, preferably well within your comfort zone, and then let the Replek catch up with you and unfold. Enjoy the journey, have fun, and get strong!

****

Karl Kristian Indreeide, PCC, is part owner of Gym Ila in Oslo, Norway, where he teaches kettlebell and bodyweight training. He also runs HAVA-Instituttet, which provides consultation, seminars and full-scale health and social services.

Filed Under: Progressive Calisthenics, Tutorial Tagged With: Century Test, Convict Conditioning, Convict Conditioning Training Log Book, Karl Kristian Indreeide, PCC, PCC Workshop, preparing for the PCC, progressive calisthenics, Replek, training log, training strategy, tutorial, workshop preparation

5 Unique Push-Up Variations to Help You Increase Strength & Size

July 14, 2015 By Todd Kuslikis 14 Comments

5 Push-Up Variations

It could be argued that the push-up is the most popular exercise ever invented. Before we had chrome plated dumbbells and Olympic sized barbells people had to rely on their own body weight for building strength.

Yet is the push-up outdated? Should it be used only as a simple conditioning exercise or as a “finisher” after the “real” weight-based exercises are completed?

Of course not.

There is still tremendous value to the push-up. It is the Godfather of all exercises so we must pay it due respect. Yet, descendants of this exercise have sprung up around the world to help bodyweight enthusiasts continue to improve their strength and build more muscle.

Today, I’d like to share with you my five favorite unique push-up variations to help you increase strength and size.

These exercises are super effective for three main reasons…

1. Challenge Different Muscle Groups

The typical push-up targets mostly the middle portion of the chest, front deltoids and triceps. In order to get stronger, you have to challenge your muscles from different angles and in unique ways. Some of these exercises you might have never heard of before, but after you try each of them, you’ll feel muscles you never knew you had.

2. Build Whole Body Strength

True bodyweight enthusiasts know that one of the greatest benefits to calisthenics exercises is that they build whole body strength. Isolation exercises can cause weak links in your armor that may eventually lead to an injury.

The exercises below surpass most other forms of exercise because they strengthen the entire chain (whole body) as a functional unit.

3. They Are Fun To Do!

Let’s be honest, haven’t you gotten tired of cranking out rep after rep of basic push-ups? When you add unique exercises to your normal routine it becomes fresh and exciting again. Which makes you WANT to do it!

That’s one of the most important aspects of fitness. Sure, getting a nice physique and becoming healthier is great, but we only get one life to live – why grudge through your normal routine? Have fun with it!

Changing up your exercises and adopting new and unique styles will help you do this.

Ok, now on to the exercises…

Variation 1: Barbwire Push-Up

The Barbwire Push-Up (also known as the Diver Bomber Push-Up) is great for developing strength through a large range of motion. You’ll work the upper, middle and lower portions of the chest along with the front, middle and rear delts.

One of the greatest benefits is that with each rep, you are improving spinal mobility. The spine is so important for keeping up your strength. As soon as your spine starts to stiffen you lose functionality which leads to poor performance.

How To Do The Barbwire Push-Up

Start off in a “Downward Dog Position”. Lower yourself down toward the floor as if you were sliding under barbwire. The more arc you can get in your spine the better. As you “slip under the barbwire” arch up while pressing down against the floor. At this point you should have a full arch in your back. Make sure to look up, too, which will extend the arch into your cervical spine.

Begin to arc back down “under the barbwire” while curving your spine the entire time. Press back to starting position.

Coaching Tips

1. The key to this exercise is getting a full range of motion. Make sure you that you are arching as much as you can.

2. To make the exercise easier you can do any number of modifications:

  • Perform the exercise on your knees (you won’t get much range of motion but it will still help you build strength).
  • Decrease the range of motion in your spine (i.e. don’t go down as far or arch up as high).
  • Do the first part of the movement normally but instead of arching back “under the barbwire” come straight to the starting position, which is also known as a Hindu Push-Up.

Variation 2: X Push-Up

The X Push-Up is one of the greatest exercises to develop whole body strength. Normally, with any exercise, you’ll have some muscles that are working much harder than others because the exercise targets a particular muscle group.

With the X Push-Up it seems that it targets ALL of your major muscle groups. In order to perform this exercise your chest, back, core, shoulders, and glutes will be firing on all cylinders.

How To Do The X Push-Up

From a normal push-up position, separate your legs so that your feet are 1.5x shoulder width. Then separate your hands 1.5x shoulder width and bring them up so they are NOT in line with your head. Your body will look like a big “X”. The further you separate your hands and the higher you bring them, the harder the exercise will be.

Lower yourself down until your nose gently touches the ground. Push back up.

Coaching Tips

1. It is important to maintain proper alignment when performing this exercise. One tip that will help you is to keep your glutes and core tight throughout every rep.

2. If the full X Push-Up is too difficult, bring your hands and legs in to 1.2x shoulder width. This will create less demand on your muscles and allow you to progress up to 1.5x shoulder width or even more.

Variation 3: Diamond Kiss Push-Up

The Diamond Kiss Push-Up is a go-to calisthenics exercise for developing strong triceps. It also helps to target the inner portion of the chest muscle and lats. You have probably heard that form is very important when performing any exercise. Well, when performing the Diamond Kiss Push-Up, it is especially important because you are putting tremendous demand on your shoulders. If you can not perform the exercise without your spine being perfectly in-line, then switch to an easier progression.

How To Do The Diamond Kiss Push-Up

Start off in a normal push-up position. Place your thumb and pointer finger together creating a diamond in-between. The diamond should be in line with your head. While keeping your spine perfectly straight lower yourself down until your nose touches the ground in between the diamond. Then press back up.

Coaching Tips

1. As mentioned before it is very important to keep your spine straight.

2. Elbow positioning is also important. While performing this exercise the more you flare your elbows out to the side, the greater likelihood of injury. Try to keep your elbows tucked close to your body as much as possible.

3. Easier Variations: If you can’t complete 5-6 reps of this variation I recommend separating the fingers so that there is more space between your hands. This will decrease the emphasis on your triceps and rely more upon your chest muscles. As your triceps get stronger you’ll be able to bring your hands in close.

Variation 4: Spider Push-Up

The Spider Push-Up is an exercise that incorporates abdominal specific training into the normal push-up. If you have a strong upper body this is a great exercise to incorporate into your training because it will help tighten not only your abs but also your obliques.

How To Do The Spider Push-Up

Start off in a normal push-up position. Lower yourself down like normal while simultaneously bringing your left knee up toward your left elbow. This may take some flexibility but eventually you’ll get it. After you reach the “down” position, press up to starting position while simultaneously bringing your left leg back. Repeat on the other side.

Coaching Tips

1. Maintain proper spinal alignment while performing this movement. You may find yourself arching up to get enough space to get your leg up. Don’t do this. If you don’t have enough flexibility to get your leg up high than just bring your leg up as high as you can (while maintaining form).

2. While performing the movement, consciously contract the abs. This will help you engage more muscle fibers and get more out of the movement.

Variation 5: Dolphin Push-Up

This is one of my favorite conditioning and strength movements. Is it the hardest progression? No. But it targets muscles you don’t normally work, which makes it challenging (especially when you get into high reps) and is very fun to do. Also, I’ll teach you a variation to make the exercise even harder.

How To Do The Dolphin Push-Up

Start off in the plank position, resting on your forearms and elbows. Lower yourself down a bit further (you won’t get a ton of range of motion but the little bit that you get will help to engage the middle rhomboid muscles in your back), then press your butt up into the air. Go as high as you can. You’ll feel muscles in your shoulders that aren’t normally targeted, which is great for developing a healthier shoulders.

Coaching Tips

1. Just like the Barbwire Push-Up, this exercise is focused on spinal mobility as well as developing strength. You don’t need to perform this exercise quickly. Keep a strong, steady pace and try to get as much range of motion as you can.

2. How To Make It Harder: Instead of resting on your forearms, start off on your hands. This is the “Horse Push-Up” variation and is harder than the Dolphin Push-Up. You’ll perform a normal push-up but instead of maintaining a straight spine up to starting position, you’ll lead with your butt and come up all the way to a downward dog position. This will increase range of motion in your spine and shoulders as well as put greater demands on your chest.

The traditional push-up is the Mac Daddy of all calisthenics, yet performing endless reps of the same exercise will eventually lead to diminishing returns. You must challenge your body in unique ways in order to get it to grow. You must apply the principles of Progressive Calisthenics so that it adapts and gets stronger. All of the above exercises are unique variations to the normal push-up. They’ll not only challenge you in new ways but also add more enjoyment to your routine.

****

Todd Kuslikis is the founder of a bodyweight exercise blog called AShotofAdrenaline.net. He teaches men how to build muscle using only calisthenics. You can download his free 3 month bodyweight training program by clicking here. 

Filed Under: Progressive Calisthenics, Tutorial Tagged With: advanced push-ups, advanced variations, bodyweight exercise, increase muscle size, muscle mass, push-up variations, push-ups, Todd Kuslikis, tutorial, video

How to Split

July 7, 2015 By Florian Kiendl 12 Comments

Florian Kiendl Splits

If after reading the headline, you expect me to give you advice on how you can get rid of your significant other, I am sorry to disappoint you. As husband to a beautiful wife and father of two sweet kids, I am simply not qualified to give you advice on that. I am however qualified to answer the question of how you can achieve a full split even if you are distinctly beyond your teens. It is a common misconception that once you have grown out of your teenage years it becomes impossible to achieve flexibility feats like the full front or side split. Let me tell you–this is definitely not the case. How can I know it? Simple: I achieved my first full split at age 40 and have now at 42 reached a level of mobility that I can do it practically every day if I please.

Before I tell you what helped me to finally get my split, let’s first get one thing straight: learning to do a full split should not be your goal just for the sake of it. If you need the flexibility because you are a martial artist like me, a dancer or yogi or otherwise need it for your sport–then go for it. If you have no definite reason to learn the splits, however, I would not advise you to add it to your list of goals. I write this for two reasons. Number one: the split does not come easy, if done properly it is a feat of strength and flexibility that requires months if not years of dedicated training. Reason number two is that it comes at a cost. Moving well in this extreme range of motion requires a very specialized kind of strength. If you don’t spend the time and effort necessary to develop this specific kind of strength, you risk the integrity of your hip and knee joint. Also training for the split will likely interfere with your other training. It’s too much bother just to get a cool looking picture! Use the concepts I will lay out in this post to archive the level of mobility you really need and then go on and pursue your other goals.

How Genetics Impact Flexibility

Everyone knows there are people who are very flexible by nature and there are those who are stiff. In which category you belong is determined by your fascia. If you are fairly young and female, chances are good that your connective tissue is soft and you can get your split fairly easily–if you are in this situation please take my advice and make an effort to strengthen your legs and core before you go for the full split. This will take a little longer but your joints will thank you for it. The fastest way to your goal is not always the best.

Should you, like me, not belong to this gifted group of individuals, I have good and bad news for you: the good news is that it is still both possible and achievable to do a full split; the bad news is that you will have to put in more work and dedication to achieve your goal.

Al Kavadlo Front Split

Understanding the Split

A split is the ability to sit on your butt while having your straight legs either out to the side or one in front and one behind you.

As there is no tissue in the body that connects your legs directly to one another, doing a split should be easy, right? I have been told, but have not seen it personally, that a fully sedated person can be positioned in a split no matter if this person can do so while awake. Anatomically there is no real reason why not everybody should be able to do that.
 The ability to perform a split (or not) lies in our nervous system rather than in our joints or muscles.

There is a right way to achieve your split and a wrong one. If you pick the wrong one you will find that you get problems in your hip and or knees because you “stretched” bands and ligaments instead of your muscles. In the German language this is called joint cavity mobility.  I personally tested this approach in my early Tae Kwon Do career and cannot recommend it.

The correct route is to keep your joints tightly in the socket and lengthen your muscles enough to allow for the desired range of motion. This is also good news for people like me, who passed their twenties without achieving the split. The older you get the harder your connective tissue tends to become–but your muscles do not lose the ability to lengthen with age.

Why is it that average people tend to get stiffer as they age? The answer is simple yet profound: You lose your mobility if you do not use it on a regular basis. Our average contemporary moves less with every passing year and thus also get stiffer. Here in Europe, we have a great example of this process at work: in the more southern parts of Europe like Italy and parts of France, public toilets are usually designed for standing use–in order to do what you have to do, you need to get into a decent (and hopefully stable) deep squat. Guess what: the number of people with a good squat is much higher in the southern parts.

Florian Kiendl Good Squat

Rules for Stretching:

1 – Always use tension
Granted if you stay loose while stretching you will get deeper, but the additional ROM does not necessarily come from the joints you’re trying to stretch, but rather from its neighbors. This does not make you more mobile but sets you up for injury as you weaken joints that are not meant to be mobile–in the case of the split this would be the knees and the lower back. Therefore it is imperative to hold everything tight and only loosen the exact joint you are targeting.

2 – Never force it
Pretty much every body can learn a full split – but not everybody can do every split. If you look at x-rays of the hip joint from different people, you will notice that there are distinct differences that impact the way somebody is most likely to get into his split. The longer the femoral neck and the more shallow the socket of the hip joint is the easier it will be for that individual to get into the a split. I have shallow sockets but a short femoral neck–therefore you will never see me sitting in the split with my toes pointing forward. 
Whenever you find a blockage during a stretch, don’t try to lever through it–simply find a better way.

3 – Understand the pain
Pain is a signal–and to do extreme stretches without injury you need to be able to interpret those signals correctly. For somebody new to stretching, the discomfort involved is usually mistaken for pain–which it is not. It is simply your nervous system trying to talk you out of the idea. Like your mother used to tell you not to go too deep into the woods when you were a kid, your nervous system does not like to explore unknown joint angles. If you are like me–you did not really listen to your mother, but you used caution while exploring the unknown. In my eyes this is the right approach for stretching also: get used to the sensation, try to enjoy it and avoid suffering. Always listen to the warning signals your body sends and back off when necessary.

4 – Mobilize first
No matter which position you’re in, always try to mobilize before you go deeper into it. When you approach the outer limits of your current ROM your joints usually feel very tight and immovable. Instead of forcing your way through this tightness you should try to make small movements until you feel less tight. Only then it is time to progress deeper into the stretch.

5 – Take time to recover
In order to stretch, your main movers need to lengthen, allowing for the increased ROM, while the smaller stabilizer muscles must protect your joints. If you are wise, you back off after every max attempt and give yourself time to recover. Every time I achieved a new PR in my journey to the split I’d take a break – sometimes as long as two weeks before I restarted my split training. In my opinion this is the reason why most people fail to reach these levels of mobility – they go too hard for too long time and the CNS finally sets its parking brake.

Florian Kiendl Stretching Rules

Side Split

The side split was my first split and it is a little easier than the front split for most people. I would not recommend to push both exercises hard at the same time.

Sit with a tall spine and open your legs until you feel a light tension on the inside of your thighs. Pull your toes to the knees and keep the knees tightly locked (pull your kneecaps upwards). Keep your lower back tight at all times.

Now try to tilt your belly button toward the floor. Go as far as you can without suffering too much and hold the position until it feels more comfortable – then open your legs more by pushing your heels away from you. Again hold this position and lightly rock your pelvis forward and back. If you feel you can go on–repeat the process. Try to hold the last position for 10 to 30 seconds before you slowly back off.

To get safely out of the stretch I like to lift both knees with the hands and bring the feet together. Stand up and move your hips.

Florian Kiendl Side Split

Front Split

If you have the side split, it is fairly easy to gain your front split also. For me the front split came almost automatically. Go into a lunge position and push your rear leg back as far as you can while keeping your knee away from the floor. Hold the position and try to go as low as possible without touching the rear knee to the floor. When you feel you cannot go deeper, push back even more until your forward leg is straight. Finally you will be able to touch your hip to the floor.

Florian Kiendl front split with rotation

Seated Straddle with Rotation

Another way to get into the front split is to sit in a wide straddle, rotate the torso toward one leg, and push yourself up. As soon as you find your mid-line, let gravity take care of the rest. Use your arms to support yourself as much as you need.

Remember to go slowly with these exercises and back off when you need to. Enjoy the process and if you are diligent and dedicated, the full splits can one day be yours.

****

Florian Kiendl, PCC, RKC Team Leader, is a second degree black belt in Tae Kwon Do and runs a Martial Arts Gym in a small town close to Munich, Germany. In his search for ways to overcome the movement restrictions of his students (and his own) he found the PCC and now works to help as many people as possible gain back their strength and agility.

Filed Under: Flexibility, Tutorial Tagged With: flexibility, Florian Kiendl, front split, side split, splits, straddle with rotation, tutorial

Simplicity and the Pragmatic Practice of Calisthenics

June 16, 2015 By Silvio Bauer 19 Comments

Silvio Bauer Dragon Flag

It is 6 o’clock in the evening. I’ve just come home from work. I slip out of my shoes and take off my backpack. I quickly get into the kitchen, pour myself a glass of water and drink it.

I head to my bedroom to change into a pair of comfortable shorts and a simple t-shirt. On a piece of paper, I briefly note four words: Muscle-ups, dragon flags, shrimp squats and handstands. I get my keys as well as the piece of paper and a pen.

Outside of the house, I start running at a steady pace. At this point, I’m already shaking off the worries of my day. I feel totally liberated, because for the next hour, all I need to focus on is the movement of my own body. Nothing can distract me. As I’m running, I’m getting further and further away from my phone, my digital leash. I soak in the environment.

In about 5 minutes, I stand before two pull-up bars. One of them I can only reach with a slight jump. My heart rate is already elevated from the run. The movements I’m about to practice will work pretty much every major muscle group, so I prepare for it accordingly.

First, I do some joint rotations for shoulders, hips, knees, ankles. I combine this with dynamic stretches like toy soldiers, arm circles and leg swings to prime my muscles.

The exercises I previously scribbled on the piece of paper are the exercises I will put my focus on today. I split them into two groups, muscle-ups + shrimp squats, then dragon flags + handstands.

For the first “super-set”, I get down into a deep squat and simultaneously do wrist circles. I do some push-ups, get up, do side lunges and then I jump up to the bar for some pull-ups. These “easier” exercises get my blood rushing through the muscles I’m going to need for my focus exercises. I never max out on these because I want to retain my strength.

After two rounds I’m warmed up and ready to rock. After a round of muscle-ups and shrimp squats, I shake out my legs and arms. I do a warrior pose to stretch my quads and hip flexors in order to improve my mobility for the next set of shrimp squats, then some shoulder mobility to help my muscle-ups. I count 5 deep breaths. Rinse and repeat.

While I am practicing these two movements, one at a time, my goal is to maximize the precision – not the effort – of each of them. When I feel I lose control over my form, I simply stop. On my piece of paper, I jot down my reps, not to impress anybody, only as a means to record my progress and to recalibrate my focus.

After 5 rounds I go to the nearest park bench. I am more than warmed up from the first two exercises, so I immediately get on the bench and do my dragon flags. After each set, I do a few kick-ups into a handstand, count 5 breaths and repeat.

After 3 sets of dragon flags, I shift my focus solely on debugging my handstand. After 15 more minutes, I call it a day.

To cool down from my practice, I get into a back bridge and counter that stretch with a forward bend. I do this once more and then I take a leisurely walk home.

As I walk, I contemplate over the quality of my workout and what I achieved. Some moves worked well today, with some I struggled a bit more than usual. But I know that this is part of the process. With consistency, I know I will get better over time.

When I approach the front door to our house, my mind gets filled with a rush of anticipation: I am going to enjoy a delicious and nutritious home-cooked meal.

-The End

The Moral of the Tale

Al Kavadlo prayer pushup

This story is not to brag about how Zen my workouts are, but rather to illustrate the key concept of calisthenics: simplicity.

In Convict Conditioning, Paul “Coach” Wade explained how he used advanced bodyweight exercises out of necessity while serving time. There was just no other way to get strong and survive but with his own body.

In our superfluous world with an abundance of options, practicing calisthenics can also enhance our “inner freedom”. By limiting options (not using machines, weights, apps or other equipment), we can liberate our training from being drawn in every direction.

But in order to make progress over time, we have to consistently apply this pragmatic approach to our training. With all the excellent information available about advanced bar calisthenics or bodyweight strength built with nothing but the floor, the variety of calisthenics exercises can be quite seductive to us enthusiasts.

Only by focusing on a few movement patterns at a time, we can ensure sufficient attention to each of these moves.

There is also no need to over-complicate the process of one’s training. Warm-ups are only needed for the specific body parts that come into play in a workout. If you follow an upper/lower body split routine, there is no need to warm up your legs on your upper body day.

The same principle applies to cool-downs. Static stretches are most effectively applied to the muscle groups that were used to generate mechanical tension. Flexibility does not need to be practiced for its own sake. It serves a purpose: making it possible for you to move the way you want to move. If you want to do pistol squats, insufficient ankle mobility will limit your ability to do so. However, if pistols don’t interest you, the necessity of ankle mobility drills is questionable.

The story above most probably differs from your own. It’s not necessarily better or worse than yours, it’s simply the template I found works best for me. It is merely an example of an application of the underlying pragmatic principles that calisthenics have to offer.

Everybody has a different story. What’s yours?

Move freely.

-Silvio

****

Silvio is a full time medical engineer who loves to practise and teach calisthenics in his free time. He enjoys creating workout plans for his friends and spreads the word about PCC over at his blog, neatstrength.com. You can follow him on facebook.com/neatstrength, twitter.com/neatstrength or on instagram.com/neatstrength/.

Filed Under: Progressive Calisthenics, Tutorial Tagged With: calisthenics, calisthenics workout, flexibility, outdoor workout, Silvio Bauer, simple workout, stretching, tutorial

  • « Go to Previous Page
  • Page 1
  • Page 2
  • Page 3
  • Page 4
  • Page 5
  • Page 6
  • Page 7
  • Go to Next Page »

Primary Sidebar

Featured Products

previous arrow
GetStrongBookCover
ConvictConditioningBookCover
StreetWorkoutBookCover
ExplosiveCalisthenicsBookCover
StrengthRulesBookCover
next arrow

Categories

Progressive Calisthenics Certification Logo
Click here for more information or to register for the PCC workshop

Get Strong Workouts TriadXP App
Get Strong Workouts App

Recent Posts

  • Top 5 Reasons Why an In-Person Workshop is the Best Way to Supercharge Your Training
  • HYBRID STRENGTH TRAINING IS HERE!
  • My Calisthenics Journey to the PCC
  • The Handstand Press: Complete Control Through the Handstand
  • The Get Strong App is Here!

Dragon Door Publications

Dragon Door Publications

Recent Comments

  • bross dandon on The Case for Curved Handstands
  • Johnny Flewellen Jr. on Strength for Life
  • Dan Earthquake on The Pursuit of the Daily Minimum
  • Johnny Flewellen Jr. on The Pursuit of the Daily Minimum
  • Johnny Flewellen Jr. on Yoga, Calisthenics and the Journey of a Lifetime
FOLLOW US ON TWITTER!

Copyright © 2025

Dragon Door Publications / The author(s) and publisher of this material are not responsible in any manner whatsoever for any injury that may occur through following the instructions or opinions contained in this material. The activities, physical and otherwise, described herein for informational purposes only, may be too strenuous or dangerous for some people, and the reader(s) should consult a physician before engaging in them.