Quick quiz!
What’s the one thing missing from most fitness programs that translates into extraordinary progress?
- Ice Cream
- More Posterior Chain Work
- Single-Sided Bodyweight Exercises
- Chipotle
- A Good Workout Partner
While a case could probably be made for any of these choices, the answer that has the greatest return on your time investment is C. Single-Sided Bodyweight Exercises.
Behold, The Domino Effect: One Side Fits All
Also known as unilateral movements, focusing on one side at a time with the upper or lower extremities has been shown to play a key role in promoting equilibrium, transforming mental and physical ideals into reality, overcoming current health setbacks, and preventing future issues from happening. These positive changes are especially noticeable when you consider the value of starting your workout on a high note with such moves—which is arguably the most important habit you can develop to increase workout productivity.
If there is such a promising range of benefits from their application, why don’t we see more single-sided exercises being performed by others on a regular basis?
Well, there are three understandable reasons why some fitness gurus still don’t prescribe one-sided exercises in their training programs. The total number of repetitions take more overall time to perform (which can lead to impatience), they don’t allow the practitioner to add a sexy amount of external load (which can influence ego), and they’re significantly more challenging on both the mind and body to perform (which can make poor form inevitable). This puts many well-informed coaches in a tough position when it comes to attracting new business and ultimately selling their training philosophy.
The good news is, no matter where you’re at right now in your fitness journey, you can have the best of both worlds—catering to both your wants AND your needs—by including unilateral calisthenics movements in the first half of every workout. The following list vivifies the healthy domino effect of this “one side fits all” training strategy—meaning that, once one of these motives is set in place, you will set off a chain reaction for the rest. Hopefully after going through this list, you too will find new motivation or be able to put previous advice into healthier perspective by balancing movement from both sides of the body more effectively.
- Train and Recover Smarter
The cool thing about training one side of the body at a time is that it encourages you to do more work without exceeding your capacity to recover. More specifically, once you become aware of which side is less strong, you have a few options for splitting up the total volume (i.e. reps) more evenly. For example, you could begin working your non-dominant side while you are more energetic, and finish on your stronger side to elicit a healthier adaptation response. You might also find alternating between sides throughout a given “set” to be beneficial—particularly when performed with a “flow” mindset. Finally, you could split up the work into halves, thirds or quarters depending on your target number of reps. As long as you sustain a quality over quantity mindset, you can really use one-sided movements to your advantage.
- Improve Core Strength
Having visible abs is considered the holy grail in the field of “bro science.” However, don’t neglect your glutes, back muscles and psoas muscle group when training your entire core. Fortunately, unilateral calisthenics moves take all the guesswork out of the equation, allowing you to turn on these key muscle areas when they matter most: when you’re OUTSIDE of the gym and NOT in a workout state of mind. The best set of cues I’ve used as an instructor to help others work their core more effectively is to turn on their glutes (an internal cue) and then pretend like they’re about to get punched in the stomach (an external cue)—before doing anything. Being able to do this without thinking about it (i.e. create a habit out of applying core strength) will ultimately contribute to further longevity.
- Cultivate Mobility, Joint Health & Overall Movement Quality
Mobility is defined as the ability to move a joint or a series of joints actively through a range of motion that encourages a healthy interaction between muscles, joints and the central nervous system. So you are not just passively increasing the range-of-motion for muscles that lack full flexibility, but you are using exercise as a tool to move your joints actively while simultaneously improving strength. If these words are a bit too complex to digest, just take any lunge variation—a unilateral lower body move—as a simple example. Holding the bottom of that lunge position will obviously increase hip flexibility, but when performed dynamically (i.e. for reps), you will also give the hips an opportunity to make the position “stick” for next time you practice the move, allowing strength & stability to settle in better. Ideally, you’ll want to include both isometric and dynamic style reps as part of any sustainable training program—always ending your practice on a high note for medicinal-like effects. By using unilateral calisthenics moves as mobility insurance, you’ll unlock new gains in movement quality and correct left & right muscle asymmetries because you’ll truly be moving your joints in every way, every day. Just remember this equation the next time your progress seems to have stalled: Strength + Flexibility = Mobility.
- Activate Your Nervous System
How many high-threshold muscular units does it take to stimulate muscle growth? Ideally, you’ll want to fire up as many as possible. In order to make this happen, though, you must first activate the neural pathways to your fast-twitch muscle fibers. Two-sided explosive strength and power training (with and/or without load) is an extremely effective way to do this. But what if you’re not ready for that style of training yet? Well, you have a few options. Your first option is to do absolutely nothing about it, and continue being weak and lame. Your second option is to start familiarizing your body with exercise through cardiovascular and weighted machines at a commercial gym. Your third and final option is to explore progressions and regressions for unilateral calisthenics moves. I don’t know about you, but that last option sounds the most fun and rewarding to me.
Just imagine for a moment what it would be like as a gymnast—being able to turn on an extremely high percentage of the muscles in your body. At that level of body tension, your muscles really have no choice but to display superhuman strength and build lean body mass. Back to reality, you can create similar opportunities for physiological gains by working one arm or one leg at a time because the nervous system has no choice but to send electrical pulses from head to toe to close any energy leaks. In this context, energy leaks are the same as leverage—which dictates how much effort you’ll be able to apply before form starts to break down. For beginners and taller/long-limbed individuals, unilateral calisthenics training will offer an even more distinguished neural activation effect—due to their experience level and anatomy, respectively.
- Increase Energy Expenditure
It’s kind of hard not to burn a ton of calories while being more athletic. More specifically, while training for strength, speed or power on one side at a time, the demand for hormonal adaptations is quite high. This heightened hormonal response leads to some favorable changes in energy expenditure and body composition that are commonly associated with active people in general—such as elevated insulin sensitivity, lower cortisol, optimized growth hormone and thyroid secretion, along with a healthy balance between testosterone and estrogen output. However, what separates unilateral resistance training from most other forms of exercise is the additional amount of time, space and force that’s required to execute such moves. This basically means that more range of motion is covered for every rep—which significantly reflects your mobility.
- Look Cool, Have More Fun!
At the end of the day, being able to have fun while working out is what it’s all about. ‘Cause if you’re not having fun, you won’t do it. Period. While everyone’s definition of fun may be slightly different, I think we can all agree that looking cool can play a healthy role in having fun. So, even if you currently suck at unilateral training or it’s not your favorite training strategy, keep in mind that we all need to start somewhere. Just because these benefits exist does not mean you have to totally ditch your bilateral movements, either. Besides, there’s a strong chance that you can already do something pretty cool that even Olympic-medal athletes or your favorite celebrity cannot do—whether fitness related or not. Start facing your weaknesses today before they turn into tomorrow’s health problems.
Summary of Unilateral Training Recommendations – To Infinity And Beyond!
Now that you have the motives behind the Who, What, Where, When and Why of unilateral calisthenics training, let’s recap with the three most practical ways for How you can get started today.
- Perform unilateral calisthenics along with your 10-15 minute full-body warm-up.
- Perform one 45-minute workout per week exclusively dedicated to unilateral calisthenics movements.
- Perform unilateral calisthenics movements for preventative maintenance–once or twice a month for tune-up purposes or year-round for complimenting your other bilateral workout programs and rebuilding your body all together.
Do you have a favorite unilateral calisthenics move? How about a unique exercise modification to the various progressions and regressions commonly practiced? Drop any questions, comments or wisdom you’d like to share below, and I’ll be sure to address them soon. Thanks for reading!
***
Eric “E-Rock” Buratty is the health & fitness coordinator at MMA & Sport, located in Damascus, MD. When he’s not fine-tuning his own awesome core strength, he teaches fitness enthusiasts of all levels how to achieve their goals. Eric offers both individualized sessions and group classes, creates evidence-based health content for websites and blogs and offers expert tips on how to prevent and manage diet—for lifestyle-related health issues. To learn more about Eric, feel free to connect with him on his Facebook page.


 At the end of the day, my goal is to become the best version of myself possible, and to help further others in their own journeys. My hope is that you might take notice of this post and give your own squeaky wheels some grease. Because let’s be honest, we’ve all got them! And don’t forget to keep it simple.


 Guru or douche? The truth is, I’m somewhere in between.
 And still, some folks would prefer if I just went away. Well I’m not.


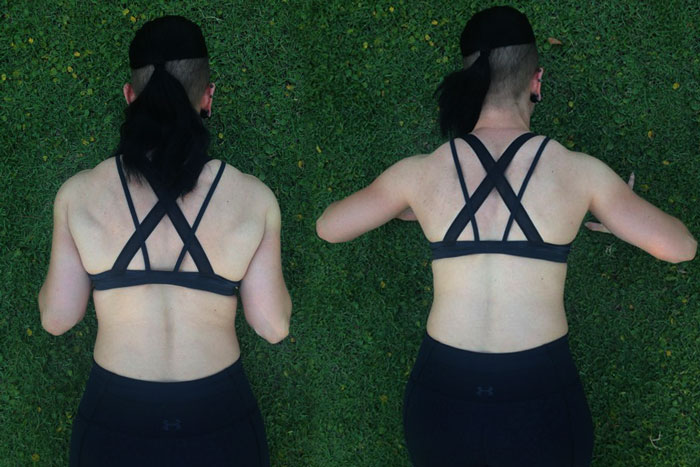

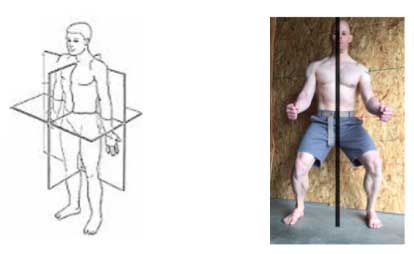
 The image to the right shows how the muscles are arranged to direct muscle tension inwards towards the centerline. Almost every muscle has at least a few muscle fibers that direct force inwards towards the spine. This is yet another reason to practice
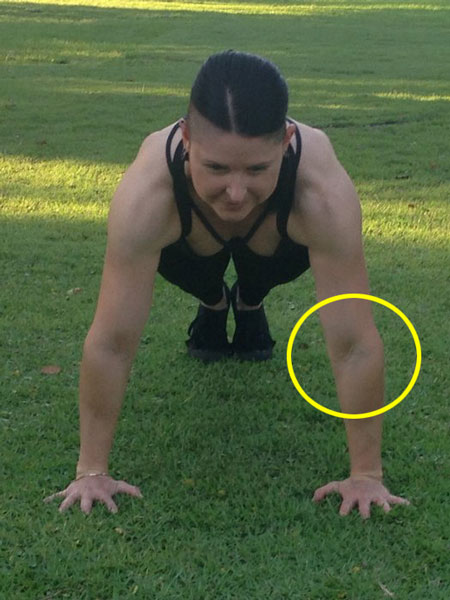
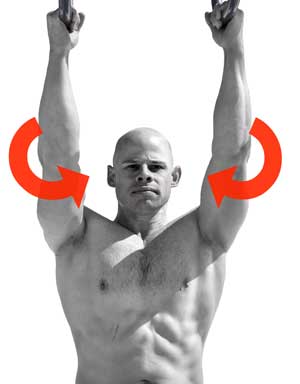 Lesson #3: “Screw” your limbs inwards
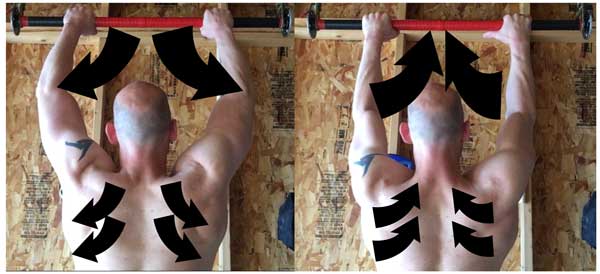
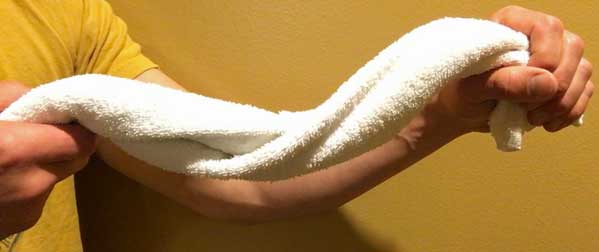
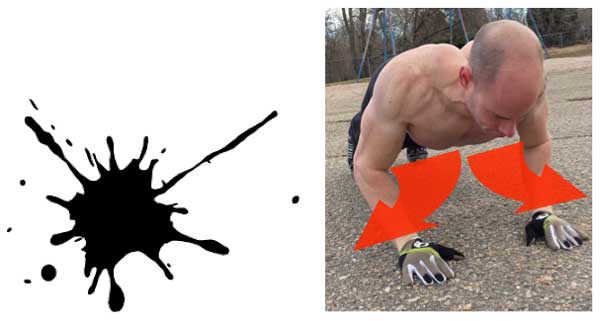
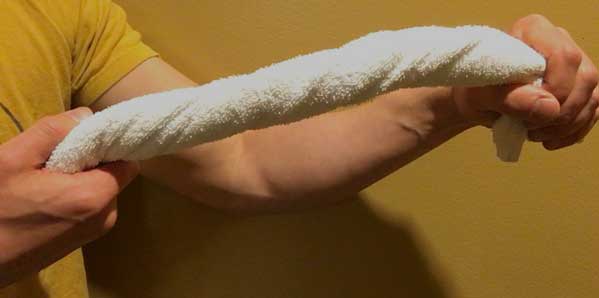 Lock it up! Applying torque on your legs or arms will make them more stable.