• Skip to main content
  • Skip to primary sidebar
  • Home
  • Contributors
  • Resources
    • Q&A with Paul “Coach” Wade
  • Workshops
  • Products
  • Forums
  • Articles
  • Blogs
    • RKC Blog
    • Strong Medicine Blog
  • Archives

PCC Blog

Progressive Calisthenics - The Official Blog for the PCC Community

squats

The 10 Minute Bodyweight Squat Challenge

March 8, 2016 By Al Kavadlo 65 Comments

Al Kavadlo Squat challenge

“I want to get in better shape, but I just don’t have time to exercise!”

If you’ve been a fitness trainer for more than about 15 seconds, you’ve probably heard this excuse from at least a dozen different people already.

It’s probably the most common rationalization folks use to justify their lack of regular exercise, and it may very well be the lamest.

The truth is, you can get a challenging and effective workout in just 10 minutes, and anyone who says they don’t have 10 minutes is just kidding themselves.

What I’m about to share with you is so quick and simple, many people may question its effectiveness. If you are one of those people, all you’ll need to verify the power of this workout is to try it for yourself.

Here’s the challenge:

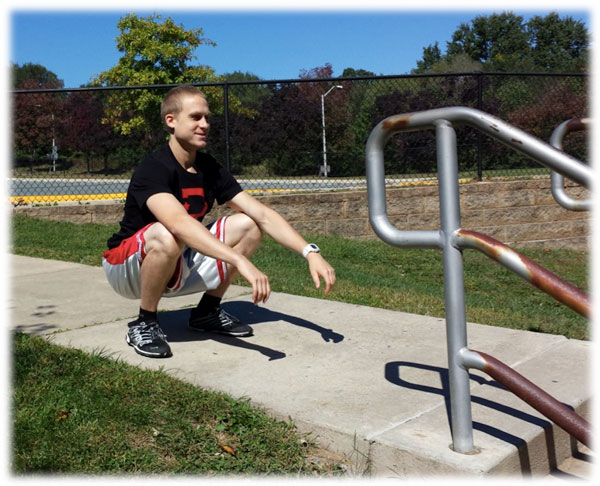
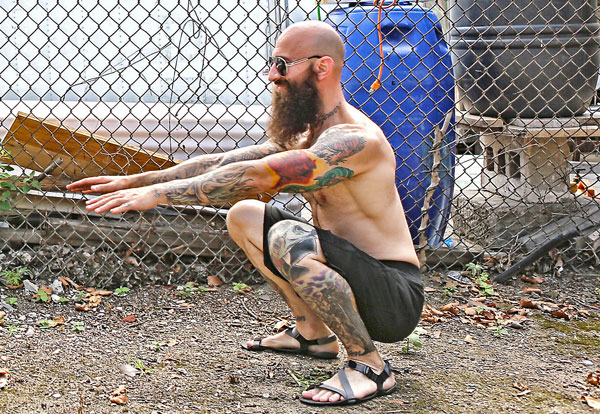
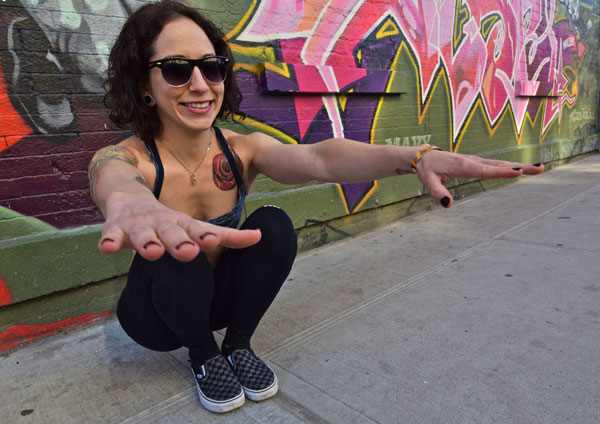
Begin by setting up your feet in a comfortable squat position. The toes may be turned outward slightly or your feet may be placed parallel. Set a timer for 10 minutes and start the clock.

Your objective is to perform as many slow, controlled squats as possible, while using a full range of motion. Aim to make each rep last for three full seconds. You may take as many breaks as you like, but your feet must remain flat on the ground where they began for the entire time.

Grace Kavadlo Close Squat

After about 30-60 seconds, your legs will likely begin to experience a burning sensation. Keep going: this workout will be a mental challenge as much as a physical one. Only take a break when you absolutely have to, and even then try to keep it to 10 seconds or less. As you go on, the amount of breaks you need and the duration of each break may start to increase. This is fine.

The first time you attempt this challenge, aim for 100 squats. That’s an average of 10 per minute. If you are sticking to the 3 second per rep rule, that’s 30 seconds of work and 30 seconds of rest every minute for ten minutes. Not too bad, right?

By the same token, the highest number of squats you could complete in ten minutes at a 3-second pace is 200 reps. Though very few will accomplish the full 200 on their first attempt, I encourage you to do this workout once or twice a week until you can make it without stopping. A good method is to add 10-20 reps each time. I guarantee that if you eventually build to the full 200, your legs will be stronger, and your ankles, hips and knees will feel great, too.

When you’re ready, the 10 minute squat challenge can eventually become your warm-up before practicing pistol squats and other one legged squat variants.

Al Kavadlo Pistol Regression

Here are a few more things to keep in mind:

– An ideal squat starts with a tall chest, neutral spine, and flat feet. As you initiate your squat, your hips will move back while your knees slide forward slightly, allowing your ankles to flex. Your heels need to remain on the ground throughout the movement.  Keep your chest upright and your back straight during every rep. You may be surprised by how much you’ll need to engage your abs and back to maintain your posture.

– In order for a rep to count, you must descend until the tops of your thighs are at least parallel to the ground. The range of motion at the top of the squat is also crucial. Do not shortchange yourself by failing to fully extend your hips and knees. I can’t stress enough how important it is to go all the way down and all the way up.

– Arm position is up to the individual, but most people find that reaching their arms forward on the way down helps facilitate proper form.

– Don’t rush. The goal is to perform every rep with precision and control.

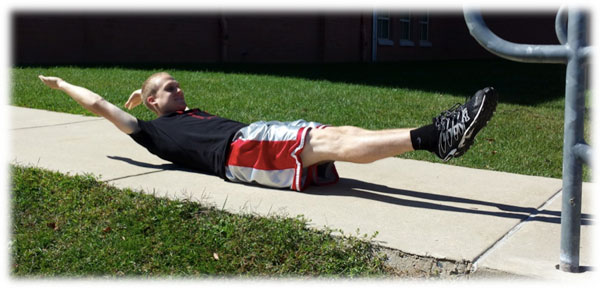
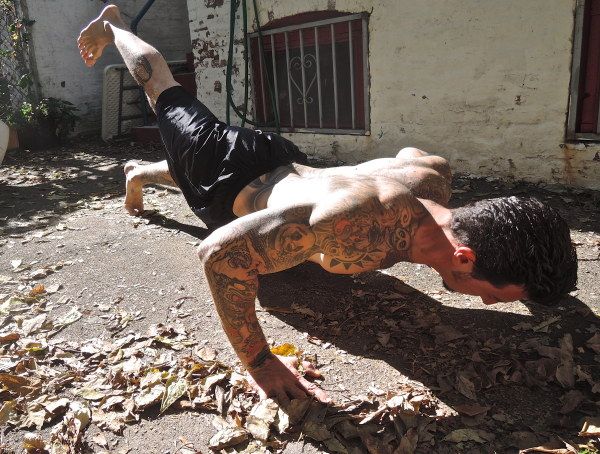
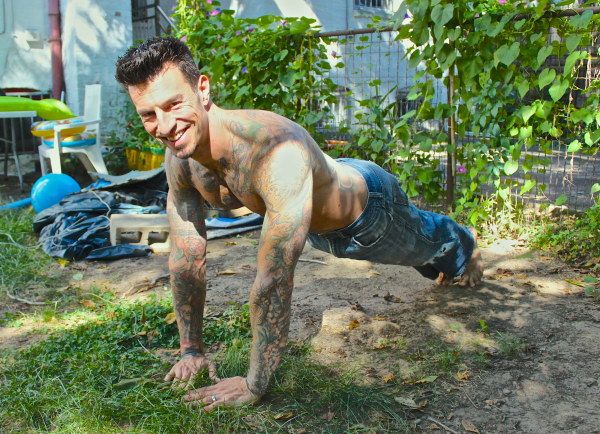
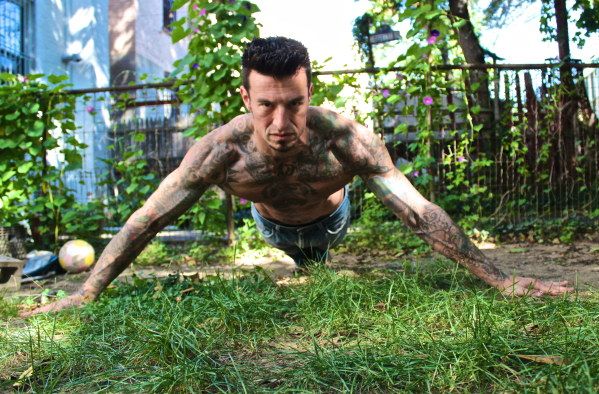
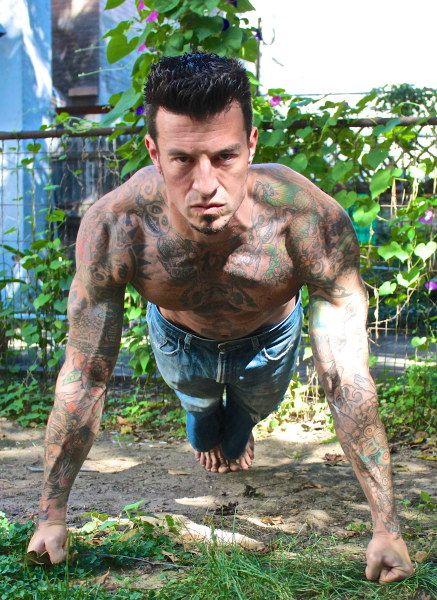
This workout will likely leave you sore for at least a day or two the first time you try it, and possibly a lot longer than that if it’s been awhile since your last leg session. This is good. Work your upper body in the meantime (maybe a ten minute push-up workout the next day?), then do your squats again once you’ve recovered.

Also, if you’ve got time to stretch after you’re finished, a standard toe touch and/or quad stretch on each side would probably feel nice, but I totally understand if you’re too busy. Ten minutes is all I initially asked for; I didn’t mean to get greedy.

Al Kavadlo Squat

***

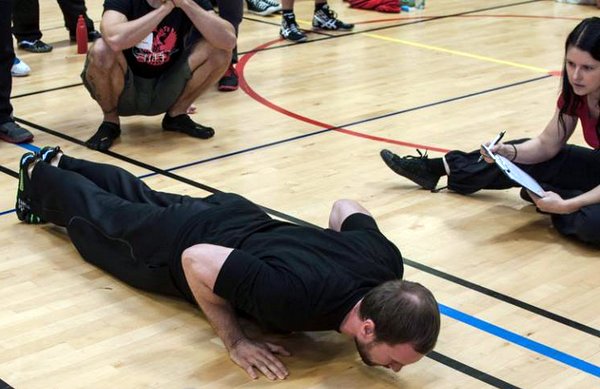
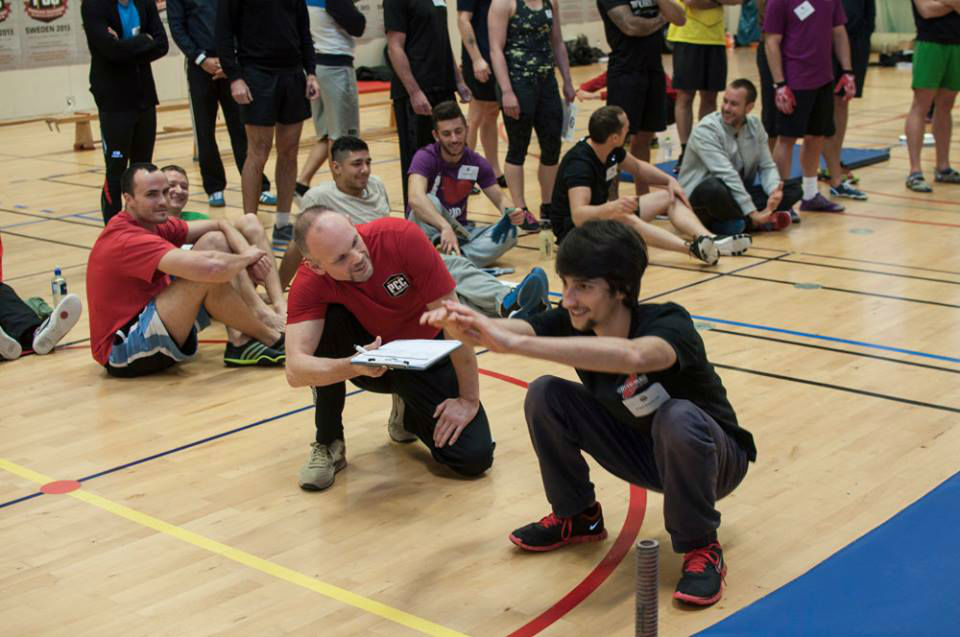
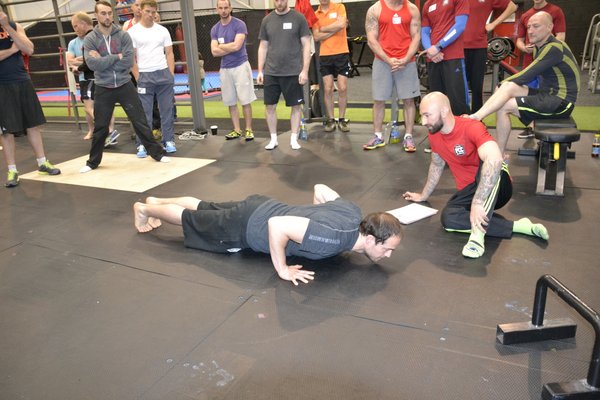
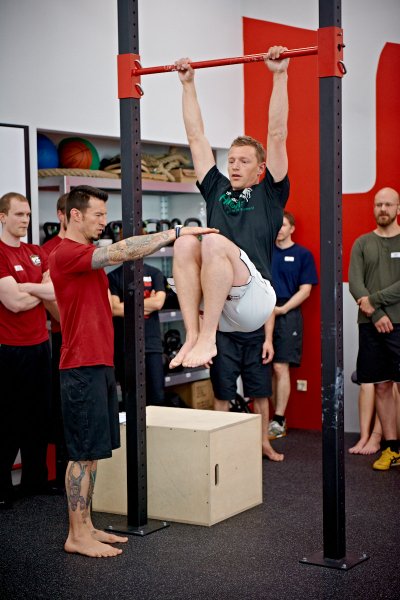
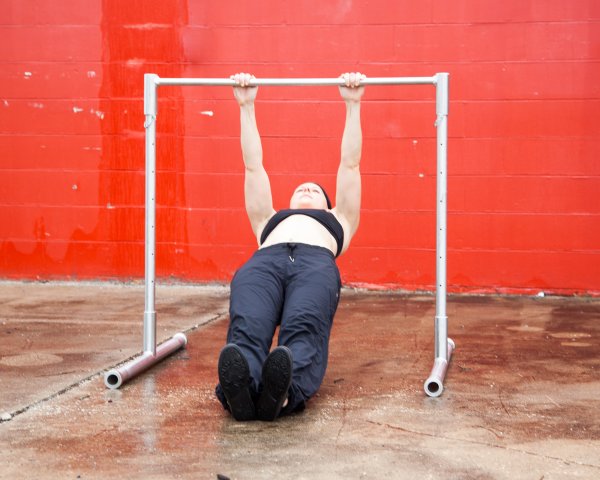
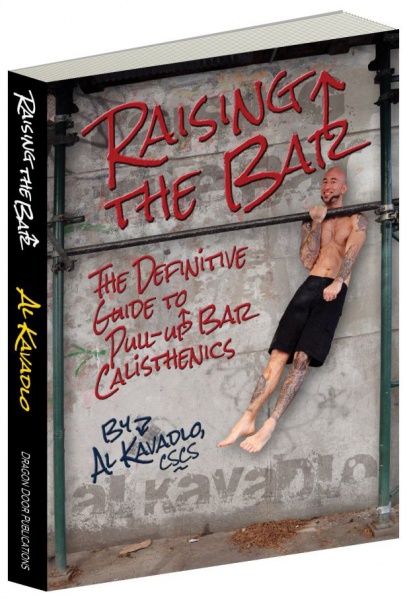
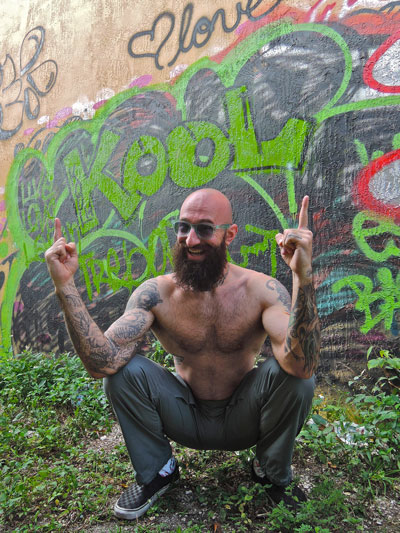
Al Kavadlo is the lead instructor for Dragon Door’s Progressive Calisthenics Certification. Recognized worldwide for his amazing bodyweight feats of strength as well as his unique coaching style, Al is the author of five books, including Raising The Bar: The Definitive Guide to Pull-up Bar Calisthenics and Pushing The Limits! Total Body Strength With No Equipment. Read more about Al on his website:www.AlKavadlo.com.

Filed Under: Motivation and Goals, Progressive Calisthenics Tagged With: 10 minute squat challenge, 10 minute workout, Al Kavadlo, Al Kavadlo squat challenge, bodyweight challenge, bodyweight squats, short workouts, squat challenge, squats

Neck Bridges, Squats and the Changing Nature of Ambition

August 18, 2015 By Dan Earthquake 31 Comments

Dan Earthquake Wrestler's Bridge

At three years old I wanted to be a wrestler. The local judo club was the focus of my ambition until I was seven and could join the class. The instructor–Ted Spacey–was a large jovial man. Among the calisthenics that he imposed upon us were neck bridges. I complained once to him that they hurt the top of my head. “Then you’re not doing enough of them,” was his reply.

Family legend puts me in the sea with my Granddad at 5 months old and I’ve always swam, mostly for leisure. Vanity lifting caused a few injuries which directed me into doing more swimming and as I found I could go further, my ambitions became more aquatic. Eventually I swam the English Channel at 39 years old. On the way to France I had a lot of time to quietly reflect upon what I wanted to do next.

A little unfinished business with a 40-mile hike was concluded nineteen months later by which time I had started watching pro wrestling again online. My wonder at the spectacle now increased by knowing what injuries feel like and having some idea what strength it takes to lift people overhead. The conditioning aspect of the sport still intrigues me. The volume of calisthenics that many of the wrestlers do is impressive. Throughout all my other activities I’ve continued to do neck bridges, and since the age of sixteen have enjoyed doing pull-ups and dips. Lately I added push-ups, leg raises and bodyweight squats (which I had largely ignored for most of my life).

Pro wrestling legend Ric Flair has spoke of doing 500 bodyweight squats and 200-250 push ups and leg raises daily for about ten years during his busiest period as NWA World Champion. Admiring his longevity & ability to take bumps into his early 60’s, I decided to see if I could get near those numbers. It hasn’t been easy.

Dan Earthquake Backyard Workout

Slow sets of five repetitions are my preference and have been my habit for nearly twenty years. I used to do these in an intense manner so as to struggle to get the fourth and fail on the fifth. This was a once a week program which fit in with an otherwise physical job and active lifestyle.

Last October I bought a copy of C-MASS, which inspired me to look at different strategies. I love that book! I decided to start as if I were a novice, using some basic strength sets multiple times a day, then do a few months of muscle building in the 15 rep range. Coach Wade posted his “Diesel 20” article in January which inspired me further to go for the 500 squats in one day.

Initially a few sets of 15 were as much as I could manage. I’d given up on my training diaries a few years ago but it was Coach Wade saying “Do it for old coach” that made me restart. I’m glad I did.  I started out by putting a set of 15 squats between other exercises and I found I could do a hundred and fifty during a session. Soon it was twenty five reps, then thirty and so on. As the reps got bigger, the sets reduced.  Some days I do five sets of a hundred. That’s not everyday–I’m not Ric Flair!

Sometimes I combine other movements using bars or benches and squat down whilst pulling on the lats as I descend. At the top I change grip and move forwards into a slow incline push up. This feels like an ideal movement to do in between sets of my favorite exercises: dips, pull-ups and push-ups.

Dan Earthquake Bodyweight Dips

Following the PCC blog is very encouraging. Recent articles of regression, simplicity, focus on the basics and the Replek concept have stimulated my imagination. Danny Kavadlo’s assertion that calisthenics is a creative discipline had me smiling and nodding in agreement.

I didn’t always realize the importance of calisthenics and in hindsight should have favored them more over the lifting in my early days. Big ambitions can distract a person from doing the right thing in many aspects of life. I’ve worked myself into a lot of dead ends. Most importantly I’ve never stopped, always finding something productive to do.

I never became a pro wrestler but I had a taste. Judo, drug-free powerlifting competitions and heats of the UK Strongest Man were as close as I ever got. I wasn’t very good at any of those things. I’m not very advanced in my calisthenics either. Rather than worry about that, however, I enjoy the experience and savor struggle.

Sometimes the small ambitions are the ones that endure to provide the most value. Impressing the judo instructor was once an ambition. I often think of Ted Spacey when I do wrestlers bridges and it always makes me smile. Two years ago I realized that my head had stopped hurting. I guess I’m finally doing enough of them now.

Dan Earthquake English Channel Swim

****

Dan Earthquake is involved in event safety and hosts winter swimming training camps for Channel Swimmers. In 2013 the Channel Swimming Association awarded him the trophy for “Greatest Feat of Endurance” for his 21hr 25 minute crossing of the English Channel.

Filed Under: Motivation and Goals, Progressive Calisthenics Tagged With: bodyweight exercise, C-Mass, calisthenics, Dan Earthquake, extremely high rep training, motivation, push-ups, squats, training

Conquering the Century Test

November 18, 2014 By Adrienne Harvey 51 Comments

Adrienne Testing Pushups At Sweden PCC
Adrienne closely observes push ups during the Century Test at a PCC Workshop

The Century Test is the climax of every Progressive Calisthenics Certification event. After three days of intense training, the Century is the only opportunity for prospective candidates to prove their mettle and earn the title of PCC Instructor.

While helping Al and Danny teach at several PCC workshops, I’ve noticed the same common issues continually come up during the Century Test. Before you think these don’t apply to you, remember I’ve actually seen many accomplished and highly athletic people make these very mistakes! Of course we make sure to point out the complete rules and standards at each workshop, but why not work to avoid these hidden perils from the beginning?

First, let’s talk about speed—you will have a total of EIGHT minutes to complete your Century Test. Somewhere along the line, a terrible rumor started about doing the test “as fast as you can.” Unfortunately, this is the opposite of how the test should be approached; the Century is not a race!

While we don’t want you to fall asleep mid-test or run out of time, we do require you to use a moderate pace that allows you to complete each rep with your best form, crisply and cleanly. We also need to be able to evaluate and count your reps in real time. If someone gets into speed demon mode, it’s very difficult to evaluate AND count each rep while making sure they are up to our standards. We shouldn’t be seeing “motion blur” around you!

Once you begin a set, you can’t stop until you have completed the required amount of reps (which will be counted by whoever is testing you—Al, Danny, or an assisting PCC instructor). For example, the first set is 40 bodyweight squats. Once that set begins, there’s no stopping until you complete all 40 reps. After a set is completed, you can take as much time (within that total of eight minutes) as you need to rest between sets—more on that later!

For many PCC attendees, an odd issue happens with the squats, but it is easily corrected. Sometimes people focus SO much on the “down” portion of the squat that they don’t always fully complete the “up” portion! Make sure you stand ALL the way UP at the end of each squat rep. Again, if this can happen to some of the most athletic and accomplished people then it can happen to anyone. If you have a training partner, ask them to keep a close eye on your full squat movement (or record a short video of yourself).

Testing Squats at the PCC

As for the lowering phase, the top of your thighs must come below parallel with the ground without any bouncing at the bottom. Some people have had issues here as well, so make sure you go all the down before you come all the way up!

Next up are push-ups, 30 reps. Men will do these from the feet, and the ladies will be doing them from the knees. (Feet must be together for men; knees together for women.) Again, be sure to come all the way up to a full lockout at the top – much like the squats, it’s easy to become preoccupied with the bottom portion of the exercise, the required depth, etc. while shortchanging the completion of the rep. Use a comfortable, moderate pace so we can see that all your reps are up to our standards.

Al Kavadlo Testing Pushups at a PCC Workshop

Many of the women who come to the PCC are super fit and have not done push-ups from the knees in a while—these same women often tend to have some very fashionable workout wear. This can be perilous when these high performance fabrics make our knees slide during the push-up. Suddenly our hands and knees are very far apart, and it’s against the rules to re-adjust them during the set. Make sure you have a non-slip mat below you, and/or hike up those shiny capris past your knees so they do not move on that mat!

Another issue that even very fit women will have with the knee push-up (especially if we’re used to doing push-ups from the feet) is the idea of keeping the body in a perfectly straight line from the knees to the shoulders, without bending at the hips. Have a training partner observe you, or shoot a video to watch and make sure for yourself. One cue I have used successfully with clients is to have them practice by starting in a “straight arm plank” position, then while keeping the trunk straight, drop down to the knees to find the proper alignment to begin a knee push-up.

Danny Testing Hanging Knee Raises

Hanging knee raises are a real equalizer! Like squats, they’re tested the same for men and women. You must not swing or use momentum to make these reps, and you must hang onto the bar for the entire duration of the set. Make sure to grip the bar tightly while squeezing your shoulders down and back (basically, don’t hang like a limp noodle!) Imagine trying to bend the bar in half to intensify this feeling. Make sure to practice this at home!

Don’t underestimate a set of 20 knee raises. Bringing your knees above your waist takes a surprising amount of abdominal strength when you don’t use any momentum. When your feet come back down (also under control), I’ve found that aiming to put them just below (or even slightly in front of) your body is a great way to prevent momentum. People have found themselves in big momentum-trouble when they’ve extended their feet behind them on the “down” portion of the knee raises, because they start swinging back and picking up momentum. It almost becomes a mini-kip. Control is the name of the game with knee raises!

Finally we have the pull-ups, which are often the most challenging (and potentially heartbreaking) part of Century Test. Sometimes someone with plenty of time to spare just wants to get the test done and he or she does not give themselves adequate rest between the hanging knee raises and the pull-ups. I’ve seen very strong (but reasonably fatigued from 3 days of fun and intensive PCC work) people fail the test at the workshop because they couldn’t finish those last 1-3 pull-ups. An extra 30 seconds to 1 minute rest time between sets could have meant the difference between passing at the PCC or having to go home, regroup, train and submit a test video. It’s moments like these that we all wish for an “undo” or “rewind” button on life! Don’t underestimate the adrenaline rush of “test time”! Remember, it is not a race; you have 8 full minutes, so use it!

For the pull-ups, men will be doing 10 dead hang pull ups from a pull up bar with their choice of underhand or overhand grip. (If the bar is too high, and/or your hands are somehow shredded because you were inspired to overdo it a bit on the previous days, do not hesitate to ask us for a step stool!) Women will be performing 10 “Aussie” pull-ups (down under the bar—also known as bodyweight rows) from a waist-height bar. Again, I can’t encourage the ladies enough to experiment with these bodyweight rows. When practicing for the PCC, find a bar that’s the right height for you, and make sure that your body is positioned in such a way that you’re able to pull yourself up to the bar without having your feet slide—experiment with a mat, or a good shoe choice, etc. Pull yourself up close to the bar at the top of each rep, stay engaged (think plank) without having your body bow up or slump down.

Adrienne Demonstrates Aussie Pull-Up

Men, make sure that you are doing full pull-up reps, as half reps won’t count and can be costly in terms of fatigue! A SLIGHT kink in the elbows at the bottom of the rep is technically allowed, but make sure to have someone check you and video yourself to make sure that you aren’t slipping into doing half-reps. And, no kipping or momentum allowed!

I hope that these details have been helpful, and please feel free to ask questions here and always at the workshop. We really do want everyone to pass if they are truly ready and able to represent the PCC as a certified instructor, while helping their students/clients improve their fitness and quality of life.

Hope to see you at a future PCC Workshop!
Adrienne

Adrienne at the PCC Workshop with Adam

***

About Adrienne Harvey, Senior PCC Instructor, RKC-II, CK-FMS, Primal Move Nat’l Instructor: Originally RKC Certified in 2010, and RKC Level 2 certified in 2011, kettlebell and bodyweight training have been crucial in Adrienne’s personal quest for fitness. A core member of the PCC team, Adrienne loves sharing her knowledge with small groups and individuals. She also loves to develop recipes and workout programs to further support performance, body composition, and of course—FUN. Go to http://www.giryagirl.com for more information about Adrienne!

Filed Under: Motivation and Goals, Progressive Calisthenics Tagged With: Adrienne Harvey, attending PCC, Aussie Pull Ups, bodyweight row, Century Test, Century Test details, Hanging knee raises, how to pass the Century Test, Knee Push ups, Passing the PCC, PCC Testing, PCC Workshop, Progressive Calisthenics Certification Workshop, pull-ups, push-ups, squats

Back to Basics: 6 Moves to Master Before Moving Forward

November 4, 2014 By Eric Buratty 35 Comments

Kavadlo Brothers Squat

Everybody wants to go straight to the advanced moves, but ain’t nobody want to make time for getting better at the basics!

Here at PCC, we get it. Your mind was just blown away from someone’s Facebook picture or YouTube video performing some sexy, ninja-like move that you want to try, too. This simply means you’ve been inspired to either try a calisthenics move (which is cool), or convert your training efforts exclusively toward calisthenics all together (even cooler).

But, like everything else people are good at in life, such graceful displays of strength, control and power require a considerable amount of time and practice to master. Not to mention the patience involved will humble anyone who might already have a strong fitness background from other disciplines (e.g., weight training, dancing and yoga).

That said, before moving on to some of the more advanced variations of calisthenics moves, EVERYONE needs to become proficient in the following basic positions.

1. Full-Depth Squat

Eric Buratty Squat

Also known as an “ass-to-grass” squat, this is a basic human resting position that involves maximal bending of your hips and knees. NO ONE has any business loading this movement pattern until they can achieve full range-of-motion with their own bodyweight, and still remain upright from a postural perspective.

Calisthenics Transition: Foundation for Progressing the Squat Chain (i.e., working up towards pistol and shrimp squat variations)
Recommended Practice: Sit in this position for 5-10 minutes daily. The more favorable times to do so are upon waking for the day, before bed, whenever on a rest day and before or after a tough workout. Feel free to shake up social conformity any time you have the opportunity to squat—especially when waiting in line or shopping out in public.

2. Supine Hollow Body

Eric Buratty Supine Hollow Position

The hollow body is the ultimate educator on the principle of whole body tension. A challenging core workout on its own, this position teaches you the principles of progression in all of calisthenics. More specifically, it allows you to feel the effect of lengthening or shortening the body as a lever for resistance, so you can adapt your training on a given day accordingly. Without understanding the principles of progression in calisthenics, you will only be setting yourself up for failure—and even injury.

Calisthenics Transition: Foundation for Precision and Control Required in Handstand, Front/Side/Back Levers
Recommended Practice: Maintain this position for a total of 2 minutes on training days involving handstands, front/back levers and human flags. Use as part of a warm-up, or superset with the aforementioned moves as active recovery during a workout (e.g., 8 sets of 15 seconds, 6 sets of 20 seconds, 4 sets of 30 seconds).

3. Hollow Body Leaning Push-Up Plank

EricBuratty Hollow Leaning Plank PushUp

By “leaning” into a standard push-up position, you’ll reach a higher level of total body tension that forces you to have greater balance and control over your body. The ability to achieve this position also serves as an excellent confidence booster for when you start experimenting with moves that involve less point(s)-of-contact with the ground.

Calisthenics Transition: Foundation for Progressing Midsection Floor Holds (e.g., N/L/V-Sits, Side Planks, Planche, Manna), Inversions and Elbow Levers
Recommended Practice: Use as part of a warm-up on workout days involving midsection floor holds, as a “finisher” on workout days involving push-ups or as active recovery on workout days involving vertical and horizontal pull-ups. Work up to holding this position for a solid 2 minutes without form breakdown.

4. Hollow Body Backbend

Eric Buratty Hollow Body Backbend

When it comes to improving overall mobility, look no further than backwards bending (AKA “bridging”). Insert “do you even backbend?” parody for “do you even lift?” here. Known for its extremely therapeutic benefits on the muscles and tendons of the entire body, you can further enhance the quality of this position by putting the lower body into as much extension as possible and concentrating on pushing the shoulders past the hands. What you’re left with is a more “hollowed” version in the basic family of bridging that opens new doors for achieving stronger three-limb holds, geckos, stand-to-stands, walkovers and eventually, arched “Mexican” handstands.

Calisthenics Transition: Foundation for Progressing Handstands
Recommended Practice: Work up to holding this position for at least a solid minute after every workout you do. Given the powerful stretch that occurs in common problem areas for Americans from performing this movement (i.e., spine, shoulders and hips), you might even want to start devoting an entire training session to bridging throughout the week.

5. Hollow Body Dead Bar Hang

Eric Buratty Dead Hang Hollow

Similar to the full-depth squat mentioned above, passive hanging is another type of human resting position. When you take the passive hang one step further and connect the scapular muscles with the rest of the body, you’re left with this active hang that’s visually appealing and graceful. This happens to be one of the best positions for activating the core, as it decompresses the entire spine and puts the shoulders into a healthy stretched position with straight arms. With consistent practice of this deceptively challenging hang, you might “accidentally” become stronger at pull-ups AND start revealing your Diamond-Cut Abs.

Calisthenics Transition: Foundation for Progressing Pull-Up Chain & Leg Raise Chain
Recommended Practice: Hang from any straight bar (or any freestanding object for that matter) that allows you to put your body into a fully extended, hollow position, and maintain the position for a total of 1-2 minutes daily. This can either be done before or after a workout to facilitate warm-ups and cool downs—or as a nice complement to an active recovery day away from your regular training.

6. Hollow Body Bar Support

Eric Buratty Hollow Bar Support

As with the other “hollow” positions above, you’re pretty much forced into a state of total body tension with the bar support—which will lead to stronger reps on any related movement you’re preparing to train. In this instance, the ability to support yourself over a bar in a straight arms, locked out, elbows forward position is definitely a good indicator that you’re ready to reach the top of the dipping chain and beyond. Who ELSE is ready to work towards their first straight-bar muscle-up?!

Calisthenics Transition: Foundation for Progressing Straight Bar Dips & Top of Dipping Chain (i.e., Muscle-Up)
Recommended Practice: Use as part of a warm-up on workout days involving the dipping chain—or as active recovery on workout days involving vertical and horizontal pull-ups. Work up to holding this position for a solid minute at a time without form breakdown.

In no particular order, there you have six positions to master before you get slammed in the face with a serious slice of humble pie.

Why do we want to emphasize these isometric positions before worrying about reps and transitions anyway?

Simply put, it’s so we know where our body is in free space and when its position changes. That way, when we reflect on those workout days where our bodies felt ginormously heavier, we might be able to identify which positions felt strong and which ones felt stronger, so we know where to improve on next time.

I’ll end with one of my favorite training-related quotes which comes from Gymnastics Coach Christopher Sommer: “Save the nonsense. Bad form simply means bad attitude. Plain and simple. It means that you did not care enough to do it right.”

To acknowledge this quote from a PCC standpoint, always focus on becoming stronger than yesterday but not as strong as tomorrow! 😉

***
Eric Buratty brings five years of experience to the DC Metro Area as a Certified Personal Trainer, Progressive Calisthenics Instructor, Nutrition Consultant and Sports Injury Specialist.
For more information about Eric, check out his website, EricBurattyFitness.com.

Filed Under: Progressive Calisthenics, Tutorial Tagged With: bodyweight exercise, bridge, calisthenics basics, calisthenics positions, Eric Buratty, foundation calisthenics, hanging hollow position, hollow position, skills training, squats, tutorial

Lower Body Calisthenics

September 9, 2014 By Corey Howard 50 Comments

Corey Howard One Arm Plank With Cast

One of the best things that happened to my training was rupturing my triceps in late May. It was devastating! Right after the injury happened, on the way to the ER my 10 year old son said, “Dad now you won’t be able to do push-ups for a long time!” He was right. After surgery it was 3 full months before I could do anything upper body related and even then that would only be light pulling movements. That being said, it was the best thing to happen to my training. I couldn’t do any upper body training, I couldn’t touch any weights, and the only thing left to train was calisthenics only for legs and abs. To most people that sounds like Hell, but to me it sounded like fun!

When you look at some of the calisthenic practitioners online, you notice they have a lean muscular athletic look, yet typically don’t carry a ton of thick lower body muscle. The week of my surgery, Dragon Door published Paul Wade’s book, C-Mass, where he shows how to add size using calisthenics. This ignited my plan. For 12 weeks I would train legs and abs twice a week using only bodyweight movements. My goal was to gain two full inches on my thighs and glutes, and at least an inch on my calves. I emailed Al Kavadlo, told him about my injury and to expect an article about my journey. Here are some things I learned over the last 12 weeks…

First, know your progressions! Paul Wade gave us all an excellent training guide in Convict Conditioning. For success, you need to know what level you’re at in the pistol squat progression, and how many reps you can do. This way, if you can only do three reps, you know to work on adding reps. Or if you’re proficient with a movement, you can pair it with an “easier” exercise to thoroughly exhaust the muscle. An example of how this worked for me was pairing sissy squats with shrimp squats, or pistol squats with split squat jumps. Over time I developed some proficiency with shrimp squats, so I did sissy squats first to make them more difficult. This exhausted my quads and cut the total number of shrimp squats I could do in half.

Corey Howard Shrimp Squat

Adding a plyo movement immediately after a high skill movement like pistols also pushed the limits of my ability. Remember, your body has no idea if you’re holding a dumbbell or simply tweaking a calisthenic movement, it just knows you’re asking it to work harder and generate more force. By pairing various squat or bridge progressions, you can really push the limits of your lower body.

Second, don’t be afraid of reps. It frustrates me when someone says, “Any more than 5 reps is cardio.” Really!!! If you want to add size, anywhere from 1-20 reps should be performed. Embrace reps. Think about bodybuilders, typically they perform 4 sets of 12 with a shorter rest period between sets. Basically they are increasing the amount of time the muscle is under tension.

Corey Howard Single Leg Bridges

So if you do 20 single leg bridges per leg, then immediately follow it up with 15 glute-ham raises you’re increasing the time under tension for your posterior chain. Things like this will create muscle growth as well as a deep soreness the next day! Don’t be afraid to push a set to failure, especially with lower body calisthenics. What’s the worst that can happen? Maybe you fall on your butt while doing pistols? If you’ve been doing your bridges it will only cushion the blow! This simple philosophy reminded me what it’s like to step off a curb and have my legs collapse!

Third, two sets will work. Why on earth do we need 4 sets of anything? For the last 12 weeks I never took a movement past 2 sets. Once you’re warmed up and locked in, fire up the grueling sets. After pushing the reps to as many as possible and doing it twice, the muscle gets the message that you need it bigger and stronger. Two working sets also gives you time for other movements, and that means you can play with some variety.

So what happened at the end of 4 weeks? I added an additional 2 inches on my thighs and glutes, and an inch on my calves. Twenty-four ab and lower body calisthenic workouts later and I have a meatier, stronger, more powerful lower body than I ever have. Keep in mind, I’m not a newbie to strength training. I’ve been working out for 22 years! After all that time, even I can add size using only calisthenics!

A side benefit from this has been the carry over. As I start with some upper body work I’m noticing that I really haven’t lost much strength, despite surgery, a cast, and upper body inactivity. If your foundation is strong, you will be strong. If anyone is interested in what I did or would like to see some of my workouts, just message me or comment below. I’d love to help. I will warn you though, none of it was easy! Fire it up!

Corey Howard added 2" to his legs after 12 weeks calisthenics only leg training

***

About Corey Howard, PCC, RKC, CK-FMS: Corey Howard strives to constantly become stronger, and to help others to achieve their fitness goals. He is the owner of Results Personal Training, and can be reached at www.resultsptonline.com or www.coreyhoward.com.

Filed Under: Motivation and Goals, Progressive Calisthenics Tagged With: C-Mass, calisthenics mass, Corey Howard, leg training, muscle mass, pistols, programming, shrimp squats, squats, training strategies

The Bodyweight Revolution

April 15, 2014 By Paul "Coach" Wade 146 Comments

Al and Danny Kavadlo
The Kavadlo brothers are the face of
the Dragon Door bodyweight revolution!

If you have been keeping track of the fitness world over the last five years, you have definitely heard the term bodyweight revolution used by writers and teachers.

Lots of folks have used this term, but few—if any—have defined it.

To me, if there is a common theme behind the modern bodyweight strength revolution, it’s this:

Cutting edge athletes and coaches are starting to break down the distinction between bodyweight training and externally-weighted methods for adding strength and muscle mass.

What does that mean?

Well, up till fairly recently, the fitness “status quo” treated bodyweight training and, say, weight-training very differently. Weight-training was done to get ya big and strong as possible. To achieve this, you were supposed to follow three basic rules:

  1. Train hard for strength and mass. (A given. No pain, no gain, bitches!)
  2. Be progressive. (The goal is always: add weight to the bar!)
  3. Focus on load, not reps. (Folks will ask: how much can you bench? Not; how many reps?)

Fairly simple, huh?

And it worked, too. For the last fifty or so years, barbells and dumbbells have been the “go-to” method for bodybuilders and strength trainers alike. Some coaches and exercise ideologists have gotten so wrapped up in the romance of the iron, that they have told us that these tools are the only way to maximize muscle and power. (This is horseshit, but you know that already, right?)

Compare this model with bodyweight training. Over the last forty-plus years, personal trainers, writers and fitness coaches have been force-feeding the world with a philosophy of bodyweight training which is built on the following three principles:

  1. Train moderately for skill or conditioning. (e.g., soccer drills, circuit training)
  2. You can’t be progressive with load. (Sure, you can add weight to pullups, but then you are weight-training, right?)
  3. Build to high reps. (How many pushups can you do?)

Notice something? The bodyweight training principles are pretty much the diametric opposite of the weight-training principles! Why? Because it was figured that there was no point in treating calisthenics like a PROPER strength and muscle discipline, coz there was no way to make the load progressive. For this reason, bodyweight training ceased to be viewed as a power and strength method. It became relegated to a “fitness” method, or for a warm-up, prior to the weights. Worse still, it was viewed as a means for “light toning”. (Puke now, ye who have the buckets readied.)

Recent conditioning icons have shattered this illusion, and are actually bringing intelligent athletes round to the notion that you can break any bodyweight exercise into progressive chunks—all the way from easy rehab work, up to the hardest strength exercises know to mankind. I’m talking about revolutionary books like Al Kavadlo’s Pushing the Limits! and Raising the Bar; Brooks Kubik’s wonderful Dinosaur Bodyweight Training; and Pavel’s breakthrough Naked Warrior.

Bodyweight can’t build total-body strength? Give me a break!
Bodyweight can’t build total-body strength?
Give me a break!

This is the idea at the very heart of the modern bodyweight revolution. If you can use external weights progressively—in hard sessions designed to build load over time—why can’t you do the same using your body’s own weight? The answer is, of course, you can. You don’t need to treat bodyweight as a gymnastics or sports skill, or as a warm-up, or as a simple endurance discipline. You can do it progressively, just like weight-training. All you need is a solid understanding of the science of bodyweight progressions. And this is why the Progressive Calisthenics Certification (PCC) organization was born, to catalog and disseminate this traditional knowledge to anyone in the fitness world who wants it.

A lot of athletes—specially those already in the bodybuilding or powerlifting world—have taken this breakdown in the barriers between regular lifting and bodyweight training approach real literally. Hell, why not apply regular lifting templates to bodyweight training? This is what many have tried to do; and in this article I’ll discuss some ways of doing it. I’ll also show you a good alternative used by my own teacher, Joe Hartigen.

The CC-Style Template

When it comes to sets and reps, I generally prefer a real simple, old school, American-style double progression. You warm up with some fairly easy exercises, then hit your major technique hard for two-to-three sets. When you hit your rep goal, you move to a tougher exercise. Don’t go to failure—always leave a little energy left in your limbs to complete an exercise safely, or in case you need to defend yourself. That’s the Convict Conditioning approach—and trust me, it works just as well for weight-training as it does for calisthenics. Many old school bodybuilders and strength athletes have used this kind of program with great success—it’s not a million miles away from the sort of training performed by old school strength marvels like Doug Hepburn, or modern-day bodybuilding champions like Dorian Yates.

Dorian Hepburn
Hepburn—like all the ultra-strong old-timers—used bodyweight training alongside his lifting. He also trained infrequently, going all-out with low sets. Sound familiar?

Popular Strength/Mass Templates

Of course, there are other rep/set formats than the CC approach. Dozens. Here’s a roll-call of a few well-known ones:

  • The 5×5 system
  • Pyramid training
  • Ladders
  • Heavy singles

All of these popular weight-training approaches can be used with bodyweight—in fact, they are being used right now. But no method is perfect, and there are problems when applying these methods.

Using singles is a good example. A heavy singles workout might consist of, say 10 sets of 1 rep, using 85% of your max. This is pretty easy to accomplish if you are working with your bench press; but it’s a lot tougher to translate it to your bodyweight pushups. For a start, how do you define “85%” of effort accurately? Which pushup progression do you select? With the bench press, you can add a tiny increment, maybe 2lbs to the bar every so often. How do you add such microscopic increments to your pushup form? How do you maintain this system, long-term with such fuzzy variables? You are kinda pissing in the wind here.

A bigger problem with most training systems is that they waste the athlete’s precious energy. A really great rule of thumb in muscle and strength work is that the degree to which your body adapts is proportionate to the stress you put it through. But what athletes constantly forget is that the muscle-building and strength stimulus is based on your best set, it’s not spread over your other sets! As I’ve said elsewhere:

Paul_Blog4To put that shit simply, if you want to get diesel, you need to do a lot of work in a single, relatively brief set. Your peak set! Trouble is, a lot of athletes are in the habit of exhausting themselves before they reach that peak set.

Bodybuilding is possibly to blame for this. Back in the seventies and eighties, it was all about “pyramiding”; you would typically warm up with 15, 12, 10 and 8 reps before knocking out a few peak sets of 6-8—then you would reverse the process. (You go up in weight, then down, hence the term “pyramid”.) The problem with this was that by the time you had done the first four sets you were too shot to do very much in your peak sets! Then you would repeat all those lighter, higher-rep sets again, just adding more volume to eat into an already overloaded recovery system.

The same problem is true of the popular “ladders” method of training. With ladders, you start with one rep—say, a pullup—then take a short break, and do two pullups. Break, then three. All the way up to your peak set, of, say, five reps. Then you take a short breather, do four reps, then break, then three, and so on down to one rep. See the problem with this? If your peak/best set here is the five rep set, you will have already done TEN reps of that exercise before you reach it! If the five reps really represent your best, then doing ten reps of the same beforehand is definitely going to adversely affect your performance in the five. In essence, ladders are a good way of doing a lot of work, but a pretty imperfect way of doing high quality sets.

5×5 is a more traditional method—it was used by Arnold’s hero, Reg Park, back in the fifties.

Big Reg Park
Bodyweight back work: Big Reg Park
rocking some behind-the-neck pullups.

Park’s method was to use two warm-up sets of five, then three sets of five with the heaviest weight you can handle for a particular exercise. Once you can hit the 3×5, you go up in weight.

It’s a simple (and pretty effective) idea. The problem—in terms of hitting one great, “peak” set—is that it makes you hold yourself back. You are inevitably (even if only subconsciously) holding yourself back from giving your all on the first hard set, in order to get the five reps on the final two sets. You need to do this, because if you really gave your all grinding out five reps on the first heavy set, you would be pretty unlikely to be able to repeat that twice. So with 5×5 you never have the motivation to really give your all and hit that one peak set.

Enter the Mentor: Joe Hartigen

One template which doesn’t contain any of these problems was taught to me in the 1980’s by my mentor, Joe Hartigen. Joe was a bona-fide calisthenics master, and although he was in his seventies when I met him, he was much more powerful than me, and remained incredibly strong in pulling movements right up to the final year of his life. Joe had forgotten more about training methods and the history of physical culture than I will ever know, and I learned virtually all the progressions in Convict Conditioning from him.

Despite the fact that Joe was an icon to me—and several others in San Quentin—we didn’t train in exactly the same way. We had different backgrounds, for one thing. I came from a “new school” calisthenics approach, one based on building up high reps in squats, sit-ups, pullups and (especially) pushups. In fact I would often return to these high-rep workouts—often ultra-endurance bodyweight work—throughout my time inside, particularly in Angola. (Think “thousand pushup days” and you got the idea.)

Joe was very much a man who favored lower, more intense, higher quality reps. He typically shook his head when he looked at my training journals, and—likewise—I must admit that when I was younger and dumber, I possibly looked down on his methods as a bit old-fashioned. Like a cool photograph, but colored in sepia. In later years, I realized he was right on the money, and although I modified my own training to better match his thinking, our workout styles were never quite the same.

The Hartigen Method

When it came to sets and reps, Joe had a pretty fixed method for working out. I’ve never heard a name for this scheme, so I’m gonna call it The Hartigen Method (although there’s no way he was the first to use it). This approach is simple to apply, allows for the use of real hard exercises, and is progressive—so I thought I’d put it out there for any ex-lifters or strength athletes looking for a new way to work with bodyweight exercises.

Here’s how it works:

1. Pick the hardest exercise you can do for 5 reps in good form.

2. Warm up, and perform a 5 rep set.

3. Rest approximately 1 minute. Shake your muscles loose as you rest.

4. Perform 4 reps of the same exercise.

5. Rest approximately 1 minute. Shake your muscles loose as you rest.

6. Perform 3 reps of the same exercise.

7. Repeat this procedure until you have performed a single rep.

That’s it! In essence, Joe picked an exercise he could do five good, strict reps with, and did 5, 4, 3, 2, 1.

It’s that simple. Joe’s theory was that if you could bust out five reps of an exercise you were working on, then after a minute’s rest, you should be able to do four reps. After another minute, you should be able to do three, and so on. Joe felt this rep scheme offered low reps for strength and muscle, but also enough reps—fifteen total—to give an athlete plenty of hard practice on an exercise, but without burning out.

Plus, using this method you can hit an exercise hard in under ten minutes. Even if you were working with four exercises in a workout (two or three would be better!) you could be done in half an hour. Joe’s method works great with weights, too—kettlebell presses and rows would be a wonderful superset, if you’re that way inclined. (5 presses, a minute’s rest, 5 rows, a minute’s rest, 4 presses, etc.) You could superset pushup and pullup exercises the same way.

Making progress
Progression couldn’t be simpler with this method. When you can do all 15 reps—that is, 5, 4, 3, 2, 1—for three workouts in a row, you move to a slightly harder version of the exercise. As with all bodyweight strength, having an extensive toolbox of progressions is key to moving forward; it’s also why the PCC Instructors’ Manual includes hundreds of progressive exercises.

There will be times you don’t get 5, 4, 3, 2, 1. You may only get 5, 3, 2, 1, 1. That’s fine, and to be embraced. When you don’t get the full 15, use these principles to move forward:

Try to add a rep (or two) next time; shoot for 5, 4, 2, 1, 1, then 5, 4, 3, 1, 1, and so on.

Whatever you get, always push yourself hard on the first set—that’s your peak set.

Adding reps on the earlier sets is more valuable than adding reps on the final sets.

Never do more reps than you are aiming for; stick with 5, 4, 3, 2, 1.

Aim to perform ALL five sets, even if those sets are very low rep; e.g., 3, 2, 1, 1, 1.

Exercises, post-set work and warm-ups

Joe often performed more exercises than I stuck to. Most people today would probably call his routine imbalanced. In particular, he loved hanging exercises, and would do all kinds of weird variations of pullups, leg raises, levers, holds and hangs. Strangely, despite being such an aficionado of hanging work, he would typically do only three exercises for the rest of his body—one-leg squats, flat one-arm pushups, and some kind of inversion; handstands, but often headstands (I rarely saw him do inverse pressing, these were typically static). I have watched Joe do bridges, and do them easily, but like the man himself, these were an exception rather than a rule.

Whatever his last exercise of the session was, Joe would often make his very final set harder by completing a ten second dynamic-tension isometric at the top position of that very last rep. He’d follow this with a slow negative of about ten seconds. He claimed that this little “trick” for finishing his workout told his body that the session was over, and increased his hormonal profile. I’m not sure that’s true, but if Joe’s physique—at over seven decades—was testament, then he knew what he was talking about.

Al Kavadlo Push-Up
No matter what exercise you finish with,
you can squeeze it at the top for an isometric benefit.

What about a warm-up? Interestingly—like Reg Park—Joe never went over five reps on his warm-up sets. He would typically do two or three warm-up sets of five reps, and he always applied Charles Atlas-style dynamic tension during his warm-ups. If he was doing an exercise like one-arm pullups, he would perform an exercise about half as tough on his warm-ups—two-arm pullups. Always five reps. Why not more? Joe felt that you should always train to meet your goals. His peak sets were always five reps, so he thought if he did more in his warm-ups, his body would get confused and start adapting to higher reps instead! I’m not certain I agree with that, but it gives you some food for thought, eh?

I often advocate using progressive exercises when warming up—maybe start with a real easy exercise for high reps, then follow with a slightly harder exercise for less reps. But Joe only ever used one exercise technique in his warm-ups, no matter how many warm-up sets he did. I used to wonder why, for example, he’d perform two sets of regular pullups before his one-arm work; why not one set of regular two-arms, then something harder, like assisted pullups? I asked him once. Because I can make the two-arms as hard as assisted pullups, dumbass! he replied. And it was true. His capacity to tense his muscles during training—dynamic tension—was so profound, he could make seemingly easy exercises as seem as hard as advanced ones. He was able to adjust the intensity of any exercise by 100% or 1%, just using the power of his mind.

That was how profound his body wisdom was. Not many athletes could aspire to this level, although it’s possible with time and patience. I still admire the man to this day!

Lights Out!

Well, that’s it from me. Thanks again for reading—it means a lot to this dopey fella that you guys and gals still take the time to read my weathered musings. I hope this article has given you a new idea to play with. Looking for a lower-rep strength and mass routine that fits well with bodyweight? Give The Hartigen Method a try…tonight!

Oh, and if you liked hearing about Joe’s attitude to training, check this article out. I wrote it for my good buddy Neil Bednar.

You could do a lot worse than modeling your training around old Joe’s philosophy. That brother was something else!

***

Paul “Coach” Wade is the author of five Convict Conditioning DVD/manual programs. Click here for more information about Paul Wade, and here for more information on Convict Conditioning DVD’s and books available for purchase from the publisher.

Filed Under: Progressive Calisthenics Tagged With: Al Kavadlo, bodyweight exercise, calisthenics, Danny Kavadlo, Kavadlo brothers, Paul Wade, PCC, PCC Workshop, Progressive Calisthenics Certification Workshop, pull-ups, push-ups, Raising the Bar, squats, strength training

ABSOLUTE BEGINNERS: 4 New Year Goals for Total Noobs

January 7, 2014 By Paul "Coach" Wade 132 Comments

 My bodyweight brothers and sisters!
My bodyweight brothers and sisters!

Welcome to the world’s finest bodyweight strength blog—and welcome to 2014! I really hope this year turns out to be something really special for all of ya.

New Year means a time for new fitness and conditioning goals—at least for a lot of folks. A brand-spankin-shiny new year is a perfect time for a fresh start…and God knows, millions of people need it. Two-thirds of Americans are overweight or obese; only 20% get regular exercise; and, horrifically, it has been estimated that less than 10% of the population can perform a full pullup. That’s only one in ten! (I think.)

Many folks are so goddam outta shape, they just have no clue how to make a start in calisthenics. So they put it off…sometimes, forever.

If that’s you—or someone you care about—then this blog is my New Year challenge for YOU. I’m often guilty of writing for experts. Why? Coz the bodyweight community is a remarkable one; it’s typified by smart, mature, knowledgeable, advanced athletes. I love you all, but this post’s not for you. It’s for the noobs.

What’s a “noob”? Well, in terms of bodyweight training:

  • If you can barely do a handful (or less) of sloppy pushups;
  • If a strict, full pullup is outta the question;
  • If a full, deep squat is impossible or feels like it’s ripping your knees apart;
  • If getting up off the couch leaves you out of breath;
  • Or if any of the above apply to you;

…then yer a noob, kid. So if you are a desperate neophyte, an interested but confused lurker, or a collapsed ex-athlete—listen up!

Four Fundamentals in Strength Calisthenics

In this post I’m going to give you FOUR basic goals to get working on. You don’t need more than that—the more goals you set, the more your willpower gets spread around ‘em, so the less likely you are to meet any of them. Research also shows that the more inconvenient New Year goals are, the less likely they are to get met. So all these exercises, and their regressions (i.e., easier versions) can be performed in a tiny space, in the comfort of your own home. You don’t need jack s*** to start today. You don’t need to buy my book. You don’t need a pullup bar. You don’t need a gym membership or new sneakers. All you need is a little courage to accept my challenge, a few minutes time, and enough space to lay down. Everybody has that much, right?

Here are the goals:

noobs_textbox1All techniques are to be executed with perfect form.

To a dedicated athlete, these four are modest goals; easy, in fact. But they are also incredibly important; the average de-conditioned American would be unable to meet these standards…amazingly, given the decline of fitness in our schools, even the average teen would struggle! So let’s get to work on these fundamentals. If these basics are beyond your reach, you stand zero hope in hell of going any further in strength or fitness. And if you really ARE new to strength training, don’t give me any of that “shouldn’t I be lifting weights?” bulls****. If you can’t do ten pushups perfectly, you got no business laying down on a bench press. Likewise, if full bodyweight squats are impossible, then perching under a loaded barbell or leg press for messy, incomplete reps is only going to wreck your knees.

Bodyweight comes first!

The Four Techniques

1. Full Squats:

Full squats generate strength in the entire lower body—quads, hamstrings, calves, glutes, shins, everything. They also build mobility in two areas that badly need it, the knees and ankles, while strengthening the lower back. To put it bluntly, they are essential, whether ya like it or not.

Full squats means all the way down until the hamstrings are resting on the calves!

You can’t do twenty full squats until you can do one full squat RIGHT. So begin by focusing on deep motion. I don’t care how weak or rusty your knees are—you can begin building motion using no weight on the knees at all. Lie on your back or shoulders, with your legs straight up, and bend your knees as fully as you can that way. (These are called shoulderstand squats.) As your mobility improves, try deep squats the right way up; use a partner or a sturdy object to help pull yourself out of the hole. Over time, use the assistance less…build to solo half-squats, and ¾ squats. Soon full squats won’t seem so tough. Once you can do your first set of 5-10 full squats, just add a perfect rep every so often. You’ll hit twenty reps real soon.

2. Full Pushups

Keep your back and legs straight and aligned—you’ll get all the benefits of planks, but without the boredom!

Hey, ten pushups is easy right? Everyone can do that, right?

Wrong.

Most people—even coaches who should know better—do them wrong. If you do them the right way—my way—they are tough as hell. For a start, most folks rush their pushups. I want you to eliminate ALL momentum (if momentum is doing the work, your muscles aren’t, right?). I want you to take two seconds up, two seconds down, with a moment’s pause at the bottom position. Secondly, you need to go deep—go down until your sternum is a fist’s width from the floor: no less. (Use books or an object like a softball to guide you, at first.) Third, don’t bounce! When you descend so that your sternum touches your books, it should touch them as lightly as you would kiss a baby on the forehead. This technique (“kiss-the-baby”) is murder, forcing you to control your body FULLY. What else is strength, but control?

Doing pushups this way makes them brutal and incredibly productive as an exercise. If they are too hard for ya, begin doing them on an incline, or even against a wall. Once you find a pushup technique you can perform five reps in, add a rep every workout or two until you can do ten, then make things harder.

3. Leg Raises

Forget what you have probably been told about working “abs”…isolating the muscles, tensing, and performing lots of sets of teeny crunches or machine exercises. Real, functional strength—from hanging on a bar to picking up a fridge—requires not just strong abdominals, but an iron “anterior chain”—that means your hips, abs, intercostals, serratus, obliques and even the deep muscles of the quads. For strengthening your anterior chain perfectly, God gave you a gift—leg raises!

Isolation is for hermits, kid.

As usual, begin easy. Start with lying knee raises; build to twenty reps. Then extend the legs a little. Then you can try one–leg leg raises, with the knees locked. Pretty soon, twenty strict leg raises will be within reach, and your abs will be harder than those pathetic crunches could have ever got ‘em. Damn, you’ll be doing these suckers hanging in no time. Six-pack from Hell, here we come…

4. Straight Bridge

The straight bridge is a wonderful exercise for noobs to aspire to master. Whereas leg raises work the entire anterior chain—the muscles at the front of the bod—the straight bridge works the posterior chain. It builds the spinal erectors, reduces low back pain, bulletproofs the spine, trains the hamstrings, and helps heal bad knees. Because the arms are pushing behind the body, this type of bridge also strengthens the “lats” of the back, and the muscles around the shoulder blades—an awesome benefit for those who don’t have a pullup bar. Straight bridges also give ya triceps of steel kid—no more kickbacks necessary.

Once again, alignment is what’s up.  Athletes make the straight-body position look easy. It ain’t.
Once again, alignment is what’s up. Athletes make the straight-body position look easy. It ain’t.

Normally I wouldn’t advise beginners to perform bridges—I think the time and energy is better spent on pulling work, typically on a low horizontal bar. That said, if you don’t have access to a bar, straight bridges can be a good way to work the back muscles.

Bridging can be demanding—so start easy. Commence with short bridges (with the shoulders on the floor), then move to table bridges (straight bridges, but with the knees bent). When ten seconds of perfectly aligned form is easy, start adding seconds—build to 20 seconds, then move to something harder. If straight bridges are too easy, try them with one leg lifted off the floor. That will teach you what your hamstrings were made for.

How to Train for these Goals

How do you go about training to achieve these goals? For a start, if you are de-conditioned, you need to get an okay from a doc before you start training hard (that’s the legal s*** outta the way). When you start, start slow. This is absolutely key—never throw yourself full tilt into a new training program. Start with exercises that are about half your full ability, and add work s-l-o-w-ly—a rep here, better form there, a harder exercise somewhere else. This approach will allow your joints and soft tissues time to adapt and get stronger, preventing joint pain. (Joints adapt to stress slower than muscles.)

As a noob, you really need to keep your programming easy and simple at first. I advise performing two exercises per session, with a day off in-between. Warm up with a gentle, ten minute walk, and perform one set of a lighter version of each exercise you are doing, also as a warm up. (For example, if you are doing incline pushups, warm up with wall pushups; if you are doing flat pushups, warm up with incline pushups. Got it?) After the warm up, perform two hard “work” sets of each exercise. Don’t go til failure, keep your form as perfect as possible, and rest between sets long enough to get most of your strength back. Such a program would look like this:

noobs_textbox2If you get sore, or stop making progress, add more rest days. If this seems easy, reduce rest days—but only if you keep making progress. If this seems like way too little, or you get fitter real fast, try the exercises all together:

noobs_textbox3Take a day off in between workouts, or more if you need to. Some will say this is not enough work. It is. Trust me, if your numbers are going up, if you are making progress weekly, you are doing better than 95% of those suckers with expensive gym memberships. More detailed programming info is included in Convict Conditioning. For motivation and to keep ya on the straight and narrow, try to write down your training sessions in a logbook, ‘kay?

I’m too fat for bodyweight workouts!

No, you aren’t. Obese would-be ninjas need bodyweight training as much or more than slimmer folks—they just need to start with easier exercises.

I’m going to tell ya a well-known “secret” now…calisthenics and weight-loss go together like love and marriage. Once your body recognizes it is regularly struggling to heft its own weight up and down, the subconscious mind kicks in and will help you shed those useless pounds. I’ve seen this happen hundreds of times, and it will work for you too if you give it a chance.

Yes, nutrition will play a role, of course. You gotta start dealing with your weight at the same time you start bodyweight training: it’s no goddam use saying; “I’ll work out when I get to such-and-such a weight”, or; “I’ll start eating right when my training gets off the ground”. Start training AND eating well right now.

The Next Step: Moving to Intermediate Level

Okay. Let’s say you have worked for a few weeks—or months—to meet these fundamental requirements. Congrats, kid! You did it. You are now stronger and more mobile than the average American! Well done.

Whazzat…? You feel better? You have added muscle, and firmed up? You are hungry for MORE? You want to know how to take the next step, and work towards becoming an intermediate bodyweight athlete?!

Now your arms, back, waist and legs are stronger, you’re qualified to begin studying at the ultimate bodyweight training college—the School of the Bar! You gotta get hanging. This article is too short to discuss bar training and techniques. Luckily, Al Kavadlo has got you covered. With John Du Cane, Al has put out the super-acclaimed Raising the Bar…the master text-book of hanging training techniques.

noob_RTB
Despite what you might think, I’m not a Dragon Door “affiliate” or any of that crap, and I don’t get paid one cent for promoting Al’s book.  It’s just too damn good not to mention. Raising the Bar includes every bar calisthenics technique under the sun—from Australian pullups and archer pullups, to muscle-ups and Korean dips, plus bonus floor training and pressing methods. Best of all, Al’s system is designed for bar athletes of all capabilities; whether you can do a hundred pullups, or if you can barely hang on to the bar, this book will get you stronger, safely.

Anyhow, I hope that gives some of you new fish some food for thought. You know somebody who needs to get started training? Be a true friend and email them a link to this post TODAY, so we can start helping them as soon as possible.

***

Got questions? Just holler at me in the comments, and I’ll do what I can to answer ya. Any experienced athletes who have advice for noobs (we are ALL ex-noobs, remember!), I’d also love to hear what you got to say, so please make a comment.

I need you all to step up this year—bodyweight is rapidly becoming the biggest movement in fitness, and I need you hidden geniuses out there to support us, and help tip it over the edge. I want lotsa ideas, questions, tips and feedback. So get typing, Jack!

***

Paul “Coach” Wade is the author of five Convict Conditioning DVD/manual programs. Click here for more information about Paul Wade, and here for more information on Convict Conditioning DVD’s and books available for purchase from the publisher.

Filed Under: Motivation and Goals Tagged With: beginner, beginner goals, bridge, bridging, calisthenics, Convict Conditioning, fitness, how to start, leg raises, Paul Wade, push-ups, squats, straight bridge

The Week of a Thousand Push-ups

December 10, 2013 By Danny Kavadlo 23 Comments

dannykavadlo_air2

As 2013 winds down and I reflect on the days and months behind me, I find that it’s impossible for me to go a moment without mentally celebrating the launch of the Progressive Calisthenics Certification. From the United States to Sweden (and soon to Australia, Ireland and more), the energy and talent that fills these rooms is simply magnificent. It is almost becoming a common occurrence to witness amazing feats, such as a first ever muscle-up, back lever, or pistol squat. As mind-boggling as that seems, these spectacular displays of strength, balance, and sheer training ethic are becoming what could almost be considered “normal.”

But it isn’t. Not to most.

Danny.Kavadlo.1

The truth is that in the world of commercial fitness, these feats are about as far out as it comes. With machines comprised of shining stacks on sliding tracks have become the standard, our simplicity is bold like a ruby in a pile of rocks. We stand proud, defiantly deviating from product-based workouts encouraged by the man. Given the tightness of the calisthenics community, it is sometimes easy to forget how far we fall from the mainstream. We’re not looking for 7-minute abs and 21 day transformations. We seek something more. We are on the outskirts of physical culture, the edge of the norm. Dammit, we are the freaks and geeks of fitness!

Danny.Kavadlo.2

So, what does that have to do with the Week of a Thousand Push-ups? Well, quite a bit. Even though the noble push-up is one of the most popular—and best—upper body exercise of all time, like the room full of Personal Records at the PCC events, the thought of doing nothing but a thousand push-ups for a week would blow most people’s minds. But that is exactly what my personal training client Mike did recently. As you know by now, we are definitely not “most people.”

Mike’s Story

Mike was going out of town for a week and planned on continuing his training even though we would not be meeting. We have trained twice a week for years and he is serious. On this particular business trip, his time was limited and he was going to be without a gym, bicycle, or pull-up bar. Although my personal clients know better than to make excuses, they are sometimes uncertain of what to do without me. I am often asked some version of “what should I do while I’m out of town?”, to which I generally reply: “Keep it basic–squat, push-up, pull-up.”

But this time Mike already had an idea in mind… and it was more basic and brilliant than I could have imagined!

“The week of a thousand push-ups,” he said.

The way it came out of his mouth, I thought it was a movie title: Simple. Concise. Even catchy.

Mike had it figured like this. There are seven days in the week, therefor an average of over 143 per day would put him at a numeric advantage. He intended to keep his plan as simple as possible, doing his first set to failure every day, then doing recurring sets throughout the day until he surpassed his daily goal 143.

Danny.Kavadlo.3

Though it’s nice to start with a plan, like many activities in life, it’s often best to improvise. As I would have done under the same circumstances, Mike changed his intended plan throughout the week. Some days, he did indeed go til failure on his first set; others, he did multiple sets of twenty or thirty throughout the day. There were days of over 300 push-ups before noon. There were also days where he barely met his goal. There are many ways to skin a cat.

Needless, to say, my man Big Mike wound up doing way over the thousand push-ups he planned on! (The next time I saw him, we trained legs.)

Keepin’ It Real

Prior to his week of a thousand push-ups, Mike informed me that to “keep an even playing field’” he would be doing only push-ups of the classic variety—feet together, two handed, no incline. He explained that this method would eliminate the temptation to switch to easier variations if his goal of 1,000 proved too challenging. I respect his decision. The classic push-up is honest, strong and true. It’s a classic for a reason.

However, there’s also something to be said mixing it up, in push-ups and life.

Danny.Kavadlo.4

Mix-Master Mania

Any one who truly knows me is well aware of my passion for the push-up in all of its wonderful forms. From the fragility of knee push-ups, to the muscular methods of plyos, to me, every single type of push-up has an art and beauty intrinsic to it that makes it stand on its own.

We already discussed some training techniques and methods (Divide evenly, go until failure, multiple daily sets), but what about different kinds of push-ups?

Although some push-up varieties are more challenging than others, it can be fun to do a thousand push-ups of several variations. Have fun and be creative. Mix it up! Here are just a few of my favorites:

Danny.Kavadlo.5

The narrow grip push-up, shown here, places more emphasis on the arms.

Danny.Kavadlo.6

The wide push-up is also a great variation and is a precursor to archer push-up.

Danny.Kavadlo.7

Doing push-ups on your fists places a unique challenge on your hands, and extends the range of motion of your push-ups.

Danny.Kavadlo.8

Get creative. Employing inclines is an excellent way to step up your game. Combine this method with different grips (like fingertips) for an added challenge. Have fun with it. The sky’s the limit!

As with the Week of a Thousand Push-ups, Mike and I have continued to keep our training exciting and, of course, effective. That’s what it’s all about. As is often the case, the client inspired me!

***

Danny Kavadlo is one of the world’s most established and respected personal trainers. He is a Master Instructor of Progressive Calisthenics and the author of Everybody Needs Training: Proven Success Secrets for the Professional Fitness Trainer. A true in-person experience, Danny is known globally as a motivator and leader in the body-weight community. Learn more about Danny at: www.DannyTheTrainer.com.


Filed Under: Motivation and Goals Tagged With: calisthenics, Danny Kavadlo, feats of strength, freaks and geeks of fitness, goals, personal record, personal trainer, physical culture, PR, pull-ups, push-up progressions, push-up variations, push-ups, squats

Al Kavadlo on Progressive Calisthenics

January 21, 2013 By Al Kavadlo 58 Comments

(includes excerpts from Pushing The Limits)


All types of strength training operate under the same principle of progressive overload. Regardless of modality, the way one grows stronger is to begin learning a movement pattern with a relatively low amount of resistance and gradually add more as the body adapts.

In barbell or kettlebell training, exercises can be learned with a light weight to get a feel for proper technique before progressing to heavier poundages. This allows the lifter to learn the form without having to overcome much resistance. Due to the nature of bodyweight training, however, progress must be approached a bit differently.

A key principle of progressive calisthenics is manipulating leverage to vary the intensity of bodyweight exercises. Since there is no way to do a one arm push-up, pistol squat or one arm pull-up without a significant amount of resistance, we instead must practice variations in which the body is positioned in such a way as to create less resistance. As you grow stronger, harder variations can gradually be introduced.

In the videos below, you’ll see me demonstrating progressive calisthenics chains that can be used to increase one’s strength over time. I’ve done one video for each of what I consider to be the three most essential movement patterns: push-ups, squats and pull-ups. Though these clips go by quickly, a beginner should expect to put in a few solid years of training to advance from the variations at the start of each clip to the master steps shown at the end.

—
www.AlKavadlo.com

A veteran of the fitness industry, Al Kavadlo has recently been appointed as the lead instructor for the Progressive Calisthenics Certification. Recognized worldwide for his amazing bodyweight feats of strength as well as his unique coaching style, Al is also the author of three books, including Raising The Bar: The Definitive Guide to Pull-up Bar Calisthenics and the soon-to-be-released Pushing The Limits! Total Body Strength With No Equipment.

Filed Under: Progressive Calisthenics Tagged With: Al Kavadlo, calisthenics, progressive calisthenics, pull-ups, push-ups, squats

Primary Sidebar

Featured Products

previous arrow
GetStrongBookCover
ConvictConditioningBookCover
StreetWorkoutBookCover
ExplosiveCalisthenicsBookCover
StrengthRulesBookCover
next arrow

Categories

Progressive Calisthenics Certification Logo
Click here for more information or to register for the PCC workshop

Get Strong Workouts TriadXP App
Get Strong Workouts App

Recent Posts

  • Top 5 Reasons Why an In-Person Workshop is the Best Way to Supercharge Your Training
  • HYBRID STRENGTH TRAINING IS HERE!
  • My Calisthenics Journey to the PCC
  • The Handstand Press: Complete Control Through the Handstand
  • The Get Strong App is Here!

Dragon Door Publications

Dragon Door Publications

Recent Comments

  • bross dandon on The Case for Curved Handstands
  • Johnny Flewellen Jr. on Strength for Life
  • Dan Earthquake on The Pursuit of the Daily Minimum
  • Johnny Flewellen Jr. on The Pursuit of the Daily Minimum
  • Johnny Flewellen Jr. on Yoga, Calisthenics and the Journey of a Lifetime
FOLLOW US ON TWITTER!

Copyright © 2025

Dragon Door Publications / The author(s) and publisher of this material are not responsible in any manner whatsoever for any injury that may occur through following the instructions or opinions contained in this material. The activities, physical and otherwise, described herein for informational purposes only, may be too strenuous or dangerous for some people, and the reader(s) should consult a physician before engaging in them.