• Skip to main content
  • Skip to primary sidebar
  • Home
  • Contributors
  • Resources
    • Q&A with Paul “Coach” Wade
  • Workshops
  • Products
  • Forums
  • Articles
  • Blogs
    • RKC Blog
    • Strong Medicine Blog
  • Archives

PCC Blog

Progressive Calisthenics - The Official Blog for the PCC Community

yoga

Three Easy Stretches to Improve Your Calisthenics Practice

December 22, 2015 By Al Kavadlo 14 Comments

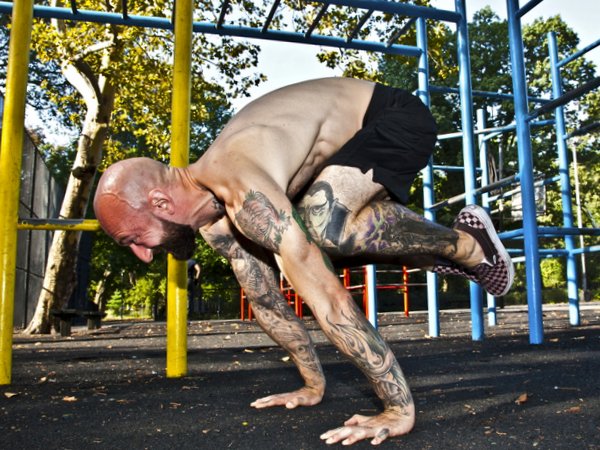
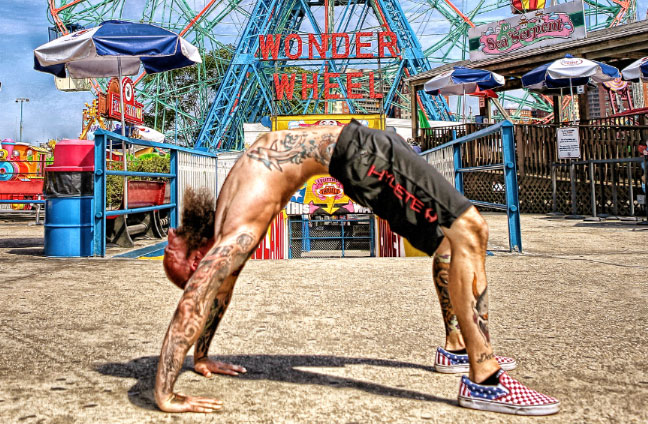
Wonder Wheel Bridge Al Kavaldo

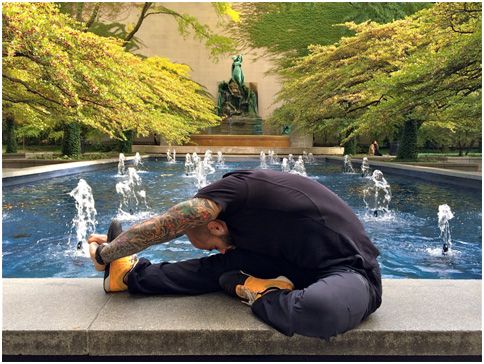
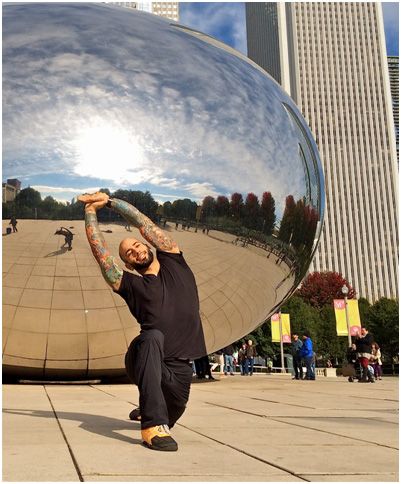
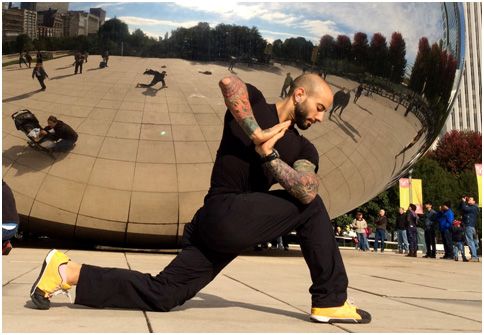
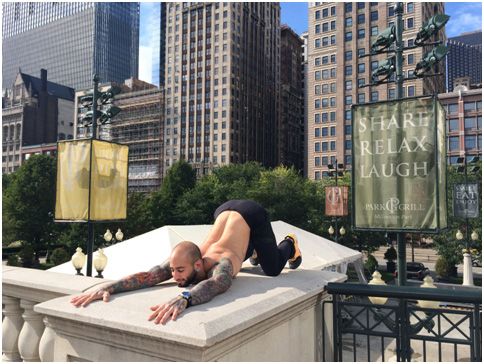
Anyone who’s practiced calisthenics long enough knows firsthand that mobility is a crucial component of bodyweight exercise. Calisthenics staples like L-sits, back bridges and pistol squats all demand a high degree of flexibility, but even less obvious exercises like pull-ups and handstands require mobility as well.

While practicing those moves in and of themselves can help you improve your range of motion, supplemental stretching can elevate your calisthenics game to the next level.

Here are three simple stretches that you can practice daily to improve your overall mobility. Just try to hold each pose a few times a day while you take several deep, slow breaths. There’s no need to set a timer or be too dogmatic about it.

Speaking of dogs…

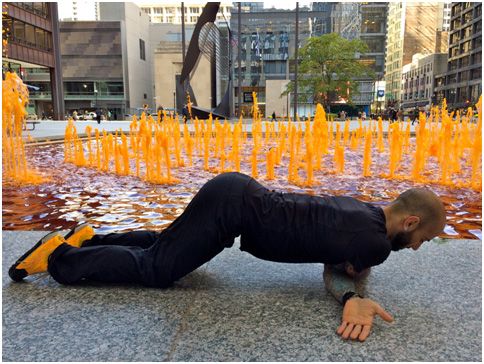
Updog

What’s up, dog?

For starters, it’s a great way to prep your spine for bridge work. It also opens your hip flexors, warms up your triceps and provides a good stretch for your abdomen.

Begin in a push-up position, then drop your hips toward the ground, lift your chest and look up. Be careful not to let your shoulders shrug up by your ears. Think about pulling down and back through your shoulder blades like you would during a pull-up. Press your hands into the ground, lock your elbows and gently contract your quads to prevent your legs from dragging on the ground.
Al Kavadlo Up Dog

Downward Dog

Downward Dog is a helpful stretch for building flexibility in the entire posterior chain as well as opening the shoulders. It will loosen your hamstrings for L-sits and pistol squats, plus it can improve your handstand as well.

Begin on your hands and knees with your toes curled under your heels, then slowly lift your hips into the air while pressing your chest toward your thighs. Try to keep your back as flat as possible while pressing your hands into the ground and reaching your hips into the air. Do your best to maintain straight arms and legs, though it’s okay to allow your knees to bend and/or let your heels come off the floor. In time, work toward fully extending your legs and pressing your feet flat. People with tight calves may find it helpful to bend one knee while straightening the other, alternating sides.
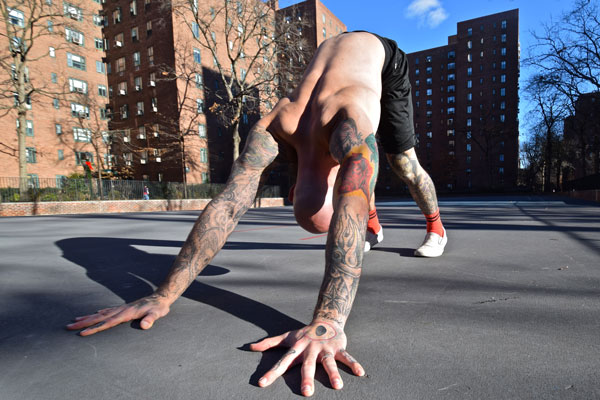
Al Kavadlo downward dog

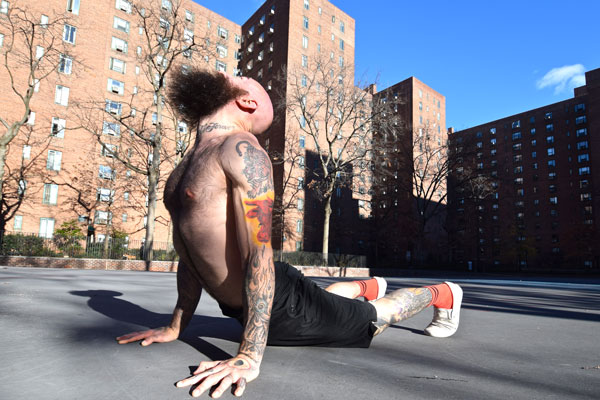
Seated Twist

A powerful stretch for the hips and spine, the seated twist is also one of Coach Wade’s three favorite stretches, as noted in Convict Conditioning 2. The full expression of the exercise, which involves binding the hands, is also a great stretch for the shoulders. Seated twists are helpful for any calisthenics move that requires rotation, such as the side crow or dragon pistol squat.

Sit on the ground with both legs extended straight in front of you. Now bend your right leg and cross it over the left, placing your right foot flat on the floor. Twist your trunk and reach your left arm out in front of your right knee. Your right hand should be placed palm down on the floor a few inches behind your back as you twist and look over your right shoulder. From here you can bend your left leg as well, tucking the foot beneath your opposite hip. For an added stretch, reach your right hand behind your back while threading your left hand through the opening beneath your right knee, bringing your hands into a bind (or gripping a cloth between the hands if a bind is not yet attainable). Make sure to repeat the stretch on both sides.
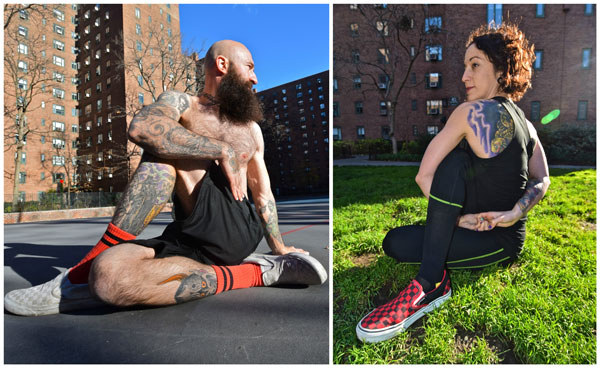
Seated Twists

I encourage you to use these stretches to warm up at the start of your calisthenics practice and/or to cool down at the end. The more time you spend in each pose, the better they should start to feel. Also feel free to practice throughout the day any time you feel stiff.

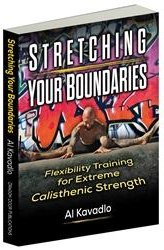
To find out more about stretching to improve your calisthenics practice, check out my book Stretching Your Boundaries – Flexibility Training for Extreme Calisthenic Strength.

Pic5StretchingYourBoundariesBookCover

****

Al Kavadlo is the lead instructor for Dragon Door’s Progressive Calisthenics Certification. Recognized worldwide for his amazing bodyweight feats of strength as well as his unique coaching style, Al is the author of five books, including Raising The Bar: The Definitive Guide to Pull-up Bar Calisthenics and Pushing The Limits! Total Body Strength With No Equipment. Read more about Al on his website:www.AlKavadlo.com.
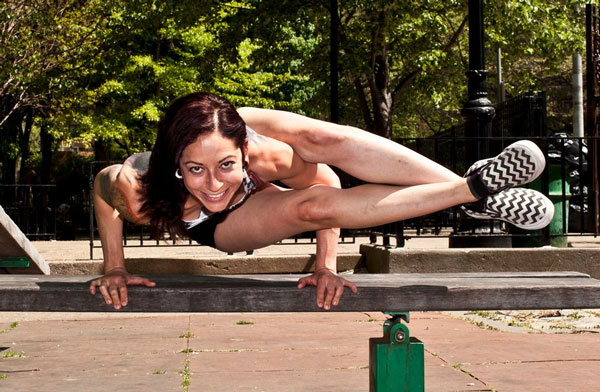
Filed Under: Flexibility, Tutorial Tagged With: Al Kavadlo, breathing, calisthenics, downward dog, flexibility, mobility, PCC, progressive calisthenics, seated twist, Stretching Your Boundaries, twist, updog, yoga

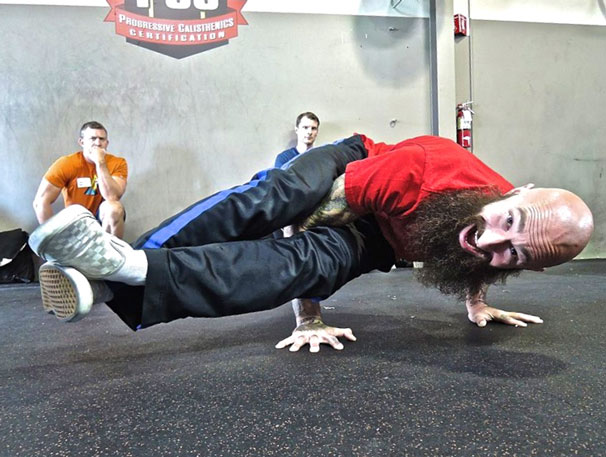
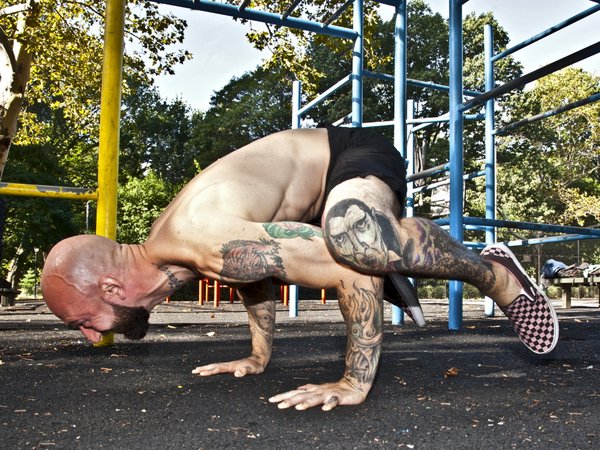
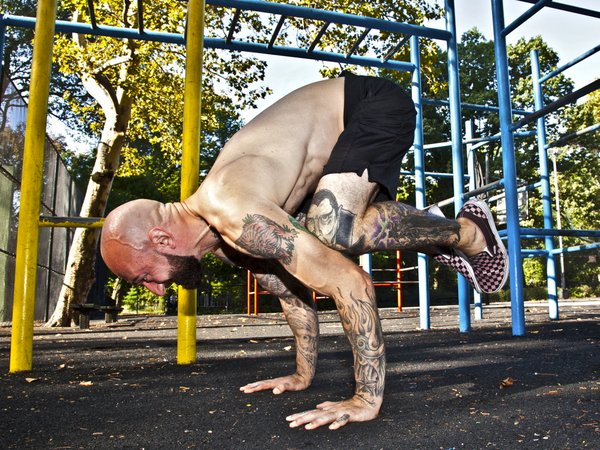
Side Crow and Crooks Pose

November 3, 2015 By Grace Kavadlo 19 Comments

GraceYogaLead-Pic

The world of hand balancing encompasses much more than just the traditional handstand. Moves like the side crow and crooks pose are excellent additions to your Progressive Calisthenics routine. These hand balancing skills cultivate synergy in the body between the upper and lower extremities and help foster improved body awareness. Although they may seem like just a party trick, they are actually a great way to build strength throughout your entire body, especially in areas like our hands, wrists and fingers, which are often overlooked in strength training. They can also be a great way to work on mobility.

Beyond the physical benefits, adding hand balancing to your regimen can be a wonderful way to hone your powers of concentration. We live in a culture where people drown out the sounds of their own breathing during training with iPods and other distractions. Learning the crooks pose requires you to be completely present and focused. This practice of mindfulness and attention can really extend into every aspect of our lives and allow us to learn to live fully in every moment.

Is this dude even working out?

The side crow and crooks pose are eye-catching exercises that will challenge your mental fortitude, physical strength and flexibility. These moves are a beautiful expression of what it means to be mobile, strong, and healthy! Before you attempt either of one, however, you should have a solid grasp on the basic crow pose. If you need to work on getting into your crow, check out my tutorial here.

Once you have gotten comfortable in the crow pose, we can continue using the system of progressive calisthenics to systematically break down these more advanced variations and help you along the journey.

GraceYoga3

Let’s Get Twisted
Since both the side crow and crooks pose involve intense trunk rotation, we will start off with a stretch to prep the lateral sides of your body. Sit on the ground with your left leg extended and cross your right leg over. Begin to twist your entire torso to the right side, placing your right hand on the ground behind you to help extend your spine upwards. Place your left elbow outside your right knee to actively push your body deeper into the twist. You should feel this stretch around your lower back, sides and midsection. Repeat on both sides.

Al Kavadlo Side Crow

The Side Crow
For many people, the side crow will be a helpful lead-up step before attempting crooks pose. Start in a squat position, then twist to one side and place your arms on the outside of one leg with your hands on the ground. Similar to crow pose, your elbows should bend back toward your legs, except this time making contact with only one leg and at two points: near your knee and the other by your hip. Lift your hips up and shift all your weight onto your hands, with your knees stacked together.

If you do not have the mobility to do the above variation, you will start by placing your hands further apart and only use one elbow as a contact point. Try to line up your elbow mid-thigh, before lifting your hips and shifting your weight onto your hand. Make sure to practice the balance on both sides!

Bow & Arrow Stretch
After you’ve conquered the side crow, you are ready for the crooks pose. Once again, we will start off with a preparatory stretch. Begin in a seated position with both legs extended. With your right hand reach for the toes of your right foot and pull your leg back, bending your knee. Wrap your leg around your shoulder and resist the urge to round your spine forward by propping yourself up with your left hand. Breathe easy and hold the position for 30 seconds before repeating on the opposite side.

GraceYoga5

Floating Bow & Arrow
This move is similar to an L-Sit in that it requires monster wrist, triceps and core strength to perform. Begin by getting into your bow and arrow stretch, but place both hands on the ground at your sides. Tense your abs and lock out your elbows to lift your butt off the ground. Actively point your toes and lean slightly forward in order to stay afloat.

Crooks Pose
Now it’s time to put it all together! From the floating bow and arrow, cross your ankles, bend your elbows and lean forward. Extend your legs to the side where you threaded your leg through and squeeze your knees together to create tension throughout the entire body.

AlYoga6

Often our own minds create a blockage as a way to shield us from the unknown. Practicing hand balancing gives you the opportunity to move past some of these self-imposed limitations. As Bruce Lee once said: “If you always put limits on everything you do, physical or anything else. It will spread into your work and into your life. There are no limits. There are only plateaus, and you must not stay there, you must go beyond them.”

Thanks for joining me on this journey into hand-balancing. Til next time, peace, love and ninja kicks!

***

Grace Kavadlo, PCC, HKC is a personal trainer and group exercise instructor located in New York City. She is a columnist for Bodybuilding.com and can be seen in several Dragon Door books, including Coach Wade’s Explosive Calisthenics. For more information about Grace, check out her website, www.DieselGrace.com

Filed Under: Tutorial Tagged With: crooks pose, Grace Kavadlo, hand balancing, side crow, yoga

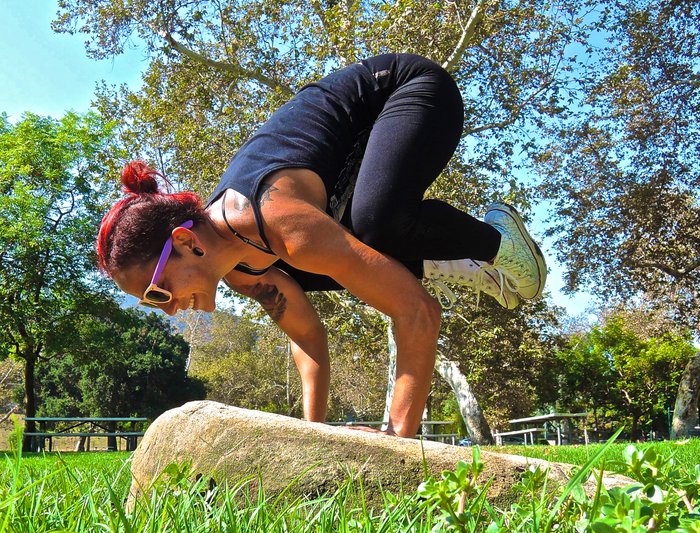
Crow Pose and Beyond

April 14, 2015 By Grace Kavadlo 28 Comments

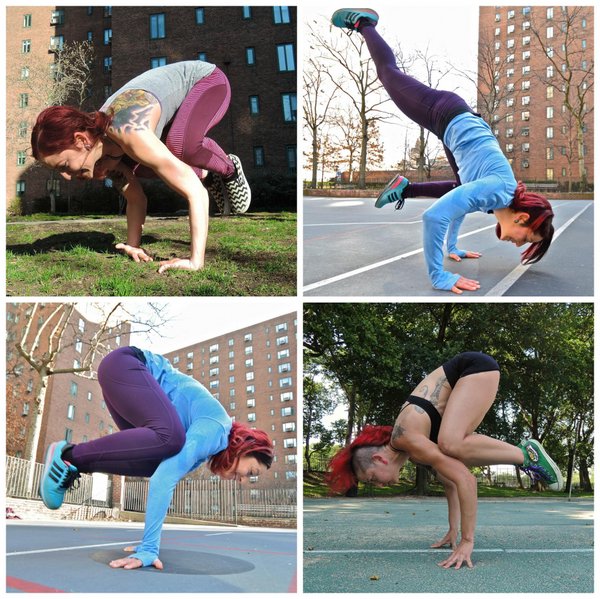
Grace Menendez Crow
Before I ever considered becoming a personal trainer, one of my earliest fitness breakthroughs was the first time I achieved a crow pose in yoga class. It blew my mind! Before then I had assumed hand balancing was reserved for gymnasts and acrobats. As far as I was concerned, it was not appropriate for me and my fitness goals. Man, was I wrong! After that yoga class, I felt inspired to improve my crow practice and learn more about the world of hand balancing.

Adding this powerful pose to your routine has more benefits than just showing-off. Crow pose strengthens your entire upper body, including your shoulders, arms, and even your abs. It can be a great way to train your brain, too!  If you have ever attempted to hold a crow pose for even a few seconds, you can attest to how much focus and concentration is involved in the process.

Crow-gressive Calisthenics
Like all bodyweight skills, you can vary the intensity of the crow pose in several ways to make the move more accessible to beginners, or challenge even the most advanced hand balancers.

Though the general idea remains the same – using the backs of your arms to support your lower body while you balance on your hands – there are a lot of subtleties that are often overlooked when learning how to perform the crow pose.

Before you begin, I suggest doing a few wrist rolls as well as opening and closing your hands and fingers as a warm-up. Placing your entire body weight on the smaller muscles of the wrists and hands can be pretty intense. Ease into your practice, listen to your body, and let’s have fun with the crow pose!

Froggy Bottom
The earliest progression toward the crow is what is sometimes known as a frog stand. Start in a deep squat position and place your hands on the floor in front of your feet. Your arms should be inside your legs with elbows pressing into your inner thighs. Keep your hand placement fairly wide when starting out.

From here, begin to bend your elbows to around 90 degrees as you tip forward, lifting your feet off the ground. You can also ease into it by lifting one foot off the floor at a time. Focus on keeping your chest lifted and squeezing your thighs into your arms as you attempt to balance. The more contact you have between your arms and legs, the easier it will be to balance. Think about looking in front of your hands rather than in between them. It can also be helpful to place a pillow or mat in front of your hands in case you are afraid of falling.

If you are finding it difficult to lift off, I suggest elevating your feet on a low platform with your hands on the ground to allow more clearance. I’ve also coached people into finding the balance by starting from a tripod position with their head on the floor and pushing off the mat back into frog stand.

Al Kavadlo Frog Stand

Crow Up
Once you’ve got the hang of the beginner version, you can try placing your hands in a narrower position to begin working toward minimizing the contact between your arms and legs. For this variation, which we can call a full crow, only your knees will be on the backs of your arms, instead of your inner thighs. You should also start working toward reducing the amount of flexion at your elbows. Point your toes and squeeze your thighs together to help generate enough muscle tension to allow you to balance. Remember to keep your eyes focused on a spot a few inches ahead of your hands to help you counter-balance.

Al Kavadlo Crow

Let It Crane
The next step in the series is what’s sometimes known as the crane pose. This variation may take a while to build up to as it requires serious strength, intense focus and extreme wrist flexibility. However, if you’ve been “milking” the earlier steps, you will eventually conquer this pose. For the crane variation, there is little bend at all in the arms, and the knees are placed further up the backs of the triceps, until they are practically in the armpits.

Start in the same squat position as before, only this time your arms will be locked. Stand on your toes and lift your hips high as you lean forward, bending your knees in towards your armpits (or as high as you can place them on the backs of your arms). Point your toes in towards each other as you tense your midsection and attempt to balance. Keep your gaze a few inches inches in front of your hands and lift your heels toward your butt. Focus on utilizing your abdominal strength to keep your hips nice and high.

AlKavadlo Crane Stand

And Beyond…
The above variations will give you plenty to practice in order to tighten up your hand-balancing game. However, there are still more progressions that you can work on to make even the advanced crane seem tame. You can practice the crow on your fingertips, with your hands reversed, or even on the backs of your hands! You can also work on single-leg variations. No matter where you fall in the crow continuum, you can always find a variant that will challenge and excite you.

Grace Menendez Crow Variations

****

Grace Kavadlo, PCC, HKC is a personal trainer and group exercise instructor located in New York City. She is a columnist for Bodybuilding.com and can be seen in several Dragon Door books, including Coach Wade’s Explosive Calisthenics. For more information about Grace, check out her website, www.DieselGrace.com

Filed Under: Tutorial Tagged With: calisthenics, crow pose, crow progressions, crow stand, Grace Menendez, tutorial, yoga

How to Put the “Active” in Active Rest

December 23, 2014 By Adrienne Harvey 14 Comments

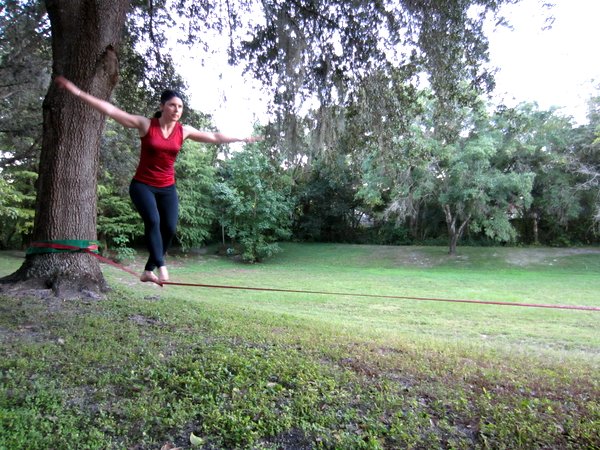
Adrienne Harvey Active Rest Slackline

“Active Rest” is a phrase that we hear and say a whole lot without really thinking about it too much. On one hand the concept is extremely simple, a light workout day to speed recovery from a recent, more strenuous effort. But, some of us tend to over-complicate the issue and end up with a dauntingly over-engineered workout on what should be an opportunity for fun, meaningful practice, and optimized recovery.

Why not just be a couch potato?

It can be extremely tempting to just completely take some time off. And sometimes that’s necessary in cases of injury or really overdoing it in a workout. I’ve long held the belief that it’s better to err on the side of caution. Push and challenge yourself of course, but part of the learning process with the progressions in Convict Conditioning and the PCC is the self-knowledge that comes along with it. While coordination and proprioception are obvious mental “gains”, the value of learning your limits, and watching them change/improve should not be underestimated.

In our “gotta have it now” instant gratification culture, it’s sometimes difficult for those of us who are highly motivated to see the value in rest. More is always better, right? Not always! As I mentioned in a previous PCC Blog post about programming other modalities and interests with Convict Conditioning/PCC, Paul Wade’s routines like “Good Behavior” and “Veterano” (both outlined in the original Convict Conditioning book) provide plenty of rest and recovery time—as well as enough time to factor in a serious interest in sports, martial arts, etc.

How do you know that you’re not getting enough recovery time? Most people first notice when they’ve hit a plateau in their progress. While plateaus can result from many things (sometimes even psychological reasons!), it is easy enough to introduce more rest or active rest to your overall plan. Go getters and super motivated people who feel like they’ve stalled in their progress are especially encouraged to consider more rest. Similarly, I find that women who have fallen victim to the “must run/cycle/cardiostep to burn x calories or else” mindset can stall their strength and even weight loss efforts by not allowing time for recovery.

Active recovery is also really important as we get older. While I’m only just beginning to sneak up on 40, there’s definitely some changes I’ve had to make in my diet and rest schedule. I’m fond of saying that when we get older we don’t necessarily get weaker, we’re just no longer able to continue abusing our bodies. Both as we age and/or as our activity levels increase, it becomes even more important to pay attention to our self care and recovery. And at any age, paying attention to rest and recovery can certainly help prevent needless injuries.

Similarly, active recovery can also help us mentally recover from an all out effort or an intense week with workouts and with life.

So, after all this talk, what does an active recovery session look like? At its very simplest, an active rest day might include an extended stroll, especially if you’ve really had a tough week and workout. While I’m always up for a good walk, most of the time active recovery should involve a more than just wandering around the neighborhood.

Here are some of my favorite active recovery ideas, and I hope that you will add yours to the comments section below this blog post. After a long week, sometimes we all need help in the creative ideas department, so please be sure to share.

Stretching Your Boundaries by Al KavadloMobility or flexibility practice. Compared to most women, I’m reasonably inflexible (physically, let’s not talk personality) and consider it to be a challenging area. While I have no aspirations to become a contortionist or a yogi, some specific mobility and flexibility work would help my progress with a few calisthenics moves, and potentially provide additional injury prevention. While flexibility is an easy example of one of my own weak points, working on an appropriate shortcoming of your own can be a great basis for an active recovery day.

A shorter/lighter version of a favorite workout, or a lighter version of a workout within your strength program. This is a great opportunity to fine tune your technique with some of the earlier progressions, since “lighter” in calisthenics doesn’t mean grabbing a lighter kettlebell or barbell. Many times some very important insights can come from a “regression-session” like this. If you’re an instructor you may also find some helpful hints for your clients or students you haven’t previously thought about.

Work on balance or a specific skill. One of my favorite recreational activities is slacklining. It points squarely at another one of my personal challenges, extreme balance! It’s a fun mental challenge and is oddly relaxing. It calls for focus and mental engagement, but without constantly tensing up the muscles (or you will fall down!) Even though I’m still very much a beginner, forcing myself to “go with the flow” during slacklining has actually helped me “accidentally” work through some muscle stiffness from tough workouts the day before!

Your tai chi or yoga practice (or an abbreviated version of it) might be another option as well. I have a favorite old qigong routine that I’ve practiced since 2000 that’s heavy on mindfulness and breathing, but light on the physical exertion. It’s been a big part of my warm up and active recovery for years, and I can definitely tell if I’ve slacked off of doing it! Similarly, less intense or short forms from tai chi as well as some of the more relaxing/meditative varieties of yoga would be good choices to consider.

Whether you are a type-a go-getter who hates the idea of taking a day off, someone who is stuck on a plateau, or simply someone who wants to maintain optimum health, adding gentle activity to your rest days can prove to be productive and fun.

***

About Adrienne Harvey, Senior PCC Instructor, RKC-II, CK-FMS, Primal Move Nat’l Instructor: Originally RKC Certified in 2010, and RKC Level 2 certified in 2011, kettlebell and bodyweight training have been crucial in Adrienne’s personal quest for fitness. A core member of the PCC team, Adrienne loves sharing her knowledge with small groups and individuals. She also loves to develop recipes and workout programs to further support performance, body composition, and of course—FUN. Go to http://www.giryagirl.com for more information about Adrienne!

Filed Under: Flexibility, Motivation and Goals Tagged With: active rest, Adrienne Harvey, Convict Conditioning, flexibility training, getting past plateaus, mobility training, programming, recovery day, rest day, Slacklining, Stretching Your Boundaries, Tai Chi, workout strategy, yoga

The Forearm Stand: A PCC Hidden Step

October 7, 2014 By Grace Kavadlo 29 Comments

Grace Menendez Forearm Stand

Are you frustrated with conquering the freestanding handstand?

We all want to progress quickly, but the jump from a wall handstand to a free-balancing one can be a huge hurdle! Enter the Forearm Stand – a relatively unknown movement in the PCC world – and a great “hidden step” on your way to the handstand!

When one of my clients recently told me her goal was to nail the forearm stand, I naturally turned to my PCC Instructor Manual, searching for a regression. At over 600 pages, the PCC manual is by far the most comprehensive guide to calisthenics I’ve ever seen, so I was surprised to find barely any mention of the forearm stand!  Luckily, I had plenty of experience with this move from my Yoga training.

Take A Stand

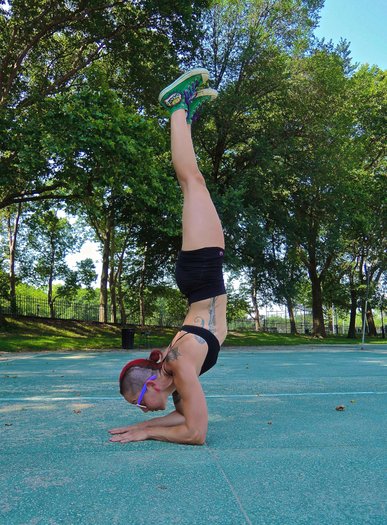
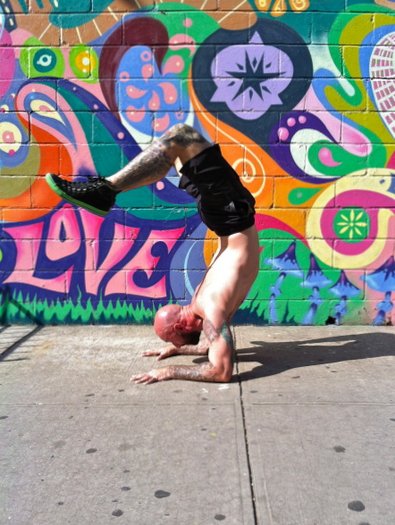
The forearm stand is a great intermediate step between a beginner’s headstand and a freestanding handstand. Known as Pincha Mayurasana (Peacock Pose) in Yoga, this move is great for strengthening your arms and shoulders while also stretching your neck, chest, abdomen and back.

Inversions are also beneficial for improving circulation throughout the body, as well as challenging the practitioner’s balance. Though a difficult move in its own right, the forearm stand is more accessible than a handstand because you have more points of contact to assist in balancing.

Here’s how to nail this move in just 3 easy steps!

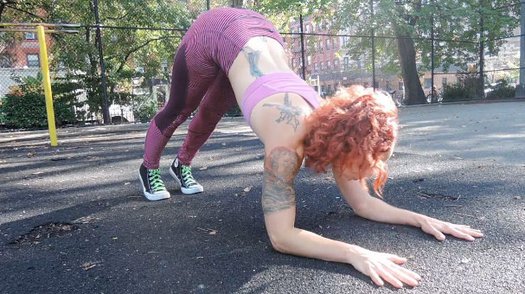
#1 Dolphin Pose

This pose is similar to Downward Facing Dog from Yoga but it is practiced on the forearms rather than the hands. Start in a plank position with your forearms shoulder-width apart, then spread your fingers and align your shoulders over your elbows as you gaze between your hands. Slowly begin to walk your feet in towards your hands as you raise your hips towards the sky. If you are new to this pose, you may only be able to walk a few steps before stopping. Your body should resemble as close to an inverted V as possible. Actively press through your hands and forearms to lift your head further off the ground and hold this position for time.

Grace Menendez Dolphin Pose

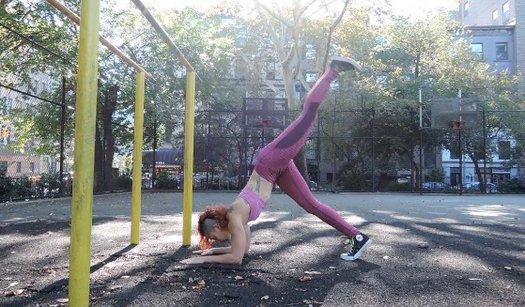
#2 The Kick-Up

Begin in Dolphin pose and extend one leg up towards the sky. The closer you can walk your feet to your elbows, the more aligned your spine becomes. This alignment allows you to “float” into this pose rather than having to rely on a significant jump. The more mobility you have in your hips and hamstrings, the less difficult this becomes. Push off the base leg as you kick upward with the extended leg. If you are unable to hold the balance at first, I suggest practicing this variation against a wall or other sturdy object until you build the confidence to try it freestanding.

Grace Menendez Dolphin Kick Up

#3 Forearm Stand

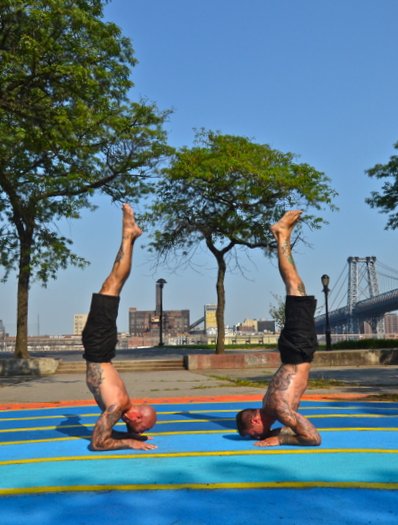
Once you are able to kick up and hold for a few breaths, you’re golden! Keep increasing your hold times by simultaneously squeezing your inner thighs and ankles together and pointing your toes towards the sky to create stability throughout your body. The key to finding the “sweet spot” is to grip the ground with your fingers while “wrapping” your triceps around the arm bones and pressing through your elbows as you balance.

Al Kavadlo Danny Kavadlo Forearm Stand

Scorpion Pose and Beyond

Initially when I began practicing forearm stands, I found it easier to hold the pose by bending my knees and allowing my heels to drop as a counterbalance. This is also known as Scorpion Pose. I must warn you this is an intense back bend, however! If you are having difficulty balancing in a regular forearm stand and want to try the scorpion variation, be sure to fit in some preparatory bridge work to warm up your spine.

Al Kavadlo Scorpion Pose

Be patient with yourself and prepare to put in some work if you want to nail this move. You might experience a “crash-landing” when first attempting freestanding forearm stands but by learning to safely fall out, you’ll gain the confidence to keep trying again. If you have the flexibility you can transition into a bridge if you feel yourself tipping over. If not, try to turn your hips and fall to the side. Stay the course and eventually this move will be yours!

Watch the video for more:

***
Grace Menendez, PCC, HKC is a personal trainer and group exercise instructor located in New York City. For more information about Grace, check out her website, www.DieselGrace.com

Filed Under: Flexibility, Tutorial Tagged With: dolphin pose, flexibility, Forearm stand, Grace Menendez, handstand, handstand regression, headstand, hidden step, how to, tutorial, yoga

Get Stronger by Improving Your Back Flexibility

March 18, 2014 By Keira Newton and Jarlo Ilano 19 Comments

Master RKC Keira Newton Spinal Flexibility

We get frustrated when flexibility work is just an afterthought in an athlete’s program, something done for only a few minutes after the main workout without a lot of thought or effort. The truth is that proper and focused flexibility training especially for your spinal flexibility, can help you get stronger!

Getting stronger from stretching sounds great, doesn’t it?

How is that? One of the ways flexibility work can make you stronger is immediately apparent in terms of form and technique. If you are so bound up in your upper back that you can’t pull your shoulders back in a proper line, your pressing is not going to be as strong, whether it’s pressing a kettlebell or your bodyweight in a handstand.

For instance, Keira remembers when she first started working seriously on her flexibility, that although her shoulders were pretty mobile, her upper back wasn’t. By working on that specifically, she was able to improve her shoulder positioning, and found her pressing strength immediately improved, as well as her hand balancing. Being able to extend correctly at the upper back placed her shoulders in a much better mechanical advantage and she was able to use her strength from a better foundation.

She also recalls one of her teaching sessions with an experienced RKC who was having trouble with her pull-ups. Keira gave her some corrective thoracic mobility exercises and she went from barely doing one, to doing sets of multiple reps. The flexibility work put her in a better position for her pull and she broke out of that plateau. She was working hard and putting a lot of effort in her pulls, but her mobility was holding her back. Once that was freed up, she was able to gain so much more from her efforts.

High tension techniques for strength and power are great. There’s no denying that those techniques work for getting people as strong as possible, but you have to balance out that tension with proper mobility to get the most out of your body. It’s not the act of stretching that will give you strength, but it’s the new options your body will have to get in the best positions to utilize the power and strength that you already have.

A Flexible Spine is a Powerful Spine

There’s a reason the word “backbone” is associated with strength and courage. A strong and flexible back is the foundation for power in the upper body, just as the hips are for the lower body. Thoracic spine (mid-back) mobility affects how well you can use your shoulder girdle and arms, by placing them either in resting positions of weakness or strength.

A kyphotic (flexed) thoracic spine puts your shoulders well forward of the vertical midline of your body and away from your power posture. It’s like trying to push from an unstable platform. You won’t be able to use your strength properly no matter how powerful your muscles.

Most of our full body rotation comes from the thoracic spine, so when you think of rotational work, that involves a great deal of thoracic function. Stiffness here reduces not just your mobility but your ability to apply the proper leveraging and angles for a lot of different strength skills.

Below we will show you comprehensive routines for improving your spinal mobility for forward bending, rotations, and backbending. You’ll probably find that some of the moves here will be easier for you while others will jump out and kick you in the butt! (Guess which ones you should work on more…)

We advise you to go through all of these movements and discover for yourself what you need to improve the most.

Forward Bending Sequence

Forward bending involves spinal joint and hip flexion, and the associated flexibility of the muscles and other soft tissues of the posterior chain. It can be difficult to isolate one specific cause as the key issue if you have tightness. While it’s very easy to say you have tight hamstrings, the fact is that the sensation of tightness in the hamstrings may very well come from an issue in your low back.

This sequence is a demonstration of “covering all the bases,” with a comprehensive approach that can be pared down as you practice and figure out what you need to work on for yourself. A quick run-through of the sequence can give you a baseline as well, and act as a measure for progress.

We begin with a full spinal flexion movement, from your neck all the way to your pelvis. You want to round out as much as possible, then move into full extension (back bending). Though the emphasis is on the forward bend, you’ll want to move into extension as a break in between. It takes the spine through a full range of motion and is a good warmup for the sequence.

In the squat, point your toes out at around 45 degrees. This positioning assists in helping you round out your lower back and go into a posterior pelvic tilt (the pelvis tucking under you). Get your chest between your knees and tuck your chin down, as well as letting your tailbone sink down. Play with rocking back and forth between your toes and your heels. Then sit back and drop down even further. Next, jump into a push-up position. Then drop your hips down to the floor and lift your chest up and out, locking your elbows out if possible. Remember to look up as well, for extension throughout the entire spine.

Do ten repetitions, or more if you feel up to it.

Master RKC Keira Newton Forward Bend SeatedNext is a standing forward bend, where you bring your hands to one side and keep them on the ground as you stand up. This is a combined forward bend and rotation. Another variant is to sit back into the opposite hip. So if your hands are to the right of your body, you’ll sit back to the left. Spend a couple minutes going between one side and the other.

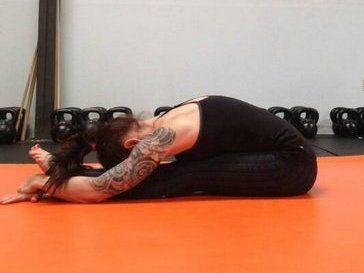
The last move in the forward bending sequence is the seated forward bend. With this move, you’ll add a rotation to the forward bend, just as you did in the standing forward bend. With your legs locked out straight in front of you, pick a side and fold forward at a diagonal on that side. Move in and out of the stretch at least ten times on each side, as well as straight forward, and hold the stretch on one side for upwards of a minute.

Back Bend Preparation

Backbending (spinal extension) can be a very uncomfortable and difficult motion for many people. When you add up all the hours we sit, drive, and are parked in front of the computer, you’ll see how rarely we get into backbending positions during our normal daily activities. So it’s no surprise that a full backbend like the bridge posture can be so daunting.

With this in mind, it helps to go through a thorough preparation before going to the limits of your spinal extension range of motion.

The first emphasis is on the thoracic spine (your midback), and improving extension and rotation in this region. Improving mobility in this part of the spine prevents undue strain on the lower back by distributing the motion throughout the spine rather than all on the lower back. In the first exercise in this video, you’ll see that Keira has to emphasize the motion, not straight down but also forward, as her shoulders are so flexible that she isn’t moving at the spine. When she improves her direction of force, you can see that the stretch is now where it needs to be. Work on this for three sets of one minute each.

Next is thoracic rotation, which is essentially extension at the side of the spine you are rotating towards. This in combination with sidebending takes you to the end-range of the extension motion. So you’ll be working on all the structures that need to be pliable for a good backbend.

Keira is demonstrating two movement variations: the first is up on forearms and knees with the back starting in a neutral position, and the second is more on the back of the upper arm and shoulder with the torso bending to the side. When you try these out, you’ll notice that the second variation places you in a sort of pre-stretched position, so you won’t be moving as far. You may skip the first variation if you are already flexible, but even then, the first one is a good warm-up to do. Play with shifting your weight more onto your knees or your arms to find the best angle for you. Start with three sets of 30 seconds on each side.

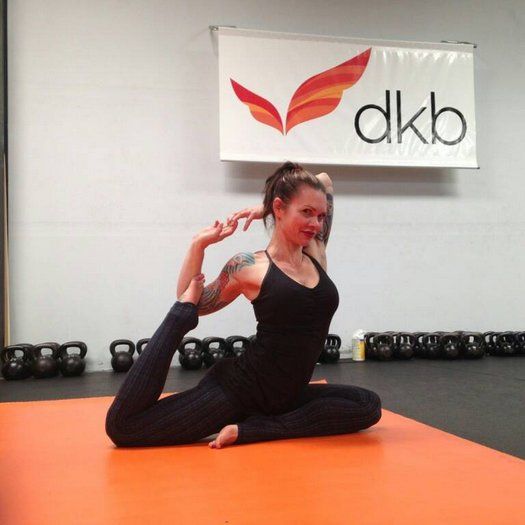
Last in this video is a more direct back bend preparation and is adapted from a sequence taught by Jarlo’s Ashtanga yoga teacher, Cathy Louise Broda at http://www.purpleyoga.com. It starts with a kneeling back bend, then works on the hip flexors, quadriceps, and shoulder bridges, to fully warm up and prepare the body for more intense spinal extension postures.

In the kneeling backbend, it is key to elongate and lift the spine as you lean back. Pushing your hips forward and lifting your chest up and back will create this “open” spine, and will prevent a jammed up feeling in the low back. Relaxing your hips and buttocks will be difficult at first, but that is another key to a good backbend. 10 – 12 slow repetitions here will do you well.

Next up are lunge stretches with rotation to the side of the front knee. Adding rotation to this position adds depth to the stretch and is a great concept to employ in almost any exercise. You don’t have to do this in full splits like Keira is showing, just go into as deep a lunge as you are comfortable. The effect is still the same. Do three sets of 30 seconds on each side.

The camel pose in yoga is a backbend with arm support, and can allow you to improve your backbending technique with relatively little strain. With the support of your arms you can stay in the position a bit longer than you could just bending back. Remember the details of pushing your hips and chest away from each other to open up your spine. Work up to three sets of 30 seconds on this posture, as that’s a good amount of time to experience this position.

Following the camel is the kneeling quadriceps stretch. If your knees bother you in this position, you can sit on a small stool or a few cushions to take some pressure off. If this doesn’t help, don’t force it and try a standing or side lying quad stretch instead. You’ll be able to do this later, but don’t hurt your knees and put yourself out of commission. The key point here is to avoid a low back arch. Keep your back flat, so the forces of the stretch will be on the upper thighs and not on your back. Take your time and gradually lean back further when you can do so without pain. Three sets of 30 seconds to a minute will work well here.

Lastly, shoulder bridge practice starts you on a more active backbend and is a great way to get a lot of repetitions in with good technique. You’ll pull all of what you’ve practiced so far in the sequence and work on a smooth spinal curve, relaxed hips, and good mobility and strength in the quads. Choose the shoulder bridge variation that works best for you, and perform a couple sets of 10 repetitions to improve your bridge.

Full Bridge

In the full bridge, or “wheel pose” in yoga, you’ll need good flexibility in your shoulders, hips, and the entire back. But you’ll also need proper technique. Important details here are to create that smooth curve and arch, like an archway in a building that can support weight evenly, and simply looks good. You can tell when a person does a bridge and there is a sharp angle in one part of the spine – in that case, there will be more of a strain rather than a curve that distributes forces evenly.

Master RKC Keira Newton Back BendFor a proper bridge, your arms and legs are the support structures and your hips and back should be relaxed and open. Your chest should be projected up and back, toward the top corner of the wall behind you, and your hips should be lifted up and forward, toward the top corner of the wall in front of you. This aiming in opposite directions creates that “openness” in the spine. Breathing should be steady and even, and you should hold the position for 5 to 10 breaths. Again, don’t force things. Take your time and improve steadily.
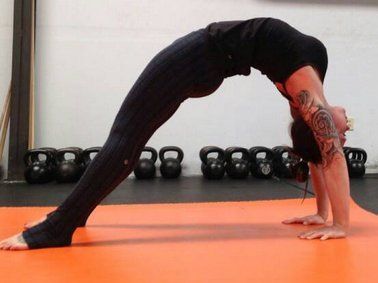
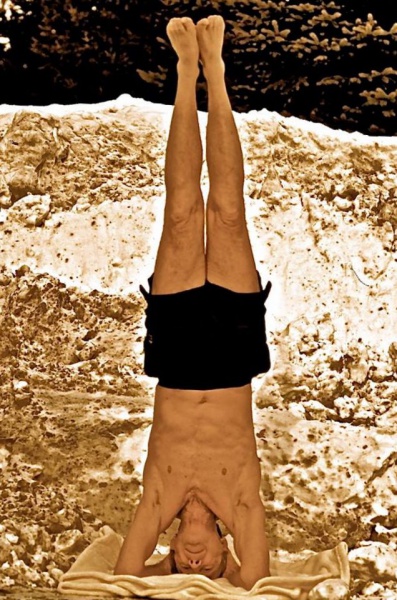
Master RKC Keira Newton Back Bend 2As you improve you can play with shifting your weight more toward your feet or toward your hands. You’ll find which way is more difficult, and that’d be what you need to work on! It will also lead you back to which of the preparation exercises to focus on. It may be the thoracic extension, or your hip flexors and quads if they are holding you back.

Invest in Your Flexibility

What we’ve shared above will improve your back flexibility and consequently improve your body positioning for every exercise and skill you practice.

It does take time and patience to increase your flexibility, especially if it’s been long neglected. But the payoff is well worth the effort. Set aside some time in your routine to make flexibility a priority and you will be more than happy with the benefits in your strength and power.

***

Keira Newton is an accomplished trainer with many certifications including that of Master RKC, Feldenkrais, FMS, and Z Health. Her combined knowledge of strength training along with flexibility and mobility work has helped hundreds of her clients at dkb Fitness and seminar students to help them achieve their maximum potential.

Jarlo Ilano,PT, MPT, OCS has been a Physical Therapist since 1998 and is a Board Certified Orthopedic Clinical Specialist. He has special interests in the neck and back, shoulder, and flexibility work, combining his clinical expertise with his own training in martial arts and yoga to provide practical and cutting edge knowledge for GMB Fitness.

Filed Under: Flexibility Tagged With: back flexibility, bridge, flexibility, Jarlo Ilano, Keira Newton, strength, stretching, thoracic spine, thoracic spine mobility, yoga

Yoga, Calisthenics and the Journey of a Lifetime

January 23, 2014 By John Du Cane, CEO and founder, Dragon Door 30 Comments

John, the Yogi who came in from the cold.

As a teenager in the sixties UK, I was highly athletic. I played wing in Rugby, had a mean long jump and high jump and could sprint like the wind. Two of my track buddies at high school went on to great fame: the iconic musician Nick Drake and Mark Phillips, who went on to marry Princess Anne.

I also loved weight lifting and was drawn to pumping iron. Unfortunately the strength coach/trainer at my school was pretty darn clueless and I would lift away without much direction at all—either from him or any literature on the subject.

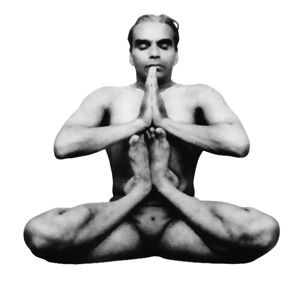
What I also discovered, in 1966, was the just-published Light on Yoga by B.K.S. Iyengar—which changed my life. I used this seminal and highly inspirational book to teach myself Yoga. Scary, perhaps, but finding a teacher in those days was challenging to say the least. By age nineteen, I could pull off a headstand while in a full lotus, had an eye-popping ability to rotate my abs, as a ridged column, through 360 degrees, with the method known as Uddiyana Bandha, plus a whole lot of other impressive looking stuff.

Uddiyana Bandha
Uddiyana Bandha
Iyenga, “the Michelangelo of Yoga
Iyenga, “the Michelangelo of Yoga”

I enjoyed looking cool, feeling cool and being proud of what I could do physically. If that doesn’t motivate you to practice physical culture, I don’t know what to say…

At the age of twenty-five I finally traveled to India to study Yoga and meditation. Ironically, there in India, I switched my allegiance to Qigong and Tai Chi as my principal discipline for physical cultivation. The Hatha Yoga I had studied had had a transformative impact on me, but it did involve almost solely holding static postures. Qigong and Tai Chi opened up a different world that was motion-based and much more satisfying for me personally.

However, those crucial dozen years where I dove deep into Yoga gave me immense flexibility benefits that have extended to my current age of 64. For instance, without having rigorously practiced the headstand since my mid-twenties, I can still move effortlessly into a full headstand. Same for the full lotus and many other cool poses.

Naturally forty years of martial arts, kettlebells and other bodyweight exercise have helped me stay in nice shape into my sixties. However, I do believe that my years as Yogi John gave me a crucial foundation that I am eternally grateful to have laid for myself.

So, when Al Kavadlo presented his latest masterpiece, Stretching Your Boundaries to me, I was thrilled and immediately impressed by the spectacular way Al tied together Yogic stretching and flexibility methods with calisthenics. Along with Paul Wade, Al has been leading the inspirational charge in a new appreciation for the healing and athletic benefits of bodyweight exercise.

BOOk_StretchingYourBoundaries

What I also love about Al’s work—and never more true than for Stretching Your Boundaries—is the aesthetic and the philosophy of physical culture he brings to the table. “Calisthenics” means “beautiful strength.” Strong, flexible, healthy, graceful body—with a mind and spirit to match. Al perfectly embodies that “beautiful strength-beautiful spirit” ideal, in my opinion. He brings a Zen lightness and equanimity to his practice. But he also brings the kind of sharp-mindedness and rigor to his physical cultivation that is another hallmark of Zen. We had Zen and the Art of Archery. Now we have the Zen Art of Stretching Your Boundaries.

I love, also, Al’s emphasis on the importance of joint health, circulation and breath work. The older you get, the more you need to move and breathe well. And nothing needs more movement for health and well being than the joints.

Just as Iyengar inspired me and millions of others to take up Yoga, Al is inspiring a new generation to improve their mobility, strength and health by integrating yoga and calisthenics in dramatic new style.

Let’s remember: we have the one body only to work with, a precious treasure that can be abused and trashed—or burnished, refined and transformed into an ongoing piece of living artwork. In Stretching Your Boundaries, Al hands you a priceless set of methods to refine your physical being. I urge you to take full advantage.

Yours in Strength,

John Du Cane

Filed Under: Flexibility Tagged With: Al Kavadlo, beautiful strength, calisthenics, John Du Cane, Paul Wade, PCC, Stretching Your Boundaries, Tai Chi, yoga, Zen

Structuring a PCC Recovery Day

November 5, 2013 By Angelo Gala 5 Comments

angelo1Hey there! How is your training going? Are you making lots of progress on your pistol, handstand push-up and bridge progressions? That’s awesome! How is your body feeling? It’s about time we address the purple and pink striped elephant in the room. Do you take the time to work on skill/technique development and regressions rather than just focusing on cultivating specific strength? How often do you take a day off? Do you include some active recovery or are you inclined to just take it easy and catch up on some youtube or boobtube? Yep, lots of questions coming your way, I know. I’m not trying to poke or point fingers at what you may be or may not be doing. Lets talk recovery and building a happy body that wants nothing more than to rebuild and be better than ever!

I personally LOVE the PCC minimalist approach, especially when it comes to recovery days. But what exactly is a recovery day? Following a simplistic approach to fitness, to me a rest and recovery day incorporates more of what you typically do less of.

Try making a point to emphasize eating and sleeping. Food provides the nutrients and building blocks that support the demands we place on our bodies. When we sleep, are body’s little worker bees put on their hard hats and rebuild our foundation to be bigger and better, allowing our muscles to grow stronger and longer. Catching up with friends and family reminds us of what is important in our lives providing a necessary distraction from the mental grind of vigorous exercise. Light cardiovascular activity is a must. Yes, I said it. I know that High Intensity Interval Training is all the craze right now with plenty of scientific research to back it up but please don’t forget that we need to be easy on our bodies from time to time. 20+ minutes of easy-moderate steady state exercise is a very heart healthy activity to include. Lastly restoring range of motion to our body’s joints and increasing our flexibility will keep our physical body in balance.

If you are wondering where to fit this in, take a step back to look at your weekly training block. How many days in a row are you pushing your body? The acclimated body can go hard for up to three days in a row before it will be asking for a de-loading day. If you are a little more advanced in your age, or have less than 3-5 years of consistent vigorous exercise under your belt, your body may require a break every third day. At a minimum one should back off at least one day a week with a preference of two (maybe three) days depending on your training history. Again, this does not require a total day of nothing on the agenda, just enough of a change of pace to allow the battery to recharge.

Structuring a Recovery Day:

It can be next to impossible to recommend a routine for everyone who reads this article, but I can at least provide some guidelines to help structure a recovery day based on the demands these workouts place on the body.

Recovery can actually to be very intuitive. Many of us are goal oriented and have been working on obtaining certain skills like a back lever or freestanding handstand push-up. Along the journey to these benchmarks we stumble across tight backs, sore shoulders and wrists or maybe even creaky knees. These are all signs from our body telling us that it may require a little extra love and dedicated time where you give back to your self.

Looking specifically at the movements found in the PCC curriculum, we ask a lot out of our shoulders, chest, triceps, forearms and core musculature as we work to support our entire body weight practicing all the push-up, handstand and arm lever variations. Though the single leg squat progressions do not place a significant demand on the lower body compared to a 2x body weight barbell squat, we may find that limits in our mobility hinder our ability to achieve full range of motion in the pistol squat, or at least challenge our confidence in the movement’s execution. If the bottom position of the pistol is easy to obtain, compare it to the shrimp squat, or even the double shrimp? Most likely we will find some difficulty along that journey.

I always structure a recovery workout for my athletes to begin with 20-30 minutes of a steady cardiovascular activity. A few suggestions may be an easy 5k run on a mostly flat to rolling course, a bike ride on the smallest chain ring of your crankset, a steady swim or up to a 5k row focusing on mechanics, cadence and breathe work. The steady cardio is programmed first in our recovery for a few reasons. Most importantly it will generate body heat and prep your soft tissue for manipulation and stretching. Steady cardio creates a calming / meditative effect on the body and mind. It also promotes an environment of self-exploration where you may develop the intuition of what areas of your body may need a little extra attention when it is time to stretch.

After the heat-building phase of the cardio warm-up is complete, it’s time to address some binding in the soft tissue with self-myofascial release techniques (self-massage). For this you can purchase all sorts of tools to address every area of the body such as foam rollers, PVC piping, rumble rollers, tennis balls, a tiger tail and so on. I suggest picking up a lacrosse ball, as it is the most universal tool, you can easily take it anywhere and it can generally apply enough pressure on your trigger points to promote change.

Using the lacrosse ball or roller is theoretically very simple. Pick a muscle group to work on and lay your bodyweight over the tool. Initially you will scan around your soft tissue on the tool looking for any tender spots or pain spots. Once something jumps out at you, stop moving and isolate the discomfort. Try your hardest to not move off the spot, then apply a contract and relax activation with the muscle group you are rolling over. You can do this by either squeezing the muscles you are resting on or moving the stimulated joint through its natural range of motion over and over. This will most definitely cause a bit more discomfort but let me be upfront and completely honest with you. When it comes to restoring / improving mobility or flexibility, its going to be uncomfortable. The more discomfort you can tolerate (aside from sharp pain, which is always bad) the more change you will make. If its not uncomfortable, then you wont be making much if any progress. Your only other option to break up the binding is to get a deep tissue sports massage on a weekly or biweekly schedule. If your budget isn’t big enough to afford regular body work, then get comfortable with being uncomfortable on a lax ball 😛

Personally, I beat my body up enough that I can spend all day doing soft tissue work, so in order to keep ourselves within a reasonable time cap, pick an area on the front side and back side of the shoulders as well as an area both on the front side and back side of the hips. Spend about 5 minutes on each or at least until you feel a bit of the discomfort begin to subside.

Now that we have successfully built requisite body heat and prepped our soft tissues to make change, its time to focus on increasing our flexibility since many exercises in the PCC curriculum require a fair level of specific flexibility. To do this we will work from the ground up.

-Single leg squats require a significant amount of ankle mobility so here we can utilize a standard Standing Calf Stretch focusing on dorsi-flexing our ankle as much as possible. Don’t forget to practice this stretch with the knee straight as well as bent.

angelo2

-To get the outer hips, a Standing Figure 4 Stretch is achieved by crossing one ankle over the opposing knee. From this position, sit back as if you were sitting in a chair while simultaneously reaching your rib cage over the top shin. Do your best to keep your hips as neutral as possible rather than shifting them to help counter balance the posture.

angelo3

-Inner thighs are most accessibly stretched in the Bound Angle Pose. Here push your lower back up against a wall and pull your heels together as close to your inner thighs as possible. For the remainder of the stretch, place your hands on your knees with fingers pointed toward your midline and gradually apply pressure down into your legs as if you could press your knees all the way to the floor.

angelo4

-Stretch the backside of your legs with the traditional Head-to-Knee Pose. From a seated position, extend one leg forward and align the sole of your opposite foot against the inner thigh of your extended leg. From here, square the center of your chest with the knee of your extended leg and lean forward in an attempt to rest your bottom rib on your upper thigh bringing your nose-to-knee.

angelo5

-Half Kneeling Hip Flexor Stretch with a side bend will open the front of the hips as well as prep the spine to bend and twist. Set up in a lunge position with the back knee on the floor. Bind your fingers and stretch both arms over head. From here slide your hips forward until you feel a significant stretch in the hip flexor muscle of the down knee then begin to side bend over the front leg focusing on a long stretch sensation from the top of the hip all the way to the bottom of your armpit.

angelo6

-You are only as young as the mobility of your spine so to improve this, hang tight in the half kneeling position while you twist your opposite elbow over the front knee. Place your hands in a prayer position with fingertips facing forward then press your hands together to engage and deepen the twist.

angelo7

-Heart Opener’s Pose is a great stretch for the mid to lower back, it improves your overhead position and acts as a great prep for bridging. Find your way into this posture by setting up in a quadruped position (kneeling on all fours). Prioritize the stretch in your middle back first by pressing your belly button down towards the floor, arching your spine. Finally, to stretch your shoulders and deepen the back bend, keep your hips stacked on top of your knees while you walk your hands forward until you can rest your forehead or even your chin on the ground.

angelo8

-Address your shoulders with a Butterfly Shoulder Stretch. Again starting in a quadruped position, cross your elbows in front of your shoulders with the tops of your hands pressed against the ground. Stretch your arms away from each other, shrug your shoulders down away from your ears then slowly begin to rock forward until your chest aligns in front of your elbows and you feel a stretch on the outside of the shoulder that is stacked in front.

angelo9

Following this blueprint may not cure all or any of your ailments, but it will certainly aid in your weekly workout recovery. It is easy to get consumed by the exercises that build strength and conditioning while losing sight of benefits gained by slightly backing off the intensity. Try adding this to your program at least once a week and let me know how it affects your progress.

***

About Angelo Gala, RKC / PCC Team Leader: Angelo Gala has been a fitness professional in the Boston area for greater than 11 years. He is a Certified Strength and Conditioning Specialist through the NCSA, and has studied the Pranavayu system of yoga under David Magone.  He is a Dharma friend at the Sakya Center of Buddhist Studies in Cambridge, MA where he completed a 1 year intensive study of Mangalam Yantra Yoga under the guidance of Lama Migmar Tseten. Go to http://www.dragondoor.com/angelo-gala/ for more info.

Filed Under: Flexibility, Progressive Calisthenics Tagged With: active recovery, calisthenics, meditation, PCC, recovery, skill training, strength, stretches, technique, yoga

My Journey to the Back Lever

August 13, 2013 By Angelo Gala 10 Comments

Photo1
It frequently catches me off guard when budding fitness enthusiasts ask me to teach them flashy drills such as kettlebell juggling, physio-ball air squats and kipping butterfly pull-ups. Sure these exercises may look impressive, however each complex movement pattern requires a level of physical competency and advanced coordination that isn’t just given away. All too often, these requests come from the same people who struggle with executing ten standard push-ups. Very rarely do people care about the benefits provided, they’re simply romanced by the “fun factor.” Demonstrate to the same person a back lever and you may see a pair of glazed eyes appreciating the skill, but not quite aware of the work required to get there.

If you are unfamiliar with the back lever, picture hanging from a pull-up bar, pulling your feet all the way to the bar, then sliding them in between your hands and rotating backwards until your chest is parallel to the floor below. The back lever finishes with a hip and knee extension that suspends your body into a plank formation while hanging from your hands. Sound fun? I thought so! But it can also do wonders for your strength, mobility and proprioception.

Working through the progressions will open up your shoulders, stretch your chest and strengthen the supporting musculature of your scapulae like no other. Once you are mobile enough to rotate your chest to parallel, the real core training begins. The back lever will simultaneously develop unbelievable amounts of strength and stability on both sides of your body. You can say goodbye to those weighted back extensions since this version of the lever will hit both your lower back and upper back musculature all while developing the awareness to align your spine in vertical, inverted and horizontal positions.

I was lucky enough to have some decent shoulder mobility and a very supportive baseline of strength when I began training this calisthenic. Here is the progression that worked for me:

Static Hang:
Starting from absolute scratch, you should develop the hand strength to hang from a pull-up bar for 30-60 seconds. If you can’t hang for that long, trying to support yourself as you flip upside down isn’t a great idea. You can practice hanging from both hands and eventually one hand at a time to develop your grip strength evenly on both sides.

Hanging Leg Raise (HLR):
To execute this requisite core exercise, pull down on the pull-up bar with both hands while simultaneously lifting your legs as straight as possible up toward the bar. Shoot for at least ten reps before you move on from here.

Skin the Cat / German Hang:
After developing strength from the HLR, it’s time to wiggle your feet in-between your hands and rotate backwards until you can look straight ahead. The finish position, known as the German hang, should look similar to your hanging start position with your legs dropping towards the ground, except your arms will be stretched behind your body. Initially you may find that you do not have the shoulder mobility to come around full circle or the fear factor may be just too great – that’s ok! Try performing a few rotations at a time, gradually increasing the amount of rotation on each attempt. Static holds in your deepest expression of the exercise as well as dynamic repetitions of the move will help loosen up tight muscles. Be sure to keep your shoulders active (squeeze the shoulder blades together and down towards your bum) as it will keep your arms attached to your body. Trust me, this is a good thing.

Photo2
Here we see a German hang and a standard bar hang side by side.

Tuck Back Lever:
Using the skin the cat technique, roll through your arms attempting to align your chest to parallel with the ground. After you pull through, tuck your knees tightly to your chest and lift your upper back to spot the ground ahead of your body. Your target here is to work up to a 20-30 second hold before you move on. Progressing your tuck lever is as simple as pushing your upper thighs away from your chest in an attempt to align your knees under your hips. Understand that this will increase the difficulty of the move exponentially. If aligning your knees under your hips feels sketchy and unmanageable, then slowly pull your knees only a few inches from the tuck position at a time. Be patient and work up to thirty second holds a few inches at a time.

Congratulations!  You are well on your way to getting the move under your belt and by now I’m sure that many people have stopped to stare at the insanity of your acrobatics!

Photo3
Single Leg Tuck Back Lever:
Once you can hold a tuck position with your knees stacked directly under your hips, you can alternate extending one leg at a time. In the beginning, it’s perfectly alright to send one leg back with the knee significantly bent. Soon enough you will be able to lock out your leg in its entirety. Keep in mind that your legs hold a significant chunk of your body weight so move slow or you might find yourself unexpectedly falling into a German hang. Don’t forget to work both sides evenly as preventing imbalance should be a goal in any fitness program. Thirty seconds per leg should be your target range of proficiency here as well.

Photo4
Full Back Lever:
We made it! It’s time to work on the full expression! Using leverage to your advantage will be the key to your success when practicing the full back lever. To execute, skin your cat until you can align your torso to about 45 degrees with your head angled towards the ground. From here, keep your knees tucked and begin to extend your hips. Once you feel stable, slowly straighten your knees until your body is fully extended into one long line angled roughly forty-five degrees from the ground. Keep your entire body as tight as possible. If you can hang here without too much issue, lift your chest to help drop your hips, moving your body position closer to parallel to the floor. The more parallel you become, the more you will feel gravity’s pull and the harder you will have to work.

All in all, I learned the progressions to this move and bagged it after almost exactly one month of work. I can’t promise the same rate of success as everyone’s starting strength and mobility will be different. As for programming, I practiced my back lever progressions three or four days a week. At least two workouts were specifically geared towards building volume in the different tuck positions with a target of three to seven attempts per workout. I worked up to owning each position for thirty seconds but started many of the holds with barely the ability to tolerate ten seconds. Other days I would skin the cat as a dynamic warm-up or finish my workouts with several sets in the German hang position so I consistently worked on improving requisite shoulder mobility and got comfortable going upside down. Keep practicing and be patient. Continued exposure to the demands of the back lever will get you there as soon as your body is ready for it

Give this a go, good luck and keep me posted on your progress!

Photo5

***

About Angelo Gala, RKC / PCC Team Leader: Angelo Gala has been a fitness professional in the Boston area for greater than 11 years. He is a Certified Strength and Conditioning Specialist through the NCSA, and has studied the Pranavayu system of yoga under David Magone.  He is a Dharma friend at the Sakya Center of Buddhist Studies in Cambridge, MA where he completed a 1 year intensive study of Mangalam Yantra Yoga under the guidance of Lama Migmar Tseten. Go to http://www.dragondoor.com/angelo-gala/ for more info.

Filed Under: Progressive Calisthenics, Tutorial Tagged With: Angelo Gala, back lever, bar lever, calisthenics, instructor, journey, PCC, progressive calisthenics, shoulder mobility, tutorial, yoga

Live and Learn

July 2, 2013 By Jack Arnow 8 Comments

jack_arnow

Jack Arnow performs a one arm chin-up at the age of 66

In high school I won a race by pushing myself past my limits. I just wouldn’t listen to my body. I threw up as I crossed the finish line, and was sick for the next 2 days. When I found chinning, I’d do reps until my muscles locked and began to spasm. I was a small, skinny, asthmatic kid who was overcompensating. I’d get injured often. I was poor and worked out in my apartment, schoolyards and parks. Back then I had no name for what I did, but “bodyweight training” probably described it best.

A friend brought me to a vacant lot in Brooklyn where Jasper Benincasa had put up a chinning bar. Lots of kids would work out on it and play stick ball or touch football in the adjacent streets. I became a regular, stopping by almost every day on my way home from school. It changed my life!

Now, more than fifty five years later I still workout almost everyday, primarily for the wonderful physical and emotional feelings that the workouts produce, but I also like the respect and attention that I get from young folks. And today’s wisdom is that it’s good for my health too!

Injuries, including elbow tendinitis and rotator cuff problems have long been my nemesis. Mindlessness and overtraining have been their root cause. Hopefully you can learn from my mistakes.

Focus on your day to day training, not just the high of achieving your goals. Future results are never a certainty, so enjoy the journey.

If your training ever becomes a chore, be creative and try new things. As I approached 50 years of age, training to regain a one-arm chin, I became desperate. Worrying that aging was causing my muscles to atrophy, I over-trained, despite the signals my body was giving me. Although I did regain the one-arm chin, I lost it again. Experiment on yourself to see what works for you, but always approach new routines cautiously and slowly in order to minimize the possibility of injury. I say minimize the possibility of injury, because you will make mistakes. All humans make mistakes. Another reason that injuries occur is that your body changes all the time. What worked today may not work tomorrow. You are a work in progress.

If you are feeling really good because you are advancing quickly towards your goals, that is a time for extreme caution. That’s when you may be likely to push it just a bit too hard and get injured. If you are upset that you are not advancing fast enough, or have reached a plateau, that’s another time to be careful. Perhaps it’s not a time to increase intensity or volume, but try something new. At all times listen to your body. Each day may be different. After one set, or one rep, or in the middle of one movement, stop if something feels wrong. Make training plans, but alter those plans if necessary. If you are uncertain how to proceed, stop to use your brain, the most important asset you have. Considering an alternative may prevent injury.

I last did a one-arm chin about 5 years ago, because I realized they were getting harder for me to do. I felt happy and smart to stop them before I became injured. I had taken up yoga, planned to get certified as a yoga teacher and wanted to continue to give massage. I did not want to risk my ability to do these things. The memorial for chinning legend Jasper Benincasa in March 2012 inspired me to try to regain a one-arm chin. I’ve advised many others how to train for a one-arm chin. I came to the conclusion that I should just listen to my own advice! I’ll be 71 in a few months and am enjoying my training immensely. It’s two steps forward and one step back. I’ve learned not to set time goals. Setting a goal such as “I will get a one-arm chin by January 1” is a terrible idea. Putting a time limit on reaching your goal may lead to making bad day to day decisions. You may focus on “getting there,” rather than listening to your body moment by moment. That will increase your likelihood of injury.

If you’re feeling weak one day, listen to your body and do less or even rest entirely. Keep in mind that you are a many-sided being, and all things affect how you feel, affect your mood, affect your strength and affect your ability to focus and recover. If you had to work overtime and are tired, if you had an argument with a friend, partner, or family member, if the weather is rainy and cold, if you are stressed out or many other factors can reduce your strength. It may even be more efficient to resolve non-training issues before continuing.

It has become clearer to me that my training and goals have long been one-sided and imbalanced. I reached very high levels in chinning (pulling) and front levers, but neglected legs, pushing and flexibility. I thank Paul Wade, and Al and Danny Kavadlo for my new insights, because I believe a more balanced approach will reduce injury. After doing half handstand push-ups at home this morning, I went to a neighborhood park in Brooklyn and attempted muscle-ups, assisted bridges and skin-the-cat. I couldn’t do a muscle up or skin-the-cat when I met Al and Danny recently, but I made them my goals. Today, a teenager in the park was impressed with my muscle-up, but I still can’t do skin-the-cat. Nevertheless, I taught the teenager to do one.

Whether you made a training mistake or not, accept injuries as part of training and being physically active. Don’t beat yourself up. Try to see the positive aspects. You may rest the injured area, and develop coordination and strength in new areas. Getting the injury can be a wake-up call to improve your technique or change another aspect of your training which will prevent further setbacks. An injury may temporarily (or perhaps even permanently) reduce your strength or ability. Although you should feel proud that you reached some of your goals, never forget that you are much more than your achievements. Don’t make the mistake of thinking that no-one will love or admire you because you can’t do them right now. Most of my friends, but especially my dear wife, think I’m nuts to spend “so much time” exercising. They love me anyway. They appreciate the many things I’ve learned from a lifetime of training: the value of determination, discipline, hard work, enthusiasm, passion and confidence. It’s relatively easier to be joyful when things are going great, but when you are injured or facing other difficult circumstances, continue to let your little light shine.

I believe you have the ability to become your own life and training guru. Learn from trainers and others with experience, read books, and be open to new ideas wherever you find them, but fundamentally no one has the capacity to know yourself as well as you do. Make it your responsibility to become your own guru. For bodyweight training, volume and intensity are very important. Too much and you will get injured. Too little and you may not reach your goals. And the particulars change often. After all is said and done, you are the best one to make that call. Review your growing experience, and try to apply insights often. People are similar but also different. Learn what works for you. Don’t think what works for you, works for others, and vice versa. If some things I wrote in this article don’t work for you, disregard them. That is natural.

Should you be able to internalize even one idea that improves your training or makes you happier, I will feel this article was a success.


(Video Courtesy of www.alkavadlo.com)

***

Filed Under: Motivation and Goals, Progressive Calisthenics Tagged With: bodyweight exercise, calisthenics, chinning, fitness, goals, Jack Arnow, Jasper Benincasa, longevity, one arm chin up, strength training, yoga

Primary Sidebar

Featured Products

previous arrow
GetStrongBookCover
ConvictConditioningBookCover
StreetWorkoutBookCover
ExplosiveCalisthenicsBookCover
StrengthRulesBookCover
next arrow

Categories

Progressive Calisthenics Certification Logo
Click here for more information or to register for the PCC workshop

Get Strong Workouts TriadXP App
Get Strong Workouts App

Recent Posts

  • Top 5 Reasons Why an In-Person Workshop is the Best Way to Supercharge Your Training
  • HYBRID STRENGTH TRAINING IS HERE!
  • My Calisthenics Journey to the PCC
  • The Handstand Press: Complete Control Through the Handstand
  • The Get Strong App is Here!

Dragon Door Publications

Dragon Door Publications

Recent Comments

  • bross dandon on The Case for Curved Handstands
  • Johnny Flewellen Jr. on Strength for Life
  • Dan Earthquake on The Pursuit of the Daily Minimum
  • Johnny Flewellen Jr. on The Pursuit of the Daily Minimum
  • Johnny Flewellen Jr. on Yoga, Calisthenics and the Journey of a Lifetime
FOLLOW US ON TWITTER!

Copyright © 2025

Dragon Door Publications / The author(s) and publisher of this material are not responsible in any manner whatsoever for any injury that may occur through following the instructions or opinions contained in this material. The activities, physical and otherwise, described herein for informational purposes only, may be too strenuous or dangerous for some people, and the reader(s) should consult a physician before engaging in them.