• Skip to main content
  • Skip to primary sidebar
  • Home
  • Contributors
  • Resources
    • Q&A with Paul “Coach” Wade
  • Workshops
  • Products
  • Forums
  • Articles
  • Blogs
    • RKC Blog
    • Strong Medicine Blog
  • Archives

PCC Blog

Progressive Calisthenics - The Official Blog for the PCC Community

Progressive Calisthenics

Cut to the Core

September 1, 2015 By Eric Buratty 14 Comments

Al Kavadlo Front Lever

It’s tempting to use the terms “core” and “abdominal” muscles interchangeably.

After all, having visible abs and sub-seven percent body fat gives us an automatic pass to forget training our core, right?

Not exactly.

You see, the truth is that the abdominal muscles are just a part of our core.

Why?

Because BROscience. And because I said so.

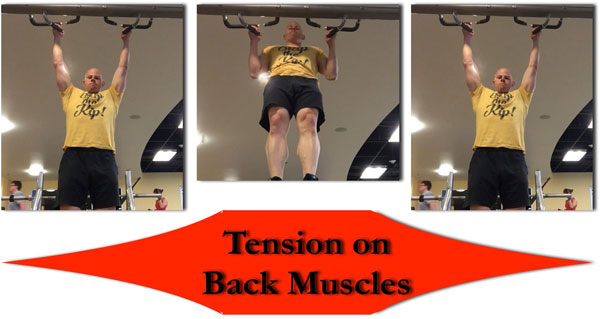
All joking aside, our entire core includes our upper back muscles, our lower back muscles, our psoas muscle and then our abdominal muscles.

That last area becomes especially important for earning our “beach body” card.

However, without a strong core, our “beach body” muscles are just there for show.

The good news is that Progressive Calisthenics happens to be the perfect way to wake these muscles up—even when they’re hidden beneath layers of fat.

What about abs being made in the kitchen (not the gym)? Yeah, yeah . . . we’ve all heard that one before.

We could just as easily counter that question with: What foods STRENGTHEN the core musculature?

So, instead of wasting time on semantics and dogmatic fitness debates, let’s cut to the core with more important matters.

Like WHEN and HOW to train the core for best results.

Who’s with me?

Al Kavadlo Beach Back Lever

WHEN to Train the Core

Ideally, we’ll train the core first thing during our workouts whenever we are:

  1. Making a comeback from a sports injury
  2. Combating some form of lagging or acute inflammation around a joint/tendon so that it doesn’t turn into chronic inflammation (i.e., performing an active recovery workout in place of a regular workout)
  3. Not feeling a solid muscle contraction where we need to on a given movement—which could lead to acute and/or chronic inflammation

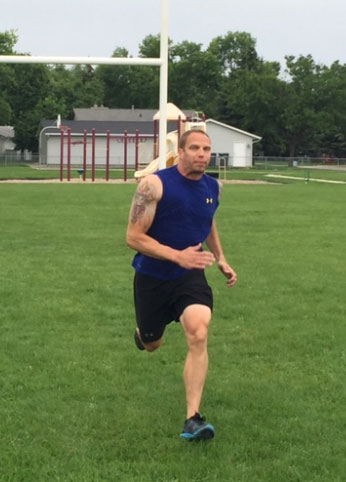
Whenever we are feeling closer to 100 percent and beyond, we’ll train our core after emphasizing our lower body muscles.
This is because, when we target our largest muscles first, we elicit a favorable hormonal response that translates into greater energy expenditure from our core musculature.

What if we’re emphasizing our upper body muscles during our main workout?

Well, it’s still recommended to superset some lower body plyometrics and core moves during our warm-up to help get us get in the zone.

We could also consider throwing in some core moves as bonus work if we accomplish our desired training effect earlier than expected for a given workout day.

Just ‘cause, you know, that playing around stuff is good for us every so often.

HOW to Activate the Core

Now that we’re all on the same page with when we should train our core, I’m sure you’re dying to know how you can start applying this info . . . like yesterday.

Kavadlo Brothers Two Flags

In this capacity, here are some drills to help you feel what it’s like to activate the entire core musculature.
These are ordered from least to most challenging and should be practiced as such.
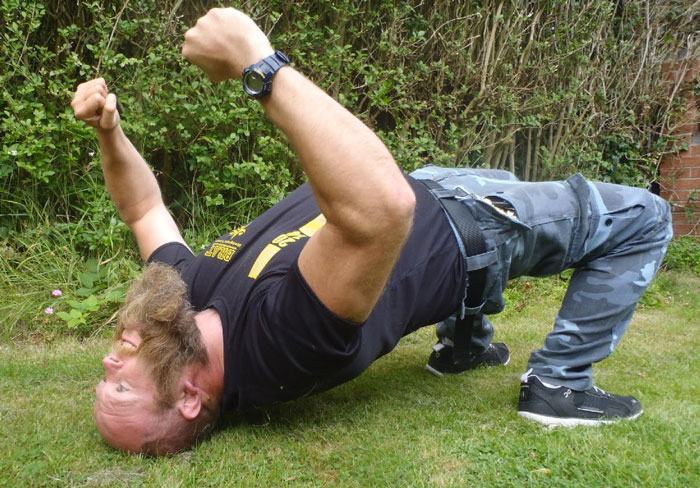
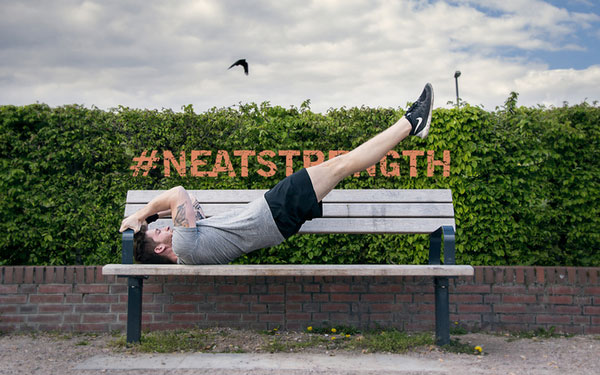
  1. Hollow Rock (Floor)
  2. Hollow/Reverse Hollow Sideways Roll (Floor)
  3. Reverse Hollow (Superman) Rock (Floor)
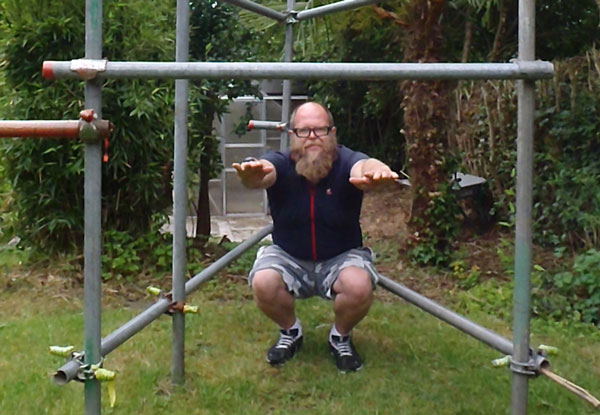
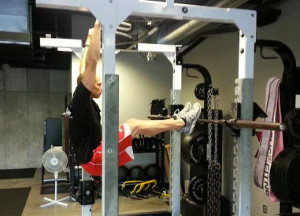
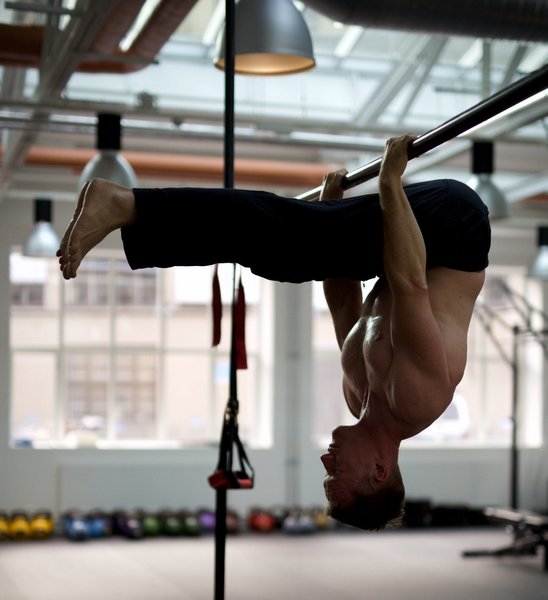
  4. Hollow/Reverse Hollow Swing (Start/Stop – Hanging)
  5. Sideways Hollow Swing (Start/Stop – Hanging)

Here’s what these moves look like in action in case you’re unfamiliar with the naming system I’ve used for them.

https://youtu.be/OjccrGGndGk

While it’s not necessary to structure your practice too much with these moves, it is recommended to just pick one or two at a time, and really focus on accentuating total body tension with them.

Implication or Application – You Decide!

As you’ll see and feel over time, a stronger core allows you to progress toward more advanced skills without fear of injury.

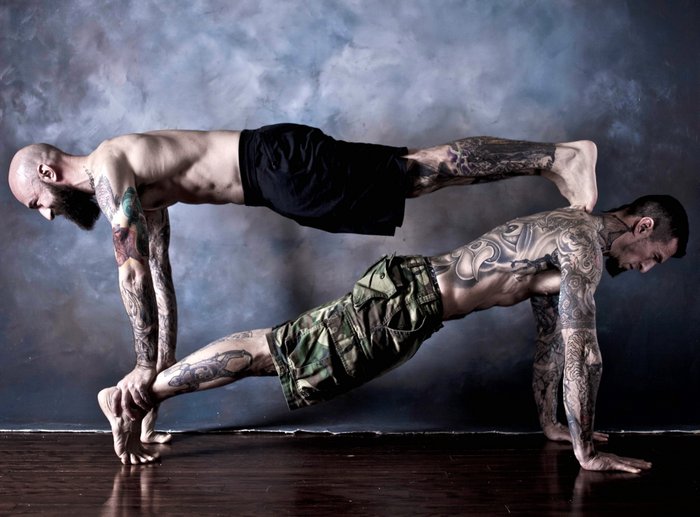
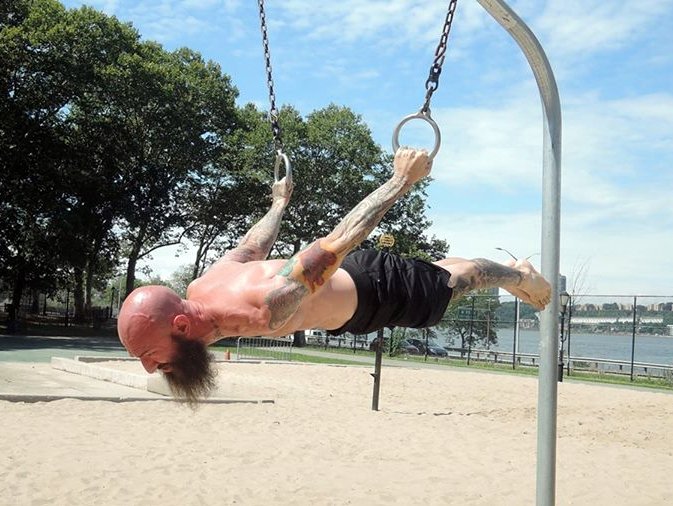
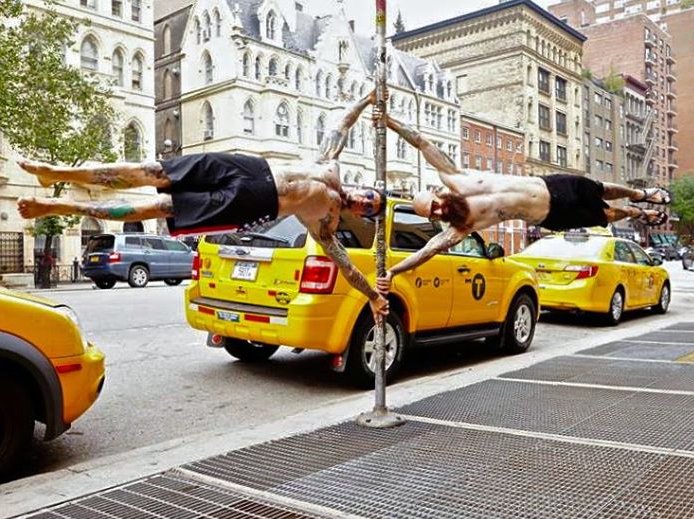
In particular, the similarities between the positions and transitions of these moves and those of front levers, kipping muscle-ups, and human (press) flags should be fairly noticeable.

Defying gravity rules!

Adrienne progression towards the human flag
Senior PCC, Adrienne Harvey working towards the full press flag with Step #6 Split Press Flag from Convict Conditioning Vol. 2

Now that you have further knowledge and tools to help you cut to the core, hopefully you will either imply other intelligent questions from this info, or apply greater integrity when using these muscles, moving forward.

In other words, knowledge is power, and the choice is yours in how you use it!

****

Eric Buratty brings six years of experience to the DC Metro Area as a Certified Personal Trainer, Progressive Calisthenics Instructor, Nutrition Consultant and Sports Injury Specialist. For more information about Eric check out his website, EricBurattyFitness.com.

Filed Under: Progressive Calisthenics, Tutorial Tagged With: abdominal training, abs, body control, calisthenics, core, core strength, core training, core training drills, Eric Buratty

Neck Bridges, Squats and the Changing Nature of Ambition

August 18, 2015 By Dan Earthquake 31 Comments

Dan Earthquake Wrestler's Bridge

At three years old I wanted to be a wrestler. The local judo club was the focus of my ambition until I was seven and could join the class. The instructor–Ted Spacey–was a large jovial man. Among the calisthenics that he imposed upon us were neck bridges. I complained once to him that they hurt the top of my head. “Then you’re not doing enough of them,” was his reply.

Family legend puts me in the sea with my Granddad at 5 months old and I’ve always swam, mostly for leisure. Vanity lifting caused a few injuries which directed me into doing more swimming and as I found I could go further, my ambitions became more aquatic. Eventually I swam the English Channel at 39 years old. On the way to France I had a lot of time to quietly reflect upon what I wanted to do next.

A little unfinished business with a 40-mile hike was concluded nineteen months later by which time I had started watching pro wrestling again online. My wonder at the spectacle now increased by knowing what injuries feel like and having some idea what strength it takes to lift people overhead. The conditioning aspect of the sport still intrigues me. The volume of calisthenics that many of the wrestlers do is impressive. Throughout all my other activities I’ve continued to do neck bridges, and since the age of sixteen have enjoyed doing pull-ups and dips. Lately I added push-ups, leg raises and bodyweight squats (which I had largely ignored for most of my life).

Pro wrestling legend Ric Flair has spoke of doing 500 bodyweight squats and 200-250 push ups and leg raises daily for about ten years during his busiest period as NWA World Champion. Admiring his longevity & ability to take bumps into his early 60’s, I decided to see if I could get near those numbers. It hasn’t been easy.

Dan Earthquake Backyard Workout

Slow sets of five repetitions are my preference and have been my habit for nearly twenty years. I used to do these in an intense manner so as to struggle to get the fourth and fail on the fifth. This was a once a week program which fit in with an otherwise physical job and active lifestyle.

Last October I bought a copy of C-MASS, which inspired me to look at different strategies. I love that book! I decided to start as if I were a novice, using some basic strength sets multiple times a day, then do a few months of muscle building in the 15 rep range. Coach Wade posted his “Diesel 20” article in January which inspired me further to go for the 500 squats in one day.

Initially a few sets of 15 were as much as I could manage. I’d given up on my training diaries a few years ago but it was Coach Wade saying “Do it for old coach” that made me restart. I’m glad I did.  I started out by putting a set of 15 squats between other exercises and I found I could do a hundred and fifty during a session. Soon it was twenty five reps, then thirty and so on. As the reps got bigger, the sets reduced.  Some days I do five sets of a hundred. That’s not everyday–I’m not Ric Flair!

Sometimes I combine other movements using bars or benches and squat down whilst pulling on the lats as I descend. At the top I change grip and move forwards into a slow incline push up. This feels like an ideal movement to do in between sets of my favorite exercises: dips, pull-ups and push-ups.

Dan Earthquake Bodyweight Dips

Following the PCC blog is very encouraging. Recent articles of regression, simplicity, focus on the basics and the Replek concept have stimulated my imagination. Danny Kavadlo’s assertion that calisthenics is a creative discipline had me smiling and nodding in agreement.

I didn’t always realize the importance of calisthenics and in hindsight should have favored them more over the lifting in my early days. Big ambitions can distract a person from doing the right thing in many aspects of life. I’ve worked myself into a lot of dead ends. Most importantly I’ve never stopped, always finding something productive to do.

I never became a pro wrestler but I had a taste. Judo, drug-free powerlifting competitions and heats of the UK Strongest Man were as close as I ever got. I wasn’t very good at any of those things. I’m not very advanced in my calisthenics either. Rather than worry about that, however, I enjoy the experience and savor struggle.

Sometimes the small ambitions are the ones that endure to provide the most value. Impressing the judo instructor was once an ambition. I often think of Ted Spacey when I do wrestlers bridges and it always makes me smile. Two years ago I realized that my head had stopped hurting. I guess I’m finally doing enough of them now.

Dan Earthquake English Channel Swim

****

Dan Earthquake is involved in event safety and hosts winter swimming training camps for Channel Swimmers. In 2013 the Channel Swimming Association awarded him the trophy for “Greatest Feat of Endurance” for his 21hr 25 minute crossing of the English Channel.

Filed Under: Motivation and Goals, Progressive Calisthenics Tagged With: bodyweight exercise, C-Mass, calisthenics, Dan Earthquake, extremely high rep training, motivation, push-ups, squats, training

Never Stop Learning: My Top 3 Training Tips

August 11, 2015 By Corey Howard 21 Comments

Corey Howard Pull Ups

At the age of 41, I can honestly say I’m still learning something new all the time.  There is no straight path to success; it is a crooked and curvy line.  I’ve learned some lessons the hard way in my training, but each setback yields another opportunity to refine my craft.

Here are 3 of the most valuable lessons I’ve learned (and relearned) throughout my time as a trainer and fitness enthusiast:

1. Work Your Legs and Glutes

If you were to look through my training log over the past year, you would see most of my workouts are focused on my lower body.  Unfortunately, this is due to having ruptured my triceps and biceps in the last year, but honestly it’s been the best thing ever.  Even when my upper body has been healthy, I still make my lower half 60-70% of my focus… EACH time I train! Most people would hate this because it’s so physically taxing but focusing on your lower half improves your testosterone levels, builds lower body muscle which helps burn more fat, improves stability in your midsection, improves mobility and helps create more explosive power for sprints and jumps. You just can’t ignore pistol squats, shrimp squats, bridges, lunges, hyperextensions or anything else that puts a beating on your lower half.

Sprinting is also a fantastic way to work your legs with only your bodyweight.  If you truly want to feel the benefit of sprints, don’t sprint on a treadmill! The treadmill takes away from you actively creating force.  Get outside and make your legs plant and propel you forward. Training outside is awesome, and running as fast as you can for a short period is even better. Again, the research on sprint work is off the charts (Coach Wade talks about it as a finisher in his book C-Mass). Sprints will thoroughly cook your lower half quickly and effectively, plus they help build size and burn fat at the same time.  So get out and sprint 20, 30, 40 or 50 yards, in a field, through a parking lot, or up a steep hill. No matter where you do it, make your body move as fast and explosively as you can once or twice a week.

Corey Howard Running

2. Refine The Basics Using Regressions

Two of my favorite exercises are jackknife pull-ups and pike push-ups.  These two are simply amazing for adding size in the lats and shoulders, plus they give you a chance to perfect your pulling and pressing groove. The jackknife pull-up has really helped me re-learn pull-ups.  It’s given me a chance to work on my height at the top as well as given me an opportunity to work various grips without completely loading my freshly repaired elbows. The pike push-up has done the same thing; given me a chance to work on various pressing widths as well as practice my groove.  Don’t scoff at either of these; pairing these two for 5 alternating sets each will leave your lats, shoulders, and triceps feeling it the next day.

Corey Howard Jacknife Pull-Ups
Corey Howard Pike Push Ups

3. Stretch!

When I was younger, I mistakenly thought that stretching was a waste of time. Now that I’m older, if I don’t stretch out I’m practically crippled the next day. If you stretch the working muscle group in between sets it not only speeds up recovery but some studies have shown it helps with hypertrophy too.  A healthy person should be able to comfortably squat below parallel with their hands behind their head.  If you can’t physically do this, you need to spend some time working on your movement quality.  I don’t know everyone’s personal movement issues or pains but if I could suggest a few areas to spend some time stretching out: the ankles, hips, shoulder complex and neck.

I’m not going to tell you to spend an hour on this every day, but 10 minutes before and after your workout is a great start.  For the ankles, find a step and stretch out your Achilles.  If your ankles can move appropriately then chances are your knees will move and feel better.  For the hip complex, I’d strongly suggest the pigeon for your glutes and the half kneeling hip flexor stretch.  Healthy hip mobility will allow the body to stabilize itself and let your hamstrings and low back relax.  As for the shoulder complex, I like to use a stretchy band hanging from a pull-up bar.  Hinge yourself forward and let the band pull your arm forward stretching through the lats, then turn around and let it pull your arm back to open up the chest.  Healthy shoulder movement will also help the body stabilize and improve your posture.  Finally some simple head nods and slow rolls will go a long way to ease tension.  Again, this is very elementary but just making time for this will be a great start. For more information, I recommend Al Kavadlo’s Stretching Your Boundaries.

Al Kavadlo Overhead Squat

Tony Robbins once said, “The secret to success is learning how to use pain and pleasure instead of having pain and pleasure use you.  If you do that, you’re in control of your life.  If you don’t, life controls you.”  I have chosen to use my pain as speed bumps or opportunities to improve.  I can’t stress it enough: train your lower body three times each week, get outside and run like you’re fleeing the scene, don’t be afraid to take a step back to refine the easier progressions, and stretch out!  It will pay huge dividends on the harder stuff.  Fire it up!


***

About Corey Howard, PCC, RKC, CK-FMS: Corey Howard strives to constantly become stronger, and to help others to achieve their fitness goals. He is the owner of Results Personal Training, and can be reached at fithubby.com, resultsptonline.com or coreyhoward.com.

Filed Under: Progressive Calisthenics, Tutorial Tagged With: Corey Howard, glute training, leg training, regressions, stretching

The Dragon Pistol Squat

July 28, 2015 By Al Kavadlo 25 Comments

Al Kavadlo Dragon Pistol Lead

The first time I ever tried to do a one-legged pistol squat, I failed miserably. Even though I thought I had strong legs from years of weight training, my initial attempt at this calisthenics staple resulted in me falling on my behind. After several weeks of dedicated practice, however, I was able to nail the pistol squat and eventually build up to performing it for reps.

Later on, I discovered an exercise known as the shrimp squat, which finds the non-squatting leg held behind the body, rather than in front, as it is with the pistol. Once again, my first attempt at this new one-legged squat variation was unsuccessful. This time, however, I was able to get the hang of my newfound lower-body calisthenics challenge within a few training sessions. The strength and stability I’d built from pistols had a good amount of carryover to learning this new skill.

As I got more comfortable with the shrimp squat, I began finding new ways to make single leg squats more challenging. By holding both hands behind my back, I discovered I could change the leverage and add a significant amount of resistance without relying on external weights. I was also starting to practice a technique that would later go on to be dubbed the “jumbo shrimp”, which involves increasing the range of motion of a standard shrimp squat by standing on an elevated surface so that the back leg can drop down lower than when standing on the ground.

Raised Shrimp Squat "Jumbo Shrimp" at Encinitas PCC workshop

Legs Get To Work
One of the most common misconceptions about bodyweight strength training is that it can only be progressed so far. After a certain point, many people would argue that the only way to increase the difficulty of an exercise is to add weight. This is especially true when it comes to leg training. Even folks who have come around to the idea that a muscular and highly functional upper-body can be built with calisthenics alone often have a hard time conceiving that the same is true for their lower half.

Though different people define strength differently, there are plenty of bodyweight squat variations to keep your workouts fun and challenging for a lifetime. If standard pistol squats and shrimp squats are no longer difficult for you, don’t start thinking you need to join a gym. Instead, consider giving the dragon pistol squat a shot.

Dragon Pistol Squat ? #ProgressiveCalisthenics #Legs #Calisthenics #Legday #PistolSquat #BeardPower #NinjaTraining #NowYouTry

A video posted by Al Kavadlo (@al_kavadlo) on Jul 23, 2015 at 11:42am PDT

Enter The Dragon Pistol
Like the traditional pistol squat, the dragon pistol requires serious strength, balance and mobility – and in a very unique way. The dragon pistol can be surprisingly taxing on your inner thighs as well as your deep glute and hip muscles. And of course, all the other muscles that you work in a standard pistol will get hit as well.

As we each have our unique strengths and weakness, some people may find this move a lot harder than a normal pistol, while others may not experience a huge disparity. Regardless, I suggest building a solid foundation in standard pistol squats before beginning to work on this variation.

Convict Conditioning Vol 2 Twist

Other than that, I recommend you spend some time working on your hip mobility by practicing twist holds, which you may recall seeing in Coach Wade’s Convict Conditioning Vol 2. Once you’re able to do a standard pistol and a full twist hold, you shouldn’t be too far from the dragon pistol.


Elevation Training
Though standing on a bench or other elevated surface when performing a shrimp squat can increase the difficulty of the exercise by increasing the range of motion, practicing the dragon pistol while elevated can actually be a very helpful regression. By allowing your non-squatting leg to drop below the bench, you can decrease the amount of mobility required to perform the exercise. (This same technique of standing on an elevated surface can be very useful when someone is learning to do a standard pistol squat as well.)

Dragon Pistol Raised Regression

Toe the Line
If you’ve spent some time working on pistol squats, you’ve probably at some point experienced a cramp in your non-squatting leg as you fought to keep it in the air. This is common when learning the dragon pistol, too, only the cramping may take place in your hip and/or inner thigh instead of your quads. To minimize this issue, many people find holding the toe of their squatting leg to be helpful, particularly in the bottom position.

The dragon pistol also has quite a bit in common with the shrimp squat, as both moves begin with the non-squatting leg behind the body, rather than in front. As such, you may find that holding your toe behind your back at the top of a dragon pistol (similar to how you would in a shrimp squat) will allow you to control your leg as you gradually extend it into the bottom position (which more closely resembles a pistol squat, only with the extended leg threaded behind the squatting leg). Note that your hand will reach across to the opposite toe for this variation, whereas in a shrimp squat it is more common to hold the toe on the same side. So if you’re going for a dragon pistol on your left leg, you would hold your right toe with your left hand.

Al Kavadlo Dragon Pistol How To

When practicing these progressions, I recommend keeping your training volume low. Warm up with a few easier moves (basic squats, split squats, maybe a few pistols and shrimps) then get into practicing your dragon pistol progressions (elevated, holding your toe, etc). When starting out, stick to just one or two reps at a time – a total of 10 reps per side in one training session is probably plenty. If you go slowly and focus on staying in complete control of your movement, you won’t need to do a whole lot of volume.

I’ve only recently begun experimenting with this move, so don’t take my guidance as the final word. I’m sure I will learn a lot more as I go. Feel free to share your experience with the dragon pistol squat in the comments below.

***

Al Kavadlo is the lead instructor for Dragon Door’s Progressive Calisthenics Certification. Recognized worldwide for his amazing bodyweight feats of strength as well as his unique coaching style, Al is the author of five books, including Raising The Bar: The Definitive Guide to Pull-up Bar Calisthenics and Pushing The Limits! Total Body Strength With No Equipment. Read more about Al on his website:www.AlKavadlo.com.

Filed Under: Progressive Calisthenics, Tutorial Tagged With: Al Kavadlo, bodyweight exercise, calisthenics, Dragon Pistol, flexibility, how to, leg training, mobility, tutorial

“Replek” Training for the PCC

July 21, 2015 By Karl Indreeide 24 Comments

Karl Indreeide Replek Training

As I prepared to attend the recent PCC Workshop in New York City, I began using a system inspired by the Swedish running technique known as “Fartlek Training”, a form of interval training where you let the terrain and your mood direct the speed and intensity of your running.

The name “Fartlek” translates to “Speed Play” in English and “play” is a very accurate word to describe it, as it’s close to the way a kid moves just for enjoyment or exploration.  It is running by feel, running by inspiration.

I decided to name my system “Replek” as it is a similar method to Fartlek, except instead of playing with your speed, you play with your reps.

The plan is well suited to the PCC Century Test as well as getting the most out of the workshop weekend. In addition to positioning you to pass the Century, it also adapts your body to handle a high volume of calisthenics over several days.

Replek is nice and forgiving. It takes your daily stresses, aches and pains into consideration. Like a sly lover, this plan lets you believe that the initiative and follow through are all yours, that there is no plan, really, no string-pulling, no forcing. It’s all about you and what you feel like doing.

You stay within your comfort-zone, don’t do anything you don’t feel like doing, and yet results appear and motivation grows. Your comfort zone will expand from the inside out, and what seemed like too much work a while ago just isn’t anymore. You didn’t break any barriers. The barriers just moved.

There is a time for working through adversity, facing your demons, finishing unbearable workouts and so on. To be able to fight through discomfort is invaluable. But so is getting results without suffering, and learning how to productively back off at the right moment.

Replek for PCC is done this way: You pick exercises or chains that you want to work on (pull-ups, push-ups, squats, leg raises, bridges, etc.), then you start playing a game with yourself.

Karl Indreeide Replek Training

Here are the rules of the game:

Wherever, Whenever
It is up to you if you want to do all your reps in a condensed workout, spread them throughout the day or do some combination of the two. I recommend that you mix all these modes. After a while, you won’t care, because you’ll have grasped the essence of the program, which is sneaking the reps in whenever possible.

Never to Failure
That means you must always stop at least one rep before your failed rep. Most sets should stay way clear of that. The only exception to this is when you on occasion, do some version of the Century Test.

Avoid Punishment
As this program is based on positive reinforcement, it is your job and responsibility to stay away from the punishment of injury, failure, getting overly exhausted or negative self talk  (or negative self talk about you giving yourself negative self talk). Stay away from the drama. Stay away from the heroism and struggle. Observe your form, do your reps, log your sets, stay fresh.

Keep a Log
You always want to capture exactly which exercise/variation you do, your number of reps and sets and the daily total of any given exercise. The log is the most important tool of this method. The log is also crucial in keeping your motivational fire burning (pun not intended, but gratefully received). In the beginning you might actually have to force yourself to log. In a short while, however, you will have a deep desire to do so.

Just write the date and the reps for each exercise. You don’t need to bother with noting rest periods and so on, but can feel free to keep additional notes if you find it helpful. But we don’t want to punish you for training by forcing you to write an essay, do we?

This was my log entry for the 16th of May, this year:
BW squat: 50
Push-ups: 20/22/6/20/24/21/21/20/22/23/15 – 224
Shoulders feeling much better than yesterday
Wheel roll-out: 10/10/4 – 24
Pull-up: 9/6/9/7/10/ 10 (chin up)/5/7 – 63
Pistol:
R: 4/3 – 7
L: 2/2/2 – 6
Push-ups – one hand on basketball
V: 4/6
H: 4/6
Bottom position of pistol: 50 sec/50 sec
Short bridge:  1 min
Crow (sec): 10/20/20
Squat bottom pos: 5 min
Couch stretch: 4 min

Another day looks like this:
Pull up: 1/5/7/13 – 26
That was all the training I did that day. Still, getting the 13th rep in was very nice! It is not my historical best in that department, but the best I had done for a long time.

Personal Records
One of the great features of this program is that you can experience personal records on a daily basis. Your goal is to increase the number of reps during a set as well as the total number of reps of any given exercise during a day. Say your first day you do four sets of push ups: 5/10/15/7 = 37. The next day you do 4/7/16/10/ 3 = 40. Boom! You double-PR’d on the push up! Whenever you PR underline the number or write in bold as I did here, so it is always easy to track the history of PRs, and check your current status.  By the way, the PRs we are talking about are the ones within this program. Forget about past glory and previous heights of achievement. Focus on the present.

Less Structure
Some days you’ll have the time or inspiration to collect your reps within the frame of a more conventional workout. Structure those sessions however you like, and feel free to change trajectory mid-flight. Concentrate on one exercise at a time, or do super-sets, tri-sets or circuits. You are guaranteed to stumble upon combos or sequences that work really well for you, and that belong in your arsenal of go-to-workouts. You will also experience that there is drive in open-endedness, especially given that you have your previous PRs to relate to.

Test the Waters
Always be extra careful with the first few sets. Hone in on the perfect rhythm, and at the same time actively search for any discomfort or pain. Go slow. Think of these reps as screening. Maintain tension in all the right places. Does this feel like a good day for squats / push ups / L-sits? If so, go for it! If not, it may be best to back off and try something else. Other times an exercise will feel much better a couple of sets in, so don’t be to quick to abort, but also keep the “ live to fight another day” mentality at heart. If it is not a great day for squats, it might be an excellent day for pull-ups.

Stay Modest
Sometimes you will feel like a star. You become the exercise, you feel power running effortlessly through your whole body as you perform perfect reps. This is when you can astonish yourself with a crushing PR. Most of the time, though, stick to modest ones. Many small PRs are preferable to a few big ones. Try to not get more than one PR per exercise each day, and don’t PR on the same exercise two days in a row.  Remember that the PR is the reward that will keep you going. Spread them out. The smaller the increments, the more PRs you can enjoy. You are setting yourself up for a very productive schedule of reinforcement, and are safeguarding against overuse.

Whenever you PR – back off, and then see what you feel like the next day. The next day you might do a very low total number of reps in that exercise, just to recover, or maybe stay away from it completely. If you feel like too much time has passed since your last PR, then do a volume PR – these are always accessible. You can always get in one more rep during a day. Just make sure you don’t sacrifice your form just to get an extra rep. This is why you can rest as long as you need between sets.

Maintain High Standards
The aforementioned point taken into consideration, a standard to reach for might still be a good idea, as long as you don’t rush to get there. If you are preparing for the PCC, then passing the Century Test is an obvious goal. 40 squats, 30 push ups, 20 knee raises and 10 pull ups should feel very comfortable on their own, meaning you should be able to do 60 squats, 45 push ups, 30 knee raises and closer to 15 pull ups.

Prioritize
The last pull-up is where many Century hopefuls fail. Make the pull-up and pull-up related work the centerpiece of your efforts.  The push up is also a natural focal point – follow the progressions in Convict Conditioning or Pushing The Limits!

That’s it! Now all you have to do is start somewhere, preferably well within your comfort zone, and then let the Replek catch up with you and unfold. Enjoy the journey, have fun, and get strong!

****

Karl Kristian Indreeide, PCC, is part owner of Gym Ila in Oslo, Norway, where he teaches kettlebell and bodyweight training. He also runs HAVA-Instituttet, which provides consultation, seminars and full-scale health and social services.

Filed Under: Progressive Calisthenics, Tutorial Tagged With: Century Test, Convict Conditioning, Convict Conditioning Training Log Book, Karl Kristian Indreeide, PCC, PCC Workshop, preparing for the PCC, progressive calisthenics, Replek, training log, training strategy, tutorial, workshop preparation

5 Unique Push-Up Variations to Help You Increase Strength & Size

July 14, 2015 By Todd Kuslikis 14 Comments

5 Push-Up Variations

It could be argued that the push-up is the most popular exercise ever invented. Before we had chrome plated dumbbells and Olympic sized barbells people had to rely on their own body weight for building strength.

Yet is the push-up outdated? Should it be used only as a simple conditioning exercise or as a “finisher” after the “real” weight-based exercises are completed?

Of course not.

There is still tremendous value to the push-up. It is the Godfather of all exercises so we must pay it due respect. Yet, descendants of this exercise have sprung up around the world to help bodyweight enthusiasts continue to improve their strength and build more muscle.

Today, I’d like to share with you my five favorite unique push-up variations to help you increase strength and size.

These exercises are super effective for three main reasons…

1. Challenge Different Muscle Groups

The typical push-up targets mostly the middle portion of the chest, front deltoids and triceps. In order to get stronger, you have to challenge your muscles from different angles and in unique ways. Some of these exercises you might have never heard of before, but after you try each of them, you’ll feel muscles you never knew you had.

2. Build Whole Body Strength

True bodyweight enthusiasts know that one of the greatest benefits to calisthenics exercises is that they build whole body strength. Isolation exercises can cause weak links in your armor that may eventually lead to an injury.

The exercises below surpass most other forms of exercise because they strengthen the entire chain (whole body) as a functional unit.

3. They Are Fun To Do!

Let’s be honest, haven’t you gotten tired of cranking out rep after rep of basic push-ups? When you add unique exercises to your normal routine it becomes fresh and exciting again. Which makes you WANT to do it!

That’s one of the most important aspects of fitness. Sure, getting a nice physique and becoming healthier is great, but we only get one life to live – why grudge through your normal routine? Have fun with it!

Changing up your exercises and adopting new and unique styles will help you do this.

Ok, now on to the exercises…

Variation 1: Barbwire Push-Up

The Barbwire Push-Up (also known as the Diver Bomber Push-Up) is great for developing strength through a large range of motion. You’ll work the upper, middle and lower portions of the chest along with the front, middle and rear delts.

One of the greatest benefits is that with each rep, you are improving spinal mobility. The spine is so important for keeping up your strength. As soon as your spine starts to stiffen you lose functionality which leads to poor performance.

How To Do The Barbwire Push-Up

Start off in a “Downward Dog Position”. Lower yourself down toward the floor as if you were sliding under barbwire. The more arc you can get in your spine the better. As you “slip under the barbwire” arch up while pressing down against the floor. At this point you should have a full arch in your back. Make sure to look up, too, which will extend the arch into your cervical spine.

Begin to arc back down “under the barbwire” while curving your spine the entire time. Press back to starting position.

Coaching Tips

1. The key to this exercise is getting a full range of motion. Make sure you that you are arching as much as you can.

2. To make the exercise easier you can do any number of modifications:

  • Perform the exercise on your knees (you won’t get much range of motion but it will still help you build strength).
  • Decrease the range of motion in your spine (i.e. don’t go down as far or arch up as high).
  • Do the first part of the movement normally but instead of arching back “under the barbwire” come straight to the starting position, which is also known as a Hindu Push-Up.

Variation 2: X Push-Up

The X Push-Up is one of the greatest exercises to develop whole body strength. Normally, with any exercise, you’ll have some muscles that are working much harder than others because the exercise targets a particular muscle group.

With the X Push-Up it seems that it targets ALL of your major muscle groups. In order to perform this exercise your chest, back, core, shoulders, and glutes will be firing on all cylinders.

How To Do The X Push-Up

From a normal push-up position, separate your legs so that your feet are 1.5x shoulder width. Then separate your hands 1.5x shoulder width and bring them up so they are NOT in line with your head. Your body will look like a big “X”. The further you separate your hands and the higher you bring them, the harder the exercise will be.

Lower yourself down until your nose gently touches the ground. Push back up.

Coaching Tips

1. It is important to maintain proper alignment when performing this exercise. One tip that will help you is to keep your glutes and core tight throughout every rep.

2. If the full X Push-Up is too difficult, bring your hands and legs in to 1.2x shoulder width. This will create less demand on your muscles and allow you to progress up to 1.5x shoulder width or even more.

Variation 3: Diamond Kiss Push-Up

The Diamond Kiss Push-Up is a go-to calisthenics exercise for developing strong triceps. It also helps to target the inner portion of the chest muscle and lats. You have probably heard that form is very important when performing any exercise. Well, when performing the Diamond Kiss Push-Up, it is especially important because you are putting tremendous demand on your shoulders. If you can not perform the exercise without your spine being perfectly in-line, then switch to an easier progression.

How To Do The Diamond Kiss Push-Up

Start off in a normal push-up position. Place your thumb and pointer finger together creating a diamond in-between. The diamond should be in line with your head. While keeping your spine perfectly straight lower yourself down until your nose touches the ground in between the diamond. Then press back up.

Coaching Tips

1. As mentioned before it is very important to keep your spine straight.

2. Elbow positioning is also important. While performing this exercise the more you flare your elbows out to the side, the greater likelihood of injury. Try to keep your elbows tucked close to your body as much as possible.

3. Easier Variations: If you can’t complete 5-6 reps of this variation I recommend separating the fingers so that there is more space between your hands. This will decrease the emphasis on your triceps and rely more upon your chest muscles. As your triceps get stronger you’ll be able to bring your hands in close.

Variation 4: Spider Push-Up

The Spider Push-Up is an exercise that incorporates abdominal specific training into the normal push-up. If you have a strong upper body this is a great exercise to incorporate into your training because it will help tighten not only your abs but also your obliques.

How To Do The Spider Push-Up

Start off in a normal push-up position. Lower yourself down like normal while simultaneously bringing your left knee up toward your left elbow. This may take some flexibility but eventually you’ll get it. After you reach the “down” position, press up to starting position while simultaneously bringing your left leg back. Repeat on the other side.

Coaching Tips

1. Maintain proper spinal alignment while performing this movement. You may find yourself arching up to get enough space to get your leg up. Don’t do this. If you don’t have enough flexibility to get your leg up high than just bring your leg up as high as you can (while maintaining form).

2. While performing the movement, consciously contract the abs. This will help you engage more muscle fibers and get more out of the movement.

Variation 5: Dolphin Push-Up

This is one of my favorite conditioning and strength movements. Is it the hardest progression? No. But it targets muscles you don’t normally work, which makes it challenging (especially when you get into high reps) and is very fun to do. Also, I’ll teach you a variation to make the exercise even harder.

How To Do The Dolphin Push-Up

Start off in the plank position, resting on your forearms and elbows. Lower yourself down a bit further (you won’t get a ton of range of motion but the little bit that you get will help to engage the middle rhomboid muscles in your back), then press your butt up into the air. Go as high as you can. You’ll feel muscles in your shoulders that aren’t normally targeted, which is great for developing a healthier shoulders.

Coaching Tips

1. Just like the Barbwire Push-Up, this exercise is focused on spinal mobility as well as developing strength. You don’t need to perform this exercise quickly. Keep a strong, steady pace and try to get as much range of motion as you can.

2. How To Make It Harder: Instead of resting on your forearms, start off on your hands. This is the “Horse Push-Up” variation and is harder than the Dolphin Push-Up. You’ll perform a normal push-up but instead of maintaining a straight spine up to starting position, you’ll lead with your butt and come up all the way to a downward dog position. This will increase range of motion in your spine and shoulders as well as put greater demands on your chest.

The traditional push-up is the Mac Daddy of all calisthenics, yet performing endless reps of the same exercise will eventually lead to diminishing returns. You must challenge your body in unique ways in order to get it to grow. You must apply the principles of Progressive Calisthenics so that it adapts and gets stronger. All of the above exercises are unique variations to the normal push-up. They’ll not only challenge you in new ways but also add more enjoyment to your routine.

****

Todd Kuslikis is the founder of a bodyweight exercise blog called AShotofAdrenaline.net. He teaches men how to build muscle using only calisthenics. You can download his free 3 month bodyweight training program by clicking here. 

Filed Under: Progressive Calisthenics, Tutorial Tagged With: advanced push-ups, advanced variations, bodyweight exercise, increase muscle size, muscle mass, push-up variations, push-ups, Todd Kuslikis, tutorial, video

PCC in the UK

June 30, 2015 By Adrienne Harvey 18 Comments

Al and Danny Kavadlo with Senior PCC Adrienne Harvey

After the first ever Progressive Calisthenics Certification Workshop in the UK (Newcastle England), Al, Danny, and I agreed that while every PCC workshop has been fantastic—including the very first one in St. Paul, MN just a little over 2 years ago—it seems like each and every one continues to improve. By now, the news about the PCC and Convict Conditioning has spread around the world, allowing Dragon Door to bring this information to even more locations. While the Newcastle PCC was the very first held in the United Kingdom, it’s already very apparent that will be the first of many.

It is always an extreme honor to have the opportunity to teach, coach, and contribute a little of my own experience to the PCC. And when the participants are so eager, prepared, and able to instantly understand and apply the cues and information, then it is that much more rewarding! This group brought so much strength, skill, and bravery that every participant had at least one major PR. More importantly, they also had insights and realizations which will exponentially increase their value and effectiveness as instructors.

The overall strength of everyone in the group was demonstrated with the unprecedented lists of groundbreaking personal achievements. A full 1/3 of the group performed their very first human flags at the workshop! Among the other standout first time accomplishments were six first one arm push-ups, fifteen first clutch flags and even a first one arm pull-up!

One Arm Pull-up PCC UK

While almost everyone attending the Newcastle PCC was a fitness instructor, trainer, or fitness business owner, there were a few highly dedicated enthusiasts in attendance as well. I am always impressed by the dedication and enthusiasm of these participants, many of who may be stepping far outside the usual territory of their day job. It seems successful professionals in all fields recognize the value, efficiency, and convenience of bodyweight exercise as taught at the PCC.

The large group of well-prepared participants included an impressive number of women. Far from being intimidated, these women were strong, did pull-ups, and performed advanced variations of nearly every exercise.

PCC UK Ladies

GymNRG was already an ideal location for the PCC (including a custom indoor pull up apparatus that I would LOVE to duplicate), but host Steven Hope went the extra mile and had a scaffolding structure erected just behind the studio. For the first time ever (even the weather cooperated) we were able to hold the flag and muscle-up portion of the workshop outdoors on this optimal setup.

This authentically reproduced “street workout” setup was further put to the test when Barstarrz athlete, Stephen Hughes-Landers (Lambarstarzz), Adrian Harrington, and Fitz Dubova performed some impromptu freestyle demos for us after the workshop.

Renos Panagidis and I with Barstarrz World Champion, Stephen Hughes-Landers

I am proud of each and every one of the newly certified PCC Instructors (as well as those who need to complete their video tests), especially since they will now be representing our PCC program and hopefully encouraging others to train in this fun and effective way.

PCC UK Group

***

Adrienne Harvey, Senior PCC Instructor, RKC-II, CK-FMS, has been RKC Certified since 2010, and RKC Level 2 certified since 2011. Kettlebell and bodyweight training have been crucial in Adrienne’s personal quest for fitness.  A core member of the PCC team, Adrienne loves sharing her knowledge with small groups and individuals. She also loves to develop recipes and workout programs to further support performance, body composition, and of course—FUN. Go to http://www.giryagirl.com for more information about Adrienne.

Filed Under: Progressive Calisthenics, Workshop Experiences Tagged With: Adrienne Harvey, Newcastle England, PCC, PCC Workshop, PRs, UK PCC, what to expect at a workshop, Workshop Experiences

Calisthenics Regressions for Strength Progress

June 23, 2015 By Matt Schifferle 29 Comments

Al and Danny Kavadlo demonstrate regressed push ups

I once attended a very high level Taekwon-Do seminar taught by an Olympian ranked 3rd in the world. I was looking forward to learning a lot of advanced techniques–yet here we were, all of us black belts, simply learning how to stand still.

The instructor spent the rest of the day drilling us on how to improve the techniques we all learned years ago. Even though we never strayed beyond the “easy” kicks and punches, we all became much better by the end of the weekend. Since that seminar, I’ve taken that lesson to heart not only with Taekwon-Do but also calisthenics.

It’s always important to train your foundation no matter how advanced you become.

When I first discovered Convict Conditioning, I made the mistake of rushing into the more advanced steps. This was despite ample instruction not to do that in chapter 11! Even though I could (barely) meet a regression standard, I figured I had passed that level and no longer had any need for that technique. After all, I could do loads of close push-ups, so why would I ever need to practice push-ups on my knees?

But, just like my Taekwon-Do, I’ve learned that I’m never above the earlier steps. There are always a few nuggets to discover with the earlier steps no matter how many reps I can do of the more advanced techniques. Here are a few examples of how the earlier steps can still hold some value to your training.

1: Warming Up

It would be considered foolish to load a bar with your maximum working weight for your first set, yet that’s exactly what I used to do. I would go from 0-100 mph as I cranked out reps of the the hardest step I could muster. Is there any wonder why I was plagued with muscle control issues, balance issues, and sore joints after a few weeks?

These days I always start my workouts with some of the first level steps of each exercise. If I’m practicing bridges I still start with step 1 (short bridges) to wake up my posterior chain and loosen up my hips. As a bonus, this approach to my practice also allows me to fully dial in my mind-muscle connection. My body and mind will both be warmed up for the next steps. It also helps me get a feel for the state of my body, so I know if I can push hard or if I should take it easy that day.

2: Muscle Building High Fatigue Drop Sets

In Paul Wade’s article, “the Diesel 20”, he mentions using easier techniques to highly fatigue a muscle group towards the end of a workout.

On of my favorite methods is to start with archer push-ups, then drop down to the narrow push-ups, then normal push-ups, and finally push-ups on the knees.

Like all drop sets it can be sort of funny to shake and struggle with an “easier” step. Watching myself struggle to get 6 knee push-ups is always a great way to keep myself humble.
Like all drop sets, it can be sort of funny to shake and struggle with an “easier” step. Watching myself struggle to get 6 knee push-ups is always a great way to keep myself humble.

3: Filling in Tension Gaps

For the longest time I’ve always noticed my back and biceps muscles would fully contract at the top of a pull-up but they tend to relax a bit towards the bottom of each rep.

Mark Shifferle Keep Tension on Back Muscles

I refer to these points as tension “gaps”. These gaps can be detrimental to muscle development, strength, power and can place more stress on the joints.

One of the best ways to fill in these gaps is to use an easier technique and practice proactively tensing the muscles at these weaker points in the range of motion. By going to the Jackknife pull-up, I was able to work on maintaining the tension in my back while keeping my shoulders and arms tight at the bottom of each rep. This is much easier on the earlier steps because my muscles are not overridden by a much higher level of resistance.

4: Learn What’s Missing

Many times I’ve struggled to advance because I was missing a critical technical detail.

The worst example was my journey into single leg squats. Again, I was foolish and just breezed through some of the earlier steps thinking I was above them. Within a couple of months, I was doing 10 single leg squats on each leg. The catch was I was tilting and moving all over the place and sometimes had to slightly bounce out of the squat. I also had to do them on an elevated surface so my front leg could extend below the level of my supporting foot.

After a year, I developed tendonitis in my right knee and it got so bad I had trouble walking up stairs. I struggled to figure out what was wrong for months, and was sometimes on the verge of tears with frustration. As a mountain athlete I need strong and healthy legs to hike, ski and pedal and here I was hobbling around like an old man.

I finally swallowed my pride and started all the way back at step 1 in the squat progressions. By the time I had made it to narrow squats, I had learned that my legs had exceptionally unbalanced development in the hips and hamstrings.

I still make close squats a staple of my training to keep my muscles balanced

It’s been over a year now and I’m back to doing single leg squats. Now there is no bounce, no tipping or wobble and I don’t need an elevated surface. Even though my numbers are far lower than before, my legs have never been stronger or healthier. I would never have figured out where my technique shortcomings were unless I went back and explored the earlier steps to a deeper level.

5: Learning to Use the Body Better

I believe Progressive Calisthenics is more than just a system for building strength and muscle. To me it’s a vehicle towards understanding my own body and learning how to use it better. Using the earlier steps has always been exceedingly helpful towards doing this. I can always control myself and dial in cleaner technique with an earlier step than I can with an advanced step. My mission is to learn why the earlier steps are so much cleaner and more stable. Once I know why, I work on bringing those qualities up to the more advanced moves. Of course, as my advanced moves become better so do my earlier steps and the whole process starts over again. In this way the quality of the earlier techniques feeds into the more advanced moves and the advanced moves make it possible to learn even more from the earlier moves. It’s a cycle that’s infinitely progressive.

In the martial arts, the student is always encouraged to retain the lessons they learned at the previous ranks. There’s a reason why students are encouraged to have a “white belt mindset.” The color black is made up of all of the rank colors that come before it so when you wear a black belt you’re still wearing a white belt, a green belt and so on. The earlier belts, and the exercises they represent are never discarded. They simply remain in the mix. The same thing is true for calisthenics, the earliest steps are never discarded but are recycled and re-purposed.

Discard nothing and gain everything!


****

Matt Schifferle a.k.a. The Fit Rebel made a switch to calisthenics training 5 years ago in an effort to rehab his weight lifting injuries. Since then he’s been on a personal quest to discover and teach the immense benefits of advanced body weight training. You can find some of his unique bodyweight training methods at RedDeltaProject.com and on his YouTube channel: RedDeltaProject.

Filed Under: Progressive Calisthenics Tagged With: beginner's mind, calisthenics, drop sets, Matt Schifferle, progressive calisthenics, regressions and progressions

Simplicity and the Pragmatic Practice of Calisthenics

June 16, 2015 By Silvio Bauer 19 Comments

Silvio Bauer Dragon Flag

It is 6 o’clock in the evening. I’ve just come home from work. I slip out of my shoes and take off my backpack. I quickly get into the kitchen, pour myself a glass of water and drink it.

I head to my bedroom to change into a pair of comfortable shorts and a simple t-shirt. On a piece of paper, I briefly note four words: Muscle-ups, dragon flags, shrimp squats and handstands. I get my keys as well as the piece of paper and a pen.

Outside of the house, I start running at a steady pace. At this point, I’m already shaking off the worries of my day. I feel totally liberated, because for the next hour, all I need to focus on is the movement of my own body. Nothing can distract me. As I’m running, I’m getting further and further away from my phone, my digital leash. I soak in the environment.

In about 5 minutes, I stand before two pull-up bars. One of them I can only reach with a slight jump. My heart rate is already elevated from the run. The movements I’m about to practice will work pretty much every major muscle group, so I prepare for it accordingly.

First, I do some joint rotations for shoulders, hips, knees, ankles. I combine this with dynamic stretches like toy soldiers, arm circles and leg swings to prime my muscles.

The exercises I previously scribbled on the piece of paper are the exercises I will put my focus on today. I split them into two groups, muscle-ups + shrimp squats, then dragon flags + handstands.

For the first “super-set”, I get down into a deep squat and simultaneously do wrist circles. I do some push-ups, get up, do side lunges and then I jump up to the bar for some pull-ups. These “easier” exercises get my blood rushing through the muscles I’m going to need for my focus exercises. I never max out on these because I want to retain my strength.

After two rounds I’m warmed up and ready to rock. After a round of muscle-ups and shrimp squats, I shake out my legs and arms. I do a warrior pose to stretch my quads and hip flexors in order to improve my mobility for the next set of shrimp squats, then some shoulder mobility to help my muscle-ups. I count 5 deep breaths. Rinse and repeat.

While I am practicing these two movements, one at a time, my goal is to maximize the precision – not the effort – of each of them. When I feel I lose control over my form, I simply stop. On my piece of paper, I jot down my reps, not to impress anybody, only as a means to record my progress and to recalibrate my focus.

After 5 rounds I go to the nearest park bench. I am more than warmed up from the first two exercises, so I immediately get on the bench and do my dragon flags. After each set, I do a few kick-ups into a handstand, count 5 breaths and repeat.

After 3 sets of dragon flags, I shift my focus solely on debugging my handstand. After 15 more minutes, I call it a day.

To cool down from my practice, I get into a back bridge and counter that stretch with a forward bend. I do this once more and then I take a leisurely walk home.

As I walk, I contemplate over the quality of my workout and what I achieved. Some moves worked well today, with some I struggled a bit more than usual. But I know that this is part of the process. With consistency, I know I will get better over time.

When I approach the front door to our house, my mind gets filled with a rush of anticipation: I am going to enjoy a delicious and nutritious home-cooked meal.

-The End

The Moral of the Tale

Al Kavadlo prayer pushup

This story is not to brag about how Zen my workouts are, but rather to illustrate the key concept of calisthenics: simplicity.

In Convict Conditioning, Paul “Coach” Wade explained how he used advanced bodyweight exercises out of necessity while serving time. There was just no other way to get strong and survive but with his own body.

In our superfluous world with an abundance of options, practicing calisthenics can also enhance our “inner freedom”. By limiting options (not using machines, weights, apps or other equipment), we can liberate our training from being drawn in every direction.

But in order to make progress over time, we have to consistently apply this pragmatic approach to our training. With all the excellent information available about advanced bar calisthenics or bodyweight strength built with nothing but the floor, the variety of calisthenics exercises can be quite seductive to us enthusiasts.

Only by focusing on a few movement patterns at a time, we can ensure sufficient attention to each of these moves.

There is also no need to over-complicate the process of one’s training. Warm-ups are only needed for the specific body parts that come into play in a workout. If you follow an upper/lower body split routine, there is no need to warm up your legs on your upper body day.

The same principle applies to cool-downs. Static stretches are most effectively applied to the muscle groups that were used to generate mechanical tension. Flexibility does not need to be practiced for its own sake. It serves a purpose: making it possible for you to move the way you want to move. If you want to do pistol squats, insufficient ankle mobility will limit your ability to do so. However, if pistols don’t interest you, the necessity of ankle mobility drills is questionable.

The story above most probably differs from your own. It’s not necessarily better or worse than yours, it’s simply the template I found works best for me. It is merely an example of an application of the underlying pragmatic principles that calisthenics have to offer.

Everybody has a different story. What’s yours?

Move freely.

-Silvio

****

Silvio is a full time medical engineer who loves to practise and teach calisthenics in his free time. He enjoys creating workout plans for his friends and spreads the word about PCC over at his blog, neatstrength.com. You can follow him on facebook.com/neatstrength, twitter.com/neatstrength or on instagram.com/neatstrength/.

Filed Under: Progressive Calisthenics, Tutorial Tagged With: calisthenics, calisthenics workout, flexibility, outdoor workout, Silvio Bauer, simple workout, stretching, tutorial

A Karate Approach to Calisthenics

June 2, 2015 By Owen Johnston 15 Comments

Back of the Wrist Pushups

Like many of my generation, I grew up watching movies like The Karate Kid, Kickboxer, Enter the Dragon, Drunken Master, and Rocky. The larger-than-life characters from these films wowed us with their fighting skills and never-give-up attitudes.

A common theme they all share is that the main character is an underdog who must train hard to become a better fighter and overcome his seemingly invincible opponents. The training methods employed often include some tough calisthenics skills. I’m sure we all remember seeing Rocky do uneven pull-ups in the second film, and dragon flags in the fourth. The perseverance of our heroes, the amazing skills they learned, and the rigorous training methods they endured inspired many of us to take up martial arts and training ourselves.

Bruce Lee popularized the dragon flag as well as other difficult bodyweight feats, like his two finger push-ups. He espoused improving your athletic performance in order to improve your martial performance, as well as to help fully express the human body. Certainly, the martial-calisthenics connection is as old as man, yet Bruce was a great catalyst in the popularization of martial arts in America, inspiring many to train hard like he did. He said, “Life is never stagnation. It is constant movement…as well as constant change. Things live by moving and gain strength as they go.”

I didn’t fully understand the implications of these words until I got into Progressive Calisthenics. There are certainly comparisons to be made between learning progressive calisthenics and martial arts. Coach Wade made some of these comparisons in “The Tao of PCC”. He brought up some important similarities to martial arts. “…nobody can remember a hundred techniques in a fight. What matters are the principles you absorb.” “You learn the form, you absorb the form, you discard the form.”

Our training shouldn’t keep us stuck in a rigid form, but instead be directed to the fullest expression of ourselves with utmost efficiency and simplicity. In Jackie Chan’s older films, many of his characters often went through a transformation from a struggling student to a graceful, efficient and powerful athlete. The training was generally harsh, but once he absorbed the principles of his master’s art, he was ready to face the next challenge!

Like the progressive calisthenics approach, traditional power training and body conditioning methods in Okinawan karate focus on bulletproofing the joints, improving flexibility, and building holistic, functional strength.

One Arm One Leg Fingertip Training

There are a number of progressive bodyweight movements taught in Okinawan karate, including knuckle push-ups, fingertip push-ups and ultimately, wrist push-up variations. The exercises have very direct benefits for “bunkai” or application of kata.

Of course, these exercises shouldn’t replace previous progressions, but supplement them. Also, don’t overdo it with directly training the joints. Be sure to allow plenty of time for your connective tissues to adapt.

To regress any of these variations, you can practice them using an incline (wall, chair etc) or you can simply create less demanding leverage by kneeling instead of performing them from your toes. You could also adapt the Convict Conditioning push-up progression to these variations. (Coach Wade has already covered this for fingertip push-ups in Convict Conditioning 2.)

Warm up your hands and forearms properly before working knuckle, fingertip or wrist push-ups. Afterwards, shake your hands out, and stretch your fingers and wrists.

Like most push-up variations, knuckle push-ups strengthen most of the muscles used in straight punches. Knuckle push-ups also strengthen the wrists and knuckles, and help toughen up the skin. A course of fingertip push-ups, grip work, pull-ups, and proper use of a heavy bag will help you punch as hard as Rocky Balboa!

Fingertip push-ups strengthen the finger extensor muscles. Naturally, they provide direct benefits to strikes using extended fingers. Fingertip push-ups can be progressed by doing push-ups on fewer fingers.

The author, Owen Johnston demonstrates a push-up on just the index fingers and thumbs.

Wrist push-ups strengthen the wrists for various strikes, and have very specific benefits for “ox jaw” and “crane” techniques. This push-up variation is done on the backs of the hands. You can also ease in by having one palm on the training surface instead of having both on the backs of the hands. Practice this way on both sides to maintain symmetry in training.

Wrist Stretches by Owen Johnston, PCC Instructor

A stretch commonly done in gymnastics will be useful in preparing for a wrist push-up progression. Sit in a kneeling position, look straight down at your knees, lean forward slightly and place the back of your hands on the ground, directly in front of your knees. Naturally, leaning forward will put some of your weight onto the backs of your hands, with the fingers turned inward. Cautiously lean into your hands until you feel mild discomfort. Hold this stretch for 10-30 seconds, then come up and shake your hands out. Repeat 1-3 times.

There are “hidden steps” between this stretch and a wrist hold in the top position of a kneeling push-up. First, gradually build strength and flexibility in the wrists with the stretch until you can put moderate pressure onto the backs of your hands with little to no discomfort. The next part of the progression is to move your hands a few inches forward from the starting position and unfold your hips slightly as you start putting pressure on the backs of your hands. Imagine that you are trying to move a little closer to perfect form for push-ups (hips locked out, weight carried through arms and hands). Find the most difficult position that you can hold for 10-15 seconds when you put mild to moderate pressure on your hands. Gradually work towards the full kneeling push-up wrist hold.

A sample progression:
1. Wall wrist push-ups
2. Incline wrist push-ups with one palm on contact surface and the back of the other hand on contact surface
3. Incline wrist push-ups
4. Kneeling wrist push-ups with same regression as in step 2
5. Kneeling wrist push-ups
6. Hold top of push-up position on backs of hands; use same regression as in steps 2 if needed at first
7. Full push-up with one palm on contact surface and back of other hand on contact surface
8. Full wrist push-ups

Programming and volume for wrist pushups are straightforward. Since the joints don’t adapt as quickly as the muscles, and the wrists can tend to be injury prone, be conservative about volume. Practicing wrist push-ups once a week for low sets of low reps is a good rule.

A few options for programming wrist training:
1) Adding it to an existing joint specialization session; see Convict Conditioning 2 for a template
2) Doing some wrist stretches, holds and/or pushups as part of your warm-ups for practice (whether karate or a sport that needs strong hands/wrists)
3) Doing some light stretches and other exercises as part of rehabilitating your wrists (of course, this will depend on what exercises your physician recommends)
4) Training wrist holds after a session of pushups
5) There are many other possibilities depending on your own needs, goals, experience, etc.

Back Of Wrist Push up variations

Martial arts and calisthenics can work hand-in-hand to develop all of the qualities needed for the development of strength and technique. I hope that you, dear reader, find my examples of this to be clear and useful. The Okinawan martial arts and the methods that Coach Wade wrote about are ancient, but are still around because they work, and can work well together!

***

Owen Johnston, PCC has served as the strength and conditioning coach at Olympia Gymnastics in Moncks Corner, SC since April 2014, and as a gymnastics coach since August 2014. He began his martial arts journey on June 10th, 2002, and is a black belt instructor. For more information, check out his site, http://www.strengthcalisthenics.com.

Filed Under: Progressive Calisthenics, Tutorial Tagged With: back of the wrist push-ups, karate, Martial Arts, Owen Johnston, tutorial, wrist flexibility, wrist training

  • « Go to Previous Page
  • Page 1
  • Interim pages omitted …
  • Page 9
  • Page 10
  • Page 11
  • Page 12
  • Page 13
  • Interim pages omitted …
  • Page 19
  • Go to Next Page »

Primary Sidebar

Featured Products

previous arrow
GetStrongBookCover
ConvictConditioningBookCover
StreetWorkoutBookCover
ExplosiveCalisthenicsBookCover
StrengthRulesBookCover
next arrow

Categories

Progressive Calisthenics Certification Logo
Click here for more information or to register for the PCC workshop

Get Strong Workouts TriadXP App
Get Strong Workouts App

Recent Posts

  • Top 5 Reasons Why an In-Person Workshop is the Best Way to Supercharge Your Training
  • HYBRID STRENGTH TRAINING IS HERE!
  • My Calisthenics Journey to the PCC
  • The Handstand Press: Complete Control Through the Handstand
  • The Get Strong App is Here!

Dragon Door Publications

Dragon Door Publications

Recent Comments

  • bross dandon on The Case for Curved Handstands
  • Johnny Flewellen Jr. on Strength for Life
  • Dan Earthquake on The Pursuit of the Daily Minimum
  • Johnny Flewellen Jr. on The Pursuit of the Daily Minimum
  • Johnny Flewellen Jr. on Yoga, Calisthenics and the Journey of a Lifetime
FOLLOW US ON TWITTER!

Copyright © 2025

Dragon Door Publications / The author(s) and publisher of this material are not responsible in any manner whatsoever for any injury that may occur through following the instructions or opinions contained in this material. The activities, physical and otherwise, described herein for informational purposes only, may be too strenuous or dangerous for some people, and the reader(s) should consult a physician before engaging in them.