• Skip to main content
  • Skip to primary sidebar
  • Home
  • Contributors
  • Resources
    • Q&A with Paul “Coach” Wade
  • Workshops
  • Products
  • Forums
  • Articles
  • Blogs
    • RKC Blog
    • Strong Medicine Blog
  • Archives

PCC Blog

Progressive Calisthenics - The Official Blog for the PCC Community

Tutorial

The Handstand Press: Complete Control Through the Handstand

January 20, 2021 By Vic Leave a Comment

Vic Handstand Press Calisthenics

The handstand press is a perfect demonstration of strength, control, and body awareness. It exemplifies a kind of elegant ease that is seen only in handstand masters. Or so they would have you believe.

It’s true, the handstand press is a difficult skill – but it is very achievable for anyone who already has a decent freestanding handstand. This is a prerequisite – as balancing through the handstand press adds another level of complexity. If you can’t do a handstand off the wall for at least 15 seconds, then you will need to work on your balance before proceeding with this tutorial.

It should be noted that there are many different types of handstand presses, and this tutorial will be focused on the easiest of these – the straddle handstand press. We will simplify this to just ‘handstand press’ moving forward.

What is the Handstand Press?

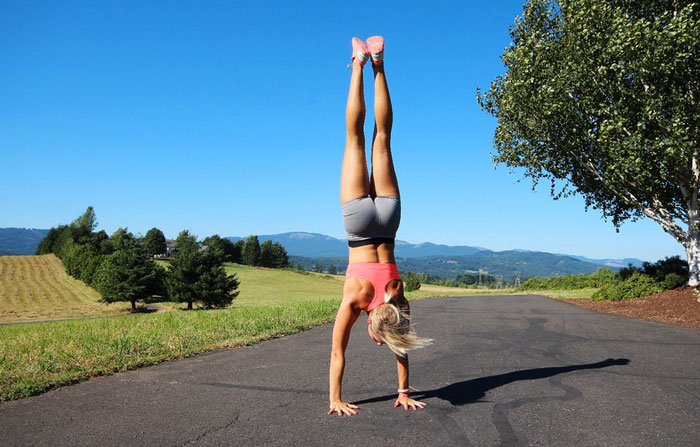
The handstand press, not to be confused with the handstand push up, is a controlled entry into handstand. The hands start on the ground slightly in front of the still grounded feet. The legs are straight and the hips are raised, creating an ‘A’ shape from hands, to hips, to feet.

The handstand is then achieved by leaning forward and allowing the feet to float up off the ground, and in a circular motion, move upward, and connect at the top. The movement is slow and controlled, with the aim to maintain straight arms and legs throughout.

Tackling the Handstand Press … Where To Start?

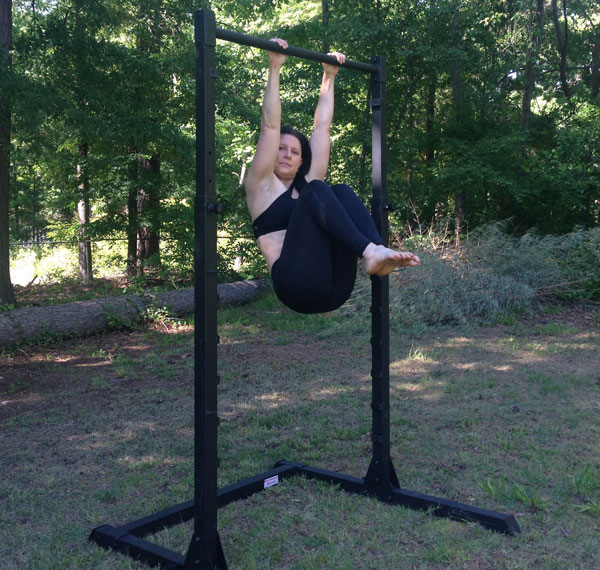
If you can already hold a freestanding handstand then you should already have the core strength to do the handstand press, or at least you should be very close. By simply working the handstand press, you will specifically engage the correct core muscles and so it shouldn’t be necessary to supplement with other exercises. Of course you’re welcome to throw in hollow body hold and toes to bar leg lifts if you want to speed up your progress even further!

The handstand press can be approached from 2 different angles.

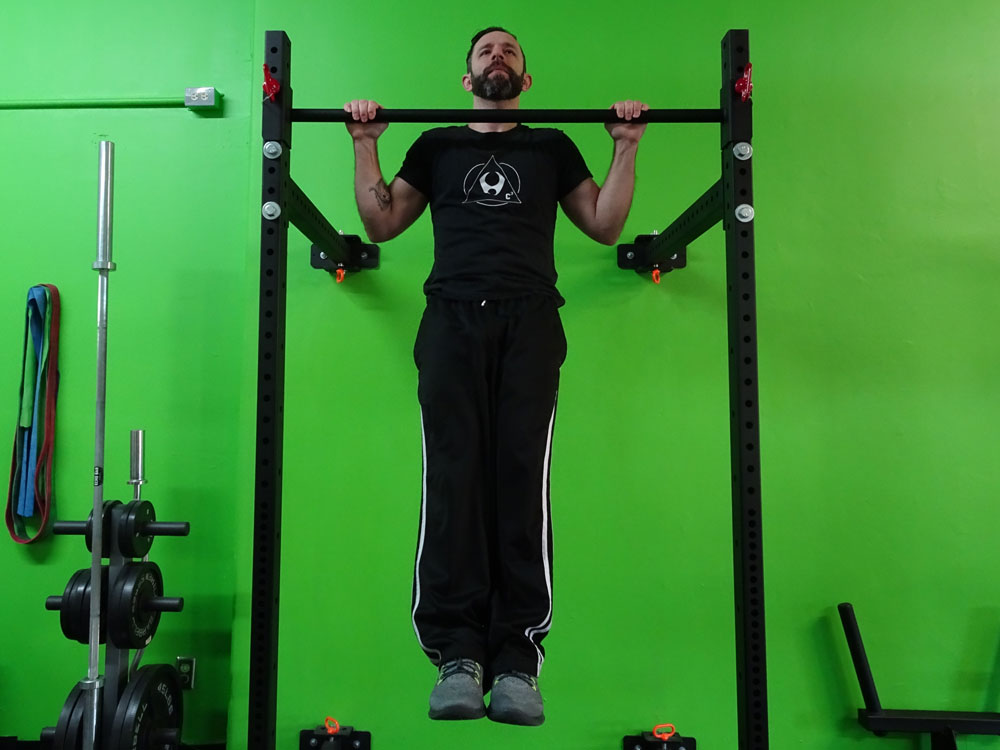
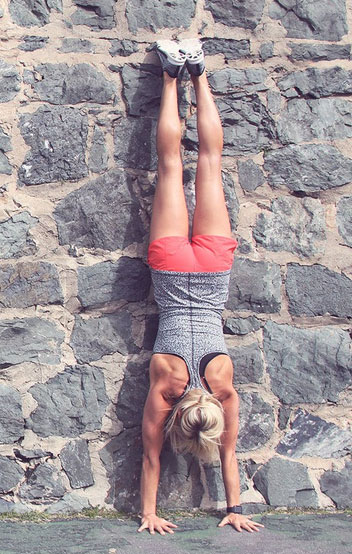
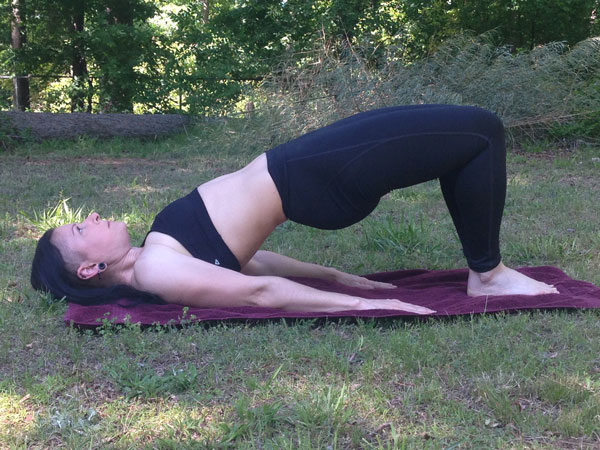
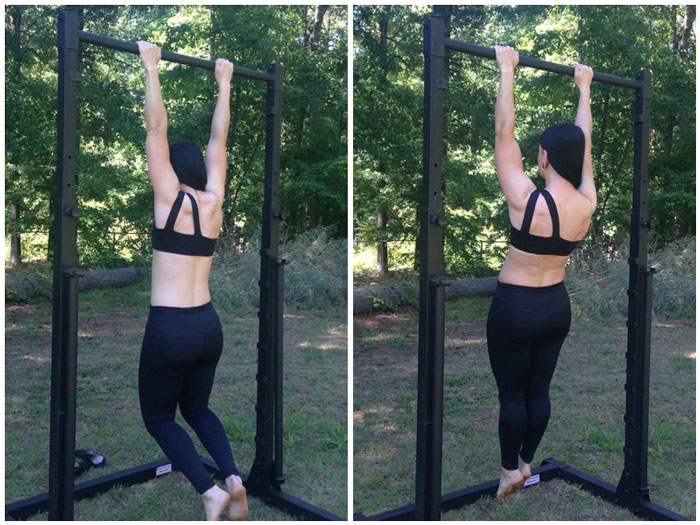
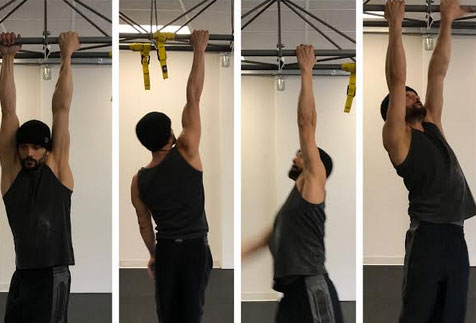
The first is to start learning it while leaning against a wall – preferably against a padded wedge. By placing your hands close to the wall and leaning forward into the wall while your feet are still in contact with the ground, you are learning one of the most fundamental principles in the handstand press – raising the hips. Once the hips come up, the legs will follow. By doing this drill you will train your body to recognize the correct amount of tilt you need to bring your hips into the correct position.

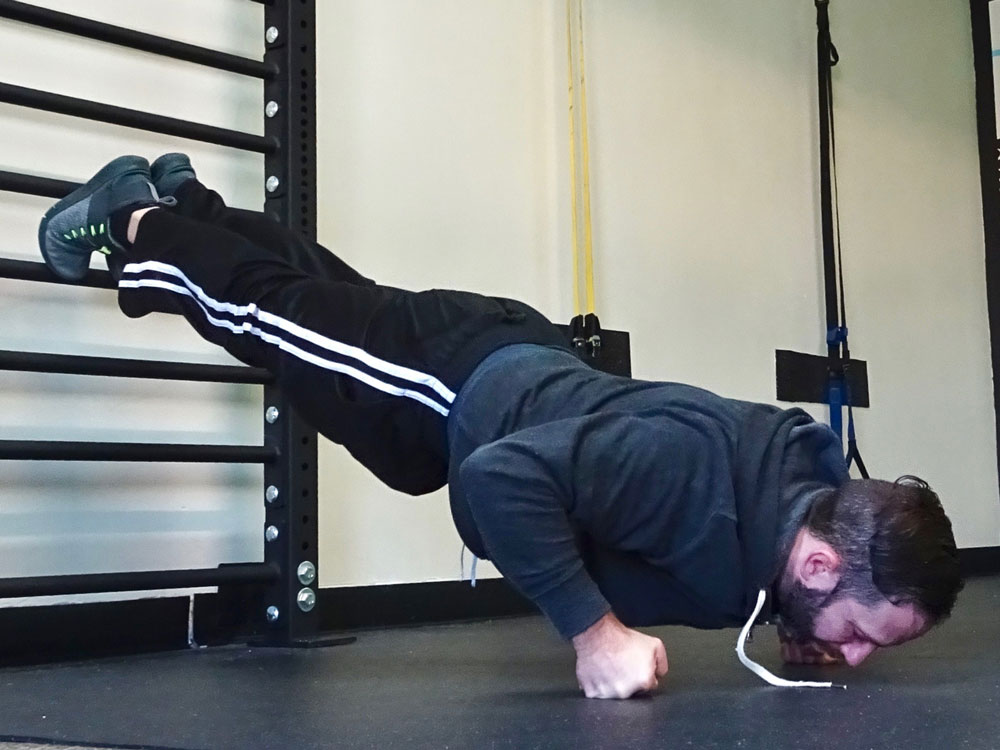
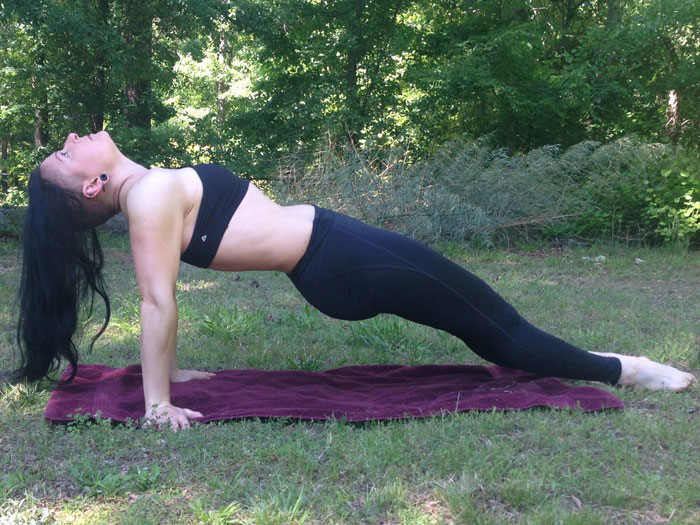
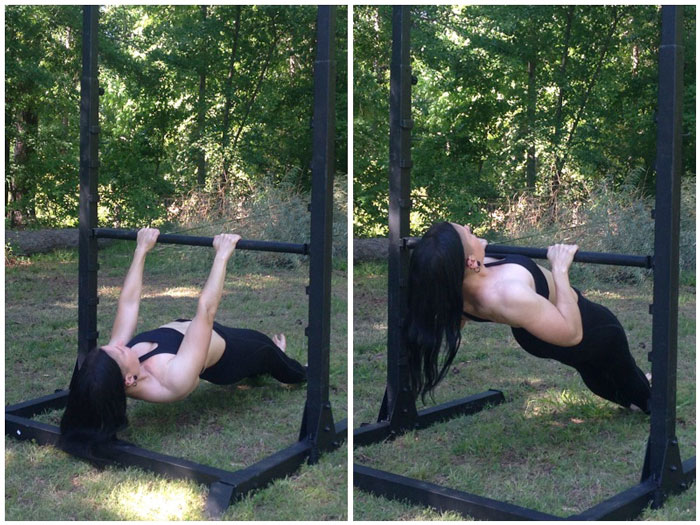
The second drill is called hovering. In this drill, the idea is similar to the first, however the main focus is not so much raising the hips as it is balance. The goal when hovering is to lean forward and take the feet very briefly off the ground before coming back down again. Remember not to jump, the motion should come from leaning forward and changing the centre of gravity rather than from momentum. Hovers are done without the wall and better replicate the handstand press. The drawback is the imminent risk of faceplanting. Most surfaces don’t agree with the face so try to catch yourself!

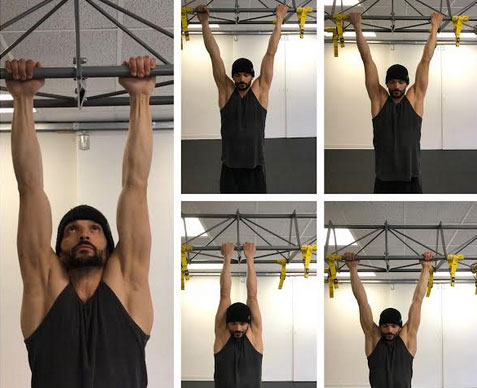
Hovers should be done at ground level initially. This will allow you to get used to the feeling. Once you get a hang of this – and become proficient at preventing 3rd degree burns on your face – it’s time to make the hovers easier and increase the stakes.

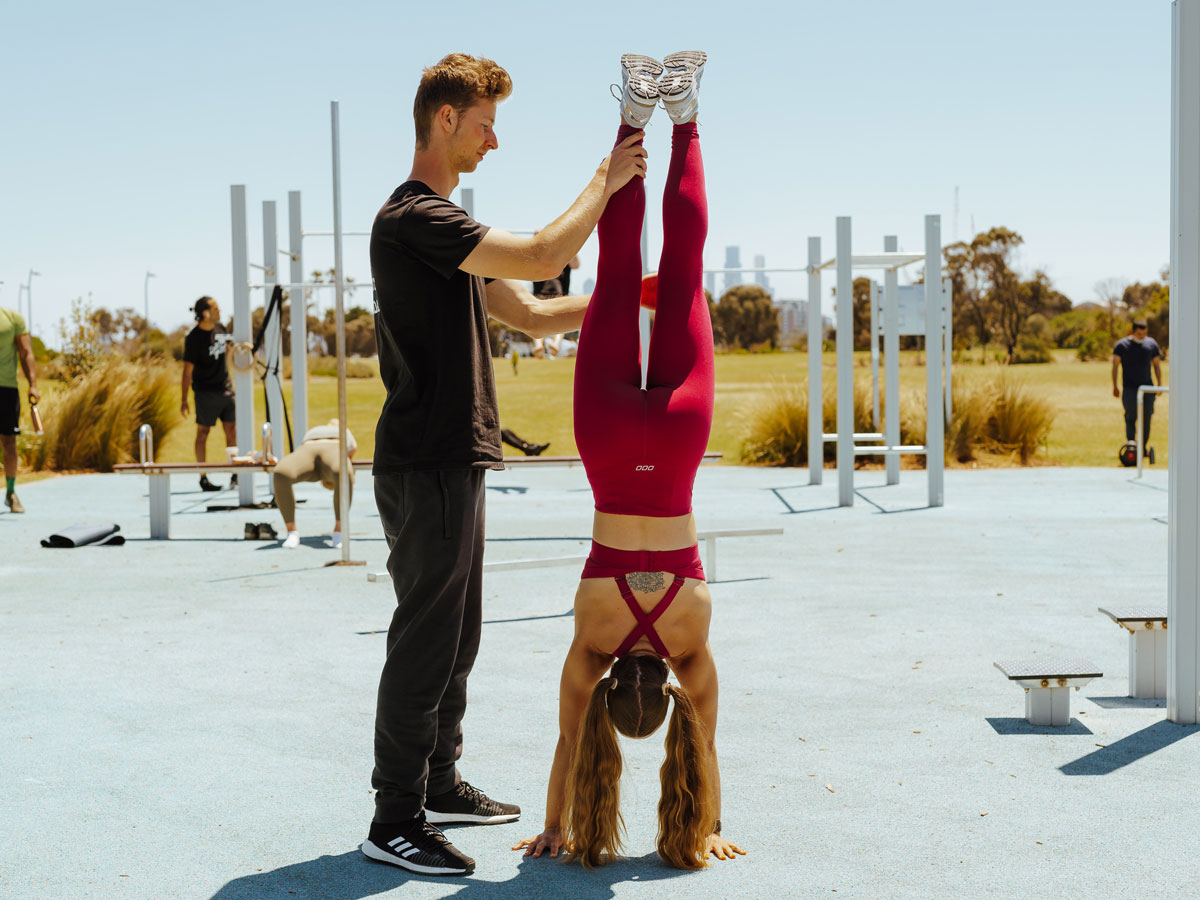
To do this, start by elevating the feet. By elevating the feet, the hovers become easier as the hips have a higher starting position. This also means that you have further to fall if something goes wrong! If you need even more of a boost, consider using a resistance band to pull your hips forward or even have a partner do this.

Vic Spotting Coaching Handstand

Advancing the Handstand Press

So you have mastered the handstand press and want some bonus challenges, or you still haven’t got it by you want to know what’s next? Well, there’s good news because the handstand press journey doesn’t stop there! As mentioned before, there are multiple variations of the handstand press. We will cover them in order of difficulty.

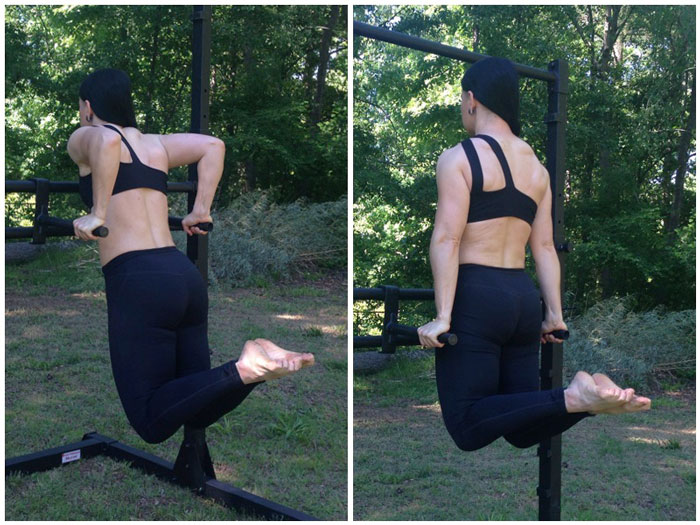
L-Sit to Press to Handstand (Parallel Bars)

This handstand press variation is done on parallettes or parallel bars. It’s a basic alternative that uses the same principles as the original handstand press. The starting position, however, is an L-sit. By pulling back through the L-sit you will hit the same starting position as you would on the ground – except now you are higher off the ground and you have more wrist control to manipulate the handstand with. This press is only slightly more difficult than the original, the main barrier being a psychological one.

Pike Press

The pike press is considerably more difficult than the original handstand press as it ditches the straddle for a pike. Instead of the legs going around, they come through the middle – and as such they feel heavier due to a longer lever length in relation to gravity. Most pros struggle with this one – it’s not for the faint of heart!

Wide-Arm Handstand Press

This is the ultimate press to handstand variation. The setup is similar to the original press to handstand, however the hands are placed much wider apart and the fingers are typically pointed outwards. This creates a much more difficult balancing position and forces the core to do a lot more work. Hard to do and even harder to balance the finished product, the wide arm handstand is one hell of a move!

Vic Handstand Press Pull-Up Bar

***

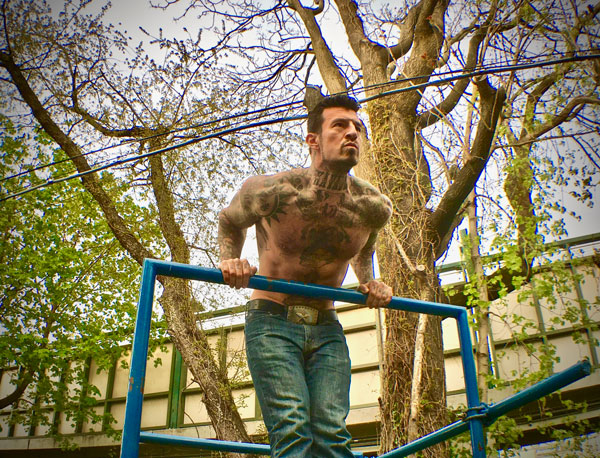
Vic is a Melbourne-based Personal Trainer, Calisthenics Athlete and the Founder of Street Workout St Kilda. and Liquid Chalk Shop. He has a passion for bodyweight training and the art of movement. Follow him on Instagram: @streetworkoutstkilda, Facebook: facebook.com/streetworkoutstkilda, and YouTube: https://www.youtube.com/channel/UCJvI67d8yXvh9gHDVVc2wsA

Filed Under: Motivation and Goals, Tutorial Tagged With: handstand, handstand press, Street Workout St Kilda, Vic

Time Under Tension

November 27, 2018 By Ray Shonk Leave a Comment

Ray Shonk Pistol Squat

Progressing in your calisthenics quest doesn’t always mean that you master the next big movement or duplicate a zany stunt. Another way of scaling the difficulty of just about any particular exercise is to simply employ time. No, I don’t mean making your workouts longer—in fact this method could make your workouts shorter—what I am referring to is time under tension.

The phrase “time under tension” refers to how long a muscle (or group of muscles) is under stress for a given rep or set. This can be achieved by lengthening the concentric, eccentric or pausing phase of an exercise.

I used this technique back in my weight lifting days. In fact, most methods of progressive resistance in calisthenics can apply to the weight room as well. When I was focused on lifting (and training people to do the same), there were times I would use less weight, instead choosing to focus on a slow tempo. Oftentimes, my clients would question my method, as they were only thinking in terms of lifting as much weight as possible. But to their surprise, when I had them do a 3 second eccentric and concentric (3 seconds down and 3 seconds up) movement for each rep, they would burn out sooner and get more out of the exercise—even at less external resistance.

Of course, you are also not limited to a 3 second tempo, you can also slow it down more so, such as a 5 second tempo. You could even add pause at the bottom of your movement. All of these are effective ways of increasing your muscles’ time under tension.

The concept of time under tension is arguably even more important when applied to bodyweight training. Because of our minimalist approach (and equipment set-ups), we are constantly using methods of increasing resistance without adding external weight. In fact, calisthenics newbies often wonder how it’s done. Well, again, time under tension is one of the least complicated ways!

Slowing an exercise down—or pausing at the bottom—are both ways to employ time over tension. This is one of the least complicated methods of progressing an exercise without adding external resistance.

In fact, for me personally, when I put the weights away and became completely calisthenics focused, I was able to achieve very high rep counts in my basic 3 exercises: push-ups, pull-ups and squats. For a while, I thought progressions were the only way to go from there, so that is what I did.

Over the course of time, and after many steps, classic push-ups became feet-elevated push-ups, two-legged squats became pistol squats, and pull-ups became muscle-ups.

Eventually, my numbers started to pick up again. So I thought back and remembered the slow tempo workouts I use to do. I decided to give it a shot and they were more challenging than I expected. You see, not only does the slow tempo maintain the tension on the muscles for longer, it also requires you to be more attentive to form, thus giving a greater yield from every single repetition.

Ray Shonk Feet Raised Push-up variation
It’s true that elevating your feet or using your knuckles are ways of progressing the push-up, but did you know that simply slowing it down is a progression in it’s own right?

Feel free to experiment. I’ve found that pausing at various points throughout the range of motion (as opposed to just the top or bottom position) can help overcome sticking points. Think about a pull-up, for example, where you pause for 2 seconds at the top, then again with your elbows at 90 degrees, then 120 degrees, with a final pause at the dead hang—ouch!) Furthermore, you can even experiment with super-slow reps, such a “the one minute push-up” which is 30 seconds on the way up and 30 seconds on the way down! Just make sure to take your time on the eccentric phase for max results!

Remember, fitness isn’t just being able to knock out 100 push-ups, or bench press double bodyweight: it is more about embracing the process, living in the present, and ranking quality over quantity when it comes to movements. Take it slow, build real strength, and focus on your form: you will see quality changes!

***

Ray Shonk, PCC is a personal trainer in Grand Rapids, Michigan, an adjunct professor at GVSU and the owner of Quest Fitness. In 2017, he authored his first book, appropriately titled, The Calisthenics Quest. Ray specializes in Calisthenics, Sports Performance and Martial Arts training. When he is not training, Ray spends time brewing beer, and enjoying time with friends and family. Learn more at www.questfitnessgym.com

Filed Under: Progressive Calisthenics, Tutorial Tagged With: calisthenics, tempo, tension, time under tension, TUT

How to Stop Sucking at Pull-Ups

October 16, 2018 By Al Kavadlo Leave a Comment

Al Kavadlo Pull-ups

I used to suck at pull-ups. It’s true.

When I first got into calisthenics as a teenager, I was able to manage a couple underhand chin-ups, but I could not do a single overhand pull-up with a full range of motion.

So what did I do?

Well, I started by doing what I could, which meant lots of chin-ups. Even though I could only do a few at a time, I would just do as many as I could, then rest and repeat. I did this every other day for months. Then one day I tried an overhand pull-up again and I could do it!

Soon after this, I encountered a pair of wide grip pull-up handles at a local gym and I was back to not being able to do a single rep. So I kept doing them on my doorway pull-up bar with the narrower grip.

Again, I just did as many as I could, then I’d rest and repeat the process several times. Since I was a teenager, I had a lot of testosterone and was able to recover pretty quickly. I did this every other day for a while and eventually I was able to do 10 in a row. Then I went back to that wide grip set-up and was suddenly able to do a few reps!

Over the course of the next several years, I continued to discover challenging new pull-up variations: Commando pull-ups, L-sit pull-ups, archer pull-ups and of course, the muscle-up. They all gave me a major humbling when I first encountered them, yet they were all ultimately achievable with consistent effort.

I’m far from being a teenager these days, and I don’t recover quite as quickly as I used to, but I still apply the same principles to all of my workouts.

The key to conquering any physical goal, whether it’s to do 10 wide-grip pull-ups, perform a human flag, or run a marathon, is the same regardless of the task. All you have to do is find a regressed version of your goal (a less difficult progression, fewer reps, shorter distance, etc.) and practice that consistently for several weeks or months. Once it gets easier, you slowly start inching your way toward the goal.

So, what if you can’t even do a chin-up yet? Then start by just hanging from the bar!

Al Kavadlo Bar Hangs Dead Hang

From there, you can eventually build toward flexed arm hangs and negative chin-ups. (A flexed arm hang is when you hold the top position of the chin-up; a negative chin-up involves slowly lowering yourself down from that position.) If you’re patient, consistent and dedicated, the results will come. Guaranteed.

I did not get good at pull-ups overnight. It took many years and countless reps, and I experienced numerous setbacks along the way.

There wasn’t any magic pill or secret formula, so I just focused on my training and did the work. I still do.

There will never be any other way.

***

Al Kavadlo is the Lead Instructor for Dragon Door’s Progressive Calisthenics Certification and the author of several best-selling books, including Get Strong, Street Workout and Pushing The Limits! Al has been featured in The New York Times, Men’s Health, Bodybuilding.com, T-Nation, TRAIN magazine and many other publications around the world. To find out more, visit www.AlKavadlo.com.

Filed Under: Progressive Calisthenics, Tutorial Tagged With: Al Kavadlo, how to improve pull-ups, progressive calisthenics, pull-up progressions, pull-up regressions, pull-ups, tutorial

How to Build Your Own Suspension Trainer

November 28, 2017 By Matt Schifferle 8 Comments

Matt Schifferle DIY Suspension Trainer

Suspension trainers are the multi-tool of the calisthenics world. You can do hundreds of exercises with them for almost any goal imaginable. They are ideal for mimicking classic weight machine exercises like chest flys, triceps extensions, and core work. Suspension trainers give you hundreds of exercises that can enhance and supplement your training. Suspending your feet, like in the image on the left, can make planks much more challenging. You can also simulate weight machine exercises, like the triceps extension on the right. A suspension trainer is the closest thing you can get to a truly portable gym. They really come in handy when you need to do pull-ups, rows, and dips while traveling.

Almost a decade ago, I purchased some of the easiest suspension trainers to come on the market. But, I quickly became obsessed with creating my own customized designs. I don’t even want to think about the time and money I’ve spent trying to develop a suspension trainer I was happy with. Every version I created had flaws and drawbacks, so I would scrap the design and start all over again. I quickly became obsessively picky with my designs and drew up a list of qualities I wanted. These included:

  • Dual anchor points so the straps can be set up at any width to accommodate your unique build and what’s best for each exercise.
  • Full vertical handle adjustment so the handles can go from an inch above the floor to an overhead reach.
  • Small and lightweight, so it’s ultra-portable.
  • Super easy to set up and take down within a minute.
  • Strong, safe and durable enough for weighted dips and pull ups.
  • Ergonomic without any rough edges or elements that impede movement.
  • Universal anchoring so you can hang it from points above that are within and beyond your reach.
  • Quick and easy infinite handle height adjustment so you can place the handles at any height.
  • Can easily accommodate a variety of accessories.
  • Can be made from inexpensive and readily available materials.

I lost a lot of sleep trying to figure out how to make all of these requirements work within one design but I finally got it right with what I call the prusik trainer.

Matt Schifferle DIY Suspension Trainer

The prusik trainer uses rope instead of nylon straps like most other suspension trainers. Rope is the ultimate smart device. It’s reliable, inexpensive and readily available. It allows you to easily customize every characteristic of the trainer to your specific needs, because rope gets its functionality from knots. Nylon suspension straps use metal hardware and stitching which work, but they add bulk, weight and cost. Hardware and stitching also compromise the versatility of the suspension trainer. Once you stitch a loop into a strap, you can’t make that loop bigger or smaller later. Knots give you all of the functional qualities you need without the weight, bulk, cost and lack of versatility. Metal hardware can also wear out nylon straps over time. Knots have much more longevity.

Materials You’ll Need:

  • Two lengths of 8mm climbing rope 9-12 feet long
  • Two lengths of 4mm climbing rope 3.5 feet long
  • Handle material from either PVC or a weight machine handle
  • Small razor blade and light grit sand paper if using PVC handles
  • Climbing tape

I buy my rope from outdoor supply stores like REI, where they can cut it to the length I need. If possible, have a professional cut your rope there at the shop. Most shops cut the rope with a heated tool that melts the ends and prevents fraying.

Knots You’ll Need to Know

  • Bowline knot
  • Fisherman’s knot
  • Prusik knot

Matt Schifferle DIY Suspension Trainer Knots

These knots are cinch knots, so the more weight you place on them, the tighter they hold. They are not too complicated, but I do recommend practicing how to tie them correctly before building your first suspension trainer. You can find videos and instructions on how to tie these knots at animatedknots.com.

How to Build a Prusik Trainer

Once you understand how to tie the knots, building a prusik trainer is quick and easy. First, take your 8mm anchor rope and tie a bowline knot into one end to create a two inch diameter loop. This loop will serve as the anchor point you will throw over an overhead bar and feed the handle through.

Matt Schifferle DIY Suspension Trainer Step1
Tie a bowline knot into the end of your 8mm rope ensuring the loop is large enough to fit your handle through. This will allow you to set up and take down your trainer without having to remove the handle. Be sure to leave some extra rope at each end of the knot to reduce the risk of it coming undone.
Matt Schifferle DIY Suspension Trainer Step 2
Throw the bowline knot over a sturdy overhead support that can easily support your weight. Thread the other end through the loop and pull it down to lock the rope around the support.

Next, take the 4mm handle rope and feed it through your handle and connect the two ends with a fisherman’s knot.

Matt Schifferle DIY Suspension Trainer Step 3
Run the 4mm rope through the handle you’ve selected and tie the ends together with a fisherman’s knot. Rotate the rope so the knot is inside the handle.

Next, tie the handle rope to your anchor rope using a prussic knot with 3-4 loops. I find it’s easier to tie the prussic knot around the anchor rope when it is hanging with some tension pulling down on it. You can stand on the end of the rope or ask someone else to gently pull down on the rope it to keep it tight.

Matt Schifferle DIY Suspension Trainer Step 4
Place some tension on the hanging 8mm rope. Wrap the handle around the 8mm rope 3-4 times. Do this by feeding the handle through the loop on the other side of the handle.

Finally, smooth out the overlapping handle rope so it hugs the 8mm rope. Be sure your prusik knot loops are flat to securely grip the 8mm rope.

Matt Schifferle DIY Suspension Trainer Step 5
Move the two ends of the prusik knot together and smooth out any overlapping loops so they all lay flat and hug the anchor rope securely.

Be sure the fisherman’s knot remains inside the handle rather than outside it. One reason is the knot won’t rub against your arm while doing push-ups and dips. The other is to prevent the knot from moving to the prussic knot and jamming it. Jamming will compromise the safety of the prusik knot.

Matt Schifferle DIY Suspension Trainer Handle Knot Diagram

What Kind of Handle Should You Use?

You have two options when making the handles for your suspension trainer: PVC pipe or handles from a commercial weight machine. I’ve used both and each option has its pros and cons.

Like rope, the advantage of using PVC is that you can custom build your handle in any length and diameter. People with larger hands may prefer a beefy handle about 1-1.5 inches in diameter and 5.5-6 inches long. Smaller hands tend to work best with a 3/4 -1-inch diameter pipe that’s about 5 inches long. PVC is also inexpensive and available in most hardware stores.

Matt Schifferle DIY Suspension Taped PVC Handles
PVC handles are inexpensive and highly customizable, but they do take a little more work to produce a finished handle that works properly.

The disadvantages of PVC are that it is a bit tricky to cut with smooth edges that won’t wear into the handle rope. If you use PVC, you must make sure each cut is at a 90-degree angle to avoid angled ends that can make rotating the handle feel uneven. More importantly, you’ll need to smooth out the inside and outside edges of the handles to minimize wear on your rope. I cannot stress enough how important it is to make sure the rotation of your handle is as smooth as butter under load. If not, you’ll risk wearing out your rope which can lead to it fraying and failing under load.

I’ve been able to smooth out the ends of PVC with a razor blade and a sanding block. Creating a smooth edge takes a little practice. Shave off the inside lip so that there are no nicks or bumps. Sanding down the ends of each handle takes time and patience, but it’s well worth it for a smooth finish.

Matt Schifferle DIY Suspension Trainer Handle Cuts

Once your handles are cut and smoothed, wrap them in climbing tape to give them a grip texture that won’t slip. Climbing tape has a similar feel to hockey tape but holds up better. The tacky adhesive won’t bleed through over time and it won’t get on your hands. You can also pick up a roll when buying your rope at the outdoor store.

Matt Schifferle DIY Suspension Trainer Tape and Handles
Climbing tape is a useful way to add some grip to the smooth texture of PVC. It’s also more durable and doesn’t leave a tacky residue like hockey or duct tape.

The other option for handles is to buy weight machine handles with a nylon strap. You can find these in many fitness equipment stores or online.

Matt Schifferle DIY Suspension Weight Machine Handles
Commercial grade weight machine handles are perfect for building your own suspension trainer. Just cut off the nylon strap and you’re good to go!

These handles are more expensive than PVC, but they are a commercially produced product designed for physical training. They are a good fit for most size hands, have smooth edges and provide a sure-grip texture. Most of them will come with a nylon loop attached. You can feed your handle rope through the D-ring on the loop, but I just cut it off to save bulk and weight. The D-rings can also get in the way of your arm or elbow during pushing moves.

So, that is my DIY prusik trainer. In a future post, I’ll share some of my favorite exercises along with some fun accessories you can add to the trainer. Feel free to drop any comments or questions down below.


****

Matt Schifferle, PCC Team Leader a.k.a. The Fit Rebel made a switch to calisthenics training 5 years ago in an effort to rehab his weight lifting injuries. Since then he’s been on a personal quest to discover and teach the immense benefits of advanced body weight training. You can find some of his unique bodyweight training methods at RedDeltaProject.com and on his YouTube channel: RedDeltaProject.


Filed Under: Tutorial Tagged With: calisthenics, DIY, DIY suspension trainer, Matt Schifferle, PCC team leader, suspension trainer, suspension training, The Fit Rebel, tutorial

Borrow These Calisthenics Cues From the Recent NYC PCC

November 21, 2017 By Adrienne Harvey 6 Comments

NYC PCC Instructors Team Danny Kavadlo, Adrienne Harvey, Julie Briggs, Al Kavadlo

One of my absolute favorite parts of any teaching situation is the opportunity to troubleshoot and help teach the troubleshooting process. This not only helps the participants with their own workouts, but teaches them how to help their clients make big changes quickly.

And whenever there’s a new group of people at a PCC, there are new questions, issues, and viewpoints. This was certainly the case at the most recent PCC held at Crunch Gym’s flagship location on 59th Street in Manhattan. As the Kavadlo brothers always say—and they’re totally right about this—on the first day we enter the room as strangers, but leave as friends. The amount of networking, cooperation, and brainstorming among the participants this time was especially high. Can’t wait to see what comes of these new friendships and alliances.

While it’s unrealistic to claim that everyone who attends a PCC workshop is guaranteed to experience a big breakthrough in their training, it seems to happen frequently. People attending a PCC are usually either trainers, instructors or serious enthusiasts, but we all have our blind spots. The combination of the demonstrations, lectures, Q&A, and the partner practice sessions on all three days of the PCC creates a powerful learning environment. Even though I’ve been involved with the PCC since the very first workshop back in 2013, I still learn something new every time. Should also add that since even the most recent time I helped instruct, the curriculum has continued to evolve and improve.

All of that being said, it is extremely rewarding to give someone a game changer cue or idea that almost instantly takes them to the next level. So, in this recap of the NYC PCC workshop I’d like to revisit a couple of my favorite cues that came up at the workshop. To those who might think I’m giving away too much, understand that these ideas really are best absorbed real-time in the context of a PCC workshop.

PCC NYC Ladies Pistols: Adrienne Harvey, Julie Briggs, Erica Dohring, Meghan Daly

“Point at Yourself” and “Pew-pew!”

Something I’ve seen both online and at PCC workshops with people who are so close to performing a perfect pistol squat is a slack looking foot on the leg held in front. Often, these same people will have the idea that they somehow aren’t strong enough to do it. But with one (or both) of the following cues they are often able to generate enough tension to pull off the move with precision.

The first cue is a personal favorite, it’s simply to think of pushing through the heel of the suspended leg while pointing the toe back TOWARDS you. “Point your toe back at your nose.” You’re basically flexing the foot as hard as you can, which causes the quad to contract very strongly, keeping the straight leg straight out in front of your pistol squat. You will want to stretch out the quad a little after this, and some folks (myself included, especially if I’m a little dehydrated) may actually get a little cramp in the quad. Common sentiment, “Oh I didn’t know I needed to contract the quad THAT hard”

Al also reminded us that generating extra tension from the upper body can also really help the pistol squat. Get in touch with your inner 007 and make the “pew-pew” fingers while strongly clasping your hands together. This can make for much more stable pistol squats in terms of tension and balance, and as in the example above, cute photos.

Al and Danny demonstrate the push-up

“I’m gonna hit you in the tummy, ok?” 

By the time someone attends a PCC workshop, they’ve done a LOT of push-ups in preparation for the Century Test. But, changing the angle or the points of contact from a standard pushup in one of the many advanced progressions taught at the PCC can make the exercise feel brand new again. Old habits can sometimes creep back when the focus moves from the familiar standard pushup. The novelty of trying a new progression can cause even the most advanced of us to forget the crucial basics.

Such was the case with a participant I helped at the workshop. He had been repping out fantastic standard push-ups and all the other variations perfectly until this point. While raising one hand high on a platform to try a nearly one-arm uneven push-up, he seemed to forget about his midsection. But, without trunk stability, this advanced push-up would be impossible. I knew he could do it based on previous performances, and after seeing his lower back sagging on the attempt, I said, “Wait! Use your abs, I’m going to hit you in the tummy, ok?”

He said, “OK,” so I gently gave him a couple little chops right in the tummy. The first one let both of us know that he had let his core go slack, and the second one revealed that he’d fixed the situation. His back was suddenly straight again and he was able to successfully complete a rep of this difficult and frankly extreme push-up variation.

No matter what push-up variation we’re discussing, the push-up at its heart is a moving plank. And that of course requires abdominal stability The more advanced the progression, the more extreme the stability requirement.

PCC NYC Participants Muscle-Ups

One Last Thing…

At the workshops I’ve been invited to help teach over the years, I’ve noticed that while we have a ton of fitness professionals attend, we also have many people from other fields. As someone with a computer science background I’m always pleased to see developers, engineers, and other technical professionals show up to a PCC and perform extraordinarily well. The idea that they are setting such a strong example in their lives outside the fitness industry is also excellent for public health. Fitness and the ideas in the PCC and Convict Conditioning really are for everyone.

NYC PCC November 2017 at Crunch Gym 59th Street

While we may all admire and aspire to the most advanced steps, and videos and photos of those feats are typically the ones that go viral, the bread and butter basics of calisthenics are applicable to all human bodies. The early progressions, especially as taught at the PCC and in Convict Conditioning are powerful for any level. And the newly certified PCC Instructors from this most recent NYC PCC at Crunch’s flagship gym are ready to bring these transformative ideas to the world.

****

Adrienne Harvey, Senior PCC Instructor, RKC-II, CK-FMS, has been RKC Certified since 2010, and RKC Level 2 certified since 2011. Kettlebell and bodyweight training have been crucial in Adrienne’s personal quest for fitness. A core member of the PCC team, Adrienne loves sharing her knowledge with small groups and individuals. She has modeled in multiple Dragon Door titles including The Neuro-Grip Challenge, Rings of Power, DVRT, Neuro-Mass, Pushing the Limits, and several others.  For her recipes and workout programs to further support performance, body composition, and of course—FUN, check out her website: http://www.giryagirl.com.

Filed Under: Progressive Calisthenics, Tutorial, Workshop Experiences Tagged With: Adrienne Harvey, calisthenics, Crunch Gym, cues, New York City, NYC PCC, pistol squats, progressive calisthenics, push-ups, top tips, tutorial, workshop experience

Getting Started with the Freestanding Handstand

October 31, 2017 By Krista Stryker 3 Comments

Krista Stryker Handstand

I didn’t grow up as a gymnast.

As a kid, I played basketball and soccer, but was fairly uncoordinated and had very little body awareness. In fact, handstands didn’t even come on the radar for me until my mid 20’s, and at that time I had just barely built up the strength to do proper push-ups and my first pull-up. Handstands seemed like something only superheroes could do.

Fast forward to today, and I’m happy to say I’ve built a pretty solid handstand. It’s one of the things I get asked about most when I’m training (I also get asked a lot if I’m a gymnast, which always makes me laugh because at 5’9” with fairly long limbs I don’t exactly have the ideal gymnast build).

But it hasn’t been easy. It’s taken me around three years of extremely consistent training to get where I am today, and while I probably could have progressed faster if I knew what I know now from the start, I’ve actually really enjoyed the ups and downs of the journey. It’s been frustrating and yet incredibly satisfying at the same time—and the constant challenge has meant that I’ve never been bored or lost interest in practicing.

If your goal is to learn to handstand, here are my best tips on making progress, whether you’re just starting out or you’ve been struggling to make progress for a while now.

No One is Too Good for the Wall

I train outside a lot, and out of everything I’m doing the main thing people like to stop and ask me about is my handstand and how they, too can work up to a freestanding handstand one day.

Without a doubt, my biggest piece of advice is to use the wall.

When I first started seriously working on handstands, I spent around six months practicing solely on the wall, and it made the absolute biggest difference in my handstand progression.

Now, I totally get that some of you will want to bypass the wall. After all, for a strong, athletic person, relying on the wall may seem like an unnecessary step. But working on the wall has countless benefits, including helping you to build endurance, establish a straight, solid handstand line, teaching you the beginnings of balancing in a handstand, and much more.

When getting started with wall handstands, most people will practice with their back to the wall. However, I’ve personally found that practicing with my chest facing the wall has been even more helpful.

Start in a plank with your feet touching the wall, then walk your feet up the wall until your body is completely vertical and your hands are only a couple of inches away from the wall (if it’s too scary to get that close at first, don’t worry, just work up to it). Once you’re there, push up through your shoulders as much as you can, tighten your core and glutes, and hold for time. This is going to help you build endurance upside down which is absolutely necessary to hold a longer freestanding handstand down the road.

Wall Handstand Balancing Drill

Once you’re able to hold a handstand for at least 30-45 seconds against the wall, you can start working on figuring out the balance portion of the handstand.

Here’s one of my favorite drills for balance:

  1. Start by walking up the wall as described above.
  2. Walk your hands away from the wall so that they’re about a foot away
  3. Slowly remove one foot from the wall and balance it overhead so that your shoulders and hips remain in a straight line. It’s okay if your leg goes slightly past your hips, just focus on your hips being directly over your shoulders.
  4. Even more slowly, remove the other foot from the wall and try your best to hold your handstand briefly. If you fall backward, just put your feet back on the wall. If you fall forward, simply cartwheel out.
  5. Split your legs back and forth, working to feel the balance in your fingertips and the alignment in your shoulders and hips.

You can practice this drill for time to build even more endurance. Just be patient with it and go slowly—this type of training can’t be rushed.

It also really helps to film yourself doing the exercise so that you can see whether you’re actually as aligned as you think you are. Videos don’t lie!

Working Away From the Wall

Once you start to feel the balance against the wall, it’s time to start working on getting away from the wall.

There are countless ways to get into a handstand, but most people will start with the basic kick up. This can be frustrating at first, and you’ll have to work on figuring out how hard to kick up to hit that sweet spot. If you don’t kick hard enough, you won’t make it to vertical—if you kick too hard, you’ll fall or cartwheel over. It just takes time and practice.

Even when you start working away from the wall, don’t give up your wall training all together. While working your freestanding handstand is a necessary step in handstand training, you should still work on the wall to keep building up endurance and working on your balance and alignment in a handstand.

A good recommendation is to spend about half of your time practicing on the wall and half of your time working on kicking up into a freestanding handstand until you get really consistent with your freestanding handstand—then you can spend most (if not all) of your practice away from the wall.

Consistency is Key

If you’re serious about being able to rock a handstand, the number one thing to keep in mind is that you have to be consistent with your training. Since handstands are more of a skill than a strength exercise (although don’t get me wrong, they can definitely tire you out!), you can practice handstands nearly every single day.

And you should—even spending 5-15 minutes a day working on your endurance and balance holding a handstand will make a huge difference towards your progress.

Ultimately, though, you have to really want a handstand and be patient with the process. It can take a great deal of time before you feel consistent and comfortable in a handstand, but take it from me, the process is absolutely worth it.

And of course, it you want to learn more about handstands, come to the PCC!

Krista Stryker With Kavadlos at PCC

***

Krista Stryker, PCC is an NSCA certified personal trainer and the founder of 12 Minute Athlete, a popular website and app helping thousands of people get fit in as little time as possible. Krista has been featured in The Washington Post, SHAPE Magazine, Muscle & Fitness Hers and MindBodyGreen. Find out more about Krista on her blog and connect on social media @12minuteathlete.

Filed Under: Progressive Calisthenics, Tutorial Tagged With: freestanding handstand, handstand, handstand drill, handstand tutorial, Krista Stryker, progressive calisthenics

Ask Al: GET STRONG Edition

July 11, 2017 By Al Kavadlo 18 Comments

Ask Al Get Strong Edition

Since the release of our latest book, GET STRONG, my brother Danny and I have gotten a lot of feedback on our new program. It seems that you guys are loving the book!

Even though the program takes 16 weeks to complete – and it’s barely been two months since the release – many of you are writing to tell us that you’re already experiencing gains in muscle and strength. Awesome!

We’ve also been getting a lot questions about the GET STRONG program. Though we did our best to explain everything as clearly as possible in the book, there are a few concerns that have been raised more than once.

That’s why I’ve created this special “Ask Al” video.

In it I address:

–What to do if you’re having trouble kicking into a handstand

–How to alter the hanging leg raise if you’re too tall to fully extend your legs

–The correct way to sequence your exercises

–How to incorporate Aussie pull-ups into the program

Let us know if you have additional questions or feedback about the program in the comments below.

Let’s GET STRONG!

Filed Under: Progressive Calisthenics, Tutorial Tagged With: Al Kavadlo, Ask Al, Ask Al video, Danny Kavadlo, Get Strong, Get Strong Transformation Challenge, Q&A, questions and answers, video

Let’s Get High! How To Do A Muscle-Up

June 13, 2017 By Danny Kavadlo 20 Comments

Danny Kavadlo Muscle Up

One of the things I love most about Progressive Calisthenics is the fact that it is a multi-faceted discipline.

You see, we human beings have a tendency to over-categorize and compartmentalize just about everything. Sadly, this can lead to an improper representation of concepts that can often be better expressed with blurred lines. In other words, not every peg fits so squarely into a hole.

An imaginary, over-lapping Venn diagram comes to my mind when I consider the virtuosity of the muscle-up. It’s a proverbial chameleon of classification. Is a muscle-up strength training or skill development? Conditioning work or muscle building? Power or control? Well, friends, the mighty muscle-up is all of the above and more!

In fact, this ultimate bar experience is the perfect fusion of raw strength and refined technique. It’s an upper body exercise that recruits full body harmony, firing up your muscles while also getting your heart racing. The muscle-up is the only upper-body move in the calisthenics kingdom that employs a push and a pull: it resembles a pull-up that transitions into a dip. But there is a lot more that goes into it. Dare with me if you will…

In The Beginning

If you consult the internet, you are sure to come across a multitude of memes portraying very fit individuals who make the muscle-up look easy. It’s not. To be clear, this is an advanced exercise and a solid foundation in the basics in necessary before exploring it.

On that note, people sometimes think there is a hidden trick or a “hack” to performing a muscle-up. There isn’t. It takes work. While the information detailed ahead will undoubtedly help your training and technique, I recommend that anybody who is serious about muscle-ups be able to a do at least 10 perfect pull-ups, 20 hanging knee raises, 20 dips and 30 push-ups before even attempting to tame this beast.

Get A Grip

Every exercise begins with our contact with the environment. In this case, the way we approach the bar is very important. To perform a muscle-up, position your hands only slightly wider than the width of your shoulders. Yes, this is narrower than you would typical place them for a pull-up. Keeping your hands closer together will help you bring the bar lower down on your body when you initiate the movement.

If you are new to muscle-ups, then use an overhand grip. (Again, this is unlike the pull-up, where beginners generally favor an underhand grip.) In fact, for many people, an exaggerated overhand grip, with the hands cocked over the bar as much as possible and the backs of the hands facing straight up at the sky, is preferable. This is sometimes referred to as a “false” grip, and can ease the transition from pulling yourself up, to pressing yourself over the bar.

Danny Kavadlo Muscle-Up 2

Breaking Down Your Muscle-Up

Pull the bar as low down on your body as you can. Get explosive! Aim to get the bar all the way down to your hips, although it will probably wind up closer to your chest. Use as much speed and force as you can muster up.

Danny Kavadlo Muscle-Up
It begins with an explosive pull. Practicing this movement pattern alone—without muscling over the bar—is a viable exercise in its own right.

At this point, press your chest forward and around the bar. Aiming to bring your elbows above your wrists will assist you in this transition. It’s also helpful to buck your hips out behind you and extend your legs out in front of you so they can act as a counterweight as you maneuver around the bar.

Danny Kavadlo Muscle-Up
This is the tricky part

Now press your hands into the bar, extending your elbows and straightening your arms. You want to “dip” yourself up, while maneuvering the bar down. It is not unusual for one arm to go over before the other at first. This asymmetrical act is sometimes referred to as “chicken winging.” While it’s OK to use this avian assist in the early stages (no one’s first is the best), it is something we want to avoid as we develop more strength and skill. Ideally, over the course of time, both arms will go over together like a dip on a single, straight bar.

Danny Kavadlo Muscle Up
This part of the transition resembles a dip. The straight bar dip is in itself a great lead-up step toward the muscle-up. Hell, straight bar dips are great even after you can do a muscle-up!

Once you are fully over the bar, you have completed the rep. Although advanced practitioners can train to do slow muscle-ups, generally speaking, all of these steps occur very quickly. Go for one or two reps at a time, so you can remain fresh for each attempt. Eventually, you can increase your reps.

Type Slow Negative

In addition to the above-mentioned explosive pull-ups and straight bar dips, simply practicing the lowering phase of a muscle-up can be helpful, too. Because muscle-ups have a huge neurological component, doing just half of the range of motion (the eccentric half) allows your body to rehearse how it feels spatially to do a muscle-up, without actually doing the muscle-up.

To do so, climb to the top position. You can use a step, a bench or the aid of a training partner. You can even assist yourself by jumping into it. When you’re at the top, pause and engage all the muscles in your body. Now lower yourself down as slowly as you possibly can. Hinge at the elbows and bend at the shoulders, as you lower your chest to the bar. Wring your wrists around the bar and extend your legs forward as you continue your descent. Continue all the way down until you are hanging from the bar. This type of slow, negative muscle-up will give you a taste of the movement pattern. Like all things muscle-up related, it’s harder than it may seem.

Bar None

It can take a great deal of time and energy to achieve your first muscle-up, but the feeling of getting high above that bar is worth it. Take your time, respect the journey and understand that, like many great things, it will require discipline, intensity and consistency. Even after you’ve done your first muscle-up, it may be a while before you do your second. That’s ok. It’s a long road; enjoy the ride. In time, the sky’s the limit!

Danny Kavadlo Muscle-Up
The sky’s the limit!

If you’ve experienced any breakthroughs with your muscle-up training, please let me know in the comments section below. Danny wants to hear about it! For that matter, feel free to post any questions you may have about muscle-ups. After all, we’re all a work in progress. I’m looking forward to hearing from you!

Keep The Dream Alive,

-DK


****

Danny Kavadlo is one of the world’s leading authorities on calisthenics, nutrition and personal training. He is the author of several best-selling Dragon Door titles including GET STRONG and STRENGTH RULES. Danny has been featured in the New York Times, Men’s Fitness, and the Huffington Post. He is a regular contributor to Bodybuilding .com and TRAIN magazine. When not working one-on-one with clients in his native New York City, Danny travels the world as a Master Instructor in Dragon Door’s internationally acclaimed Progressive Calisthenics Certification. Find out more about Danny at www.DannyTheTrainer.com

Filed Under: Progressive Calisthenics, Tutorial Tagged With: Danny Kavadlo, how to do a muscle-up, muscle up, pull-up bar, tutorial

How to Restore Desk-Damaged Physiques with Calisthenics

May 9, 2017 By Adrienne Harvey 23 Comments

Adrienne Harvey UnDesk Lead Photo

Years ago, well before the PCC, and just after Convict Conditioning began to get extremely popular, I heard Andrea Du Cane say that we shouldn’t live in the posture of our sport. In many cases, we should also not live in the posture of our work.

It seems as though many of our clients (and in some cases ourselves) spend the majority of their working hours seated at a desk looking at a screen, then spend hours staring at a small screen. So, let’s take a moment to work with some do-anywhere calisthenics exercises to help build healthy habits while undoing some of the desk-damage so we can continue to help our students, clients, and ourselves safely build strength.

In 6th grade, a brilliant friend (math genius and fellow computer nerd) and I would get to school early to boot up a lab of dinosaur-era computers. Already at that young age, my friend had the dreaded forward leaning head, hunched shoulders, and rounded upper back from hours and hours of programming. Thankfully, I was still spending a reasonable amount of time playing in the backyard on the monkey bars—while getting regular reminders from Mom to stand up straight and keep my shoulders back—which saved me from the same situation.

But, pulling long hours at work, then tapping at tiny screens has left almost everyone pretty susceptible to bad habits and weaknesses that can hold us back in our calisthenics training—and in our everyday enjoyment of life.

First, for those of us who are instructors, it’s important to remember our scope of practice. If a student or client is in pain or has a medical issue—or even if you’re just unsure about the situation—always refer them to an appropriate medical professional.

As much as it would be great to think that a standing desk would solve all the sitting related problems of the world, some of us have noticed that intense cognitive tasks requiring full concentration and extreme focus just don’t seem to go as well when working at a standing desk. That has definitely been my experience, as my typing speed and overall productivity seem to suffer if I try to do highly mental tasks at a standing desk. So, under the assumption that we or our students/clients will need to work at a desk for a significant period of time most workdays, let’s discuss how we can help.

We already know that it’s important to take breaks from seated work. I’m a huge fan of the Pomodoro technique—it can also boost productivity at the same time. Basically, set a timer for 25 minutes of work, then take a 5 minute break to walk around, do a few movement exercises, then repeat the 25min, 5min cycle four times before taking a longer break.

Poor posture habits while standing and sitting often stem from a lack of core or (as Paul “Coach” Wade would say) midsection strength. It’s also pretty common for people with weak midsections to have or develop back issues. Think of the midsection as a cylinder, if the “front half” isn’t doing its fair share, then the back half will be carrying an extra burden. If the abs aren’t able to hold us upright while standing or seated, then the back has to compensate that much more—often leading to discomfort or worse.

The great news is that instead of doing endless questionable crunches, the PCC and Convict Conditioning methodology emphasize training the midsection specifically, and instruct us to engage it when performing most (if not all) of the other calisthenics exercises. For example, It’s hard to even imagine performing a pistol squat without abdominal involvement—the same is true with any advanced push-up (it’s critical for Neuro-Grip push-ups)—and just about every other exercise in the PCC and Convict Conditioning curriculum.

While many different schools of training have their own approaches to counteracting the very modern problem of too much sitting, in this post I’ll mainly focus on calisthenics strength, and very basic mobility. Nothing too fancy is necessary for most of our general population clients to work on counteracting the dreaded desk body. But, if you are inclined to work more on mobility and flexibility alongside your calisthenics strength, definitely check out Al Kavadlo’s Stretching Your Boundaries.

I think of “un-desking” as having the following components:

  • Unlocking the hips and hip flexors
  • Abdominal/midsection strengthening
  • Stretching and strengthening the shoulders and upper back

Unlocking the Hips and Hip Flexors

The short bridge (also sometimes called the hip bridge or shoulder bridge) is a regular part of my mobility warm-ups and those I teach to others. It’s accessible for nearly anyone. When practicing the short bridge, the beginner is comfortable and in control as they work towards bringing the hips higher while engaging their glutes.

Start on the ground with your hands at your sides. Push down hard through your heels and strongly activate your glutes to get your hips as high as possible. This is nearly the opposite of slumping over at a desk. It’s sometimes helpful to think of pushing the hips up and over towards your head (but only THINK this, your feet need to stay on the ground).

Adrienne Harvey Short Bridge

The straight bridge is another extremely valuable early step toward a full bridge in Convict Conditioning that is very useful long after achieving a full bridge. Like the short bridge, you may also know it by other names. Those of use who spend a lot of time typing—and who are also pull-up enthusiasts can greatly benefit from this move. I love it and love to hate it. At the top of this bridge variation, be sure that the shoulders feel rotated back and down. Experiment with different hand positions (fingers facing forward, to the side, backwards) while working to bring your chest and body high off of the ground in a reverse plank position.

Adrienne Harvey Straight Bridge
Remember to try different hand positions when trying the straight bridge: fingers pointing towards the toes, out to the sides, or pointing backwards.

A favorite bodyweight stretch from the RKC curriculum also has great value for calisthenics practitioners. It’s no secret that I love kettlebells as much as I love calisthenics, and I’ve found that including this RKC hip flexor stretch in bodyweight only workout warm-ups can do wonders for bridging. If you find your hip flexors are tight and have never tried this drill before, give it a go! It’s a lifesaver after long car rides, or marathon writing sessions at the computer.

On a padded surface, get in a half-kneeling position. Without pushing forward in any kind of extreme lunge, simply think of tucking your tailbone while strongly activating your glutes. The front of your hip and thigh on the leg with the knee on the mat should feel a strong stretch. Take time with this powerful move and be sure to try it on both sides.

Adrienne Harvey RKC Hip Flexor Stretch

Abdominal/Midsection Strengthening

As mentioned earlier in this post, most if not all of the calisthenics exercises in the PCC curriculum and Convict Conditioning involve the abdominals. But if you or your students are having desk-related issues, focused abdominal strengthening can really help. The leg raise series beginning on the ground all the way up to the most exotic lever strongly impact the abs. Since the midsection recovers quickly, it can be trained much more often than most muscle groups—some may opt to train the midsection daily.

Adrienne Harvey Hanging Knee Raises
Double down on “un-desking” by combining slow and controlled hanging knee raises with a timed active hang. How slow can you go?

Stretching and Strengthening the Shoulders and Upper Back

Weak upper backs and weak shoulders tend to round forward during desk work—but so do the shoulders of active people—especially boxers and pull-up addicts! Spending time hanging from a pull-up bar can not only greatly increase grip strength, but it’s an opportunity to relax and activate the back with dead and active hangs—done for reps, this move is sometimes called a “scap-up” referring to the movement of the scapula. (In a past PCC blog post I outlined several different bar hang grips but in this case, even the most basic bar hang grip will fit the bill.)

Pay particular attention to how your shoulders and upper back are feeling, and if you’re a beginner, take it easy.

Adrienne Harvey Bar Hangs
The dead hang and active hang look and feel completely different!

Last but certainly not least, the Aussie pull-up, especially performed to the chest can help remind our shoulders to stay back where they belong. Far from being just a step on the way to the pull-up, the Aussie pull-up (aka bodyweight row) performed slowly with a nearly isometric hold at the top can help posture, upper back strength and lead to better lockouts at the top of standard pull-ups. Be sure to experiment with lower bars of various heights. The Aussie can be further regressed for beginners or deconditioned students by bending the knees. This shortens the lever of the body and places some of the body’s weight on the feet.

Adrienne Harvey Aussie Pullups, Bodyweight Rows

One of the great and occasionally frustrating things about progressive calisthenics is that there are so many options and there’s never time to talk about or do them all! I’ll just briefly mention dips here for intermediate folks, since the delightful chest stretch at the bottom of the dip (don’t dip so low as to risk impingement) is great after a day at the desk. Likewise a strong active hold at the top awakens many of the upper body muscles that suffer when we sit and slouch.

Adrienne Harvey Bodyweight Dips

Example Un-Desk Warm-Up Sequence (repeat for a few rounds if you have time):

Optimally begin by taking a short walk.

  • Short bridges: 5 reps, pausing for height and max tension at the top
  • RKC hip flexor stretch 1-2 per side
  • Dips and/or straight arm holds above dip bars
  • Bar hang alternating between dead hang and active hang (scap-ups) + a few pull-ups if they’re not maximum effort for you. This is not PR time.
  • Aussie pull-ups (aka bodyweight rows) 5 slow reps with max tension at top of each rep.
  • Short Bridge a few test reps to note improvement.

While it would be ideal for all workplace settings to have space for—and the social acceptance of—spontaneous exercise sessions, coming up with minimalist sequences for the work day can at least alleviate some of the issues until you can destroy the stress of the day at the gym or at home.

Bonus Slouch Slayer:

If you’re not sure if/when you’re slipping into a slouch at the desk, Place a mirror to the right or left of where you’re seated. While you work, take a second to catch a glimpse of your profile. Catching myself slouching a couple times was enough to build great upright posture habits at the desk. The moment you catch yourself in a really hunched slouch in that mirror, you’ll be motivated to sit up straighter, check your shoulders, abs, etc. At that point I’d also encourage you to stand up, and try a few of the calisthenics “un-desk” moves.

My home office is always a work in progress, but if I feel like I’m slumping, I’ll place that mirror to my left for a day or two – sure enough that fixes the problem!

****

Adrienne Harvey, Senior PCC Instructor, RKC-II, CK-FMS, has been RKC Certified since 2010, and RKC Level 2 certified since 2011. Kettlebell and bodyweight training have been crucial in Adrienne’s personal quest for fitness. A core member of the PCC team, Adrienne loves sharing her knowledge with small groups and individuals. She also loves to develop recipes and workout programs to further support performance, body composition, and of course—FUN. Go to http://www.giryagirl.com for more information about Adrienne.

Filed Under: Progressive Calisthenics, Tutorial Tagged With: Adrienne Harvey, calisthenics, calisthenics strength, desk neck, posture, progressive calisthenics, sitting, strength, tutorial, undo damage of sitting

Hang Your Way to Better Pull-ups

April 4, 2017 By George Corso 16 Comments

George Corso Al Kavadlo Tree Hang

A basketball coach walks into the gym and witnesses one of his athletes shooting free throws. He makes 1 out of 50 shots. The coach asks the athlete what he’s doing and the athlete replies “practicing free throws.” The coach then asks him a simple question: “Are you practicing making them or are you practicing missing them?”

Pull-ups are kind of like free throws. They take practice, but you have to make sure you are practicing the right way. Though many people feel that they would have an easier time climbing Mount Everest than accomplishing even one pull-up, I hope to show you a different approach that will not only help with your pull-ups, but many other bar exercises as well.

When I started my own practice in calisthenics I was able to get my chin above the bar, but it really was far from a perfect pull-up. I sensed that something was off so I began to film myself doing pull-ups. It’s not always easy to be critical of yourself but I knew that this was an essential element of perfecting this exercise. I broke it down step by step from the first pull to the middle section and then to the top of the bar.  Then I studied it in reverse while lowering myself. I found that I was a complete mess!

It made me think back to the story about the free throws. I applied that coach’s criticism to my situation and realized that I was practicing my pull-ups without much regard for quality. It was obvious that I had to make corrections. I started with the initial pull. To my surprise, I found that I was pulling more from my biceps, which caused me to round my shoulders too much. A lack of strength in my scapulae was a real issue. I also discovered a lack of grip strength. In order to fix this problem I decided to scale back and dedicate my pull-up practice to different variations of hanging on the bar in order to work my way back up with proper technique.

Here’s what I did:

Dead Hangs
I started with the basic dead hang. The dead hang is such a great introduction to calisthenics bar training. It not only preps the hands but also decompresses the spine. Plus it opens up the chest so you can gain better shoulder mobility.

Start out with 10-30 seconds at a time. From there you can build to longer hangs. I recommend playing with different grips on the bar as well: Supinated, pronated and alternated grips are all fair game. I also suggest using a variety of different hand widths to add to the benefits of the dead hang. Using different grips will work the body in different ways, which can help you discover where your individual strengths and weakness lie.

George Corso Dead Hang Bar Hang Grip Variations

Active Hangs
The active hang is the next progression. In this variation, you’ll still be hanging with your arms completely straight, but your lats and shoulder blades will be engaged to “pack” the shoulders into their sockets. Adding this move into my programing leveled up my strength more than I could imagine. Active hangs helped me understand the proper muscle sequence in the motion of the pull-up, with scapula depression being first and foremost of the movements. As with dead hangs, I encourage you to explore and play with different grips.

Al Danny Kavadlo Active Hangs

Active Arch Hangs
These are one of my favorites! The active arch hang is one of the most challenging due the the body position needed. The goal is to hang with an arched back, while actively depressing and retracting the shoulder blades. It’s almost like a back bridge combined with an active hang. This will not only increase one’s strength in pull-ups, but will also aid you in someday catching the extremely challenging front lever.

George Corso Active Arch Hangs

Ape Swings
This exercise requires stamina, strength, control and mobility in order to accomplish. Start off in a dead hang with a mixed grip (one palm facing away and the other facing towards you). From here, release the palm that is facing you and rotate your body beneath the bar, switching your grip for the other side. Continue moving across the bar in this fashion, then reverse direction. What I love about this exercise is the control and scapular strength needed in order to bring yourself up enough to grab the bar. Each rep is almost like a one arm scapula pull-up.

George Corso Ape Swings

****

George Corso is a PCC, RKC, CSCS, NSCA-CPT, Certified Animal Flow instructor and the co-owner of FORZA in Millbrook, NY. For more information, connect with George on Facebook.

Filed Under: Progressive Calisthenics, Tutorial Tagged With: bar hangs, George Corso, grip strength, hanging hollow position, Pullups

  • Page 1
  • Page 2
  • Page 3
  • Interim pages omitted …
  • Page 7
  • Go to Next Page »

Primary Sidebar

Featured Products

previous arrow
GetStrongBookCover
ConvictConditioningBookCover
StreetWorkoutBookCover
ExplosiveCalisthenicsBookCover
StrengthRulesBookCover
next arrow

Categories

Progressive Calisthenics Certification Logo
Click here for more information or to register for the PCC workshop

Get Strong Workouts TriadXP App
Get Strong Workouts App

Recent Posts

  • Top 5 Reasons Why an In-Person Workshop is the Best Way to Supercharge Your Training
  • HYBRID STRENGTH TRAINING IS HERE!
  • My Calisthenics Journey to the PCC
  • The Handstand Press: Complete Control Through the Handstand
  • The Get Strong App is Here!

Dragon Door Publications

Dragon Door Publications

Recent Comments

  • bross dandon on The Case for Curved Handstands
  • Johnny Flewellen Jr. on Strength for Life
  • Dan Earthquake on The Pursuit of the Daily Minimum
  • Johnny Flewellen Jr. on The Pursuit of the Daily Minimum
  • Johnny Flewellen Jr. on Yoga, Calisthenics and the Journey of a Lifetime
FOLLOW US ON TWITTER!

Copyright © 2025

Dragon Door Publications / The author(s) and publisher of this material are not responsible in any manner whatsoever for any injury that may occur through following the instructions or opinions contained in this material. The activities, physical and otherwise, described herein for informational purposes only, may be too strenuous or dangerous for some people, and the reader(s) should consult a physician before engaging in them.