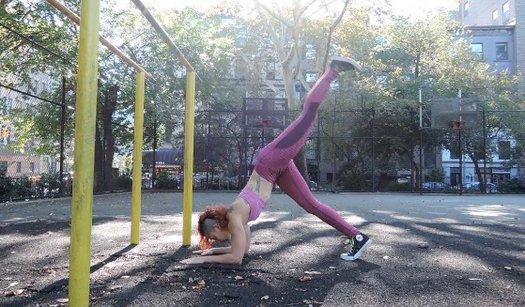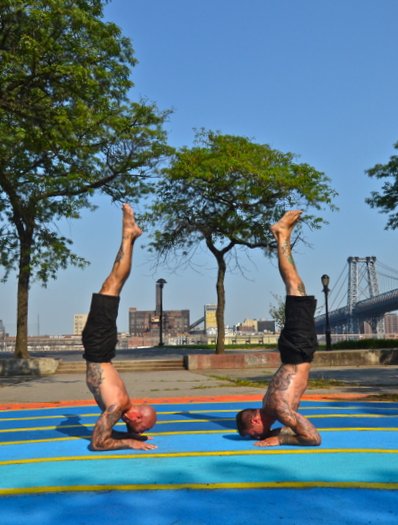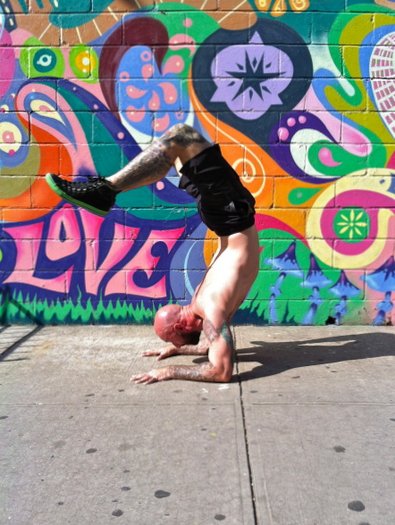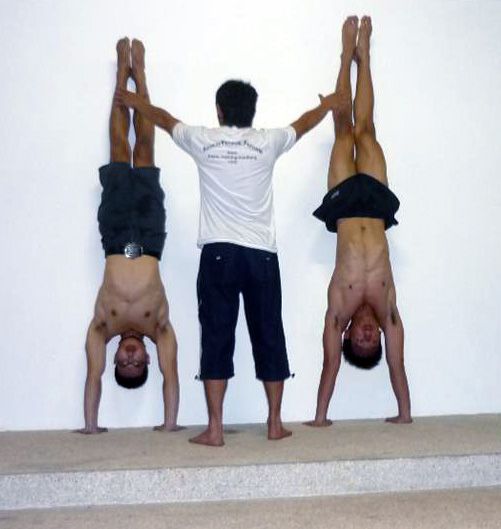
• Skip to main content
  • Skip to primary sidebar
  • Home
  • Contributors
  • Resources
    • Q&A with Paul “Coach” Wade
  • Workshops
  • Products
  • Forums
  • Articles
  • Blogs
    • RKC Blog
    • Strong Medicine Blog
  • Archives

PCC Blog

Progressive Calisthenics - The Official Blog for the PCC Community

handstand

The Handstand Press: Complete Control Through the Handstand

January 20, 2021 By Vic Leave a Comment

Vic Handstand Press Calisthenics

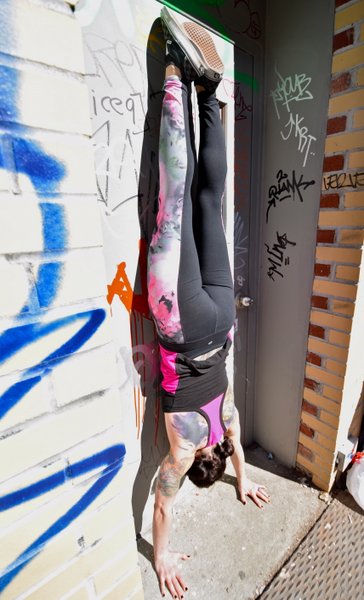
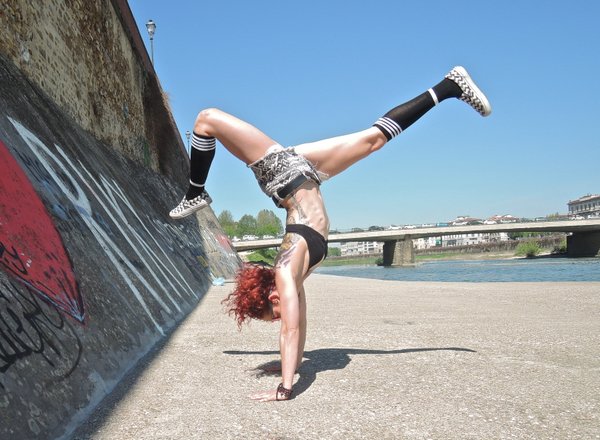
The handstand press is a perfect demonstration of strength, control, and body awareness. It exemplifies a kind of elegant ease that is seen only in handstand masters. Or so they would have you believe.

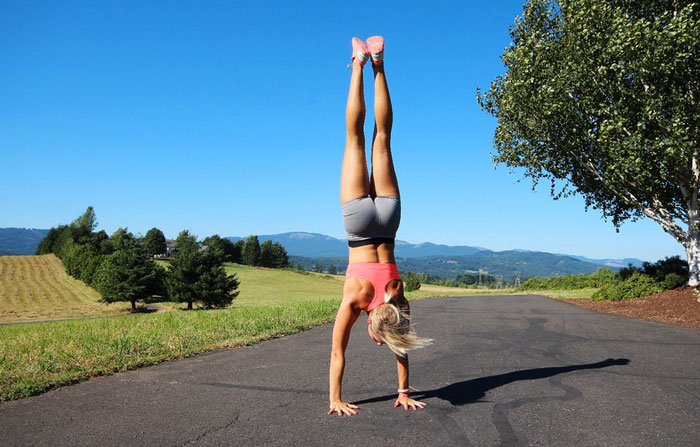
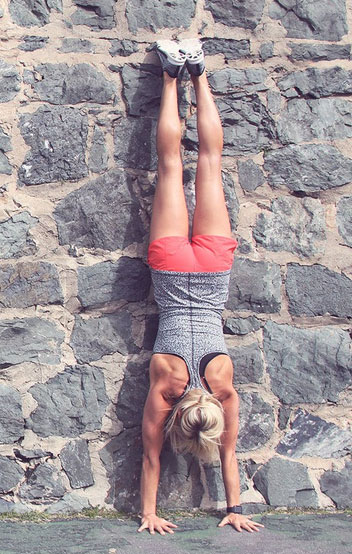
It’s true, the handstand press is a difficult skill – but it is very achievable for anyone who already has a decent freestanding handstand. This is a prerequisite – as balancing through the handstand press adds another level of complexity. If you can’t do a handstand off the wall for at least 15 seconds, then you will need to work on your balance before proceeding with this tutorial.

It should be noted that there are many different types of handstand presses, and this tutorial will be focused on the easiest of these – the straddle handstand press. We will simplify this to just ‘handstand press’ moving forward.

What is the Handstand Press?

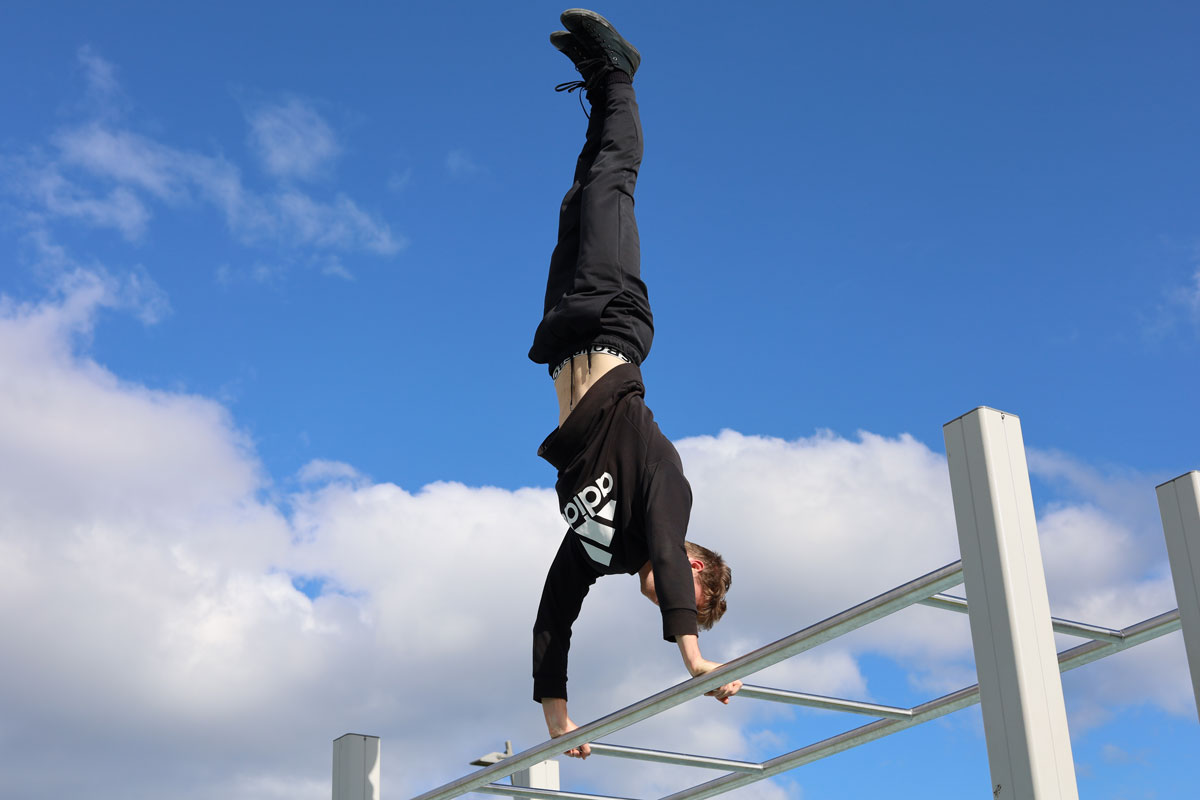
The handstand press, not to be confused with the handstand push up, is a controlled entry into handstand. The hands start on the ground slightly in front of the still grounded feet. The legs are straight and the hips are raised, creating an ‘A’ shape from hands, to hips, to feet.

The handstand is then achieved by leaning forward and allowing the feet to float up off the ground, and in a circular motion, move upward, and connect at the top. The movement is slow and controlled, with the aim to maintain straight arms and legs throughout.

Tackling the Handstand Press … Where To Start?

If you can already hold a freestanding handstand then you should already have the core strength to do the handstand press, or at least you should be very close. By simply working the handstand press, you will specifically engage the correct core muscles and so it shouldn’t be necessary to supplement with other exercises. Of course you’re welcome to throw in hollow body hold and toes to bar leg lifts if you want to speed up your progress even further!

The handstand press can be approached from 2 different angles.

The first is to start learning it while leaning against a wall – preferably against a padded wedge. By placing your hands close to the wall and leaning forward into the wall while your feet are still in contact with the ground, you are learning one of the most fundamental principles in the handstand press – raising the hips. Once the hips come up, the legs will follow. By doing this drill you will train your body to recognize the correct amount of tilt you need to bring your hips into the correct position.

The second drill is called hovering. In this drill, the idea is similar to the first, however the main focus is not so much raising the hips as it is balance. The goal when hovering is to lean forward and take the feet very briefly off the ground before coming back down again. Remember not to jump, the motion should come from leaning forward and changing the centre of gravity rather than from momentum. Hovers are done without the wall and better replicate the handstand press. The drawback is the imminent risk of faceplanting. Most surfaces don’t agree with the face so try to catch yourself!

Hovers should be done at ground level initially. This will allow you to get used to the feeling. Once you get a hang of this – and become proficient at preventing 3rd degree burns on your face – it’s time to make the hovers easier and increase the stakes.

To do this, start by elevating the feet. By elevating the feet, the hovers become easier as the hips have a higher starting position. This also means that you have further to fall if something goes wrong! If you need even more of a boost, consider using a resistance band to pull your hips forward or even have a partner do this.
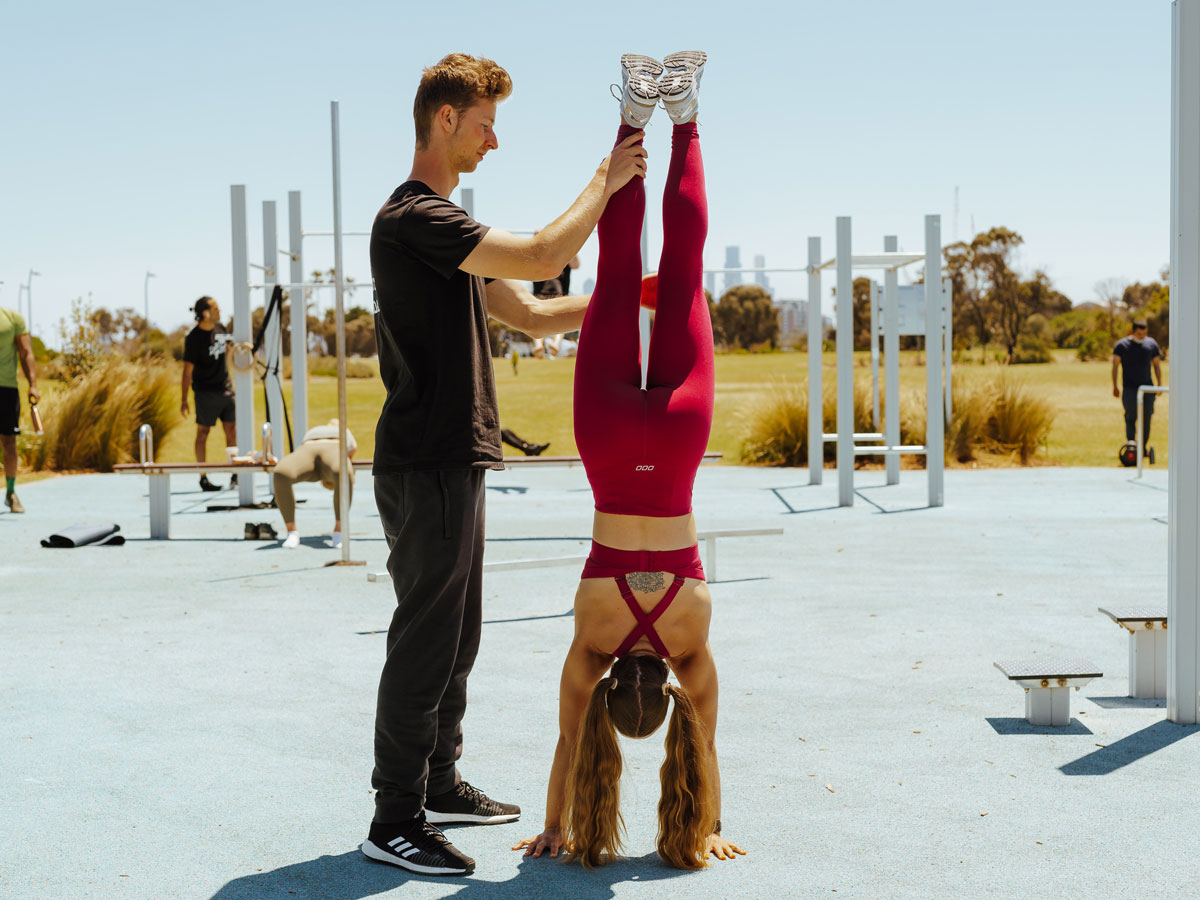
Vic Spotting Coaching Handstand

Advancing the Handstand Press

So you have mastered the handstand press and want some bonus challenges, or you still haven’t got it by you want to know what’s next? Well, there’s good news because the handstand press journey doesn’t stop there! As mentioned before, there are multiple variations of the handstand press. We will cover them in order of difficulty.

L-Sit to Press to Handstand (Parallel Bars)

This handstand press variation is done on parallettes or parallel bars. It’s a basic alternative that uses the same principles as the original handstand press. The starting position, however, is an L-sit. By pulling back through the L-sit you will hit the same starting position as you would on the ground – except now you are higher off the ground and you have more wrist control to manipulate the handstand with. This press is only slightly more difficult than the original, the main barrier being a psychological one.

Pike Press

The pike press is considerably more difficult than the original handstand press as it ditches the straddle for a pike. Instead of the legs going around, they come through the middle – and as such they feel heavier due to a longer lever length in relation to gravity. Most pros struggle with this one – it’s not for the faint of heart!

Wide-Arm Handstand Press

This is the ultimate press to handstand variation. The setup is similar to the original press to handstand, however the hands are placed much wider apart and the fingers are typically pointed outwards. This creates a much more difficult balancing position and forces the core to do a lot more work. Hard to do and even harder to balance the finished product, the wide arm handstand is one hell of a move!
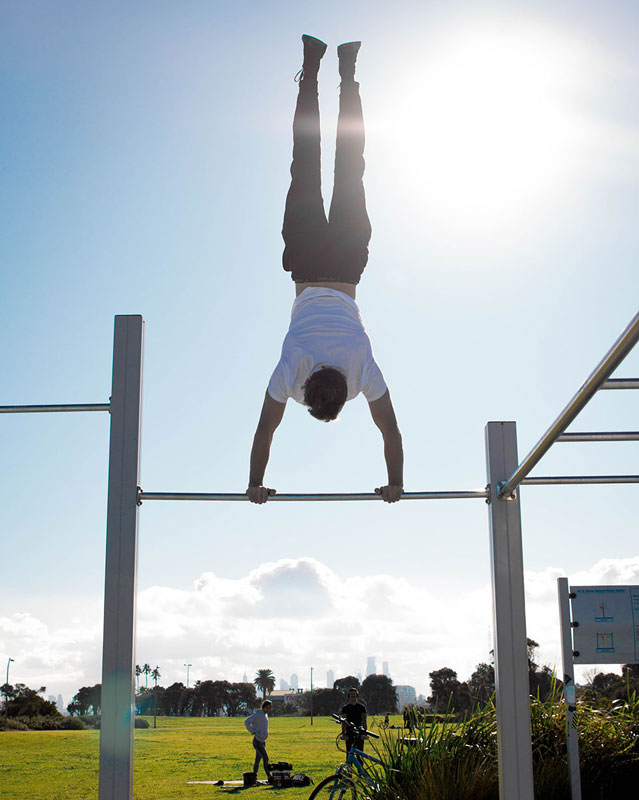
Vic Handstand Press Pull-Up Bar

***

Vic is a Melbourne-based Personal Trainer, Calisthenics Athlete and the Founder of Street Workout St Kilda. and Liquid Chalk Shop. He has a passion for bodyweight training and the art of movement. Follow him on Instagram: @streetworkoutstkilda, Facebook: facebook.com/streetworkoutstkilda, and YouTube: https://www.youtube.com/channel/UCJvI67d8yXvh9gHDVVc2wsA
Filed Under: Motivation and Goals, Tutorial Tagged With: handstand, handstand press, Street Workout St Kilda, Vic

Getting Started with the Freestanding Handstand

October 31, 2017 By Krista Stryker 3 Comments

Krista Stryker Handstand

I didn’t grow up as a gymnast.

As a kid, I played basketball and soccer, but was fairly uncoordinated and had very little body awareness. In fact, handstands didn’t even come on the radar for me until my mid 20’s, and at that time I had just barely built up the strength to do proper push-ups and my first pull-up. Handstands seemed like something only superheroes could do.

Fast forward to today, and I’m happy to say I’ve built a pretty solid handstand. It’s one of the things I get asked about most when I’m training (I also get asked a lot if I’m a gymnast, which always makes me laugh because at 5’9” with fairly long limbs I don’t exactly have the ideal gymnast build).

But it hasn’t been easy. It’s taken me around three years of extremely consistent training to get where I am today, and while I probably could have progressed faster if I knew what I know now from the start, I’ve actually really enjoyed the ups and downs of the journey. It’s been frustrating and yet incredibly satisfying at the same time—and the constant challenge has meant that I’ve never been bored or lost interest in practicing.

If your goal is to learn to handstand, here are my best tips on making progress, whether you’re just starting out or you’ve been struggling to make progress for a while now.

No One is Too Good for the Wall

I train outside a lot, and out of everything I’m doing the main thing people like to stop and ask me about is my handstand and how they, too can work up to a freestanding handstand one day.

Without a doubt, my biggest piece of advice is to use the wall.

When I first started seriously working on handstands, I spent around six months practicing solely on the wall, and it made the absolute biggest difference in my handstand progression.

Now, I totally get that some of you will want to bypass the wall. After all, for a strong, athletic person, relying on the wall may seem like an unnecessary step. But working on the wall has countless benefits, including helping you to build endurance, establish a straight, solid handstand line, teaching you the beginnings of balancing in a handstand, and much more.

When getting started with wall handstands, most people will practice with their back to the wall. However, I’ve personally found that practicing with my chest facing the wall has been even more helpful.

Start in a plank with your feet touching the wall, then walk your feet up the wall until your body is completely vertical and your hands are only a couple of inches away from the wall (if it’s too scary to get that close at first, don’t worry, just work up to it). Once you’re there, push up through your shoulders as much as you can, tighten your core and glutes, and hold for time. This is going to help you build endurance upside down which is absolutely necessary to hold a longer freestanding handstand down the road.

Wall Handstand Balancing Drill

Once you’re able to hold a handstand for at least 30-45 seconds against the wall, you can start working on figuring out the balance portion of the handstand.

Here’s one of my favorite drills for balance:

  1. Start by walking up the wall as described above.
  2. Walk your hands away from the wall so that they’re about a foot away
  3. Slowly remove one foot from the wall and balance it overhead so that your shoulders and hips remain in a straight line. It’s okay if your leg goes slightly past your hips, just focus on your hips being directly over your shoulders.
  4. Even more slowly, remove the other foot from the wall and try your best to hold your handstand briefly. If you fall backward, just put your feet back on the wall. If you fall forward, simply cartwheel out.
  5. Split your legs back and forth, working to feel the balance in your fingertips and the alignment in your shoulders and hips.

You can practice this drill for time to build even more endurance. Just be patient with it and go slowly—this type of training can’t be rushed.

It also really helps to film yourself doing the exercise so that you can see whether you’re actually as aligned as you think you are. Videos don’t lie!

Working Away From the Wall

Once you start to feel the balance against the wall, it’s time to start working on getting away from the wall.

There are countless ways to get into a handstand, but most people will start with the basic kick up. This can be frustrating at first, and you’ll have to work on figuring out how hard to kick up to hit that sweet spot. If you don’t kick hard enough, you won’t make it to vertical—if you kick too hard, you’ll fall or cartwheel over. It just takes time and practice.

Even when you start working away from the wall, don’t give up your wall training all together. While working your freestanding handstand is a necessary step in handstand training, you should still work on the wall to keep building up endurance and working on your balance and alignment in a handstand.

A good recommendation is to spend about half of your time practicing on the wall and half of your time working on kicking up into a freestanding handstand until you get really consistent with your freestanding handstand—then you can spend most (if not all) of your practice away from the wall.

Consistency is Key

If you’re serious about being able to rock a handstand, the number one thing to keep in mind is that you have to be consistent with your training. Since handstands are more of a skill than a strength exercise (although don’t get me wrong, they can definitely tire you out!), you can practice handstands nearly every single day.

And you should—even spending 5-15 minutes a day working on your endurance and balance holding a handstand will make a huge difference towards your progress.

Ultimately, though, you have to really want a handstand and be patient with the process. It can take a great deal of time before you feel consistent and comfortable in a handstand, but take it from me, the process is absolutely worth it.

And of course, it you want to learn more about handstands, come to the PCC!

Krista Stryker With Kavadlos at PCC

***

Krista Stryker, PCC is an NSCA certified personal trainer and the founder of 12 Minute Athlete, a popular website and app helping thousands of people get fit in as little time as possible. Krista has been featured in The Washington Post, SHAPE Magazine, Muscle & Fitness Hers and MindBodyGreen. Find out more about Krista on her blog and connect on social media @12minuteathlete.

Filed Under: Progressive Calisthenics, Tutorial Tagged With: freestanding handstand, handstand, handstand drill, handstand tutorial, Krista Stryker, progressive calisthenics

Training Handstands For Strength

March 1, 2016 By Grace Kavadlo 26 Comments

Grace Kavadlo Handstands 1

When many people think of the handstand, they think of a bodyweight skill. In other words, if your goal isn’t to hold a freestanding handstand, somehow it’s not a worthwhile exercise. While learning to balance on your hands is certainly a noble pursuit, a lot can be gained from approaching the handstand from a pure strength training perspective by using a wall for support. In calisthenics, we encourage all types of isometric holds from elbow levers to L-sits. You can think of the wall handstand as just being the inverted variety.

Wall handstands take the balance element out of the exercise and are excellent for building overhead pressing strength. Practicing wall handstand holds is also a great way of building shoulder stability and increasing static strength. Handstands strengthen your triceps, delts, rhomboids, traps, and the extensor muscles of your forearms which can help build strong, healthy wrists. When you tense your entire body in a wall handstand, similar to how you would in a plank, you can also target your quads, glutes, and even your abs.

Below are 3 different wall handstand variations that you can try. Aim to hold each pose for as long as you can, ideally working up to one full minute. It’s not uncommon to feel dizzy or slightly disoriented after performing long holds, so ease in slowly and rest as needed between efforts.

Back-to-the-Wall Handstand
This is a great place to start if you are new to handstands. Begin by facing a wall with both hands on the ground, your front knee bent and the other leg extended behind you. Hop off your bent leg and reach your extended leg towards the wall. It may take a few hops before you finally hit the wall. Make sure your arms are straight with your elbows fully extended. A common mistake beginners tend to make is to bend their elbows as they kick up which makes them fall on their head and never want to attempt a handstand again. Remember “when the elbows bend, the power ends.”

Once you’re up, allow your head to relax between your shoulders as you actively press into the ground. It is normal to have a slight arch in your back when you are practicing this exercise, but aim to minimize this pressure on your low back by actively squeezing your glutes, engaging your abs and pushing your head and chest through your arms. When you’re ready to come down, release one leg at a time back to the ground, doing your best to land gently.

Grace Kavadlo Handstands

L-to-the-Wall Handstand
Begin in a push-up position with your heels touching the wall behind you. Slowly begin to crawl your feet up the wall as you fold at the waist, walking your hands in closer until your hips are aligned above your shoulders. Your body will wind up in an inverted capital letter L-shape. It may help to have a pair of eyes on you to let you know when you are in position, as it can be hard to tell at first.

In addition to upper body strength, there’s a lot of flexibility needed in your hamstrings to fully extend your legs. If you don’t have the mobility to achieve a full lockout, you can practice with a slight bend in your knees and/or allow your heels to come off the wall slightly. This is also a really intense exercise for your shoulders. It can help to alternate extending one leg upwards at a time in order to take some of the pressure off your shoulders if it starts to get too intense.

Grace Kavadlo Handstands

Face-the-Wall Handstand
Similar to the L-to-the-wall, begin in a push-up position with your heels against the wall, then start crawling your feet up and walking your hands in. This time, the idea is to get the entire front of your body pressed flat against the wall. When you reach the wall, tuck your chin to your chest, tense your glutes, squeeze your quads, point your toes and engage your abs. Think about lengthening your body as much as possible by actively shrugging your shoulders, pressing into the ground and reaching your legs upward.

You can ease into this variation by walking in as close to the wall as you feel comfortable and then walking back out. Gradually you will build the strength and confidence to bring your hands all the way the wall.

Grace Kavadlo Handstands

Upside Down and Inside Out
From an overall health perspective, inversions have a lot more to offer than strength or skill alone. Due to the effect gravity has on the body, practicing inversion holds can be beneficial for the circulatory, lymphatic, and nervous systems. Your body has many valves and veins all transporting lymph fluid, nutrients, and blood constantly. By inverting yourself, you are in essence helping these natural processes by encouraging venous return from the lower extremities back to your heart, brain, lungs, and lymph nodes. As such, there are many folks in the yoga community who consider handstands to be the fountain of youth, so don’t neglect them!

See you on the flip-side, ninjas!

Grace Kavadlo Handstands

****

Grace Kavadlo is a PCC Team Leader, personal trainer and group exercise instructor located in New York City. She is a columnist for Bodybuilding.com and can be seen in several Dragon Door books, including Coach Wade’s Explosive Calisthenics. For more information about Grace, check out her website, www.DieselGrace.com

Filed Under: Progressive Calisthenics, Tutorial Tagged With: calisthenics, Grace Kavadlo, handstand, handstand tutorial, handstands, how to, wall handstand variations, wall handstands

The Forearm Stand: A PCC Hidden Step

October 7, 2014 By Grace Kavadlo 29 Comments

Grace Menendez Forearm Stand

Are you frustrated with conquering the freestanding handstand?

We all want to progress quickly, but the jump from a wall handstand to a free-balancing one can be a huge hurdle! Enter the Forearm Stand – a relatively unknown movement in the PCC world – and a great “hidden step” on your way to the handstand!

When one of my clients recently told me her goal was to nail the forearm stand, I naturally turned to my PCC Instructor Manual, searching for a regression. At over 600 pages, the PCC manual is by far the most comprehensive guide to calisthenics I’ve ever seen, so I was surprised to find barely any mention of the forearm stand!  Luckily, I had plenty of experience with this move from my Yoga training.

Take A Stand

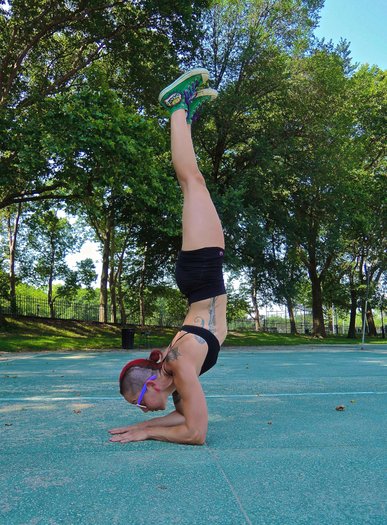
The forearm stand is a great intermediate step between a beginner’s headstand and a freestanding handstand. Known as Pincha Mayurasana (Peacock Pose) in Yoga, this move is great for strengthening your arms and shoulders while also stretching your neck, chest, abdomen and back.

Inversions are also beneficial for improving circulation throughout the body, as well as challenging the practitioner’s balance. Though a difficult move in its own right, the forearm stand is more accessible than a handstand because you have more points of contact to assist in balancing.

Here’s how to nail this move in just 3 easy steps!

#1 Dolphin Pose

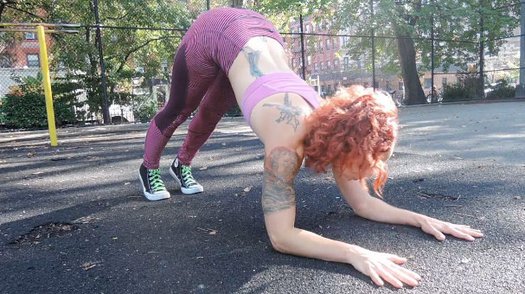
This pose is similar to Downward Facing Dog from Yoga but it is practiced on the forearms rather than the hands. Start in a plank position with your forearms shoulder-width apart, then spread your fingers and align your shoulders over your elbows as you gaze between your hands. Slowly begin to walk your feet in towards your hands as you raise your hips towards the sky. If you are new to this pose, you may only be able to walk a few steps before stopping. Your body should resemble as close to an inverted V as possible. Actively press through your hands and forearms to lift your head further off the ground and hold this position for time.

Grace Menendez Dolphin Pose

#2 The Kick-Up

Begin in Dolphin pose and extend one leg up towards the sky. The closer you can walk your feet to your elbows, the more aligned your spine becomes. This alignment allows you to “float” into this pose rather than having to rely on a significant jump. The more mobility you have in your hips and hamstrings, the less difficult this becomes. Push off the base leg as you kick upward with the extended leg. If you are unable to hold the balance at first, I suggest practicing this variation against a wall or other sturdy object until you build the confidence to try it freestanding.

Grace Menendez Dolphin Kick Up

#3 Forearm Stand

Once you are able to kick up and hold for a few breaths, you’re golden! Keep increasing your hold times by simultaneously squeezing your inner thighs and ankles together and pointing your toes towards the sky to create stability throughout your body. The key to finding the “sweet spot” is to grip the ground with your fingers while “wrapping” your triceps around the arm bones and pressing through your elbows as you balance.

Al Kavadlo Danny Kavadlo Forearm Stand

Scorpion Pose and Beyond

Initially when I began practicing forearm stands, I found it easier to hold the pose by bending my knees and allowing my heels to drop as a counterbalance. This is also known as Scorpion Pose. I must warn you this is an intense back bend, however! If you are having difficulty balancing in a regular forearm stand and want to try the scorpion variation, be sure to fit in some preparatory bridge work to warm up your spine.

Al Kavadlo Scorpion Pose

Be patient with yourself and prepare to put in some work if you want to nail this move. You might experience a “crash-landing” when first attempting freestanding forearm stands but by learning to safely fall out, you’ll gain the confidence to keep trying again. If you have the flexibility you can transition into a bridge if you feel yourself tipping over. If not, try to turn your hips and fall to the side. Stay the course and eventually this move will be yours!

Watch the video for more:

***
Grace Menendez, PCC, HKC is a personal trainer and group exercise instructor located in New York City. For more information about Grace, check out her website, www.DieselGrace.com

Filed Under: Flexibility, Tutorial Tagged With: dolphin pose, flexibility, Forearm stand, Grace Menendez, handstand, handstand regression, headstand, hidden step, how to, tutorial, yoga

The Straight Handstand—The Door to Amazing Strength Development

November 19, 2013 By Co-written by Lionel Ng and Bruce Dierl 9 Comments

ng1If you are reading this blog, chances are you are looking to make some physical improvements to yourself – e.g. you want to be able to run faster, or to jump higher, or to churn out amazing feats of strength, etc.

Being able to do and hold a straight handstand for one solid minute will aid in all-round athletic development.

But before we begin, let us first take a look at a couple of handstand photos.

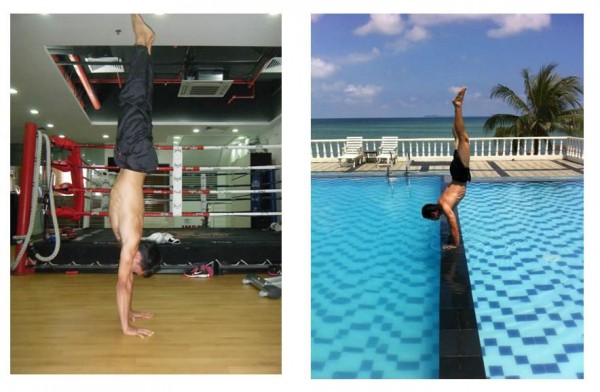
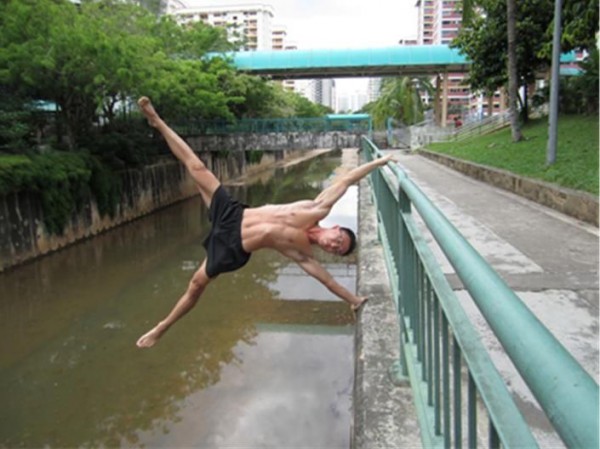
ng2Even though there is no one “perfect” handstand form, so to speak, the straight handstand that we are talking about here should approximate the one shown in the picture on the left, as opposed to and contrasted with the handstand depicted in the picture on the right.

Essentially, a straight handstand should find the back flat, with no arch in the lower back. The major limbic joints of the body, i.e. the wrists, elbows, shoulders, hips, knees, and ankles should find themselves “stacked”.

The reason for the difference between a straight handstand and an arched one is also the reason why being able to do and hold the former is going to make you stronger and more coordinated.

The key word here is “tension”.

In order to perform a handstand, as with any other physical feat, one requires some level of bodily strength. If you are able to stand and balance using your arms, just imagine the kind of strength, coordination and body awareness that you will achieve.

In a straight handstand, the entire body is tensed in a coordinated manner, with the exception of the facial and neck muscles. We are talking about conscious muscle engagement (you are using it, not just training) to hold this unnatural position, it makes subsequent hand balancing elements ‘easier’ to learn. When one finds his or her lower back arching in a handstand, chances are that some parts of the body are not being engaged as needed to achieve the straight form, or some structural issues subsist that makes the straight form difficult to achieve.

The ability to generate and hold this muscular tension throughout the body such that a straight handstand is achieved comprises two key ingredients: coordinated strength and body awareness.

Our legs are strong not only because they make up a large part of our bodies; it is also because we tend to stand a lot. We are able to stand on our feet so well because we have been doing it since we were little. Using the concept of perceived effort level (PEL), over time as your musculature has been doing prolonged hours of work keeping you standing upright, you get so used to it that you stop perceiving this effort level as an undue strain or demand. Of course, we don’t remember much from when we were really little. Otherwise, you might have recalled that learning to stand was a real pain.

The same broad principles apply in the handstand. Because the handstand is a relatively new and somewhat unnatural position for those of you who are not acquainted with it, you are going to find it terribly difficult, at least initially, to tense your body in the requisite manner while trying to hold it in the air, on your hands. This is normal, and only to be expected.

And, make no mistake, the handstand, especially the straight handstand, is a powerful physical tool that unlocks many doors in the realm of physical fitness and culture.

You will get stronger from holding your handstand. This is because the tension that your body generates and maintains while you are performing a handstand is an exertion of strength.

Through the practice of handstands, we learn to generate muscular tension in some pretty challenging circumstances. Which means to say, the finer balance involved while you’re standing on your hands will compel you to tense your muscles harder than when you are standing on your feet. What this in turn means is that you are able to contract your muscles rather powerfully, and hold this contraction over a certain period of time.

Speak to any strong power lifter and he or she will tell you to brace your trunk while you are lifting. The act of bracing the musculature in the torso is a cornerstone of the ability to move some serious weight. Bracing is a requirement for a straight handstand and can be translated into the other athletic disciplines or types of movement that you may be interested in.

Since your hands are smaller than your feet (pardon my presumption if this isn’t true for you), and they lack a proper heel that would allow for effective balance in the direction away from your fingers, you will find that in holding a handstand you will be needing to perform many micro-adjustments in your musculature as a form of re-balancing exercise in order to continue staying on your hands.

When all is said and done, while the handstand is not going to make you as strong as the Hulk, or as finely-balanced and superbly-coordinated as Spiderman; but what it is going to give you is a sound foundation upon which these traits can be more readily built and refined.

Envisioning your body in space while holding an inverted position on your hands helps with development your body awareness, in terms of muscular effort and proprioception. For those of you dreaming of flags and front levers and the like, all these skills share a similar trait that requires full-body tension as in the handstand. Main point of difference – since in a flag or a front lever, or a back lever or a planche, your major limbic joints are not going to be as stacked under your bodyweight as in the handstand, they are going to require far greater and more specific arm and shoulder strength in varying scapular positions.

ng3For a novice, the tremendous arm and shoulder strength required for a proper planche or lever isn’t going to come as quickly as is hoped. Tensing the body while struggling to hold a desired position is often nigh on impossible. That is why one should start with the handstand if one aspires to these other skills – the handstand, by the law of simple physics, does not require the same staggering levels of arm and shoulder strength. Learning it will teach you the body tension that will then stand you in good stead as you pursue the other static strength holds.

Often, the exertion of the scapular complex to fight the pull of gravity in a lever or flag or planche is going to be rendered extremely challenging if the body is not tensed. A loose and sagging torso and legs represent far greater resistance by leverage than a torso and legs that are powerfully-tensed/engaged. Acquiring the ability and the capacity for this tension in the handstand will greatly expedite the learning process for the other, more strength-demanding, exercises.

On a side note, even if the freestanding handstand is not your goal, hand balancing training has benefits which should not be overlooked. Hand balancing training is more than just kicking up onto the wall and holding for time. The alignment and balance drills and flexibility training will help with many of the mobility issues faced by the individual on a daily basis.

Due to the nature of the practice, hand balancing training helps with shoulder health and strength. Strength and health should go hand in hand unlike today where the pursuit of one aspect (usually strength) solely results in poor long term health (joint problems, imbalances etc).

***

Post is Co-written by Lionel Ng and Bruce Dierl of Basic Training Academy.  Credit to Ling Qinghu, ex-acrobat from the Fujian Acrobatic Troupe, for teaching me (Bruce) the fundamental principles behind the handstand.  Credit to Yuval Ayalon, former gymnast and former Le Reve performer for his guidance in understanding the finer intricacies of hand balancing. Bruce and Lionel previously attended a workshop by Ido Portal.

Filed Under: Progressive Calisthenics Tagged With: basic training academy, Bruce Dierl, calisthenics, gymnast, handstand, handstand variations, Lionel Ng, straight handstand, strength training

Handstand Push-ups and My “Aha” Moment

September 24, 2013 By Logan Christopher 10 Comments


Logan_Phonebook HSPU
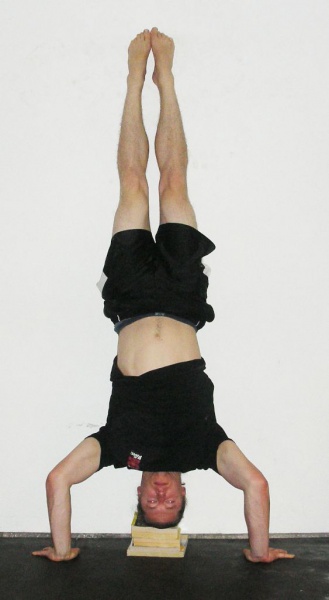
This very wide stance, along with phonebooks to limit the range of motion, can be useful when getting started with this exercise. Demonstrated by Logan Christopher.

When I got started with bodyweight training my goal was to be able to do a handstand push-up against the wall. My upper body strength had always been quite weak as judged by the bench press, so I figured if I could achieve this goal I’d be on my way.

However, it was a long ways off. It took me awhile just to get the handstand against the wall. If I bent my arms at all I would come crashing down. But I was committed to the journey, and within a few months I achieved my goal.

This started a lifelong love of the handstand push-up. There wasn’t all that much information available on how to do this exercise out there so a lot of what I learned came from trial and error.

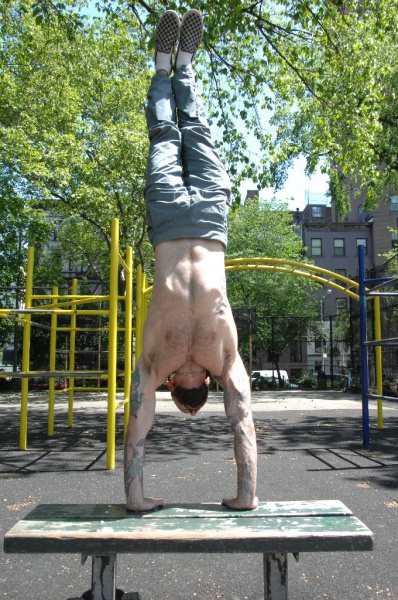
elevated handstand
Al Kavadlo demonstrates the elevated handstand.

I’ll never forget the one training session that led to my “Aha!“ moment. Fast forward a couple of years from my first rep and I was doing a handstand push-up focused routine. I had worked up to doing about 5 reps and thought I was ready to increase my range of motion. Now my goal was a full range handstand push-up  (hands to shoulders on an elevated platform).

One of the best ways to get better at handstand push-ups is to increase the range of motion just a little bit at a time. This was a method I had used in getting to my first head-to-the-floor rep, and it was my plan in working towards the full range.

I kicked up on my elevated setup in my garage and went for my first rep. As I lowered down I couldn’t even manage a single rep. What was going on?

I had only increased the range of motion about two inches. It shouldn’t have been THAT much harder. But it was.

What I came to realize is that I hadn’t just changed the elevation but much else about how I was doing the exercise. This was the first time I came to realize that small changes in your body position make BIG differences in the difficulty of the handstand push-up.

When the average person does regular push-ups, their elbows flare out far to the sides. While this is okay, it is not optimal. Done too much, this can cause problems for the shoulders as all the stress is placed into one area.

However the same problem does not occur in handstand push-ups. Because of the vertical, rather than horizontal angle, the shoulders are in a fine position either way.

Al -HSPU
Al demonstrates the handstand push-up.

Do a little experiment with me. Go ahead and put your arms straight overhead right now. Now widen their position. If you look closely you’ll notice that when you widen them they’re not quite as high.

A part of how this hand position changes the difficulty may be in a favorable angle for you to push. This will probably depend on what you’re used to doing. The majority of it comes from the fact that you shorten your range of motion with a wider hand position. A shorter range of motion means an easier exercise. And this is something you can do without any sort of equipment.

Although it’s not a huge decrease in range of motion, it is close to the sticking point in the press and thus can make a big difference in what you can do.

If handstand push-ups are something you can do right now go ahead and kick-up against the wall and give this a shot. Do a few reps with a wide hand placement. (Don’t go too wide as you’d lose all leverage and it would then become very hard). Then try a couple with the hands at shoulder width and note the difference.

If you watch people doing handstand push-ups, you can notice how close or far their hands are when they do them. Remember,  a wider position is easier and will allow you to do more.

This can be helpful in allowing you to achieve that first rep.

This can be useful in allowing you to push your numbers up. (This easier form of handstand push-ups is what I used to achieve my current record of 21 reps against the wall.)

This can be used in helping you do full range handstand push-ups.

This can also be a big help in doing freestanding handstand push-ups and other bent arm presses.

When you’re holding a handstand you’ll usually want the hands to be shoulder width apart, as this is best for maintaining the structure in the handstand. However, if you’re doing any sort of bent arm press it can be made easier using this technique. All you have to do is practice balancing in the handstand with a wider than normal hand placement.

Of course, if you use this all the time it may make it harder to do anything where you need the shoulder width or more narrow hand position. For this reason it is best to mix it up. In any case this technique can be a useful addition to your bag of tricks, and a form of progression you can use.

The wide stance makes these freestanding handstand pushups easier.
The wide stance makes these freestanding handstand pushups easier.  Demonstrated by Logan Christopher.

***

About Logan Christopher: Logan Christopher has been called a physical culture renaissance man as he is accomplished in a wide range of strength skills from kettlebell juggling, performing strongman stunts, and bodyweight exercises. He is the author of numerous books including Secrets of the Handstand and The Master Keys to Strength & Fitness. In addition, he’s spent the last several years going deep into mental training to find out what it takes to really excel and tactics that can help people instantly improve their exercises. You can find out more about all this at http://www.legendarystrength.com/.

Filed Under: Progressive Calisthenics Tagged With: advanced, bodyweight exercise, handstand, handstand push-ups, Logan Christopher, strength training

10 Hot Bodyweight Exercises You Should Be Training

September 10, 2013 By Alex Zinchenko 39 Comments

Alex1Ok, so you got serious about this “progressive calisthenics” thing. And now your head explodes from endless dilemmas: should you train this or that? What’s better: the planche or the one-arm push-up? Should you be working on one-arm chin-up or front lever pull-ups? Possibilities are limitless while our resources are definitely limited. You can’t think “screw it”, and train with every technique at once. You must choose something if you want to make any meaningful progress. So what should you choose? Let me give you 10 hot calisthenics exercises you should spend time training (in no particular order).

1. Handstand

If you don’t train this exercise you are missing out big time. This would be my number one priority. Why the handstand? Well, if you can stand on your legs, shouldn’t you be able to stand on hands? Not convinced? Ok, then here is what I can tell you from experience. The handstand develops your upper body like nothing else. There’s simply no substitution. It makes your shoulders and arms more stable and robust. You’ll definitely feel the newly gained strength and stability in all other pushing movements. For example, all my training clients benefited from implementing handstand training into their routines and increased their pushing numbers (some of them had a 20% increase, which is great, in my opinion). Anyway, no matter what your goal, you should strive to learn the handstand as soon as possible. And, of course, it looks awesome. If you are struggling to learn the skill here are 10 tips that will help you.

Alex2

2. Handstand Push-Ups

I differentiate handstand push-ups into two types:

  • Wall-Assisted Handstand Push-Ups [WA HSPU]
  • Free-Standing Handstand Push-Ups [FS HSPU]

They are two quite different things. When we are talking about WA HSPUs we are talking about an almost purely strength move. Balance is not an issue here, while FS HSPUs will require decent balance and stability as well as proficiency in the handstand. No matter what you prefer, it is good idea to train both. Once you get good at them you can increase difficulty in one of these ways:

  • Increase range of motion;
  • Add a weighted vest;
  • Move to one arm work.

Ideally, you should end with weighted full ROM one-arm handstand push-up.

3. Chin-Ups/Pull-Ups/One-Arm Chin-Up

Alex3

Everybody knows these exercises. You can call them whatever you want, but you can’t deny the fact that chin-up is one of the best lat and biceps builders known to man (if not the best). It is an essential pulling movement pattern and it should be practiced a lot. I won’t get deep into details here, but for the regular chin-ups your main technique points are:

  • Back should be arched
  • Shoulder blades together
  • Chin up until chest touches the bar

Also it would be a good idea to practice chin-ups on different apparatus. Do them on bars, monkey bars, rings, towels etc. This will add spice to your training.

Another interesting thought would be to perform them every day (of course, assuming you can do at least 10-12). Try doing 30-50 Chin-Ups total (in as many sets as needed) every day for the next 3-4 weeks and you can be amazed with your new set of guns and barn door back.

When you are able to perform at least 15 chin-ups it will be a good time to slowly introduce one-arm chin-up work. My main tip would be to get into it very slowly. You don’t want to experience intolerable elbow pain, right? Anyway, I believe that the one-arm chin-up is definitely an exercise you need to master someday.

4. Pistol

You can’t ignore your leg training unless you desire that set of toothpicks you can often see in commercial gyms. There is an exercise that can help you not to look that stupid. It is one-legged squat a.k.a. the “pistol”. You know that it works your legs from all angles and pretty well. But there’s a problem with the pistol. Once you can do 10 reps in the exercise it becomes more endurance oriented rather than strength. What to do in such situation? The simplest solution is to add weight. A weighted vest should be ideal. If you don’t have one then you can use a backpack. Here’s the article on how to do it. Also you can use kettlebells, a sandbag, or a barbell. If you have nothing you can grab a stranger (girl, preferably) and put him/her on your shoulders for added resistance.

But what to do if you have nothing at hand, there are no people around and you feel unstoppable urge to train your legs? You can combine pistols with jumps. Try to jump onto a platform from the bottom of the pistol position. Or you can try broad jumps in pistol position. Use your imagination.

5. Planche/Planche Push-Ups

The planche is another awesome gymnastic position/move you can effectively implement in your training routine. Is it essential? Probably not. But it is a very good test of your straight arm scapular strength. It works your delts, upper chest, lats and biceps quite decently. Also it’s a staggering sight to see a human being holding their body parallel to the ground on straight hands.

Here are a couple of tips:

  • Most people don’t have the necessary flexibility in the wrists so it will be a good idea to turn your hands a bit sideways.
  • Always perform this skill with your elbows locked. Otherwise, it is not a planche.
  • Don’t overdo it. If you want to train it more than two times per week don’t go even close to failure. Otherwise, you’ll feel very annoying pain in your forearms.

Once you master the specific planche position it is good idea to try push-ups in it. For example, once you can hold an advanced tuck planche for at least 10 seconds you can try to add push-ups in this position.

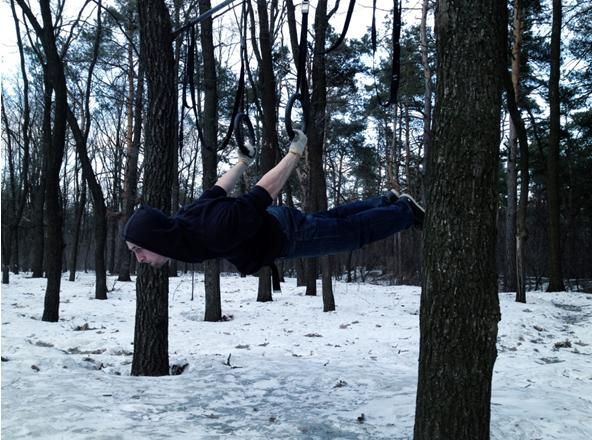
6. Front Lever

Alex4

The front lever is another useful skill in our arsenal. It works arms and back while torching your core. Many people think that it is easy. Obviously, they are fooling themselves. You’ll need lots of time to master the skill especially if you are 80+ kg and tall.

Again, as with the planche you want to keep your elbows locked. And also you don’t want to overdo it for the same reasons.

A good tip for mastering the front lever is to use a “false grip” while performing it. More on this later in the article.

7. Human Flag

Everybody loves the human flag. It’s a core killer as well as test of upper body strength and stability. There are lots of tutorials on the human flag out there. What can I add? Here are couple of thoughts:

  • Don’t start training the human flag before the handstand is mastered.
  • Learn the human flag on Swedish bars first (or use some kind of ladder). Then move to pole version.

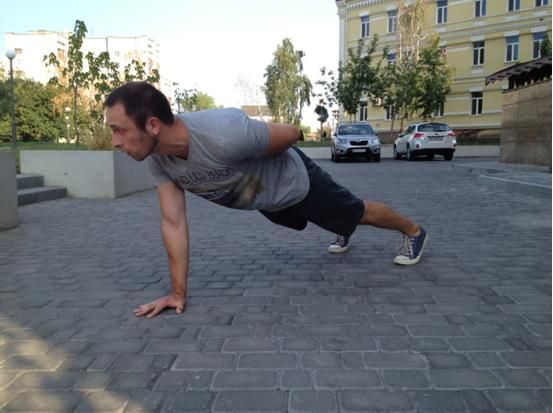
8. Push-Ups/One-Arm Push-Up

What’s so hot about push-ups? Not much. Purely the fact that they lead to the one-arm push-up. And the one-armer is hot by any stretch of the imagination.

Alex5

A lot can be said about this move but I’ll concentrate on technique points. For me a one-arm push-up “counts” only if:

  1. feet are not wider shoulder width;
  2. shoulders are parallel to the ground;
  3. body is perfectly straight looking from the side;
  4. twist of the body is MINIMAL looking from the top.

You may ask: “is it even possible?” Yes, it is. But it will require lots of patience and hard work to achieve. Maybe even more than any other complex bodyweight skill. If you need some more inspiration here you can find 10 tips for mastering the Perfect One-Arm Push-Up.

9. Back Lever

Alex6

The back lever is not a very hard skill but it is essential for learning the planche. Also there are lots of other skills that use this position so it will be smart to spend some time learning it. The most important thing I’d like to share with you is what to do when the back lever is mastered. The most basic thing you can do is to learn Back lever pull outs. You get into the inverted hang position, then lower down into the back lever position, hold it for a second and pull yourself back into inverted hang. Repeat for desired amount of reps.

 10. Muscle-Up

I can’t leave this article without mentioning the muscle-up. You can hear or read different things about this skill. Some people say that it is essential and you should master it as soon as possible. Others (usually brainwashed with modern bodybuilding) argue saying that it’s useless because you combine pulling and pushing. They state that you can’t load the pulling and pushing pattern as much as you could if you split them.

Nevertheless, I believe that muscle-up is one of the skills you must learn. And I’m talking about controlled muscle-up here, not the kipping one.

There are two points I’d like you to concentrate on:

  • Use a “false grip”—with the thumbs over the bar, rather than wrapped around it. Watch some videos on YouTube on this subject. One exercise that will help you here is false grip chin-ups.
  • The main struggle is the transition part. There are three exercises that will help: Russian dips, chest-over-bar pull-ups (pull yourself very high) and muscle-up negatives.

It’s beyond the scope of this article to explain these exercises in detail, but if you want me to explain them just leave a comment and I’ll try to make it happen.

Another interesting thing about the muscle-up is that ring muscle-ups are actually easier than bar muscle-ups. Why? Due to the fact that you can pull the rings to sides during the transition phase.

Closing Thoughts

Of course, you’ll need much more than this article to create a reasonable program. My goal was to show you what exercises would develop your body and what you should focus on while programming your training. What now? You must absorb the knowledge and use it. Thanks for reading.

If you have a fitness-obsessed friend, you can do a good thing and share this article with him or her.

Play rough!

Alex Zinchenko

P.S. If you have any thoughts regarding the topic, let’s chat in comments.

***

It is a pleasure for the PCC to present Alex Zinchenko—the Ukraine’s hottest personal trainer! Alex is a strength addict, coach and author of the Rough Strength blog, where he shares his crazy ideas regarding training and nutrition. He is honest as toothache, straightforward like a train and dares to believe that heavy calisthenics, kettlebell and sandbag training along with intermittent fasting can deliver you all the results you want.


Filed Under: Progressive Calisthenics Tagged With: Alex Zinchenko, back lever, bodyweight exercise, calisthenics, front lever, handstand, human flag, muscle up, outdoor training, PCC, pistol, planche, progressive calisthenics, pull-ups

How I Use the Convict Conditioning Program Along with Kettlebells

February 26, 2013 By Adrienne Harvey 22 Comments

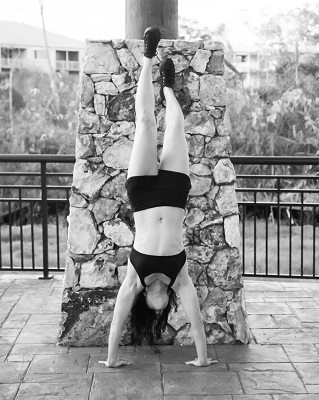
AdrienneHandstand

Since many of us who practice Progressive Calisthenics are often involved with other athletic pursuits like kettlebells, martial arts,  and/or sports, a question which continually comes up is how to program our sessions in a way that allows for high performance in some areas and at least maintenance in others.  People beginning the Convict Conditioning program sometimes ask a similar question, thinking that they need to “add in” cardio, thinking that the program somehow isn’t “enough” on its own for fat loss or other physique-related goals.   The good news is, the program can absolutely stand on its own, it’s just very different from the familiar sets-reps-weights-n-cardio paradigm.   It’s important to realize that the bodyweight programs as presented in Convict Conditioning are complete, and use a strategy which is entirely different from mainstream “conventional” approaches.

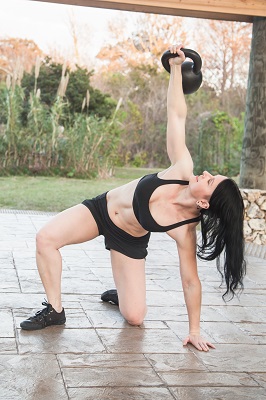
AdrienneGetUp

For fat loss, it isn’t really necessary for someone to have to add steady state cardio.  An  improved nutritional plan and consistent work with Convict Conditioning should produce incredible results.   Especially when this beginning calisthenics athlete begins to really feel, on a visceral level, how their performance is enhanced by getting stronger, and by becoming a little lighter.  This sort of dual reinforcement is powerful—it can motivate people to permanently adopt a healthier lifestyle.   Given the program’s power,  athletes participating in competitive sports, martial arts, or other athletic pursuits like kettlebells will want to keep this in mind when programming.   Motivated athletes of all kinds seem to short change their rest and recovery.

I’ll be giving an example week of how I have made a Convict Conditioning program work within my own lifestyle of instructing, maintaining, and further refining RKC kettlebell skills while still creeping towards some fairly big long-term bodyweight goals (1 arm chin up, human flag, etc).   A few of the routines in CC are specifically designed with enough rest days to allow for the inclusion of sports.   Good Behavior and to a lesser degree Hard Time are great examples.   Hard Time is especially upper body focused, so if your “extracurricular activities” are particularly upper body inclusive you may wish to choose a different routine to work with.

An important thing to remember with both Convict Conditioning and kettlebell training is that less is often more.   Convict Conditioning requires  absolutely strict form and coordinated full body tension with each exercise—while not training to failure (and theoretically still leaving you enough energy to defend yourself).  In my opinion, practicing Progressive Calisthenics, like kettlebell training, is as much about building skill as it is about building raw strength.   Often on Facebook and other online communities we see some very ambitious sounding workouts with just amazing rep ranges, but it’s important to remember that these longer duration workouts will have performance and form trade offs.   Think of a marathon vs. a sprint—to run a marathon, the athlete will need to pace themselves.  In a sprint, the athlete will basically go “all out” for a short period of time.   Personally, I like shorter duration workouts aimed towards skill building, optimal movement patterns, and the control of maximum tension where needed in each rep.   Most days my “workouts” tend to be small, near maximal sets of very challenging exercises spread throughout the day.   The CC logbook is especially great for keeping track of these activities.

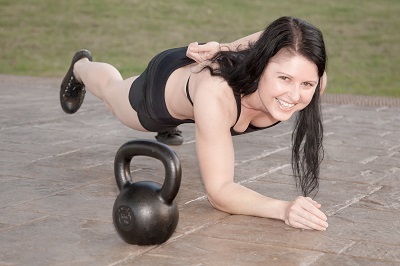
AdriennePlank1arm1legKB

Since maintaining and refining kettlebell moves is essentially my current “sport” or “martial art” right now, a program like Good Behavior can be easily adapted for several weeks of progressive training.  The weeks following the example below would have variations in kettlebell exercises and weights, and if appropriate (the progression standard met) a graduation to the next step in a given Convict Conditioning progression.  The names of the calisthenics exercises refer to wherever I am in the progression.   This is a fairly typical example of my training on a non-traveling week, adapting the Good Behavior routine:

 Monday: Push Ups – 2 Work Sets*; Leg Raises – 2 Work Sets

Optional kettlebell swings and a few get ups as a warm-up, or to break up a typical Monday heavy on business, writing, or internet work.

Tuesday: Moderate kettlebell work (RKC snatch test or slightly heavier bell)  technique workout for get ups, swings, high pulls, and snatches.  RKC Planks and hollow position holds.  Rep range is significant but nothing spectacular.

Wednesday: Pull Ups – 2 Work Sets; Squats – 2 work sets   Optional swings and/or get ups.  After the work sets of pull ups and significant rest, I might play-practice with pull up variations and or a muscle up or two along with dragon flags and working towards the “human flag” here and there in the day.

Thursday: Rest/Mobility/Extra tai chi skills practice and/or Extra Primal Move mobility/skills work

Friday: Handstand Push Ups – 2 work sets; Bridges – 2 work sets

Saturday: A kettlebell challenge circuit workout – usually includes pressing and/or clean&jerks, along with an extra implement or challenge like Battling Ropes or flipping tires.  Play with advanced variations of a CC exercise, or a PR attempt of some kind.

Sunday: Rest/Recovery/Mobility

*Work sets in Convict Conditioning are preceded by a few warm up sets of earlier parts of the progression, the book has all the details and several workout routines like Good Behavior for you to start working with immediately.

—

About Adrienne Harvey, RKCII, CK-FMS, Primal Move Nat’l Instructor

I started studying kettlebell training over three years ago and became RKC Certified in October of 2010, and became an RKC Level 2 Instructor in July 10th of 2011.   Kettlebell and bodyweight training have been absolutely crucial in my personal quest for fitness, and I love sharing these ultra-effective modalities with small groups and individuals.  Similarly, developing recipes to further support performance, body composition, and general enjoyment is another passion.  Go to http://www.giryagirl.com/ for more information about Adrienne!


Filed Under: Progressive Calisthenics Tagged With: Adrienne Harvey, calisthenics, Convict Conditioning, creating workouts, handstand, kettlebells, program design, progressive calisthenics, women

Primary Sidebar

Featured Products

previous arrow
GetStrongBookCover
ConvictConditioningBookCover
StreetWorkoutBookCover
ExplosiveCalisthenicsBookCover
StrengthRulesBookCover
next arrow

Categories

Progressive Calisthenics Certification Logo
Click here for more information or to register for the PCC workshop

Get Strong Workouts TriadXP App
Get Strong Workouts App

Recent Posts

  • Top 5 Reasons Why an In-Person Workshop is the Best Way to Supercharge Your Training
  • HYBRID STRENGTH TRAINING IS HERE!
  • My Calisthenics Journey to the PCC
  • The Handstand Press: Complete Control Through the Handstand
  • The Get Strong App is Here!

Dragon Door Publications

Dragon Door Publications

Recent Comments

  • bross dandon on The Case for Curved Handstands
  • Johnny Flewellen Jr. on Strength for Life
  • Dan Earthquake on The Pursuit of the Daily Minimum
  • Johnny Flewellen Jr. on The Pursuit of the Daily Minimum
  • Johnny Flewellen Jr. on Yoga, Calisthenics and the Journey of a Lifetime
FOLLOW US ON TWITTER!

Copyright © 2025

Dragon Door Publications / The author(s) and publisher of this material are not responsible in any manner whatsoever for any injury that may occur through following the instructions or opinions contained in this material. The activities, physical and otherwise, described herein for informational purposes only, may be too strenuous or dangerous for some people, and the reader(s) should consult a physician before engaging in them.