• Skip to main content
  • Skip to primary sidebar
  • Home
  • Contributors
  • Resources
    • Q&A with Paul “Coach” Wade
  • Workshops
  • Products
  • Forums
  • Articles
  • Blogs
    • RKC Blog
    • Strong Medicine Blog
  • Archives

PCC Blog

Progressive Calisthenics - The Official Blog for the PCC Community

tutorial

Tight is Right

June 18, 2013 By Mike Gillette 3 Comments

blue Oz

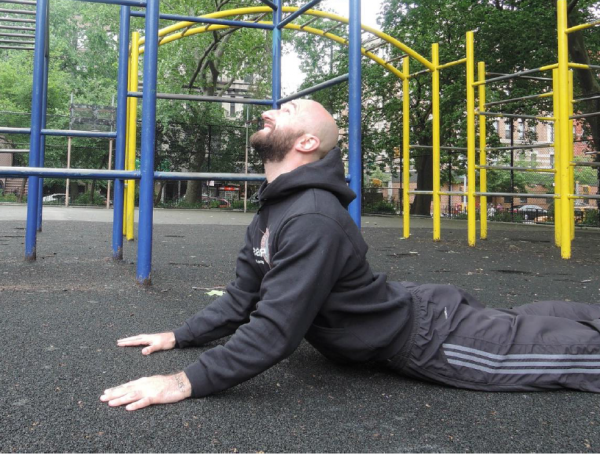
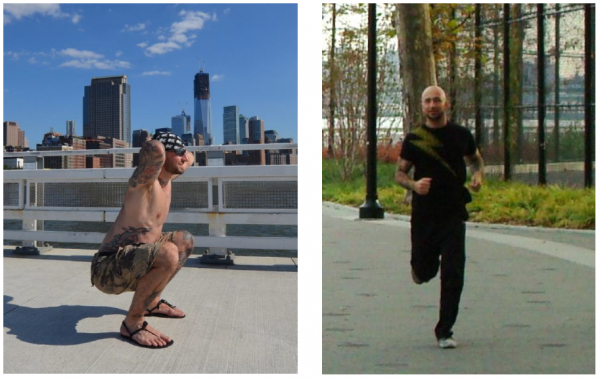
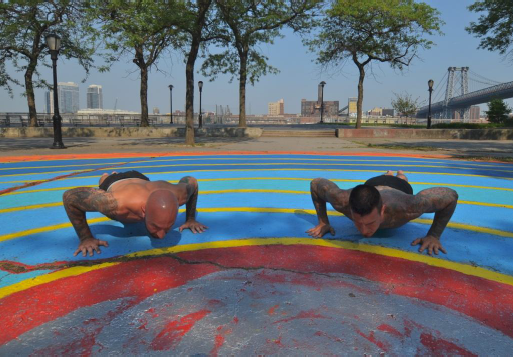
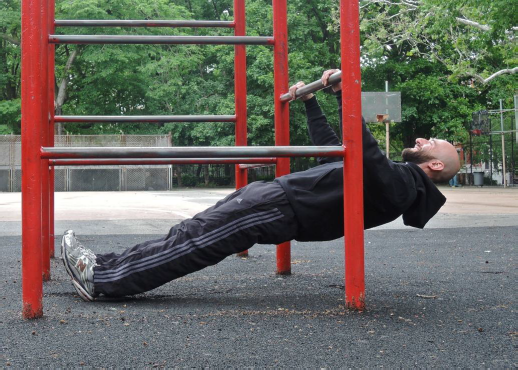
Photo courtesy of Mike Gillette

Control… Tension… Control-able Tension… These are the success-essentials for bodyweight mastery. If you (or your clients) lack the ability to “tighten that which needs to be tightened,” then the structural integrity of your exercise-specific postures will be soft, saggy and sad. What you (or your clients) need is the ability to generate head-to-toe tension at will.

If you’ve been training for any length of time, particularly those of you who wield kettlebells, then you have already been teaching yourself how to generate tension. Bracing the body while under dynamic or asymmetric loads is a very effective self-teaching tool when the subject at hand is tension-generation.

But what about your clients? Particularly your new clients? Is there a way to expedite the development of intentional body control so they too can reap the benefits of bodyweight strength-development?

Absolutely.

The following Body-Control Drill sequence is perfect for beginners and simple to administer in a group exercise setting. Once all participants are in the starting position, you will provide a series of instructions. You will be leading your trainee(s) through a process of tightening and relaxing different parts of the body. In addition to the benefit of learning how to generate tension on demand, you are also teaching your clients to respond to your cues. This will make you more effective at teaching them advanced movements down the road. Here’s how you run the drill…

TO BEGIN: Have your trainee(s) stand in a neutral position with feet shoulder-width apart, hips over heels and head over hips. The arms should be resting comfortably at the sides. Shoulders are back and the head is level with eyes cast “on the horizon”.

Points-of-Performance:

  • Do not exceed 5 seconds of tension at a time. Two contractions per isolated body part are sufficient.
  • Trainees must be cued to “breathe through” the contractions. They are NOT to hold their breath.
  • Coaches must be careful not to “burn out” clients in the performance of this drill. Done with intention, this drill can be grueling.
  • As the coach you are in charge of quality-control. If there is a slacker in your group, then poke, prod or do whatever you need to in order to get them to tighten up to your satisfaction. In general you will be able to assess your athletes visually, but there will be times when you have to go “hands-on”. (Note: When I work with females, I make a fist and gently bump the area in question. This prevents the appearance of hand contact which looks or feels like I am squeezing/grabbing them. If it’s a male athlete I do the same thing, I just don’t bump as gently).
  • This is just a drill. Use it where and when it makes sense, but stay focused on the bigger picture.

Step 1: “Grab the floor with your feet and hold” ….. “Now release”

Step 2: “Tighten your lower legs and hold” ….. “Now release”

Step 3: “Tighten your upper legs and hold” ….. “Now release”

Step 4: “Tighten up from your feet through your upper legs and hold” ….. “Now release”

Step 5: “Tighten your glutes and hold” ….. “Now release”

Step 6: “Tighten your midsection and hold” ….. “Now release”

Step 7: “Tighten up your glutes and midsection and hold” …. “Now release”

Step 8: “Tighten your shoulders and chest and hold” ….. “Now release”

Step 9: “Tighten your arms and hold” ….. “Now release”

Step 10: “From head to toe, tighten your entire body and hold”… “Now release”

That’s it. It’s an easy drill for you to administer and easy for your clients to understand. And using this drill as a basic framework, you can apply variations. Your clients could perform it seated, while holding a broomstick or a length of rope, they could even perform it supine at the end of a workout.

***

About Mike Gillette: Former SWAT Commander and Executive Bodyguard, Mike Gillette is a relentless student of the human factors which allow people to succeed despite overwhelming odds. His research and experiences have taken him through many different worlds and disciplines. They have ultimately produced a body of knowledge which has been put to use by clients ranging from high-risk professionals operating in extraordinary circumstances, to ordinary people who want to make extraordinary changes in their lives…

Find him on Facebook!


Filed Under: Progressive Calisthenics, Tutorial Tagged With: body control, bodyweight exercise, full body tension, Mike Gillette, tension, tutorial

Five for 5

May 28, 2013 By Paul "Coach" Wade 46 Comments

Summer is knocking at the door, boys and girls. (Allegedly.) Everyone is outside, hanging out in the golden rays, whiling their hours away in sun-soaked fun and romantic adventure. (Allegedly.) Summer lovin’. It’s like a scene from Grease, I tells ya. And why the hell not? A spell in the sunshine promotes Vitamin D synthesis, improves mood, and boosts immunity. It may even increase lean tissue-building testosterone levels. (Allegedly.)

Seriously, there are some times you want to lock yourself away in your cell and perform hours and hours of calisthenics—and there are times you definitely don’t. There are times you want to get a quick, productive workout under your belt, so you can go out and enjoy life instead. For a lotta folks, summer is one of those times.

My hands are up, officer; I’ve been guilty of long, draining, excessive workouts throughout my career. But I have also experimented with very brief, efficient, training sessions—and I want to share a few of the tactics I’ve personally used for super-short workouts. Specifically, I’m gonna give you five types of session that will keep your motivation high, keep you strong, flexible and tough—and all for the temporal investment of a mere five minutes. (Yeah, you read that right. Five minutes.)

I want you crazy kids to enjoy summer. Think you can’t get a viable training session done in five minutes? Read on, Macduff.


The S4 Method

This right here is my personal favorite strategy for a quick, effective workout. It’s simple, too—provided you can view a clock or wristwatch. For any movement or body-part, you warm up, then perform: a minute of a strict bodyweight strength exercise; a 60 second muscular hold for stamina and control; a minute of a fast calisthenics exercise; and a final stretch. (Strength, Stamina, Speed and Stretch—four “S” qualities. S4, get it?)

So the method looks like this:

paul_pic1

How quick and simple is that? You just knock out each of these for one full minute. Non-stop activity, with no rest in-between exercises. That’s it!

If you think this is not effective, I challenge you to try it. Here’s how it might work for midsection. You warm up for a minute with some abdominal tension, leg swings and hip rolling; then—eye on the clock—jump up and grab the overhead bar. For sixty seconds you grind out slow, smooth, perfect leg raises. (Ten reps is about right, champ.)

paul_pic2

By now, you are grimacing—but you still got some life in ya, right? So drop to the floor and press out into an L-hold—now stay there for sixty seconds.

paul_pic3

By the end of this (if you manage it) your legs will be trembling, and your gut will be in agony. But the show ain’t over, bud. Hook your feet under something; you have one minute to pump out as many bent-leg sit-ups as you can stomach. (Pun intended.) You are going for speed—military style.

paul_pic4

 USCMC image (LCpl Esteban Gallegos)

By now your midsection is spent, and you will be pretty much snapping up using everything you have. The minute—which will seem endless—finishes, somehow. Your body just wants to curl up in pain right now, but I want you to do the opposite—roll onto your stomach and straighten your arms, pushing up into a cobra stretch.

paul_pic5

This hold is a strange mix of relaxing—as it decompresses your confused and tangled, deep-fried muscles—and painful, as the time mounts up. One minute of this, and you walk out a free citizen—if you can walk at all!

Sure, this workout is too tough for most athletes. But as with all progressive calisthenics, you can tailor it to your own level. Can’t do leg raises? Knee raises or lying leg raises. Not loved by the L-hold yet? Bent-leg holds or jackknife holds work the same. Too shot to do the sit-ups? Throw a b-ball at the wall and catch it on the rebound for a minute (an underrated gut exercise).

Even the time aspect is variable. A minute is unthinkable for these exercises? Start with 30 seconds for each and build up a few seconds each session.

The S4 method works with pretty much anything. Want some upper-body push action?

paul_pic6

Again, with the PCC “toolbox” you can vary the difficulty in dozens of ways. For example, beginners might sub dips for kneeling push-ups. The elbow lever could be swapped for easier prone statics like planks, wall planks or raised elbow levers (see the PCC Instructor’s Manual for even more options). Fast push-ups could be subbed for incline push-ups, focusing on pumping out rapid-fire reps in the top range. Stretch out on a doorway for an easier pec stretch.

S4 works for legs, too:

paul_pic7

If you are working on unilateral or asymmetrical exercises, it’s best to alternate sides each rep. Again, you can use different difficulty levels, or different techniques—S4 stands a lot of tweaking.

Strength, control, speed and mobility. That’s three simple, five-minute workouts right there that very few advanced athletes could manage—trust me.


Gear Change Sets

Fancy a change? A workout new and fresh, free from the baggage of your long-term program? It’s a good idea to try novel exercises. It’s another cool idea to change your sets and reps. But how many athletes think about radically changing their speed? Or, how about changing your speed as much as possible…in a single set?

This is the basic idea behind Gear Change sets. You begin with a handful of slow-mo reps, and finish with a bunch of max speed reps. There are many ways you can approach this. A great one is to shoot for 4 slo-mo reps—that’s 30 seconds up, 30 seconds down—immediately followed by a minute’s worth of a very high-speed, explosive exercise for the same body-part. For example, after 4 slo-mo squats, I used to perform tuck jumps for a minute (if you are outside, a maximum speed run for 60 seconds is probably even better).

So here’s a potential Gear Change workout for the legs:

paul_pic8


paul_pic9

Ever combined slo-mo squats with running? Murder.

Pick the right movements for your ability, and you have an amazing five minute body-part workout right there. But for Christ’s sake, always start each slo-mo rep at the bottom—or you may find yourself doing a 30 second negative squat you cannot push up out of. Slo-mo reps are tough, so don’t try slo-mo with an exercise unless you can do at least twenty strict reps with it at regular speed.

The method works for any body-part. For midsection, you could follow 4 slo-mo leg raises with squat thrusts for 60 seconds. After slo-mo push-ups or pull-ups, you might apply a minute of intense bag work or shadow boxing. You get the idea.

This slow-to-fast method is an amazing way to train. Through the complete elimination of momentum, the slow moves are tougher than you imagine (until you try ‘em). They just seem to hit the muscles in a new way, activating deeper fibers we don’t reach by bouncing mindlessly through reps, like so many folks seem to do. Very slow reps also really teach your brain something about the movements you are using; leverage, joint tracking, movement angles, weight shift. Subtle qualities of bodyweight motion, easy to miss at regular speed, now scream at you. When you are done with them, your muscles feel totally numb—and asking them to switch to their highest gear is a true challenge.

The Gear Change set also replicates real life. There would have been times when our ancient ancestors had to move very slow with high tension—maybe dragging a carcass back to the cave—then they were forced to suddenly fight off a predator trying to steal their prize. Slow to fast. Survival today is no different; imagine a soldier in the desert carrying heavy weapons or equipment, suddenly having to run for cover in a firefight.

Don’t get me wrong. Gear Change sets (like the other ideas here) are not meant to form the basis of your long-term training program. But they sure are fun, effective and instructive once in a while.


The H.P.A.S. Protocol

This is a beaut of a workout. I’m gonna call it HPAS, coz “Half Pyramid Antagonistic Super-sets” is too hard to say (at least for me). The premise—as always—is real straightforward. Pick two exercises for opposing muscle groups. Begin by doing each for 10 reps, then each for 9 reps, then 8 reps and so on, until you get down to one rep per set—and you do all this without stopping.

Here’s one potential workout:

paul_pic10

paul_pic11

paul_pic12

Few exercises go together better than regular push-ups and Aussie pull-ups.

Back to back antagonistic superset madness! On sale NOW!!

Can all this be done in five minutes?—if you use brisk reps with no pauses, yeah. But it’s not easy, and most folks will have to seriously build up to this. (There’s a good goal, huh? I’m looking at you, Jack.)

The HPAS Protocol is a perfect example of how short sessions can be both powerful and productive. Very popular in jails. If you can follow the above workout, you will have scorched every muscle in your upper bod, knocked out 20 sets, and got a helluva cardio workout, too.

This workout is proof that you don’t need to be in the gym for hours to make progress. In calisthenics—as in life—it’s quality that counts, not quantity. A hundred thousand rhinestones won’t make you rich, son; but a handful of diamonds sure will.


“The Century”

The Century is the rapidly-becoming-classic PCC certification test. It is designed to display technical ability in combination with an advanced level of conditioning, but it can also be a damn fine workout in its own right. In case you haven’t heard of The Century (where you been, dude? Under a rock?!), it’s so-called coz it features one-hundred nonstop reps in a single set:

paul_pic13

PCC-certified super-achievers will probably be sick of training for The Century, but it’s still a good staple to return to from time-to-time. Not only is it great to get back to the basics, but a hundred reps of the good stuff will leave your circulation and energetic system supercharged.

Beware though—if you want to crack this sucker in five minutes, you better have taken some Super Soldier Serum this week, kid. It can be done, though.


Al Kavadlo owns The Century in under 2 minutes 39 seconds.
Can you come close to that?


The Bridge

One final suggestion. You want the best five minute bodyweight workout money can buy? Hold a bridge for five minutes.

paul_pic14

I’m not kidding. The bridge has so many benefits, it’s crazy. It is the best bodyweight exercise in the world. A long hold will increase total-body strength and endurance—not just in the showy muscles, but in the vital deep tissues and tendons. It will increase flexibility, mobilize the ribcage, hip flexors and stomach wall, and disperse adhesions and calcifications in the shoulders. It bulletproofs the spine and lower back and drastically reduces knee pain. The inverse head position increases circulation to the noggin, releasing endorphins, inducing calm, and improving brain health. The bridge rocks.

I know what you’re thinking. Just one exercise? That’s an imbalanced workout, for sure! No way, José. In the real world, most eager athletes do so much for the front of their bodies—the showy pecs, biceps, abs and quads—that throwing a little extra meat to the under-loved posterior chain cannot hurt one bit.

Besides, the bridge is one of the all-time bodyweight classics, no different from pushups, squats or pull-ups. If you can’t hold a bridge for five minutes, there’s no way you can call yourself in great shape, no matter what else you can do.


Lights Out!

There you go—a killer series of five-minute summer training tactics, just for you.

So, what are your plans tonight, buttercup? What’s that? In a little while, you’re gonna eat, grab a shower, then head out for the evening?

Sounds great!

…before that, you’ve got five minutes to spare for old Coach, right?

My thanks go out to Al Kavadlo (PCC Lead Instructor) for generously contributing such cool pics to illustrate this article. This is not the first time Al has donated pics (and advice) for free to promote the bodyweight cause—thanks Al!

***

About Paul “Coach” Wade: Paul Wade is the author of five Convict Conditioning DVD/manual programs. Click here for more information about Paul Wade, and here for more information on Convict Conditioning DVD’s and books available for purchase from the publisher.

Filed Under: Progressive Calisthenics, Tutorial Tagged With: Al Kavadlo, bodyweight exercise, bridge, bridging, calisthenics, Century Test, Convict Conditioning, creating workouts, fitness, HPAS Protocol, Paul Wade, progressive calisthenics, S4 Method, short workouts, tutorial, workout

One Arm Bridge, Twists and the Valdez

April 30, 2013 By Logan Christopher 8 Comments

In my previous article I covered some advanced versions of the wrestler’s bridge exercise to build both more neck and spine strength, as well as dynamic flexibility.

Now its time to turn on the gymnastic bridge.

By itself the bridge requires a high degree of flexibility. The truth is when your flexibility is great, then holding the position isn’t too hard. It requires more strength when you don’t have the flexibility to do it, because you can’t quite get to lock out.

If you’re not there yet, keep at it. Make sure to read Convict Conditioning to build your bridge.

And what I want to cover here is an advanced variation not covered in that book, that takes your flexibility, and stability, to another level. Here is a short series of progressions you can do. The video shows each one and you can read more about them below.

One Arm Bridge Hold

Get into a gymnast bridge and lockout your arms. Shift your weight slightly to one side then raise up the other arm off the ground. Hold for time. If you can get a minute you’re doing great.

Work both sides equally. You can come down and rest between sets or shift back to two hands, then onto the other arm.

One Arm Bridge Twist

There are several versions of this move that just change it up slightly.

To start with get into you’re your one arm bridge. Rotate your torso towards that arm as you kick your opposite side leg over until you come to a position where you’re on all fours.

Note that your hand may need to twist on the ground as you turn.

After you get to all fours you can then rotate back.

Work to both sides. You’ll likely find one side is better than another. This is usually more because of flexibility than strength. Also notice that it requires an even greater degree of shoulder and wrist flexibility plus shoulder stability through an interesting plane of motion.

One Arm Bridge Twist from Sitting

Now we’re going to do the same thing starting from a sitting position. For description purposes I’ll describe this from the position of having the left hand on the ground.

Start with your left hand on the ground, pointing away from your body. Your left leg will be straight and your right leg bent and close to your body. Raise your hips up and onto that arm as you bridge over. Your hand has to do a 180 as you come into a bridge position. Once in position you can place your right hand on the ground.

Try coming up with the same or opposite arm back to a sitting position.

Valdez

This is a move from gymnastics that is usually reserved for women as they tend to have more flexibility. Still it can be worked up to, if you’re willing to put in the time.

This combines the previous exercise, the one arm bridge twist from sitting, with a kick over done in seamless fashion. In the beginning you may need to break it down into sequential steps and of course both should be solid before attempting to put them together. You actually begin kicking up with the leg even before your second arm touches the ground.

I’ve pulled this one off before, but not in many years. Without working on it recently, I haven’t quite got the flexibility and control required for it.

So if you’re ready for some more intense bridge work start working in this series. If you can do all this, just holding a bridge will never be a problem again.

***

About Logan Christopher: Logan Christopher has been called a physical culture renaissance man as he is accomplished in a wide range of strength skills from kettlebell juggling, performing strongman stunts, and bodyweight exercises. He is the author of numerous books including Secrets of the Handstand and The Master Keys to Strength & Fitness. In addition, he’s spent the last several years going deep into mental training to find out what it takes to really excel and tactics that can help people instantly improve their exercises. You can find out more about all this at www.LegendaryStrength.com.

Filed Under: Progressive Calisthenics, Tutorial Tagged With: advanced, bridge, calisthenics, Logan Christopher, One arm bridge, tutorial, twists, valdez, video

The L-hold Tutorial

April 16, 2013 By Aleks Salkin 15 Comments

aleks1

The L-hold (also known as the L-sit) is one of the 7 static holds included in the PCC syllabus. Like all statics, L-holds are phenomenal for tendon strength and powerful, total-body co-ordination—but don’t expect to see them performed in gyms around America anytime soon.

My own recent exploration of the L-hold started off somewhat embarrassingly – with a locked-up lower back. After botching my first dance with heavy pullovers, my lower back felt like a piece of wood – stiff and immovable (note to interested parties: common sense would dictate not to arch your back while doing pullovers. My common sense was evidently on a smoke break at the time. Don’t arch your back if you do them). I couldn’t do anything. I couldn’t do pistols, I couldn’t do L-holds, I couldn’t even hinge at the hips without feeling like I was going to catapult face first into the ground.

I was in trouble with a capital “TROUB”.

Fortunately, I had a hunch that there was a simple solution to this sudden bout of inflexibility, and the answer lie in strengthening my low back’s next door neighbor: my abs.

I chose the L-hold because hanging leg raise variations were unbearable at the time, and because of the high promises made about L-holds in Convict Conditioning 2: “Cure bad hips and low back inside and out.” Could it really be that simple? Would the L-hold break its promise when I most needed it to deliver? There was only one way to find out, and fortunately the progression sequence Paul Wade laid out in Convict Conditioning 2 was just what the doctor ordered. I started with bent leg holds and found that pumping my legs between progressions increased the difficulty and skyrocketed my strength and blood flow to my low back all at the same time. To make a long story short, within a few short days my back was as good as new. In this post, I’m going show you how I approached mastery of the L-hold.

First and foremost, you are going to need two things: strength in the form of strong shoulders, lats, triceps, and (of course) abs. Be sure you’ve cut your teeth on dips, one-arm pushups and their progressions, handstands, pull-ups, and leg raises before you tackle this move. Second, you are going to need some good active flexibility, or as Coach Wade refers to it in CC2 “Tension flexibility”, in your hips and legs. Whereas passive flexibility is essentially yielding to the force of gravity to improve your range of motion, active flexibility uses muscle tension to kick gravity to the curb and move in an advanced range of motion against the Earth’s otherwise unforgiving pull.

L-hold domination

To begin with, start on some sort of raised surface rather than on the floor: paralettes, kettlebell handles (careful!), or a sturdy desk will do the trick. For the sake of variety, consider practicing them on all these surfaces. While I have no hard proof of it, getting good at a this or any skill in a variety of contexts may very well make you better at the movement overall.

To keep your shoulders happy, keep them pushed down as far away from the ears as possible, and keep your “elbow pits” forward for all the steps in each series. Let your shoulders round forward – flare your shoulder blades – and hold that position tight. Keep your gaze straight ahead.

aleks2

Nope! Chest is too wide and back is arched. You may not pass go.

aleks3

Bingo! Back is flexed, chest is sunken, abs are tight. You have redeemed yourself.

Aleks4

Make your elbow pit point the same direction as your fingers.

Your goal is to work up to 20 second holds on each progression before moving on. However, because you’ll achieve that goal by getting stronger before focusing on endurance, I’ll give you a tool to get a taste of the next progression in the series to help build your strength faster and work your way toward the advanced L-hold more time efficiently. Not only will you be building static strength, but you will also be building dynamic strength, thereby giving you some built-in variety and the ability to feel out the movement a bit better.

When your arms start shaking and you are making ugly faces and grunting to get through your sets, you’ve already gone too far. If you’re working yourself into the ground you’re building fatigue, not strength. Knock it off.

You’re going to start with the bent leg hold. Prop yourself up on your raised surface, bend your legs to about 90 degrees, and…well, hold it. Hold it for as long as you (semi) comfortably can, take a break, and repeat.

Your journey through the progressions will go in this order.

1) Bent leg holds

–>Bent leg-to-straight leg

2) Straight leg holds

–> straight leg-to-N-holds

3) N-holds

–> N-holds-to-L-hold

4) L-hold

And if you want to take the first small step toward V-holds, you can add in this gem

==> L-hold-to-advanced L-hold

5) Advanced L-hold

Check out the video for the deeper details to kicking gravity in the face L-hold style. Note that during the dynamic variations I’m controlling my leg movement, not letting it control me (i.e. bouncing around and losing balance). Don’t move on until you can do the same.


Programming will be different from person to person. If you’re a rank beginner, you can get by initially with just two days a week of work. I say “initially” because the L-hold is not as taxing as movements such as hanging leg raises and Dragon Flags, so practicing them daily should become your goal.

The following programs are examples. You may progress faster, you may progress slower. Use these programs as templates, not gospel, and you will find that you have a solid base to work from and progress should roll in faster than you can spell “transverse abdominis.”


Beginner program:

Week 1: Don’t overthink it – keep your effort level at around 50%-80%. No need to go balls-to-the-wall just yet.

Monday: Bent leg holds

Thursday: Bent leg holds to straight leg holds

Week 2:

Monday: sets of bent leg holds and bent leg-to-straight leg holds

Thursday: Straight leg holds


After this, three days a week should be no problem. If that’s still overdoing it, stick with two days a week and progress as slowly as you need to. You don’t get a medal for racing through the progressions.


Intermediate program:

Week 1:

Monday: straight leg holds + bent leg-to-straight leg holds

Wednesday: bent leg holds

Friday: straight leg-to-N-holds

Week 2:

Monday: N-holds + straight leg-to-N-holds

Wednesday: straight leg holds

Friday: N-holds to L-hold

And if you’re more advanced and want to work on these daily, here’s an advanced program.


Advanced program:

Week 1:

Monday: (warm up: bent and straight leg holds) N-holds + N-hold-to-L-hold

Tuesday: (warm up: bent and straight leg holds) N-holds

Wednesday: (warm up: bent-to-straight leg holds) N-holds-to-L-hold + L-holds

Thursday: (warm up: bent-to-straight leg holds) N-holds

Friday: (warm up: bent-to-straight leg holds) L-hold-to-advanced L-hold

Week 2:

Monday: (warm up: straight leg holds) N-hold-to-L-hold

Tuesday: (warm up: straight leg holds) L-holds

Wednesday: (warm up: straight leg holds and N-holds) L-holds + L-holds-to-advanced L-holds

Thursday: (warm up: straight leg holds to N-holds) L-holds

Friday: (warm up: N-holds) Advanced L-holds

Congratulations! You have just kicked the L-hold’s ass! And now your abs are punch proof. But they’re not punch proof enough – not if you’re reading this anyway. For the average exerciser a full L-hold is a laudable accomplishment. But you’re not average, otherwise you wouldn’t be here reading this. The time to go above and beyond is nigh. Stay tuned. The V-hold is calling your name. And it will soon be time to answer the call.

***

About Aleks Salkin: Aleks Salkin is a calisthenics and kettlebell fanatic and Primal Move Fundamentals instructor currently headquartered out of Haifa, Israel. In addition to his love of old school strength training, he is also a devotee of intelligent flexibility training and tension flexibility in particular. Aleks grew up scrawny and unathletic until he was exposed to Pavel and his training methodologies in his early 20s. He currently spends his time spreading the word of strength and health both in person to his clients and online via his website and Facebook page. He is available for online coaching for select, dedicated individuals, and enjoys crushing weakness wherever it tries to hide. Find him online at http://www.alekssalkin.com/

Filed Under: Progressive Calisthenics, Tutorial Tagged With: abdominal training, abs, Aleks Salkin, bodyweight, calisthenics, Convict Conditioning, L-hold, L-sit, Paul Wade, tutorial, workout

  • « Go to Previous Page
  • Go to page 1
  • Go to page 2
  • Go to page 3
  • Go to page 4

Primary Sidebar

Featured Products

previous arrow
GetStrongBookCover
ConvictConditioningBookCover
StreetWorkoutBookCover
ExplosiveCalisthenicsBookCover
StrengthRulesBookCover
next arrow

Categories

Progressive Calisthenics Certification Logo
Click here for more information or to register for the PCC workshop

Get Strong Workouts TriadXP App
Get Strong Workouts App

Recent Posts

  • Top 5 Reasons Why an In-Person Workshop is the Best Way to Supercharge Your Training
  • HYBRID STRENGTH TRAINING IS HERE!
  • My Calisthenics Journey to the PCC
  • The Handstand Press: Complete Control Through the Handstand
  • The Get Strong App is Here!

Dragon Door Publications

Dragon Door Publications

Recent Comments

  • bross dandon on The Case for Curved Handstands
  • Johnny Flewellen Jr. on Strength for Life
  • Dan Earthquake on The Pursuit of the Daily Minimum
  • Johnny Flewellen Jr. on The Pursuit of the Daily Minimum
  • Johnny Flewellen Jr. on Yoga, Calisthenics and the Journey of a Lifetime
FOLLOW US ON TWITTER!

Copyright © 2023

Dragon Door Publications / The author(s) and publisher of this material are not responsible in any manner whatsoever for any injury that may occur through following the instructions or opinions contained in this material. The activities, physical and otherwise, described herein for informational purposes only, may be too strenuous or dangerous for some people, and the reader(s) should consult a physician before engaging in them.