• Skip to main content
  • Skip to primary sidebar
  • Home
  • Contributors
  • Resources
    • Q&A with Paul “Coach” Wade
  • Workshops
  • Products
  • Forums
  • Articles
  • Blogs
    • RKC Blog
    • Strong Medicine Blog
  • Archives

PCC Blog

Progressive Calisthenics - The Official Blog for the PCC Community

video

Ask Al: GET STRONG Edition

July 11, 2017 By Al Kavadlo 18 Comments

Ask Al Get Strong Edition

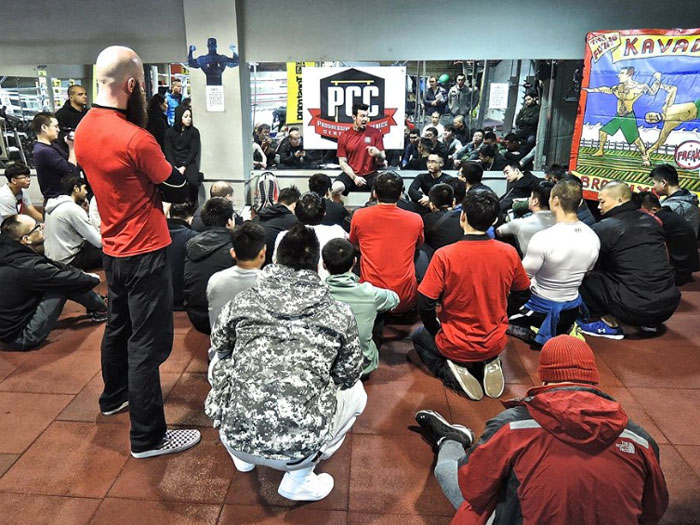
Since the release of our latest book, GET STRONG, my brother Danny and I have gotten a lot of feedback on our new program. It seems that you guys are loving the book!

Even though the program takes 16 weeks to complete – and it’s barely been two months since the release – many of you are writing to tell us that you’re already experiencing gains in muscle and strength. Awesome!

We’ve also been getting a lot questions about the GET STRONG program. Though we did our best to explain everything as clearly as possible in the book, there are a few concerns that have been raised more than once.

That’s why I’ve created this special “Ask Al” video.

In it I address:

–What to do if you’re having trouble kicking into a handstand

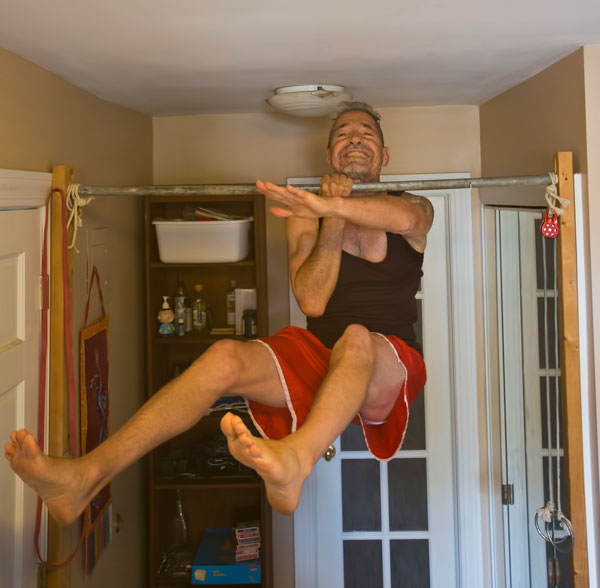
–How to alter the hanging leg raise if you’re too tall to fully extend your legs

–The correct way to sequence your exercises

–How to incorporate Aussie pull-ups into the program

Let us know if you have additional questions or feedback about the program in the comments below.

Let’s GET STRONG!

Filed Under: Progressive Calisthenics, Tutorial Tagged With: Al Kavadlo, Ask Al, Ask Al video, Danny Kavadlo, Get Strong, Get Strong Transformation Challenge, Q&A, questions and answers, video

One Rep Away To Undo Laziness

January 26, 2016 By Eric Buratty 18 Comments

LeadPhotoOneRepBuratty

Laziness is a cornerstone of the many excuses people give for not staying active.

In an effort to reduce laziness, we commonly experiment with several workout strategies that offer us an exciting challenge and minimize boredom.

When we think about it, though, many proven strength training programs are boring cookie-cutter routines. These same workout templates have been around forever—as recycled/revamped set-rep schemes that are also available online for free.

If they work so damn well, what’s the issue?

Well, for starters, they’re hard to stick to.

This is because the physiological benefits from a strength training program over the short run aren’t always consistent with our psychological experience over the long run.

In other words, we all enjoy getting stronger by following those cookie-cutter programs until their linear progressions stop working.

Then we no longer experience the same level of happiness from our workouts.

Then anxiety, frustration and boredom settle in.

Then we lose interest and get lazy.

Then we find ourselves hopping around programs like a bunny that lost its energizer batteries.

EricBurattyChart

As we can see, it’s a hellacious cycle of unrewarding time and effort invested. This is what happens when our original goals become more important than our journey.

So . . .

HOW do we adapt our goal-oriented mindset to fit in with our process-oriented reality?

HOW do we embrace the method to our madness without letting our strength program become just another boring cookie-cutter routine?

HOW do we find balance between the physiological and psychological aspects of exercise without losing sight of what we originally set out to accomplish?

. . . We focus on performance.

Even on the most sluggish of days, the way we perform our reps still dictates the type of gains (or lack of gains) we receive. So, once we become more aware of our stronger and weaker days (over the course of weeks, months and years of experience), the key to boosting performance is then through executing variety in repetition.

Let’s go over how to apply some popular rep styles that further maximize performance and minimize laziness.

Please note that, to get the point across in the most objective manner possible, we’ll assume a total body workout emphasis with demonstrations of each rep style coming from the handstand push-up chain of progressions (i.e. pike push up – to target upper body) and the shrimp squat chain of progressions (i.e. foot elevated/Bulgarian split squat – to target the lower body).

ExerciseCollageKavadlos

FASTER “SNAPPY” Reps

This rep style is characterized by a maximum application of force on the acceleration phase of a range-of-motion. Imagine trying to launch off like a rocket or catapult when transitioning from the eccentric/lowering phase to the concentric/lifting phase–especially when our bodyweight resistance makes a movement (initially) feel lighter (until fatigue sets in, of course).

This rep style can be further divided into two subcategories: explosive/ballistic and plyometric reps. The key difference between these two subcategories is that explosive/ballistic reps are performed without “catching any air,” while plyometric reps involve a short but powerful time period off the ground.  From a physics perspective, explosive/ballistic reps demonstrate why force equals mass times acceleration (i.e. F = ma), whereas plyometric reps take things a step further to show why power equals force times velocity (i.e. P = fv).

FASTER Upper Body Demo 1 (explosive-ballistic)

FASTER Upper Body Demo 2 (plyometric)

FASTER Lower Body Demo 1 (explosive-ballistic)

FASTER Lower Body Demo 2 (plyometric)

Pros: Improves speed, explosiveness and fast-twitch motor recruitment—which means greater carryover to athletic skills that require considerable force and power production; Permits the use of momentum to support a smoother eccentric to concentric transition—which allows for a higher number of reps to be performed cleanly.

Cons: Decreases total body awareness—which can lead to injury when an individual hasn’t fully mastered a movement or progressed it appropriately; Does not simulate the amount of speed and muscle tension for setting PRs.

When to Use: Ideal for all fitness levels training in the 6-12 rep range (i.e. working with the lower level progressions of “the big six” from Convict Conditioning) – wherein the emphasis is on speed & power output first, muscle-building & size second, and strength third.

Beyond Calisthenics: For those who wish to supplement their calisthenics training with weighted movements, this rep tempo would be most appropriate for exercises like kettlebell swings and snatches, one-arm rows with dumbbells/kettlebells/barbells, as well as barbell push-presses and hang power snatches.

SLOWER “Grinding” Reps

This rep style is characterized by a deliberate application of constant muscle tension throughout the entire range-of-motion.  Imagine trying to flex the target muscles for an exercise as hard as possible—as if we’re doing a photo shoot for a fitness magazine cover—while executing a single rep for an exercise.

SLOWER Upper Body Demo

SLOWER Lower Body Demo

Pros: Increases total body awareness—which has implications for injury prevention—even if the rest of mainstream health & fitness media deems a particular exercise as being “unsafe;” Simulates the amount of speed and muscle tension required for setting PRs.

Cons: Decreases speed, explosiveness and fast-twitch motor recruitment—which means less carryover to athletic skills that require considerable force and power production; Does not permit the use of momentum to support a smoother eccentric to concentric transition—which will not allow a higher number of reps to be performed cleanly.

When to Use: Ideal for intermediate and advanced-level individuals training in the 1-5 rep range (i.e. working with the higher level progressions of “the big six” from Convict Conditioning) – wherein the emphasis is mostly on strength and precision in power output.

Beyond Calisthenics: For those who wish to supplement their calisthenics training with weighted movements, this rep tempo would be most appropriate for exercises like Turkish get-ups with kettlebells/dumbbells, heavy deadlifts and front squats with a barbell, goblet style shrimp squats (AKA airborne lunges) or Cossack squats (AKA side-to-side squats) with a kettlebell/dumbbell.

MODERATE “Recovery” Reps

This rep style is characterized by a fluid contraction/stretching of the muscles that may also target strength/stability at a specific point throughout a range-of-motion. Imagine the body as an oscillating wave of potential energy—such as a slinky going down a flight of stairs, a child riding a swing back and forth or Wile E. Coyote jumping off the Burj Khalifa building in Dubai with a bungee cord in an attempt to catch The Road Runner.

From a fitness perspective, we’ll have to fire a large number of rapid muscle contractions every second in order for our joints, tendons and muscles to remain stable under oscillating conditions. The more of these contractions we initiate per second while remaining in a stable equilibrium position, the greater our capacity is to recruit the muscles we need to stimulate contraction/growth or stretching/recovery.

There are a few different ways this can be applied:

Isometric Reps

Upper Body Demo

Lower Body Demo

Dead Stop Reps

Upper Body Demo

Lower Body Demo

Pulsed Reps

Upper Body Demo

Lower Body Demo

Normal Reps

Upper Body Demo

Lower Body Demo

Pros: Reinforces a graceful mastering of the positions and transitions throughout a range-of-motion—which can be helpful in overcoming sticking points and plateaus; Encourages healthy circulation and blood flow to muscles, as well as tendons and joints; Ultimately helps make PRs look AND feel easy; Minimizes the amount of muscle fatigue from eccentric stress—which allows the individual to perform more quality work

Cons: Not as energy-expensive as slow or fast rep styles—so they may not be the best starting point for individuals who are simply interested in taking off a few pounds

When to Use: Ideal for anyone interested in progressing high-tension movements like the family of backbends, forward bends, handstands/inversions, front/back/side levers and mid-section holds, as well as one arm or one leg variations for any of these movements—all while facilitating an individual’s original strength training goals

Beyond Calisthenics: For those who wish to supplement their calisthenics training with weighted movements, this rep tempo would be most appropriate for exercises like paused snatches or clean & jerks (i.e. Olympic lifts from floor or blocks), squats with a barbell on the front side or back side, kettlebell or barbell thrusters, cable bicep curls and close grip barbell bench press, as well as farmer’s walks with heavy weight(s) carried above the head, at the “rack position” or beside the torso.

Wrap-Up

At the end of the day, understand that going faster isn’t always better.

And neither is going slower.

We must get stronger and perform better in all rep ranges with their appropriate tempo to balance the physiological and psychological aspects of any workout program.

Since performance is both mental and physical, expect fluctuations to occur depending on sleep and nutrition quality. Learn to respect body along the way to keep those fluctuations to a minimum.

When energy levels are lower, take the intensity down a few notches, and just have some fun without any formal workout structure.

When energy levels are higher, kick the intensity up a few notches, and add in some structured work sets to earn that breakfast, that holiday meal or that dinner out with family & friends over the weekend.

When in doubt, do a little of both!

After all, a wise person once said, “for every action, there’s an equal and opposite amount of laziness we kill.” 😉

Have any favorite rep styles? Or how about a movement flow that combines one or more rep styles?

Share them in the comments below!

****

Eric Buratty is the health & fitness coordinator at MMA & Sport in the suburbs of Montgomery County. When he’s not fine-tuning his superhero core powers, he helps self-starters move their bodies with more integrity in both one-on-one and group workout settings, writes actionable health content and seeks out further education to help others prevent health problems instead of cure them.

Get to know Eric better and stay updated on his content by connecting with him on Facebook.

Filed Under: Progressive Calisthenics, Tutorial Tagged With: bodyweight training, Eric Buratty, rep speed, reps, tutorial, video, workout strategies

Training One Rep at a Time

December 1, 2015 By Jack Arnow 40 Comments

Jack Arnow: One Rep at a Time

Several months ago, inspired and guided by Paul Wade’s Explosive Calisthenics, I started training for the “suicide jump.” From a standing position with a stick between my outstretched hands in front of my thighs, the goal is to jump over the stick which ends up behind my thighs.

Most of my best friends advised me not to train for the “suicide jump,” as they assumed injury was extremely likely for a 72 year old. There was much truth to their assertions, but I decided to train anyway. I thought the joy of training was worth the risks. It was!

I trained extremely carefully, discovering ways to make the training even safer, advancing one small step at a time. I really didn’t think I would succeed in reaching the master step, but that was a blessing in disguise. It allowed me to focus on each rep in each step with no distractions at all, improving technique, listening to my body, and trusting my intuition.

As a result, I loved the training. It was so much fun because I wasn’t overly attached to the outcome. To my surprise, after a few months, I jumped over a long straw, not a stick. Then a while after that I jumped over a rubber flex bar. Just recently I jumped over an actual stick!

https://youtu.be/ZZ12VRBTmxg

The funny thing is that I thought I already had learned to train this way, focusing on the present, but in retrospect I wasn’t. This was particularly evident in my training for one arm chin-ups over the last several years. Even though I should have known better, I’ve been too aggressive in my pursuit to regain this amazing feat of strength. I’ve lived and learned a lot over the years, but certain lessons need to be continually revisited.

Recently I applied my lessons from training the “suicide jump” to training the one arm chin. I began varying my workouts based on how each rep felt. I will end or continue my workout based on my immediate feeling, not on a predetermined idea. I test new ideas cautiously to see if they help. I’ve learned once again that joyful creative training makes you stronger.

On September 20th 2015 I finally did a flat footed righty one arm chin, but continue training towards a full dead hanging one arm chin. The future is never really certain, in life, or in exercise goals, so enjoy and focus on the present.

Jack Arnow Flatfooted righty chinup

Having clear goals is important, but listening to your body in the immediate present is essential to make better training decisions, and especially to reduce the chance and severity of injury. Constantly strive to improve your technique. One small advance follows one small advance, eventually leading to clear gain, but there will inevitably be setbacks along the way, so be patient with yourself. Others may help you with particular training ideas or suggestions, but test these things carefully in your practice because we are all unique in one way or another.

Regardless of your exercise achievements, be proud of them because your hard work made them happen. If others inspire you, or you inspire others, that is fantastic. Most likely both things are happening. Most importantly, try not to make the mistake of thinking you are better than someone else because you can do something they can’t. You know the difficulties and obstacles that you had to overcome, but probably don’t know theirs. And they most certainly can do many things that you can’t.

Have fun and practice one rep at a time.

***

A student of calisthenics legend Jasper Benincasa, Jack Arnow has been practicing calisthenics for over 60 years. He can be reached by email at jackarnow1@gmail.com.

Filed Under: Motivation and Goals, Progressive Calisthenics Tagged With: explosive calisthenics, goals, Jack Arnow, one arm chin up, smart training, training strategies, video

5 Unique Push-Up Variations to Help You Increase Strength & Size

July 14, 2015 By Todd Kuslikis 14 Comments

5 Push-Up Variations

It could be argued that the push-up is the most popular exercise ever invented. Before we had chrome plated dumbbells and Olympic sized barbells people had to rely on their own body weight for building strength.

Yet is the push-up outdated? Should it be used only as a simple conditioning exercise or as a “finisher” after the “real” weight-based exercises are completed?

Of course not.

There is still tremendous value to the push-up. It is the Godfather of all exercises so we must pay it due respect. Yet, descendants of this exercise have sprung up around the world to help bodyweight enthusiasts continue to improve their strength and build more muscle.

Today, I’d like to share with you my five favorite unique push-up variations to help you increase strength and size.

These exercises are super effective for three main reasons…

1. Challenge Different Muscle Groups

The typical push-up targets mostly the middle portion of the chest, front deltoids and triceps. In order to get stronger, you have to challenge your muscles from different angles and in unique ways. Some of these exercises you might have never heard of before, but after you try each of them, you’ll feel muscles you never knew you had.

2. Build Whole Body Strength

True bodyweight enthusiasts know that one of the greatest benefits to calisthenics exercises is that they build whole body strength. Isolation exercises can cause weak links in your armor that may eventually lead to an injury.

The exercises below surpass most other forms of exercise because they strengthen the entire chain (whole body) as a functional unit.

3. They Are Fun To Do!

Let’s be honest, haven’t you gotten tired of cranking out rep after rep of basic push-ups? When you add unique exercises to your normal routine it becomes fresh and exciting again. Which makes you WANT to do it!

That’s one of the most important aspects of fitness. Sure, getting a nice physique and becoming healthier is great, but we only get one life to live – why grudge through your normal routine? Have fun with it!

Changing up your exercises and adopting new and unique styles will help you do this.

Ok, now on to the exercises…

Variation 1: Barbwire Push-Up

The Barbwire Push-Up (also known as the Diver Bomber Push-Up) is great for developing strength through a large range of motion. You’ll work the upper, middle and lower portions of the chest along with the front, middle and rear delts.

One of the greatest benefits is that with each rep, you are improving spinal mobility. The spine is so important for keeping up your strength. As soon as your spine starts to stiffen you lose functionality which leads to poor performance.

How To Do The Barbwire Push-Up

Start off in a “Downward Dog Position”. Lower yourself down toward the floor as if you were sliding under barbwire. The more arc you can get in your spine the better. As you “slip under the barbwire” arch up while pressing down against the floor. At this point you should have a full arch in your back. Make sure to look up, too, which will extend the arch into your cervical spine.

Begin to arc back down “under the barbwire” while curving your spine the entire time. Press back to starting position.

Coaching Tips

1. The key to this exercise is getting a full range of motion. Make sure you that you are arching as much as you can.

2. To make the exercise easier you can do any number of modifications:

  • Perform the exercise on your knees (you won’t get much range of motion but it will still help you build strength).
  • Decrease the range of motion in your spine (i.e. don’t go down as far or arch up as high).
  • Do the first part of the movement normally but instead of arching back “under the barbwire” come straight to the starting position, which is also known as a Hindu Push-Up.

Variation 2: X Push-Up

The X Push-Up is one of the greatest exercises to develop whole body strength. Normally, with any exercise, you’ll have some muscles that are working much harder than others because the exercise targets a particular muscle group.

With the X Push-Up it seems that it targets ALL of your major muscle groups. In order to perform this exercise your chest, back, core, shoulders, and glutes will be firing on all cylinders.

How To Do The X Push-Up

From a normal push-up position, separate your legs so that your feet are 1.5x shoulder width. Then separate your hands 1.5x shoulder width and bring them up so they are NOT in line with your head. Your body will look like a big “X”. The further you separate your hands and the higher you bring them, the harder the exercise will be.

Lower yourself down until your nose gently touches the ground. Push back up.

Coaching Tips

1. It is important to maintain proper alignment when performing this exercise. One tip that will help you is to keep your glutes and core tight throughout every rep.

2. If the full X Push-Up is too difficult, bring your hands and legs in to 1.2x shoulder width. This will create less demand on your muscles and allow you to progress up to 1.5x shoulder width or even more.

Variation 3: Diamond Kiss Push-Up

The Diamond Kiss Push-Up is a go-to calisthenics exercise for developing strong triceps. It also helps to target the inner portion of the chest muscle and lats. You have probably heard that form is very important when performing any exercise. Well, when performing the Diamond Kiss Push-Up, it is especially important because you are putting tremendous demand on your shoulders. If you can not perform the exercise without your spine being perfectly in-line, then switch to an easier progression.

How To Do The Diamond Kiss Push-Up

Start off in a normal push-up position. Place your thumb and pointer finger together creating a diamond in-between. The diamond should be in line with your head. While keeping your spine perfectly straight lower yourself down until your nose touches the ground in between the diamond. Then press back up.

Coaching Tips

1. As mentioned before it is very important to keep your spine straight.

2. Elbow positioning is also important. While performing this exercise the more you flare your elbows out to the side, the greater likelihood of injury. Try to keep your elbows tucked close to your body as much as possible.

3. Easier Variations: If you can’t complete 5-6 reps of this variation I recommend separating the fingers so that there is more space between your hands. This will decrease the emphasis on your triceps and rely more upon your chest muscles. As your triceps get stronger you’ll be able to bring your hands in close.

Variation 4: Spider Push-Up

The Spider Push-Up is an exercise that incorporates abdominal specific training into the normal push-up. If you have a strong upper body this is a great exercise to incorporate into your training because it will help tighten not only your abs but also your obliques.

How To Do The Spider Push-Up

Start off in a normal push-up position. Lower yourself down like normal while simultaneously bringing your left knee up toward your left elbow. This may take some flexibility but eventually you’ll get it. After you reach the “down” position, press up to starting position while simultaneously bringing your left leg back. Repeat on the other side.

Coaching Tips

1. Maintain proper spinal alignment while performing this movement. You may find yourself arching up to get enough space to get your leg up. Don’t do this. If you don’t have enough flexibility to get your leg up high than just bring your leg up as high as you can (while maintaining form).

2. While performing the movement, consciously contract the abs. This will help you engage more muscle fibers and get more out of the movement.

Variation 5: Dolphin Push-Up

This is one of my favorite conditioning and strength movements. Is it the hardest progression? No. But it targets muscles you don’t normally work, which makes it challenging (especially when you get into high reps) and is very fun to do. Also, I’ll teach you a variation to make the exercise even harder.

How To Do The Dolphin Push-Up

Start off in the plank position, resting on your forearms and elbows. Lower yourself down a bit further (you won’t get a ton of range of motion but the little bit that you get will help to engage the middle rhomboid muscles in your back), then press your butt up into the air. Go as high as you can. You’ll feel muscles in your shoulders that aren’t normally targeted, which is great for developing a healthier shoulders.

Coaching Tips

1. Just like the Barbwire Push-Up, this exercise is focused on spinal mobility as well as developing strength. You don’t need to perform this exercise quickly. Keep a strong, steady pace and try to get as much range of motion as you can.

2. How To Make It Harder: Instead of resting on your forearms, start off on your hands. This is the “Horse Push-Up” variation and is harder than the Dolphin Push-Up. You’ll perform a normal push-up but instead of maintaining a straight spine up to starting position, you’ll lead with your butt and come up all the way to a downward dog position. This will increase range of motion in your spine and shoulders as well as put greater demands on your chest.

The traditional push-up is the Mac Daddy of all calisthenics, yet performing endless reps of the same exercise will eventually lead to diminishing returns. You must challenge your body in unique ways in order to get it to grow. You must apply the principles of Progressive Calisthenics so that it adapts and gets stronger. All of the above exercises are unique variations to the normal push-up. They’ll not only challenge you in new ways but also add more enjoyment to your routine.

****

Todd Kuslikis is the founder of a bodyweight exercise blog called AShotofAdrenaline.net. He teaches men how to build muscle using only calisthenics. You can download his free 3 month bodyweight training program by clicking here. 

Filed Under: Progressive Calisthenics, Tutorial Tagged With: advanced push-ups, advanced variations, bodyweight exercise, increase muscle size, muscle mass, push-up variations, push-ups, Todd Kuslikis, tutorial, video

A Look at the 3 Way Kick

October 1, 2013 By Matt Schifferle 8 Comments

matt_shifferle1There is nothing like a strong pair of legs.

You can keep your strong core, wide shoulders and massive arms. My experience has taught me that all of the strength and conditioning in the world is practically worthless without a strong set of legs.

But hold the phone, strong muscles alone won’t build strong legs. True strength for the field, court or mountain requires much more than a lot of horsepower in the engine. In order to fully unleash your lower body strength you must also possess the following:

– Balance and control

Strong muscles without balance and control is like putting a massive engine in a car with bald tires and worn out brakes. Either you’ll never use all of that power or you’ll end up crashing. Control ensures you can use all of the power you have and use it in the most effective way.

– Flexibility

For every muscle you contract there is one that must lengthen. When the muscles are tight and resist lengthening you’re literally fighting your own tension. Becoming even a little more flexible ensures that you’ll have less resistance holding you back in everything you do.

– Strength and stamina in supporting muscles

When it comes to leg strength, we tend to focus on the bigger muscles in the legs like the quads, hamstrings, glutes and calves. These are important for sure, but what about some of the smaller and more subtle muscle groups like the ones in the feet and hips? While not the biggest or most powerful lower body muscles, weakness in these smaller muscles can greatly handicap the bigger muscles.

Calisthenics is a very effective way to condition all three of these characteristics. It’s impossible to even attempt moves like lunges and single leg squats without developing balance, flexibility and strength in the supporting muscles.

That being said, it doesn’t hurt to further develop those weak links in the lower body chain. Doing so can make your weakest link so strong that your entire body can reach new levels of performance.

The following video showcases an exercise which is great at developing your balance, flexibility and strength.

This exercise does wonders at unlocking some of the lower body strength that’s been dormant in your lower body. Just running through this routine a few times before each leg workout will leave your legs and hips feeling brand new within a few weeks. It’s also a great cool down afterward to refocus your mind.

***

Matt Schifferle a.k.a The Fit Rebel made a switch to calisthenics training 5 years ago in an effort to rehab his weight lifting injuries. Since then he’s been on a personal quest to discover and teach the immense benefits of advanced body weight training.  You can find some of his unique bodyweight training methods at www.RedDeltaProject.com.

Filed Under: Flexibility, Progressive Calisthenics, Tutorial Tagged With: 3 way kick, calisthenics, Fit Rebel, leg training, lower body strength, Matt Schifferle, power, tutorial, video

One Arm Bridge, Twists and the Valdez

April 30, 2013 By Logan Christopher 8 Comments

In my previous article I covered some advanced versions of the wrestler’s bridge exercise to build both more neck and spine strength, as well as dynamic flexibility.

Now its time to turn on the gymnastic bridge.

By itself the bridge requires a high degree of flexibility. The truth is when your flexibility is great, then holding the position isn’t too hard. It requires more strength when you don’t have the flexibility to do it, because you can’t quite get to lock out.

If you’re not there yet, keep at it. Make sure to read Convict Conditioning to build your bridge.

And what I want to cover here is an advanced variation not covered in that book, that takes your flexibility, and stability, to another level. Here is a short series of progressions you can do. The video shows each one and you can read more about them below.

One Arm Bridge Hold

Get into a gymnast bridge and lockout your arms. Shift your weight slightly to one side then raise up the other arm off the ground. Hold for time. If you can get a minute you’re doing great.

Work both sides equally. You can come down and rest between sets or shift back to two hands, then onto the other arm.

One Arm Bridge Twist

There are several versions of this move that just change it up slightly.

To start with get into you’re your one arm bridge. Rotate your torso towards that arm as you kick your opposite side leg over until you come to a position where you’re on all fours.

Note that your hand may need to twist on the ground as you turn.

After you get to all fours you can then rotate back.

Work to both sides. You’ll likely find one side is better than another. This is usually more because of flexibility than strength. Also notice that it requires an even greater degree of shoulder and wrist flexibility plus shoulder stability through an interesting plane of motion.

One Arm Bridge Twist from Sitting

Now we’re going to do the same thing starting from a sitting position. For description purposes I’ll describe this from the position of having the left hand on the ground.

Start with your left hand on the ground, pointing away from your body. Your left leg will be straight and your right leg bent and close to your body. Raise your hips up and onto that arm as you bridge over. Your hand has to do a 180 as you come into a bridge position. Once in position you can place your right hand on the ground.

Try coming up with the same or opposite arm back to a sitting position.

Valdez

This is a move from gymnastics that is usually reserved for women as they tend to have more flexibility. Still it can be worked up to, if you’re willing to put in the time.

This combines the previous exercise, the one arm bridge twist from sitting, with a kick over done in seamless fashion. In the beginning you may need to break it down into sequential steps and of course both should be solid before attempting to put them together. You actually begin kicking up with the leg even before your second arm touches the ground.

I’ve pulled this one off before, but not in many years. Without working on it recently, I haven’t quite got the flexibility and control required for it.

So if you’re ready for some more intense bridge work start working in this series. If you can do all this, just holding a bridge will never be a problem again.

***

About Logan Christopher: Logan Christopher has been called a physical culture renaissance man as he is accomplished in a wide range of strength skills from kettlebell juggling, performing strongman stunts, and bodyweight exercises. He is the author of numerous books including Secrets of the Handstand and The Master Keys to Strength & Fitness. In addition, he’s spent the last several years going deep into mental training to find out what it takes to really excel and tactics that can help people instantly improve their exercises. You can find out more about all this at www.LegendaryStrength.com.

Filed Under: Progressive Calisthenics, Tutorial Tagged With: advanced, bridge, calisthenics, Logan Christopher, One arm bridge, tutorial, twists, valdez, video

Primary Sidebar

Featured Products

previous arrow
GetStrongBookCover
ConvictConditioningBookCover
StreetWorkoutBookCover
ExplosiveCalisthenicsBookCover
StrengthRulesBookCover
next arrow

Categories

Progressive Calisthenics Certification Logo
Click here for more information or to register for the PCC workshop

Get Strong Workouts TriadXP App
Get Strong Workouts App

Recent Posts

  • Top 5 Reasons Why an In-Person Workshop is the Best Way to Supercharge Your Training
  • HYBRID STRENGTH TRAINING IS HERE!
  • My Calisthenics Journey to the PCC
  • The Handstand Press: Complete Control Through the Handstand
  • The Get Strong App is Here!

Dragon Door Publications

Dragon Door Publications

Recent Comments

  • bross dandon on The Case for Curved Handstands
  • Johnny Flewellen Jr. on Strength for Life
  • Dan Earthquake on The Pursuit of the Daily Minimum
  • Johnny Flewellen Jr. on The Pursuit of the Daily Minimum
  • Johnny Flewellen Jr. on Yoga, Calisthenics and the Journey of a Lifetime
FOLLOW US ON TWITTER!

Copyright © 2025

Dragon Door Publications / The author(s) and publisher of this material are not responsible in any manner whatsoever for any injury that may occur through following the instructions or opinions contained in this material. The activities, physical and otherwise, described herein for informational purposes only, may be too strenuous or dangerous for some people, and the reader(s) should consult a physician before engaging in them.