• Skip to main content
  • Skip to primary sidebar
  • Home
  • Contributors
  • Resources
    • Q&A with Paul “Coach” Wade
  • Workshops
  • Products
  • Forums
  • Articles
  • Blogs
    • RKC Blog
    • Strong Medicine Blog
  • Archives

PCC Blog

Progressive Calisthenics - The Official Blog for the PCC Community

Progressive Calisthenics

Upgrade your Life and Looks with the Knee and Leg Raise Chain

May 5, 2015 By Adrienne Harvey 46 Comments

Adrienne Harvey Hanging Knee Raise

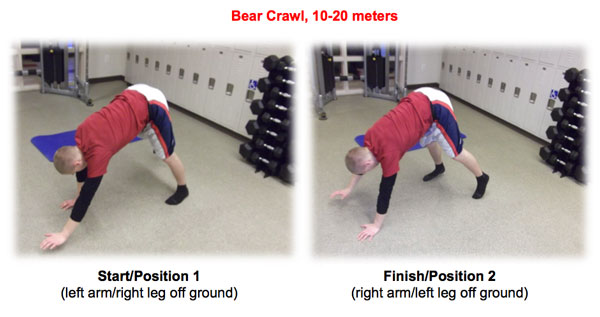
The humble but powerful knee and leg raise progressions featured in the PCC Workshop and Convict Conditioning don’t always get as much attention as some of the more visually intense exercises. Even though these moves might not be tailor-made for showing off online, don’t underestimate their importance. These progressions are the sort of “strong silent type” movements which build the muscles and coordination necessary to attempt many more advanced moves. In the context of the Century Test, the 20 knee raises also (along with the bodyweight squats) have the same requirements in the men’s and women’s tests. These 20 knee raises have sometimes been or directly led up to the make-or-break moment in a Century Test.

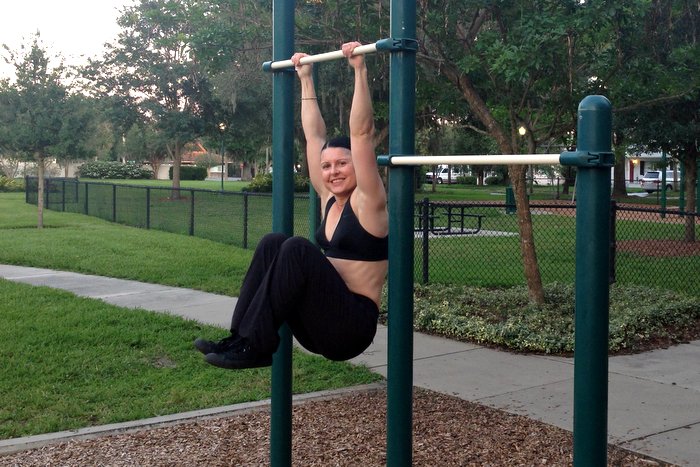
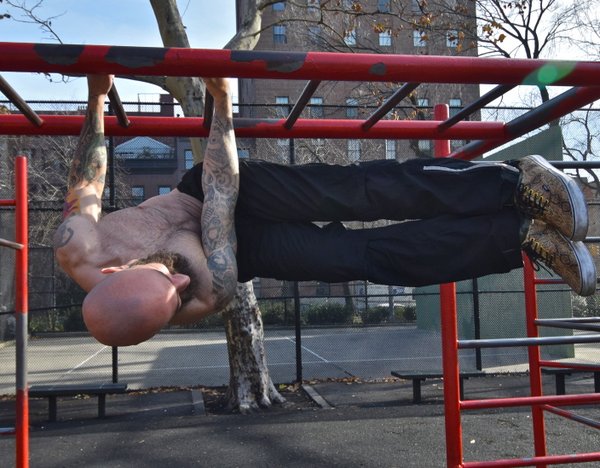
Testing aside, the hanging knee raise and leg raise progressions are not only great for working on your midsection, they’re a great reason to spend more time hanging on the bar and strengthening your grip. In the video at the end of this blog post, you’ll see just one of the many possible grip variations you can use when practicing hanging knee raises. Almost by accident I started doing a challenging fingertip variation—just because the available overhead support happened to be an I-beam. It was a fun challenge that really raised the difficulty of a few sets of 25 knee raises in my workout that day. Hanging knee and leg raises are also a great way to determine what you need to work on most. What “gives out” first? Your abs? Grip? Shoulder engagement? Start in on a max or near-max set of hanging knee or leg raises and you’ll soon find out!

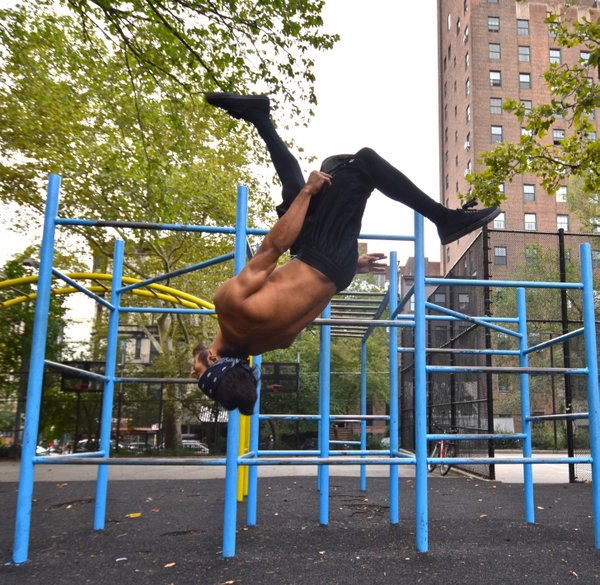
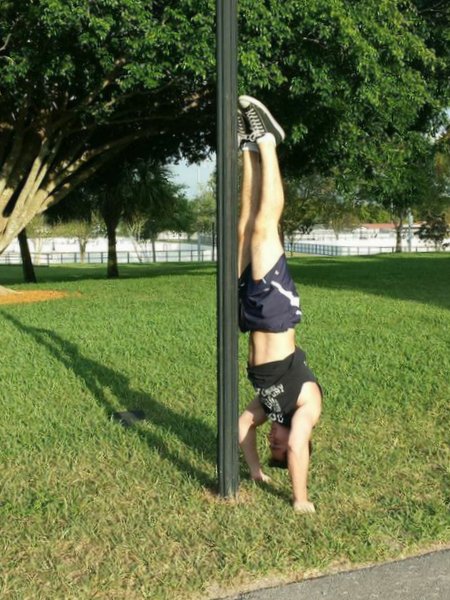
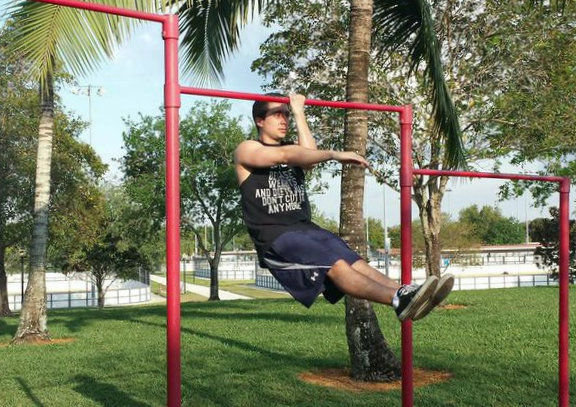
In a crowded gym with people fighting over the more “traditional” or ab-specific items, all you’ll need to do is find a good overhead bar and you’re set. Out in the “the wild”—on a municipal fit trail (like the one in my video) or even a playground, you can easily get in some ab work, without having to lay on the ground that might be muddy. The powerful knee and leg raise drills leading up to the hanging bar work in Convict Conditioning are extremely valuable, can be practiced anywhere at all, and start at a level where literally anyone can begin and benefit. If you’re still “on the ground” with your knee and leg raise progressions, you can always still work on your strength and strategy with timed hangs on the bar.

To meet PCC standards, you shouldn’t be swinging around with your hanging knee raises. A quick but not-so-easy way to make sure you don’t swing is to really control your grip on that bar. RKC kettlebell enthusiasts will recognize the idea of trying to “bend” or “break” the bar (or in their case the kettlebell handle). In the video below I break some sticks to give you the idea. Thinking of bending the bar in this way will stabilize your upper body and give you a solid foundation for hanging knee raises, hanging leg raises and any number of twisting variations that would otherwise have you looking like an out of control set of human wind chimes. Keeping yourself in control on the bar is a great habit to start developing and to have in your personal toolkit.

Adrienne Harvey Hanging Pike Raise

You can use the hanging knee and leg raises to a work on your grip, and to strengthen your other moves. Really, any time spent working on the bar will have positive effects on your training, strength, and physique. While many of us don’t publically talk about this last item—our physical appearance—let’s get honest about it for a minute. It’s simply human nature for us to want to look our best (at least to our own definitions). While the real benefits of these hanging knee and leg raise progressions are increased usable strength, a great side effect is some muscular development in the midsection. Provided your nutrition is in line, this can result in the coveted six pack, or the “flat tummy” touted in women’s fitness marketing. While I personally think performance and strength are better long-term motivators, having those positive visual side effects certainly doesn’t hurt! I will say that most people seem to have better long term training commitment if outward appearances are not their ONLY motivator.

Having a strong, trained midsection really sets you up for success (and safety, since a strong abdomen protects your back) with all kinds of lifting and other fun activities. I could even go so far as to say that having a strong midsection can generally improve your quality of life. (You can do everything from lift everyday heavy objects without injury to holding your own while trying a new activity like stand-up paddleboarding.)

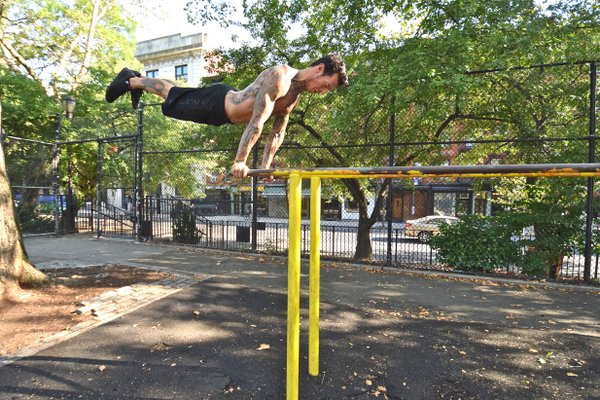
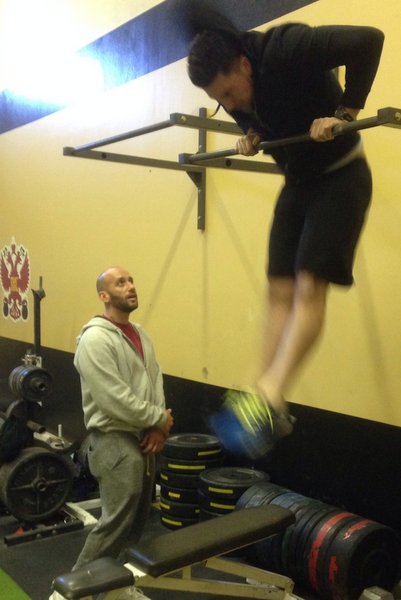
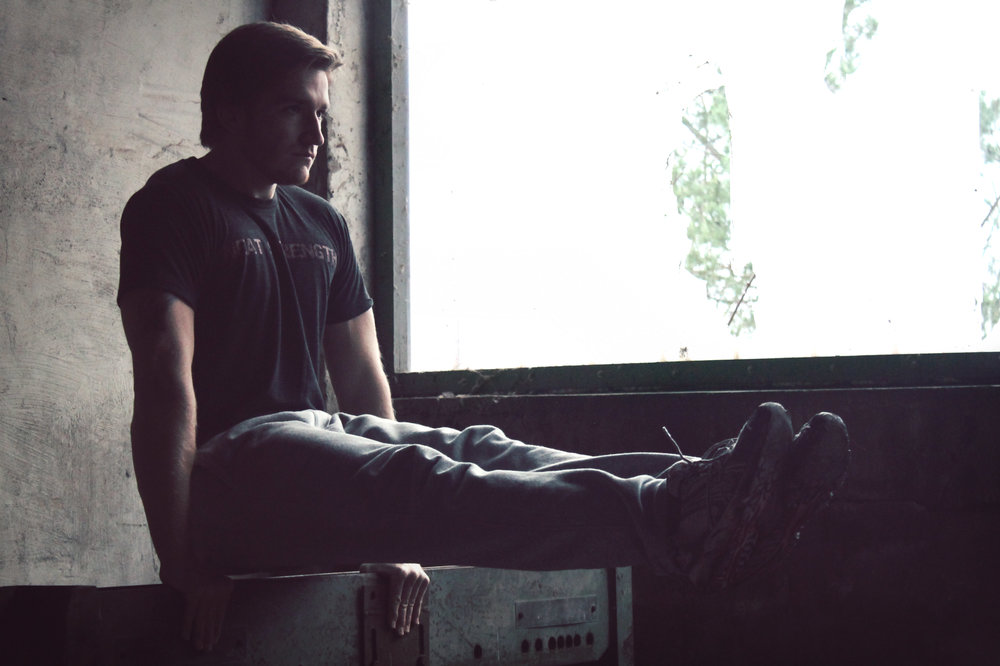
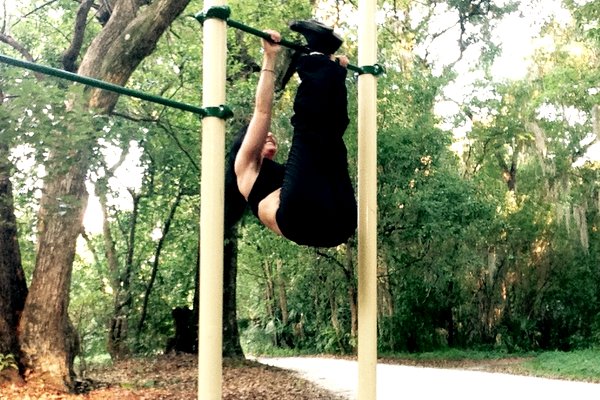
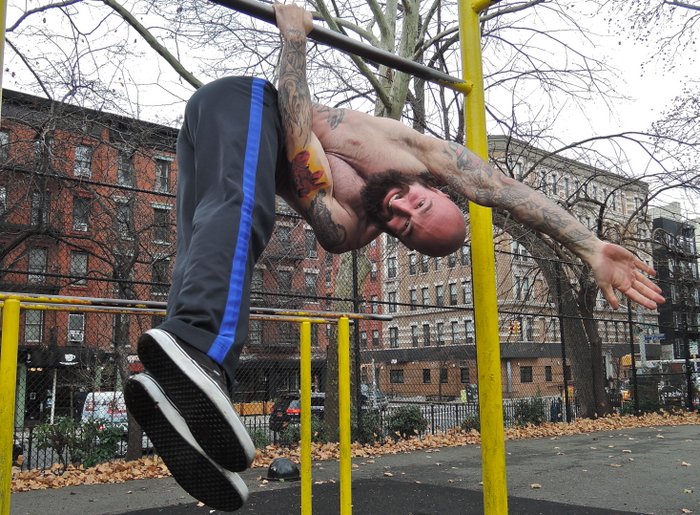
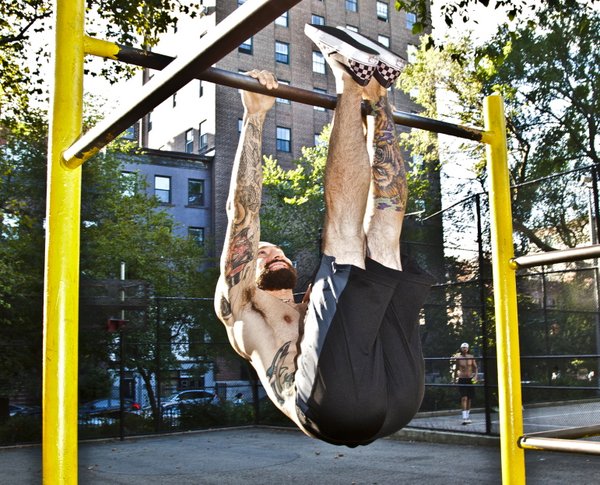
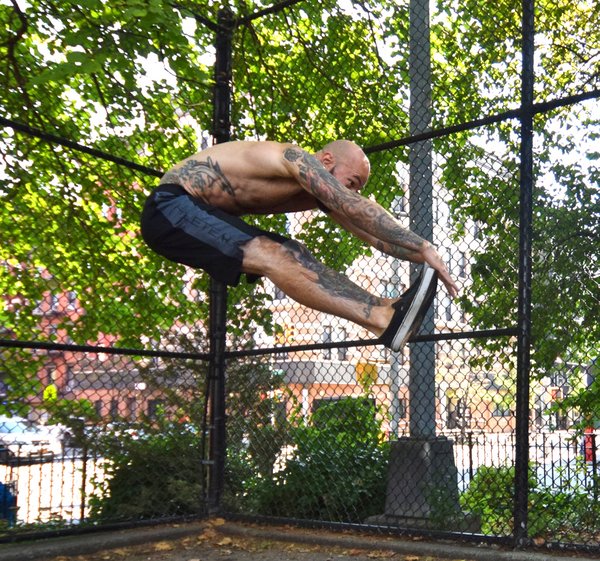
Once you’re comfortable doing a few hanging pike raises (the PCC term for a leg raise taken up to shins to the bar) and have a reasonable grasp on pull ups, you can also try a fun and useful move called the “rollover”. While some people like to kip into this move, if you have the requisite strength, you don’t have to! Perform about ½ of a pull up, then pull your straight legs up and slightly past the bar, you’ll easily roll right over and be on top of the bar. This is a great way to practice bar dips or negative muscle-ups without burning yourself out trying to get on top of the bar. It’s also a lot of fun and looks cool! Towards the end of the video below, I demonstrate the rollover somewhat slowly so you can see what’s happening. While I had the necessary strength to do this move for a very long time, figuring out the timing of it was the crucial key.

This video is a medley of hanging knee and leg raise tips, variations, and training ideas I’ve put together just for you:

How are you using the hanging leg raise chain in your training?

***

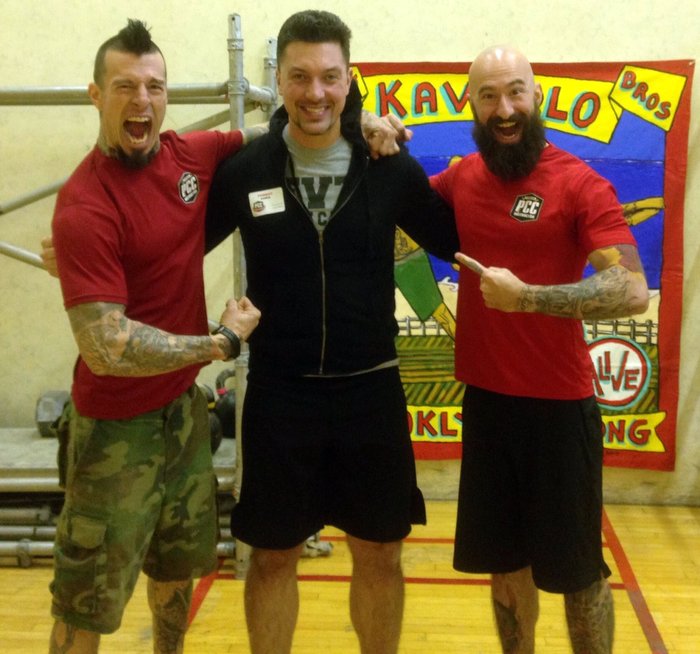
Adrienne Harvey, Senior PCC Instructor, RKC-II, CK-FMS, originally RKC Certified in 2010, and RKC Level 2 certified in 2011, kettlebell and bodyweight training have been crucial in Adrienne’s personal quest for fitness. A core member of the PCC team, Adrienne loves sharing her knowledge with small groups and individuals. She also loves to develop recipes and workout programs to further support performance, body composition, and of course—FUN. Go to http://www.giryagirl.com for more information about Adrienne!

Filed Under: Progressive Calisthenics, Tutorial Tagged With: abdominal training, abs, Adrienne Harvey, Century Test, Convict Conditioning, Hanging knee raises, Hanging leg raise, midsection, midsection training, PCC, PCC Workshop

Strength Cycling for Continuous Improvement

April 7, 2015 By Juan De Jesus 35 Comments

Juan De Jesus Human Flag

Though progressive calisthenics training brings plenty of benefits, ranging from increased flexibility, control, and of course, strength, your body perceives it as a stress. As such, the body builds resistance toward it, which manifests in you getting stronger. Twenty push-ups today might force an adaptation, but twenty push-ups a month later might not.

One way to continue getting stronger on a consistent basis is to pick harder exercises as time goes by (you could begin with band-assisted pull-ups, then full pull-ups, then clapping pull-ups, etc), or by adding reps to your sets (do 3 sets of 30 squats today, 3 sets of 32 next time, etc). Most calisthenics trainers will recommend these two main variables in order to make their workouts harder and induce an adaptation.

At some point, however, our recovery cannot keep up with our want for reps or added difficulty. We’ve all been there: you were supposed to do 15 hanging leg raises today (couple more than last time), but you just could not go past 12. So what do you do?

If you can’t make the reps in one set, I propose simply adding more sets. Look at this cycle:

Juan De Jesus Calisthenics Chart

This is actually a personal example of a 7-week cycle I did with one-arm push-ups. I was only able to manage 3 reps in one set before week 1. Clearly, with such a hard exercise, doing 3 sets and adding reps on a weekly basis would burn me out incredibly fast. So instead, I chose sets of one less rep (sets of 2 reps), and did more and more sets each session! By the time week 3 rolls, doing sets of 3 is actually quite easy (you’ve gotten very strong after a 9 sets of 2!), so you cut the sets down, and begin doing sets of 3. Then add more sets. Repeat as necessary. Deload when you’re feeling fatigued.

I’ve actually started using this template for many of my exercises, and with amazing results! In 6 weeks, I was able to move my handstand push-ups from 4 rep-max (RM) to a 7 RM. For those math geeks out there (like myself), consider a 4RM is about 90% of a 1RM while a 7 RM is close to 82% of a 1RM. So the ratio of your new 1RM to your old 1 RM is of 0.9/0.82 = 1.10. You could say this is akin to boosting your 1RM in a barbell lift by 10% in a measly 6 weeks!

Juan De Jesus Handstand

I obtained a similar result by making my 3RM with one-arm pushups into a 6 RM in 7 weeks. I attribute these exceptional improvements to two main things. First, every session is somehow a bit harder than the one before. (As I mentioned before, your body sees training as a stress. In order to cause strength gains on a weekly basis, you need to train hard, rest well, and make the next session a bit harder somehow.)

Second, because I expect to build up to high volume with many sets, my choice of reps-per-set is conservative at the beginning. So for the first four weeks or so of these cycles, I stay away from failure and really get to concentrate on tension, technique and form. When the cycle gets tough and your sets are much closer to failure, you’ll find strength coming out of nowhere because you built up this foundation at the beginning of the cycle.

Once you’re satisfied with your max, switch to a harder exercise. This is a vital part of progressive calisthenics!

Juan De Jesus One Arm Chin

Note that the idea of adding sets instead of reps in order to get stronger is incredibly flexible. It is more suited towards max-strength exercises (one where you could perform 3-8 RMs) since adding reps on a weekly basis to the sets can be quite difficult when the exercise is so tough. But it certainly does not have to be twice a week as I’ve chosen to do. A routine that works an exercise 3-4 times a week would also work well. Here, you might prefer to just do 1 more set than the session before until you feel confident enough to increase the amount of reps on each set. Then you’d decrease the sets, do sets of more reps, and build back up.

To the beginner student of calisthenics, it is certainly advisable to stick to a few sets, concentrate on form, add reps, and switch to a harder exercise once you’ve squeezed all the strength gains possible from your previous exercise. However, the more seasoned calisthenics enthusiast might need one more tool in order to burst through plateaus. I’ve certainly needed it myself when I find my reps just won’t climb no matter how hard I push. At that point, manipulating the amount of sets might be exactly what you need to bring about continuous strength improvements.

****

Juan De Jesus is a Sophomore at MIT studying Electrical Engineering and Computer Science. His enthusiasm for bodyweight and minimalist training was born in high school with his workout club Body Strength by Calisthenics (BSC) and has stayed with him ever since.

Filed Under: Progressive Calisthenics, Tutorial Tagged With: calisthenics, Juan De Jesus, programming, programming your training, strength, strength training, training, training template, tutorial

The Meathook

March 31, 2015 By Al Kavadlo 32 Comments

Al Kavadlo Meathook
PCC Lead Instructor Al Kavadlo demonstrates the meathook.

Using all of the body’s musculature together as one cohesive unit is among my favorite aspects of bodyweight training. Iso-lateral calisthenics moves like the “one arm push-up” are misleadingly named, as they require strength throughout the entire body—not just one of its appendages. Few iso-lateral moves demonstrate this full body harmony better than the little known (and perhaps more aptly named) “meathook” exercise.

Hooked on Calisthenics
Though a full body movement, the meathook still emphasizes certain areas. It requires tremendous grip strength as well as monstrous shoulders and lats, plus a powerful core. If you don’t have those attributes yet, practicing toward this move can help you build those areas along the way.

Before you are even ready to begin working toward the meathook, however, the first step is to be sure that you have a solid foundation in push-ups, pull-ups and hanging knee raises. I recommend getting to at least 30 push-ups, 20 hanging knee raises and 10 pull-ups before you even consider attempting the meathook. (Those numbers may look familiar.) I also suggest you get comfortable with full range-of-motion, straight hanging leg raises before working toward a meathook. You should to be able to get your shins all the way to the bar before you move on to the next step.

Al Kavadlo Hanging Leg Raise
Get comfortable with full range-of-motion, straight hanging leg raises before working toward a meathook.

Wipe Out!
The windshield wiper is a very challenging exercise in its own right, but it is also a crucial lead-up step toward the meathook. Once you’ve met those initial requisites, your next step is to start working on windshield wipers. Begin by hanging from an overhead apparatus, then raise your shins to the bar and begin rotating your legs and hips toward one side. Aim to get your legs parallel to the ground before reversing direction and lowering them to the opposite side.

Once you get comfortable performing several windshield wipers in a row, you’re almost ready to attempt the meathook, which you can think of like a static windshield wiper held on just one arm. Naturally, before you’re ready for all that, you’ll need to get comfortable performing a basic hang on one arm. These can be surprisingly tough when you are starting out. I advise you to use the progressions in Convict Conditioning 2 to build toward a one arm hang if you aren’t there yet.

Al and Danny Kavadlo Windshield Wipers
The windshield wiper is a crucial lead-up step toward the meathook.

Hook It Up
Though grip strength is an important prerequisite, remember that the meathook involves a lot more than just the ability to hang on to the bar. Your lats and shoulders need to be very strong and stable to hold the meathook, plus you will need powerful abdominals and obliques. Do not attempt this move until you’ve built up to a solid one arm hang and can do several consecutive windshield wipers.

Once you’ve satisfied those requirements, you are ready to rock and roll! Begin by grasping the bar tightly, then perform a windshield wiper toward your dominant arm. When your legs are all the way over to the side, lift your hips toward your elbow, folding your body around your arm. It may take some trial and error to get a feel for finding the “sweet spot” but at a certain point, you will feel your balance shift.

Al Kavaldo Windshield Wipers
The elbow of your primary arm should wind up down by your hip.

Once your hips are in position, begin to loosen the grip on your secondary hand, gradually transferring all of your weight to the other arm. When you feel confident enough to completely release your secondary hand from the bar, do so carefully.

You’re now holding a meathook – Congratulations! Stay here for a few seconds, then slowly reverse the movement and try it on the other side.

If you are unable to take your other hand away, try removing a finger or two instead. Over time you can work toward relying on your secondary arm less and less as you progressively build the strength to perform the full meathook.

Once you’ve gotten the “hang” of getting into a meathook this way, you can start building up to longer holds and experimenting with different methods of getting in and out of position. The meathook can also be useful for bridging the gap toward one arm pull-ups and the rarely seen one arm back lever.

There are many uses and applications for this move; feel free to experiment and get creative!

***

About Al Kavadlo: Al Kavadlo is the lead instructor for Dragon Door’s Progressive Calisthenics Certification. Recognized worldwide for his amazing bodyweight feats of strength as well as his unique coaching style, Al is the author of five books, including Raising The Bar: The Definitive Guide to Pull-up Bar Calisthenics and Pushing The Limits! Total Body Strength With No Equipment. Read more about Al on his website:www.AlKavadlo.com.


Filed Under: Progressive Calisthenics, Tutorial Tagged With: Al Kavadlo, bodyweight training, meathook, meathook progressions, progressive calisthenics, tutorial

The Hand Truck Workout

March 24, 2015 By George Corso 20 Comments

George Corso Handtruck Workout

My clients count on me to be an innovative trainer. In fact, I’ve always enjoyed finding new and effective ways to work with people way before the trend of ‘being different just to be different’ became popular. So it wasn’t much of a surprise when my client Lorraine came in for her training session at my studio carrying a dolly that she grabbed from her dumpster at work. Her dad had made it but decided to get rid of it so she brought it with her and said “I have a very bad feeling that you can make good use of this”. Immediately my wheels started turning with all the fun ways I could use this thing. I took my time and experimented. I found movements that were safe and distinctly purposeful for my clients.

After a lot of thought and even more practice I came up with 24 useful ways to train with the dolly. Most of them stem from the prone position but each one remains unique with different neuromuscular firing patterns. Like all bodyweight training regimes, every exercise is a progression to more advanced movements. These movements are all accomplished with a “slow is smooth, smooth is fast approach. (Thank you Phil Dunphy.) They all not only require stability, but also an understanding of how the muscles of the body have to behave as one cohesive unit.

Here are the exercises in order from beginner to advanced.

THE PLANK WALK. I believe that the plank walk is the most important exercise of the 24 exercises I have listed. This one movement will set you up for all of the rest. It is excellent for developing control and discipline and it teaches a client how to become patient when learning and performing a new exercise. The plank walk is performed by keeping the body rigid while the forearms are resting on the dolly. The only parts of the body that are moving are the feet and ankles while you SLOWLY move towards your destination. It is imperative that this be mastered before moving on.

The next 4 videos demonstrate the plank walk:

  1. Plank Walk
  2. Injured Bear Crawl
  3. Wheel Barrow
  4. Reverse Wheel Barrow

Series 1 Hand Truck Workout

Be sure to continue to move slowly during the next progression.

THE TRAVELING PUSHUP. Now we will be adding additional movements. In the introductory phase we kept the body rigid while traveling with the dolly. Next we will be moving the body in different planes of motion while emphasizing control. Bodyweight practitioners discipline themselves to move with utmost precision in order to reap the greatest rewards. This is important to convey to the newcomers to this kind of conditioning.

The next 4 videos demonstrate the traveling pushup variations:

  1. Traveling Pushups
  2. Travel Bus Driver Pushups
  3. Single Leg Wheel Barrow
  4. Rotational Wheel Barrow

Series 2 Hand Truck Workout

THE TRAVELING V WALK. During the next series of exercises there is more emphasis on the transfer of weight onto the shoulders. This series is ideal for the client who wants to progress to walking on their hands in an inverted position. These selected exercises will definitely help them attain that goal. The traveling v walk will specifically strengthen the wrists. It also aids in teaching the client the proper forward lean that is needed while also adding flexibility to the wrists.

The next 4 videos demonstrate the traveling v walk and the variations:

  1. Traveling V Walk
  2. Traveling Inch Worm
  3. Tuck Walk
  4. Swimmers


Series 3 Hand Truck Workout

THE 360. The next series is called the 360 because there is a shift from developing strength towards developing stability.   These exercises require control and concentration from the client. There is an emphasis on 100 percent body compression as well.

The next 4 videos demonstrate the 360 and its variations:

  1. 360
  2. Side Walk
  3. Bus Drivers
  4. Single Arm Walk

Series 4 Hand Truck Workout

THE LEG SEQUENCE. This series emphasizes balance and leg strength. I was trained as a track sprinter and have come to the conclusion that it is important to isolate the hamstrings and fire up those fibers first by performing some bridges before moving on to squatting and lunging techniques.

The next 4 videos demonstrate the leg sequence:

  1. Hip Bridges and Leg Curl
  2. Straight Leg Bridge
  3. Injured Animal Run
  4. Pistol Sweeps


Series 5 Hand Truck Workout

PRESSING. These last 4 exercises will require that clients move while pressing. Your clients will need adequate shoulder stability and full body awareness before moving on to this advanced series. If your client has stalled in a particular calisthenic movement, these applications may help him or her to achieve a goal that at one time seemed impossible, or your client may just feel like these are achievements on their own! Either way, whatever your level, proceed slowly and own the move!

The next 4 videos will demonstrate the press sequence

  1. Hop off the Press
  2. Rotational Hop Press
  3. Sweeping One Arm Press
  4. Press and Slide

Series 6 Hand Truck Workout

You can pick up a dolly at the local hardware store and easily incorporate it into your training. Use your imagination and come up with variations specific to your clients’ needs. I use this piece of equipment in group training, with one on one, and during my own training. My clients love to tell me how much they have come to hate the dolly but always admit in the end that they love the results they are seeing!!!!


***

George Corso, CSCS, NSCA-CPT, PCC, RKC, I360, WKC, is the co-owner and founder of CORSO. Over the last 15 years, George has been a successful varsity track and field coach, working with athletes to reach district and state championships. He actively trains in the art of Jeet Kune Do (JKD) as a level 3 student. George can be contacted at george@corsofit.com.

Filed Under: Progressive Calisthenics, Tutorial Tagged With: bodyweight training, creative workout, George Corso, hand truck workout, plank progressions, progressions, progressive calisthenics

How to Be “The Complete Package”—The Martial and Athletic Heritage of Explosive Calisthenics

March 19, 2015 By John Du Cane, CEO and founder, Dragon Door 109 Comments

Danny Kavadlo Superman

The greatest fitness writers grab you by the wrist—and yank you into a new vision of what it means to excel as a human being. These writers inspire you to transcend your self-imposed physical limitations and to fly high in your athletic aspirations. These writers open up whole new vistas of potentiality for you—and dare you to dream big.

These rare writers challenge you to separate yourself from the herd of also-ran followers—to become leaders, survivors and winners in the physical game of life. But they don’t just challenge and inspire you. They give you the means, the secrets, the science, the wisdom, the blueprints, the proven methods and the progressions—that make success inevitable, when you supply YOUR end in consistent, diligent, skillful application.

Al Kavadlo Angled Pike Jump
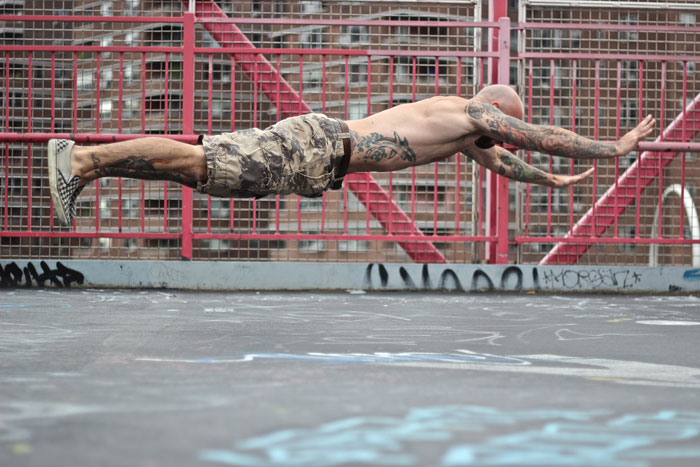
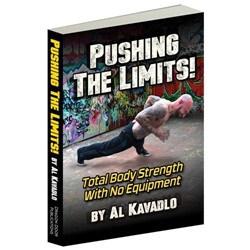
These writers each possess their own potent, soulful, visceral voice. They are artists in their expression. They resonate profoundly with their own distinct vibe. You can feel the implicit truth of their message in every sentence they write.
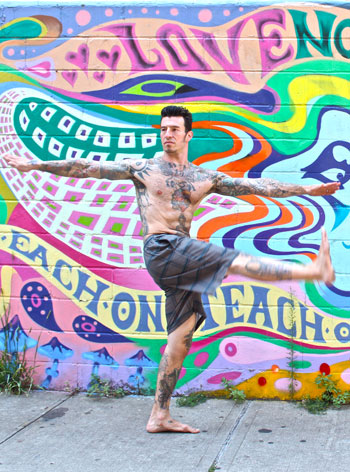
Now—sad to say—I don’t need all of my ten digits to count out the fitness writers who have rocked my world in this manner. And I’ll bet you don’t either… Such writers are as rare as the most iconic of athletes, the Michael Jordans of their domain…

And if God chopped off all of my digits, except for my right forefinger—and asked me to point at the greatest modern writer in fitness? Without a nanosecond’s of hesitation I would point at Paul Wade.

I pride myself at recognizing true excellence in the world of fitness writing—but I almost jumped out of my skin with excitement when I first laid eyes on Paul’s Convict Conditioning in September, 2008. CC had greatness stamped all over it. Here was a work that could change the fitness landscape big time—and most assuredly it did. Now a legendary international bestseller, Convict can lay claim to be the Great Instigator when it comes to the resurgence of interest in bodyweight exercise mastery.

And—while Convict Conditioning 2 cemented Paul’s position as the preeminent authority on bodyweight exercise—there is no doubt in my mind that his magisterial new accomplishment, Explosive Calisthenics is going to blow the doors off, all over again.

What makes Explosive Calisthenics so exciting—and so profound in its implications?

See, it goes back to the laws of brute survival. It’s not “Only the strongest shall survive”. No, it’s more like: “Only the strongest, quickest, most agile, most powerful and most explosive shall survive.” To be a leader and dominator and survivor in the pack, you need to be the complete package.

Traditional martial arts have always understood this necessity of training the complete package—with explosive power at an absolute premium. And resilience is revered: the joints, tendons, muscles, organs and nervous system are ALL conditioned for maximum challenge.

Really great athletes are invariably that way too: agile as all get-go, blinding speed, ungodly bursts of power, superhuman displays of strength, seemingly at will…

How do you excel as a martial artist, as an athlete—or really at almost anything? You excel by relentlessly building your foundation and fundamentals. You excel by relentlessly practicing the skills it takes to master the moves. No one gets great by half-hearted, inconsistent application or by employing some special “hack” that’s going to magically transform you into a monster. Get real.

Luciano Acuna Jr. Flash Kick

Note the word “skill.” The foundation and fundamentals center first around the building of power and speed. But Explosive Calisthenics does a masterful job of elucidating the skill-practices needed to safely prepare for and master the more ambitious moves.

So, Explosive Calisthenics is for those who want to be winners and survivors in the game of life. Explosive Calisthenics is for those who want to be the Complete Package: Powerful, Explosive, Strong, Agile, Quick and Resilient.

But—the hallmark of greatness— Explosive Calisthenics doesn’t just inspire you with the Dream of being the Complete Package. It gives you the complete blueprint, every detail and every progression you could possibly want and need to NAIL YOUR DREAM and make it a reality. YOU, the Complete Package—it’s all laid out for you step by step.

Danny Kavadlo Swing DipFrankly, I shake my head at Paul Wade’s brilliance…the wisdom and sheer practicality…the compelling authoritativeness… the clarity. There’s been an enduring conspiracy theory that I am actually Paul Wade. That I secretly wrote Convict Conditioning and concocted a whole trumped-up marketing shtick to sell it with. Too funny! But, God, if only I could be that brilliant myself!

I am aware of how many hundreds of thousands of people around the world are now stronger and healthier as a result of Paul Wade’s first two volumes in the Convict Conditioning series. That’s wonderful to know and to contemplate. I am proud to have helped get the message out.

Now—for those who have the balls and the will and the fortitude to take it on—comes the next stage: Explosive Calisthenics. The chance not only to be strong and healthy but to ascend to the Complete Package. If you want it, then here it is…

Filed Under: Progressive Calisthenics Tagged With: CC3, Convict Conditioning, Convict Conditioning Vol 3, explosive calisthenics, John Du Cane, Paul "Coach" Wade, Paul Wade

Healing Powers

March 3, 2015 By Danny Kavadlo 56 Comments

Danny Kavadlo Wolvie

Wouldn’t it be great if we all had healing powers? Think about it. If the perils of injury were non-existent? If the chances of maiming, straining or spraining any particular body part were a work of fiction, best suited for the comic books? What if the words “pain” and “gain” were not so frequently associated?

Marvel at a universe where getting hurt is not a major concern.

Well here’s the thing, bub: It’s NOT a major concern. Not much of one anyway. Now before you start freaking out, try hearing me out. Yes I acknowledge that it is possible that one can get injured doing a pull-up (or lifting weights, running, jumping, or even walking down the street). But it’s also possible to get hurt while cleaning your garage, giving birth, or driving a car. You can even choke while eating an organic kale salad. Does that mean we shouldn’t do these things?

Despite what some say, I’m a true believer that the chances of getting injured if you work out are much lower than if you don’t work out. Makes sense, right?

We are constantly subjected to fear-mongering tactics perpetrated by the media, even (especially?) the fitness industry itself. That’s right, my people: Most of the commercial fitness industry does not actually want you to work out! That’s why there is equipment (abs machines for example) that’s built to isolate muscles that are not made to be isolated! Or why treadmills are designed to give the illusion of exertion (fat burning zone???) but not get you in shape.

Ab Machine treadmill
These machines are not built to get you in shape.

It’s also why gyms sign up new members every day but never get any more crowded week to week. They’d go out of business if all their members actually got results. Better to sign you up, feed you some bullshit and send you on your way. Thank you, DON’T come again.

The real deal is that people respond to fear. When it snows, the news tells you to go out and stock up on groceries and shovels or you’re gonna die an icy death. (Conversely when it’s hot out–and a slow news day–similar threats are made about the perils of heat.) For shame.

Danny Kavadlo Snowy Pull-up
I’m not dead yet.

Ultimately, it’s the individual’s choice what to accept, inspiration or fear. The truth is that it’s very unlikely you will inflict bodily harm while calisthenics training. A plane can crash, but flying is still the safest way to travel. I’ve even fallen off my bicycle, but I still ride it every day. It’s still good for me. Don’t hate. Appreciate.

Danny Kavadlo One Arm Pull Up
Don’t hate. Appreciate.

Sure, a day (or even a week) off can be a good thing. But you don’t necessarily have to plan for it or measure it with a slide rule. And you certainly don’t need to be afraid to work out intensely or frequently. Let your body, life and experience dictate. Simply put, if your legs are aching, then train your arms. Listen to your body. It’s wiser than you think.

We all need to recover at times; I’d never deny it. As far as healing goes, respect your level. Though I sometimes feel like I have an adamantium skeleton, I don’t. So when those moments arise when I need to back off, I do. No biggie. Common sense prevails yet again.

Danny Kavadlo hmm
Hmmm… Try some common sense.

In fact, I’ve been practicing calisthenics for over 25 years and I’ve never suffered more than a few nicks and dings (mostly from bumping my head on the pull-up bar or other such carelessness). Some tendonitis is the worst injury I’ve ever gotten, which is relatively minor on the grand scale.

And if we do get injured, no we don’t have supernatural healing powers, so pay attention to what you’re experiencing. Embrace every moment with care. Be aware of what’s around you. These practices are helpful in all aspects of life, not just fitness. Living in the present goes a long way, my friends. Every body needs training!

Keep the dream alive,

-DK

***

Danny Kavadlo is one of the world’s foremost authorities on calisthenics, nutrition and personal training. He is the author of the Dragon Door titles Diamond-Cut Abs and Everybody Needs Training. Danny is known for his minimalist philosophy, simple approach and motivational talents.

A true in-person experience, Danny is a Master Instructor for Dragon Door’s Progressive Calisthenics Certification. He has been featured in the NY Times, TRAIN, Men’s Fitness and is a regular contributor to Bodybuilding.com. Learn more about Danny at www.DannyTheTrainer.com

Filed Under: Motivation and Goals, Progressive Calisthenics Tagged With: awareness, calisthenics, common sense, Danny Kavadlo, in the present, injury prevention, progressive calisthenics, safe training

Big Man Calisthenics

February 24, 2015 By Forest Vance 17 Comments

Forest Vance  with Al and Danny Kavadlo at the Encinitas PCC
Forest Vance with Al and Danny Kavadlo at the Encinitas PCC

A couple of years ago, cumulative injuries, less time to hit the gym, and just wanting a break from hard lifting motivated me to explore other modes of training to gain functional, healthy strength. I’d been lifting weights for almost 20 years and needed to try something different. The simplicity and practicality of bodyweight training appealed to me, but I always thought that at my size (6’4″ / 245 pounds) advanced calisthenics were out of my reach. If you look around YouTube, I’m a lot bigger than the typical people you see doing this stuff!

Back in my football days (I played college ball and had a short stint in the NFL), bodyweight work WAS a big part of our routine. However, it was mostly conditioning – stuff like jumping jacks and running in place. I had NO idea of how to use bodyweight training for any other type of goals (strength, muscle gain, etc).

I remember searching around on the internet one day and running across one of Al’s YouTube videos. It featured him doing human flags, muscle-ups, and a bunch of other stuff and that’s what led me down the “rabbit hole” of bodyweight exercise.

I went in to PCC Encinitas not knowing what to expect. Watching videos and practicing on your own is one thing, but going to an event like this with dozens of other calisthenics enthusiasts is another. I went in not knowing if I could even DO any of the exercises taught, let alone hang with the gymnast-types I expected to see at the event.

The certification weekend turned out to be one of the best fitness events I’ve EVER attended – and I’ve been to dozens over the 10 years I’ve been in the fitness business full time!

Forest Vance Muscle-Up

We learned and trained bodyweight exercise for three full days, including:

Push-ups
Pull-ups
Human flags
Muscle ups
Squats
Back bridges
Ab work (everything from L-sits to dragon flags to hanging leg raises)
Front and back levers
Floor levers
Handstands

And MUCH more.

From the staggering amount of new exercises, technique tips, and coaching cues I came away with, to the top-notch instruction from Al and Danny and the rest of the PCC team, to the positive attitude and energy of every single attendee, it was truly an amazing experience.

And my worries about fitting in and being able to hang were gone almost as soon as the event started. Being able to try “basic” versions of exercises like the human flag, muscle-up, dragon flags, floor levers, and many more showed me that these movements ARE possible for a big man. The huge amount of progressions presented showed me that if I put my mind to them, and work consistently on getting better over time, I can make a lot of progress!

Forest Vance Assisted Pistol

Add to that the accepting, positive, encouraging approach of the instructors, and you have probably the most universally applicable training course for a fitness professional that exists. Master this bodyweight stuff and you can train any client, anytime, anyplace, with zero equipment.

I feel a new enthusiasm for training that I haven’t felt in quite a while, really since I discovered kettlebells six or seven years ago. That alone is worth the cost and time of the trip 10x over.

It turns out my fear about my size was really just an excuse I made up in my mind! YOU can do this progressive calisthenics stuff – big or small, young or old, fit pro or just calisthenics enthusiast … make it happen! You’ll be glad you did.

Keep training hard!

Forest Vance At PCC

***

Forest Vance, PCC, RKC II, is a Master of Science in Human Movement, former professional football player, and currently runs a fitness boot camp and personal training facility in the Sacramento, CA area. Find years worth of free kettlebell and body weight – related articles, videos, and training courses at Forest’s personal blog at http://forestvance.com

Filed Under: Progressive Calisthenics Tagged With: big man calisthenics, Forest Vance, PCC Encinitas, progressive calisthenics, workshop experience

3 Steps to Getting “In the Zone” for EVERY Workout

February 17, 2015 By Eric Buratty 36 Comments

Al Kavadlo superman push-up

Want to know what it feels like to explode?

No, I’m not referring to those whack pre-workout supplements.

I’m referring to what it feels like to get “in the zone,” which naturally occurs during your superhero-like workouts. These are the moments when you look and feel deceptively stronger to the naked eye. These are the moments that ultimately allow you to push your limits.

Since we’ve all experienced those days where we feel like crap and less motivated to train, it’s time to put a cap on that mental and physical stress once and for all. Here are three steps for a stronger workout and improved recovery rate, EVERY time.

Step I: First Things First – Eliminate Distractions!

  1. Turn off your computers, mobile devices, and yes, even “high energy” music.

Responding to emails, text messages and social media notifications during the time you’ve set aside for working out is a good way to kill your training progress all together—due to their emotionally distracting capabilities. Playing “high energy” music may also upset the balance you want to achieve between feeling overly excited and feeling too calm.

  1. Turn away from all timers, stopwatches and clocks.

Reaching the highest level of performance possible during a given workout requires an attentive mind and body. Therefore, it would be silly to try and gauge your performance in the moment right in front of you if you’re too focused on beating the clock. While in a utopian-like society we would make linear progress, the mind and body simply do not work like that. So, in reality, we must respect our body’s dynamic progress capabilities without training on the nerve from elapsed time.

  1. Ditch the mirrors.

Mirrors create the illusion of space—which can sometimes be helpful in the short run for teaching body awareness. However, in the long run, too much reliance on mirrors can slow down your reaction time, affect your force and power development and interfere with your body’s natural balance and stability. These are the EXACT qualities you need to be mindful of when successfully getting in the zone

Step II: Select Your Secret Weapon – Choose a Movement for the Type of Workout You’re About to Do.

  1. Choose a Jump Variation for workouts involving more lower body volume AND for total body workouts.

Here’s a video I put together that features some fun options for you to try.

  1. Choose a plyometric Pushing Variation for workouts involving more upper body pushing volume.

This guy knows what I’m talking about.

  1. Choose a plyometric Pulling Variation for workouts involving more upper body pulling volume.

Unless you’re proficient with chest to bar pull-ups or kipping muscle ups, stick to the horizontal axis for some explosive Australian pull-ups.

Step III: Get in the Zone – Activate Your Nervous System.

  1. Regardless of what your current fitness levels are like, when you last worked out or what time limitations you may currently have, it’s imperative that you hit a warm-up that’s specific to the workout you’re about to perform. This is because the way you spend your first 5-10 minutes is the best indicator of how the rest of your workout will go. So we’re all on the same page, a solid warm-up will typically involve any of the following elements.

a) Active Stretch

Danny Kavadlo Toy Soldier
Danny Kavadlo demonstrates the “toy soldier”

b) Isometric or Dynamic Core Move (examples: plank or leg raise)

c) Lower Level Big Six Movement from Convict Conditioning for higher reps

d) Lower Intensity Cardio Exercise of your choice (light jog, jumping jacks, wall or some moderately paced mountain climbers with a training partner if you have one (see below))

Angelo Grinceri & Rosalia Chann of Couples Calisthenics

If you have a training partner, some moderately paced mountain climbers for as little as 15 seconds at a time will surely warm-up your core, and get some blood flowing through your entire body. Talk about killing two birds with one stone!

  1.  We’ll now kick up this baseline warm-up a few notches with that plyometric move you selected in Step II above. This is because, the more athletic your warm-up is, the better your chances are of putting yourself into the zone. Perform a superset between that plyometric movement and your warm-up movement(s).
  1. In order to make the plyometric movement look and feel as graceful and explosive as possible, you’ll perform 3-5 reps ONLY at various points throughout your warm-up. Ideally you’ll want to get away from counting with such few reps as this habit encourages you to train on the nerve. But that’s the approximate range for those of you who need quantitative satisfaction in the beginning.

Not sure where to start?

I recently performed a total body workout that consisted of pike push-ups, hanging V-leg raises, reverse lunges and straight leg bridges for reps. So, to give you an idea of how to apply this info, here’s the specific warm-up sequence/circuit I used prior to that workout.

Burraty Pike To Pancake

Burraty Standing Plow Good Morning

Burraty Bear Crawl

Burraty Staddle Box Jumps 1

Burraty Staddle Box Jumps 2

You’ll learn to feel this, but your performance WILL increase with each successive set/rep of your plyometric movement if you’re completely engaged in the moment right in front of you. It should also go without saying that this info can be applied toward workouts with weights for those of you who choose to supplement your calisthenics training.

By the end of your warm-up, you should feel ready to do more—with noticeable improvements in performance—but should NOT at any time feel excessive metabolic fatigue, out of breath or as though you’re doing the Valsalva Maneuver.

In sum, here are some key benefits you’ll experience from getting in the zone for EVERY workout.

  • Mood-uplifting, “neural-charge” effect—wherein eustress exceeds distress from an exercise standpoint
  • Greater body awareness through free space—remind upper and lower extremities of each other for total body synergy
  • More control over body momentum—reinforce a strong carryover between “loading” and “landing” positions (i.e., eccentric and concentric phases in a range-of-motion)
  • Make exercise fun, playful and less routine-like.

Do YOU have any favorite strategies that help you get in the zone for your workouts? If so, I’m sure we would love to hear about them. Just drop your tips in the comments below!


***
Eric Buratty brings five years of experience to the DC Metro Area as a Certified Personal Trainer, Progressive Calisthenics Instructor, Nutrition Consultant and Sports Injury Specialist.
For more information about Eric, check out his website, EricBurattyFitness.com.

Filed Under: Progressive Calisthenics, Tutorial Tagged With: Eric Buratty, explosive calisthenics, fitness training, focus, mental training, plyometrics, stretching, tutorial, warm up, warmup, workout strategy

Calisthenics, Injuries and Life

February 10, 2015 By Corey Howard 72 Comments

Corey Howard One Arm Aussie Pull-Up

On June 8 of 2014, I turned 40.  The following day I had surgery to repair a ruptured triceps in my right arm.  In late August, just 3 months later I was able to pass all of the skill elements for my RKC recertification using ONLY calisthenics for training.  But what happened in between those dates is where the magic of calisthenics lies.

Fitness gives me life.  It helps me stay in shape so I can help out my wife around the house and keep crossing things off the seemingly never ending to-do list.  Being in shape gives me the ability to play basketball with my son in the driveway, or throw soft toss to him in the batting cage.  In late May when I ruptured my triceps I was no stranger to working around injuries, but it still gave me a few new opportunities.  First, I was able to focus entirely on my lower body and write what turned out to be a fairly successful blog post about calisthenics leg training.  Second, it forced me to start my upper body training from ground zero and really dig deeper into the Convict Conditioning progressions.

How does an advanced lifter re-teach himself one arm push-ups?  I will admit, despite limited range of motion in my elbow and absolutely zero pushing strength in my right arm; I had retained most of my pulling strength.  After regaining complete active full range of motion in the joint I was able to start push-ups at an incline as well as horizontal pull-ups. Pairing the pushing and pulling together gave me a chance to work on regaining my tricep strength as well as the range of motion from the pulling movements.

Despite my youthful desire to challenge myself and rush to the next progression I made sure I was able to hit 20 quality reps with each movement before moving on to the next harder step.  I think this also helped strengthen the tendon as well as create movement proficiency.  Eventually I was able to do 20 quality narrow push-ups on the floor and 20 wide grip pull-ups with my ankles elevated on a support bar.

Corey Howard One Arm Raised Push-Up

The transition to a dead hang pull-up was surprisingly quick and easy, but moving to the one arm push-up proved to be a bit more challenging.  To accommodate the added weight and strain on the elbow joint I had to move to incline one-arm push-ups and follow a similar rep progression back to the ground.  I think it really helped practicing single arm push-ups at various heights and immediately following it with tight narrow push-ups on the floor.

I learned a couple things along the way.  First, patience is everything.  Don’t rush to get to the next progression until you’ve mastered the step you’re on.  As Paul Wade says in Convict Conditioning, earn the right to advance to the next step.  This pays dividends when you attempt the next step and find that you can actually control a few reps with quality technique instead of surviving and gutting out two or three sloppy injury risking reps.  Second, most of us are not professional athletes.  Yes, a lot of us think part of our identity comes from what we can do in the gym.  Our true identity is created by how we are as a husband and father.  My injury sucked.  It took away my ability to train upper body and I lost some of my hard earned muscle mass, but that paled in comparison to not being able to play catch with my son, or help my wife carry in the groceries.

On Friday January 9th, I ruptured my bicep in the other arm.  On Monday the 19th I had surgery to repair that. Click here for a photo during the repair process. Warning: Graphic medical photo.  Two major injuries in six months.  This time around I’m not worried about the lost training time, I’m upset that I won’t be able to go sledding with my son, or do everything my wife needs me to do.  I’ll admit I’m having a hard time dealing with this one. Three months from now I know I’ll look back and see countless blessings from this, including a deeper appreciation for the pull-up progressions, but right now I’m in the storm and it’s tough to see the shore over the tall waves.

Corey Howard Recovers From Surgery

I know there are tons of people dealing with worse situations than mine; those of us in the fitness world sometimes stake too much of our identity on our physical capabilities. Twenty years from now the only thing people will remember is how you treated your family and those around you. It’s easy to forget that we work out to be healthy and so we can have a good quality of life. I may have temporarily lost the use of my arm, but I’m not going to let myself lose sight of the big picture.

***

About Corey Howard, PCC, RKC, CK-FMS: Corey Howard strives to constantly become stronger, and to help others to achieve their fitness goals. He is the owner of Results Personal Training, and can be reached at fithubby.com, resultsptonline.com or coreyhoward.com.

Filed Under: Motivation and Goals, Progressive Calisthenics Tagged With: bodyweight exercise, calisthenics, Corey Howard, Injury, push-ups, recovery from injury, surgery

Increasing Frequency: How to Work Out More Without Overtraining

February 5, 2015 By Silvio Bauer 26 Comments

Silvio Blauer Pistol

If you are anything like me (which means people call you crazy, but that’s another story) you love to work out. You cannot go a day without training and you feel itchy when you miss a workout.

I’ve certainly been there while traveling or when I was stretched thin from work and social commitments. I get a bit moody and my feet start trembling. You may call me addicted.

But all this name calling is total nonsense, because there is a sound way to develop the resilience necessary to work out daily. The good news: I’m gonna tell you about it.

Ready? Good, let’s get to it then.

Why Go High Frequency?

So, let’s first consider the why before we delve into the how. There’s a good number of reasons why it’s pretty neat to be able to work out daily.

  • Habit building: People who struggle working out consistently might find it harder to collect enough will power 3 times a week compared to working out daily. But how can working out less often be harder? Because that way, it’s not a habit. When I come home after work, I change into my workout clothes, find a pull-up bar and do my workout. I don’t ponder about this, I just do it. It’s automatic. By working out only 3 times a week, it’s tempting to postpone a workout because every time, it’s a decision that has to be made.
  • More practice time: If your main goal is mere strength, a high frequency (HF) program is what you need. The more often you practice a certain skill, the faster your progress. And if you, like me, have a long wish list of feats of strength you want to accomplish, that additional practice time gives you room to sneak in one or two more moves you can practice.
  • Plateau busting: When you’re stuck with a progression, say, pistol squats, what can you do? Well, do a lot of pistols or pistol regressions. Do them every day. I dare you to not get better at a move by doing this.
  • Toughening up: When you finally buy into the HF training method, you forget about your excuses. It’s not a big deal anymore when you feel a bit stiff or sense a light muscle soreness. You’ll also learn to really listen to your body, how a good warm-up can do wonders and you will enjoy an enhanced ability to recover from your workouts.

If these are not good reasons to train more often, I don’t know what is.

However, here is what an HF program is not:

  • An ideal bodybuilding method: Most of the Monday-Wednesday-Friday routines come from the bodybuilding community. And if all you want is bigger guns, HF training as described here is not your best bet. I’m not saying you cannot build muscle with this (in fact I gained visible mass from doing pistols every day). It just might not be optimal for mass gaining.
  • A very structured routine: I’ll describe this in detail below, but to implement HF, you have to learn to go with the flow. Therefore, I recommend this only for strength trainees who A) know exactly what they want from their training and B) have enough experience to scale their workouts.

Now, if you want everything from the first list and can manage to miss out on the second one, here is what you need to do.

How to Implement High Frequency Training

Silvio Blauer

I came across the idea of HF training first by reading Squat Everyday by Matt Perryman. It’s an awesome read and, though it’s geared towards weightlifters, really useful for every fitness enthusiast because it’s about much more than just squats. It’s about questioning sport’s “science” and challenging your belief system from time to time.

I never thought I could train that often because I got really sore from my workouts. I was a big fan of the High Intensity Training (HIT) Method and therefore destroyed myself with every workout.

Now, my dentist told me that this won’t work if I wanted to work out almost every day. Here’s a diagram that illustrates why this is the case.

FIV_triangle

I call this the FIV triangle (I’m actually not the first person to come up with this diagram. I first saw this in an article by Alex Zinchenko). The orange dot in the middle is metaphorical you. You can be everywhere inside the triangle. The nearer you are to one corner, the more distant you are from the other two.

Now, when you want to work out very often, the first thing you have to do is do lower intensity and lower volume workouts (volume meaning the total number of sets you do each week, for every muscle respectively).

frequency-FIV

This is an extreme case and probably resembles something like working out 2 times a day, every day. If that’s you, I envy you for your spare time.

A useful method to implement higher frequency training would work with two things:

  1. Scale every workout so that the dot does not come near the lower corners of the FIV triangle (intensity and volume).
  2. Skew the FIV triangle so that a higher frequency is possible with intensity and volume being the same.

The skewed triangle below would resemble a good case of strength focused HF training.

high-frequency-FIV

This means we’re doing HF, medium high intensity and low volume.

To produce this kind of training regimen, you need to learn the Art of Going with the Flow and to push through some light discomfort. To elaborate this further, let’s take the pistol as an example.

Say you want to get really good at pistols and you therefore try to do them every day. Depending on your level of strength, the pistol can be a very demanding and therefore intense exercise. So doing 5 sets of 5 pistols (5×5) every day might be too much.

That’s exactly when you need to listen to your body: If you did a few intense sets of pistols on Monday, scale down on Tuesday. Maybe do a couple of sets of light bodyweight squats followed by one good set of pistols.

Maybe Wednesday and Thursday are medium intensity and you feel good to go again on Friday for a higher intensity workout. I plotted an exemplary weekly course of intensity in the diagram below.

intensity_curve

As you see, the intensity (the orange line) throughout the week varies significantly. This is to keep the balance between volume (dark grey area under the curve) and recovery (light grey area between curve and maximum intensity line).

Now we can see why the FIV triangle makes sense: If you keep intensity at maximum every day, there is no recovery. You can go high intensity, but therefore you need to have rest days (so intensity zero).

The low intensity days are nothing more than active recovery. In fact, doing lighter regressions of an exercise helps promote blood flow to your muscles and your joints, which in turn speeds up recovery and prevents injury. Spiffy!

There is no exact method how to scale each and every workout, because everybody is at a different level, both in strength and recovery ability. That’s something you need to experiment with yourself.

The neat thing about adopting this varied intensity scaling and HF training is that it makes you more resilient. You will get sore less often and will enjoy faster recovery. That’s mighty useful if you want to participate in a PCC Workshop, by the way. You won’t be beat up so much after the three days and can take The Century Test like a breeze.

So once you get the hang of taming your inner beast during your workouts, you can work on skewing the FIV triangle so that you can take more frequency with the same intensity and volume.

But do yourself a favor and be deliberate about your workouts. That means, keep a workout log and write out your workout beforehand on that specific day, based on how you feel. You can correct your plan during the workout but try to keep this at a minimum.

For the first few HF weeks, plan out your workouts lighter than you think you can handle. If after a week you think your workouts have been a joke, scale them up a notch.

Maintaining High Frequency Training

Silvio Blauer L-Sit

There are a couple of things to keep in mind when riding the HF horse. Firstly, warm-up properly with dynamic stretches, mobility drills or very light regressions of your target skill. After your workouts, I recommend some good old-fashioned stretching. Specifically stretch the muscles involved in your HF training.

After about 2 weeks of experimenting with pistols every day, I felt that my legs got really tense and stiff. It wasn’t soreness, just a slight tiredness. So I took a day off, did a nice recovery routine, had a couple of beers (I’m German, that’s how I recover 😉 ) and jumped on the pistol wagon again the next day.

So yes, you can take a day off once in a while. Just know that you won’t die from working out with slightly sore muscles. There have been so many times when I felt like I didn’t have enough energy for a productive workout, but after a good warm-up, it usually turned out great.

You also don’t have to implement this for all your skills and moves (but you could, I guess). I did this with pistols to finally master them with ease. But you could incorporate this for just about any skill like one-arm push-ups, elbow levers or dragon flags.

So there it is. All you need to know to toughen up and practice as often as possible without burning out. Happy tricking!

-Silvio

***

Silvio is a full time medical engineer who loves to practice and teach calisthenics in his free time. He enjoys creating workout plans for his friends and spreads the word about PCC over at his blog, NeatStrength.com. He writes about minimalist fitness and can also be reached through his Facebook page: facebook.com/neatstrength.

Filed Under: Progressive Calisthenics, Tutorial Tagged With: high frequency training, high intensity training, how to, neat strength, programming your training, progressive calisthenics, Silvio Bauer, tutorial

  • « Go to Previous Page
  • Page 1
  • Interim pages omitted …
  • Page 10
  • Page 11
  • Page 12
  • Page 13
  • Page 14
  • Interim pages omitted …
  • Page 19
  • Go to Next Page »

Primary Sidebar

Featured Products

previous arrow
GetStrongBookCover
ConvictConditioningBookCover
StreetWorkoutBookCover
ExplosiveCalisthenicsBookCover
StrengthRulesBookCover
next arrow

Categories

Progressive Calisthenics Certification Logo
Click here for more information or to register for the PCC workshop

Get Strong Workouts TriadXP App
Get Strong Workouts App

Recent Posts

  • Top 5 Reasons Why an In-Person Workshop is the Best Way to Supercharge Your Training
  • HYBRID STRENGTH TRAINING IS HERE!
  • My Calisthenics Journey to the PCC
  • The Handstand Press: Complete Control Through the Handstand
  • The Get Strong App is Here!

Dragon Door Publications

Dragon Door Publications

Recent Comments

  • bross dandon on The Case for Curved Handstands
  • Johnny Flewellen Jr. on Strength for Life
  • Dan Earthquake on The Pursuit of the Daily Minimum
  • Johnny Flewellen Jr. on The Pursuit of the Daily Minimum
  • Johnny Flewellen Jr. on Yoga, Calisthenics and the Journey of a Lifetime
FOLLOW US ON TWITTER!

Copyright © 2025

Dragon Door Publications / The author(s) and publisher of this material are not responsible in any manner whatsoever for any injury that may occur through following the instructions or opinions contained in this material. The activities, physical and otherwise, described herein for informational purposes only, may be too strenuous or dangerous for some people, and the reader(s) should consult a physician before engaging in them.